Hello beautiful Friends! Are you feeling Jolly yet? My six year old has been going around singing, “Deck the halls of Holwy Jolwy!” all week, so I think he’s there. And I am just putting the finishing touches on my Christmas décor so I am almost there too!
Today I am bringing you my first Holiday post of the season, a cute project I made for this month’s Get Your DIY On theme, “Knock-Off Holiday Décor”.
I know I usually post on Thursday and expected to as usual yesterday, but two of our party co-hosts had Christmas Home Tours they were involved in, so we decided to share our projects today instead.
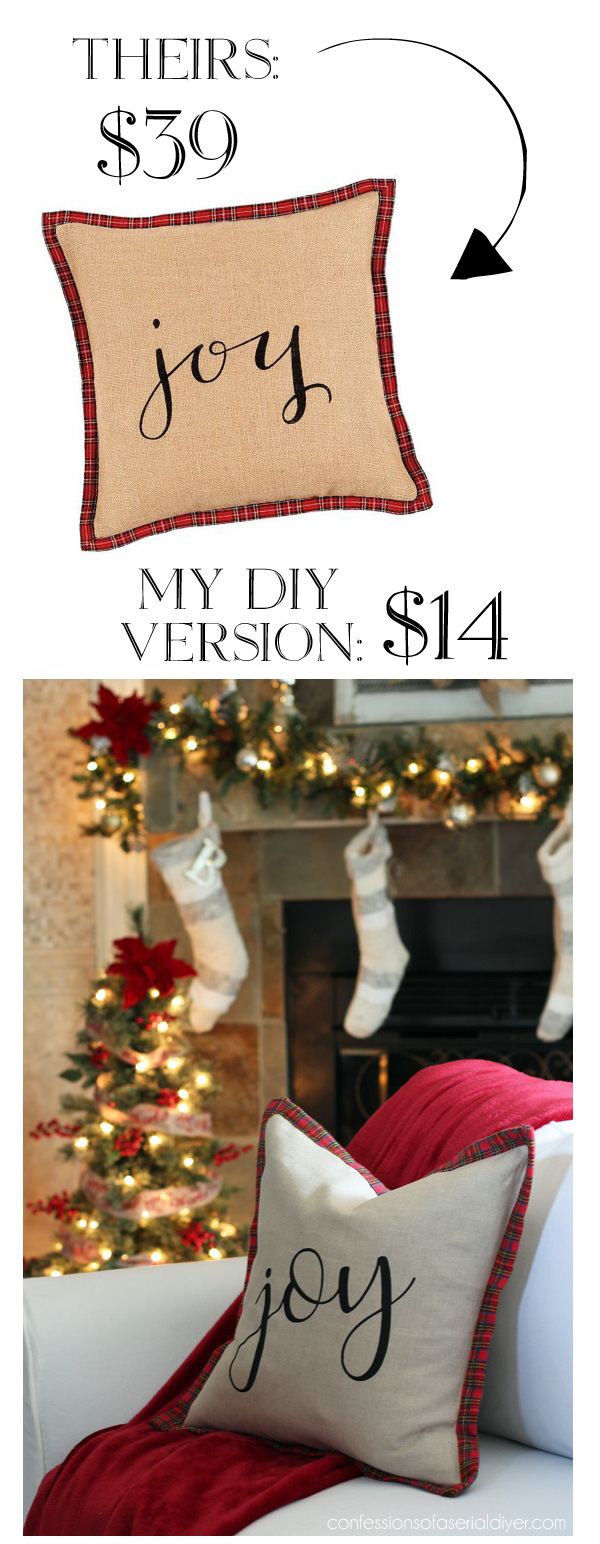
It was so easy to find inspiration for this project. I looked at the Holiday décor from a couple of my favorite high-end retailers and quickly found this super cute pillow from Ballard Designs:
I loved it right away and knew I could make one myself.
I have included a few affiliate links so you can find the products I love.
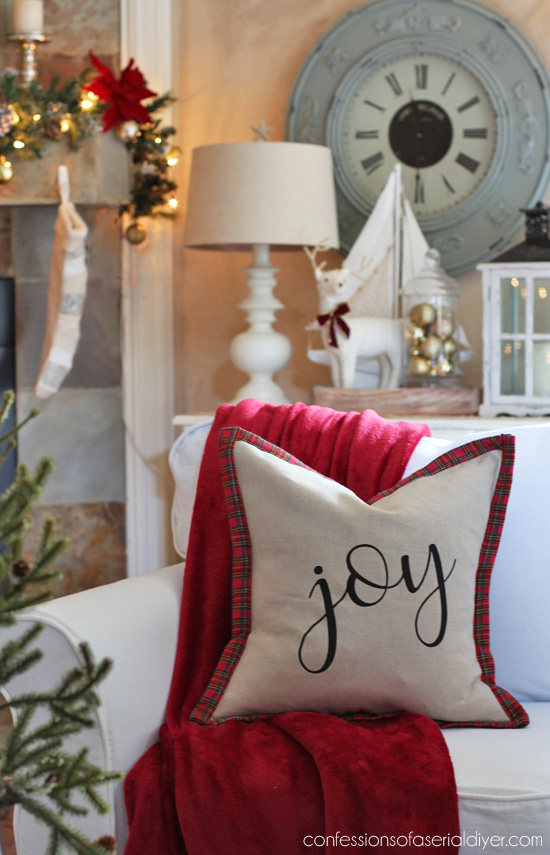
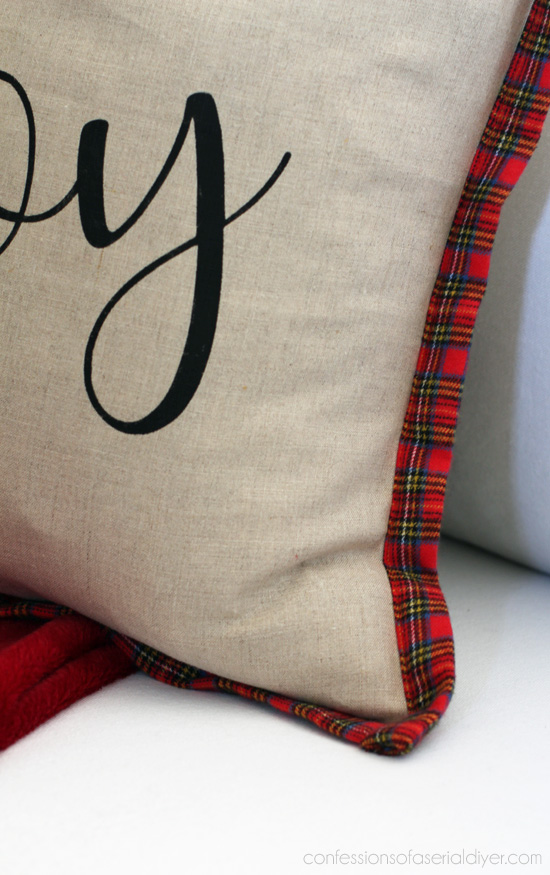
Here is my DIY version:

I think it turned out pretty darned cute!

Ballard version: $39 My DIY version, including down insert: $14
Not too shabby!
I purchased several down inserts from IKEA when I was there a while back for only $5.99 each.
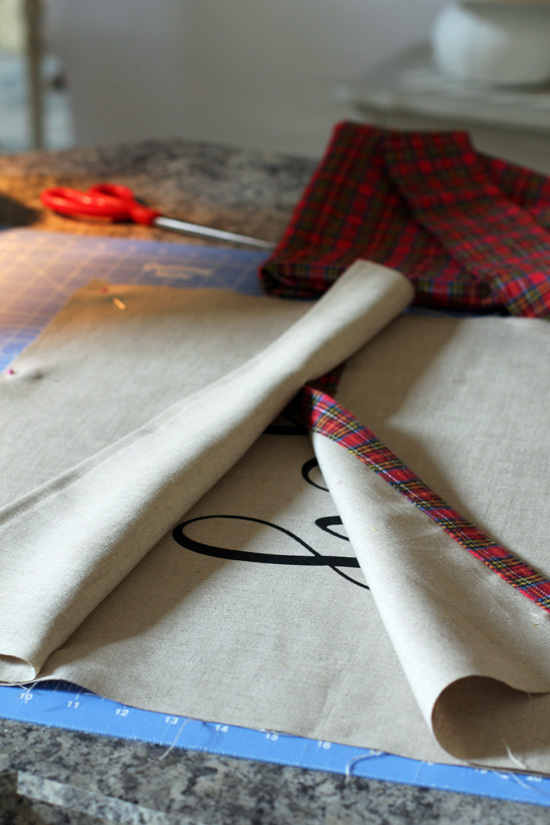
I found my fabrics at JoAnns:
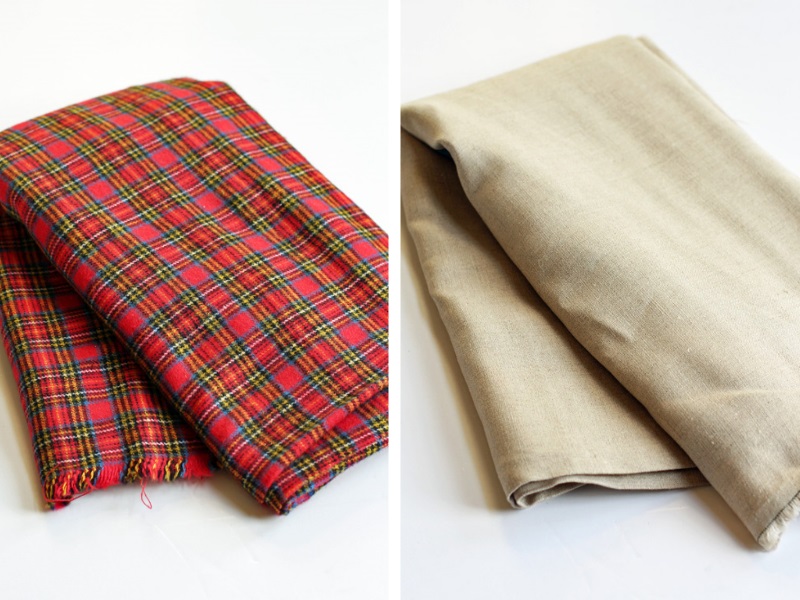
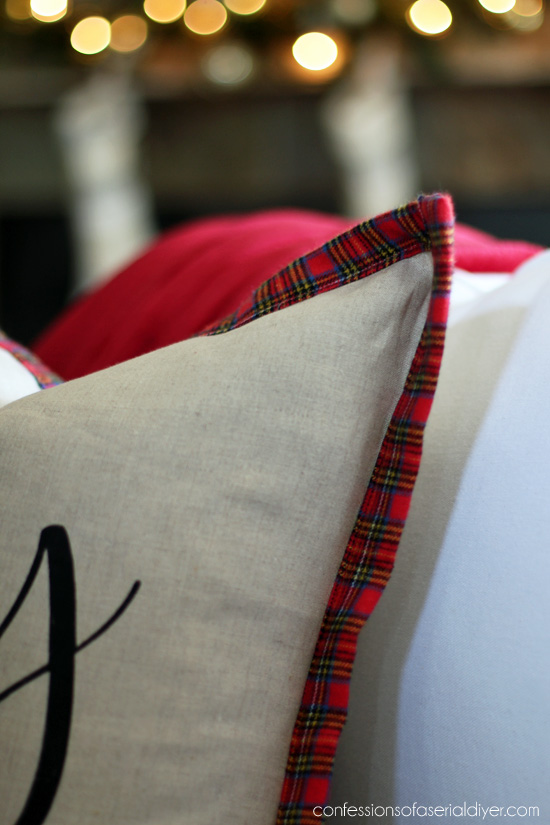
The only plaid fabric I could find was this flannel, but I think it adds a cozy factor. The other fabric is linen.
I used about a third of a yard of the plaid and about a yard of the linen, both on a good sale last weekend.
Making them was pretty easy!
If you’re looking for new pillows to add to your Holiday décor this year, don’t want to spend a fortune, and can sew a straight line, here’s how to make this one.
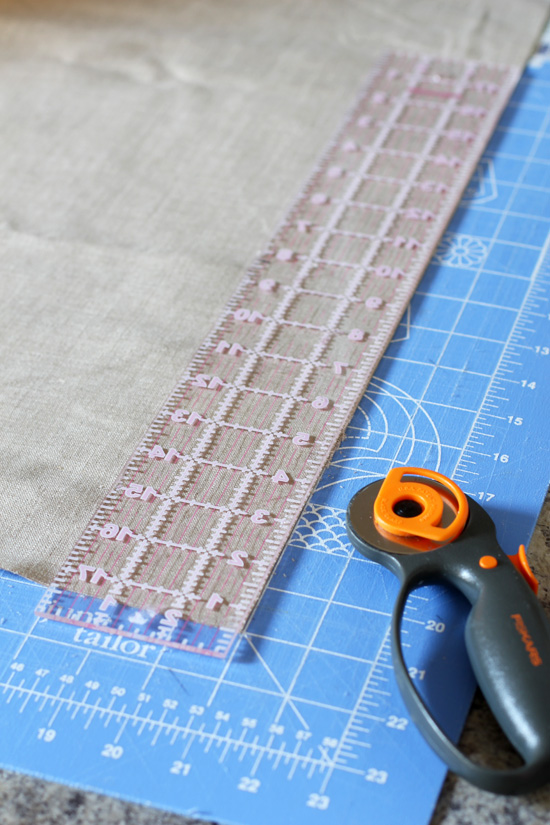
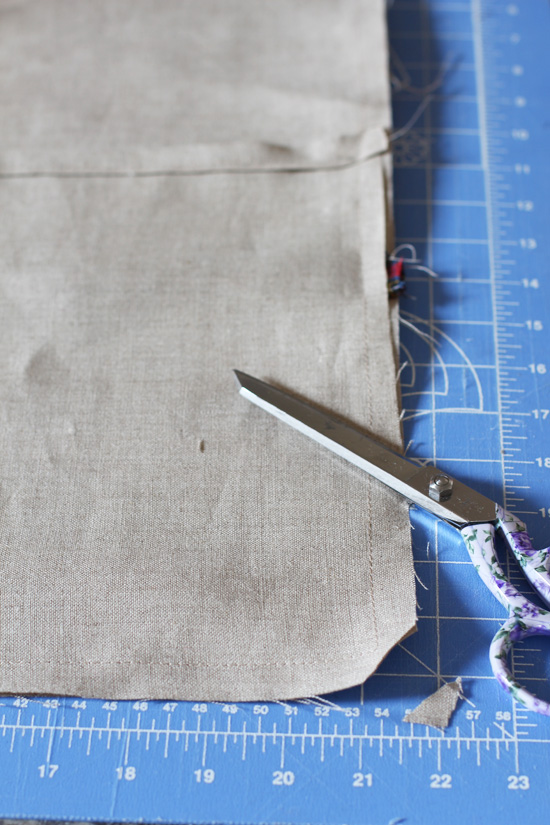
- First, cut the linen fabric: one piece at 21″x 21″ for the front, and two pieces at 14″ x 21″ for the back. (Using a straight edge and rotary cutter makes this so much easier!)
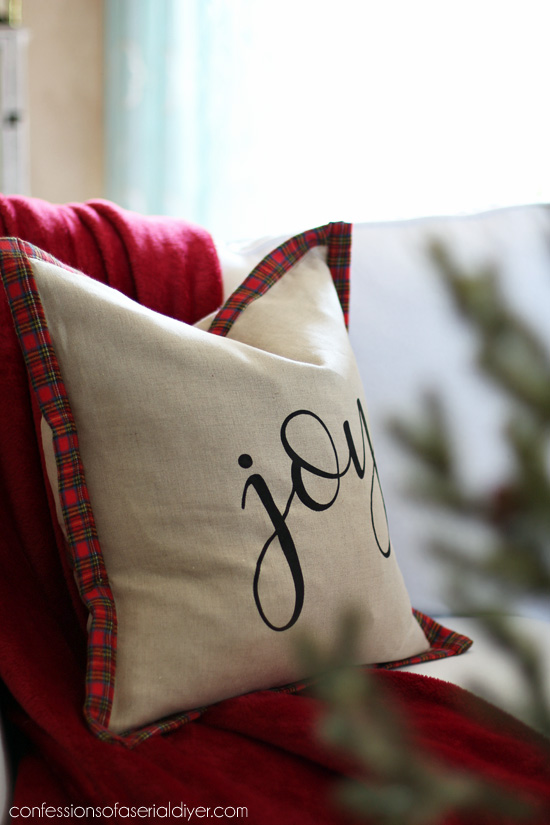
- Add the “Joy” to the front of the pillow:
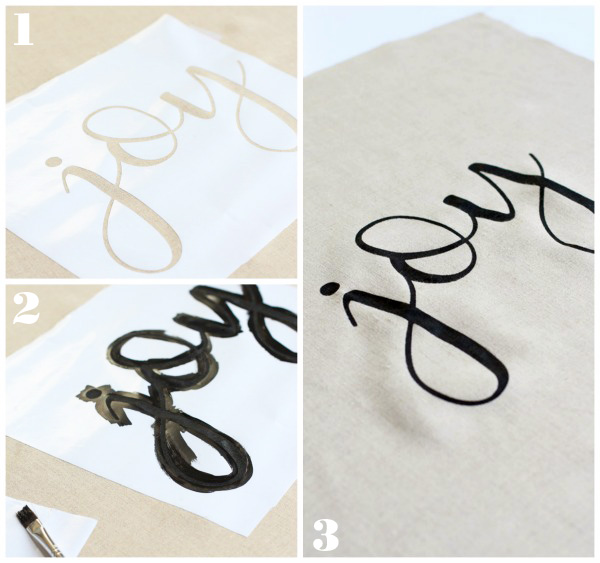
I created my wording using the Marchy Script font, and uploaded it to my silhouette machine. (I have this one.) Yes, it even works wonders on fabric! I used contact paper to cut out this “stencil” and black acrylic paint to fill in the letters. It made a perfectly sharp transfer. Then I ironed it flat to remove the puckering you see above. Here is a pdf of the “Joy” for your own use if you have a silhouette: If not, this probably wouldn’t be too hard to free hand with pencil, and then paint in either.
- For the back of the pillow, fold over the raw edge of one side 1/4″ then fold again and iron flat, sew in place.
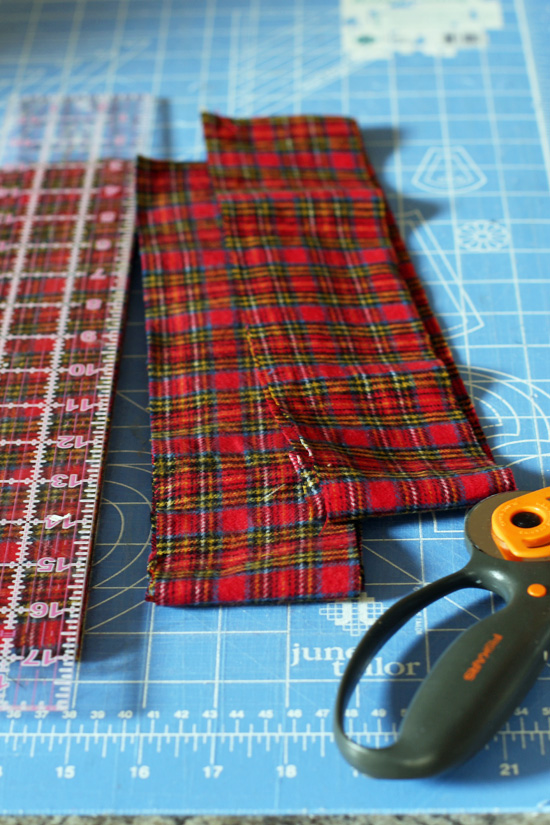
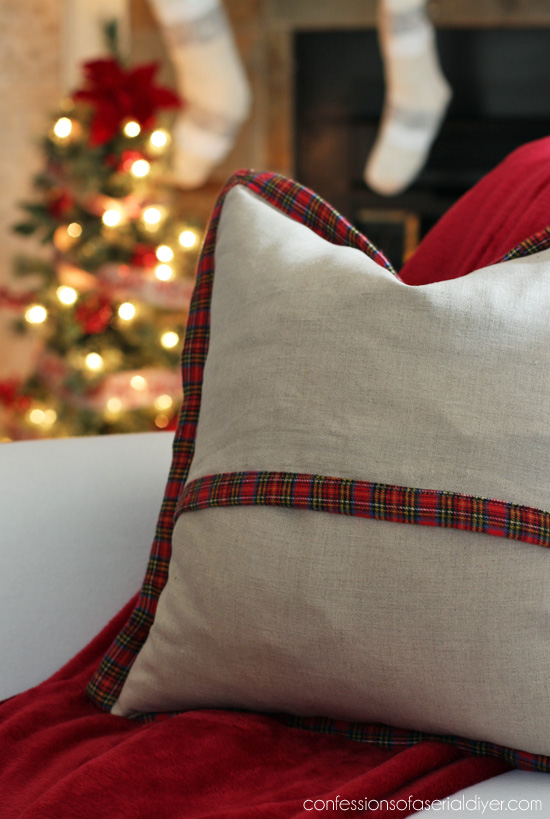
- You can see I added a strip of the plaid to the other back piece instead, totally optional. I added this the same way I added the binding, so if you like this addition, see the instructions for the binding. You will need to cut a 3″ strip, 21″ long for this piece. If not, finish off one edge of the other back piece the same way as the first.
- Pin the front and back pieces, right sides together:
- Sew all around the outside edge, clip corners.
- Seal your edges to prevent fraying in the wash by adding a zigzag stitch all the way around the outside.
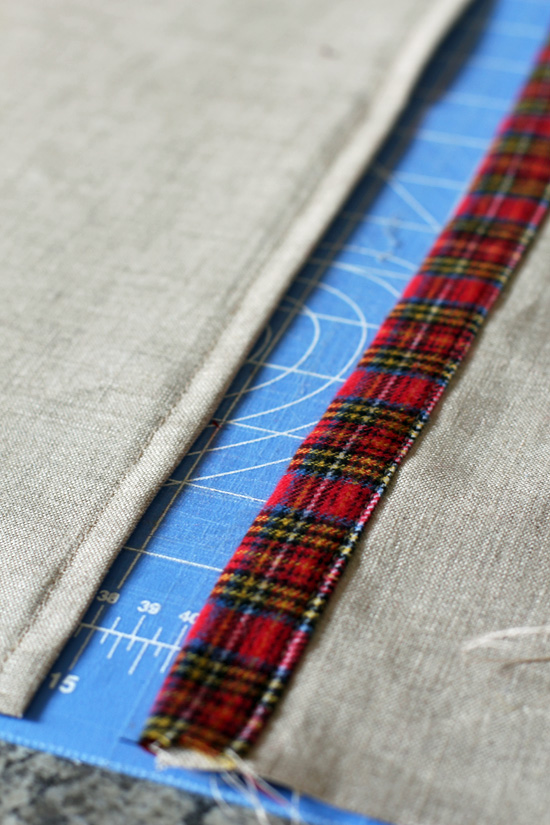
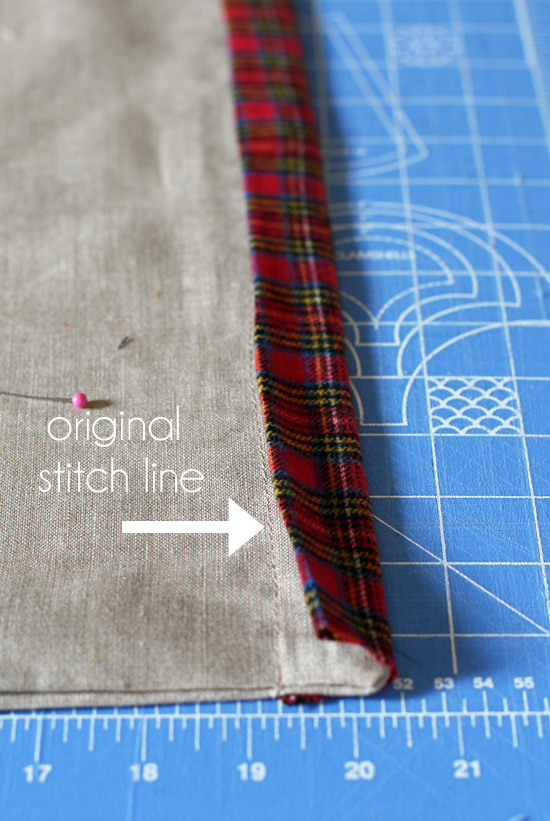
- Turn right-side-out and press. Time to add the binding. Cut two pieces of the plaid the length of two of the finished sides.
- Attach the plaid by sewing along the bottom edge of the pillow on the front side, about an inch from the edge. Notice I moved the plaid away from the edges about a 1/2″ as well:
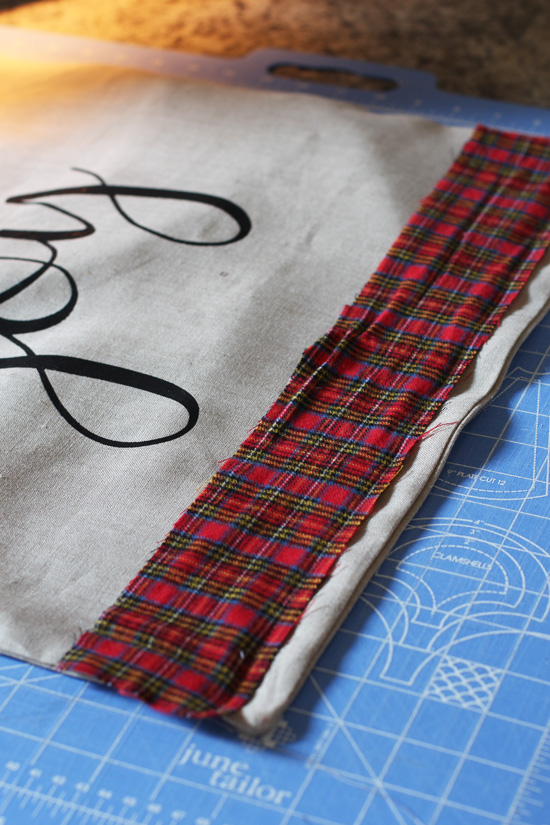
- Fold the plaid over and press. Flip the pillow over to the back side and fold the plaid fabric under to where it meets the stitch line from attaching it to the front:
- Sew in place. Repeat on opposite side (top of pillow).
- Cut a piece for each of the two sides, about an inch longer than the finished length.
- Sew those in place the same way, leaving about a 1/2″ hanging off of either end.
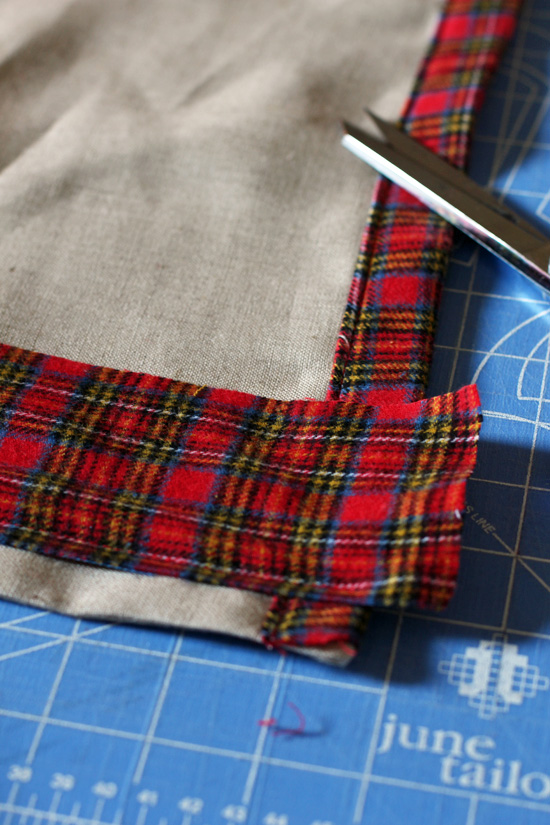
- Fold extra lengths on either end over around the back before folding the entire side lengthwise.
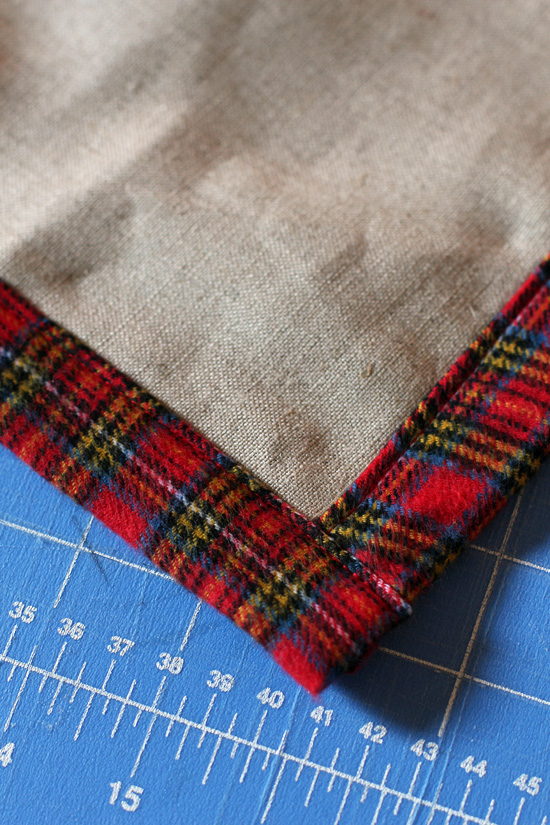
Both sides of binding should have a nice finished edge:
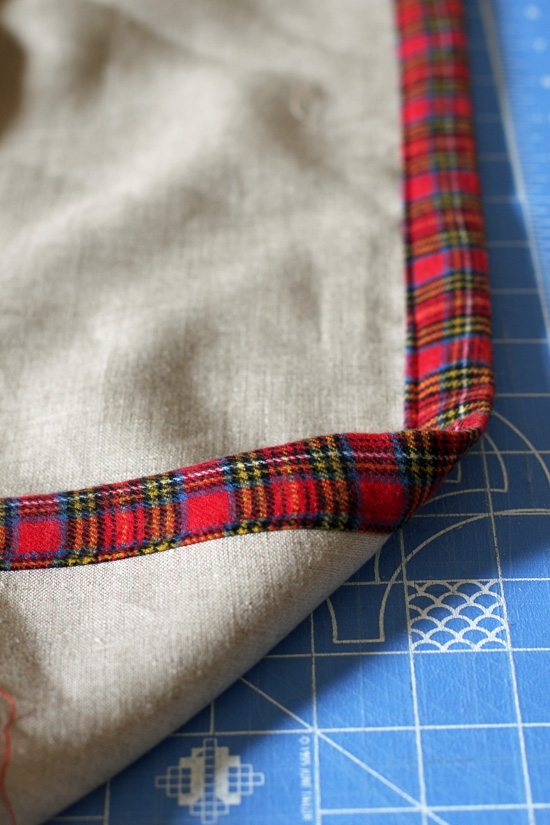
- Insert pillow form and voila!

And the back:
I used to make pillows all the time. They really are such a simple way to beautify your space without spending a fortune. And you can easily just change out the covers to match the seasons!
My Get Your DIY On Girls are also sharing Knock-off Holiday Décor today!
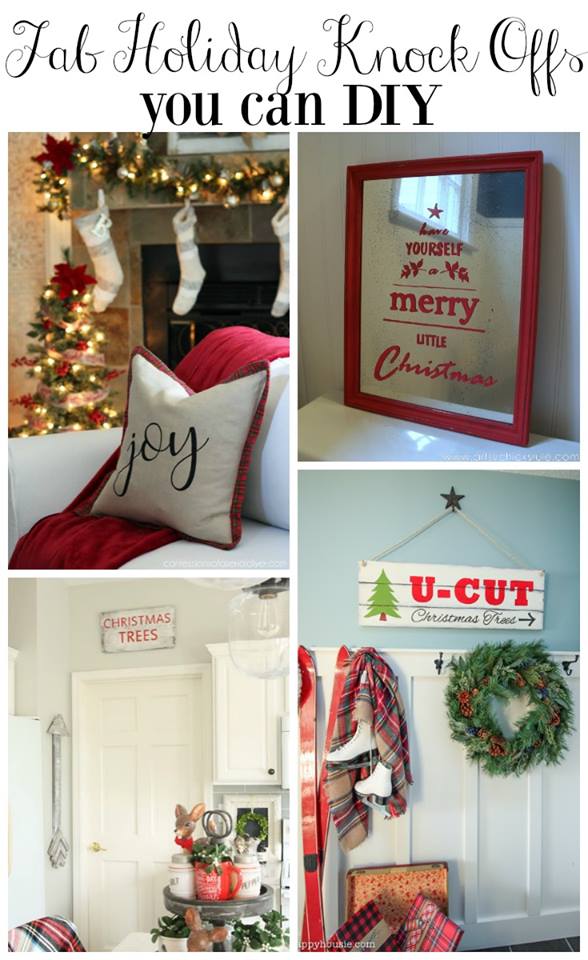
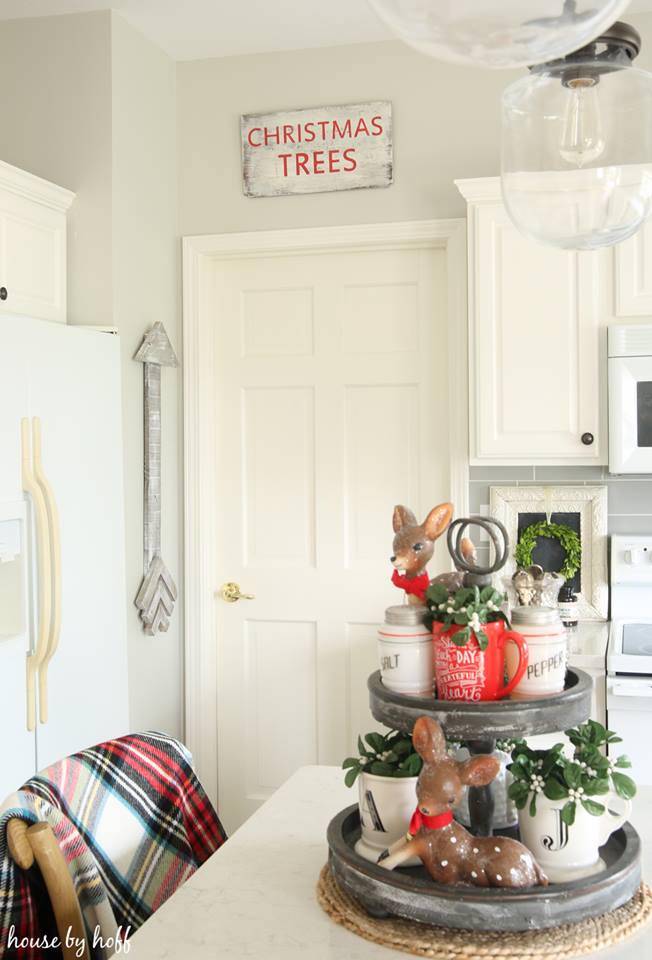
Knock-Off Antique Christmas Trees Sign by April at House by Hoff
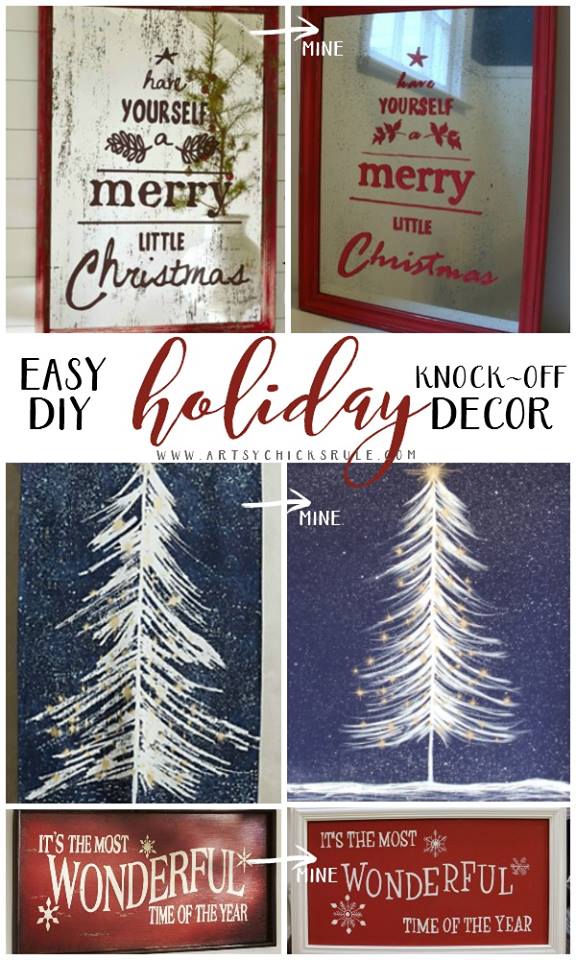
Inspired Holiday Projects You Can Make from Nancy at Artsy Chicks Rule

Faux Wood Vintage Style U-Cut Christmas Tree Sign by Krista at The Happy Housie
You may remember another Holiday knock-off from Anthropology that I did a couple of years ago using these sweaters:
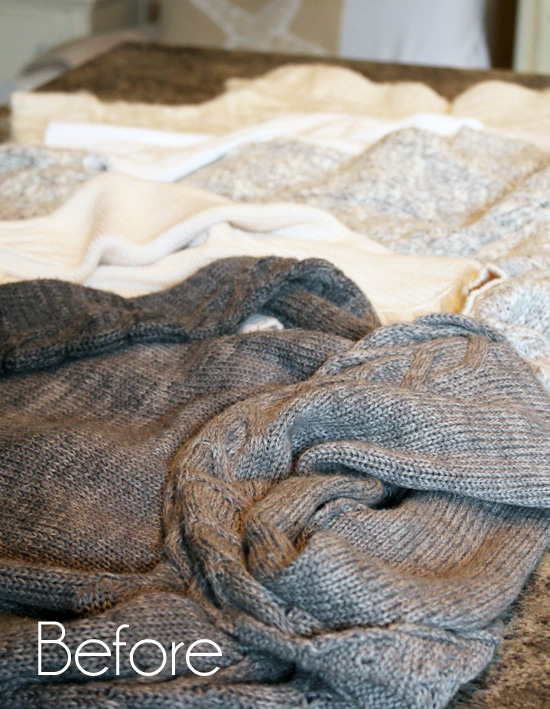
Check out what I made with them HERE.
I’ll see you back here on Sunday at 7:00 pm EST with our Get Your DIY On Party! Bloggers, come by and share your knock-off holiday décor, and awesome readers, come by and get inspired by what they share!

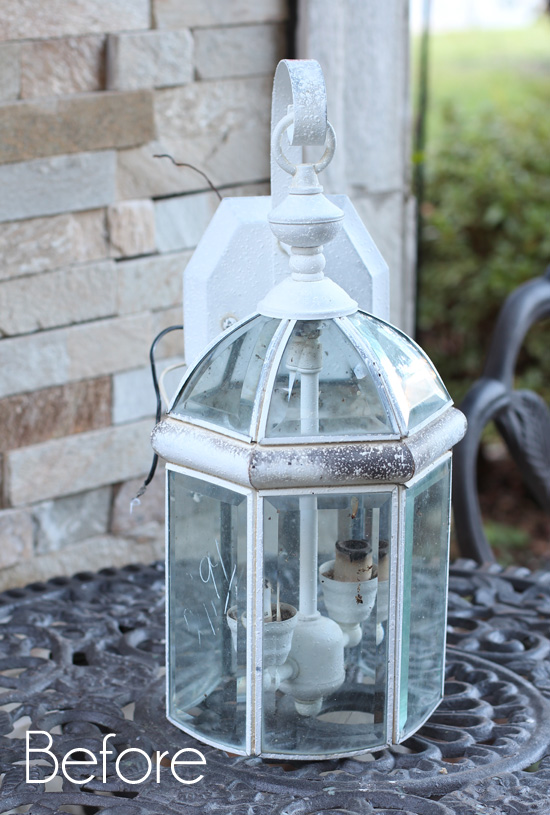
I’ll also be back on Sunday with my bHome friends sharing Holiday décor. Anything goes so I’ll be sharing what I made out of this outdoor light fixture I found at the Habitat Restore:
See ya then!
UPDATE: Check out the super cuteness that is this light fixture now HERE!
XO,
![]()
Don’t Miss a Thing!
If you like what you see, there are several ways to follow along!
Email * Facebook * Pinterest * Twitter * Instagram


Sandra powell says
I love this Christy, I’m pinning this one to do for sure at some point! Great job! Have a great weekend!????
Christy says
Thanks so much, Sandra! I want to make a couple more…we’ll see if I actually do it ha! Have a fabulous weekend too! 🙂
JamieK says
LOVE LOVE LOVE the pillow! JOY is my favorite word!! Thanks for sharing!!! Beautiful job!!
Christy says
Thanks, Jamie! So glad you like it!! XOXO
Sue says
Your pillow is so cute!!! Love it. Sure wish I could sew!!! Can’t wait to see what you did with the lantern.
Christy says
Thank you, Sue! There really is so much you can do with a sewing machine. Enjoy your weekend and I’ll see ya Sunday! XOXO
Marcie Lovett says
Well done, Christy. A very Holwy Jolwy Christmas to you!
Christy says
Ha ha thank you, Marcie! We can’t get enough of it lol and make him sing it all the time! 🙂
Becky says
Perfect! And I think yours looks just that little bit nicer too. : ) I love red plaid flannel. : )
Christy says
Thanks, Becky!! I am so thrilled it turned out well, cause you just never know lol. Have a great weekend! XO
Cindy Pierce says
It’s beautiful!! I have to say I like your much better. I like the way the JOY came out much better, (one of my favorite Christmas words).
Christy says
Thank you so much, Cindy! I love the font as well…thinking about making a sign with the same “JOY”! 🙂
Julie B. says
Wellll, I like YOUR pillow even BETTER than the store bought (really)! Thanks for sharing! It seems you haven’t been posting as much… Is it my imagination? I’m sure you are one BUSY woman at this time of year! 😉
Christy says
Thank you, Julie!! I post two new projects a week (usually Tuesday and Thursday), but took last Thursday off since it was Thanksgiving. 🙂
Patty says
Love your pillows Christy, they are just beautiful. Nothing says Christmas like red plaid, it is so warm and welcoming.
Can’t wait to see what you do with that light fixture.
Christy says
Thank you, Patty!! I agree…love the plaid for Christmas. Can’t wait to share the light fixture this weekend!! 🙂
chris aka monkey says
seriously freaking awesome xx
Christy says
Aww thanks, Chris!! SO glad you like it! XOXO
Sally says
That pillow is sooooo cute!! You amaze me, you are so talented. You should sell these in your shop, you’d make a killing. I know I would buy one if I could come to your shop.
Christy says
Aww thank you so much, Sally!! You’re right, these would do great! XOXO
Marie from The Interior Frugalista says
Really really pretty pillows, Christy and they look fabulous with your white slipcovers! Pinning to share
Christy says
Thank you, Marie!! I love the pop of red with the white as well. Hope you are enjoying your weekend so far! XOXO
Wendi@H2OBungalow says
This is darling! Love the plaid trim in flannel against linen. Super tutorial as always! Fun tour, you all outdid yourselves! Pinned:)
Christy says
Thank you, Wendi! Enjoy your weekend! XOXO
Megan @ Adventure & Home says
Wow! What a transformation! It looks so similar to the original design! And, I’m sure you will love it more for having made it yourself. I know I always love the projects I do myself more because my time, energy, and love was put into them. Nice work! Can’t wait to see everyone else’s projects at the party! 😀
Christy says
Thank you, Megan! Yes, it’s always a proud moment when something actually works out lol. XO
Krista says
This looks fabulous Christy!! I love it – such a fab replica!!
Christy says
Thank, Krista! Enjoy your Sunday! XO
Melva says
Beautiful job! In fact, I like your version better. I think the lighter shade of the pillow looks classier.
Christy says
Thank you, Melva! I had a hard time finding fabric that was similar in color that wasn’t burlap or outdoor fabric, so I settled on the linen, but I think I like it better too! 🙂
Janice Holt says
Is there nothing you can’t do. I have so enjoyed your website since subscribing a few weeks ago. Excited every time I get an email from you. Keep it up.
Christy says
Aww thank you so much, Janice! I’m so thrilled to hear you are enjoying my posts…thank you for choosing to follow along with me! XOXO