Hi friends! I have a quick makeover to share with you today. A few months ago our fridge went kaput. It was time for a new one anyway, but when we went searching we quickly learned that there was not a fridge available in the height we needed that would fit under our cabinets. We came to the realization that we were going to have to purchase a shorter cabinet to accommodate our new fridge. That left me with two perfectly good cabinet doors!
Here’s our old fridge and you can see the cabinets that we had to replace:
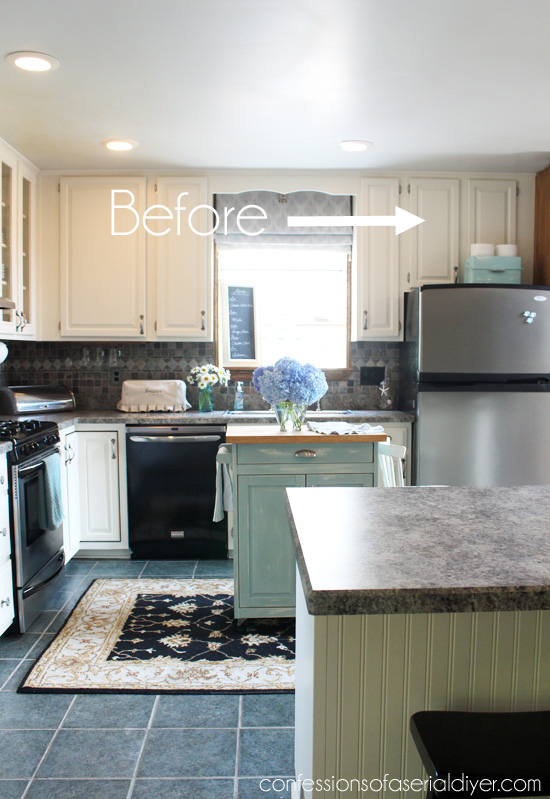
I never realized we had a short fridge until we went searching for a new one. That floor is gone also yippee!
Here is our new floor going in:
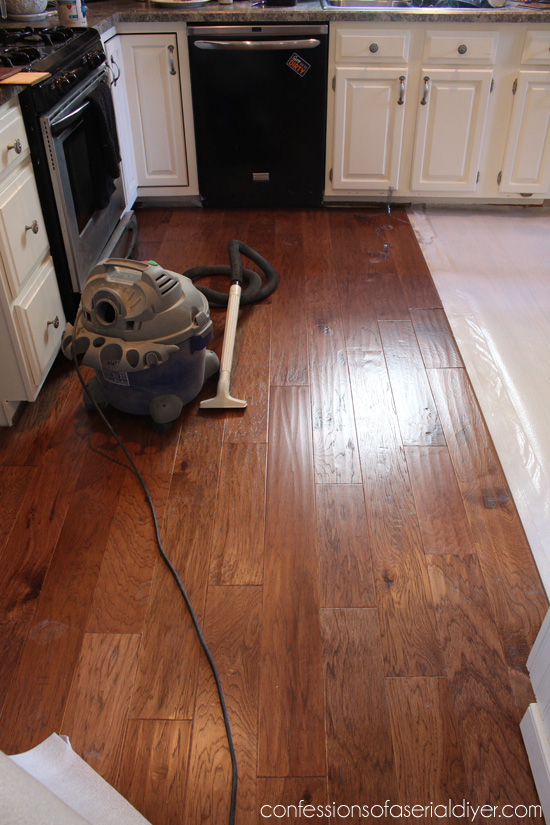
They are completely installed now, but I still need to paint the base molding and put it all back where it came from.
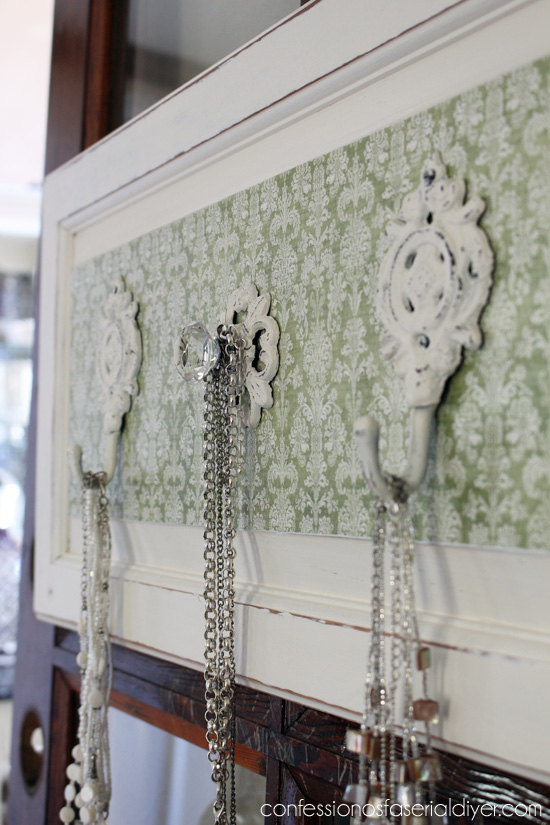
Back to our cabinet doors though! I decided to give one a very simple makeover:
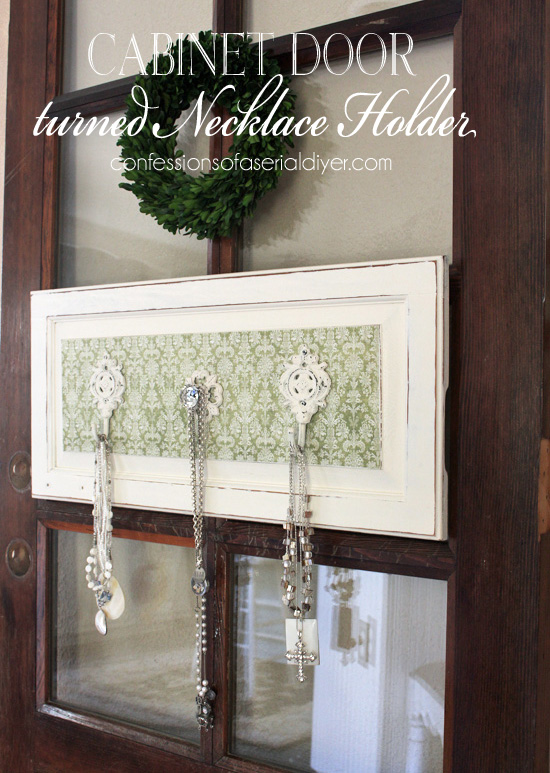
I added this pretty paper you may remember me using not too long ago, using matte Mod Podge. Then I sanded the edges here and there, including the edges of the paper.
The hooks are from Hobby Lobby and used to look like this:
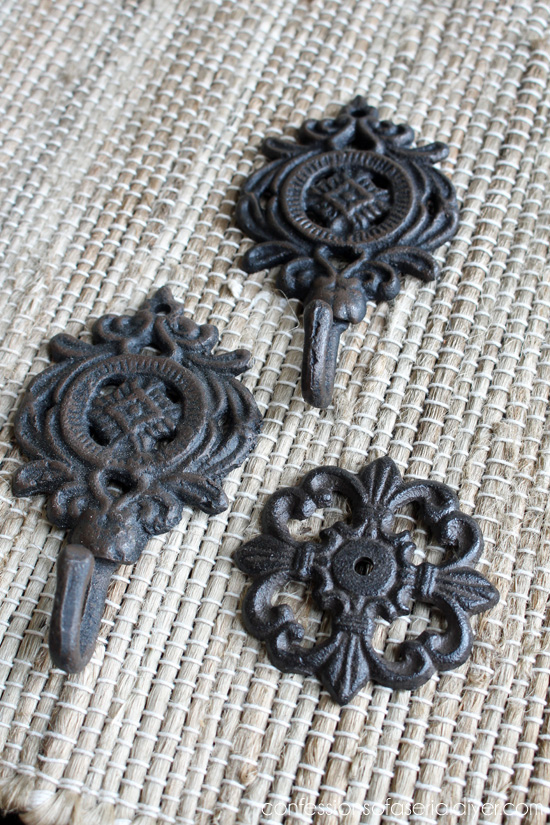
I spray painted them in Rustoleum’s Heirloom White and sanded them a bit…
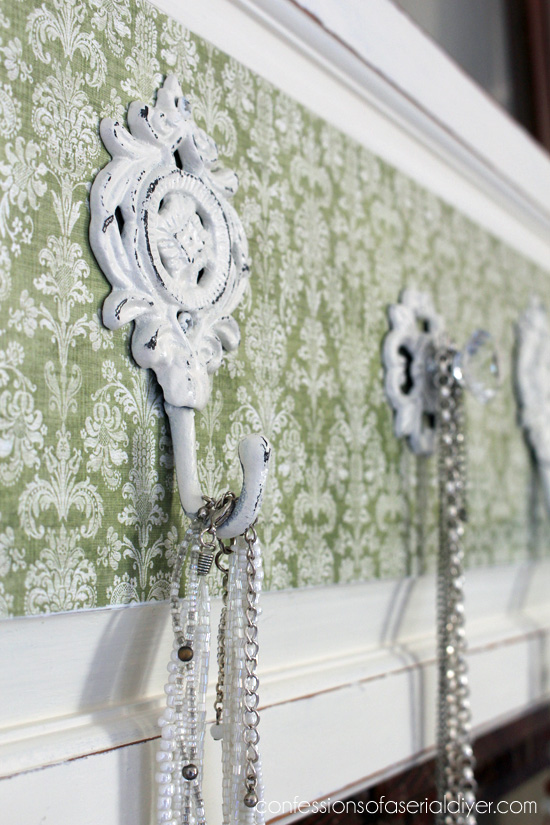
I already had the glass knob. It adds a little bling and a real feminine touch.
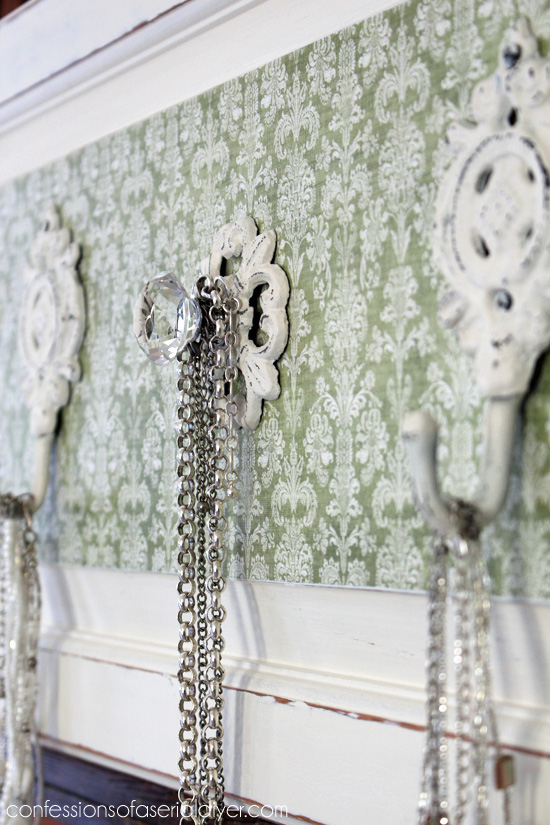
I didn’t even bother to fill in the holes from the hardware.
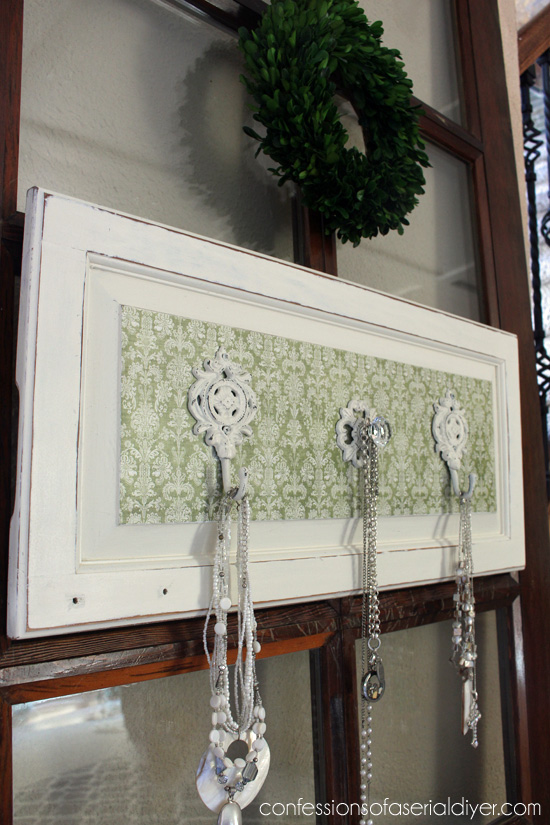
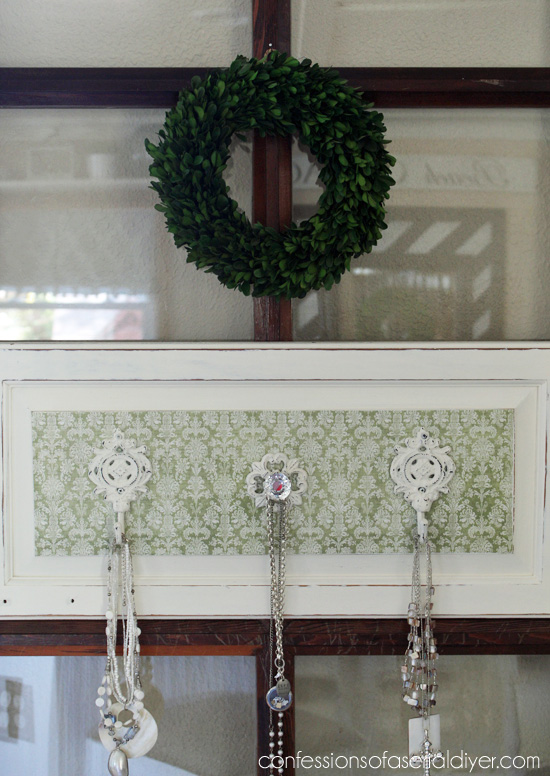

I’ve done a few of these for my booth with various cabinet doors I’ve found, but only ever blogged about one of them:
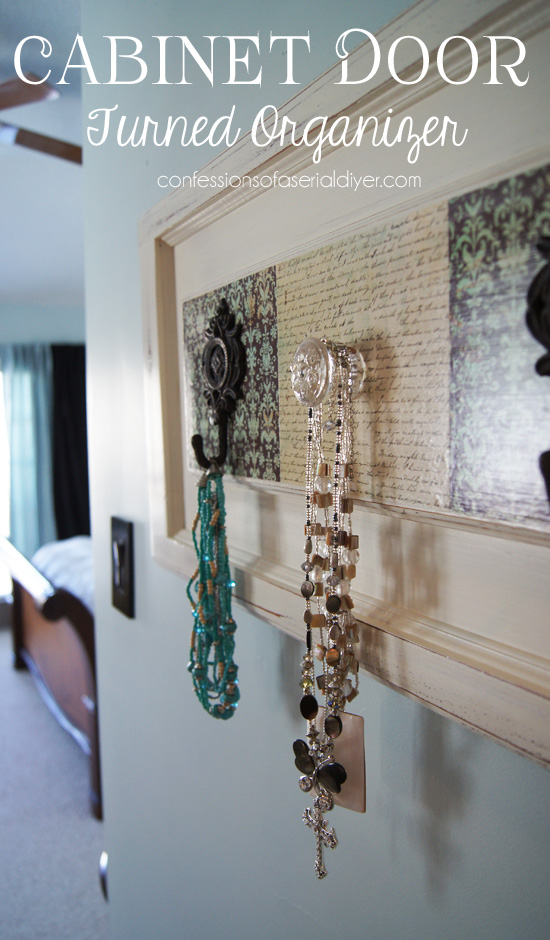
You could use these for coats, towels, in a child’s room to hang backpacks or costumes, but I love them for holding necklaces! There are so many pretty ones out there and this way they can be decorative too!
If you missed my kitchen makeover, you can see it here!
Well that’s all my sweet friends!
Hope you have a great day!
XO,
![]()
If you like what you see, there are several ways to follow along! ![]()
Email * Facebook * Pinterest * Hometalk * Twitter * Instagram
I love to share at some of these great parties:
Home Stories A to Z Not Just a Housewife Kammy’s Korner The Happy Housie Design Dining and Diapers Liz Marie Blog Funky Junk Interiors Savvy Southern Style Tatertots and Jello DIY Show Off Redoux Interiors Between Naps on the Porch The DIY Dreamer Oh My Creative Little Miss Celebration Just a Girl and Her Blog Sand and Sisal Interior Frugalista House on the Way Addicted 2 DIY I should be Mopping the Floor Miss Mustard Seed


Sue Farmer says
What a cute idea!! Darling for a little girl’s room. Hope all is going well with your new floors. They look gorgeous!! Have a great day. xoxo
Christy K. James says
Thanks, Sue! I’m so happy to have the floors down! 🙂
Linda J says
Love it! Just simply love it! Yours are much better done than most I have seen, I my opinion. It is now on my “kto do” list and I just happen to have a door on hand! Yea!
Christy K. James says
Thanks, Linda! I was pretty nervous about ruining my cabinet doors, but thankfully they turned out great and were not that hard! Good luck with yours, they made the biggest difference in my kitchen! XO
Marie@The Interior Frugalista says
Love the paper and the hardware – so pretty. Fabulous cabinet door repurpose!
Christy K. James says
Thank you, my friend! I’ve got one more to play with. 🙂
Becky says
So cute! I never would have though of this.
Christy K. James says
Thanks, Becky! 🙂
Carole says
Christy, I love that you see potential in almost anything you discard, like the cabinet door, or something found in a resale shop. Not many people have minds that work like yours. I love everything you put on your blog.
Christy K. James says
Thanks so much, Carole! Sweet comments like yours make sharing so much more fun! XO
Paige says
Love the hardware! I’m hitting the Hobby Lobby on our way back to NC to resupply my knob stash.
Christy K. James says
Thanks, Paige! It’s so nice to have one close to us now. They have the best selection of knobs and pulls!
Elizabeth says
I love this idea! I am presently working on a cupboard door that I painted and then used chalk board paint where you applied your pretty paper. I want to add knobs along the bottom … all the knobs I purchased at Hobby Lobby have a really long screw. Did you keep your original screw with the knob or did you get a different or did you cut it? Yikes, to many questions …
Christy K. James says
Thanks, Elizabeth! Just the center knob required a screw from the back here, which I replaced with a shorter screw. However that was still a tiny bit short, so I used a drill bit that was slightly larger than the screw head and hollowed out the area on the back of the cabinet a bit where the screw screws in, so that it would fit. Hope that makes sense! 🙂
Elizabeth says
Yes, that makes sense. I will have to look at the different knobs and see what I come up with. Some of them are glued into the knob so I can’t take them out and replace with shorter screws. My problem: I am to impatient and want a quick fix.
Thanks for the response…love your work and your blog!!
Elizabeth
Christy K. James says
Thanks! And you can always use a hacksaw to saw off part of the screw. I’ve done that before too. 🙂
Nancy @ Artsy Chicks Rule says
Love it Christy! and your other one too! We had to do the same thing when we moved in to this house. Cut out space to the right which meant making one cabinet smaller (door no longer fit). I used the open one for cookbooks for years before I went ahead and took both doors off and made it REAL open shelving! 😉
Can’t wait to see your floor post!
Nancy
Christy K. James says
Thanks, Nancy! I was frustrated since I had just painted all the cabinets not too long ago, but thankfully it’s done. 🙂
laura@top this top that says
oh my word. you are stinkin resourceful! love this
Christy K. James says
Thanks, Laura! 🙂
Liz says
You always do a great job, you have that Knack and special touch, you go girl! ;). Happy pre mothers day, enjoy relax and no painting or projects on Sunday… You deserve a break! Liz
Christy K. James says
Thanks so much, Liz! I will definitely be having a restful day on Sunday! 🙂