If you follow me on Facebook, you may have seen the hint I gave about what I was working on yesterday, while the rainy weather had me confined to the house:
This arm belongs to this chair:

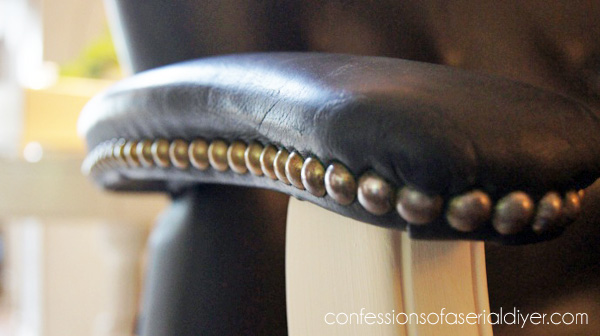
I found this chair at the thrift store for $40. You may be looking at it and wondering why on earth I dragged this home for $40? It is without a doubt, the most comfortable and supportive desk chair my behind and I have ever experienced. It had to come home with me.
When I got home and googled the make and model on the bottom, I found out that the cheapest you could purchase this chair for is on Amazon, for no less than $500!!! No wonder it feels so good!
Now let’s look at the reality. It’s navy blue. It doesn’t match a single item in my house unless you count our cereal bowls. It has cherry wood trim. You’ll find beautiful cherry cabinets in our master bath, but this chair has to reside in our living room.
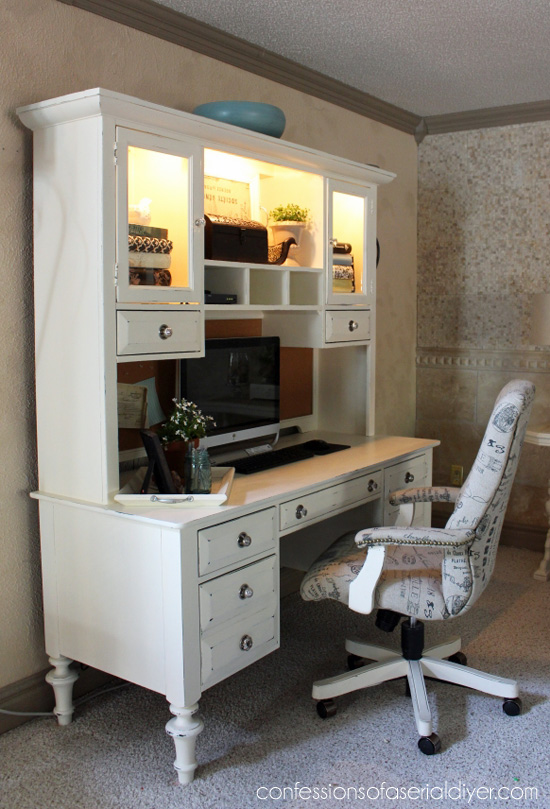
If you read about the little estate sale stool I refinished, with DIY chalk paint, you know that my office is actually just a desk…in the living room.
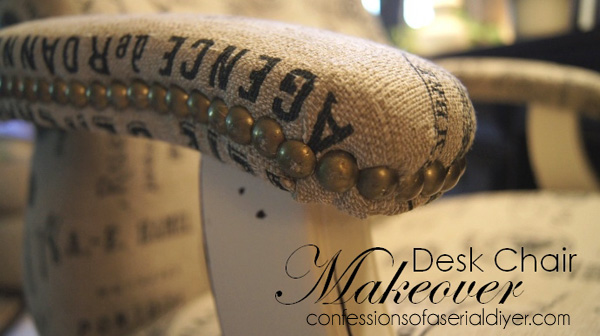
But not to worry…because this board room reject got a makeover:
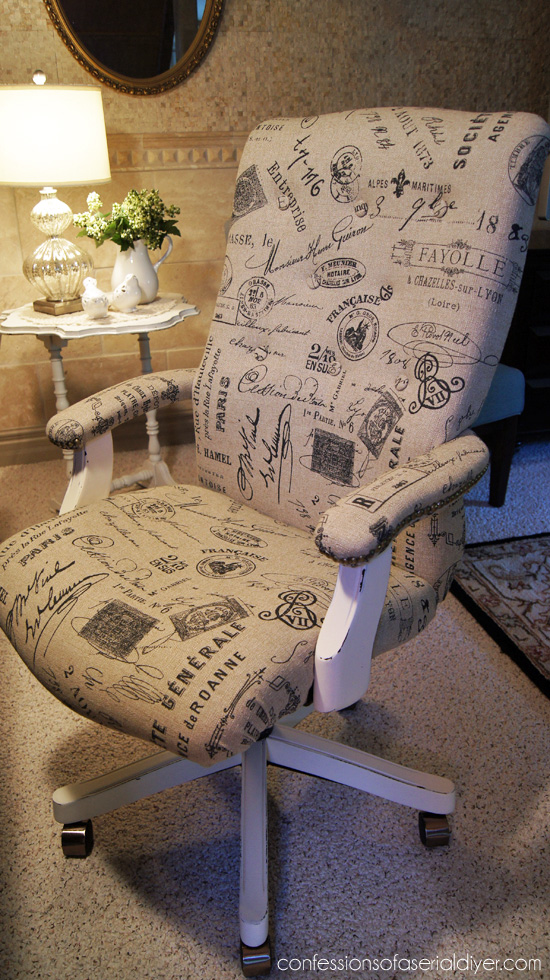
I needed something that would coordinate with my living room. If the original had been black, I probably wouldn’t have even considered reupholstering it.
I didn’t take really detailed step-by-step photos like I usually do, but you’ll get an idea of what goes into redoing a desk chair.
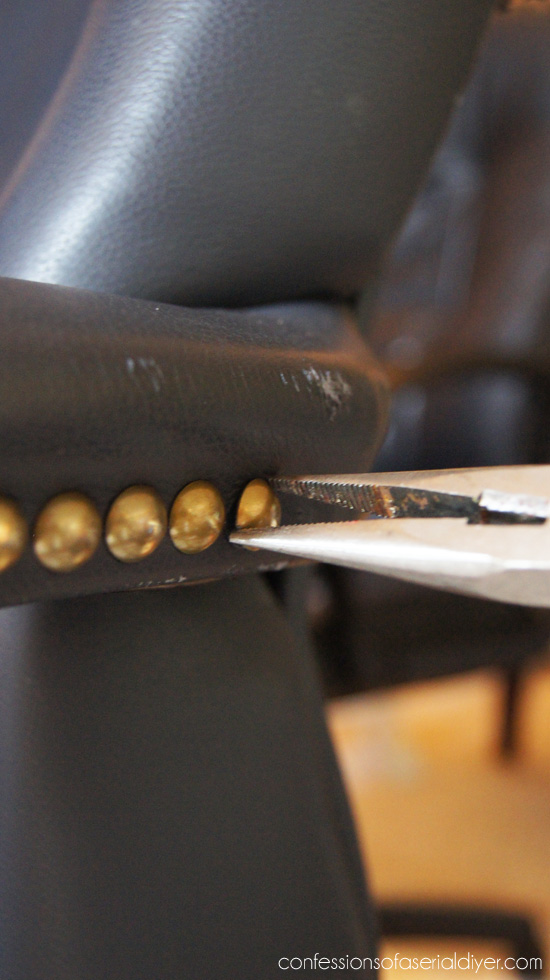
First I removed the buttons from the seat back tufting and then the brass nail heads, one…by..one. SO tedious. I love this detail and wanted to reuse them.
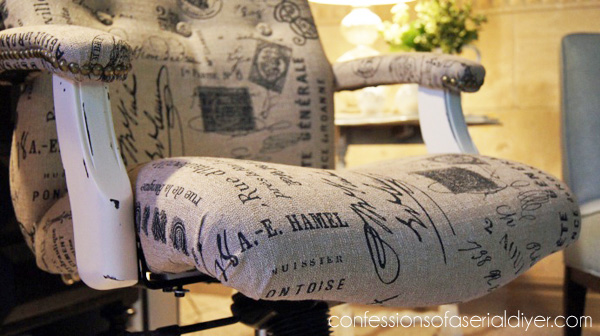
Then I removed the arms which were just screwed on and painted the wood detail on the arms and feet with DIY chalk paint, followed by Annie Sloan clear wax and a good buff.
Next I removed the back:
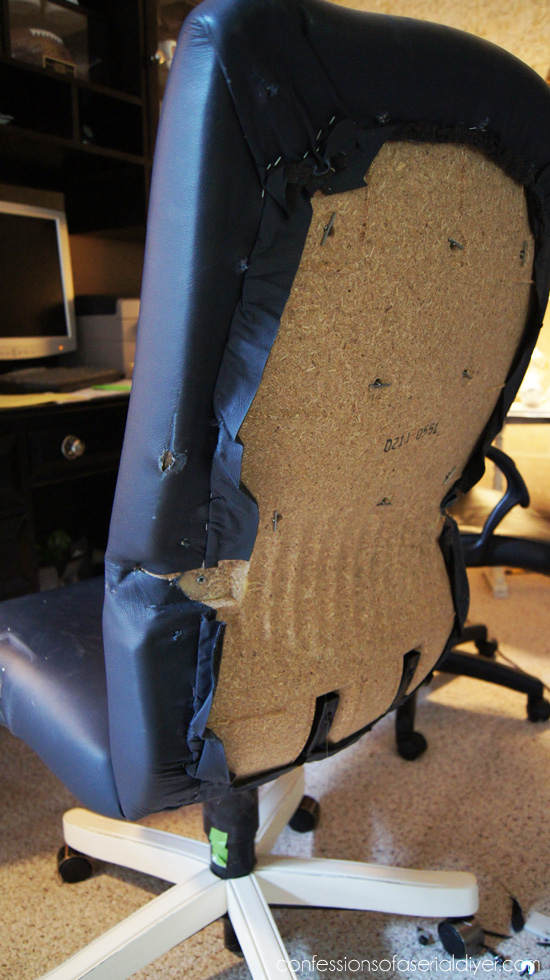
The back piece was held in place with a bunch of these:
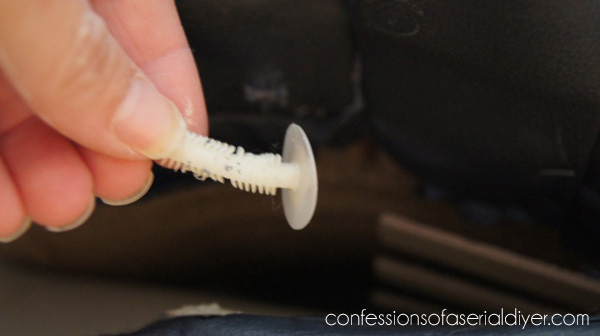
I saved them also to reuse.
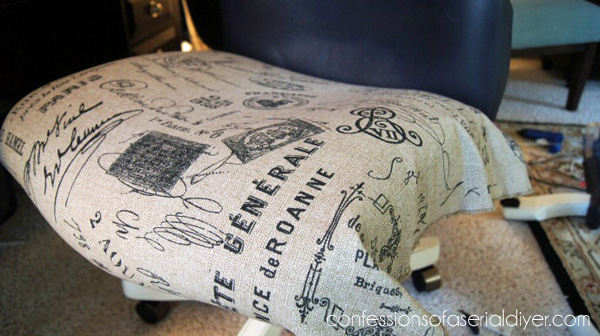
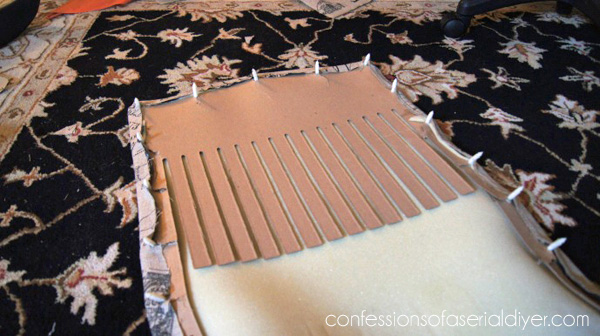
Next I covered my seat using a staple gun:
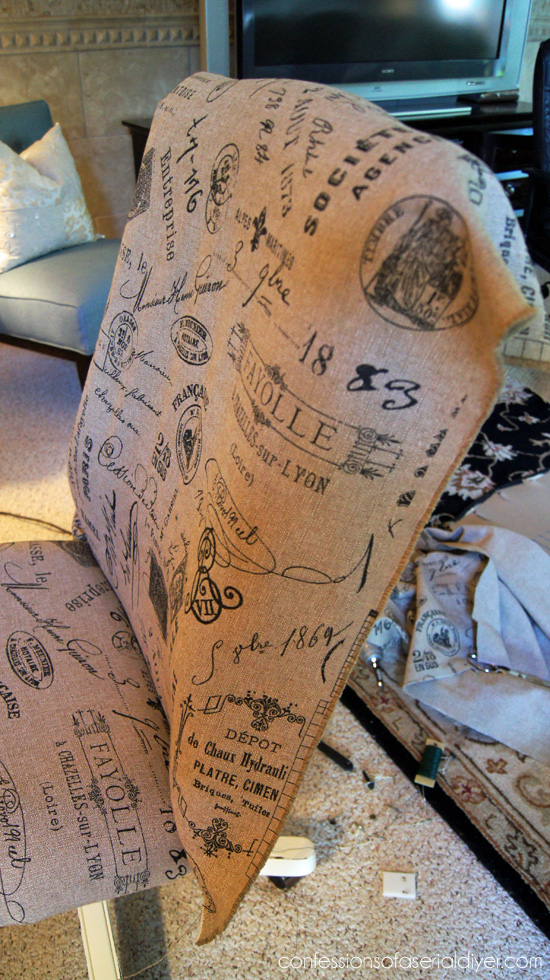
Then the back, again using a staple gun to secure the fabric to the back:
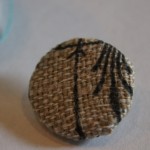
Before going any further, I needed to make covered buttons to replace the originals for the seat back tufting.
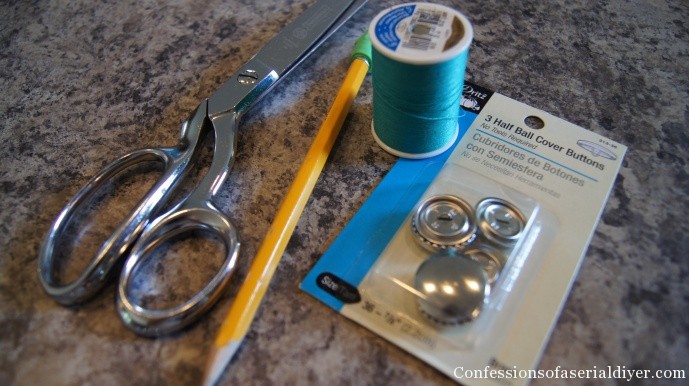
I used a simple button kit. If you have never covered buttons before, it’s super easy. I took a quick pic step by step to share if you’re interested. (Of course you button-covering veterans can skip this part!)
Here is what you will need to make your own fabric covered buttons ( I used the kind that has little teeth to catch the fabric, all around the inside rim):
And here’s your how-to:
-
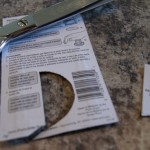
- Cut out the template on the back.
-
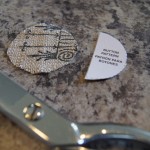
- Cut a circle of fabric using your template.
-
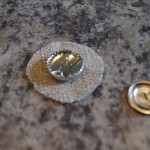
- Place the button in the center of your circle.
-
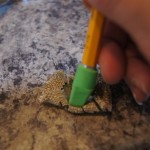
- Use an eraser to help catch the fabric in the teeth along the inside rim.
-
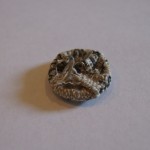
- It should look like this.
-
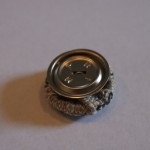
- Place your button back on top.
-
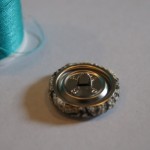
- Use a spool of thread to apply even pressure to snap the back in place.
-
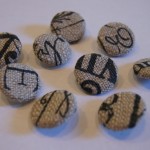
- Les buttons!
Easy, right?
Now I was ready to attach my buttons. I used a tiny crochet hook to help secure the buttons with floral wire:
Oooooh pretty!
Then I wrapped the backing in fabric and secured with hot glue. I also had to do some repair to the back which wasn’t too tough for my glue gun:
I used a hammer to tap the white upholstery thingys back into their original holes.
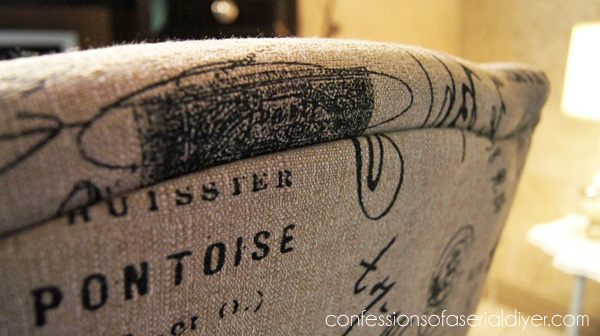
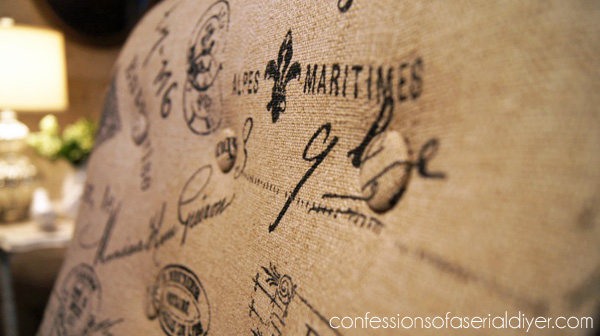
I’d say it turned out pretty good! I love this fabric! It’s a heavier weight decorator fabric I found at Hancock Fabrics.
This isn’t the first piece of furniture I’ve taken apart. Have you seen the sectional that I destroyed and rebuilt?
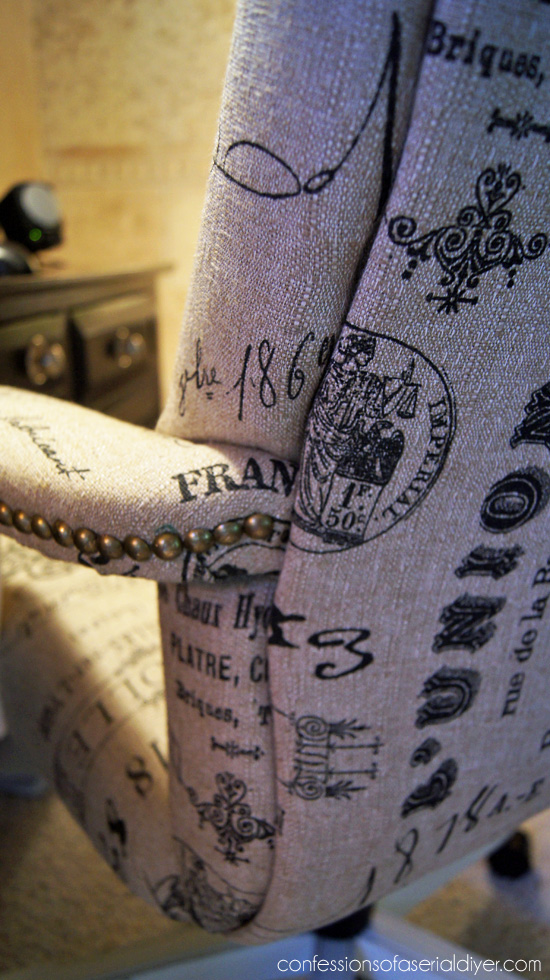
Oh! I almost forgot the most frustrating never heard so many curse words good thing babies were in the back yard best part, the nail head detail! Swoon…
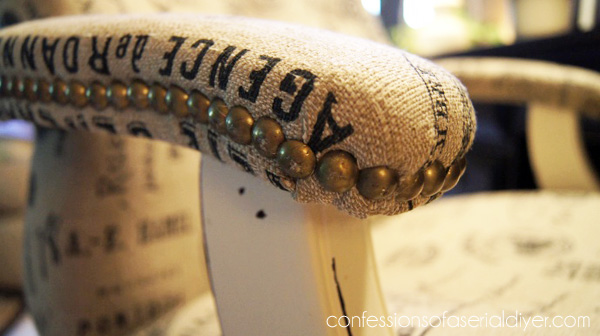


Oh, and I wasn’t kidding about the nail heads…many many casualties:

A certain husband of mine (not naming any names), thinks I should have left it navy blue. Seriously?
If you liked this post, you may also like the makeover I gave the desk:
UPDATE: It has been just over three years since I recovered this chair and it is still holding up fantastically, and I use it A LOT!

I shared this along with several other furniture makeovers that I have transformed for my home in this post here:
See it all HERE.
XO,
![]()
Don’t Miss a Thing!
If you like what you see, there are several ways to follow along!
Email * Facebook * Pinterest * Hometalk * Twitter * Instagram


Donna says
It is like night and day. You did a great job. Love to have something like that at my kitchen desk.
Christy K. James says
Thanks, Donna 🙂
rhonda says
Christy, What an amazing job you did!! I am sooooo excited to now tackle the 2 chairs in my office. My office has had complete makeover but my chairs stick out like a sore thumb. You have inspired me!!
~~~rhonda~~~
Christy K. James says
Thanks so much, Rhonda! The crazy thing is, I’ve had a really sad old pleather chair thats starting to rip sitting at my desk forever. I guess I just didn’t have the motivation to do anything to it. Finding this gem gave me that push! Good luck on yours 🙂
Sonya ~At Home with The Barkers says
That is a GREAT makeover! Totally wishing I hadn’t passed up an old office chair recently at a thrift store.
Christy K. James says
Thanks, Sonya! Now you need to keep your eyes pealed for another!
Cindy Eikenberg says
Christy, you did an incredible job on this and I LOVE the fabric! This is just gorgeous and what a transformation! Thanks for much for sharing and have a wonderful Sunday!
Christy K. James says
Thanks, Cindy! I need to drag it outdside and scotchguard it before little sticky fingers find it! Enjoy your Sunday, too 🙂
Vicki says
Wow! What a great job!! You are expert at this upholstering stuff…..I’m too chicken to try it. The chair looks amazing and professionally done. And to be comfortable to boot…. you lucked into a buy. Pat yourself on the back and give hubby a big smile!!!
Christy K. James says
I really need to show my husband my comments. He seriously told me how much he did NOT like it which is strange b/c he’s normally very supportive. I think the real issue is that I replaced his old ugly desk chair!! As for upholstery, I figured I was only into for $40 so I didn’t have much to lose! Thanks for your sweet comment 🙂
Sandra says
What a transformation–beautiful job. I’m inspired. Do you also have a project to use the old upholstery material for? Always look forward to your posts.
Christy K. James says
Thanks so much, Sandra!! I didn’t remove the old fabric, I just covered over it. There wasn’t much left over from this project, but I did save that…just in case 🙂
Michelle says
This looks amazing-I never would have believed it could look so great! I wish you lived next door…so many projects you could help me with!!
Christy K. James says
Thanks! It’s funny you say that because my neighbor was just asking me today if I’d paint an armoire for her lol! Thanks for stopping by:)
Natasha in Oz says
Wow, it looks amazing! That is some transformation-great job!
If you have a minute to spare I’d be thrilled if you could share this post at my weekly Say G’day linky party. It’s on now and this would be a great addition!
Best wishes,
Natasha in Oz
Christy K. James says
Sure, Natasha! Thx:)
Natasha in Oz says
I just popped by to say thank you for linking up to Say G’Day Saturday. This weekend’s party has just started so I hope you can join in again!
Best wishes for a great weekend,
Natasha in Oz
Christy K. James says
Thanks for the reminder, Natasha! Have a great weekend 🙂
Jen @ Girl in the Garage says
Love it! I am so glad you saved the nailhead trim, it makes me swoon too. 🙂 I’m undertaking a big reupholstering project soon so I appreciate your button-covering tips! I’m going to read back through in case I missed it, but where did you buy the fabric? Visiting from the CRAFT linky. Thanks!
Christy K. James says
Hi Jen! I found it at Hancock Fabrics. The sale price was $17/yard which is a bit pricey for me, but I wanted the durability of a the heavier weight fabric. I need to keep checking your blog…I’d love to see what you’re working on! 🙂
BethM@Under A Pile of Scrap! says
It looks FABULOUS and you are obviously a much more patient person than I! Although, I might possibly consider doing this for my own chair, but NEVER for anyone else. It’s probably a good thing I don’t have a quality office chair to tempt me (yet).
Christy K. James says
Thanks, Beth!! The biggest challenge believe it or not, was the nail head trim. Other than that, it was actually not too difficult! My old chair was cheap with plastic arms and legs and I had no desire to make that pretty…it just took the right chair 🙂
Annette says
Just in time! I bought two chairs at an auction recently and didn’t know where to begin to recover them. Thanks for the info!
Christy K. James says
So glad you found me! Hopefully this is helpful…I had never recovered a chair like this before, but I was pleasantly surprised to find that it wasn’t too difficult! (Except for those stubborn nail heads ha!)
kat says
oh my goodness! im now following, posted your button to my blog, i love what you did with this chair! what a great upholstery job! not to mention i am a huge burlap fan!!!WOW gorgeous blog! i love the chair, blue, original, NO! lol hugs kat =^.^=
Christy K. James says
Thanks so much, Kat! New followers so welcome and much appreciated!! Hope you enjoy what I share:)
Georgia says
Christy!
You did a beautiful upholstery job! Your chair is gorgeous! I love the fabric……..can you
tell me where you bought it and is it soft, not scratchy?
Thank you!
Christy K. James says
Thanks, Georgia! I found it at Hancock Fabrics and it is NOT scratchy! It looks a little like burlap I guess, but it’s a heavier weight decorator fabric…perfectly comfy to sit on! 🙂
Diane | An Extraordinary Day says
Now that is a fabulous makeover!! Thank you for sharing all the little details. I always have wondered about recovering an office desk chair. Now I will keep my eye open for a good one. And a good one does make all the difference.
Thanks for sharing at Monday Funday Link Party!
Hope your week is extraordinary!!
P.S. Pinning and sharing on FB
Christy K. James says
Thanks so much, Diane! My old hair was ugly with plastic arms and legs. Ths chair was so comfortable and supportive that I just knew I had to try to make it work! Thanks for the shout out:)
Jodi Blackmon says
Oh my gosh I think I love you! I was just looking at my husbands old desk chair, thinking of how to redo it for me. I’m setting up our guest room and want to make a sewing area, to learn while I recuperate from spinal surgery.
Visiting from Project Inspired, and so glad I did.
Cheers!
Jodi
Christy K. James says
You’re funny! I hope all went well with your surgery! Our old chair used to be my husband’s but it was so worn out! Finding this gem at the thrift store gave me the mojo to tackle this makeover. Aside from the brass nail head trim, this wasn’t too difficult of a project! Thanks so much for stopping by!! 🙂
Marty@A Stroll Thru Life says
I am totally impressed. I have never reupholstered anything, and this looked like it would be so complicated. You gave a fabulous tutorial on how you did it. Looks amazing. Thanks tons for joining Inspire Me. Hugs, Marty
Christy K. James says
Thank you, Marty! Besides a sectional I took apart and sliced up a bit, this was my first real reupholster job! It wasn’t as difficult as I originally thought it would be:) XO
Kim @ Curtain Queen says
You did a great job! Thanks for the inspiration – I have 3 of these in my home, all of them office-looking. Now I’ll know how to give them a “homey” look.
Christy K. James says
Awesome! So glad you like it:)
Nancy @ Artsy Chicks Rule says
Ok Christy, I’m coming over to that side more often to shop thrift stores! You find the best stuff. 😉 This chair turned out fabulous. Love it, what a makeover. Thanks so much for sharing it on Project Inspire{d}. 🙂 Pinned!
Nancy
Christy K. James says
They had several other matching chairs but with four legs…stationary like what would go around a desk in a boardroom! I swear I was trying so hard to think what I could do with them! Thanks for checking out my chair 🙂
Dee says
Wow! Your desk chair is gorgeous!!!! I pinned it 🙂
Christy K. James says
Thanks, Dee!! 🙂
Michele says
Oh, do I EVER feel. your. pain! Yet in the end, you have the most wonderful. chair EVER!! Wonderful. job! 🙂
Christy K. James says
Lol…I take it you know this nailhead trim business well, eh? I thought that would be the easy part! Have a great day:)
Michele says
l.ol., that’s exactly what I thought. I actuall.y considered hot glueing them on in the end! LOL
Christy K. James says
Lol!! I cheated a bit by not taking it all the way down the inside of the arm b/c I destroyed too many!
Pam @ Simple Details says
WOW, Christy!! It turned out fabulous, and the nailhead detail takes it over the top!
Christy K. James says
Thanks, Pam! 🙂
Virginia says
Wow! I’m impressed! That chair turned out great.
Christy K. James says
Thanks, Virginia:)
Kristen says
This is amazing! I would never have had that vision. It’s so beautiful! You took a boring office chair and made it a masterpiece!
Christy K. James says
I know, right??? Can you believe my husband wanted me to keep it navy blue? I think he thinks it isn’t very masculine now (perfect for me!) and he has to sit in it too! I think it might be growing on him, though 🙂 Thanks so much for stopping by and taking a moment to comment! XO
Teresa says
That chair looks amazing, how in the world did you pull it off, I never could have done it!!! You did a wonderful awesome job!!!
Christy K. James says
Thanks, Teresa!!
Lori Lehman says
Wow I love how your chair turned out!! It is so unique!!! Great tutorial too!!
Christy K. James says
Thanks, Lori!!
Gaylin says
Wow! Beautiful
It’s so clean and perfect! I have to say best post on button making.
Christy K. James says
Thanks so much, Gaylin! 🙂
Nancy says
You are amazing! You make it look so easy! The chair looks wonderful and I am envious of your ability to take furniture apart and then re do!
Inspiration, that is why we do blogging, right? You are full of inspiration. Thanks
Nancy
http://wildoakdesigns.blogspot.com
Christy K. James says
Thanks so much, Nancy!! I think I’ve been lucky so far:)
Susan says
I just bought that fabric to recover the seats of my dining room chairs! I’m pondering painting said chairs with chalk paint. Which color did you use, was it Old White or something else? Fantastic job on the chair!
Christy K. James says
Hi Susan! I found your comment in my spam folder, so sorry for the late reply. I used DIY chalk paint. I provided a link to the recipe as well as the color of paint I used, in the post. It is very similar to Old White, maybe just a tiny but lighter. I love this fabric! It will do perfectly for dining room chairs!!
karen@somewhatquirky says
You are right! It turned out beautifully! I’ve been looking for a chair to makeover for my husband’s desk – but I haven’t been quite so lucky as you.
Christy K. James says
Thanks, Karen! I’ve actually had my eye out for a more vintage chair, but the only one I’ve come across so far was really wonky. (I think I made that word up!) When I sat in it and leaned back, I thought I was going to fall completely back! So needless to say, I passed on it. I only bought this for the comfort level it provided. I knew I HAD to make it work! I think that’s why I’m surprised it turned out so well 🙂
Krista @thehappyhousie says
Love it Christy! So pretty – and quite the transformation!!
Krista
Christy K. James says
Thanks, Krista 🙂
laura@Top This Top That says
amazing chair redo. I like your fabric choice and the nailhead trim. I am going to feature in my weekly wow’s on Saturday.
Christy K. James says
Awesome, Laura! Can’t wait to see it 🙂
Kathy says
You have inspired me to recover my old office chair in my basement sewing room. It is a really old, ugly gold. It never bothered me because I’m the only one who sees it, but now I want to recover it. Thank you!! Why shouldn’t all our surrounding be beautiful?
Christy K. James says
Great, Kathy! Of course, why shouldn’t you be surrounded with things you love, instead of things that ‘make do’! I’m so glad you stopped by! 🙂
Brooke says
What a fun Paint Project! I love this Idea!
Come over to my blog and link up at my Paint Party!
http://startathome.blogspot.com/2013/06/paint-party-and-giveaway.html
Brooke Start at Home
I will follow on my way out!
Kim says
Super project! I love the way you brought this chair back to life!
Christy K. James says
Thanks, Kim! 🙂
Gretchen Gerg says
The chair is just awesome! Are you the daughter or granddaughter of an upholsterer? I would have a chair like that at my desk if it looked that good. Girl…you ROCK!
Christy K. James says
Thanks, Gretchen! No upholsterers in my family, I just take things apart and pray they go back together! I’ve been lucky so far! 🙂
Roeshel says
You did an AMAZING job! Now come and do mine! haha! I love it, Christy! Beautiful work!
Christy K. James says
Ha ha I’ll be right over!:)
Suburbsmama says
Beautiful transformation! I love the fabric choice. If you get a chance, please share this on my linky party: http://suburbsmama.blogspot.com/2013/06/sunday-linky-party-12.html
Christy K. James says
Thanks for letting me know about your party, glad to link up! 🙂
Funky Junk Interiors says
W.O.W. I sure didn’t know an executive high back could look this awesome. Outstanding outcome on this, Christy!
Christy K. James says
I’m so glad you like it, Donna! Thanks for coming to check it out! 🙂
Beverly says
What an incredible makeover. That was a hugh undertaking. You did a fabulous job.
Have a wonderful weekend,
Bev
@ Eclectic Red Barn
Christy K. James says
Thanks, Bev! It really wasn’t too bad. It came apart pretty easily. The hardest part was hammering in the upholstery nails! Thanks for stopping by 🙂
Feral Turtle says
WOW!! What a fantastic chair you have re-created. Cheers!!
Christy K. James says
Thanks! I’m so glad you like it! 🙂
Denyse @ Glitter, Glue & Paint says
Well there are so many LOVES hear! The chair, the detail, the FABRIC….What a beautiful addition to your office. I might have to go in search of a chair and finish it. I’m in need of a new desk chair. Once I figure out how to add buttons to cushions I would love to makeover a few things in my house.
I’m a new follower from Uncommon designs and would love to invite you over to visit http://www.glitterglueandpaint.com
xoxo
Denyse
glitterglueandpaint@gmail.com
Christy K. James says
Thanks, Denyse! I’d love to come visit, thanks for the invite!
Anne@DesignDreams says
Awesome job! Where did you find that fabric? That’s exactly what I’ve been searching for. Sigh. What a gorgeous makeover!
Christy K. James says
Thanks, Anne! I found it at Hancock Fabrics. It’s a heavier weight decorator fabric and it’s soft, not scratchy like burlap. But it gives you that look. I like that it will hopefully hide whatever sticky little fingers may bring its way! 🙂
Judy says
This is one of the best makeovers I have seen in a while. I love it. I will be featuring this tonight at my Sizzle into Summer party that opens at 8pm EST. Please stop by and pick up an I’ve Been Featured button. Thanks.
Christy K. James says
Yay! Thanks, Judy! You made my day! 🙂
Sherry says
Hi Christy, I just dropped by again to let you know your chair project will be featured at this week’s Open House party.
xx,
Sherry
Christy K. James says
Woo hoo! (Doing a little happy dance!) Thanks so much, Sherry 🙂
karen says
Wow!!! This turned out so amazing. I pass these old chairs up all the time, but I never thought to reupholster them! I am sharing at my party tomorrow, and a HUGE giveaway. Thank you so much for linking up at Redoux!
Christy K. James says
Thanks so much, Karen!! I need to come over and find out if you revealed your new secret source for good junque! (Did I spell that right?!) 🙂
Sarah says
WOW! I love this chair transformation. It’s truly amazing.
Sarah
Christy K. James says
Thanks, Sarah! 🙂
Jan G. says
Thanks to the Linky Party, I am seeing this blog. For the chair, approximately how many yards did it take to cover the chair, as I would like to get the material while on sale and then being the search party for the right chair! Love, love this…
Christy K. James says
Thanks, Jan! I believe I bought three yards to complete this and had just a little bit left over. 🙂
Jan G. says
Thanks Christy for the quick reply. I have been in search of burlap “appearing” but not “feeling” material and this seems perfect; now to cross paths with that chair! I work from home at night and my chair is uncomfortable and so, so boring!
Christy K. James says
I spend a lot of time in my chair, too! That’s why when I found it, even though it was ugly, I had to make it work! Good Luck, Jan 🙂
west furniture revival says
love the chair makeover , it turned out beautiful,
I would love to feature it, if that would be ok please let me know,
lauren
Christy K. James says
Absolutely, Lauren! I love that you love it! 🙂
west furniture revival says
i posted the feature and you can see it here. thanks again,
lauren
http://westfurniturerevival.blogspot.com/2013/07/revival-monday-122.html
Christy K. James says
Sweet! Thanks, Lauren!!
Cristina@remodelandolacasa says
Oh Wow, the new chair is stunning! Having worked with nail heads on a couple of projects I understand your frustration, I hate when they don’t align and when the nail gets all twisted :-/
Christy K. James says
Yes, Very frustrating! Plus because I’m too cheap, I reused the old ones that were a bit wonky to start lol! 🙂
Alli says
I am absolutely amazed! I didn’t know a desk chair could look that good and so not like a boring desk chair! Beautiful. Simply beautiful. So glad you shared this at Throwback Thursday!
Christy K. James says
Thanks, Alli! I’m thrilled it turned out! You just never know when you start tearing stuff apart 🙂
Alli says
Just wanted to stop by and let you know that you were my featured post at Throwback Thursday last week. I was amazed by your beautiful desk chair makeover! You can stop by and grab the “I Was Featured” button on my website. Thanks so much for joining us!
Christy K. James says
Thanks so much, Alli! I am loving this party theme. There are so many great posts and projects that get buried away! Have a great day! XO
Doc says
Great job (and zillions of kudos (and peanut butter Kudos bars) for being so dedicated to take out nailheads and remove the beastly blue leather! (I’d have either stapled in some new fabric over the leather, or smeared metallic paint all over the chair, flung some ultra-fine glitter over it, and called it a day. 🙂
Wondering if you remember the name, make, and/or model of the chair? I just poured a final coat of epoxy over my Gold/Fishbowl Floor the other day, and am now frantically searching for something to put in my new office/recording studio.
Thus far, I’ve considered building a banquette or buying a kneeling chair; the former will probably cost more to build than buy, and the kneeling chair might help my back, but won’t do my busted knee any favours.
Thanks so much for sharing your lovely work–and for being an inspiration!
🙂
Christy K. James says
Thanks so much for your sweet comments, Doc! This chair is the Executive Hi Back Traditional by The Hon Company. I found it at a thrift store for $40, but retail is quite pricey…way more than I’d be willing to pay anyway! Thanks for visiting! 🙂
JoAnn @ SweetPepperRose says
I think everyone says it all! Fantastic job.
Christy K. James says
Thanks for checking it out, JoAnn 🙂
Julie @ Being Home says
Ha! It took me a while to scroll down through all these comments! lol Rightfully so. This chair is GORGEOUS! Boo, to navy blue. lol I love the new look and would totally buy that chair. 🙂 You do fantastic work, Christy. 😀
Christy K. James says
Aww, you are sweet…thanks, Julie! Can you believe my husband preferred it before?! No style, I tell ya!
Holly Fuller says
I absolutely love that desk chair make over. I have been searching for that fabric for a wingback chair I inherited. Where oh where did you find that fabric? It would be good on my husband’s home office chairs, as well!!!
Christy K. James says
Hi Holly, I found this fabric at Hancock Fabrics. It’s perfect to hide little sticky finger messes which is why I chose it 🙂
Jill says
Can you tell me how your fabric has held up? I am looking to do the same thing to an office chair I have but don’t want to go to the trouble if it’s only going to last a dew months! Thank you!!
Christy K. James says
So far, so good, Jill! This a heavier weight decorator fabric and it’s doing well so far!
Cora says
WOWWW!! That is beautiful! They certainly don’t make office chairs as pretty as this one. I know there are always a bunch similar to your “before” at my thrift stores – now I can see what these castoffs can become with a little hard work!
Christy K. James says
Thanks so much, Cora! I’m surprised someone hasn’t come up with a line of pretty office chairs. There’s definitely a market for them! Until then, we’ll have to beautify our own. I’m so glad you like it! 🙂
Cynthia Banessa says
Super!!!!!
Christy K. James says
Thanks, Cynthia! XO
Catherine Knapp says
I love how the chair turned out it is amazing! I have a chair and haven’t mustered up the courage to re-do it yet. Your chair is inspiring me !
Christy K. James says
Go for it, Catherine! Those chairs are all so boring , right? You can make it beautiful…and thank you!! 🙂
Vicki says
This is what I’ve been looking for! How did you get the back off? Pried with a screwdriver? My chair looks like it has a similar back. I can pull it away a tiny bit but think it’ll take some work to pry it off. Hope I don’t break it… And hope it has those white plastic things holding it together…
Christy K. James says
Hi Vicki! I used a pair of needle nose pliers and just grabbed hold of the back panel and pulled it off. It took a bit of tugging! Hopefully yours is similar! I’d love to hear how it works out!
Lauren @ The Thinking Closet says
I love that you are never afraid of getting sweaty with your DIY projects, Christy…and the hard work pays off because they are always out of this world amazing! And this desk chair is no exception. I especially love nail head details. Well worth the casualties! Best of luck with CWTS! I’d LOVE to see you as a contestant. 😉
Christy K. James says
Thanks, Lauren! You are so sweet! Some of my projects do get ugly, luckily most of them turn out in the end. Thanks for the vote of confidence! 🙂
Wendy says
Your chair is amazing! You have made it look so simple. I just might have to try something like that now! Thanks for the inspiration.
Christy K. James says
Thanks so much, Wendy. This really did end up being less complicated than I anticipated. Love those kinds of projects! Thanks for stopping by! 🙂
Jessica says
So first timer here…
You inspire me. Love your work and am so glad I came across your blog!! I look forward to more of your posts and I just subscribed to your email posts! I cant wait to try some of your DIY’s!!!
Christy K. James says
Awesome, Jessica! I’m so glad you found me. I appreciate your taking the time to leave such a sweet comment! XO
Erlene says
Amazing! I ran over to your sectional redo and you’re a brave brave woman. I don’t think I would’ve ever attempted that.
Christy K. James says
Thanks, Erlene! It was either that or ordering a new corner piece to match our existing sectional. My hubby was glad to bust out his saw lol!
Nancy @ A Joyful Cottage says
Loving this. Pinning this. Great job, Christy! ~ Nancy
Christy K. James says
And it’s holding up great! It was such an ugly duckling!
Roger Moore says
Great Job. Looks good.
Regarding your husband:
Maybe he doesn’t like changes.
Probably he loves you just the way you are.
Good for you.
As long as you want to keep him.
Cheers!
Christy K. James says
Yes, I suppose you are right, Roger! He wonders why I feel the need to change things all the time. I think I’ll keep him just the way he is though. 🙂
MarciaMarcia says
Christy – what a wonderful desk and chair! It is exactly what I would want..down to the fabric and nailhead trim! Thanks for sharing!
Christy K. James says
Thanks so much, Marcia! I have a soft spot for it too 🙂
Betsy @ Happily Ever After Etc. says
I just love this project, I’ve been wanting to tackle my hubbys desk chair for a while now and this post makes me want to tear into the office with a hammer and some fabric… looks like I’m off to raid the fabric stash! Great Job!
Christy K. James says
Yeah girl, go for it! Just make sure he’s not too attached to it just in case ha ha! I think most chairs are probably made very similarly and you should have no problems. Good luck 🙂
Tina Matteson says
I just love this. You have inspired me to take mine apart and redo it. It’s so ugly. 🙂
Christy K. James says
So glad you feel inspired, Tina! It wasn’t very difficult at all! XO
Julie says
Hi! Ive started a monigramming business and im turning a guest room into my home office….bought the same chair for a STEAL OF A DEAL off if Craigslist and want to give mine a makeover. ..how much fabric did you have to get to do this chair?
Christy K. James says
I don’t recall for certain, but I would say no more than about a yard and a half. This fabric was 54″ wide. Good luck! 😉
Julie says
*monogramming*
Carole says
Christy, you are the queen of reupholstering. When I was young I did a fair amount of it, however, I was never as creative as you are. You take risks which is necessary to get the job done more often than not and to have a beautiful outcome. Now your desk has a mate. Beautiful.
Christy K. James says
Aww thanks, Carole! I don’t know what makes me think I can tackle these projects sometimes when I look back, but it sure is satisfying when things work out well. 🙂
Sheila Hottinger says
This is beautiful! Love it! I was perusing websites trying to find how to reupholster an office chair and bingo! My leather, high-back , office chair is about to undergo a complete strip down and make-over. My question is this: How much material did you need to purchase? I am uncertain on that one point..lol
Thank you!
Again…beautiful chair! 🙂
Christy K. James says
SO glad you like it, Sheila! Sure beats the blue leather lol! I probably used no more than three yards for this chair. You can guesstimate by measuring your chair, one yard = 36 inches. Most fabrics come in either 45″ wide or 54″ wide. Hope this helps and good luck!! 🙂
Daphne Levenson says
My current office chair is being held together with leopard print duct tape. Obvo I needed this pin at this time. The structure of the chairs is simular. How much fabric did you buy / use?
Christy says
Hi Daphne! Shouldn’t take more than three yards.
patricia says
waooooooo its incredible. good job
Where to buy that beautiful fabric?
Christy says
Thank you, Patricia! I bought it at Hancock Fabrics but they have unfortunately gone out of business. Broke my heart!