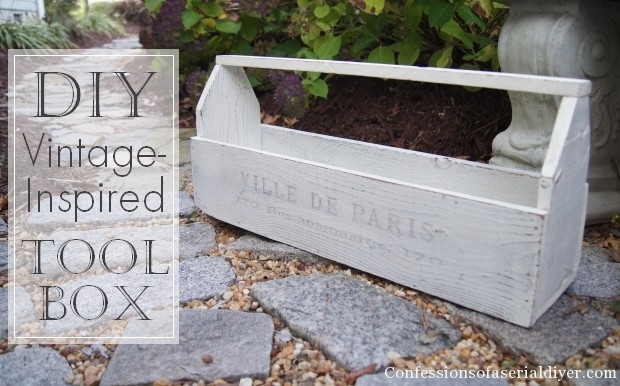
Hello lovelies! Today I’m going to show you how easy it is to make a vintage inspired toolbox. This one’s a true trash to treasure project.
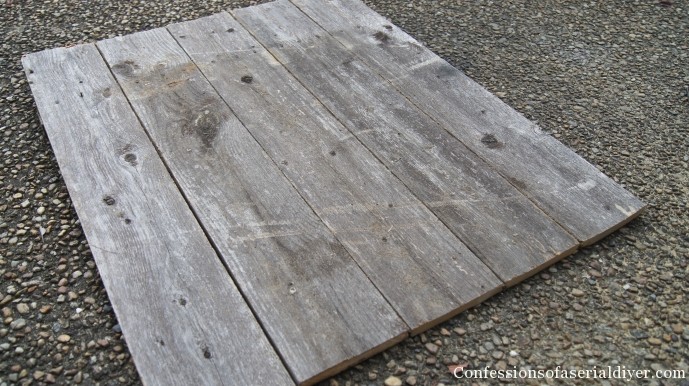
Remember this dresser makeover with the fabric inlay I shared recently? I found that dresser at a yard sale, but before I found that beauty, I passed a stack of old fencing all cut in perfect 3×3 squares stacked neatly on the curb. I backed right on up and shoved it into my car.
Then I found that steal of a dresser and was playing out in my mind how on earth I would possibly get it all to fit into my SUV. I had both of my boys with me that day too. I unloaded the fence, squeezed in the dresser and then crammed the fence in every available cranny until it all fit. I wish I’d gotten a picture! What kind of blogger am I?? The lady who sold me the dresser probably thought I was a crazy junk lady! (I’d don’t think it’s come to that…yet 🙂
Anyway, on with the tutorial… here is one of the squares of fencing…perfectly cut as I found it.
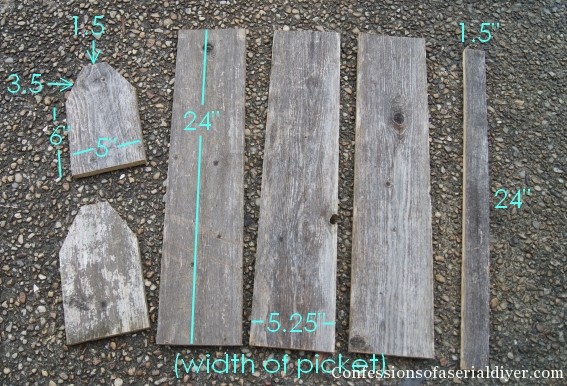
I cut my pieces to the following dimensions using my table saw.
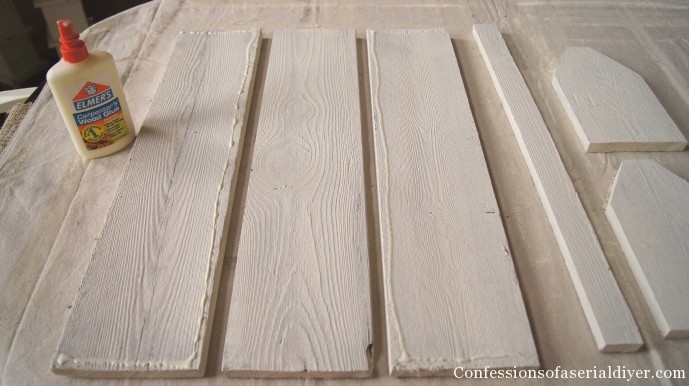
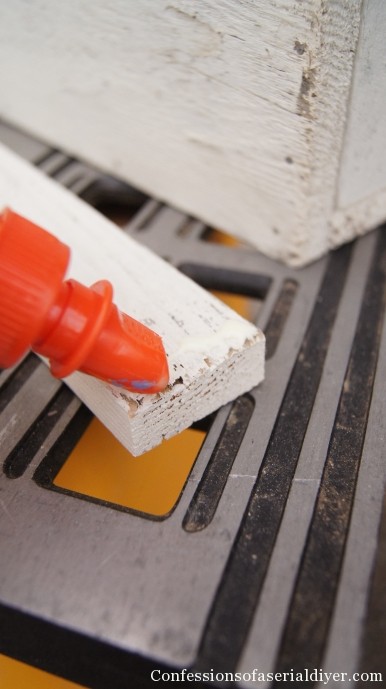
After painting my pieces with one coat of flat latex paint and waiting patiently for them to dry, I added a bead of wood glue in the places shown as well as to both ends of the middle piece:
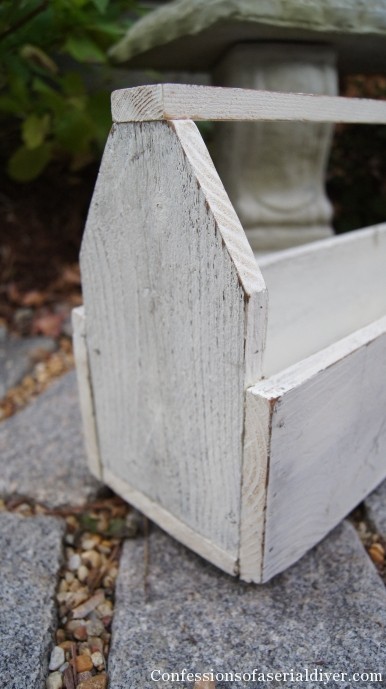
Then I constructed my box using clamps to hold everything in place. You can see how it went together here:
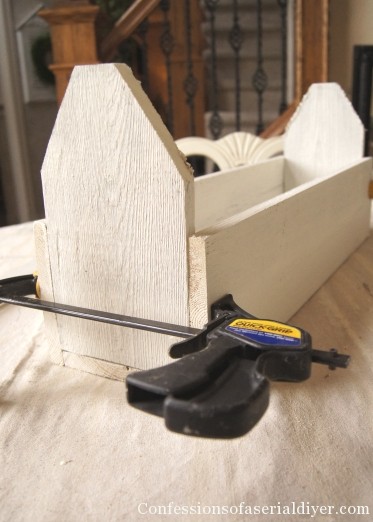
You’ll also notice my edges are all still pretty rough from the cuts. That’s ok because they will be sanded last. My cuts aren’t perfect either, but that only adds to the charm. (Right?)
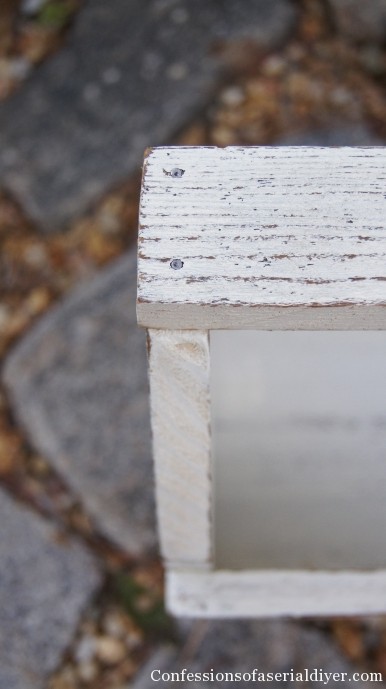
When the glue was dry enough to remove the clamps, I nailed everything in place.
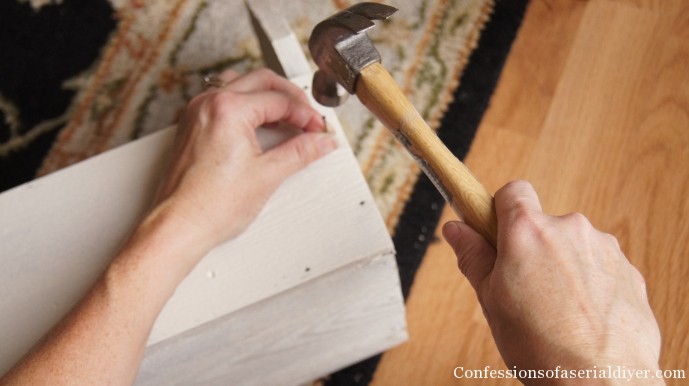
The wood was pretty soft, so I didn’t have to countersink my nails. If you use new wood, you’ll want to countersink your nails. You could also use a nail gun, but since I left mine exposed, I prefer the look of regular nails. (That and the fact that I don’t own a nail gun.)
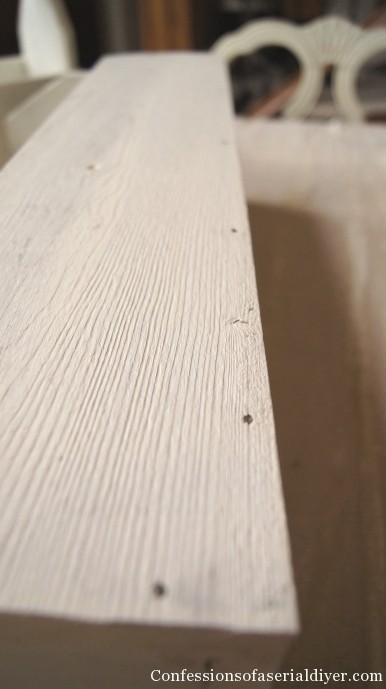
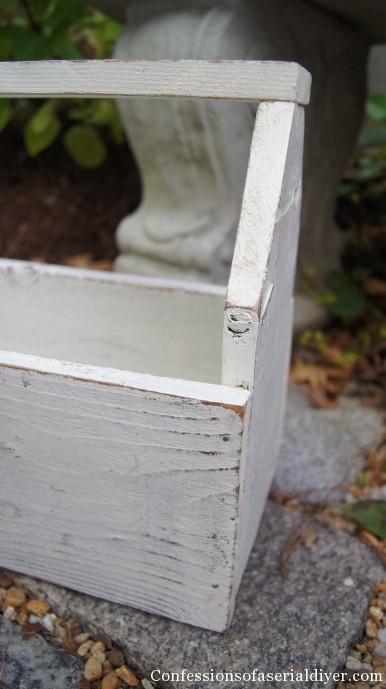
Before adding the handle, I hand sanded all the surfaces inside and out. Then I added a dab of glue to the handle and nailed it in place.
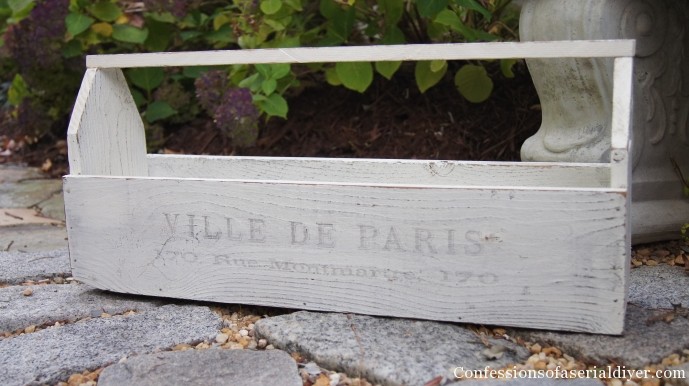
I transferred some graphics from The Graphics Fairy that I intended to paint, but I liked how it looked faded as is. So, I sprayed it with a coat of clear matte sealer to seal it. Done. Perfect 🙂
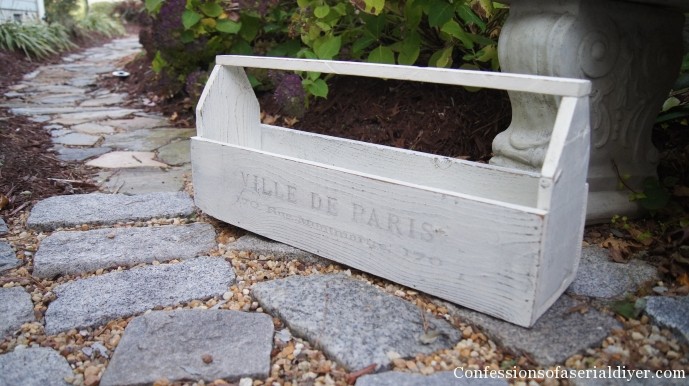
Sanding it really brought out all the character of the wood grain.
I was so pleased with how it turned out that I made three more! They’ll be for sale at the Christmas Market Thanksgiving weekend. I will be keeping one for myself though 🙂
I’m going to add greenery and lights to mine for the Holidays!

I love it so much…probably because it started out as nothing more than someone’s trash pile. Aren’t those the best projects?
You might like these fence picket projects too:
Old Fence Pickets to Pretty Tray
You may also enjoy seeing 12 more thrifted and DIY totes I’ve done:
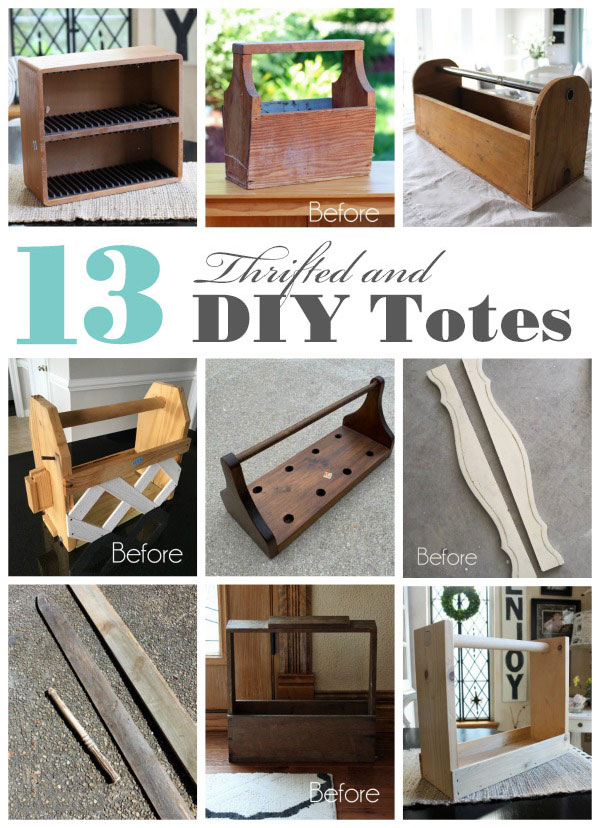
See them all HERE!
Have a blessed day!
XO,
![]()
Don’t Miss a Thing!
If you like what you see, there are several ways to follow along!
Email * Facebook * Pinterest * Twitter *Instagram


Cindy Eikenberg says
Christy, what a great project and it looks fantastic! I have a feeling that you’ll sell these like hotcakes! 🙂 Pinning! Hope you have a wonderful Sunday!
Christy K. James says
Thanks, Cindy! I hope so! It was freezing here today, but still a great day! Have a great week sweet friend! 🙂
JoAnn @ SweetPepperRose says
It looks great!! and then again, all of your projects look great 😉 I’ve admired many of these old timey tool boxes and it’s still on my to-make list. I can pretty much handle our new chop/ miter saw, so this may be one of those projects I don’t have to have my hubby help me make.
Christy K. James says
I love these too, JoAnne. I’ve always wanted one, so I was looking at this pile of old fence and it just came to me…I’ll make one from these pickets! You could definitely do this with a chop saw, probably much easier actually! Have a great Thanksgiving! 🙂
Carrie says
Too cute! And I love the texture of the wood showing through.
Christy K. James says
Thanks, Carrie! 🙂
JaneEllen says
Love projects like this, the beauty is in the simplicity. Nothing like it. Love the tutorial, you always make things look so much easier. I’ll have to save this and pin it so I don’t lose it to make when the weather clears up.
Right now we have mud, yesterday we had 3 inches of snow then rain and somewhat higher temps, doggone it. I wanted the snow to stay. Our dog hates to have his feet cleaned, he’s 72 lbs. of black lab/border collie, lot stronger than I am so cleaning his feet to come in is a challenge at all times for me. I have to stand over his back with a wet towel to clean each of his webbed feet. He lets me know about it in no uncertain terms,
he’s quite a talker.
I love to make boxes like yours, they are so handy for so many things, including decorating. So extremely versatile. Great project/post. Happy Thanksgiving.
Christy K. James says
Thanks JaneEllen! Sounds like you have your hands full with that pup! I hope you and your family have a blessed thanksgiving 🙂
Diane says
Hot diggity dog, Christy! This is so fine! Now I know what to do with the pallet I had hubby grab off the side of the road the other day. :>}
I hope you have a wonderful Thanksgiving!
Christy K. James says
Yes! This would be perfect built from a pallet! 🙂
Mindi says
It is so perfect Christy!! You did a great job! And I am still chuckling at the sight of you fitting in the dresser and the wood, I am so guilty of doing that same thing! Junkers unite! I love the dresser too! Thanks for you sweet comment on my blog!! Hugs!
Christy K. James says
Thanks, Mindi! I really wish I’d taken a picture…my boys are great sports! As if they have a choice! 🙂
Krista @thehappyhousie says
Okay, this is awesome. You are seriously one talented lady. Love it!!
Christy K. James says
Thanks, Krista! 🙂
Katie Goldsworthy says
It’s beautiful! Thanks for linking it up at Monday Funday!
Jamala says
That looks really lovely, Sooo country chic. And you gave great instructions
Christy K. James says
Thanks, Jamala! 🙂
Andi says
I have a major girl crush now. You use the table saw AND drive your own nails. Whew.
-andi
Christy K. James says
Want me to stop by and install that flooring for you? I’m on my way 🙂
Shelly- MinettesMaze says
Great tutorial!! And I like that you aged it! Thanks for sharing on DIY Sunday Showcase.
Shelly
minettesmaze.blogspot.com
Danelle - Tattered Treasures says
Looks great! I will add this to my TO DO project list. Thanks for sharing.
Christy K. James says
Glad you like it, Danelle. Thanks for stopping by! 🙂
Jo says
Any chance you still have one of these left? Love it but don’t have the time to make. Please let me know and the price too!
Christy K. James says
So sorry, Jo…I don’t sell online.