I’ve got something really cute to share with you.
See this sweet-as-can-be pillow?
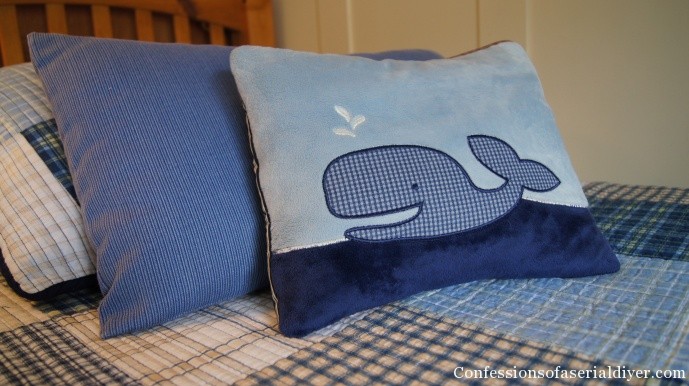
I made it out of the bumper pad that was in Brennan’s crib!
{Cute story}:
We transitioned him to a big boy bed a couple of weeks ago (he’s two and a half). His crib was still up in his room because really, I think we just didn’t want to let go! Well, the other night I put him down in his big boy bed and said my good nights. When I went to check on him after he was asleep, he was not in his his bed!! I was scanning his dimly night-light-lit room and guess where I found him? IN his crib sound asleep! Awe…he missed his crib. WAIT, what?! How did he get in there???
So it was time. Time to say good-bye and down the crib went.
I was folding his bumper pads and thinking that they were so cute and how time has passed so quickly. They served their purpose and now its time to say good-bye to them too.
Good-bye little monkey hanging from the coconut tree.
Good-bye pirate ship.
Good-bye tiny checked whale.
Wait, he’s kinda cute…
That’s when I had a revelation.
I can make tiny checked whale into a cute little pillow!
So, that’s what I did! (Besides, I needed an excuse to use my new sewing cabinet!)
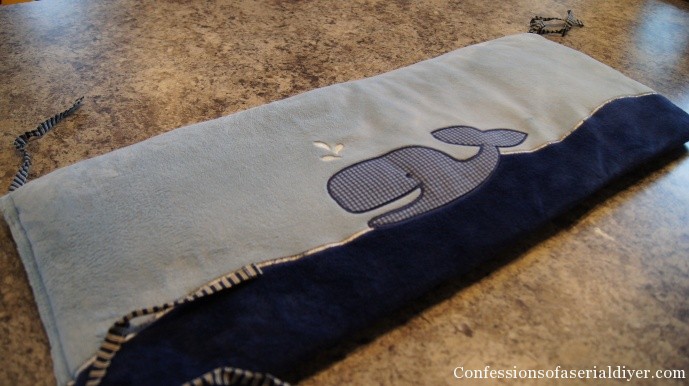
Here is the bumper pad before:
This is how I did it:
{If you already have skills in the sewing department and don’t need this how-to, scroll to the bottom for a bonus before and after!}
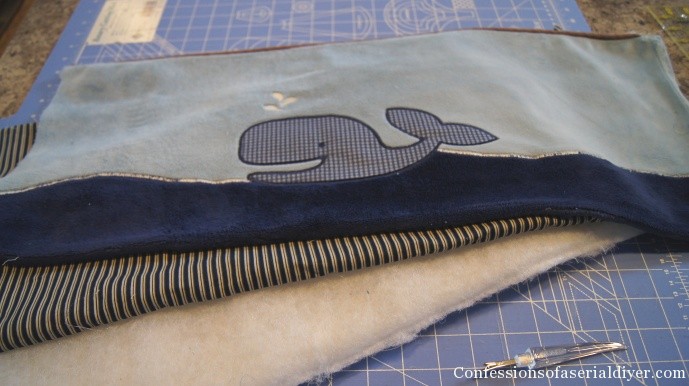
I took it apart using my seam ripper to reveal the front, the back, and a layer of batting.
Next, I cut the front to the size I wanted using my rotary cutter.
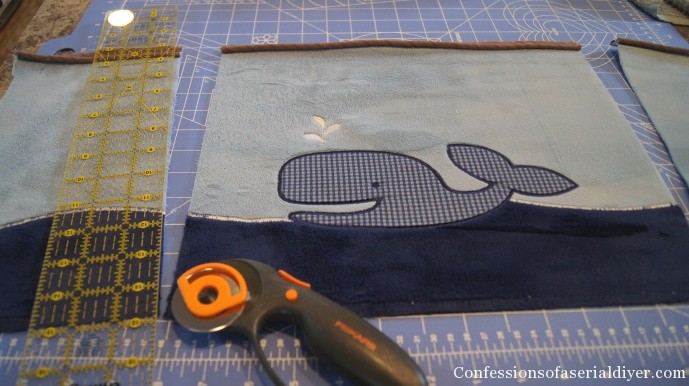
I cut the back piece into two pieces, each about 1/3 wider than the front. This way they will overlap and create a flap in which to insert the filler.
Then I ironed each piece and removed any loose threads.
{Tip}:
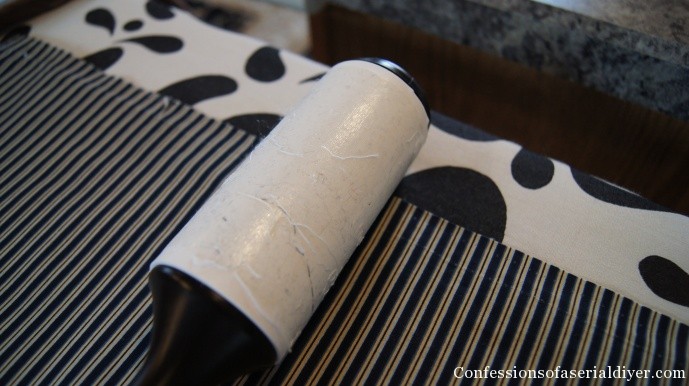
To remove loose threads, use a lint roller.
I have to pick out at least one seam that I messed up on during every sewing project! A lint roller does some of the dirty work for you!
I sewed the batting to the front. I wanted the pillow to be smooth from the front just like the bumper pad.
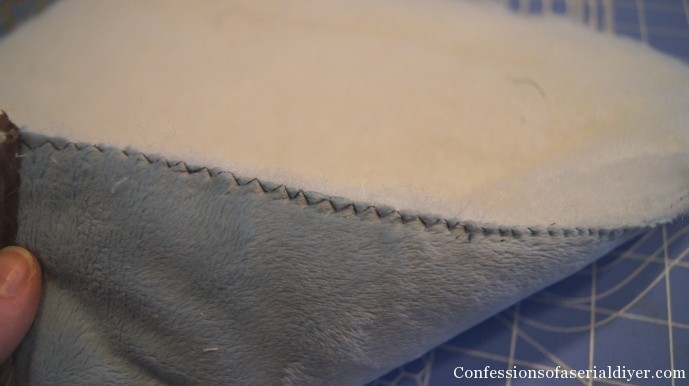
Next, I sewed a finished edge along one side of each of my back pieces.
Then, I sewed all three layers together. The front and two back pieces (finished edges overlapping one another to line up with the size of the front piece) right sides together.
Then I clipped the corners and sealed the edges using a zigzag stitch. (So it doesn’t come unraveled in the wash.)
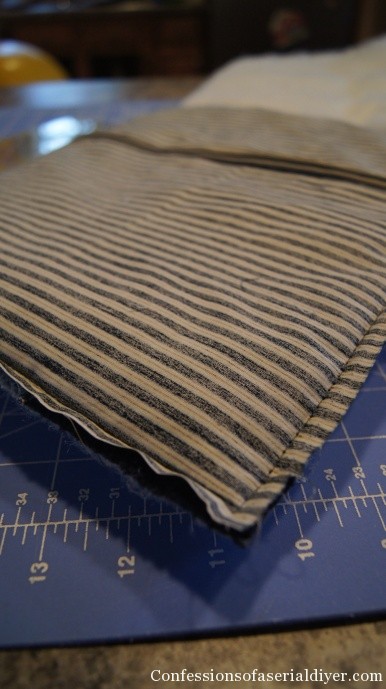
I turned it right-side out and stuffed it with the remaining batting.
I love it!

Welcome to your new life Mr. Tiny Checked Whale…make yourself at home on Brennan’s big boy bed!
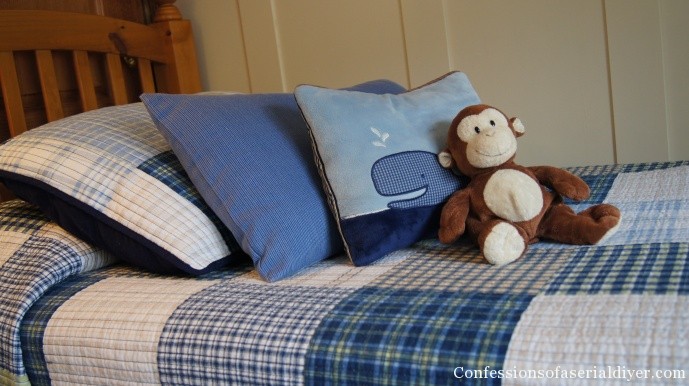
Oh, I see you’ve invited a friend:)
I can’t think of a better way to preserve a little piece of baby’s first bedding! 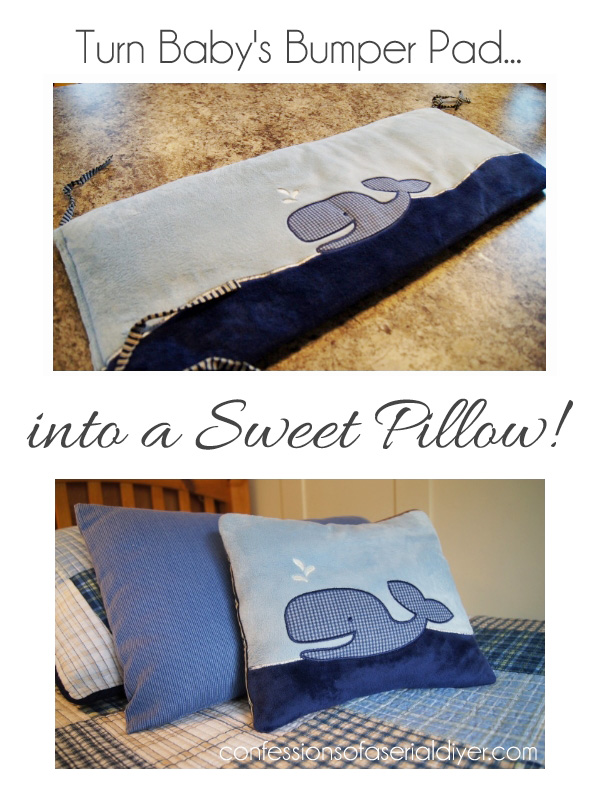
I now have a {BONUS} before and after to share with you!
Here is the big boy bed sleepin’ star of this post, Brennan…before: 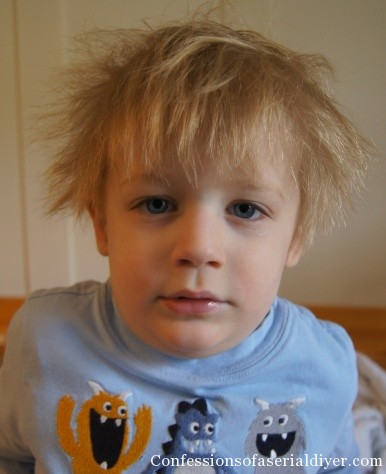
And after: Many tears shed, lollipop fed, he got a big boy haircut to go with his big boy bed!
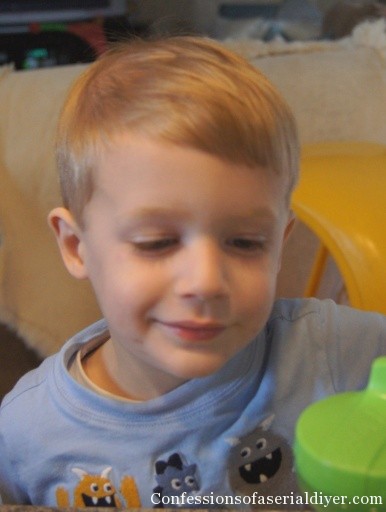
It was time!!
This was the best “after” I could get. This boy doesn’t sit still for a second!
XO,
![]()

Callie @ Callie's Crafts says
What a great idea and you don’t have to redecorate to make a big boy room. I’m co-hosting my first linky party tonight @ 7:00 I would like for you to link up. http://calliescrafts.blogspot.com/
Christy K. James says
Thanks, Callie:)
Bethany says
Awesome idea! I removed my son’s bumpers when I read they were a suffocation hazard and have just hung onto them. They are made of really cute fabric, I will have to do this with them! Thanks so much for sharing.
P.S. Love the before and after pictures, what a cutie you have!
Christy K. James says
Thanks, Bethany! I thought his bumper pads were so cute, so this way I could keep his theme going too:)
Leslie Harris says
Christy you are a genius!! What a fantastic way to transform such a sentimental piece. I only wish I would have done that, but I do have their favorite baby blankets still. Thanks for the great idea.
Leslie (Gwen Moss)
Christy K. James says
Thanks, Leslie! I wish I would have thought of it when my first had outgrown his crib, but I have his fav baby blanket,too, ( he actually still sleeps with it at 10:)
Rachelle S says
What a great idea! Your pillow turned out great! (visiting from the Girl in the Garage link party).
Christy K. James says
Thanks, Rachelle…it’s a fun way to preserve a piece of baby’s first bedding 🙂