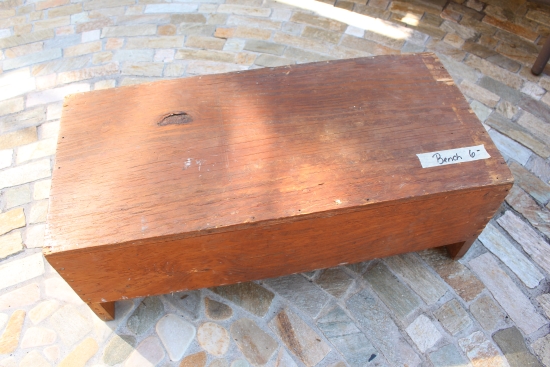
Hi friends! I’m so glad you stopped by today. I’m sharing how I freshened up George’s bench. George was the previous owner of this sad, but super functional bench:
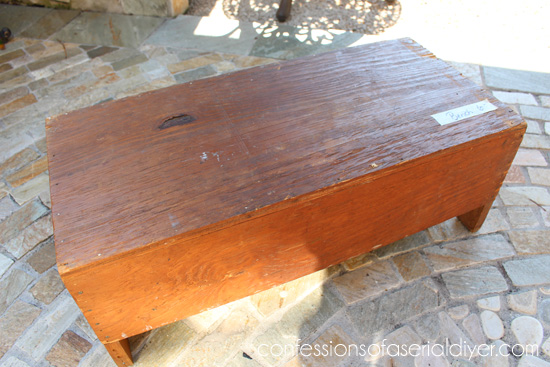
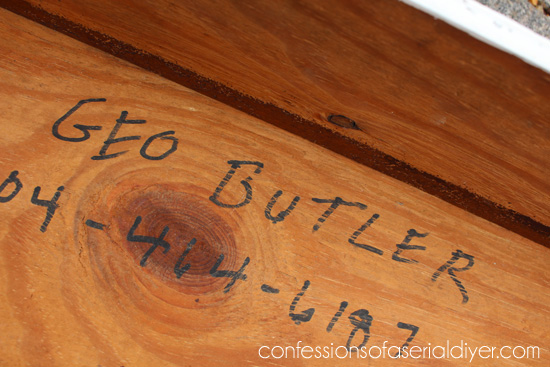
I found it at his estate sale in the corner of the garage covered in cobwebs. I know his name because he put it on the bottom:
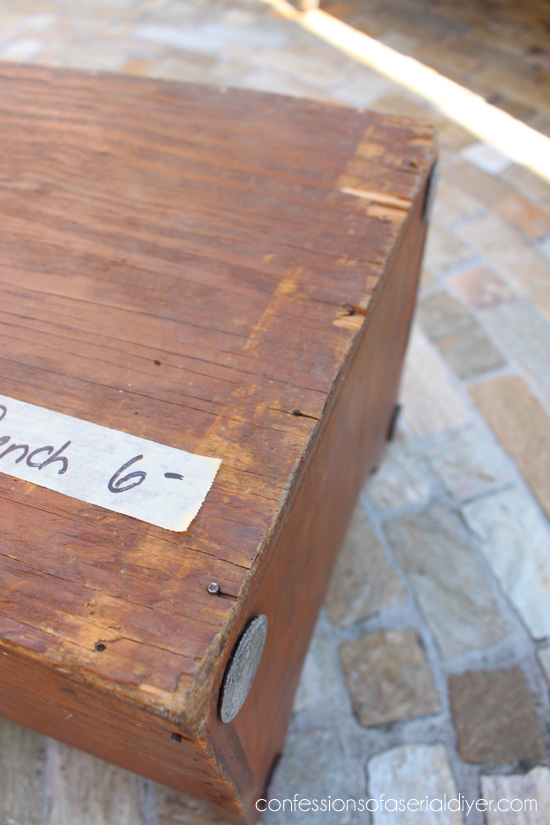
I love that. I was drawn to this little bench because clearly it was hand-built and I loved all the imperfections.
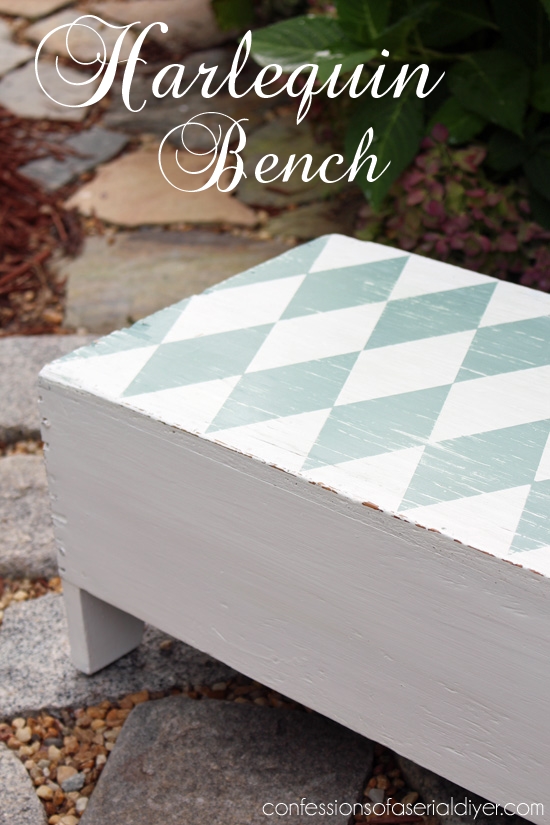
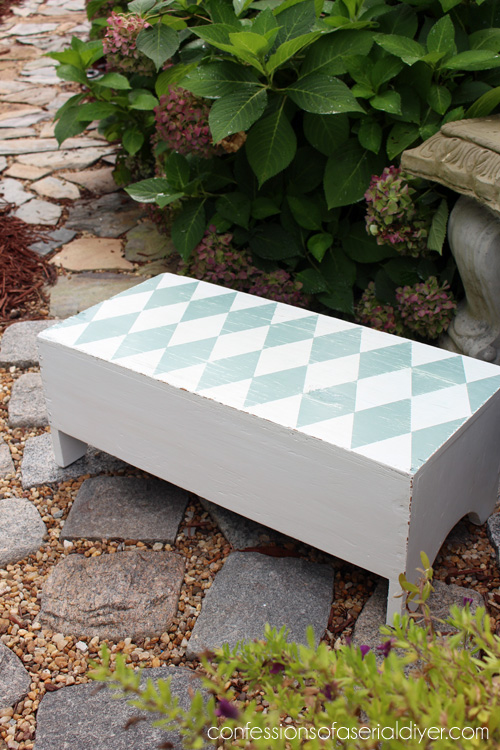
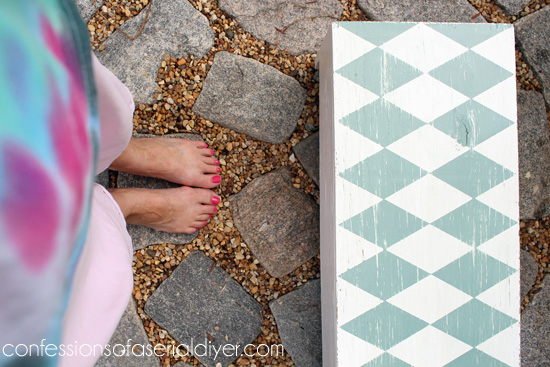
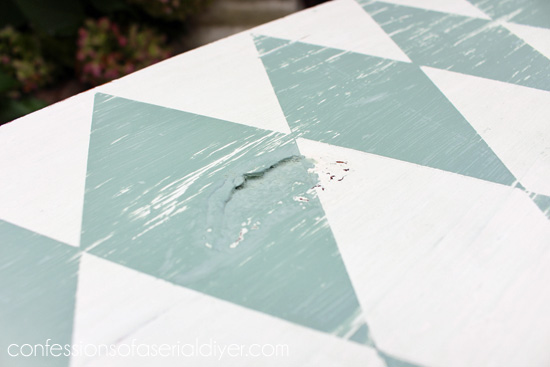
I decided to paint it with a fun harlequin pattern…
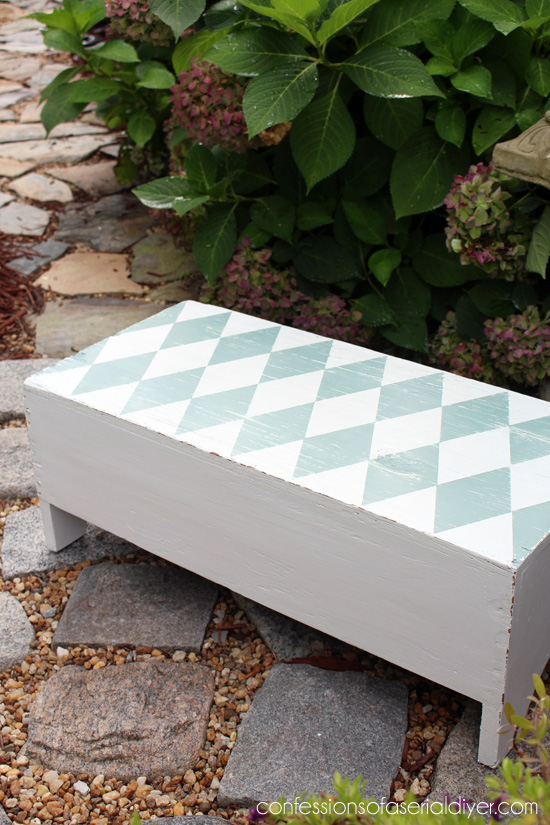
I used flat white latex since I was painting on raw wood. The diamonds were painted with Annie Sloan’s Duck Egg blue.
I have used this pattern a couple of times before like on this piece:

And this lovely piece (I know you want to see what I could have possible done with this one, right?):

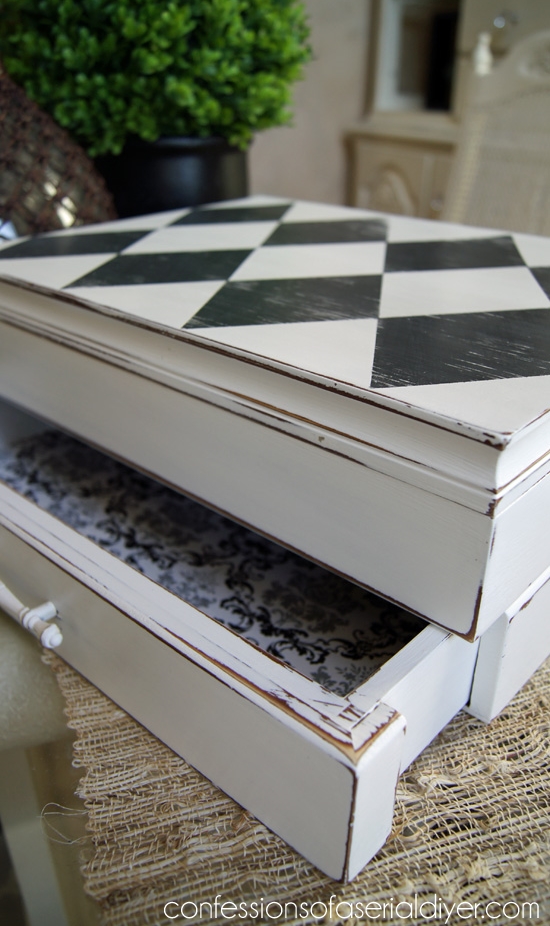
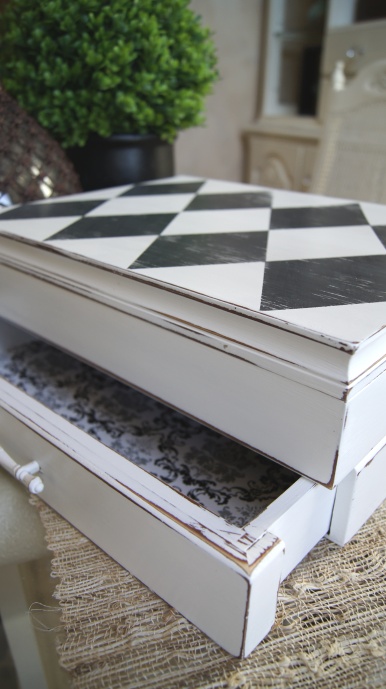
I also redid this old thrift store flatware box last year:
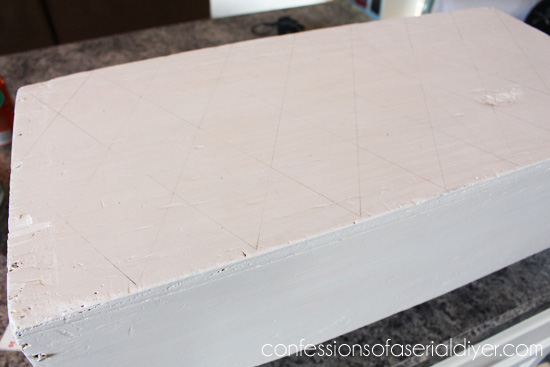
I created the pattern for this bench the same way I did for this chest:
- Using computer paper, tape together enough pieces to create one piece the size of the surface you want to add your pattern to. Fold in three widthwise.
- Open it up and fold it in two lengthwise. Your number of folds will depend on how large your surface is and what size you want your diamonds to be.
- Use the grid created by your folds to draw out your pattern with a pencil and straight edge. (If your surface area is dark, go ever your pencil lines with white chalk.)
- Turn the paper over and lay on top of your surface. Go over the same lines again using a pencil and straight edge.
- This should transfer your lines. You can barely see them in the photo above.
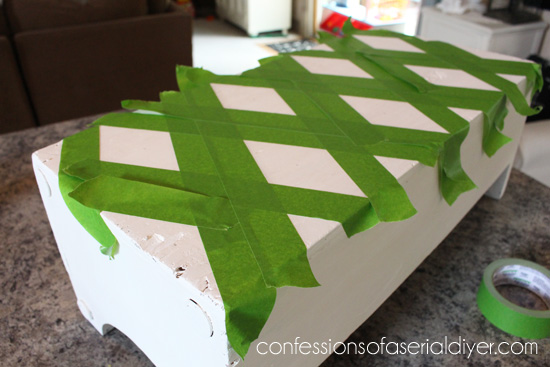
- Use something to highlight the diamonds you want to tape off. I used m&ms. Tape off with Frog tape.
- Paint in the diamonds using two coats of paint.
- Remove the tape immediately after painting the second coat.
- Tape off the remaining diamonds and paint.
- Again, remove the tape immediately after the second coat.
Here is my bench in progress. You can see the pencil lines a bit more clearly here.

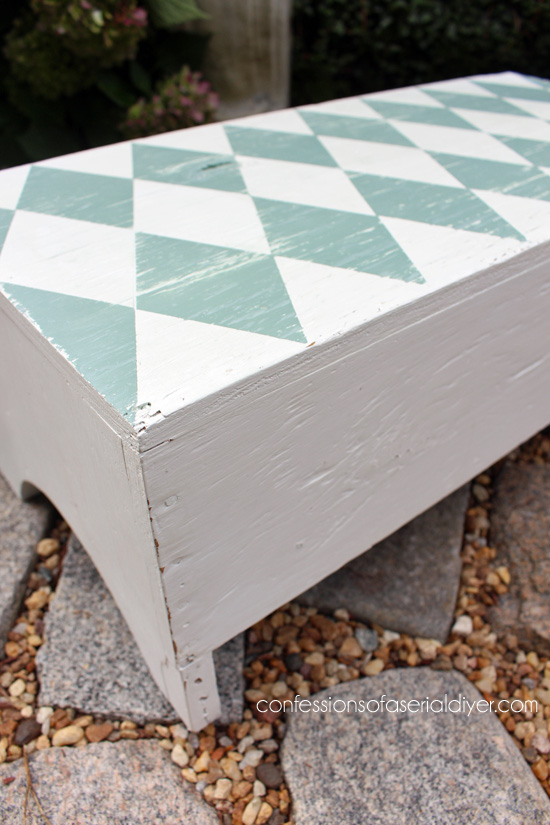
This is a fun way to update the surface of a piece.
I love the imperfections.
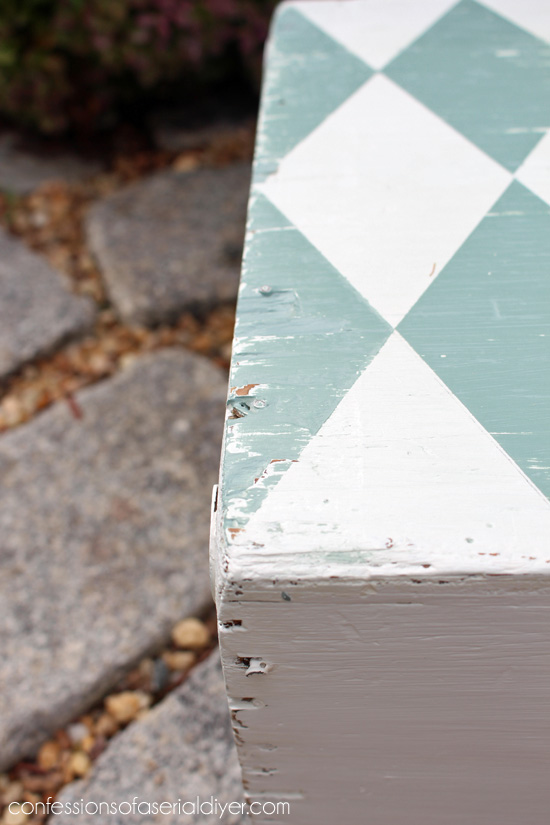
They add so much character.
And that’s how George’s bench…
…was made over.
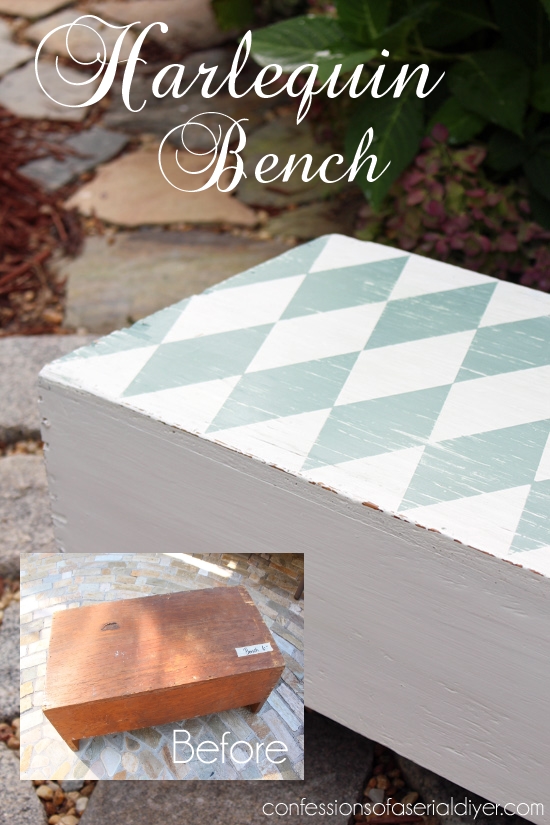
I love making old things pretty again. Hopefully George is okay with the girly twist I gave his bench. 🙂
XO,
![]()
P.S. To my lovely and much appreciated EMAIL SUBSCRIBERS: If you are receiving my posts twice, I have recently switched email delivery services. I am working on the issue, but feel free to unsubscribe at the bottom of the posts delivered via Google. My new service is through Mail Chimp. Sorry for any inconvenience!
If you like what you see, there are several ways to follow along! ![]()
Email * Facebook * Pinterest * Hometalk * Twitter * Instagram
I love to share at some of these great parties:
Home Stories A to Z Not Just a Housewife Kammy’s Korner The Happy Housie Design Dining and Diapers Liz Marie Blog Funky Junk Interiors Savvy Southern Style Tatertots and Jello DIY Show Off Redoux Interiors Between Naps on the Porch The DIY Dreamer Oh My Creative Little Miss Celebration Just a Girl and Her Blog Sand and Sisal Interior Frugalista House on the Way Addicted 2 DIY I should be Mopping the Floor Miss Mustard Seed


Thistle says
Love that pattern! And your grain sack chair is amazing, too!
Happy day to you friend!
karianne
Christy K. James says
Thanks so much, Karianne! XO
Julie at Being Home says
This is beautiful! And, you must have lots of patience do those harlequin designs. I would get frustrated. lol So, where are you placing the bench?
Christy K. James says
Thanks, Julie! It has actually found a home at the bottom of my pantry so my littles can reach the cereal. 🙂
Marie@The Interior Frugalista says
I’m sure George would be pleased – very nice! Thanks for the tutorial on how to create the harlequin pattern too.
Hugs,
Marie
Christy K. James says
Thanks, Marie! I think he would be ok with it too. Have a great weekend! XO
Margaret Anne @ Natural Chow says
You did a great job. That was a great find with a history all it own.
Christy K. James says
Thanks, Margaret! I was glad to find it 🙂
Mandy Hank says
Thank you for teaching me how to do this- I could not figure out how t tape it off. What a pain. Nice toes 🙂
Christy K. James says
Sure! Did you like my outfit lol 🙂
Wendi @ H2OBungalow says
Fantastic makeover! I’m sure George dosesn’t mind one little bit that you improved his wooden chest! 🙂
Christy K. James says
Thanks Wendi! I don’t think so either. Hope your weekend was lovely 🙂
Carol Rea says
Looks great. For an even easier way (imho) to paint diamonds or checkerboards and more,though – take a look at my blog at http://creativmusings.blogspot.com/. Scroll down a bit to find it.
Christy K. James says
Thanks for sharing, Carol. Checked it out this morning. I wonder how easy it would be to get the diamonds vertical? Your finished table is lovely!
Mindi says
Super cute! I love the pattern and colors!
Christy K. James says
Thanks so much, Mindi! XO
andi says
That George has cute feet!!!
-andi
Christy K. James says
Doesn’t he though? 🙂
Kelly G says
CRAZY CRAZY question—- where was the estate sale? I have a family member named George Butler and I wonder if this was his bench? Love the makeover!
Christy K. James says
Thanks, Kelly! It was in Virginia Beach, VA 🙂