How many of you were so excited about finding just the perfect sectional only to realize that once you got it home or lived with it a while, it was not the perfect seating choice after all? Pick me, pick me (as my husband always says when he has the answer), me!
I shopped for what seemed like forever for just the perfect sectional sofa, and I thought I had found just the one. I imagined we would all be lounging around on it together in our jammies under blankets watching movies. The reality is…my Hubby’s not leaving his recliner to sit with all of us on that couch, and we have a terrible time making it through a whole movie in one sitting anyway. Can you see my lovely family movie night slowly slipping away?
And another thing, why does the size of the sectional seem to be twice the size you thought it would be? I measured, I swear! Okay so I know you want pictures so here you go.
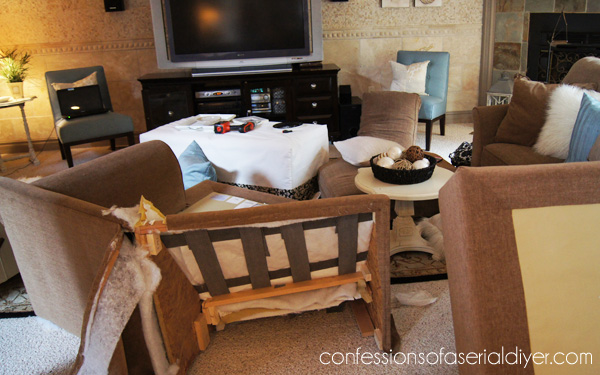
This is my sectional before:

Awkward, right? This is comprised of a couch ( to the left), a single seat (middle), and the monster on the right is called a cuddle something or other. That’s the piece that is in big big trouble. It’s like we’re sitting in a circle.
Here’s a better view of what’s on the chopping block:

I chose the big awkward piece out of a book so I never saw how huge and awkward it was before it was brought into my living room. I chose it because my husband’s recliner had to stay and so for some reason I imagined this would work. ( I made my husband drive us to go get it on the only day it snowed that Winter! It was like a blizzard. He thought I was crazy but he loves me.)
The only table that could work is something like what I have here and it’s totally dwarfed by the sectional. I really needed the middle to be a love seat to pull it off but there just wasn’t enough space.
Plus, in some of the following pics you can see that my fireplace is on an angle which also makes placement awkward. OK enough background, want to see what I did to it?
Warning: This is NOT a tutorial, nor do I reccomend this to anyone!! (Does that save me from any liability?!)!
I started pulling staples just to take a peek.
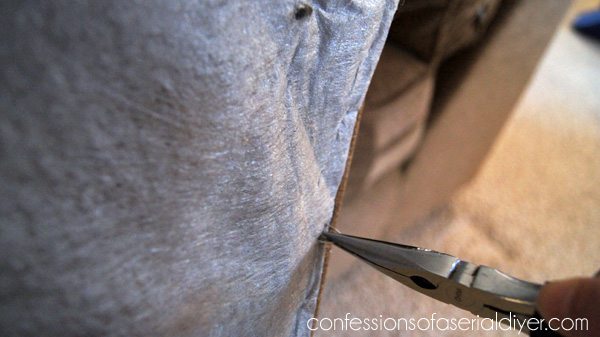
Phew, no Springs! (That’s important!)
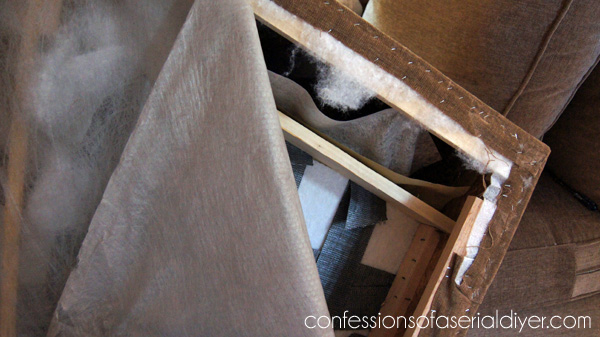
About a thousand staples later
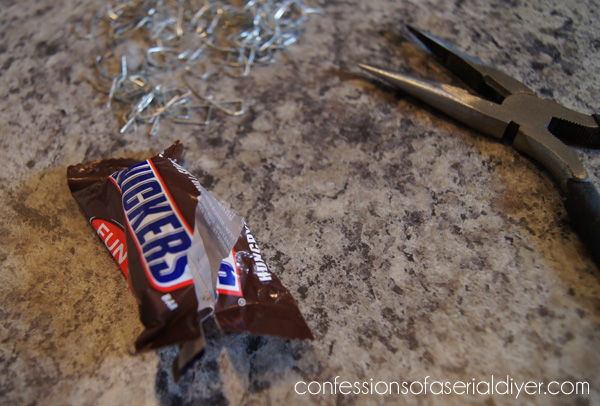
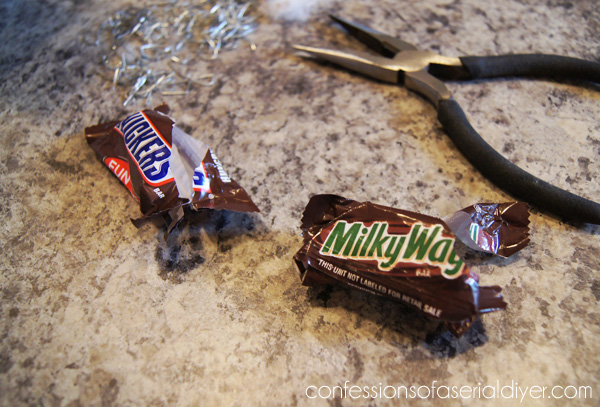
Break time! All that staple pullin made me hungry.
No turning back now…my husband is going to kill me if this doesn’t work out!
That’s why I had to make him an accomplice.
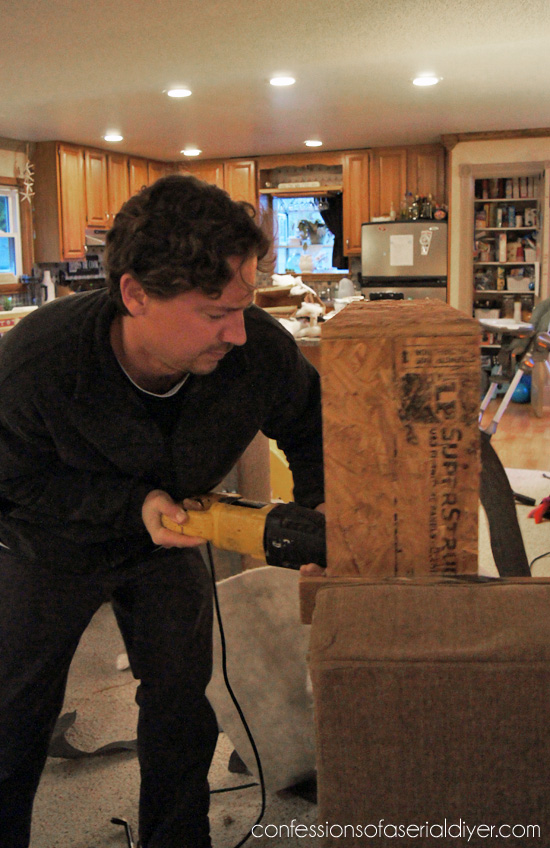
Don’t you love how the rest of your house is destroyed during projects like this?! BTW that kitchen in the background got a whole new paint job HERE!
I’m just going to have some more chocolate while you work on that for me, baby. I swear sometimes I think the only thing keeping me going is chocolate 🙂
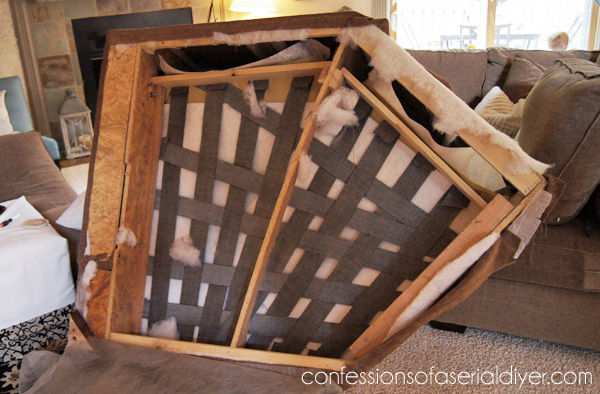
Is this crazy or what? Who does this?!
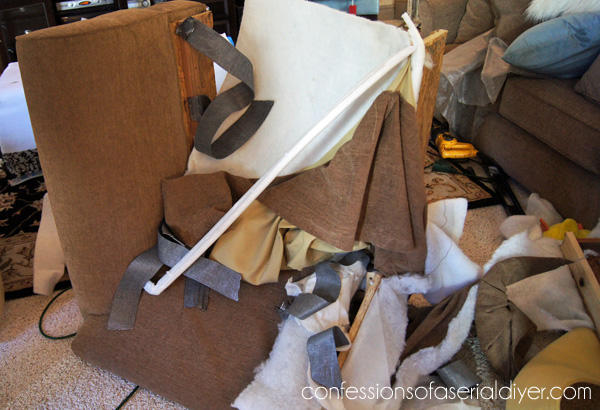
Me, that’s who! If you are even remotely thinking of doing this to your beloved sofa, the only real advice I can offer is to take a ton of pictures as you go, so that you can figure out how to put everything back together!
I also had to cut the seat cushion. It looks like I cut it with those itty bitty scissors but I actually used a carving knife. It did the job just fine.

Are you ready to see how it turned out?

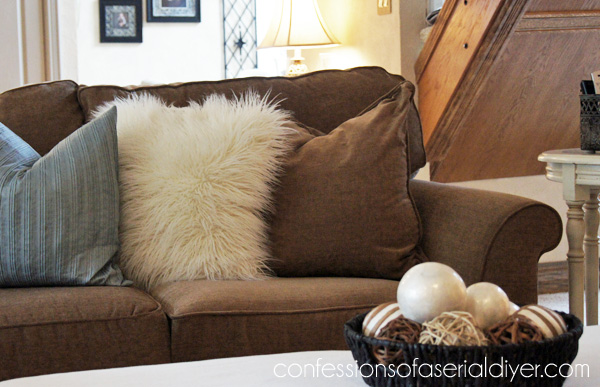
No more awkward angles!

Doesn’t it look like it was purchased this way?
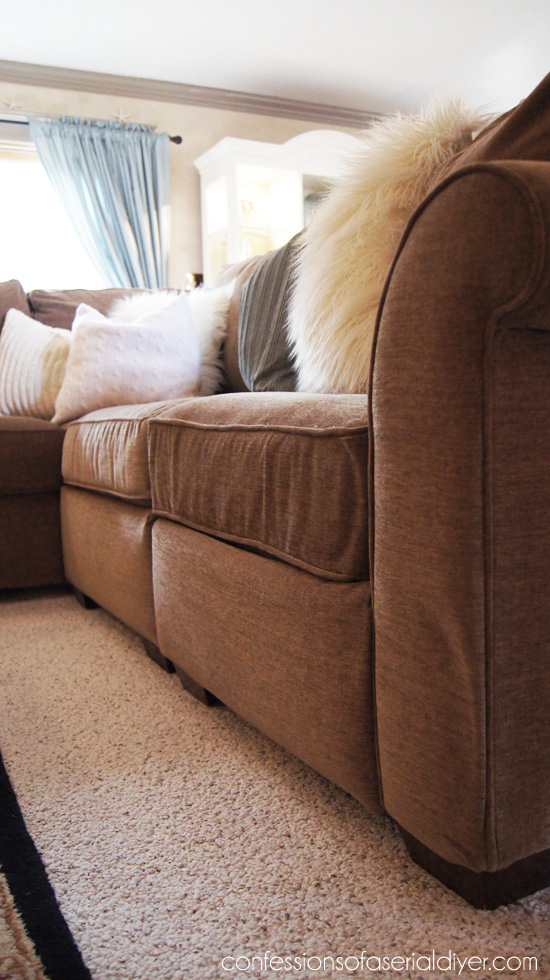
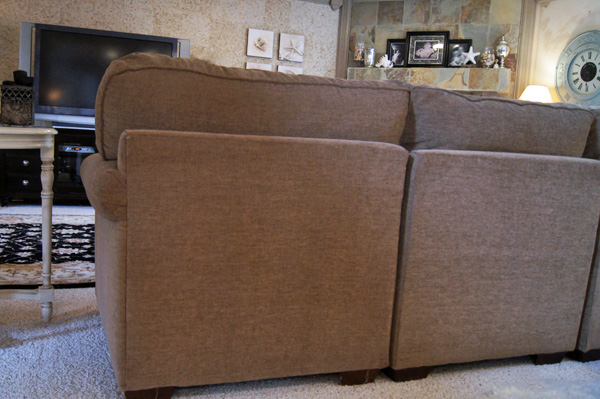
It’s even pretty from the back. You would never know that half of it had been sawed off!
Are you as surprised as I was that it turned out so great? The old set up was so awkward. This is only 3 years old and I love how child-friendly this color is so I really didn’t want to get a new sofa. Now my problem is solved and I’m loving my sectional once again! 🙂
Now do you want to see what’s hiding behind my sectional?
Brennan’s play area!
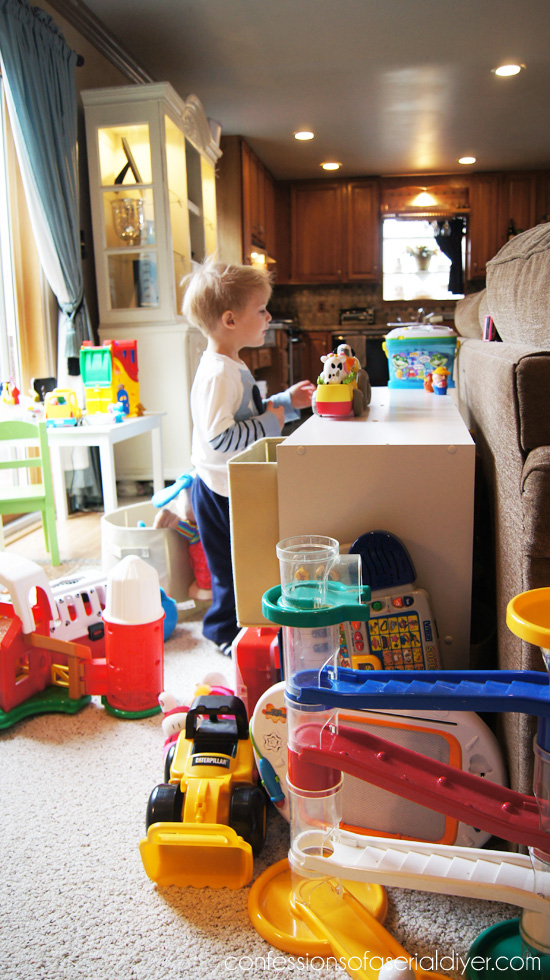
From the entrance, you don’t even know it’s there! 🙂
UPDATE: This sectional got another update…slip covers!

Check out how it looks now HERE!
XO,
![]()
If you like what you see, there are several ways to follow along! ![]()

Jen says
I found this through Miss Mustard Seed’s link party and I was so excited to see that it IS possible to re-do a sectional. I bought one last summer and it’s still sitting in my basement because I have been terrified that I may have bitten off more than I can chew (and I eat a lot, so that means something!). If you have any hints, let me know and if you want to hop over to my blog to take a look at the monstrosity, I would love it!
Jen says
Sorry, you probably want the post address, if you do feel inclined, just scroll down the page of endless projects and eventually you’ll find it! 🙂 http://theyellowbrickcottage.blogspot.com/2012/12/my-goals-for-2013-now-that-we-all-know.html
Christy K. James says
Yes it is! I was so over my set up and one day it just hit me…maybe I can take it apart! I figured if I ruined it, I could purchase a new piece from the collection since the store I bought from still sells it:) just take lots of pics so you can see how it goes back together.
Shelley Fosse says
I am impressed with your courage and resourcefulness! Nice work!
Christy K. James says
Thanks! I think I surprised myself with this one!
kathy says
Wow!! It turned out great. What guts to make that first cut!!
Christy K. James says
Thanks! I was so relieved that it turned out!
Rose @ Walnut Acre says
It turned out amazing!
Christy K. James says
Thanks for checking it out!
Suesan says
I found you from Roadkill Rescue. What a big project, but what fabulous results. You did an amazing job.
Christy K. James says
Thanks Suesan!
Susan @'sunflowerhugs.blogspot.com says
Wow! I would have been too scared to do it, but it came out perfect!!
Christy K. James says
I was so over the awkward layout that I wasn’t thinking clearly lol. So glad it worked out though!
amanda@studio1404.com says
Wow! Found you on Roadkill Rescue. I was expecting a slipcover or something. You blew me away!!! It looks perfect!
Christy K. James says
Thanks Amanda, I am thrilled that it turned out so well!
Amy says
Fabulous-this took guts!
Christy K. James says
Thanks Amy!
Kate says
When we bought our home 10 years ago, the previous owners left their sectional – it had two recliners and a sleeper sofa. It was very, very heavy. It was also cheaply made and eventually everything moveable was stuck or broken. I didn’t want to cart the whole thing to the dump, so I gave it over to my teenage sons to take apart. What destructive fun they had and disgust at how poorly it was constructed. Anyway, we saved all wood and metal parts, zippers and stuffing and carted very little to the landfill.
Christy K. James says
Did you end up reusing the parts? I have a really hard time getting rid if things. I always think I’ll find a use for them eventually:)
Sherry says
That’s awesome! Way to make it work for your family! Having pulled out a million staples myself in the past I know exactly how hard that can be on your hands 🙂
Christy K. James says
You’re not kidding…ouch!
Rebekah says
I am seriously impressed that you achieved this. I’ve had a look under my sofa to see if I could fix the arm rests which have collapsed. Suffice to say that instead of having your courage to continue and explore I put new staples back in the base and turn the sofa right side up. I would also love to say that POPCORN is NOT off the menu for your movie nights. I too do not have a microwave I use a trusty saucepan, olive oil, and corn kernals. Put a lid on and watch them pop. Much better for you that the pre-packaged microwave ones and takes the same amount of time.
Christy K. James says
I’ll have to try that! Honestly that’s the only thing I miss not having a microwave!
DeDe says
Wow, you were very brave to take this on! Awesome job! Found you through Roadkill Rescue!
DeDe@DesignedDecor
Christy K. James says
Thanks! I’m really happy it turned out as well as it did!
Shelly says
I plan projects like this all the time, in my head, mostly as I am falling asleep! Fantastic -clever of you to think of this!
Christy K. James says
I always do my blogging stuff at night before I go to bed so I always fall asleep thinking about new projects,too! We need to keep a notebook under our pillow just in case!
Linda says
Wow I’m totally impressed. It turned out great!
Lauren @ The Thinking Closet says
What an ambitious project! I’m so impressed how it turned out. Seriously, it blows my mind how you were able to catch a vision for how to make this happen and then bring it to fruition. You are living up to your blog title, for sure! Way to go with this d.i.y.
(And thanks for your sweet comment on my blog the other day. Glad to have gotten the opportunity to visit your incredible blog as a result.)
Cheers,
Lauren
Christy K. James says
Thanks Lauren! I am thrilled at how it turned out…I took A LOT of pictures to help me along the way:)
I found a ton of good advice on your blog, thanks for putting that post together:)
Leslie Harris says
Wow. What a brave person your are! I never even considered going to work on my ugly sectional but maybe I should. It looks fab and my favorite part are the toys on the side. Too precious.
Leslie (aka Gwen Moss)
Christy K. James says
Thanks, Leslie! If its already ugly you have nothing to lose, right?
Terry says
Well, after picking my mouth up off the floor, I am now on the floor bowing down to you. This is just amazing and I applaud you for your courage to even attempt this. I would do this, but most people won’t so I am happy to see not only how awesome it came out but also how awesome you are to do this! Now, have some more chocolate…you deserve it. And, I am now going to follow you.
PS. I just put on my blog a small tufted stool that I transformed and it makes my piece look like a walk in the park.
nancy carlson says
I was going to write a new comment, but this one is so perfect that I thought I’d just second it, and be done with it.
Amazing job!
Cindy says
Wow, turned out perfectly. Must have been all those candy bars…I can do most anything as long as I have chocolate! Tee Hee…really, so wonderful!!!
Visiting from Cow Girl Up!
Blessings,
Cindy
Kammy's Korner says
You have got to be the bravest soul on the planet! So glad it turned out perfect!!!
Linda @ Itsy Bits And Pieces says
This really is a “wow” project…you did a wonderful, professional job of restyling the sectional into a piece that works for your family!
Nancy says
You are a brave, brave soul…and it turned out amazing!
How, did you get the fabric to go back so well?? Is that really the same piece of sectional? Simply creative and outstanding.
Nancy
Come for a visit sometime
http://wildoakdesigns.blogspot.com
Dianne says
This is absolutely GREAT! I have never seen a DIY project like this before. You did a wonderful job!
Roeshel says
Wow! That is amazing! You crack me up too. I definitely need chocolate when DIY turns the house upside down!
Christy K. James says
Yes! Isn’t it amazing what a little chocolate can do to keep us going??
Jan says
Hi, visiting from Shabby Creek Cottage. That is just the most awesome thing I have seen thus far since I’ve been looking at decorating and D-I-Y blogs (probably 3 years now). You didn’t explain but – how on earth did you figure out you’d be able to do that? I mean, like where to make the cuts — and did you have to take the feet of the end and attach them to the “new” smaller piece that was left over? And how did you reattach the upholstery and get it to look like factory-made when you put everything back together? My Gosh! And how long did it take? It seems like you did in in a relatively short time. My mind just boggles. I hope you win a prize in that contest you’re entering! You deserve it for sheer guts alone.
Christy K. James says
Wow, thanks Jan!! I’ll be honest, I wasn’t sure it would work when I started. I saw that if I could cut off the extra angle and remove part of the front, I would have a piece the exact same size as the opposite end. I did not have to mess with the arm because it too was the same size as the opposite arm. I just had to remove the piece that was attached to it that made it longer on that side. I removed and reattached the feet. It did get really confusing at times and I constantly had to step back and assess what I was doing. I was able to use the existing upholstery tack strip to get the upholstery lined up nicely again. I took a TON of photos along the way so I would be able to see how it went back together! It functions so much better now. Hopefully I answered most if your questions, but feel free to ask me anything else. I’d be glad to answer:)
Christy K. James says
It took me three days to complete:)
Jan says
Three days, wow! Well, I guess no guts, no glory. That is just one awesome DIY and you are ONE BRAVE WOMAN!
Christy K. James says
Three days including chasing a two year old:)
Katie B. of HousewifeHowTos.com says
Wonderful job! That you managed this on only two chocolate bars AND while chasing a two year old is nothing short of a miracle. Well done!
I’d love if you’d come join my How To Tuesday link party, too.
http://housewifehowtos.com/link-party-2/how-to-tuesday-link-party-9/
Christy K. James says
I love when comments make me laugh! You should see what I can do with only 4 hours of sleep ha ha! Thanks for the invite,too! 🙂
Meliss says
Holy Shi* Balls Batman!
Omgggggggggg…you are one BRAVE momma and a talented one too *Obviously 😉
WoW!! great friggin’ job!
I. LURV. IT!
Christy K. James says
Thanks! I’m glad I was able to evoke that sort if emotion ha ha:)
Val Fitzpatrick says
Holy cow, nice job! I can do that (and by that I mean eat lots of chocolate too) 🙂
Christy K. James says
Thanks for the laugh, Val:)
Jacqueline says
Wow!! You are either way braver or way crazier than I am 🙂 I can’t believe it turned out so well!
Christy K. James says
Thanks! A little bit of both, crazy and brave:)
Tammie says
Just found your blog. Sending you a link for someone that has done somthing similar. You two must be relatives! Teasing.
http://www.fourgenerationsoneroof.com/2012/04/diy-couch-before-and-after.html
Christy K. James says
Wow! She did a great job, thanks for sharing! Are you lolling to alter a sofa,too?
Trisha says
O.M.Gosh!!!!!! I cannot believe you did that and how well it turned out!!!!!!!!! Your talent is amazing!! I think you are my favorite blog post! You don’t just paint the same old same old, you actually transform and create – A M A Z I N G!!!!!!!!!! I am truly inspired by you! Thanks!! Trisha
Christy K. James says
I can’t tell you how nice that is to hear!! I love to take on a challenge (as you can see:)! I hope you keep coming back. We’re hosting a sixteen week challenge link party starting Sept 8th where each week will have a different theme. I hope you’ll consider coming back to link up if you have any projects that fit the theme! I just posted all the info 🙂 XO
Beverly Creamer says
Oh my gosh! ! I’m in awe!! I’m so grateful you did this! I don’t have a sectional, but rather a sofa and loveseat I brought from my old place when I married two years ago. My sofa is entirely too big for our living room. The furniture set we’d love is not something we want to put our necks on the line for right now, so we went back to the furniture store where I bought my set to price a matching recliner, chair-and-a-half or another loveseat. We thought we’d throw the sofa in the basement/future family room and go with one of the above. Turns out we didn’t want to spend that much either. Now I’m thinking…..hmmmmm….I really wouldn’t mind losing the center section of that huge sofa. I’ll be checking out that possibility first thing in the morning! Thanks for being so brave and inspiring! I love it! PS: Enjoy all that “stuff” you have hiding behind your sectional. It grows up very quickly. I miss those days.
Christy K. James says
Hi Beverly! Thanks so much for taking the time to leave a sweet comment! You may be able to save your sofa afterall, right? Check to see if it has springs first. Mine did not in that particular piece so it was full steam ahead! I’m not sure I would have known how to proceed otherwise. If you’re good on that front, go for it! My only advice is to take lots of pictures when you are taking it apart so you can figure out how to get it back together. Good luck! I’d love to know how it turns out! 🙂
XO,
Christy
Suzie @ Dorothy Sue and Millie Bs too says
Wow! I am so impressed with your mad skills powered by chocolate! Turned out fabulous!!!!
Christy K. James says
Yes, it is amazing what a little chocolate and a deep discontent with your sectional can do. I think all my other furniture is terrified now lol!
Nancy @ A Joyful Cottage says
Ok, there are 3 things (no 4) I have to say about this: 1. An amazing transformation. So, so cool. 2. You are one gutsy lady. 3. Your husband gets my vote for Best Husband of the Year — what husband goes along with ripping a sectional apart? I mean, come on, most guys would say, “No way you’re doing that!” 4. Love your sense of humor.
Christy K. James says
Aww, you are so sweet! Honestly, my husband knew that this was the cheaper way to go lol! Thank goodness it worked 🙂
martha says
A. Maz. Ing. I am your new greatest fan!
Christy K. James says
Thanks so much, Martha!! I’m thrilled to have you here 🙂
keri says
Ooooookaaaayyyyy……so I see the first pics.,the ensuing carnage….but the few pics. leading up to perfection, feel like I just missed Harry Houdini’s magic secrets! Seriously, how the heck did that happen? Did you have to do major sewing and ordering new coverings? I am in a state of awe…You, are a diy goddess!
Keri
Christy K. James says
Keri, you are so funny! I didn’t take pics of every step since it wasn’t really a tutorial, but I took tons of pictures as I was taking it apart, so I would be able to put it back together! I used the materials I had and since I was taking a chunk off, I had plenty of extra to work with. I did have to just sit and stare at it a few times to understand what on earth to do next ha ha. XO
Joey Bagadonuts says
You do know that popcorn existed prior to the invention of the microwave right?
Christy K. James says
You just read a post about sawing a sectional and all you have to comment on is popcorn? Ha ha! Just kidding! I actually learned how easy it is to make it in a pot about six months ago. It tastes so much better too! Need to update that post! Thanks Mr. Bagadonuts! 🙂
Kindie says
Wonderful!!! I am about to embark on a project like this! We moved and our sectional will not fit in our living room without blocking a doorway. I about to take it apart and reduce a section of it. Glad to see it is possible and others out there have similar ideas with great outcome!!
Christy K. James says
Yes, it is possible! Mine didn’t have any springs and I’m not sure how that might affect your outcome. Best of luck and remember to take lots of pictures to help you put it back together! 🙂
Nicoleta S says
Wow, that was a complicated work. I do not think I would have been abled to rebuild this sectional sofa :))
Lea P says
WOW, it came out amazing, i have a huge sectional that fit perfect when i had a huge house but since we have moved to a smaller one. We love our sectional because it is soooo comfortable and thats hard to find, but i find myself starring at the sofa for hours imagining how great it would be if it had one less seat! Everyone thinks I’m crazy when i tell them my ideas but now seeing your article it makes me feel like I’m not the only one that would dare do something like this!
Sylke says
This is soooo funny! Your humor is divine. I love the pics of creative destruction and that you used your husband as an accomplice! What you did with you chocolate beast is genius. I, too, have a brown beast which I love-hate and now am inspired to also destroy and rebuild so I’m not drinking more vodka due to depression around the couch-fortress I currently have. Thanks for your inspiration and courage.
Christy K. James says
Ha ha…yes, it felt like this beast might just swallow us hole before. So much better now!
Lainie H. says
Christy, I stumbled onto your website when I did a search for turning a sofa and love seat into a sectional. I didn’t have a clue as to what I was going to see, but I have to say…WOW!!!…your sectional is amazing. My living room set is very different, but you’ve given me hope that I can figure it out. Thanks!
Christy K. James says
Thanks, Lainie! I was seriously just going to toss the old piece and purchase the piece I should have bought in the first place, if this didn’t work out. I’m thrilled that it did though and it is still holding up perfectly! Good luck with yours…I hope you’re able to work it out. 🙂
Madelyn Griffith-Haynie, CTP, CMC, MCC, SCAC says
GOD BLESS YOU for this!
My sectional came already “squared off” but I didn’t notice that it can really only go together one way until it was too late. One of the arms on the couch piece is shorter (and the seat cushion is a T to accommodate it). It doesn’t work as a left-L in my new apartment – I need it to be a right-L. Right now you walk into the back of the couch as you enter the room.
As you might imagine, I have been wondering if I could DIY that little problem, but have been hesitant because I do NOT want to have to buy a new couch if it turned out to be impossible (once I got it all apart!).
Your pictures have given me courage. MY remake is nothing compared to yours, so if you can do it, so can I. THANKS!
xx,
mgh
(Madelyn Griffith-Haynie – ADDandSoMuchMore dot com)
– ADD Coach Training Field founder; ADD Coaching co-founder –
“It takes a village to transform a world!”
Christy K. James says
Glad I could offer inspiration, Madelyn! Double check to make sure you don’t have springs, as I wouldn’t be sure how to proceed if so. Just take a ton of pictures every step of the way so you can refer to them when piecing it all back together. Good luck! I’d love to know how it turns out. 🙂
Madelyn Griffith-Haynie, CTP, CMC, MCC, SCAC says
I WILL come back and let you know how it went BUT I doubt that, after seeing your pics, mine would be share-worthy! I barely understand how to take/upload pictures at all – that’s how new I am to all this “take your own photos” stuff. My blog is primarily educational – word-based – so graphics simply illustrate concepts in my articles and give readers a break from all the written content. (think science writer vs lifestyle or DIY blogger – I am in awe of blogs like yours!)
Thanks for the warning, btw, but I’m not sure springs will matter. It’s primarily the arm and the seat cushion I need to adapt/augment/replace. What I needed, more than anything, was the courage to do it. (I mean NOBODY does this, right?) So you will forever be the DIY goddess in my eyes — especially if my couch turns out okay ::grin::
In any case, since I *just* moved and have a Christmas puppy coming, this project will simmer “backstage” until early next year. My to-do list is VERY long right now. I have yet to redo all the closets, and I’m still building shelves for my library so I can finish unpacking — and I have not a curtain in the place, for example (brrrrr – not good for winter!)
Both parents were pretty handy (and fairly fearless), I have learned to use a ton of power tools, and figured out how to slipcover what I call “my eat-in-couch” on my own, so surely I can work this out with time and patience. I will take your excellent suggestion to photo the steps for my own inner sense organization, however.
For now I will probably flip the darned couch around and hide the “gap” with a bunch of DIY throw pillows (or presents ::grin::). Maybe by the time I attack the remake I will have taken enough puppy pictures to be able to send snaps — but they will NEVER be as good as yours, even following your tutorials, without popping for some better equipment.
But I have learned that there IS one absolute in this life: NEVER say never!!
Thanks again for sharing your competent creativity (and so specifically) – you are a dervish! (although I suspect you have must have clones – or elves)
LOVE your blog – did I remember to say that?
xx,
mgh
Christy K. James says
You are awesome! At least you are brave enough to even do a search of the idea! Ha ha! I hope it all works out for you. No pressure to share photos, I totally understand! Good luck to you. So glad you have you here! 🙂
Madelyn Griffith-Haynie, CTP, CMC, MCC, SCAC says
THANKS!
I can’t wait to see what you come up with for Christmas. I’m a Christmas NUT – and have a bunch of Christmas-themed Pinterest Boards. I just started one for house tours – which I’m sure will begin posting soon. LOVE it!
xx,
mgh
Christy K. James says
Oh the pressure ha ha! I can’t wait to see what I come up with too. 🙂
Tracey says
It definitely looks like it was purchased that way. You did an absolutely amazing job. I’m sure are are LOTS of people with sectionals that could use this info.
Actually…I have a wing chair that matches my couch and a lovely ottoman. They were purchased by my mom at Norwalk and cost a small fortune. She gave them to me. I don’t like the shape of wing chairs, so I was thinking maybe I could take it apart and change the sides and back. You’ve inspired me to give it a go!
Thanks!!!
Christy K. James says
Awesome, Tracey! If you don’t like them anyway, I guess you have nothing to lose, right? Good luck!! 🙂
gia frank says
Absolutely loved your fix!! I’m inspired to do mine now. Thanks so much:)
Christy K. James says
It still is holding up great, Gia! Just be sure you don’t have springs and that you take a lot of pictures as you dismantle it. Good luck! 🙂
Kris says
I laughed the entire way through this post. I cannot believe you did this and am extremely impressed! Looking through the pics, I started to feel anxiety when I hit the one that showed sofa carnage. I think because I’ve felt that way in some of my projects when I’ve hit the “no going back now” point. You did an amazing job!!
Christy K. James says
Thanks, Kris! I just went back and looked at that post…I really need to edit those old dimly lit photos lol! Sometimes I can’t believe I did that either, but it is so much more functional now. I’m happy to say my sectional is still holding up perfectly! 🙂
Robin says
Looks perfect! I have the same problem except my cuddler is on the end of, what would be a perfect sofa. What exactly did you do? Take the cuddler apart so you could attach the arm to the end of the sofa? Your advice would be greatly appreciated! We are trying to sell our house and I think that the cuddler is making the room look small but I really don’t want to buy new furniture since the sofa is not even 2 years old!
Thank you!
Christy K. James says
I tried to go back and update this post to show more steps, but honestly the pictures I have made no sense and you would not know what you were looking at. When I was deciding of I could alter mine, I took the bottom cover off to take a peek at what was under there first. You want to be sure there are no springs. I could see that the side with the arm was exactly the same dimensions as the arm on the other side at the end of the couch portion. So I figured there must be a way to remove the awkward angled part and I could see that from looking underneath. The store I purchased this from still sold this sectional, so I knew that if I destroyed it I could easily go buy the piece I actually needed. If you are determined to redo yours, the best advice I can give is to take a ton of pictures along the way so you can see how it all goes back together once you remove the piece you want to remove. Good luck!:)
Saundra D says
Christy,
I love your blog and everything you have done!!. You have inspired me to get back on track and create again. I had no desire to craft, paint, garden or do anything since becoming ill. I came across your blog through Pinterest and have been on your blog all day. I love it!!! Thanks to your “blog -therapy” and the wonderful things you have created, I am going to begin my journey to create and get my happy back!!
Saundra D.
Christy K. James says
Oh you almost made me misty eyed, Saundra! I am so thrilled that you are feeling that urge to create again! Nothing makes us feel better than feeling like we accomplished something. Thank you for this lovely comment! XOXO
Mary says
Oh my gosh. I was laughing my butt off because this is exactly like me and my husband. I wish we were neighbors I would love to be your accomplice in ripping apart furniture. I found your blog today searching for how to turn my antique bed into a bench. But this sofa rip apart made my day!
Christy K. James says
Hi Mary! So glad you stopped by! I am still amazed at how easily my husband went along with this crazy plan ha ha! 🙂
Sierra Smith says
Wowza, I just came across your post from a google search on “what to do with a sectional that no longer fits.” You were pretty much the first post – and considering I have this EXACT same sectional, and the EXACT same cuddler piece is what’s causing me problems!!! I need to square if off so it will fit into the living room at the new place we just moved in to. I was just about to give up and head to the furniture store to special order a new end piece. But then what the heck will I do with this cuddler piece? Ha! I’ll show my husband these pics and see if he’s up for taking on this challenge with me. Too bad we aren’t neighbors… then maybe I could convince you to come help me replicate this DIY!
Christy says
Oh my gosh, that is SO funny! That was a few years ago ant that piece is still holding up great. I was so over that cuddler piece. I figured if I messed it up, I could just go buy the square piece that goes on the end instead, but it worked! Give it a go…and I’d love for you to update me if it works out. Good luck!
Wes says
Nice job! When I began reading your post I thought you were going to splice your husband’s recliner into your sectional while he was at work. I subscribed immediately! What you actually did was very impressive. I couldn’t even tell, from the final pictures, that you had removed a part of the sectional. Well done.
Christy says
Oh ha ha that would have been cool! Thank you!!
Pam says
I really love the color and texture of your living room walls. Is this paint or wallpaper?
The couch looks as if it came that way, you did an amazing job putting it back together.
Christy says
Thank you, Pam! The wall behind our TV is tile, and the wall behind our sectional is done using a texture additive that you add to paint to give it texture. My husband rolled on that paint, then went back over it with a rag and a bit darker color to give it a suede look. You can see much more updated photos here: https://www.confessionsofaserialdiyer.com/christmas-home-tour-2015/ 🙂