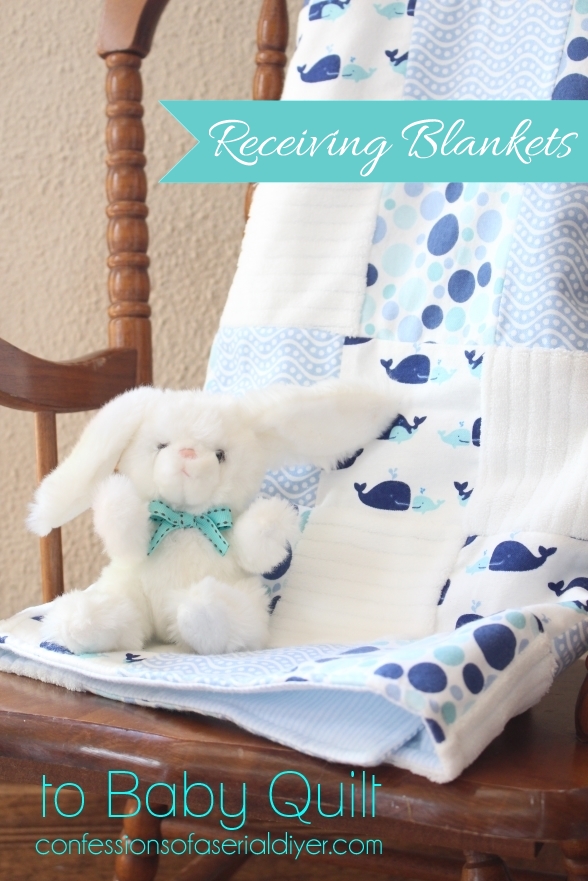
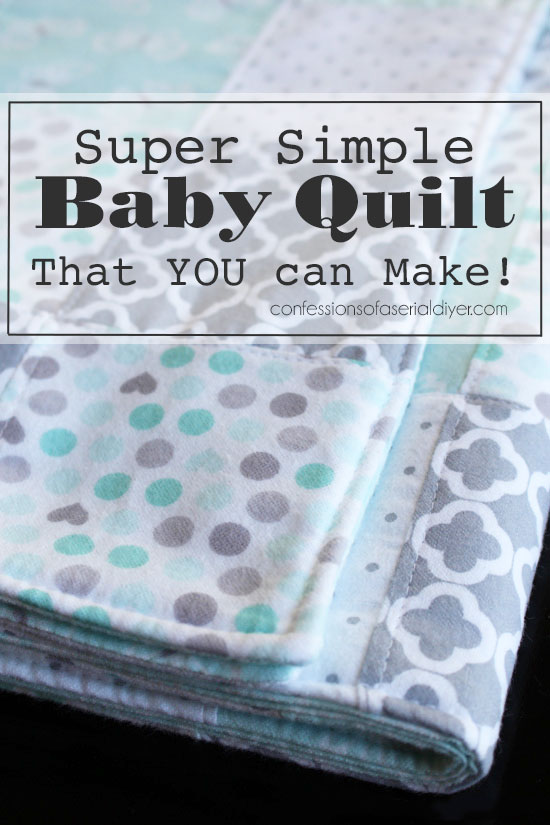
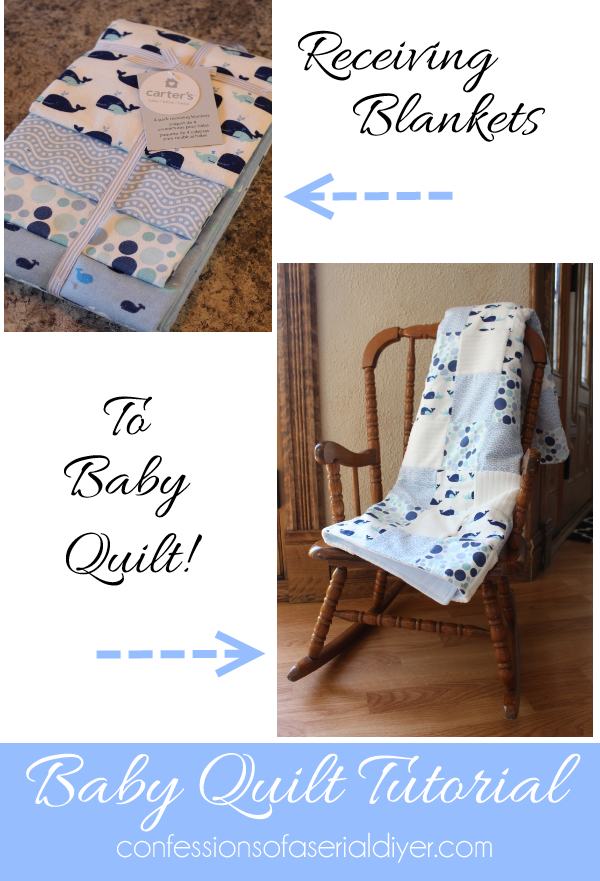
Hello amazing friends! Today I thought I’d pull this fun project from a few years ago out of my archives. This is a super simple tutorial for making a baby blanket out of receiving blankets. It still brings me lots of traffic from Pinterest, and with all the babies that are on the way in the next couple of months (thanks to those holidays that get all the feel-goods going!), I thought it was a good time to reshare. 🙂
But first up…my exciting news! NO, I am NOT pregnant ha ha! Did I fool y’all with the baby quilt thing?? We are so done in that department!
Our super exciting new is…drumroll…we bought a house!! Can I get a woot woot?? We close one week from tomorrow so I figured it was close enough that I could spill the beans without jinxing anything. (If anything happens at this point, I’ll just post a big crying face emoji and go find a hole to burry myself in somewhere!)
I don’t want to keep you in suspense, but I’m trying to wait to share photos until after it is official and we have the keys in hand, just in case.
Remember in the Spring when I shared how I easily updated our faded outdoor light fixtures without taking them down? Or how about how my kitchen cabinets have been holding up since I painted them three years ago, and how easy it was to touch them up? Yep, we were getting our current home ready for the market!
Lot’s of small projects have been going on around here, but thankfully because y’all have been so awesome about me resharing a few old favorites, I have still had time to enjoy some quality time with my babies. (At almost 15 and 7, can I still call them my babies?)
We just started officially packing yesterday. Our move-in date is scheduled for August 4th. Hopefully that will give us time to get some painting and a couple other projects tackled at the new house before we move in.
I will have tons of new projects to share since I will have a bigger house to furnish, so I am super excited about that! (I may have already bought a thing or two to redo!!)
If you read all that, thank you! I can’t wait to share more details and photos soon! 🙂
**********************************************
Okay onto today’s project!
This blanket takes very basic sewing skills, I promise, so don’t run just yet!
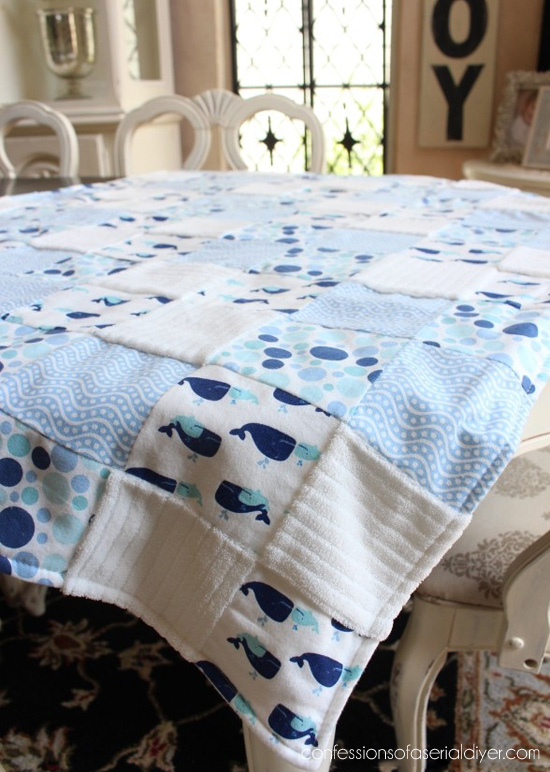
My youngest has one just like it that he still sleeps with. It is the perfect size at 36″ X 44″, for him to snuggle up with. I’m sharing this one I made for a neighbor first. Then I made another for my sweet niece with a few adjustments that I liked better. I’m sharing both of them today.
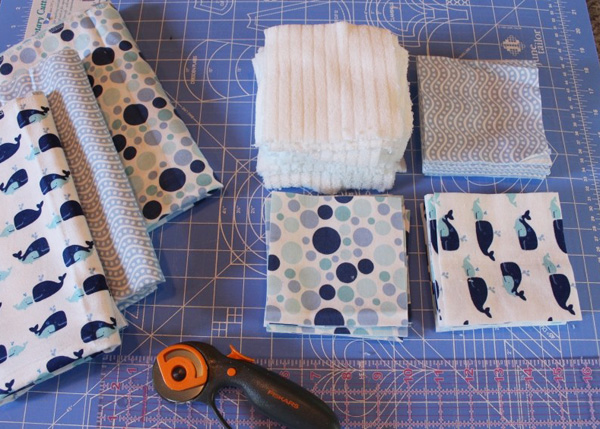
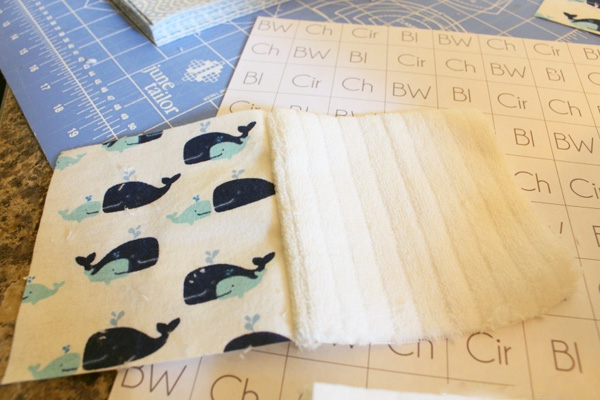
To make the first quilt, I started with a pack of coordinating flannel receiving blankets:
![]()
These are perfect because the flannel will wash up super soft and cozy, and the fabrics are already coordinated perfectly. Plus it’ll save you an hour standing in front of the baby flannel section at the fabric store trying to make up your mind!
I did need to purchase a few more things:

The chenille adds a bit of fun texture, but I’ll warn you that it does get everywhere when cutting it. It did add a fun texture to this quilt, but it’s not necessary. (I used it in place of one of the blankets.) I also purchased one yard of quilt batting and one yard of nursery flannel fabric for the back.
Let’s get started…
Create a Pattern
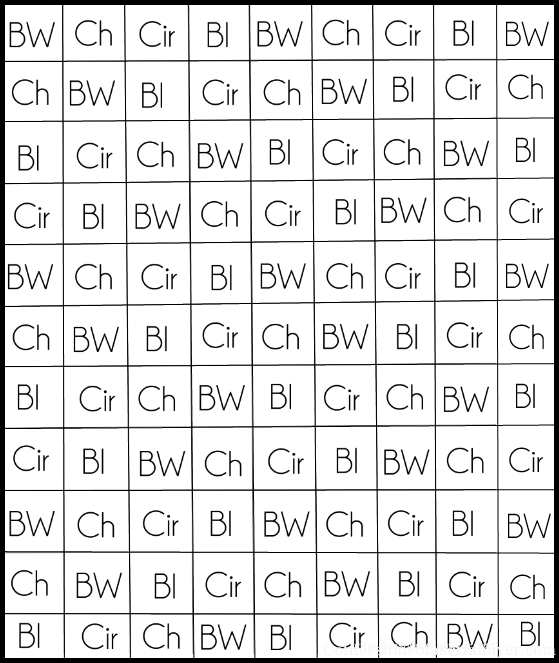
I started by creating a a pattern to use as a guide. You can use this one; just substitute your own abbreviations (BW=big whale, CH=chenille, etc.) or create your own. (I share another later in this post.)
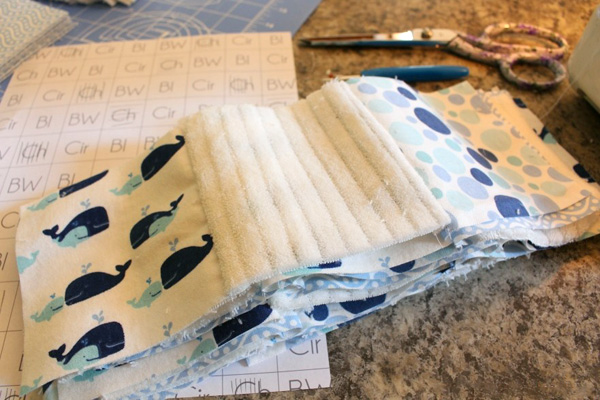
Cut Squares
The best tools for cutting even squares, are a rotary cutter, straight edge, and cutting mat. (I now have this set HERE.) I use my set ALL the time!
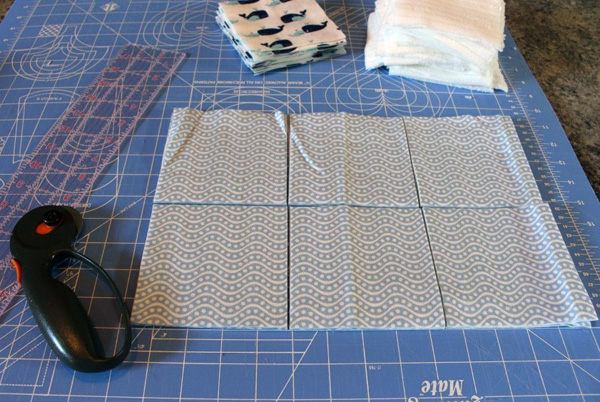
I cut my squares 4 1/2″ x 4 1/2″. As you can see also, I folded my fabric prior to cutting as the rotary cutter will cut through a few layers very easily, allowing you to cut several pieces at once.

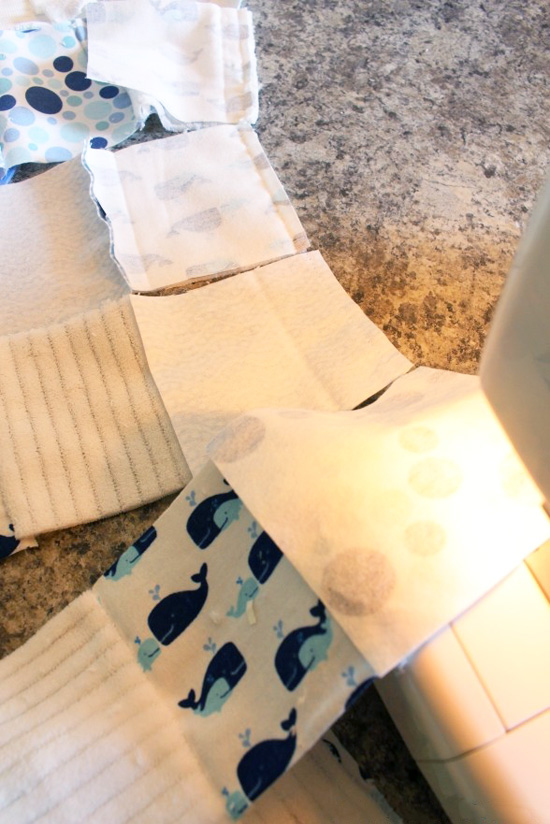
Sew Squares Together
Keep your pattern handy as you’ll be referring to it often. Start with your first square (top, left hand corner), and attach it side-by-side to the next square. I started with “BW”, big whale and attached it to “Ch” for chenille.
You could then add the next square, which for me would be “Cir” for Circles and so on until you have the top row complete. Then move onto the next row and so on.
However, I started with the same two squares, but instead of adding the third square, I moved to the next row down and sewed those first two pieces together. I continued until I had all of the first two squares of each horizontal row sewn together.
Then I added the third square to each row (following my pattern) and worked my way down.
The reason for assembling the squares this way is so that I can “butt” each piece behind the next, through the machine which saves time and thread. (Using those old quilting skills!)
Either method yields the same results…a set of 11 rows, 9 squares each:
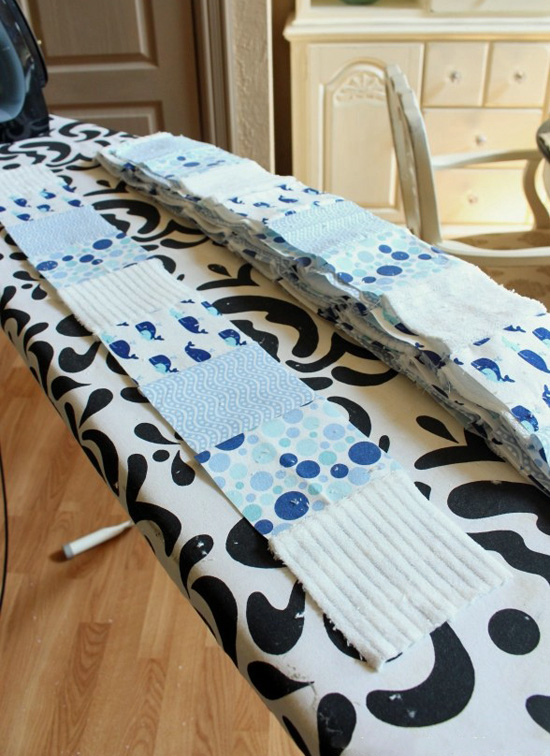
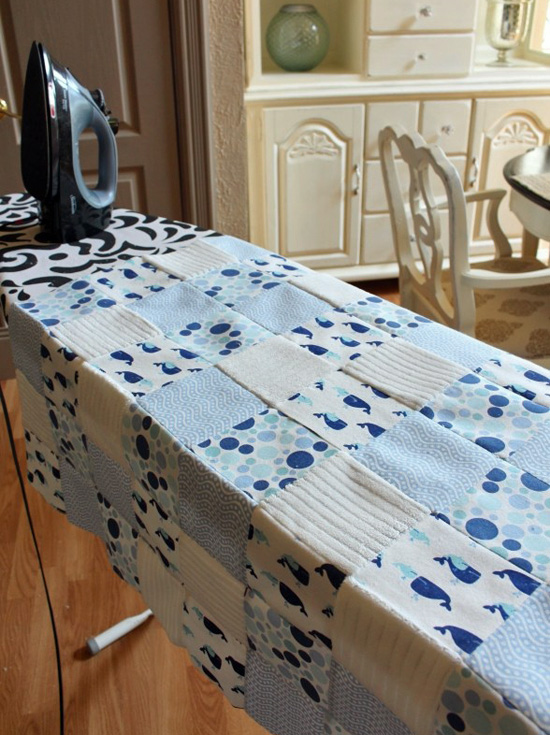
When you have all of your horizontal rows complete, iron each row. Be sure to iron all of your seams in the same direction.
Then referring to your pattern, sew each row together. You’ll end up with something that looks like the picture below.
Assemble Quilt Layers
Next lay out your quilt batting and place the quilt top face up on top. Pin in place.
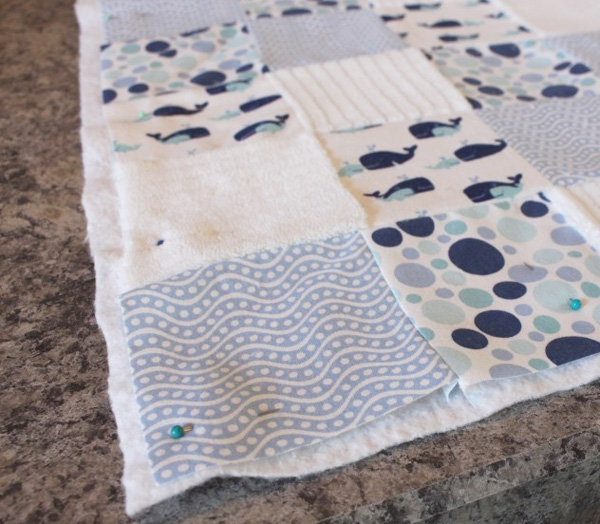
Sew around the outer edge. Trim any excess batting.

Place flannel fabric for backing face down on top and pin in place:
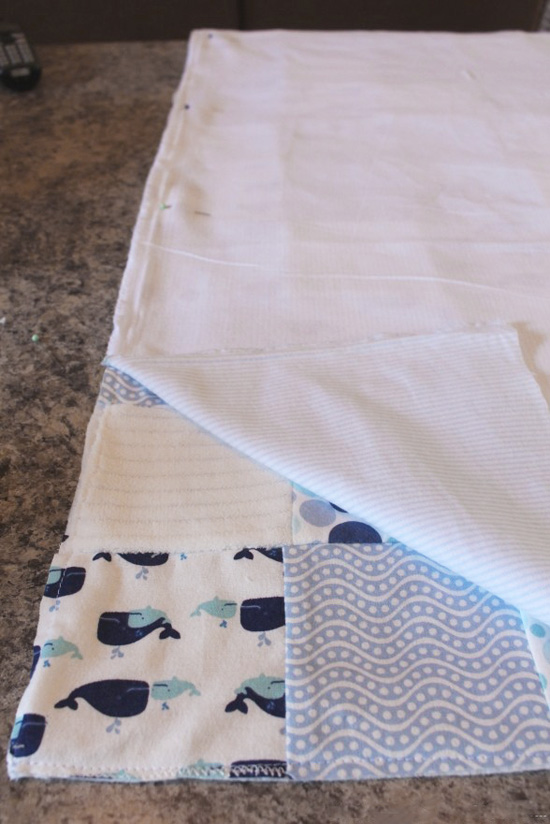
Sew around the outer edge again, this time leaving several inches open on one side to flip the quilt right-side-out. Trim any excess fabric.
Clip the corners to get a nice sharp corner before turning:
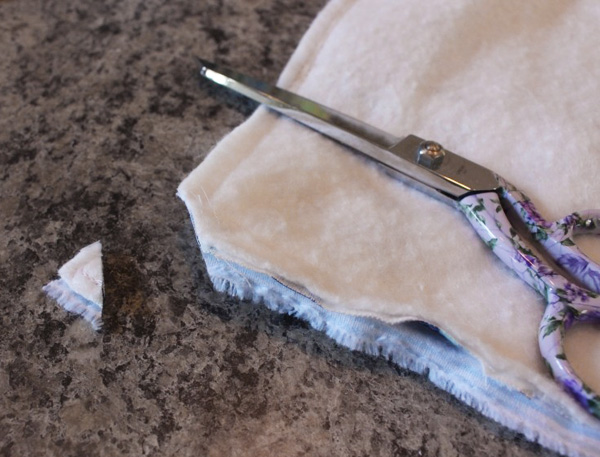
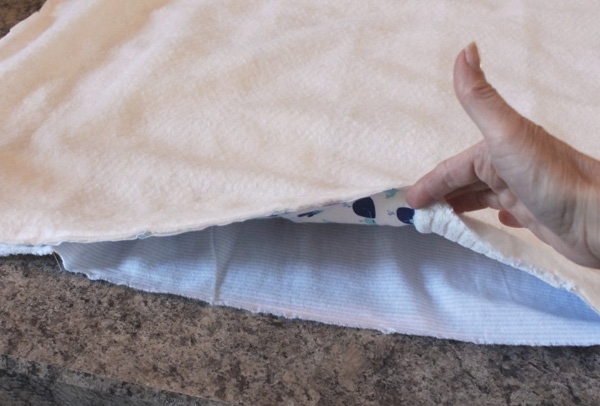
Finish off the Edges
Turn right-side-out and pin opening closed. Sew a seam 1/4″ around the outside edge. This should close up your opening too.
This is a cheater’s way of getting out of making a binding for the edges!
To keep things together, I added knots in several places using embroidery thread. I knotted it on the front…
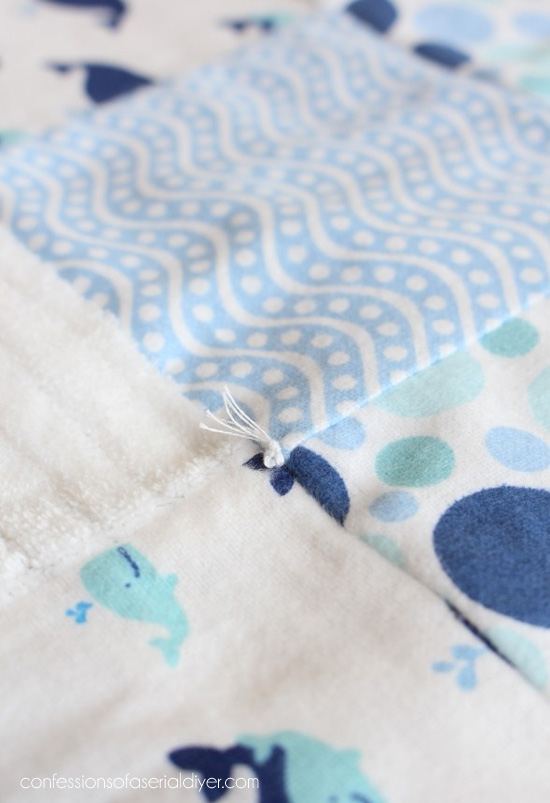
…and on the other side:
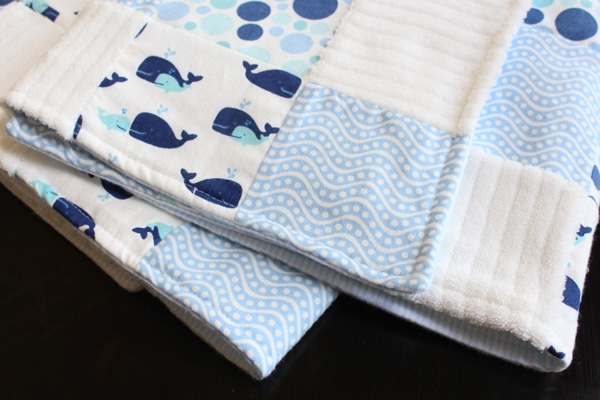
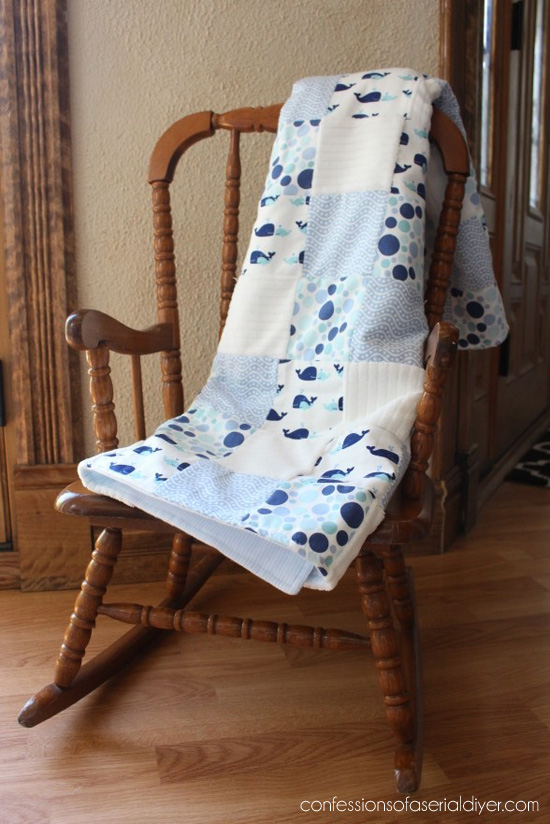
Stand back and admire, you did it!
I made this for my neighbor as a baby shower gift to match her son’s nursery and she loved it!
Ours has had a gazillion washes (and looks like it too), but it is so soft and snuggly!
Don’t worry if your squares don’t align perfectly. Those little imperfections are what make it special.
Hand-made gifts are a gift from the heart.
Here is the one I made for my niece:
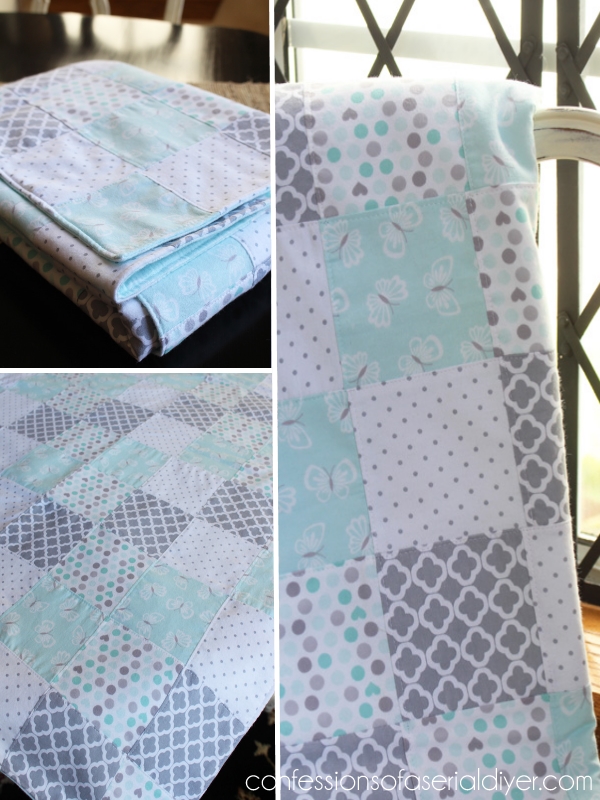
Her mama was not a fan of the color pink so this was a pretty alternative for a girl. Only two of the patterns in this particular blanket are receiving blankets though since I had a hard time finding girlie printed receiving blanket sets that weren’t pink! I purchased the flannel butterfly fabric and the dots and hearts fabric from JoAnn Fabrics. I used the pretty aqua butterfly fabric for the back:

I did a few things differently on this one that I like better!
I kept this one more simple and just used all flannel instead of adding the chenille for texture. It was a bit easier to put together.
Another thing I did differently for this one was I changed up the pattern and I think I prefer this one:
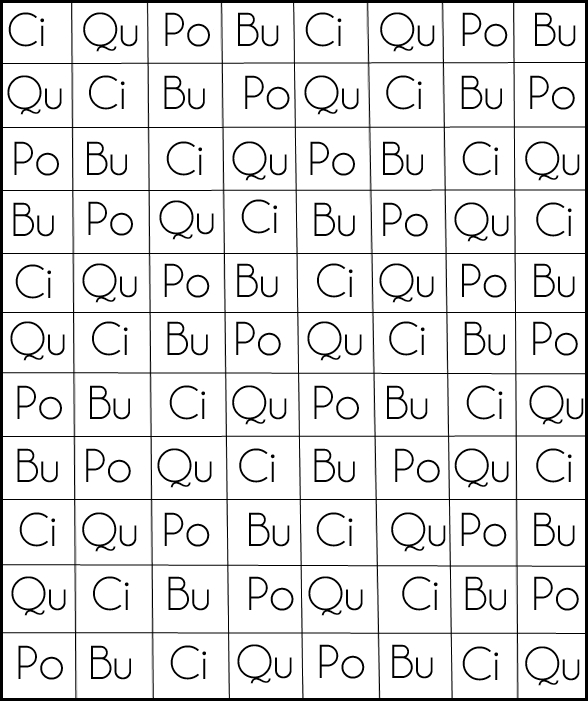
Ci=Circles Qu=Quatrefoil Po=Polka dot Bu=Butterfly

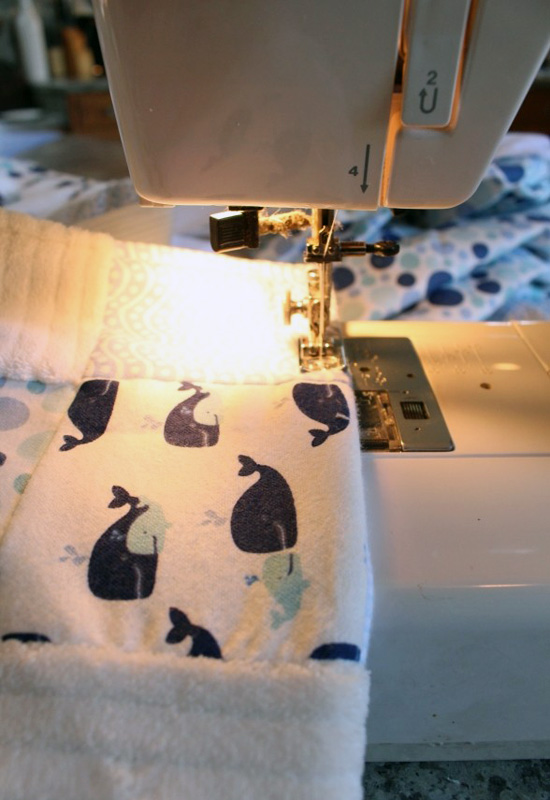
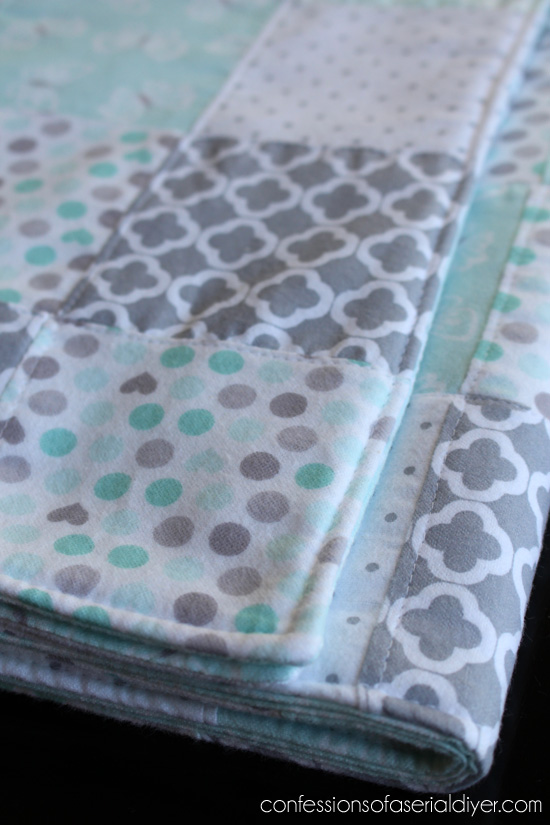
And lastly, I added a stitch about 1/8th of an inch from the seam along one side of each row, lengthwise and widthwise, on the top layer only. (Before stitching, be sure the seams are all ironed to face the same direction and that this additional stitching runs over top of the folded-over seam. I hope that makes sense?!)

It makes the squares sit more neatly.
This was added to my brother and sister-in-law’s baby shower gift basket:
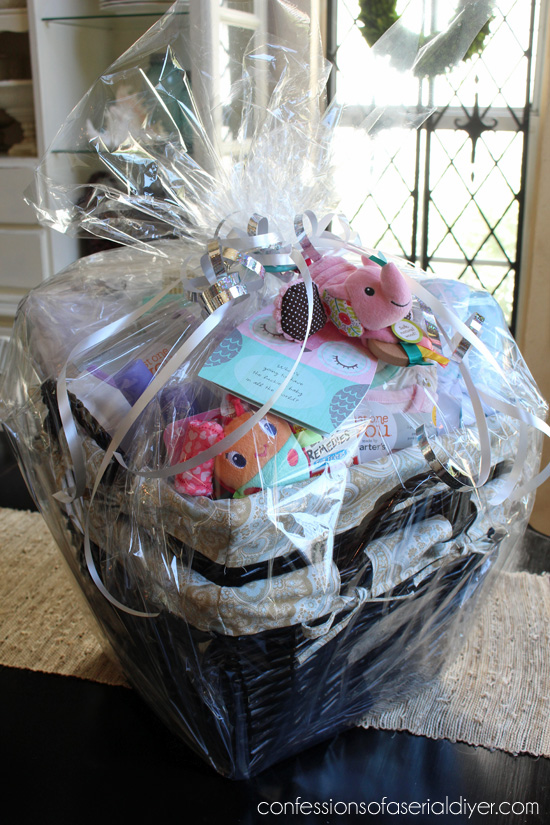
See what else I made in there HERE!
I love the idea of using a pack of receiving blankets to make a quilt. There is the perfect amount of fabric, and everything is perfectly coordinated. Again, it also means you don’t have to spend an hour in the baby flannel aisle trying to make up your mind. That’s a win win win for me! 🙂
It was fun for me to look back at these quilts because they were made for sweet babies I love! I hope you enjoyed it too!
If you’re looking for me this weekend, I’ll be knee deep in boxes packing my little heart out. Yay!!
UPDATE: Ready to see our new house??? You can HERE!!
See y’all Tuesday!
XOXO,
![]()
Don’t Miss a Thing!
If you like what you see, there are several ways to follow along!


")


Mary Kaiser says
Wow, I can’t believe your moving, how fun, a new adventure. Can’t wait to see your new home.
Christy says
I know it all happened so fast I can hardly believe it myself, Mary! We just needed more space, but I will miss this one for sure! XOXO
Paula says
What a wonderful gift to make for a little one. I’m going to a baby shower on Sunday but I was a slacker and am giving a store bought gift. When family members start having babies (they are all high school/college age now), I’ll use your tutorial.
Congrats on your new house!
Christy says
Ha ha I usually buy most of my baby shower gifts too, but for the more special ones, I love to be able to make something and this is pretty simple to make. Thanks for the congrats on the house…looking forward to new projects!! XOXO
Sherry Schillaci says
Oh wow Christy! I’m SO excited for you and your family. I’ll keep my fingers crossed and say a prayer or two everything goes smoothly for you guys. Can’t wait to share in your joy!!
Christy says
Thank you, Sherry! I appreciate all the prayers we can get. Can’t wait to share more!! XOXO
Christina in FL says
Christy, this is positively gorgeous and brilliant! I will look for flannel receiving blanket bundles. I didn’t even know such things existed. I’ve always been a fan of the finishing method you used. Though I admit I am a huge fan of black and white bindings. 🙂
Congratulations on your new home! I know everything is going to go as smoothly as glass and you’ll have plenty of time to do the primping and preening of your new house before you move in. I am super thrilled for you!!
Christy says
Thanks, Christina! I never thought of doing a black and white binding…that would be a fun finishing touch. And I hope you’re right…hoping all goes smoothly with the house! So far so good…can’t wait to share more!! XOXO
Michelle says
Darling quilt!! Good idea to use receiving blankets. As a much older mom, and now a grandma, it’s nice to see some things don’t change! I have always loved receiving blankets, they are so soft and snuggly!
Christy says
Thank you, Michelle! Using a pack of coordinating ones makes it that much easier…and yes so soft and snuggly! XO
Rust says
Congrats on your new house! Loved your blanket creations and tutorial. 🙂
Christy says
Thank you so much, Rust!! XO
Sue says
Congratulations on buying your new house!!! I know how fun it will be decorating a new house. Have you sold your house you are in now? Don’t work too hard and enjoy!!
Christy says
Thank you, Sue! I am so excited to start decorating! We have not sold our old house yet, but will be listing as soon as the last truckload of furniture leaves! XOXO
Deborah Burgess says
I’m finding that I don’t open your posts very often due to all the ads now. They really slow things down, especially when there are a lot of pictures as in today’s tutorial. One of the pop up ads actually froze everything and I had to close your post and reopen it. I probably won’t read anymore after this one. I love your work, though.
Christy says
I’m so sorry to hear that, Deborah. I switched ad networks in April to make the user experience better. Unfortunately ds are a necessary evil since this is how I earn my living, but I do understand. Thank you for following along as long as you have! XOXO
Margie says
Cute idea for quilt,thanks. Happy for you & family on your new home.Looking forward to new projects for your house????
Christy says
Thanks, Margie! I too am so excited for new projects! XOXO
Ange says
Congratulations on your new house. How exciting…New projects, new memories! And yes, you can still call them your babies! ????
Christy says
Thank you, Ange! I am so excited…can’t wait to start making new memories there. And I will probably still be calling my boys my babies when they’re grown ha ha! XOXO
Candy Walsh says
LOVE these blankets and it looks fairly easy!! Congratulations on your house! I can’t wait to see pics and all the great projects I know you’ll be doing, that’s so exciting!!
Christy says
Thanks, Candy, it really is pretty simple to make. And I cannot wait to share pics of the new house. It was all I could do to restrain myself from sharing them now ha ha! XOXO
Larissa ~ Prodigal Pieces says
Congratulations!! So excited for you and will pray all goes smoothly. I adore your quilt too.
Christy says
Thank you, Larissa! I appreciate the prayers for sure. Everything is looking good so far…just one week to go eek! XOXO
Patricia B says
Hey Christy,
Congratulations!!! I can imagine how much you’ll love decorating a new house! Love the quilt ideas.
Christy says
Thank you, Patricia! I have been daydreaming about decorating the new house in my head since we found it ha ha…one more week to go! XOXO
Cecilia says
That is super exciting news! So happy for you and I can’t wait to see the pictures and projects!
Cute quilts and I love the idea of using coordinating blankets for the fabrics.
Christy says
I know I am SO excited!! Thank you, Cecilia! And this little quilt is so easy especially when using a pack of already-coordinating blankets! 🙂
Marie says
How exciting, congratulations! Looking forward to seeing pictures. Love the baby quilt too – I don’t remember seeing that post. Pinned
Christy says
Thanks, Marie!! It was all I could do not to share every. single. photo. I have so far ha ha! This quilt was from a few years ago, but still gets pinned often, so I thought some might enjoy it again! Have a great weekend! XOXO
Nancy Walden says
Very cute and your tutorial was excellent!
Christy says
Thanks so much, Nancy! XO
Julie Briones says
OH. MY. GOODNESS! CONGRATULATIONS! I am SO excited for you, Christy! It never even crossed my mind that you were getting ready to sell. 🙂 Have you had any ‘bites’? Did it already sell? How close is the new home? (inquiring minds want to know 😉 )
Christy says
Thank you, Julie!! I am SO excited to get my hands on the new house! We have not yet listed our current home, but it will be ready as soon as the last box is loaded onto the moving truck. Our current neighborhood is only a bike ride from the beach, so we are hoping for a quick sale! Our new one is about 10 minutes up the road, but it will give us much more room to spread out. Can’t wait to share more!! XOXO
Nancy @ Artsy Chicks Rule says
Can’t wait to see all you do in that pretty house Christy!!! xoxo
Christy says
Thanks, Nancy! Me too ha ha!! One week to go eek!! XOXO
Linda Petersen says
Congratulations on your ???? home! Can’t wait to see pics. I know you will have a blast decorating. Love the baby quilts–who knew receiving blankets would be so adorable. X0X0
Christy says
Thank you, Linda! I am so excited to get my hands on it! And yes…those flannel blankets make pretty quilts! XOXO
Suzan says
Can’t wait to hear more about your new house. Exciting times for your family!
Sweet baby quilt! One little suggestion since you are using flannel on the top and bottom of the quilt. Use another piece of flannel as your batting. The quilt is still warm and comfy but it will have a beautiful “drape” for wrapping baby and will go through several seasons. I almost always use flannel “batting” on simple baby quilts.
Christy says
Thank you, Suzan! We are definitely excited. I never considered using a piece of flannel for the batting. It bet it would also make it not so hot when the little ones still want to snuggle up with it in the Summer months! Great tip! XOXO
Addie says
Love the blankets.
Oh my!!! a new house….lots of new projects!!!
Be sure to show us LOTS of before pics !!!
Addie
Christy says
Thanks, Addie!! I can hardly wait to get in there and get started! I have lots of pics that I’ll share soon! XOXO
Jeanne says
Very sweet. I never thought to use receiving blankets for the squares…I love this idea. It is sometimes hard to find wonderful soft cotton fabric. Thanks!
Christy says
Thanks, Jeanne!! The receiving blankets work perfectly! XO
Fonda says
I would like to add that the receiving blankets should be a good quality. I can’t imagine an inferior flannel blanket making a great quilt.
Christy says
Yes, good point! XO
Melinda says
you are so talented!! I enjoy your blog very much.
Christy says
Thank you so much, Melinda! I’m so thrilled to hear that! XOXO
Terri Hughes says
Using receiving blankets to make these quilts, was a great idea. They are so cute!
Christy says
Thanks, Terri! 🙂
At Rivercrest Cottage says
That little quilt turned out so cute! Love it.
Christy says
Thank you so much! XO
Holly says
Congratulations Christy!! So happy for you. I will miss seeing your old house though 🙂 Can’t wait to see what you do to this one! Much luck to you and your family ox
Christy says
Thank you, Holly! I will miss our old house too for sure, but we definitely needed more space. Looking forward to putting our mark on the next one! XOXO
Kathy S. says
I love the idea of using receiving blankets to make these cute quilts, and I followed everything you wrote in the directions… but I’d suggest one change.
Instead of pressing all of the seams the same direction, I’d press all the seams in row 1 one direction (say left), all the seams in row 2 the opposite direction (say right), and continue alternating left and right for each row. Then, when sewing the rows together, the bulk of the seam allowances will be spread evenly to each side of the seam, making stitching easier and, I imagine, the blanket smoother. Then you could topstitch on BOTH sides of the seams or use a wide decorative stitch (a gentle curve perhaps) down the center of the seams to hold the seam allowances down. Or topstitch/quilt long diagonals through all the squares, starting at one edge of the quilt, going diagonally to the other side, turning around and moving to the next diagonal, and stitching back across the quilt. This quilting would eliminate the need to tie the quilt. A walking foot would be advisable to use on your machine for sewing through layered quilts… it keeps the top and bottom fabrics and the batting moving through the machine evenly.
Christy says
Thanks for the tips, Kathy! 🙂
Nanette says
How exciting for you and all of us that enjoy your posts! How long have you been at your current home? Very much looking forward to you new adventures and thank you for all of your great advice!
Christy says
Thank you, Nanette! We have been here for 12 years. Looking forward to new projects! XOXO
Becky says
Yay! Congrats on the new house!!! Now we get all the FUN of seeing a new house decorated with none of the work! : ) Blessings upon your new home, and may all go smoothly this last week and with move-in.
I love the idea of using a blanket set for pre-matched prints! Genius!
Christy says
Thank you so much, Becky!! Ha ha yep! I am SO excited…only one week to go. Can’t wait to share pics!! XOXO
Kaycee says
Congratulations on the new house, what an exciting time for you and your family!
Christy says
Thank you, Kaycee! We are super excited! XOXO
Moriah says
Congrats!!! What a busy yet exciting time for you. Enjoy your “babies.” My youngest is 17 and her oldest sister just got married. They grow up quickly and are in their own life adventures before you know it. But that doesn’t mean I’m ready to be a grandma and make a baby quilt just yet ;). I’ll tuck this project away for the future and work on painting furniture 🙂
Christy says
Thank you, Moriah! We are very excited! People always say they grow up so fast, and it so true. I try to enjoy my boys as much as I can. You are lucky to have girls….hoping my boys stay close, but you never know! XOXO
Amy says
Christy! I just read this weeks post, I’ve been away, and had to run back and read this one because you’re moving!! Congratulations!! I’m so happy for you all, and wish you nothing but Love and Laughter in your new home!!! I’m so looking forward to seeing the new digs and the wonderful things you’re going to do with it! Maybe I’ll get some magical inspiration for my New (1 1/2 years already) Home!! Post every thing! Even if you think it’s not worthy, because I know you’ll be helping someone out there for sure! Okay, now I can calm down and relax and can’t wait till you start posting on it! Hope your move goes without a hitch!! <3
Christy says
Thank you SO much, Amy! Yep we have been talking about moving for a couple of years now and finally decided to go for it! I can’t wait to share it, and I do hope to share as much as I can as I tackle each room…looking forward to a new project! XOXO
Sean Mahan says
Thank you so much for sharing the tutorial! I already have the supplies here, so I’m definitely going to make it. Thanks!
Christy says
My pleasure, Sean!
Jane says
I’m SO excited for you with your new house. I think that is one of the things that thrilled me the most when I bought mine because I knew I could make it what I wanted! Happy, Happy, Happy
Plus this little blanket is so timely for me. My little sister who is almost 40 and has never had a child is expecting for the first time!! We are all over the moon about it. She never worried about becoming a parent and she and her hubby just thought they’d be childless and were fine about it. She told everyone about a month ago and the baby is due in November. I cried and cried with happiness for them as I know she has secretly wanted to be a mom for some years. We all feel so blessed and I can’t wait to make her this little blanket. In truth, I’m having to reign myself in from getting out of control with this new addition coming, lol. Thanks for the pattern and best wishes in moving. I hope it goes smoothly!
Christy says
Thank you so much, Jane!! I am beyond excited about the new house! I know there are many women out there who feel like their lives are complete even without children, but I wonder if it is a case of “you don’t miss what you have not had”. Your sister is blessed to be able to know that feeling for herself. It is pretty darn amazing being someone’s Mom…and hard work too ha ha, but would not trade it for the world. Have fun spoiling her new little one!! XOXO
Annie says
Hi Christy, Sorry I’m just reading this post now. Congratulations on your new home! I can’t wait to see the first post 🙂
Christy says
Thank you, Annie! We are super excited to get started on the new house…will share soon! XOXO