Are you finished decorating for the Holidays yet? I still have much to do, but one area I can cross off my list is my front courtyard. I shared it earlier this week and in case you missed it, here’s a peek:
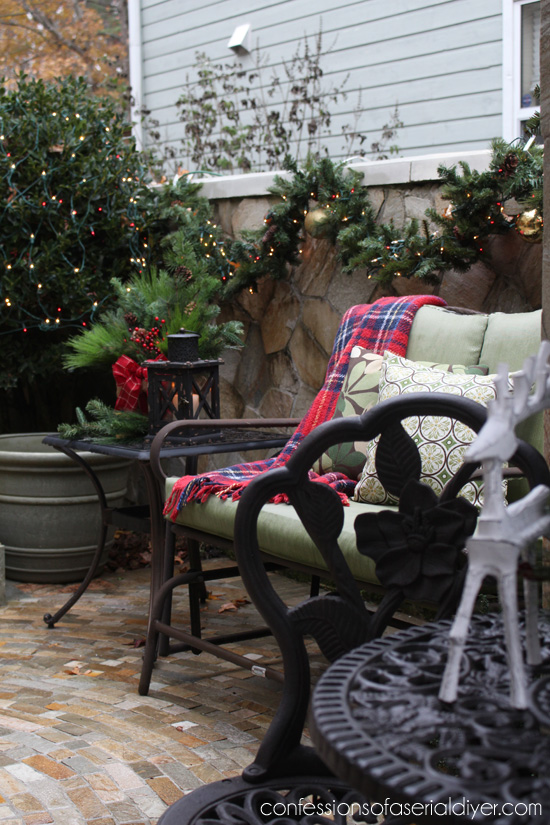
I’d love for you to take a closer look here and you’ll also find out why this space is so dear to me.
I wanted to liven up my courtyard a bit, and one of the best ways to do that for the Holidays is by adding fresh greenery. I usually keep the pieces that are sawed off the end of our tree when we purchase it and grab a few more stray pieces on my way to the parking lot. However, this year we picked out our tree and then my hubby went back to pick it up with his truck, so I didn’t get my fresh (and free) greenery.
Then a couple of days later, I was browsing through Lowes when I saw these fresh greenery arrangements:
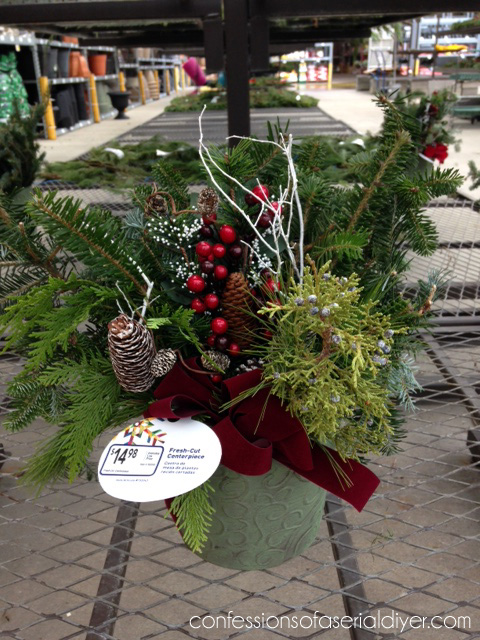
I loved the idea of these, but I didn’t love that I wouldn’t be able to use them again after this season, so I made my own!

Of course mine are not real, so I can use them year after year! Mine came in at around $18 without the container. (That was $5)
You know I love to share the how-to just in case anyone else is inspired to create one for their own home!
Here are the picks I used, and the quantities of each:
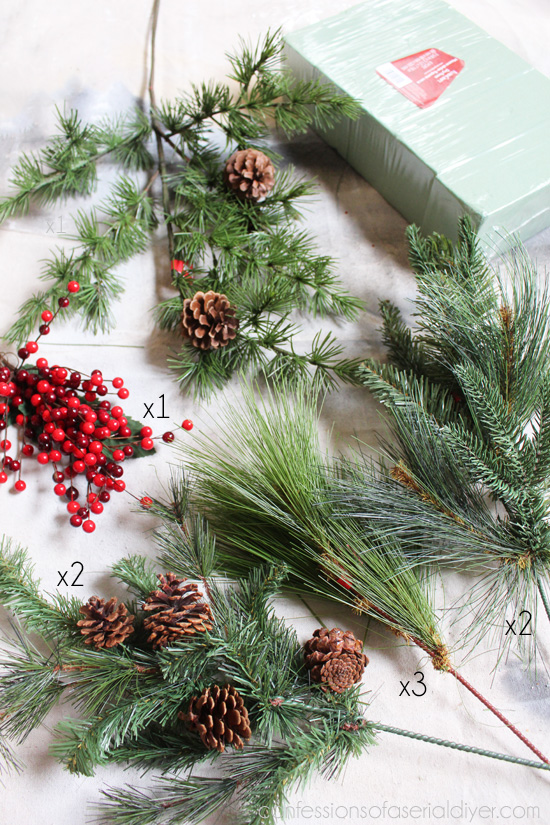
I purchased all of my supplies at Hobby Lobby. Michaels is my first choice, but they didn’t have what I was looking for.
I also needed a few more things…
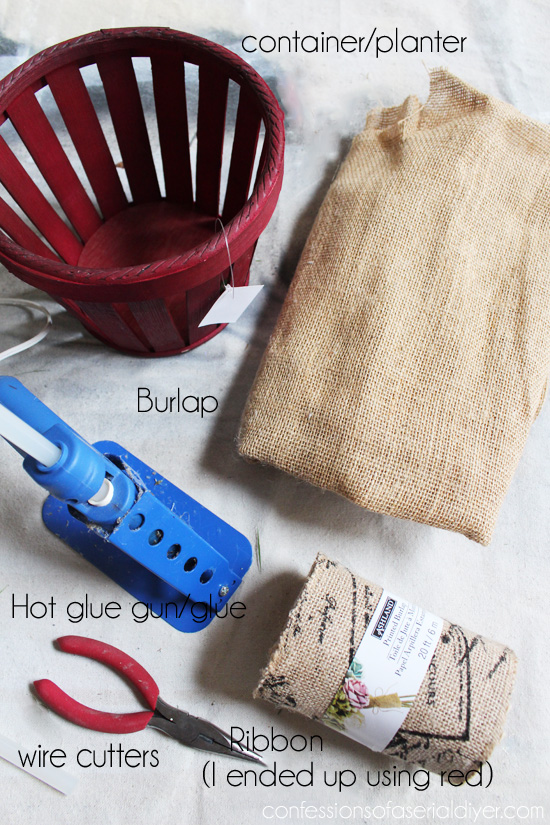
The picture shows burlap ribbon, but I ended up using red. Don’t forget the floral foam (top photo).
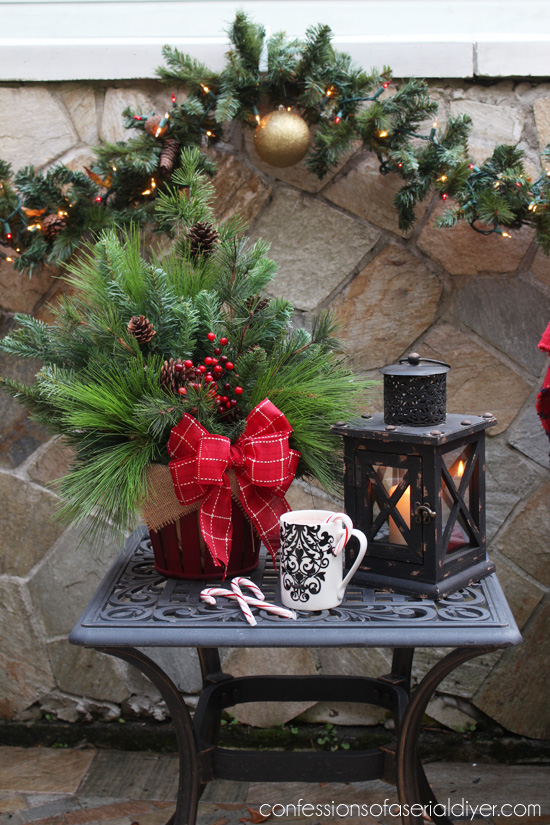
I started by cutting the burlap into a square: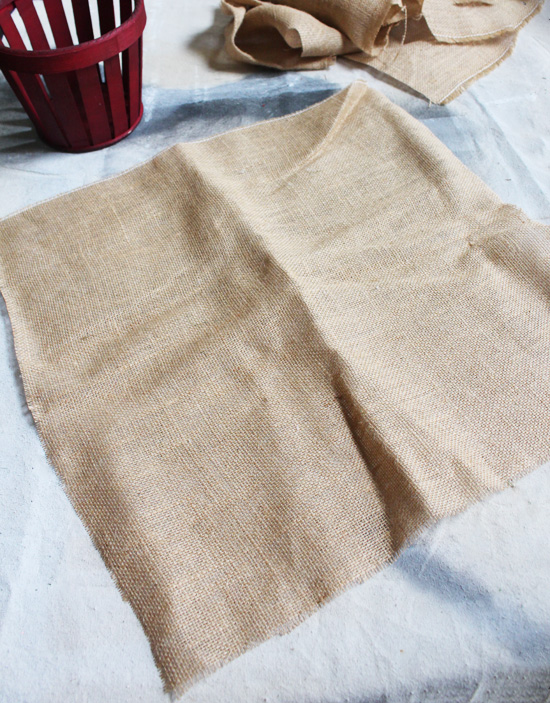
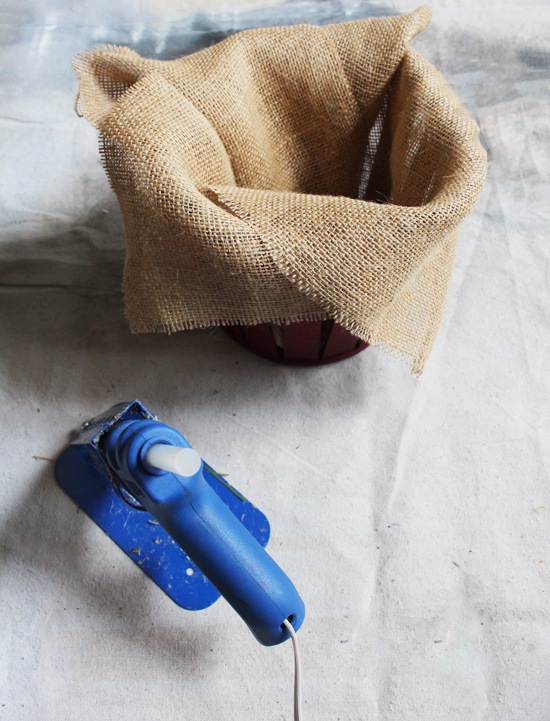
Then I tucked it into my container, using hot glue to secure it to the bottom.
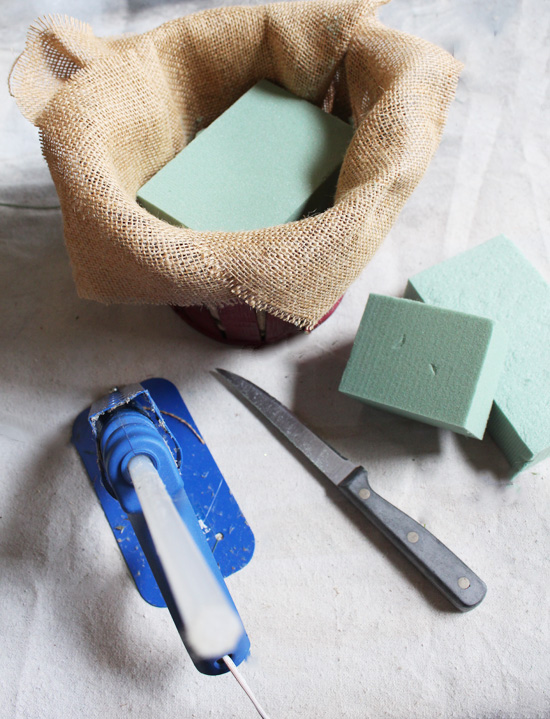
Next I added floral foam, easily cut with a steak knife, securing with hot glue also:
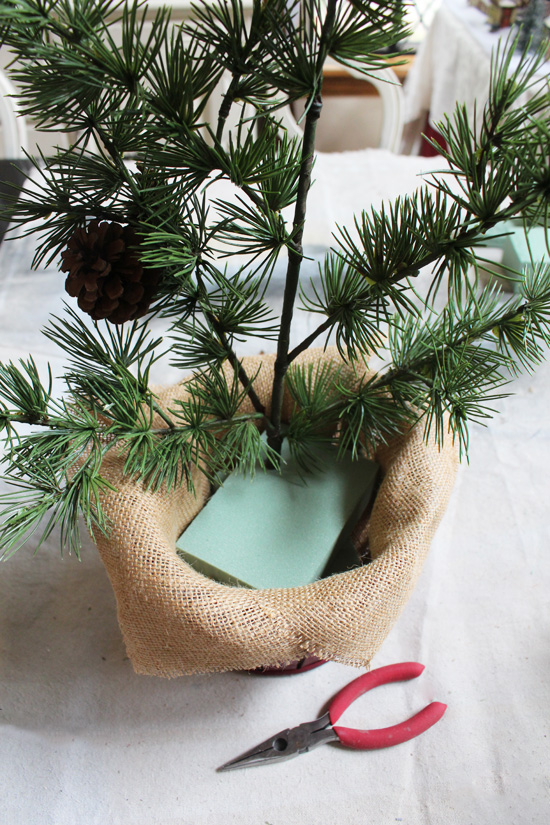
Then I started adding my picks, starting with the one tall one:
Then I added two simple picks to either side: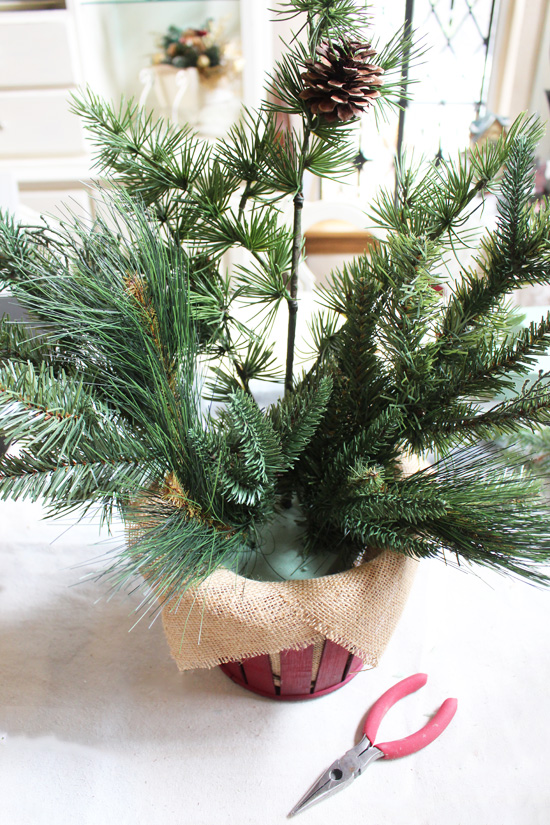 I cut the stems as needed as I went.
Next I added the pine cone picks to either side…
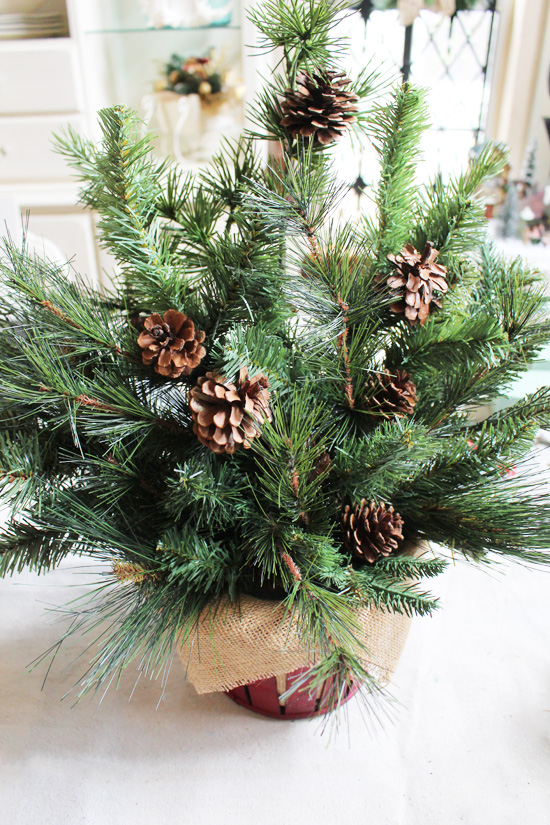
Looks pretty good already, I think, but let’s add one more variety…the soft green picks. I added three of those:
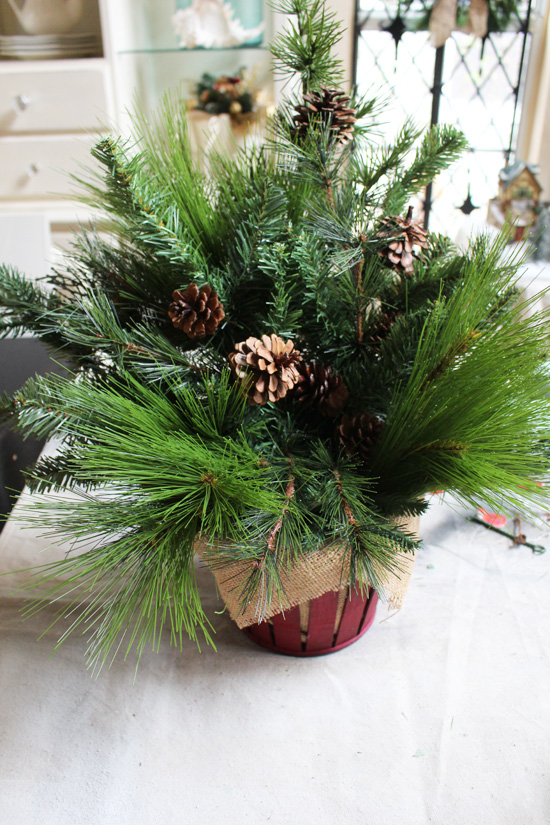
Then I cut off a piece of berry stem and added that to the center.
A pretty bow completes this arrangement!

I love how it freshens my little sitting area right up!
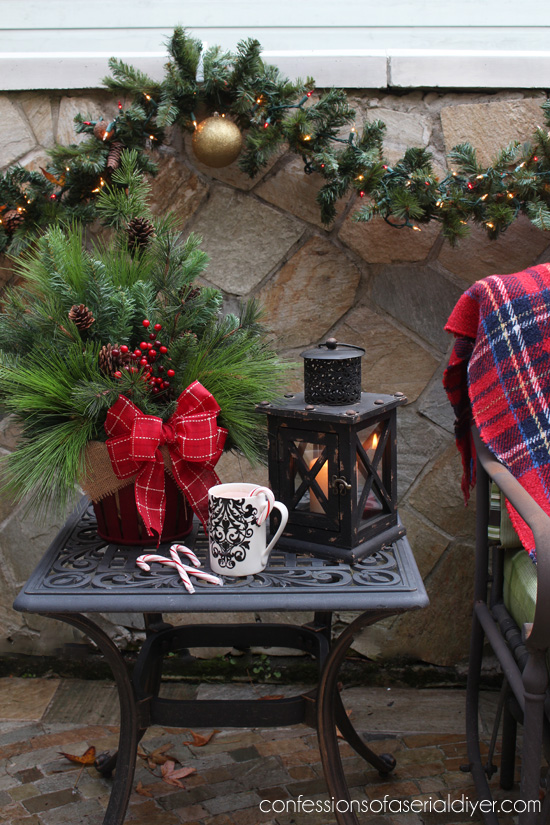
Guests walk right by this area as they approach my door, so I wanted something pretty to put there. I’m so pleased with how my arrangement turned out!
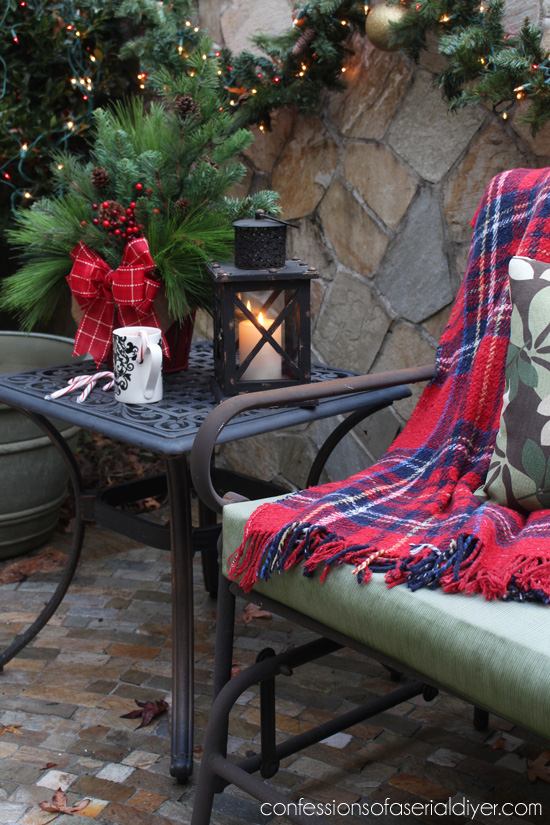
It’s pretty with this little lantern I also picked up at Hobby Lobby.
Care to come over for a steaming cup of hot chocolate?

Then I could share the story with you of why this space is so special…then I might start dragging out the photo albums…

This is also my Get Your DIY on project for December! If you’re a newer follower, I host a monthly link party with four other fabulous ladies, on the first Sunday of each month. Each month has a theme and we invite other bloggers to add their projects to our party, creating a ton of inspiration for you! December’s theme is Hand-made Holly-days! So there should be tons of décor and gift ideas that you can make, at our party!
Here is what my lovely co-hosts hand-made for the Holidays:
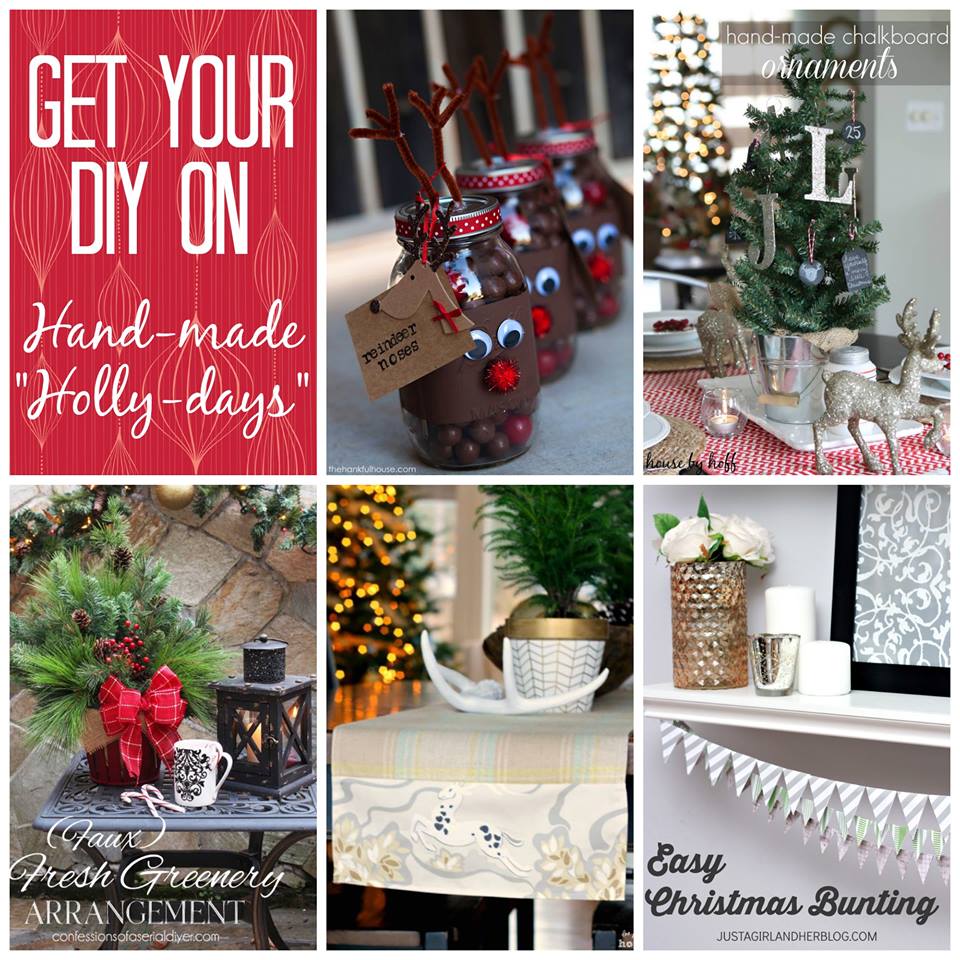
Reindeer Noses Mason Gift Jars The Hankful House
Hand-made Chalkboard Ornaments by April at House by Hoff
DIY Custom Fabric Table Runner by Krista at The Happy Housie
Easy Christmas Bunting by Abby at Just a Girl and Her Blog
The party fun starts this Sunday, December 7th, at 7:00pm EST.
Bloggers, we want to see what you’ve made for the Holidays, so we can inspire our readers!

XO,
![]()
If you like what you see, there are several ways to follow along! ![]()
Email * Facebook * Pinterest * Hometalk * Twitter * Instagram
I love to share at some of these great parties:
Home Stories A to Z Not Just a Housewife Kammy’s Korner The Happy Housie Design Dining and Diapers Liz Marie Blog Funky Junk Interiors Savvy Southern Style Tatertots and Jello DIY Show Off Redoux Interiors Between Naps on the Porch The DIY Dreamer Oh My Creative Little Miss Celebration Just a Girl and Her Blog Sand and Sisal Interior Frugalista House on the Way Addicted 2 DIY I should be Mopping the Floor My Repurposed Life Miss Mustard Seed


")


martina says
BEAUTIFUL arrangement Christy…love that whole area!!
Christy K. James says
Thanks so much, Martina! Makes me want to sit out there at night even though it’s freezing 🙂
Marie@The Interior Frugalista says
Very nice and I like that for pretty much the same cost yours is going to last for years!
Christy K. James says
I know, right? Glad you like it, Marie! Have a great weekend. 🙂
Lindsay O. says
Darling! Thanks for including the quantities you used. I always end up really underestimating or seriously OVER-estimating. This will keep the frustration low!
Christy K. James says
I always over-estimate too! Hopefully this will help! You probably need to use a similar sized container too. 🙂
Lindsay O. says
What is the size? I hadn’t thought about that! 🙂
Christy K. James says
I just ran outside in my jammies to measure it ha ha…the container was tough to measure perfectly since it is filled already and it tapers slightly at the bottom, but it looks like about 7″ across.
MaryJean says
Very pretty Christy! Simple yet elegant!
Christy K. James says
Thanks so much, MaryJean! XO