
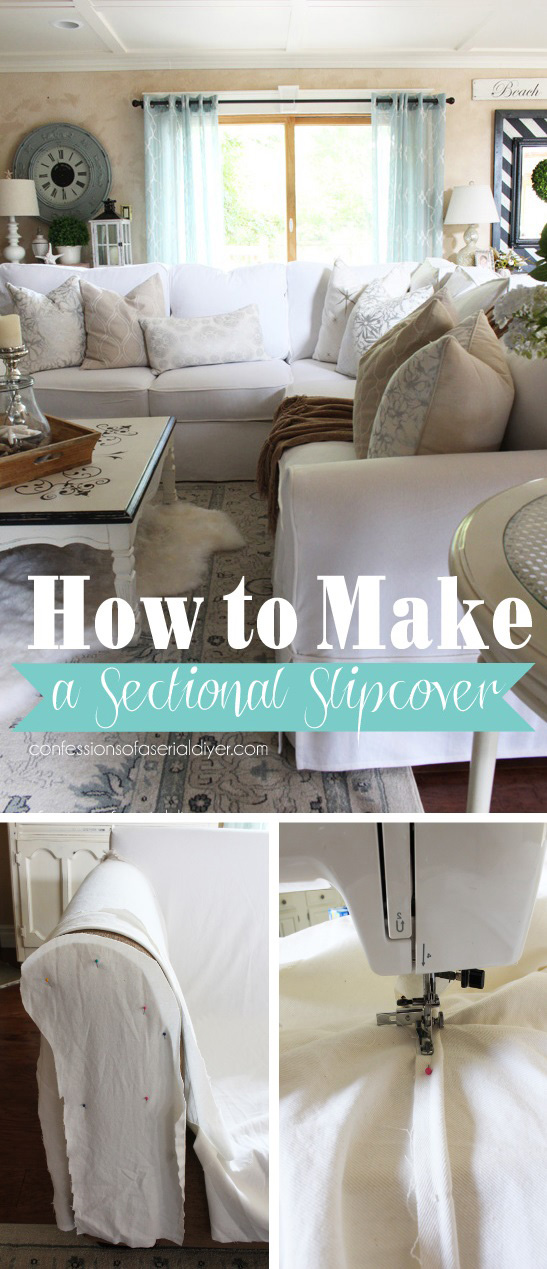
Hello Friends! I recently posted the big reveal of my new sectional slipcover, and today I am back to share how I made my sectional slipcover, step-by-step! I am starting with the base of the sectional, and I will follow up with how I covered the cushions in a separate post. (See that HERE.) I have a ton of pictures to share, as in I edited over 80 photos, so I could share as many details as possible. Because of that, it was necessary to break this tutorial into two posts.
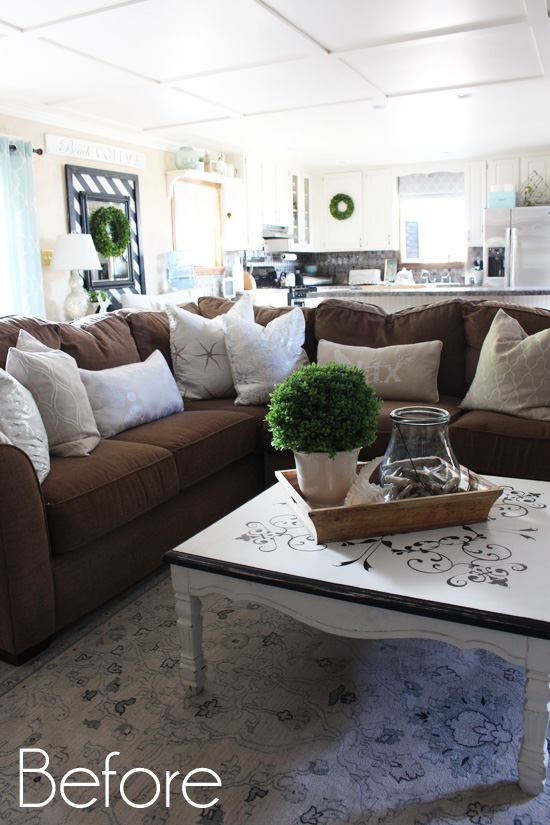
Here is what our sectional looked like before, a big brown beast of a sectional:
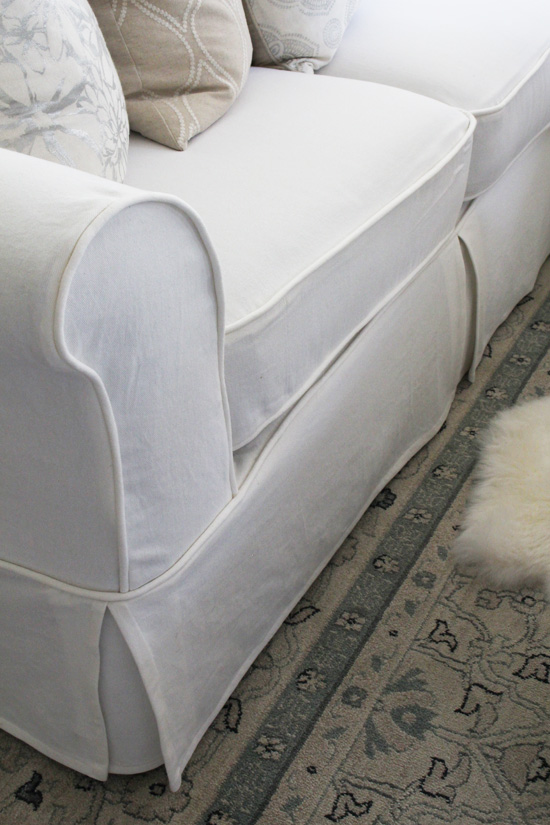
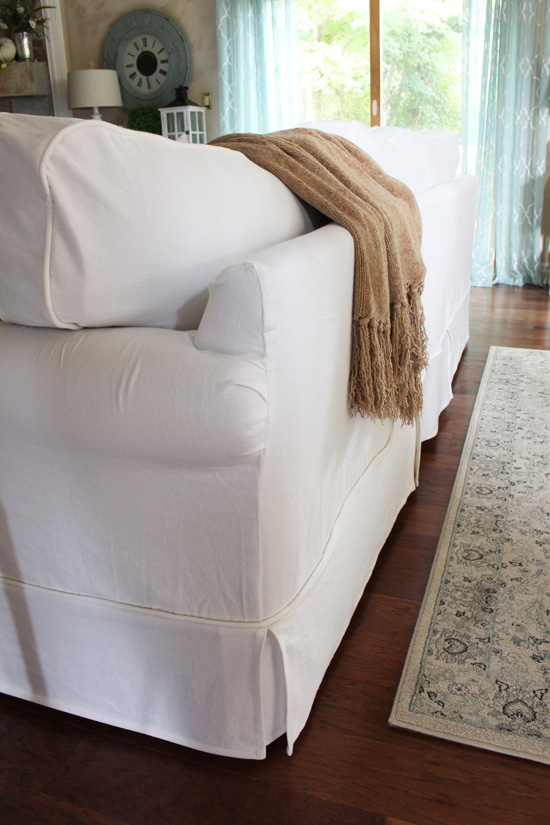
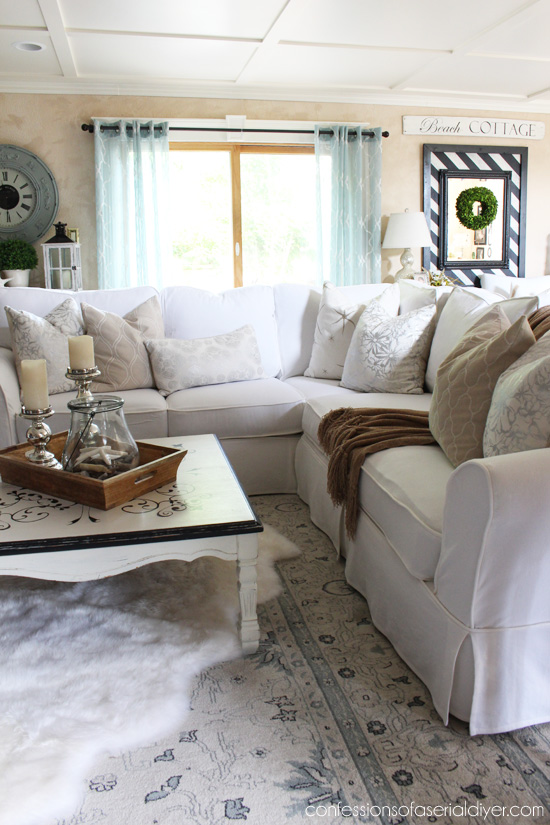
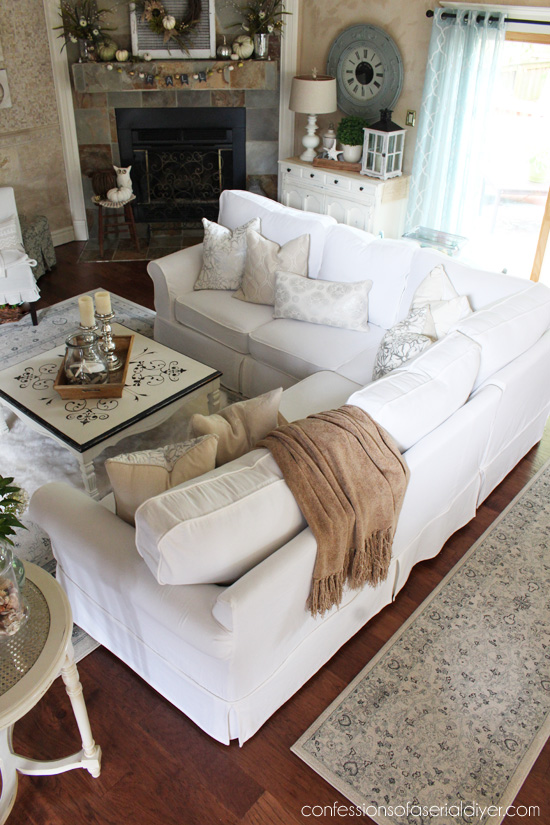
And here it is all shiny and new with its brand new slipcovers!
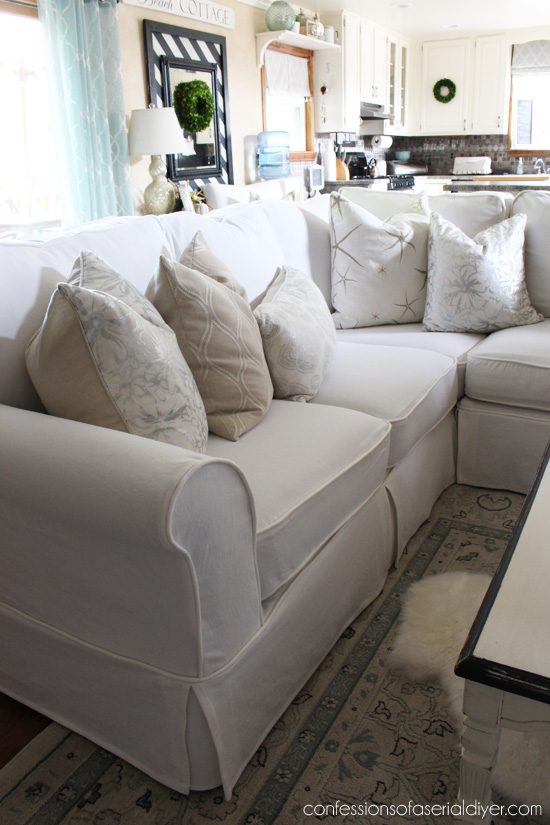
Not too shabby, eh? What a great way to lighten up a space!
Making this slipcover for our sectional took me six days, working about eight hours each day. It was time-consuming, but really not super difficult. I would not attempt this as a first time sewing endeavor, but if you know your way around your machine a bit, and have sewn a few things, I’m confident you can tackle this too. I’ve included affiliate links so you can find the exact products I used.
Let’s get started!
Supplies
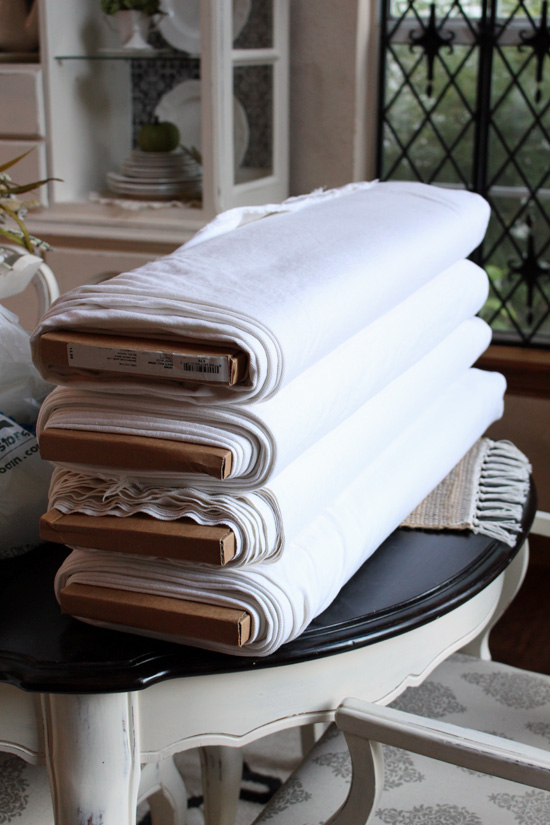
- Fabric I used 35 yards (8 yards to a bolt, 58″ wide) of Sew Classic Bottomweight 10oz Natural Bull Denim in White
that I ordered from JoAnns. Here is the actual item #:10508372. TIP: I linked to the product online, but if your store does not have enough in stock, order it from the store, not online. I purchased mine online originally and two of the bolts were bright white compared to the other two bolts that looked more Winter white. In order to receive a refund, I could not return them to the store, and I had to return the entire order, as it is considered one cut of fabric. Now this was made super simple because they included a return UPS shipping label with my order, but returning it to the store would have been easier. If you purchase your fabric from the store and there are any issues, they can take care of it right there. I had no issues when ordering from the store. Also be sure to look on JoAnns website for coupons! They always have them.
- Thread I used five spools of Coats and Clark Dual Duty Thread-400yds in White
. TIP: buy a pack of bobbins and wind all your bobbins before you get started. I used around 10 total.
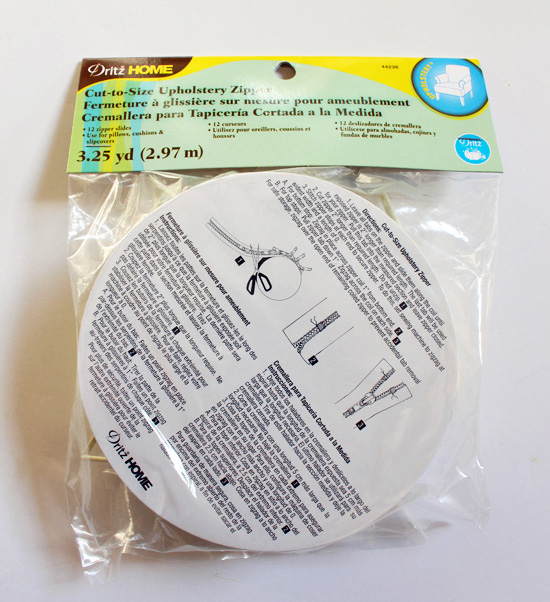
- Zippers I used cut-to-size upholstery zippers. One large roll did three cushions:
- Straight Pins
- Measuring Tape
- Cutting Mat, Straight Edge, & Rotary Cutter Well worth the investment for nice straight cuts.
- Good Scissors (for cutting fabric) and Not-your-Favorite-Scissors (for cutting zippers)
- Sewing Machine This is definitely NOT a no-sew project!
- Zipper Foot
- Pencil
- Piping/Cotton Cording I used 1/4″ cording from the hardware section at Walmart
- Iron/Ironing Board
Wash Fabric
The first step to a brand new beautiful slipcover is to wash the fabric. That’s right, all 35 yards of fabric. This was not nearly as hard as it sounds. I washed a bolt’s worth (8 yards) at a time without detergent, in warm water. Then I tumble dried it on the setting I would be drying them in the future. As soon as each piece was dry, I rolled it back onto the bolt, smoothing the wrinkles out as I went.
This prevented me from having to iron all that fabric!
Where to Start
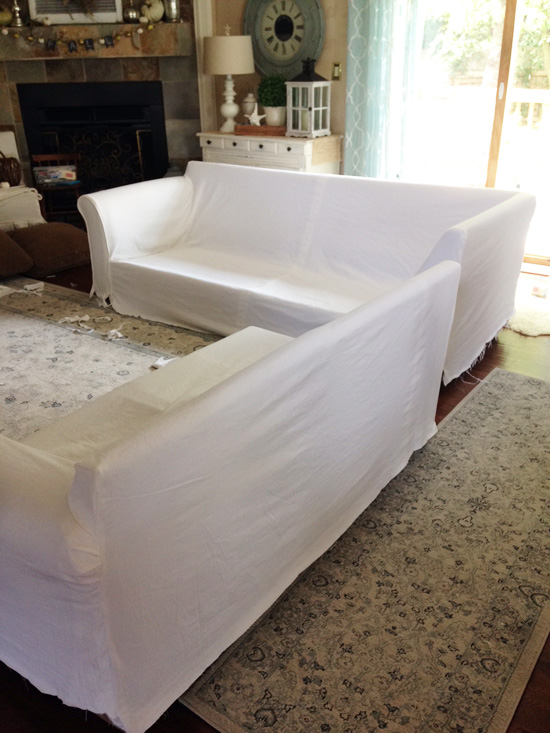
Time to start on our slipcover. My sectional is in three pieces:
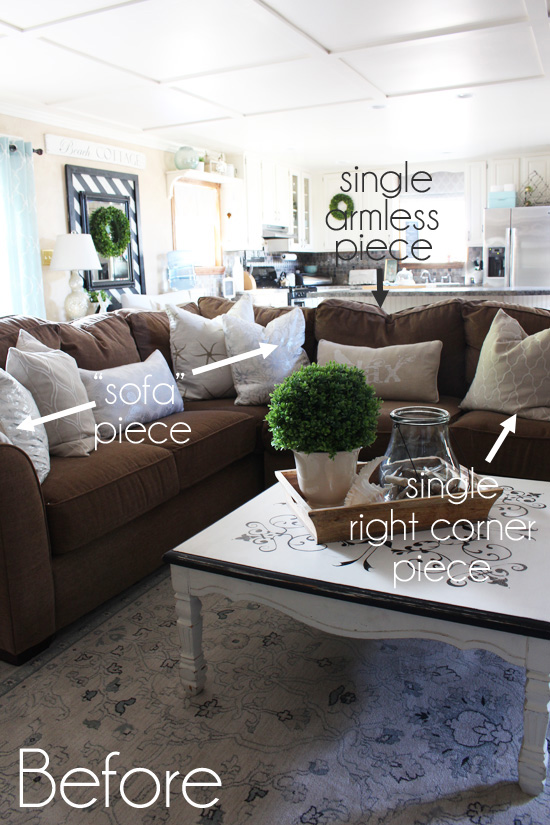
The entire left side is one “sofa”piece and then I have a single armless piece in the center, and the single right corner piece that has a rolled arm to the right of that.
I decided to make a base cover for the left side and then one to cover both pieces on the right.
I started with the smaller of the two.
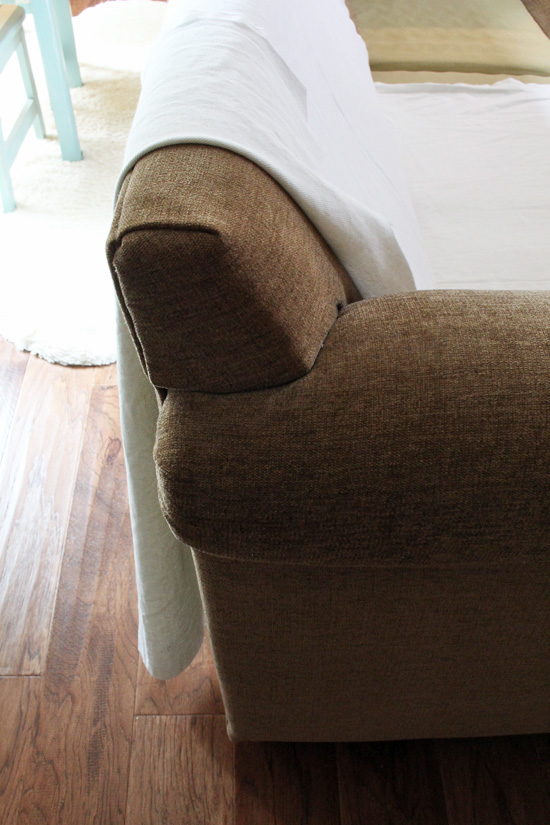
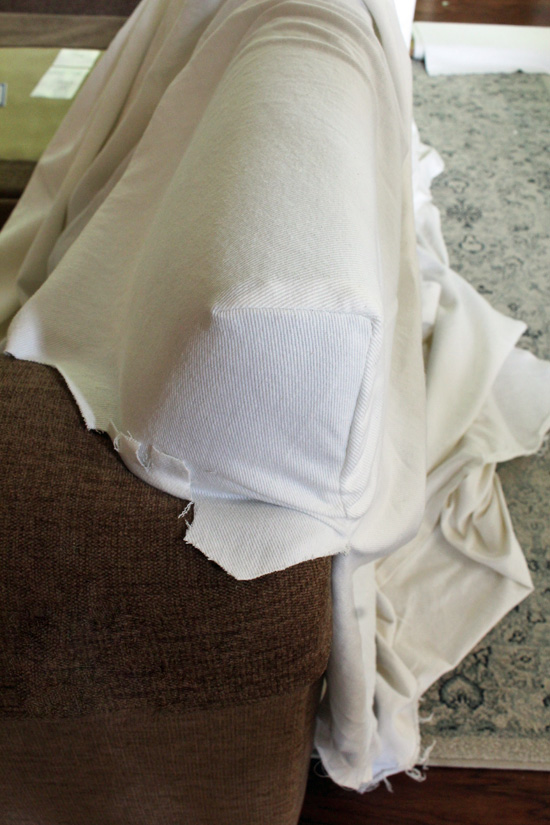
To create a slipcover for a traditional sofa, you would place the fabric over the sofa right side down and pin, sew, then flip it right side out and voila…a slipcover. With a sectional, it’s not that simple because the ends don’t always match or aren’t perfect replicas of each other. The left side of my sectional or the “sofa” side, has a normal rolled arm on the left end, and this on the right:
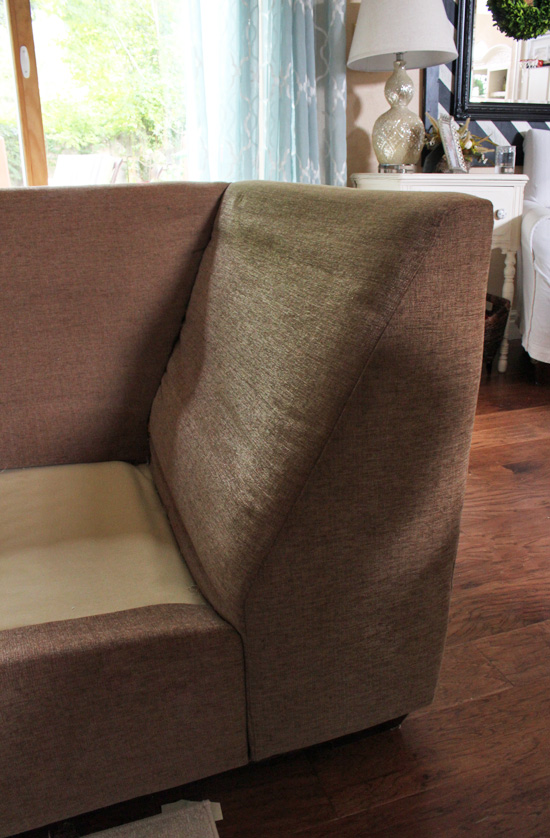
Luckily the opposite end (the single right corner piece) has the same rolled arm as this piece has on the left side, so to get started on the base cover for the smaller two sectional pieces, I used the rolled arm of this larger piece.
Lay out the Fabric
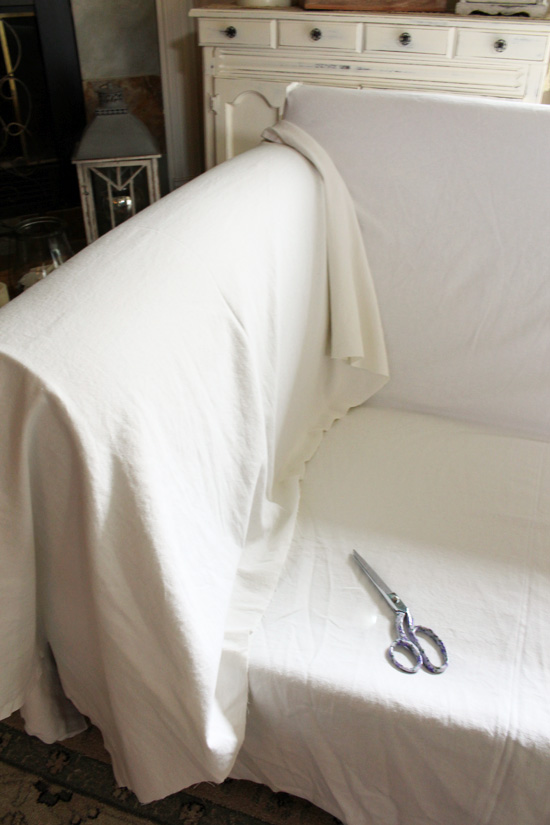
Start by laying your fabric from front to back. Pull it over far enough over to hang past the back corner of the sofa by a few inches:
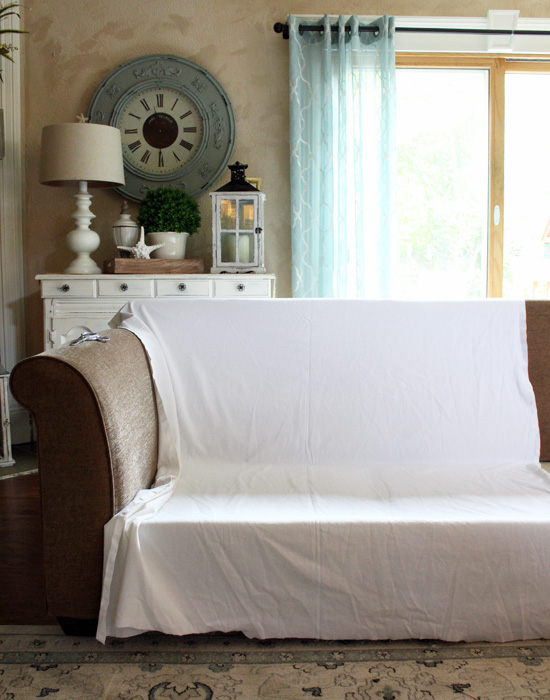
If you plan to add a skirt to the bottom, you don’t have to have it touching the floor like I have here, a few inches below the front edge would work perfectly. I ended up trimming quite a bit off in the end. Trim straight across the back a few inches from the floor as well.
(If you do not plan to add a skirt, let it drag on the floor a couple of inches.)
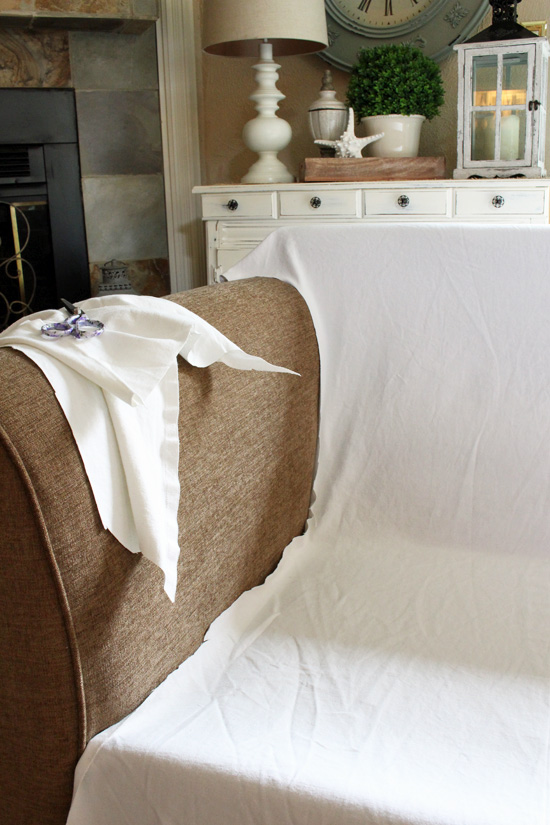
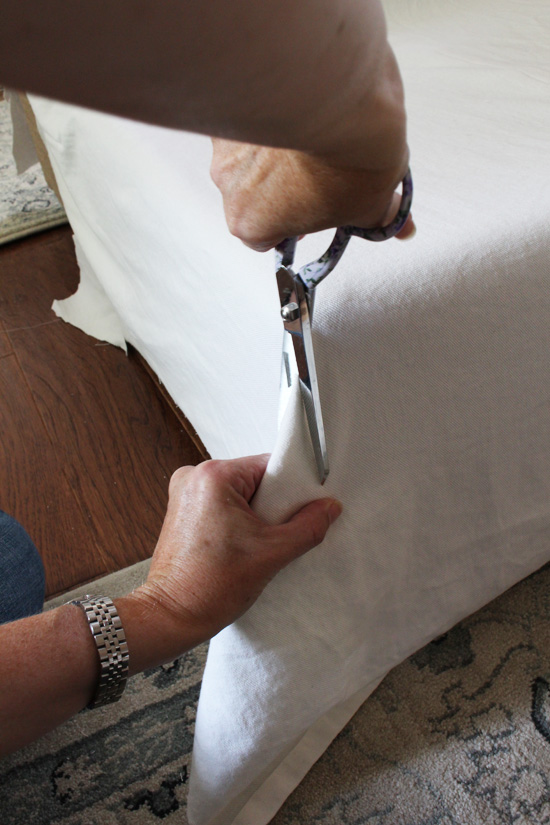
Following the lines of the inside corner of the sofa, trim fabric:
Pin, Sew, Test Fit, and Repeat
NOTE: All raw edges will need to be sealed to prevent them from unraveling when you wash your slip cover. However, I waited to do this until the end. More on that later.
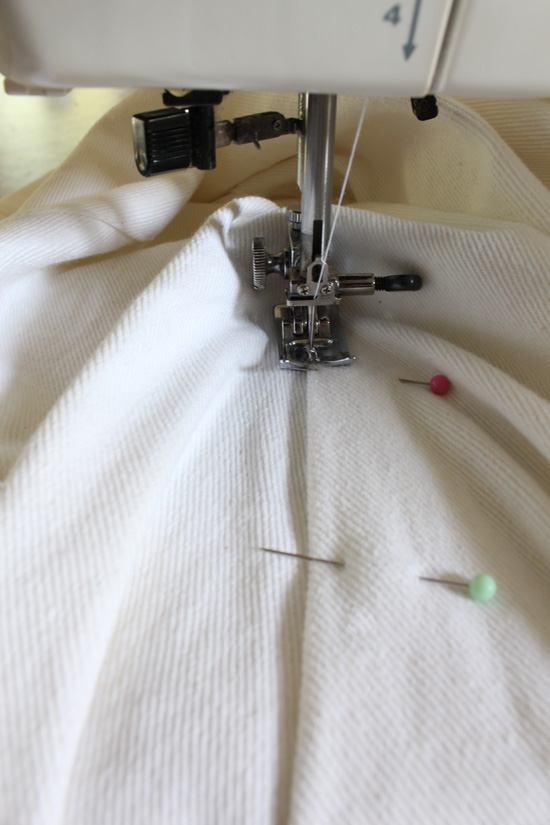
Start pinning on the back corner. Here is what the top of the back corner of mine looks like:
I pinned where the seam is across that top edge, and snipped the fabric a few times where I wanted it to turn the corner easily:
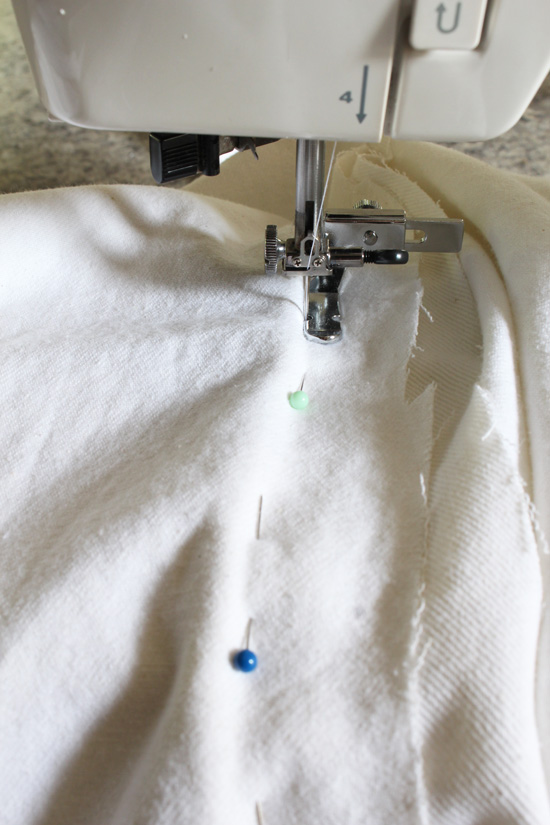
I sewed where I pinned across the top:
Then I pinned down that back corner:
And sewed it. Then I did a test fit on the opposite side…
So far, so good. I pinned. removed, sewed, test fit, pinned, removed, sewed, test fit a lot as I went.
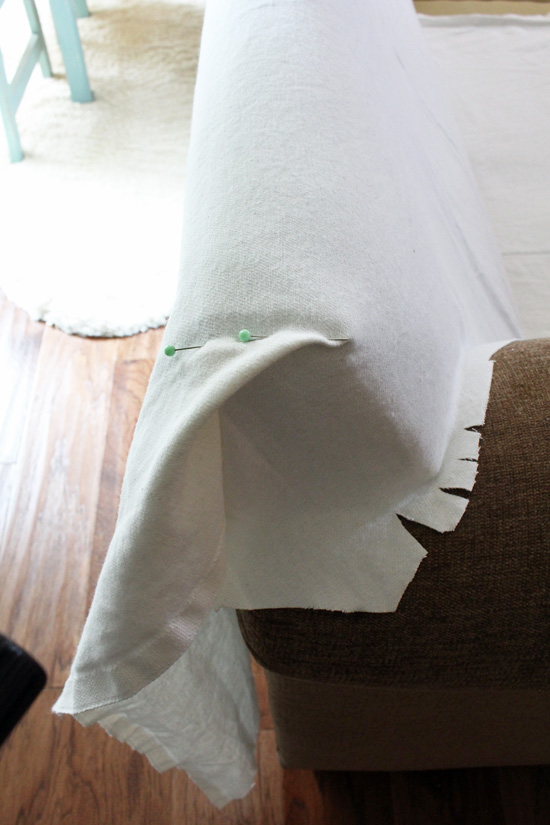
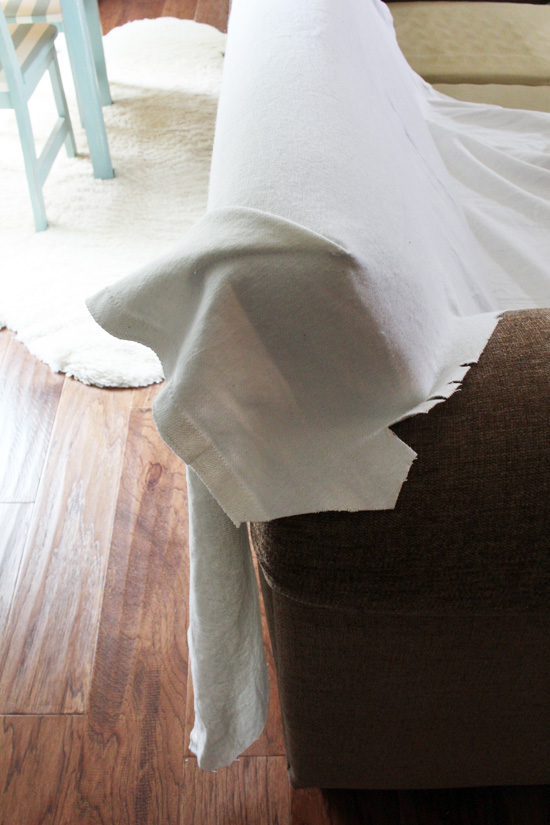
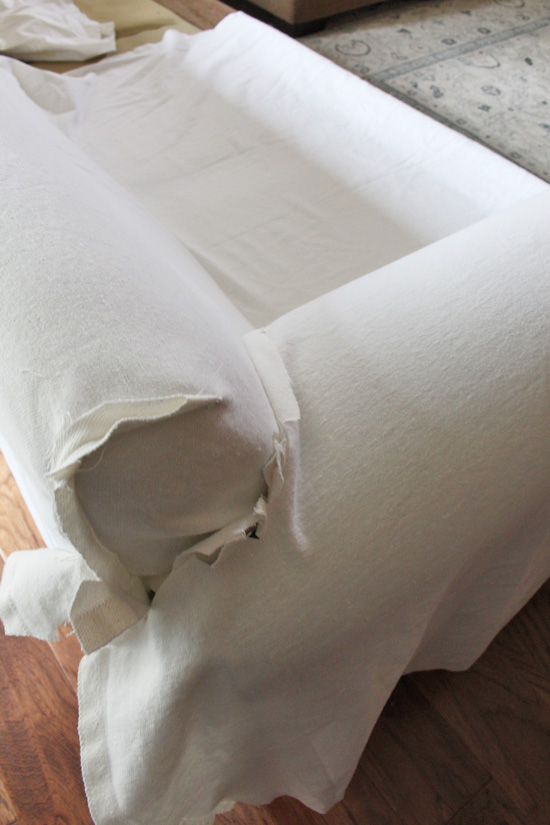
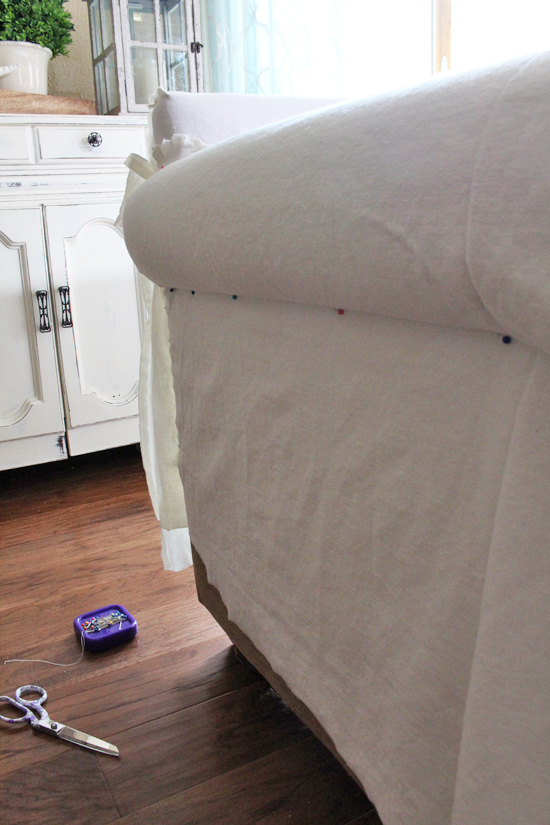
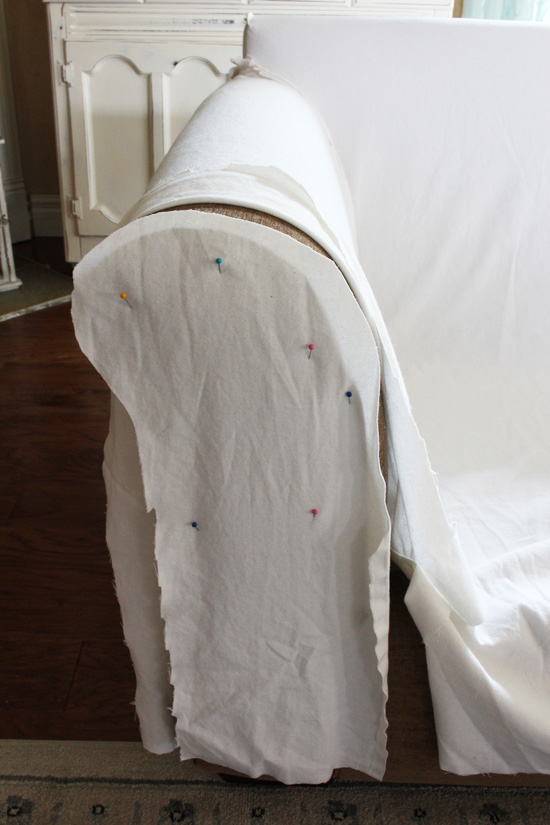
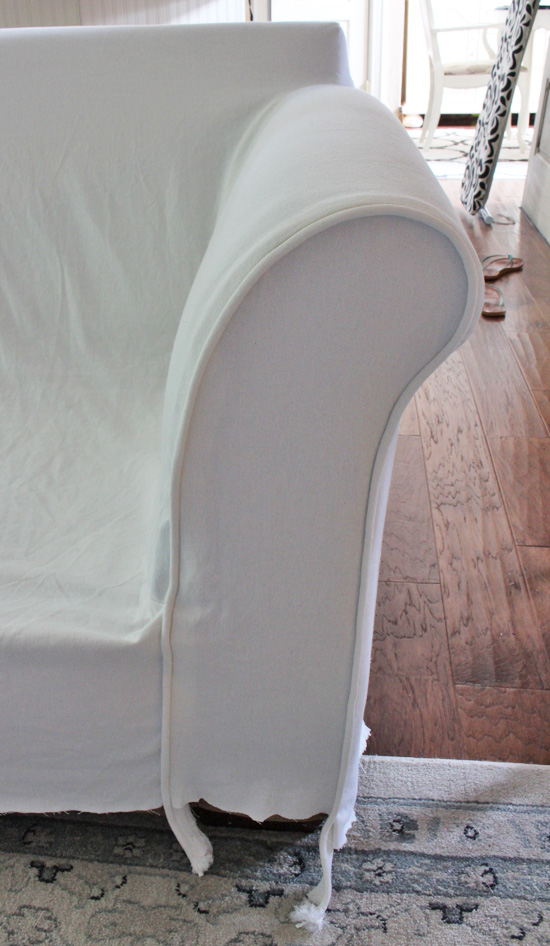
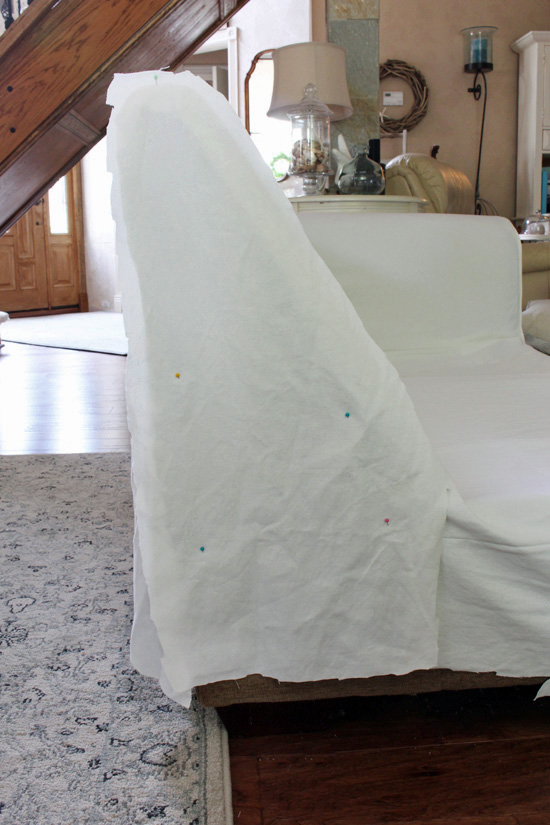
Next I started on the arm by draping fabric from the bottom crease, over the rolled arm, and down to a few inches from the floor.
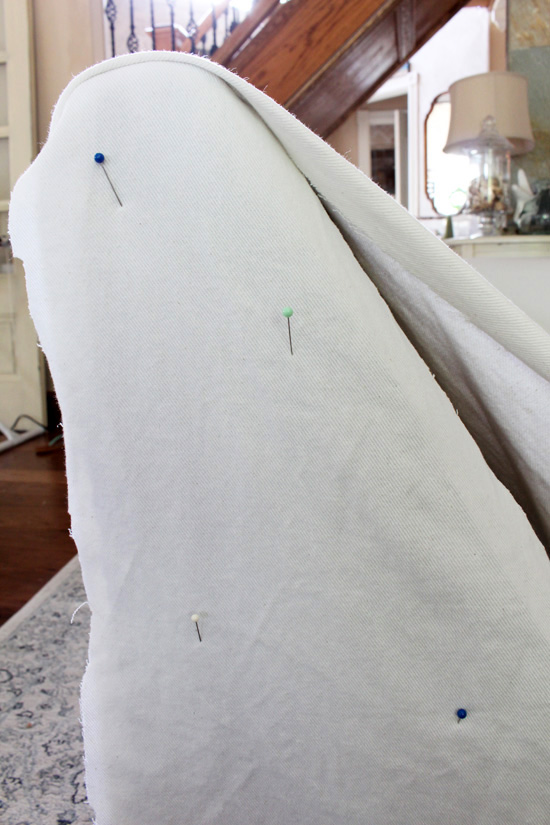
I trimmed the excess and pinned on the topside of the arm, starting in the back…
And working my way to the front:
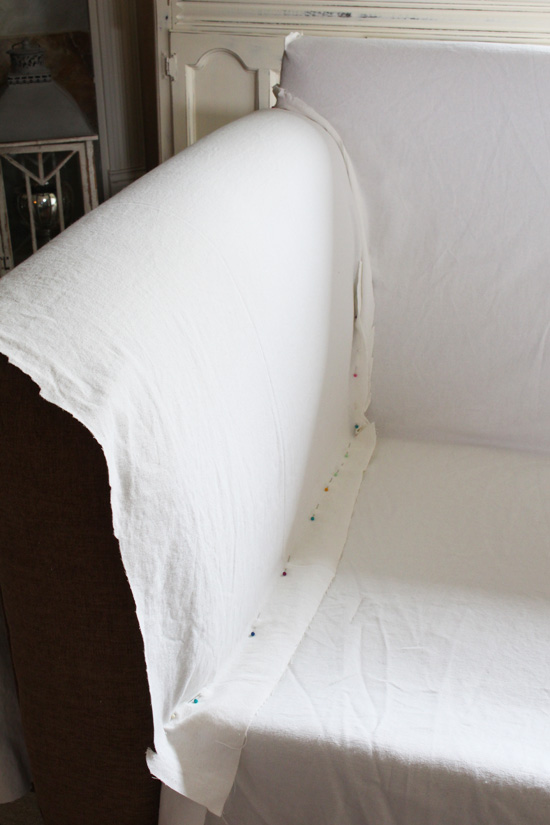
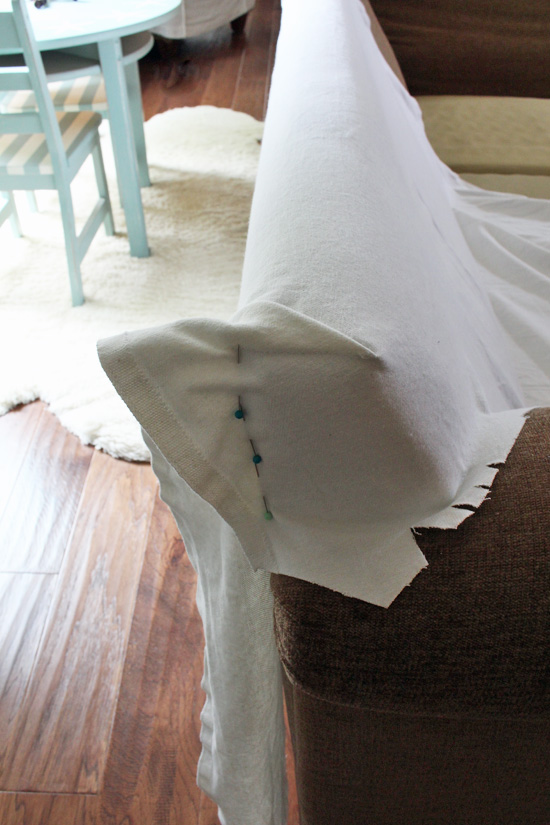
Before working my way down the back, I anchored the fabric in place with pins on the portion below the arm:
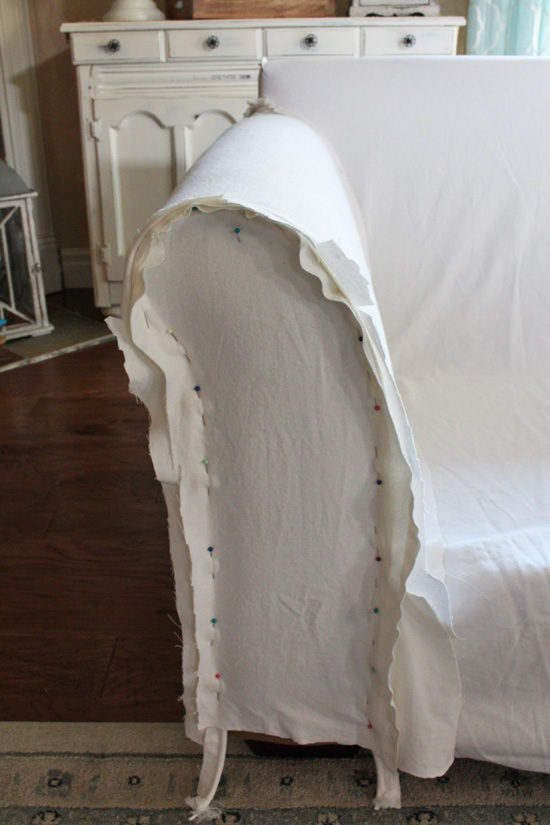
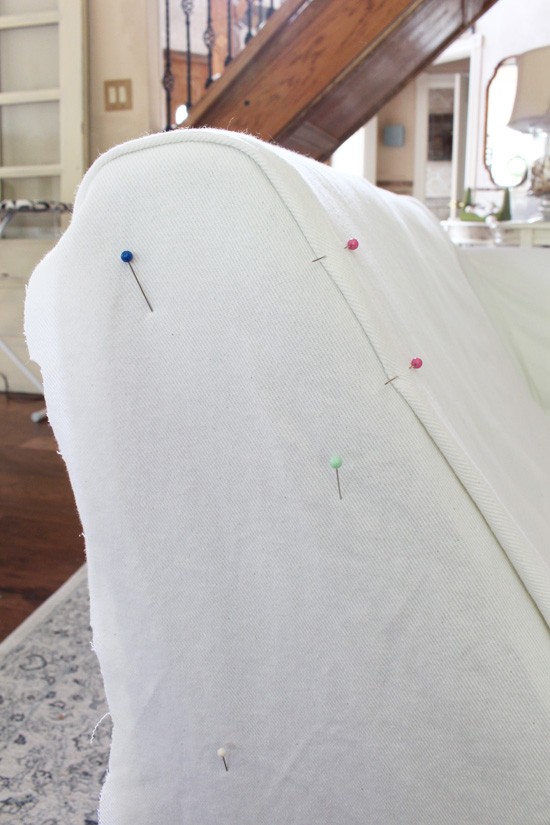
Then I pinned the back of the rolled arm, making three gathers in the rounded portion for a smooth fit:
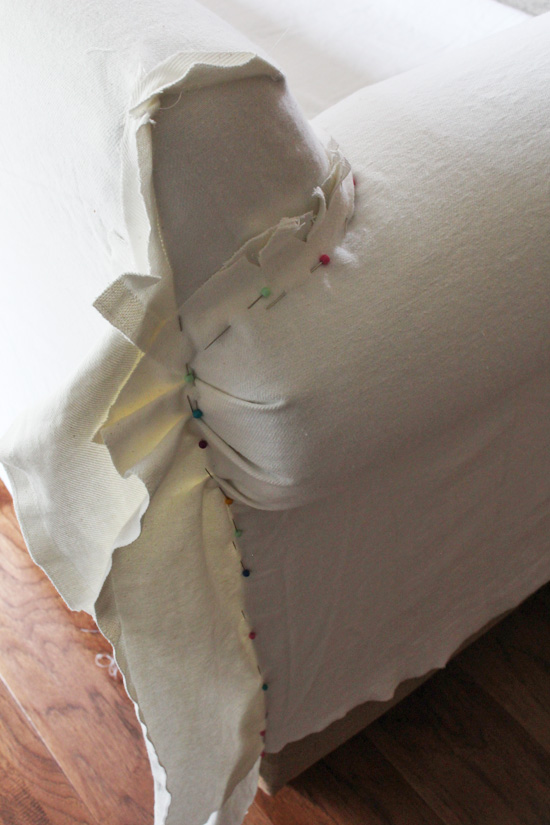
Then I removed the anchor pins under the rolled arm and sewed, starting at the same point where I started pinning. Then I sewed down the back corner last, and did a test fit:
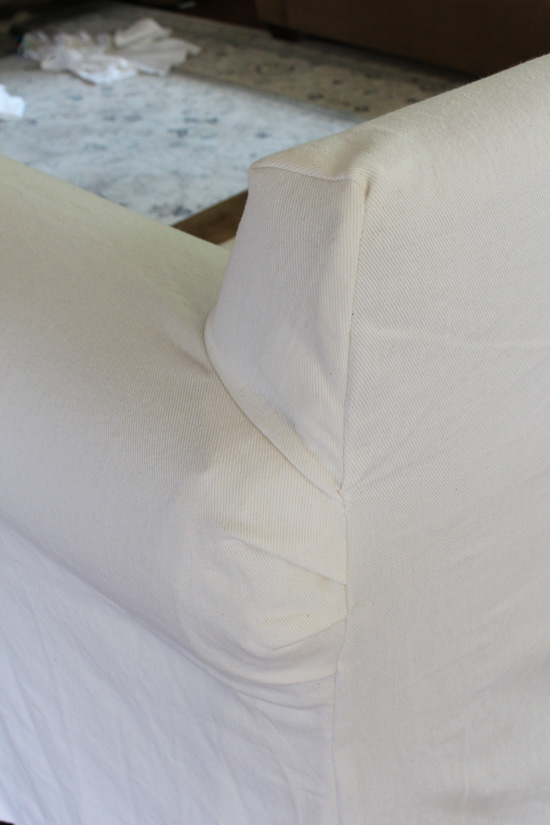
Looking pretty good.
If at any point, it doesn’t look good or is puckering funny somewhere, just unstitch with your seam ripper and adjust.
If you were creating a slip cover with a rolled arm on either end of the same piece like a regular sofa, you would likely need a zipper down the backside to help get it on and off easily. My covers have a rolled arm only on one side of each cover, so it was not necessary.
After a successful test fit, I put the slipcover back on the other piece, and resecured the fabric under the rolled arm:
Before moving forward with the front of the rolled arm, I needed to make a the piping for the outside edge of the rolled arm.
Piping
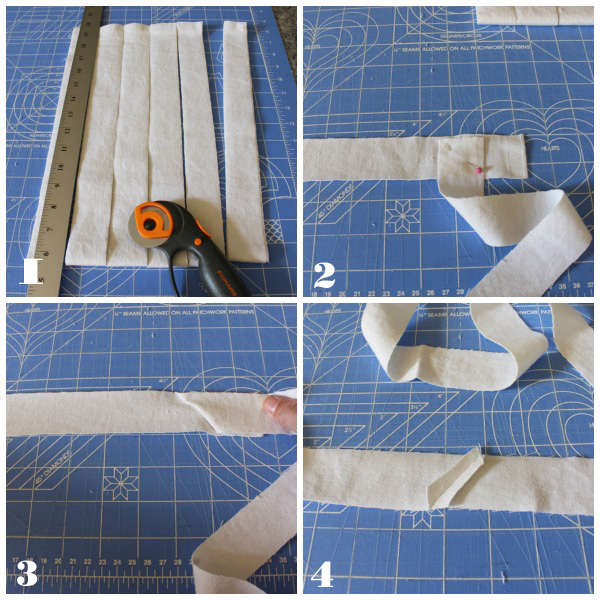
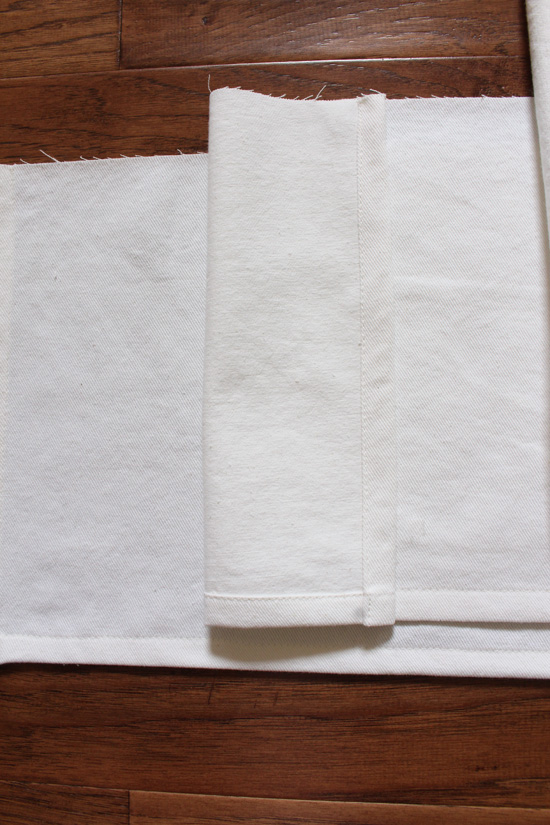
- To create the piping, I folded the fabric in half and then in half again. I used a straight edge and rotary cutter to cut 1 1/2″ strips of fabric. (I did not worry about cutting on the bias.)
- I pinned the pieces together on the diagonal. (This shows less bulk in your piping where the seam is.)
- I checked to see that the pieces would line up correctly before I sewed each seam.
- Then I sewed the seams, and ironed them open.
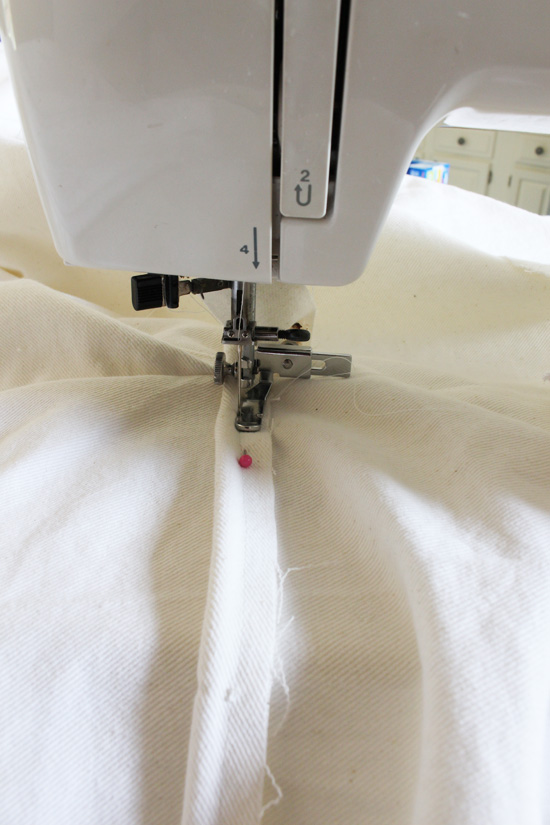
Using my zipper foot, I folded the fabric over my piping and sewed…
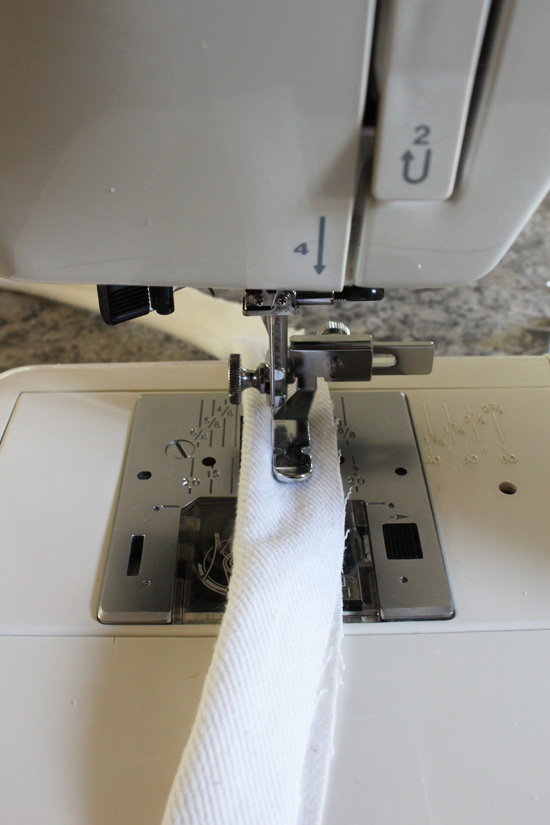
I have made several projects with piping in the past and never used a zipper foot, but for this project, a zipper foot is a necessity.
NOTE**I cut several strips of fabric for the piping at this point, but only sewed enough piping for the outer edges of the two rolled arms. You will need to make some for the skirting later also, but I will share a time saving trick for the cushions in that tutorial.
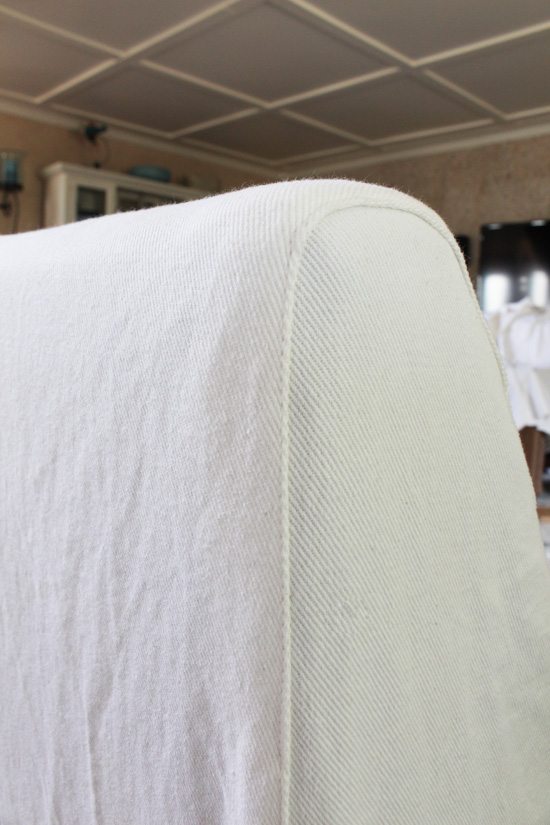
Front of Arm
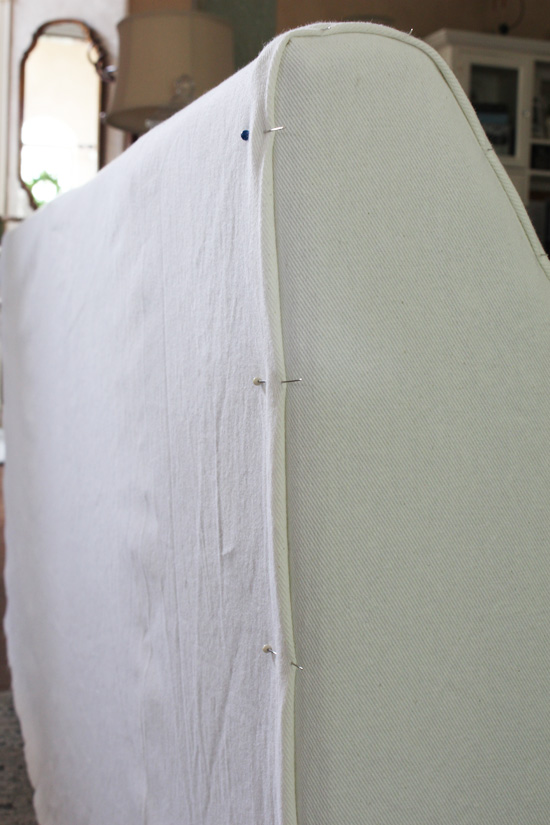
I cut a panel for the front of the arm and pinned it in place to anchor it.
Then I sandwiched the piping in between the top of the arm and the top of the arm front:

I pinned all the way around…
Then removed and sewed…
I trimmed the excess fabric and test fit it:
Perfect!
Add Width
As you can see below I still needed to add fabric to the left side…

I just cut a piece to fit front to back, sewed it to the other piece with the arm complete, and ironed my seams flat. (No need to seal these edges since I used the factory edge. I would zig zag them otherwise.) Then I trimmed the edges of the end like so:
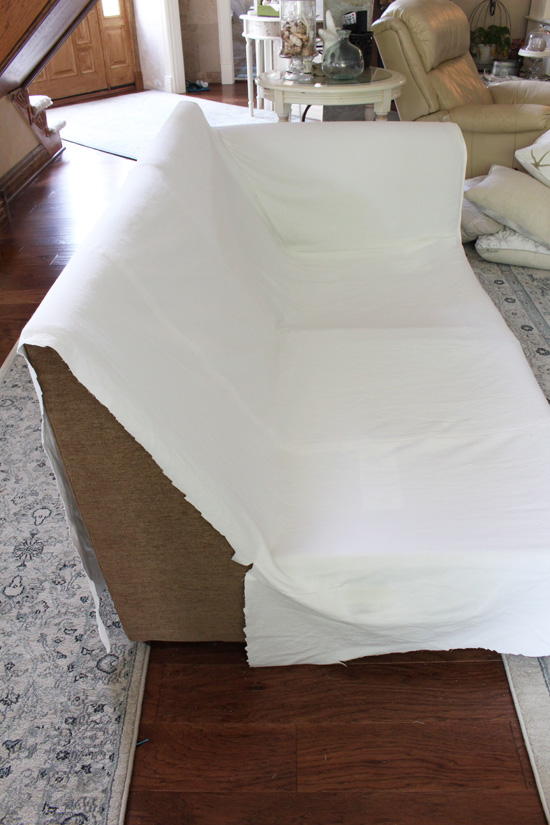
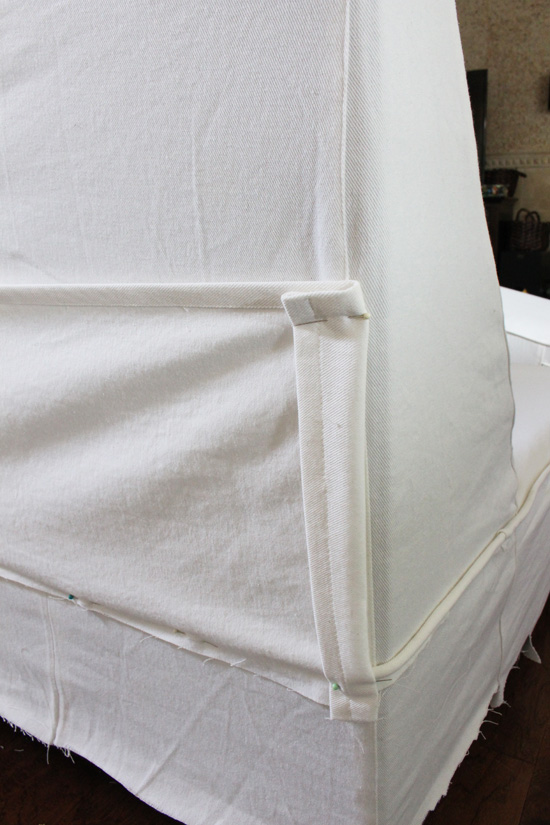
Figure out Weird Sectional End
What better way to put it, right? Those ends are weird and you cannot simply turn them inside out and pin this time. No worries, I figured this part out for you!
Keeping the slipcover right-side-out this time, I started by working on the front corner, trimming the excess fabric:
Here’s how I worked this front corner:
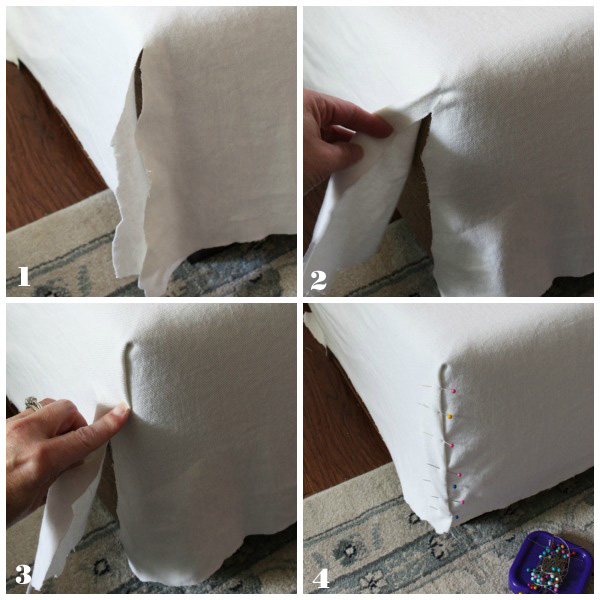 I then moved on to the side panel. I cut a piece to fit and anchored it in place with pins:
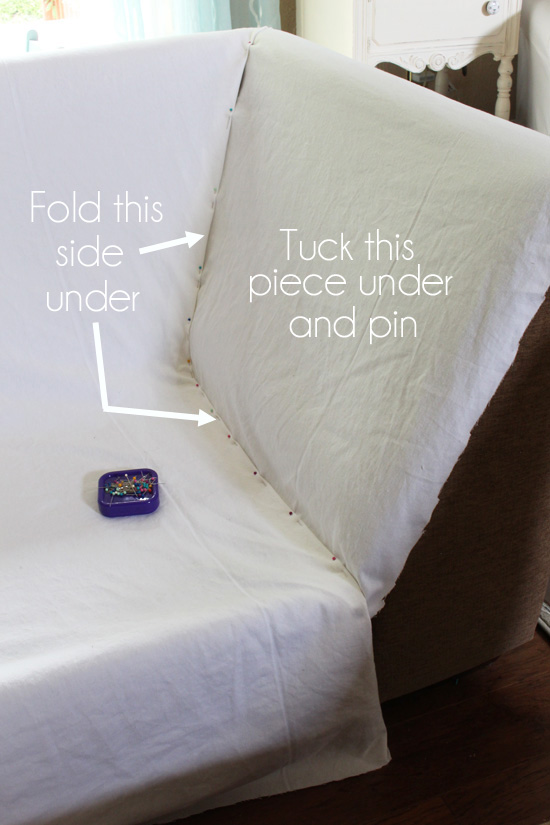
Then I folded the top seam under and tucked the top of the front panel under it:
Then I pinned it in place all the way around:
And sewed that seam very close to the edge:
To look like this:
Looks pretty good! I sewed that front bottom corner the same way.
For the cover on the larger “sofa” piece, I followed the same directions except I sewed two pieces together first so I could center the seam down the back.
The end of this piece had this weird corner. I started with the rolled arm at the opposite end and then worked my way to this corner. These pieces are right-side out, and like the end of the piece I just finished, I folded the one side under and tucked the other piece under that and pinned in place:
I took that all the way down the back. The piece on the right goes over the arm and down the side.
Here is that side completed before adding the skirt: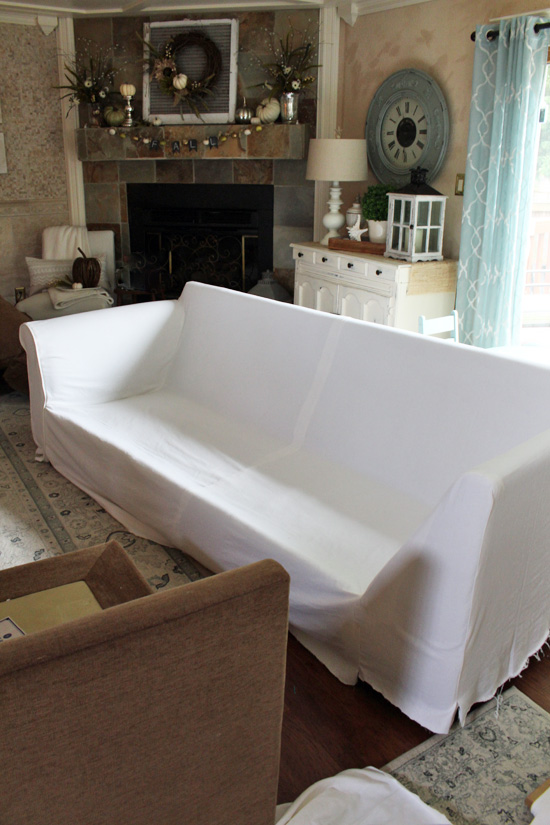
You can also see where I centered the seam on that side.
Here are both pieces before adding the skirt:
Progress!
Add Skirt
Ahhh the home stretch of these base covers…the skirting! If you like (and assuming you kept it long enough all the way around), you could hem it at this point and call it a day. It is really tempting, but I love the tailored look the skirt adds, so here’s how I did it.
I determined that I wanted my skirt to start at the 90 degree angle where the seat meets the front. That measures 11″ from the floor on my sectional, so I lightly marked all the way around with a pencil at 11″.
I made enough piping for the skirting and pinned it where I marked with a pencil earlier:
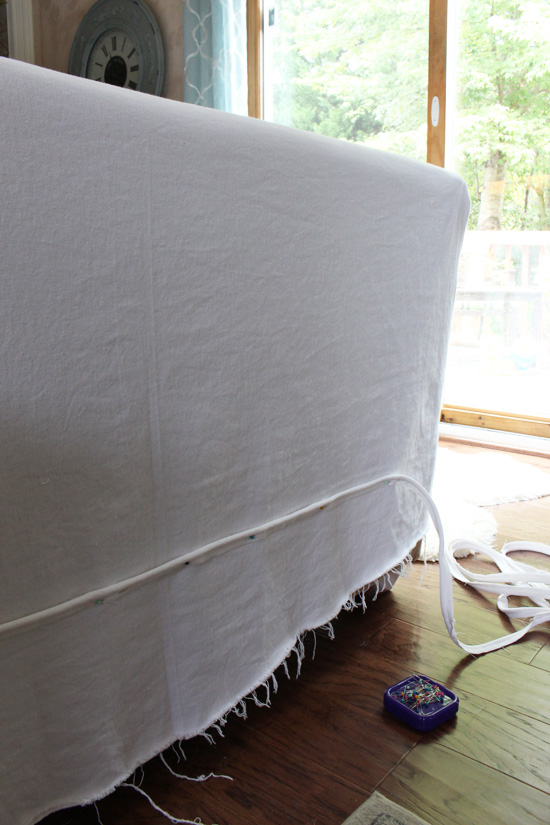
Then I sewed the piping in place:
The skirt will have “pleats” in it, so I chose to have those at the corners, and where the cushions meet.
On the back, I divided the width evenly in three on the “sofa” piece and followed the natural breaks in the sectional pieces on the back of the other cover.
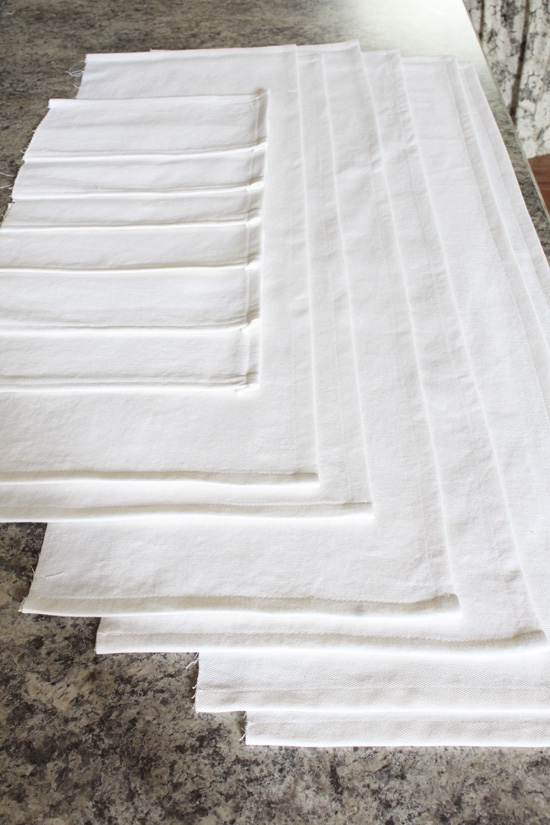
I measured for my pieces and added two inches to the width of each, and added an inch and a half to the length to allow for the hem and seam where it will attach to the piping. I used a rotary cutter to make my cuts. Then I finished the bottom hem of each piece by turning up once and then again for a nice clean seam that will not fray when washed. Then I folded the sides of each piece over the same way and sewed, ironing the edges as I went:
I also created strips to go behind where the skirt panels will meet. These will help create the “pleats”. They are about 6″ wide finished, so I cut them about 8″ wide.
Here all my pieces ready to go:
I ended up marking them with post-its to remember where each piece would go.
Then I started pinning each piece to the skirt just under the piping like so:
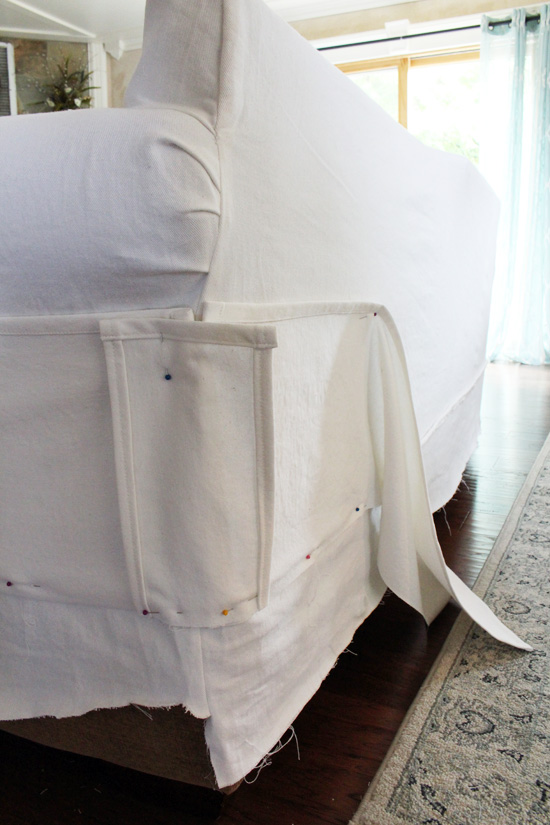
I was over in width a bit on some pieces when I got to the corners. I just folded and pinned them like I show below. Then I unpinned those pieces and ran them through the machine. Easy fix!
After I had all the skirt panels pinned, I sewed them in place.
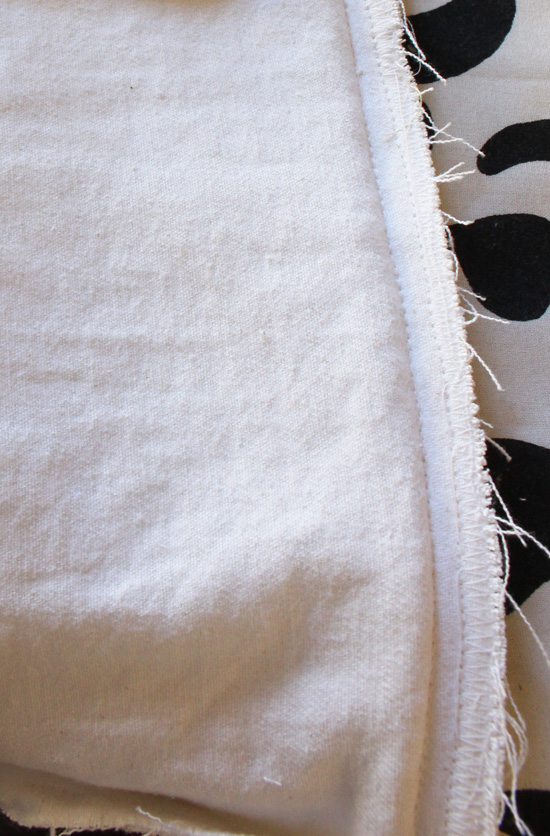
Finish Seams
If you leave raw edges anywhere, they WILL fray in the wash, I promise. Now that the base cover is complete, you will want to trim all of your seams to no bigger than 1/2″. Then go back and seal your seams by setting your zigzag stitch to the widest setting, but the distance between each stitch to the narrowest without taking it to a “stretch” setting.
Mine looked like this: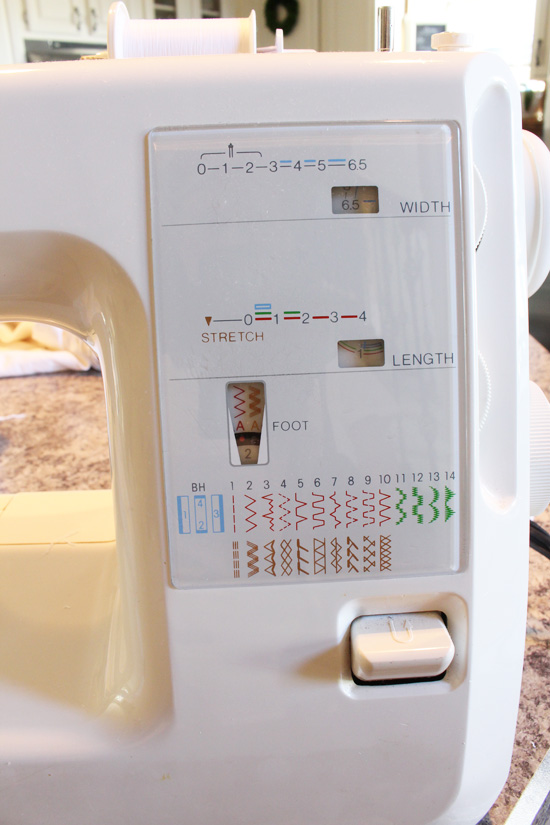
Your seams should look like this:
That wasn’t too bad, right?
Before you know it, you will be able to enjoying your brand new custom slip covers!
The cushions aren’t too bad at all, but they are time-consuming. I’ll be back to share the how-to for those very soon!
UPDATE: See part two here now!
I tried to be as detailed as possible, but if you have any questions at all please feel free to reach out via the Contact Me tab at the top!
XO,
![]()
Don’t Miss a Thing!
If you like what you see, there are several ways to follow along!
Email * Facebook * Instagram * Pinterest * Twitter


")

Kris @ Junk Chic Cottage says
Wow Christy how beautiful and amazing is this slipcover. What a wonderful job you did the sectional if gorgeous with her new slipcover. If you can sew your tutorial is amazing. I am so impressed.
Kris
Christy K. James says
Thanks so much, Kris! It really has made such a difference in my space! Hopefully people will find this tutorial helpful! 🙂
Christina in FL says
Christy, I am SOOO impressed! You created a stunning slipcover and your directions are ah-MAZ-ing! Thank you!!!!
Christy K. James says
Awesome, Christine thank you! I try not to leave a single detail out. 🙂
Christy K. James says
Awesome, Christina thank you! I tried not to leave a single detail out! 🙂
DebraShoppeno5 says
Wonderful post. I will be doing this although I have a couch and loveseat.
Christy K. James says
Thanks, Debra! Hopefully you will still find this helpful! 🙂
Catherine McD says
Christy, you have done a beautiful job with this huge project!!! Your tutorial is excellent, and the detail and photos taken to accomplish this was another huge project in and of itself! I have been sewing for 40 years (since junior high!) and have sewn everything from clothing, window treatments, slipcovers, home furnishings, but have never attempted a project of this scope. You are so very talented and fearless as I’ve mentioned before. Thank you for sharing!!!!
Christy K. James says
Aww thank you, Catherine! Stopping to take photos along the way probably slowed me down just a bit, but I am happy to be able to put this together for anyone that can use it. This is my first sewing project of this magnitude as well, but I’m so glad I went for it! Thanks again for such positive feedback! 🙂
Robin says
That looks amazing!
Christy K. James says
Thank you,Robin! XO
Linda D. says
You’re my hero. You make it look so simple, but the trick here is great fitting skills and a well maintained sewing machine. I rarely pull mine out, saving it for pillow and drape making, so when I attempted slipcovers several years back, the odd angles and oceans of fabric frustrated this novice sewer — especially when the ‘timing’ went off on my machine. In the end I gave up. I’ll do cushions from here to Sunday morning, but my nightmares are made of fitting the base of sectionals! Brava to you! They look fabulous.
Christy K. James says
Aww thanks, Linda! That huge pile of fabric can be very intimidating and making the cuts is daunting as well, so I completely understand how you felt. I tried it take it baby steps at a time. 🙂
tracy leas says
Wow. I would love to this but I am afraid it would end up partially done and in the closet. I am impressed
Christy K. James says
Thanks, Tracy! It does seem like an intimidating project, but if you just take it one small step at a time, I’m sure you could do it too!
Marie from The Interior Frugalista says
I really appreciate you sharing this tutorial with us Christy. I’m pinning it to refer back to when I get the courage to sew a slipcover for my club chair. I have to admit, this scares the you know what out of me!
Christy K. James says
Sure! I am glad to share! I’ve seen you work miracles on furniture…you can SO do this, Marie! XO
Khadija says
Oh my God, you’re fearless!!! 😀 After reading this post I actually think I might be able to save my own sofa by making a slipcover. Yours looks amazing, much better than a store bought one. Congratulations! (I bet you smile every time you see your sectional.)
Christy K. James says
Thanks, Khadija! I really do love my sectional now…it’s no longer the big brown beast!!
victoria says
Dear Christy: I compare you to the men and women of the Renaissance, they did many things and different disciplines and did everything well …. is incredible your ability and how talented you I sincerely admire you.
Thank you for sharing.
Christy K. James says
Thank you so much, Victoria! I am truly humbled by your sweet words! XOXO
jan says
How talented are you!!!! This is such a wonderful, informative tutorial that I might have to try it! Thank you!!!
Christy K. James says
Thank you, Jan! Yes, go for it!! 🙂
Rose says
This is crazy good, thats so cool how it turned out you’re amazing!!
Christy K. James says
Thank you, Rose! I am tickled at how it turned out!! XOXOXO
Colleen says
Wow Christy, just reading your post brought back tremors and sweats of when I also made a slip cover for my couch! Although it turned out beautifully, I might add, not as nice as yours, it was well worth the effort. It also took me probably a week of working long hours to complete the project. When I am complimented on the slipcover, I smile and say “thank you” and leave out the details. It was not difficult, more measuring, pinning, fitting and repeat that was so time consuming. I swore I never would touch a sewing machine again, but enough time has passed that I would do this again. You did a superb job!
Christy K. James says
Thank you, Colleen and oh my goodness, you understand so well then! I certainly had a few of those “what have I gotten myself into??” moments, but I am SO glad I did it and that it is done ha ha. XO
Becky says
Oh wow. I just did a big chair-and-a-half recliner dealy a couple months ago. That right there was on the edge of overwhelming! There were a few times where I was READY TO QUIT. Your work is phenomenal. I decided I was happy with a somewhat “rustic” look, just not sloppy, but yours goes way beyond and well into the “professional” and “beautiful” categories! Next time I lose my mind and cover something I’ll be referring to your posts. Well done!
P.S. I can’t even imagine stopping to take all those pictures! Thank you!
Christy K. James says
A recliner?? I would love to hide my hubby’s recliner…I never thought about covering it! I think it would be very difficult to get a really fitted look for a recliner anyway so I’m sure yours does the job perfectly! XOXOX
Deena says
Great Job! Slip covers are a lot of work. Now people will constantly ask you to slipcover their sofas and chairs. Believe me I know from experience…I tell them no thanks.
Christy K. James says
Thank you, Deena! Yes I’ve already had a couple of requests…a big no thank you from me too ha ha!! XO
Kathryn says
Oh my heck…I bow to you!!!! That was quite the undertaking. Thank you for all the great details. Even though I sew well this would be daunting. Kudos for a terrific job and a fantastic tutorial.
Christy K. James says
Thanks you are so sweet, Kathryn! A big job this was for sure, but so worth the effort! 🙂
Maggie M says
Now I understand why slip covers are so expensive! You did a fantastic job, but this would be too difficult for me and my limited sewing skills.
Christy K. James says
Thanks, Maggie…yes they are a lot of work. I can’t believe there are people that do this for a living!
Iris Nacole says
Oh my gosh, that was amazing! If I could sew a straight line well enough I might have attempted this before getting our new couch, but sadly I’m not gifted in that area. Thank you so much for sharing your talents with us at the Your Home Decor & More Link Party! We hope you link up again!!
Christy K. James says
Thank you, Iris! XO
Ruth Anne says
Wow! Your slipcovers look great! And such a fabulous tutorial! I sewed a slipcover for our living room sofa a number of years ago so I can truly appreciate what it takes to do it! Yours look like they fit perfectly. Hope you have given yourself a big pat on your back for all your labors!
Christy K. James says
Thank you, Ruth Anne! Yes, a LOT of work these slipcovers are, but worth the effort. 🙂
Jennifer D. says
I agree with the others: you are fearless! Such an act of creativity and ingenuity to “make up” (contemplate and figure out) how to do the different ends of a sectional). Your slipcover came out beautifully and it really looks like you sent it out to a professional. Clearly you don’t need to pay anyone to do what you do. You’re an inspiration to me. I’ve wanted and definitely need to make a removable, washable slipcover my sofa. This is such a thorough tutorial; you explain what you’re doing, how you’re doing it and why, and your photos are the most helpful I’ve seen. When I come across something I don’t quite understand it becomes very clear once I scroll down to the photos. Thank you so much for taking the time to teach those of us who don’t believe we have the skills needed, let alone where to start, for such a project. I can’t wait to get my fabric.
One question: I’d like to use a neutral color (pale linen, the color of the cloth canvas drop-cloths you find at hardware/home supply stores, etc.) and I have two dogs who are certain the sofa belongs to them. In your opinion is the denim you used sturdy enough for this type of use? They’re not really rough on it: no tears, holes, etc., mostly hair and a dinginess that develops over time. Thanks again for another great tutorial.
Christy K. James says
Wow, Jennifer…if I could hug you, I would! It is a lot of work to put a tutorial like this together, but to hear that it is helpful makes it so worth it, and I am glad to share so thank you! I would say this fabric is plenty durable enough. It feels like a soft pair of well-worn jeans. Good luck to you and I’d be glad to answer any questions you may have along the way! XO
Stephany says
Christy this is exactly the tutorial I have been hoping for and my sectional is exactly the same style – BONUS! I am so happy I came across your blog. I can’t wait to make a slipcover once the holidays are over. Thank you so much for sharing your wonderful step by step tutorial and expertise.
Christy K. James says
Awesome!! I tried to be thorough with my instructions, but if you have any questions along the way at all, don’t hesitate to ask! What an exciting project to have to look forward to, I love my sectional so much better now! 🙂
Mary Ellis says
What a beautiful job!. You are talented, competent and persistent. Your work is beautifu1 It looks so professional. I appreciate the time you took both to do the BIG project and to make the tutorial. Thank you. What a treasure trove. It was a pleasure to see your pictures and read your wonderful instructions. It is a project that previously seemed undoable to me, but now I would consider doing. Congratulations on your great accomplishment!
Christy K. James says
Thank you so much, Mary! I think it helps tremendously to see it broken down step by step. The most time-consuming part was making the cushion covers, but that was just a lot of repetition. Thanks for taking the time to leave such positive feedback, it is truly appreciated! XO
Pat says
Thank you so much! You are an inspiration.
Christy K. James says
Thank you, Pat! You are so welcome!!
Elizabeth says
Hi Christy! you are an inspiration! Thank you so much for putting this tutorial online and share your hard job with us. Now I am in the urgency to go to buy my fabric for work on my own slipcover. Thank you for your generosity!!!
Christy says
Thanks so much, Elizabeth, for the very sweet comment! My hope is that, after seeing this project broken down step-by-step, it will seem less daunting and actually do-able…because it is! best of luck to you! XO
Jenny says
Hi! Wonderful tutorial. I am wondering if you are able to share how much you spent, total, on this project? I am wanting to compare that to having one made. Thanks so much!
Christy says
Thanks, Jenny! I did give a final cost in part 2 of this tutorial, but I should have added it to the first part as well. I spent around $275 for my cover. That included fabric, zippers, thread, and bobbins. Such a cost-saver to do it yourself for sure! I utilized as many JoAnn coupons as possible as well. Hope this helps!
Christy says
Oh that included cording as well. 🙂
Gaye says
Do you have any suggestions on the type of sewing machine needed to handle this type of sturdy fabric? I’m new to sewing but willing to give it a go if it will turn out as nice as yours did!
Christy says
Hi Gaye! I just used a regular old machine and a standard needle. The white denim is way softer than regular denim. Best of luck!
Samantha says
I just found your tutorial as I am about to recover my brown sectional too!
A couple questions…
1. how did you decide on your fabric? Ive done some research and it looks like there are lots of options. Have you found your fabric to be decent at holding its shape without an insane amount of wrinkles?
2. Did you find that the fabric is thick enough to not see the brown fabric underneath?
Great job!!
Christy says
Hi Samantha! Thank you! The fabric I chose was perfect for the job and I would choose it all over again! It hardly shows wrinkles at all and covered the brown with no problems. Best of luck to you! 🙂
Barbara Whitaker says
I have slipcovered 3 couchs, and a couple of chairs. You did a wonderful job …. and were so informative in your explanation of how to make a slipcover. Great job and although I’ve seen your blog in the years past, I finally signed on … no more stalking!
Christy says
Thank you, Barbara! Making slipcovers can definitely test your patience as I’m sure you know, but wow they are so worth it! Thanks for choosing to follow along with me yay!! Tomorrow’s post is a sewing based one as well, but one that was much more fun. 🙂
bonnie jay says
You are the only one who can do this… except for a professional upholsterer. I would not more tackle my sofa, and it’s only one piece than try to do brain surgery. You are certainly talented.
Christy says
Thank you, Bonnie! I was super intimated to get started on that big sectional actually, but I just took it step by step! XO
Jess says
You, lady, are one hell of a DIYer. I am honestly blown away with your talent and ingenuity.
Christy says
Aww thank you so much, Jess! I appreciate that!! XO