
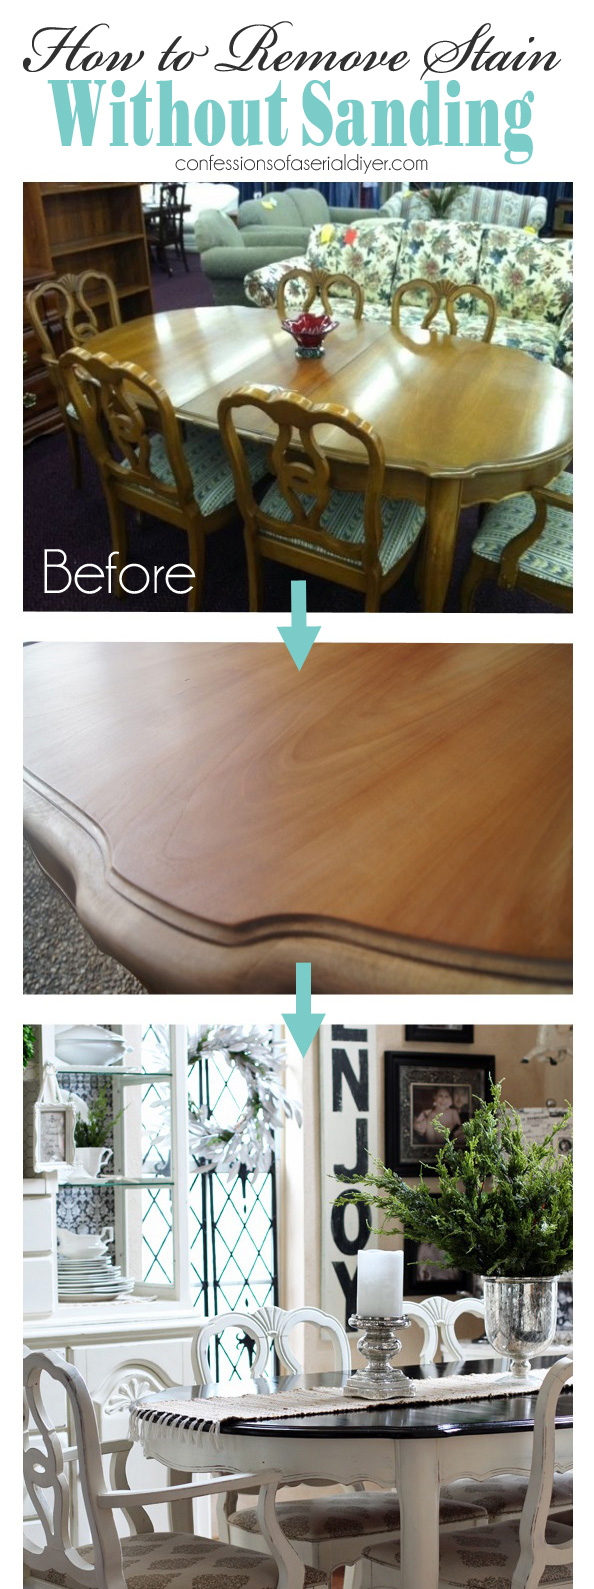
Hi friends! Today I’m sharing how to remove stain without sanding using my own dining room table.
The first thing I usually reach for when removing the stain from a piece of furniture is my handy dandy sander. I thought I’d share another option that is pretty simple, that doesn’t remove any of the original surface through sanding, leaving those pretty curves completely intact.
I’m including a few affiliate links so you can find the products I used. Read my full disclosure here.
Here is a before photo of my dining set at the thrift store:
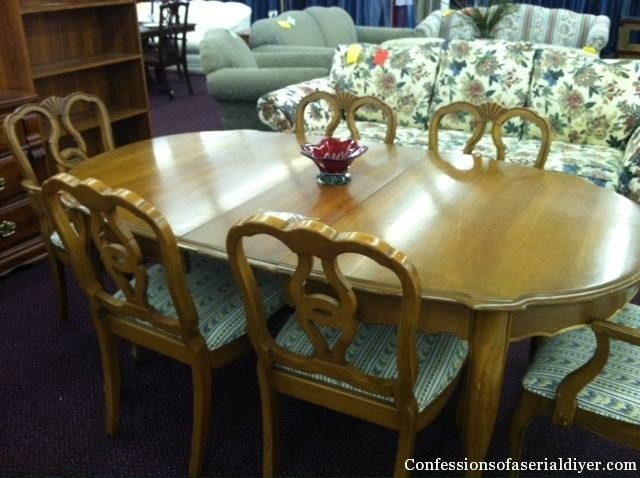
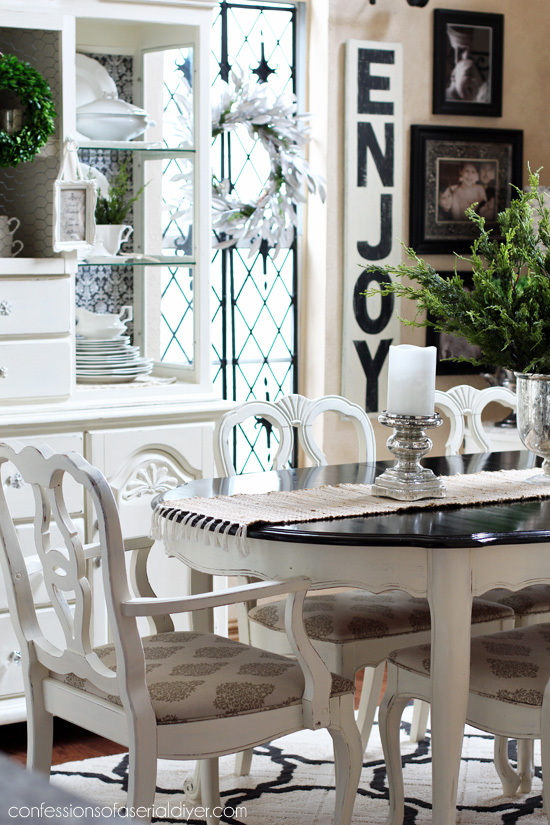
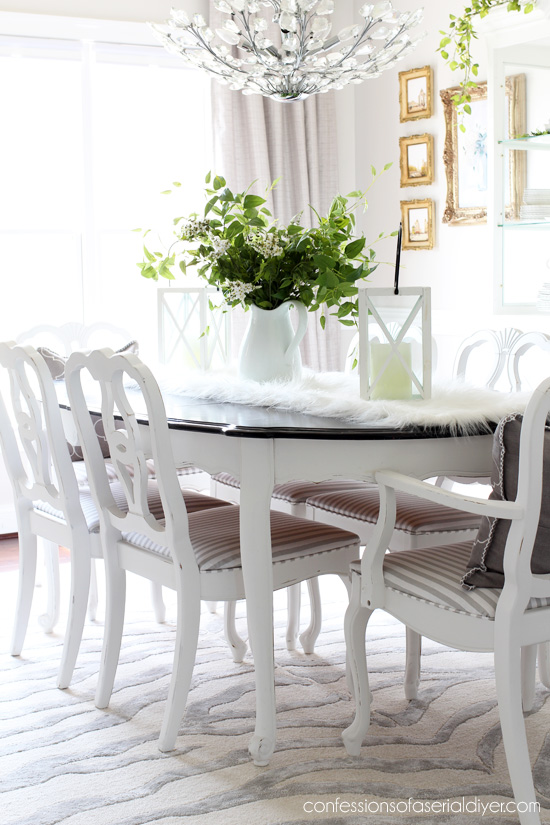
I paid $85 for this beautiful set. This is how it looks today:
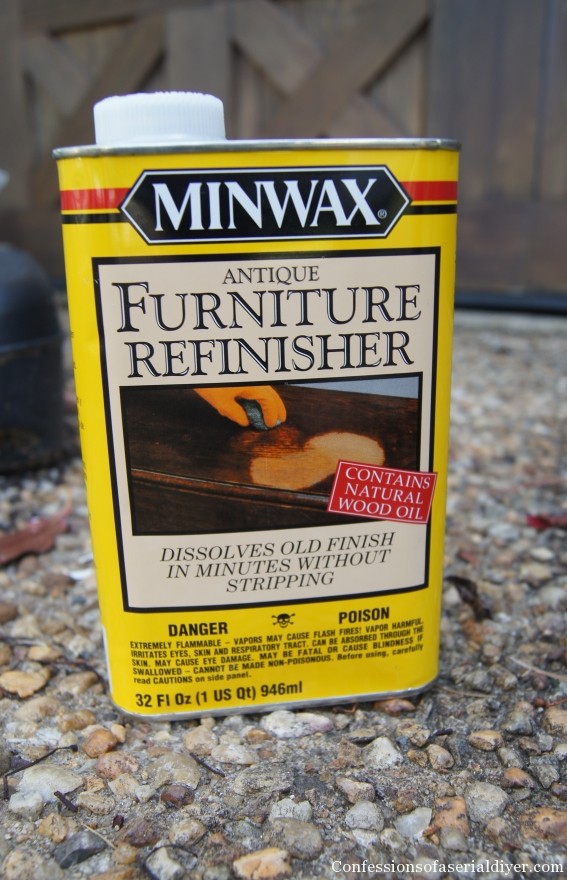
To remove the old stain, I used Antique Furniture Refinisher by Minwax:
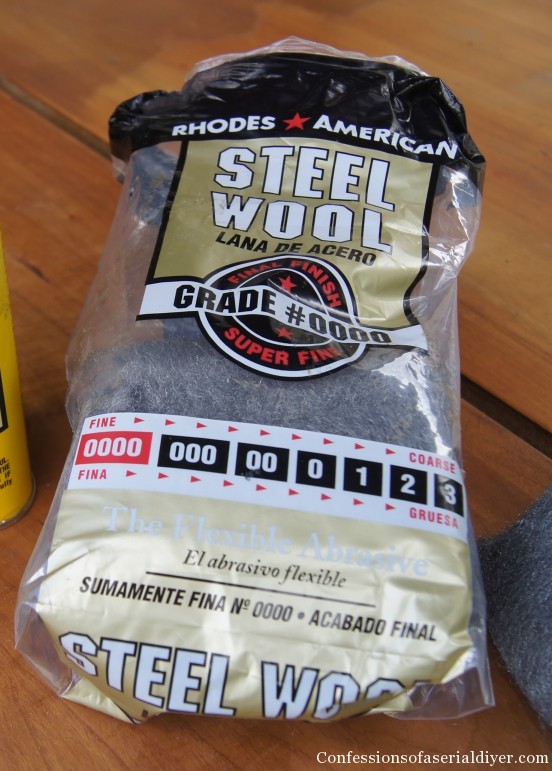
And very fine steel wool…
The refinisher is very stinky, so if you can’t take your project outside, be sure to use in a very well-ventilated area! You’ll also need something to protect your hands.
Here’s a close up of the (not so) beautiful finish before:
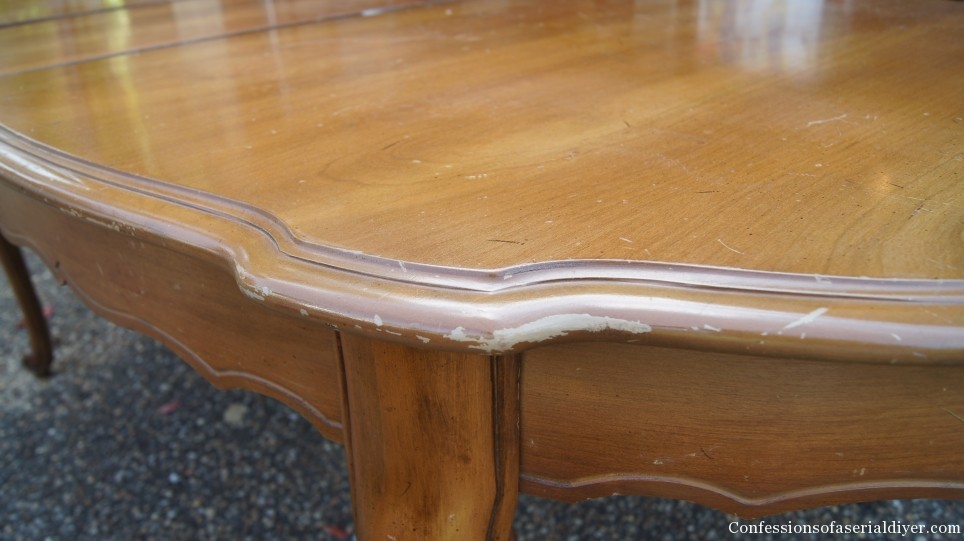
A bit dated.
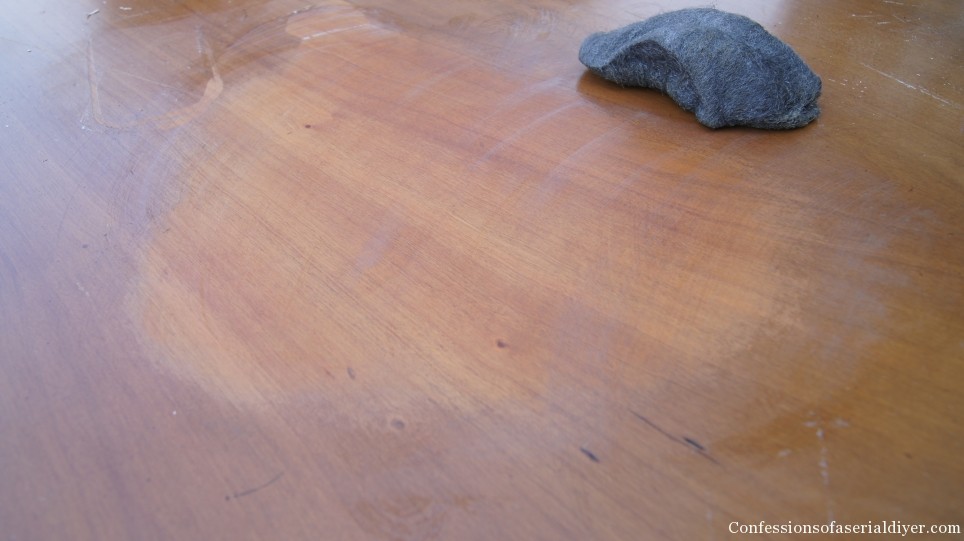
I just poured some refinisher onto my steel wool and rubbed gently in circles:
The stain comes right off. It works best on a new piece of steel wool, so change it out often. I went through almost two bags.
Like my gloves? Ha ha…I can never find them small enough to be functional anyway.
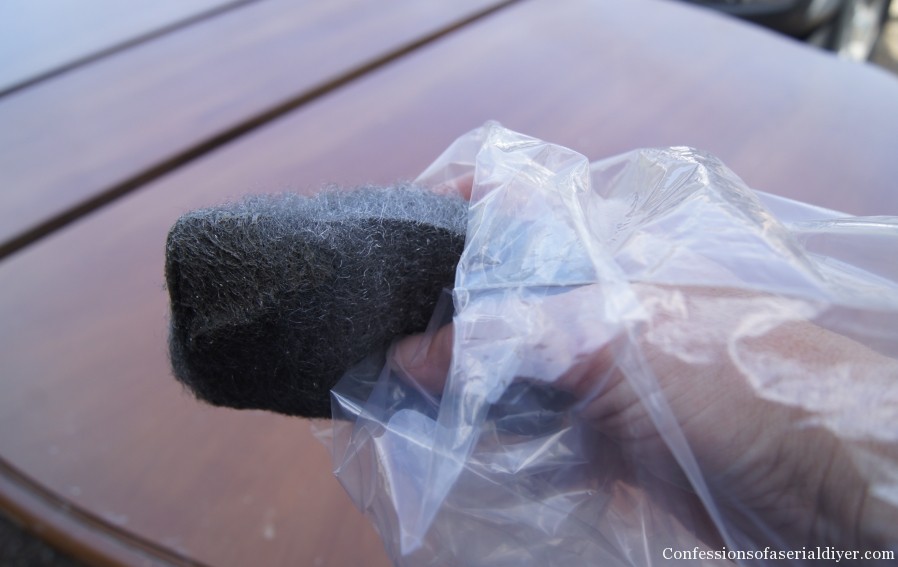
(Attention Home Improvement stores: It’s not just large men who are in need of disposable gloves!)
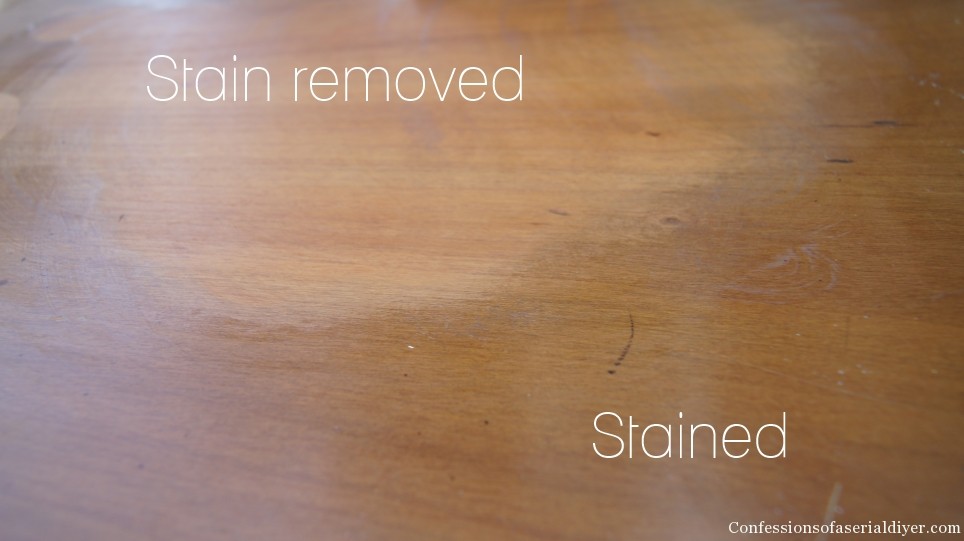
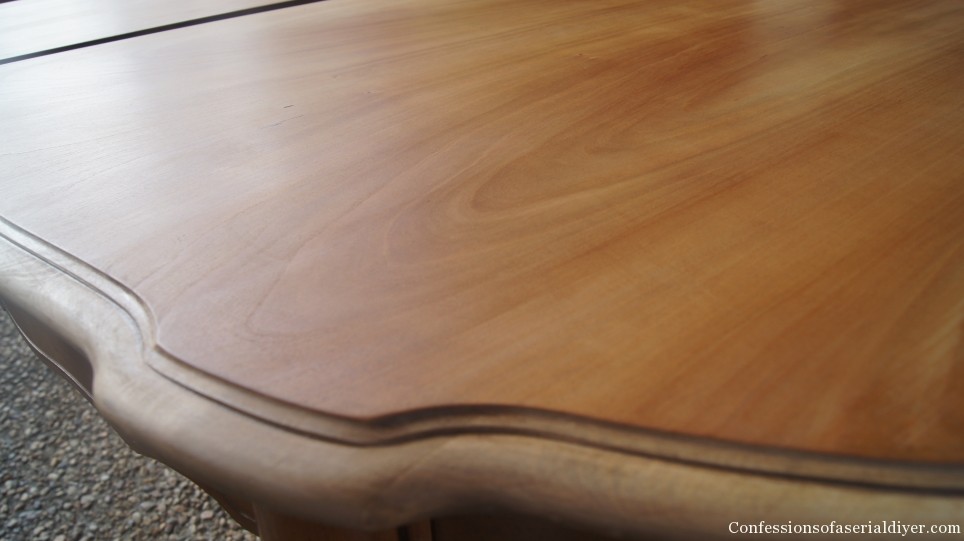
You can see a big difference here:
It takes a little bit of elbow grease in some stubborn areas, but just keeping switching out for a fresh piece of steel wool.
The results are amazing:
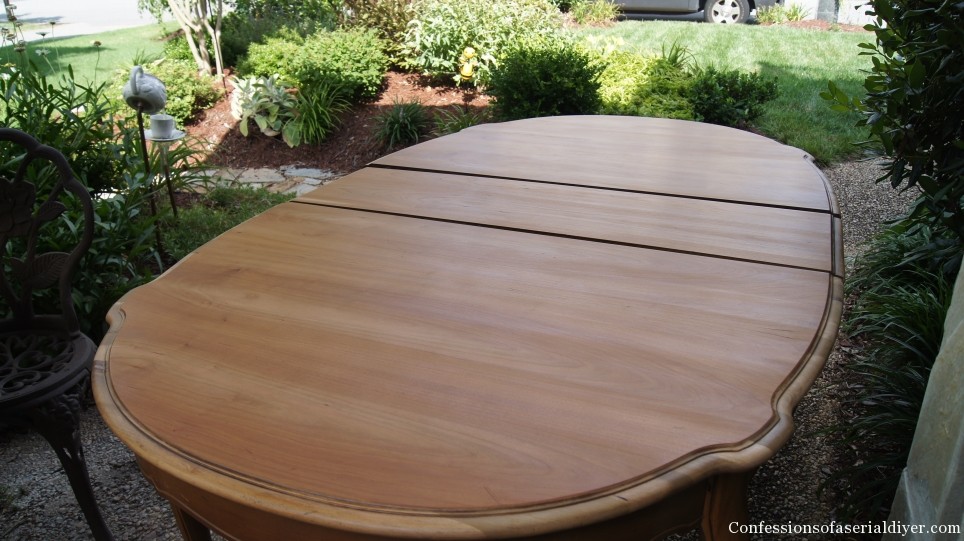
The wood is so beautiful. I love that the integrity of the wood remained in tact. Sanding could have altered those beautiful curves.
I love the product I used to remove the stain.
I used Minwax Polyshades to restain, but I brushed it on way too liberally, so all of the stain was not absorbed into the wood which did not allow the beautiful wood grain to show through. Next time I would probably apply with a cloth or in thinner coats, and I would use wood conditioner prior to staining for a more even application. I’m still happy with the end result though.

It’s a long way from where it started!
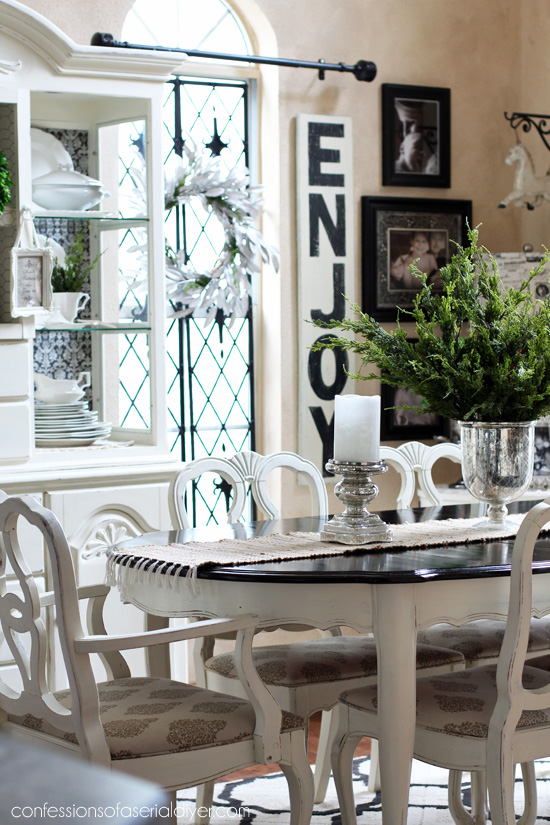
Update: The body of the table and chairs were painted white when we moved to our new house, but the top is still going strong!
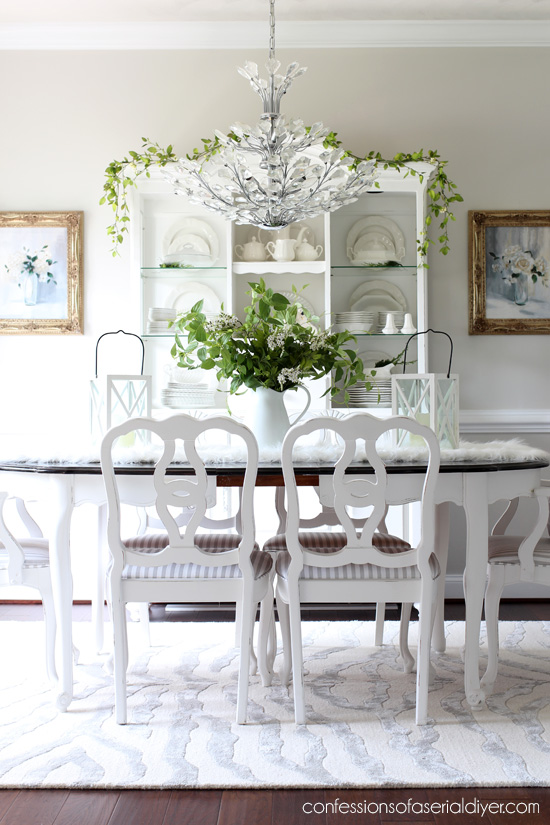
See more of our new dining room HERE.
Here’s another post you might enjoy:

How to Add Piping to Dining Room Chairs: SEW and NO-SEW Methods
As always, thanks so much for stopping by! I love when you visit!
XOXO,
![]()
Don’t Miss a Thing!
If you like what you see, there are several ways to follow along!
Email * Facebook * Pinterest * Twitter * Instagram


Andi says
I’m super-glad you know how to do this because I happen to have an entire table AND chairs set that needs to be completely stripped. And you’re just the stripper to do it. Yep.
-andi
Christy K. James says
I use to be a stripper… now I paint over things 🙂
Nancy @ Artsy Chicks Rule says
I truly LOVE the shade of the top of your table! It’s gorgeous. But I understand! I sure wish I had known about that product (the refinisher) I sanded my dining table down a couple years ago and stained it with Dark Walnut (and yep, the wood conditioner does help a bunch). For that and a few other pieces I’ve stripped (with Citristrip) I’ve used a metal bristle brush around the curves….but it’s a pain! lol This product would be so much better! Thanks for the tip!!! I also use PolyShades but usually on small pieces…but you are right, it doesn’t allow the grain to really show through well. It works well for some pieces but not all. (and really well on a piece of furniture that I just redid…with a particle board top! Who knew? I didn’t, lol but I was determined to have the “wood” look!)
Hope your week is going well! It’s finally warm! Hope it stays. 😉
xo
Nancy
Christy K. James says
I’ve seen a couple of pieces you’ve done and they look amazing. I think it would be great to freshen up a piece that you didn’t want to strip all the way down. I am happy with my table, just disappointed that there’s no sign of the wood grain beneath. You’ll see when you come over! 🙂 I’m so happy to feel warmth when I open my door instead of an arctic blast!
Katie Shelton says
Nancy, do you have a picture of your table redo? I am working on a table right now that is some type of compressed wood with something laid over it and I am trying to stain it dark like Christy’s table. I want it to appear to be wood and I am considering using the polyshades over paint.
Christy K. James says
Not sure if Nancy will get this comment, but here is a link to that post: http://www.artsychicksrule.com/2012/11/china-cabinet-and-dining-table-re-new.html Her dining room table is beautiful! And She did not use the same espresso that I did. I thought you were referring to a table she had in her entry way. 🙂 Good luck! Feel free to share pics if you like when you’re done. 🙂
Katie Shelton says
Thanks again! I will try to post pics when I get finished. 🙂
JoAnn @ SweetPepperRose says
Boy, that’s a pretty table set – what an awesome price!! I need to come your way to shop!! I like the dark top with white. It strikes a nice balance. And I could have SO used this method about a month ago… I think. The table I bought had some deep bad spots so not sanding wasn’t really an option. But I’ll know next time 😉 as always thanks so much for sharing your knowledge.
Christy K. James says
Thanks, JoAnn! I was cleaning out my old photos and came across these of the stain removal process and realized I had never shared this wonderful product! Maybe it will come in handy in the future. Hope you had a wonderful Easter 🙂
Ellen, the Bluestocking Belle says
This is great information! I need to tackle my kitchen table sometime in the next year (I hope), and I’m pinning this post so I can use all your tips. Your table and chairs turned out to be just gorgeous. I do see what you mean about the stain and poly product, though. In a few years, you can redo the table top! 😉
Christy K. James says
Thanks, Ellen! I was really bummed about not being able to see that beautiful wood grain, but it still turned out pretty and you’re right, I can always redo it 🙂
Cindy Eikenberg says
Christy, thanks for this wonderful tip – and I do the love the thinking-on-the-fly with the gloves! I’ve got some definite stains on furniture, so I’d better stock up on plastic bags and get to it! 🙂 Pinning – have a happy Wednesday!
Christy K. James says
Ha ha…I was all set to get started and realized my box of plastic gloves was empty! The bags worked great in a pinch. Hope you are enjoying the Spring weather that decided to come back for a visit 🙂
June G. says
Thanks Christy, for the tip on a product that is “new” to most of us! I’ll be picking some up to have on hand for a project like yours. Glad your warming up back there….I fully expected you at more door step since I heard you were having another cold wave! 🙂 Well in the 80’s already here in CA! But hoping for a little rain this week! Have a great day!
Christy K. James says
Oh yes, we had perfect Spring weather today! It was mid to upper sixties and sunny! 🙂
Wendi @ H2OBungalow says
Christy..Wow! I did not know that about the stripping product! Your table came out beautiful. Your work is beautiful, love the chairs!
Christy K. James says
Thanks so much, Wendi! 🙂
Emily says
Thank you so much for sharing! I know that I’ll need this tip one day, so I’ll surely be pinning! Your table looks great!!
Christy K. James says
Thanks, Emily 🙂
JP says
Such a beautful job, Christy…it looks so perfect in your home. I’m curious to know how long it took you to complete it with all those chairs!
JP
Christy K. James says
Thanks, JP! I vowed never to pant another dining table and chairs ever again ha ha. It was a lot of work, maybe four or five days?
Krista @thehappyhousie says
Thanks for the great tip Christy- I pinned it to remember it… the table did turn out so beautifully!!! Like a whole new piece:)
Christy K. James says
Thanks, Krista! 🙂
Cindy@DIYbeautify says
Very timely post Christy!! I’m hoping to redo the top of my dining table as soon as the rain stops, lol! I’ve already painted the apron and the legs of my table so I’m a little worried about the product dripping when I do the lip of the tabletop. Did you have that problem? I’m assuming it’s a liquid rather than a thicker product. Also…I have some gouges in my table. Would you recommend I sand those after I remove the stain or before? Thanks so much!!!!
Christy K. James says
Well this post came just in time! This product is a liquid, but I think you should be okay as far as drips. I would remove the stain first and see what the bare wood looks like. If you are staining your table dark, you may not notice the gouges after staining, or I wonder if you could fill them in with wood filler before restaining instead of sanding? Just a thought. Good luck. Can’t wait for you to share it 🙂
Christine says
Less work, no flesh-eating, stinky chemicals, or space suit safety gear: Citristrip.
Put that stuff on like you’re frosting a cake. I press cut up plastic grocery bags onto it to hold the stripper against the wood. Leave it alone (That’s the very hardest part) for several hours. I squeegee the lifted goop off into another plastic bag, then wipe it down with [wait for it] water and a plastic scrubbie. For removing stain, I do it outside. For removing paint, I just do it in my living room or master bedroom. It’s that easy. Citristrip sucks the stain right out of the wood. I have done 15 antique doors right down to raw wood. No sanding. I’ve got pictures! Ask me how I have a perfect, invisible matte finish! Anyway, I wanted to offer you another idea that doesn’t involve lung damaging chemicals.
I like your dining room table. You certainly gave it a 2nd life!
Christy K. James says
I never knew you could use Citristrip to remove stain? That’s awesome, thanks for sharing! I just bought some to remove the paint from a little antique side table, but I’ll definitely keep it in mind next time I need to remove the stain from a piece. The product I recommended is super easy to use and no waiting, but it’s nice to know there’s another, less stinky option 🙂
Christine says
It does for me! 🙂 Keep in mind it does behave differently with every finish it encounters. So far, though, I’ve used one coat for paint (leaving it overnight or while I’m at work) then a 2nd coat for stain. Sometimes if the stuff is pressed down to the wood, it’ll start removing the stain, too. IOW, just two coats at the most for me. The most difficult thing is not fussing with it!
The thing is, believe a tiny blurb on their web site and neutralize or wipe down your piece with water and the scrubbie. I followed the advice of an almost hysterical Customer Service guy and did Mineral Spriits with one door. OMG. It reliquified he antique stain right back into the wood. It was, magenta. Bright, glowing magenta. I had to put on a 3rd Citristrip layer, wasting time, $$ and product to suck THAT back out of the wood.
But that’s why, when I can, I do the stain removal outside. I can just set something on it’s side and rub or squeegee the goop on to the ground. The water makes a bigger mess than anything I’ve ever stripped! But it’s not painful or nasty.
After it’s really dry, if you have any dust or residue left over, you can brush it off with a soft bristle brush, or lightly sand it off. No biggie. It’s saved me hours and hours of destructive sanding, because I haven’t had to sand a cabinet, door, table, or garden pot now since I discovered this stuff. I do this in my PJs sometimes.
Anyway again, I’d love to hear how it works for you. I’m a true believer!
Christy K. James says
Thanks again, Christine! I might just have to give it a try! 🙂
Rose says
Another question 🙂 The table I have has a bit of water damage at one end. Should I remove the stain and then sand before restaining? Thank you!!
Christy K. James says
Do you plan on removing the stain on the entire table before restaining? If the water damage is only to the finish it may not be necessary to sand as well. If the damage is to the wood, then sanding with 220 grit sandpaper might be a good idea. Sorry for the late reply…just returning form a conference. 🙂
Rose says
Thank you! I’m actually working on it now! I removed the stain with the refinisher and it took the damage right out!
Christy K. James says
Fantastic! 🙂
Rose says
More questions! How did you apply the actual stain? Did you use a paintbrush? And did you let the stain sit a few minutes before wiping it off, or did you immediately wipe off?
Christy K. James says
I used Minwax Polysahdes which I applied with a natural bristle brush. HOWEVER, I was NOT happy with the end result in that the polyshades is a stain and poly in one and sits on top of the wood. This does not allow the beautiful wood grain to show through. I would not recommend the Polyshades unless you just wanted to revamp a small piece, but their regular stain is fantastic. You can wipe it on with a rag in several coats until you get the desired color. I have also used a brush on other pieces, and applied thin coats till I was happy. I know the instructions on stains these days say to let the stain sit and wipe off. I would follow their suggestions since they are the experts. Good luck 🙂
Christy K. James says
Oh and to answer your question…I wouldn’t let it sit too ling before wiping off.
Katie Shelton says
I have just found your blog and I love it! I have found a table that is very similar to this one. The top is very hard with a shellac, lacquer or poly coat on it. I’ve read that the refinisher will not remove poly. Was your table only stained without any clear coat on top or did it have a hard clear coat that this product can eat through? I do not want to sand. I’m planning on doing my table very similar to yours! Thanks for the idea!
Christy K. James says
Thanks, Katie!! If your table is an older one that has not been refinished, it is probably ok to use on it. Mine did have a clear coat on it, but I’m not certain what.
This is from the Minwax site:
Minwax® Antique Furniture Refinisher removes old finishes, including shellac, lacquer and some early forms of varnish.
◾Antique Furniture Refinisher contains natural wood oils that penetrate and condition wood.
◾Antique Furniture Refinisher does not remove paint or polyurethane.
◾It is the perfect product for antique wooden furniture restoration.
As long as it’s not poly, it should be ok. I would test it in a small area first to be sure. Good luck! 🙂
Katie Shelton says
Thanks so much for your quick reply and all the inspiriation on this blog!
Christy K. James says
You are so welcome 😉
Katie Shelton says
Okay, I have another question. 🙂 I read through the comments so I apologize if I missed this but what is the shade of stain (color name) that you are using? Upon further inspection my table top is not solid piece of wood and even though I am dissapointed, I want it to look like yours so I guess it doesn’t matter that there isn’t wood grain. I’ve sanded the table and applied two coats of an expresso colored latex paint. I’ve read elsewhere that you can apply stain over paint to create depth which I need. So I am debating using the stain and poly that you used.
Christy K. James says
Hi Katie, Nancy and I both used Minwax Polyshades in Espresso. If you can’t find that color, Java is close.
Katie Shelton says
Thank you, Christy! I love that you actually respond (very quickly, I might add) to your blog! Yay! 🙂
Christy K. James says
You are so welcome. I aim to please. 🙂 Can’t wait to see pics!
Katie Shelton says
Oh my gosh, I have another question. I went to look at the polyshades and it comes in satin and gloss. Which did you use? I’m so sorry for all the questions!
Christy K. James says
I thought I answered this yesterday so you could have you answer right away, but it’s still on my pending comments, so sorry about that! I used satin.
Katie Shelton says
Thanks! I did get the answer before I went back to home depot and I got the satin. The polyshades was really easy to work with and I like the result so far after the first coat. Now I am kind of apprehensive to steel wool that and apply a second coat as suggested even though I know I have to…lol
Christy K. James says
Oh good! Hope it’s going well!
Moira Stride says
Kristy, It turned out gorgeous! I am about to tackle on my dinning room table with 3 leaves, and 6 chairs. Question and I apologize in advance if you mentioned it somewhere…what color did you use to paint the chairs???
Hope to hear from you!
Moira
Christy K. James says
Hi Moira, Thank you! I used Annie Sloan’s Old White chalk paint for the chairs. Good luck, you have your work cut out for you, but the results will be SO worth it. 🙂
Moira Stride says
Opps, I mispelled your name above. 🙂
Christy,
Thanks for the luck, I think I am going to need it, but there is no stopping me. 🙂 I was watching a tutorial how someone stated that you can just stipple chalk paint on furniture and it dries smooth, is this correct? Or should I just use smooth strokes? I really do appreciate you getting back to me so quickly.
Christy K. James says
I would use smooth strokes for sure! You will see the brush strokes faintly, but I’ve never tried stippling so I don’t know how that will turn out. It seems smooth strokes would be easier anyway? 🙂
Julie Allen says
This looks beautiful and I’ve been trying to get the same look with a dresser that I’m currently working on. I would like some help- I used what I think may be the same Minwax Poly shade of ebony that I was hoping for a deep walnut color. I had used it previously on a small bedside table that worked like a charm. However, on the dresser, on most of the top you can’t see the wood at all. It’s dark almost as if it were paint but crusty. It’s so dark and black. And it doesn’t look as good as your table mind you, for whatever reason. I could try a second coat I guess, but should I just go ahead and paint it black? I keep thinking I should just do that since there are some places where the veneer was sanded down too far (I have a way to fix that but if it’s going to look as it is now I’m not sure I should even mess with that). But if I paint it black, will it look like wood at all, as your table does??
Christy K. James says
Ooh that’s a tough one…I too was disappointed at how opaque the polyshades was on my dining table, but I used Espresso. which is a bit lighter than the ebony. If you paint it, I’m not sure it will look like stain at all if that is the look you are going for. I did paint a dresser top in Annie Sloan’s Graphite that turned out beautifully though. You can see that here: https://www.confessionsofaserialdiyer.com/dresser-with-fabric-inlay/ So you may like the paint instead. Good luck!
Julie Allen says
Thank you for the quick reply and for the suggestion of the graphite. I did go ahead and fix the veneer where it was sanded through and then did a second coat and it looks SO much better. I can tell I’m going to be happy with it. There is one thing. When it is finished drying I’m not sure if it will keep the shine it has now. Did you put a varnish on your finished table? Or what did you use to finish it off?
Again, reading through this gave me some hope and I’m quite inspired actually by your beautiful table. Thank you for your blog post!
Christy K. James says
If you used the polyshades, it already has a poly in it so no need to seal. 🙂
Laura S. says
I love the job you did on the table! It looks great. I do have a curiosity question…you have a curtain rod up over that window with the wreath, but there are no curtains??
Christy says
Thanks, Laura! I hung that rod to hang curtains, but the curtains just did not look right. I took them down, but left the rod in case I find some I do like. Someone once asked me if it was there for decoration only lol. If it appears in photos, I usually tell my readers to just ignore the random curtain rod in the background. 🙂