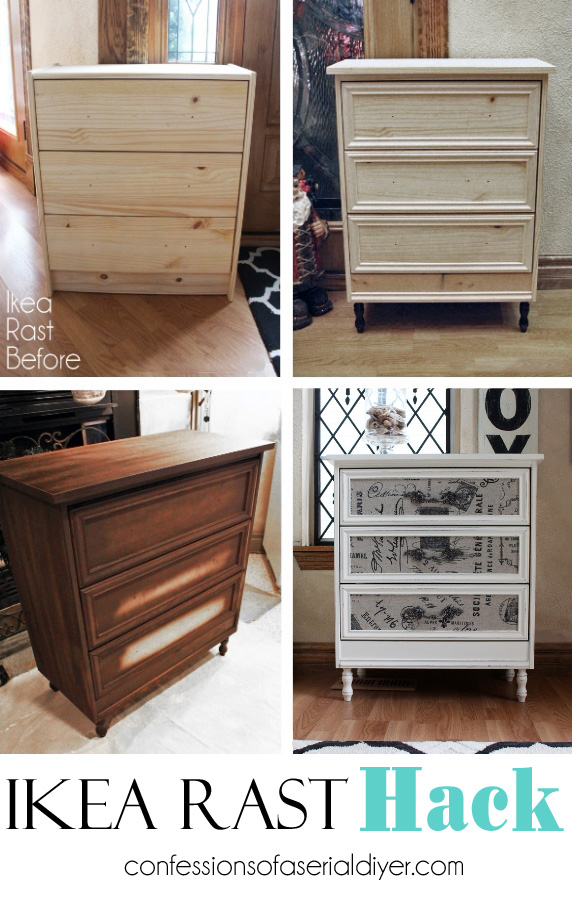
Hello friends! Have I got a fun makeover to share with you today! A couple of months ago I was contacted by marketing for Hickory Hardware, asking if I would be interested in participating in an Ikea Rast Hack challenge. That’s where you take a very simple piece of Ikea furniture and put your own twist on it.
The closest Ikea to me is about three hours away, so I don’t shop there too often. I have seen some amazing hacks out there using their basic furniture pieces though, and I was definitely intrigued. And you know I love a challenge! I was provided the Ikea Rast, hardware of my choice, and a $25 gift card to purchase materials for the challenge.
Ikea’s furniture comes unassembled, so I enlisted the help of my son to put it together for me. I figure if he can build all those lego sets and whatever else with a million and one pieces, he might enjoy this challenge.
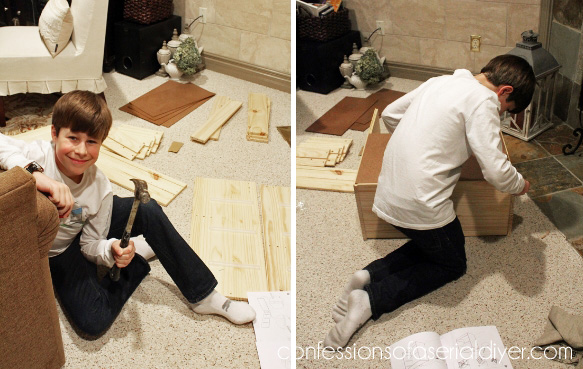
And he sure did! After he was done, he said this is what he wanted for Christmas, more furniture kits to build! I could have bought 10 more of these for what his Xbox cost.
This is where I took over:
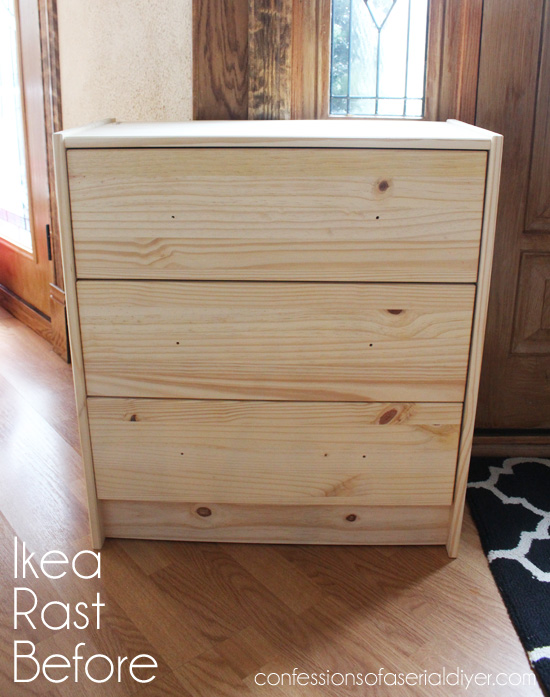
Not very big on style, eh? Now I know why so many of these things get “hacked”. They need it. Although at $34.99, the price makes it very affordable.
Here is how I transformed my Ikea Rast:
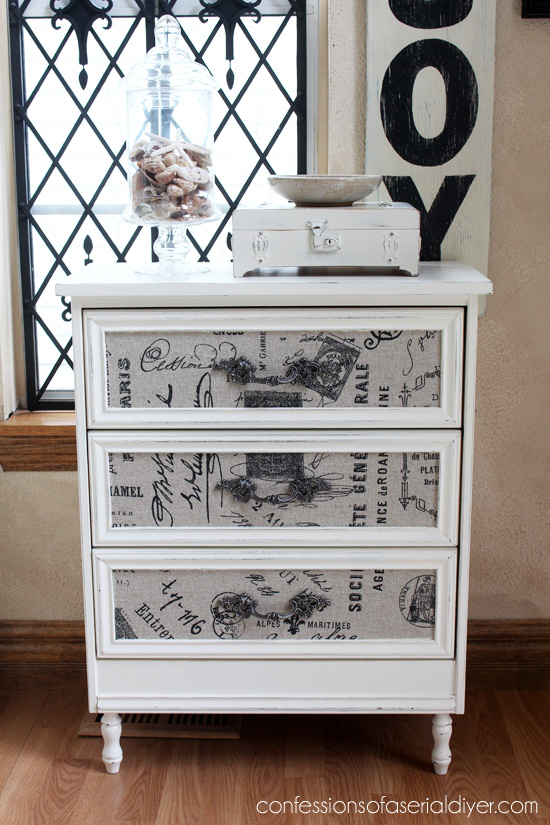
Not so blah now, right??
Here’s a quick breakdown of what I did to this piece:
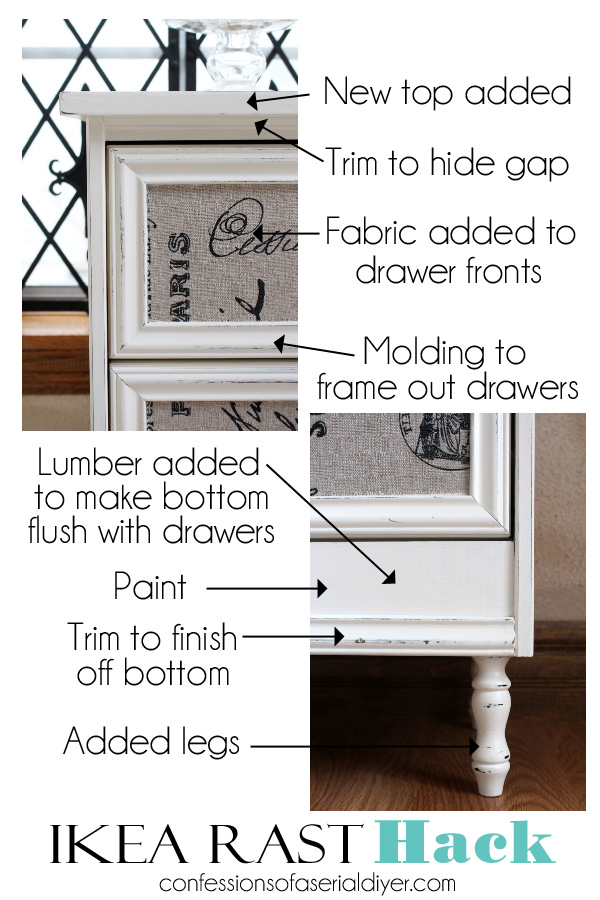
- I started with the addition of a new top, which I built by cutting two pieces of pine to fit the top. This required joining them together with a bit of wood glue to make the top deep enough to fit:
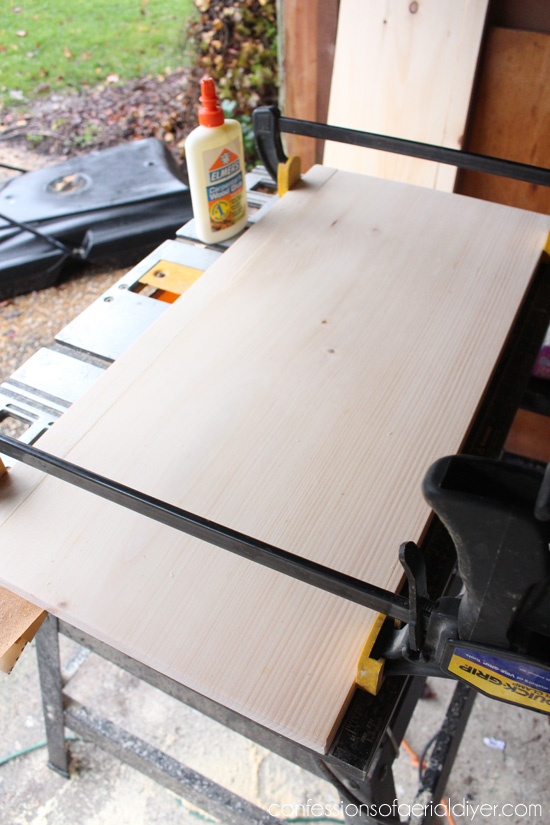
- After the wood glue dried, I sanded the seam to a super smooth finish. I recommend sanding the entire furniture piece before painting or staining.
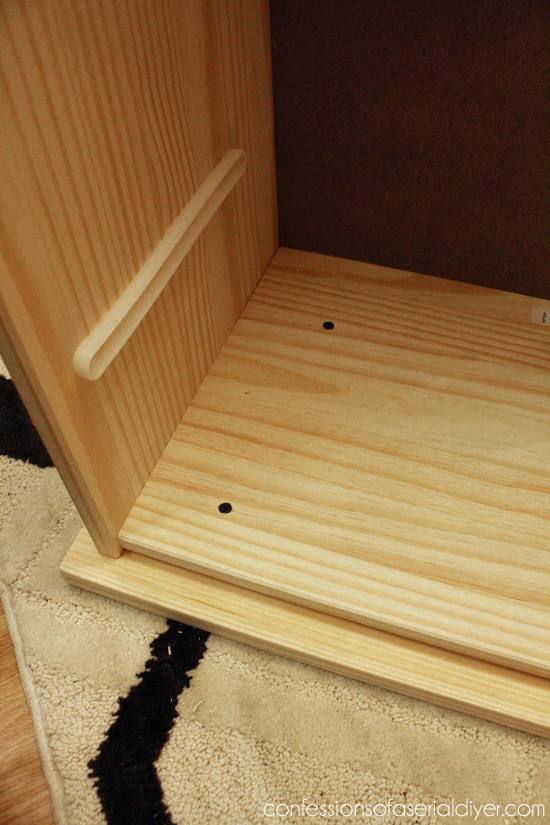
- I added the new top by screwing it in from the underside:
- Next I made a few more alterations:
- There was a slight gap after adding the top, so a small piece of molding was added using wood glue, to cover the gap.
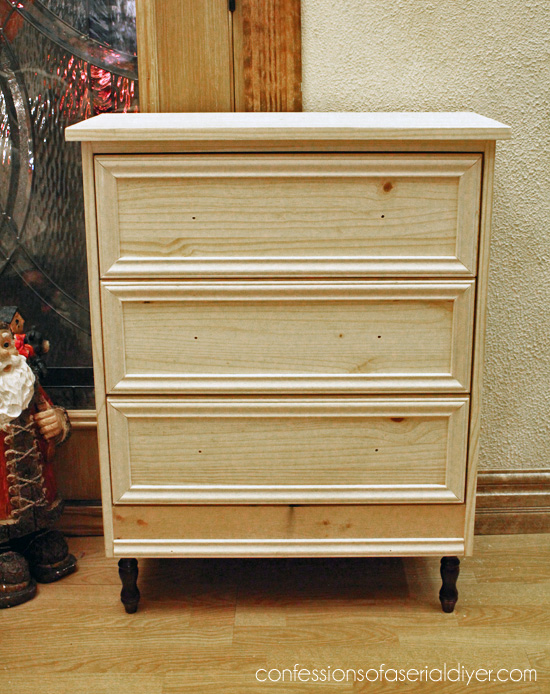
- I cut molding to trim out the drawers, using a miter saw which I added using wood glue.
- I added a scrap piece of wood to the bottom of the front to make it flush with the drawers.
- I trimmed out the bottom with left over drawer molding to finish it off.
- I added screw in legs to the bottom from an old stool I had in the garage. This also required adding a piece of scrap wood to the bottom at the back to screw the legs into.
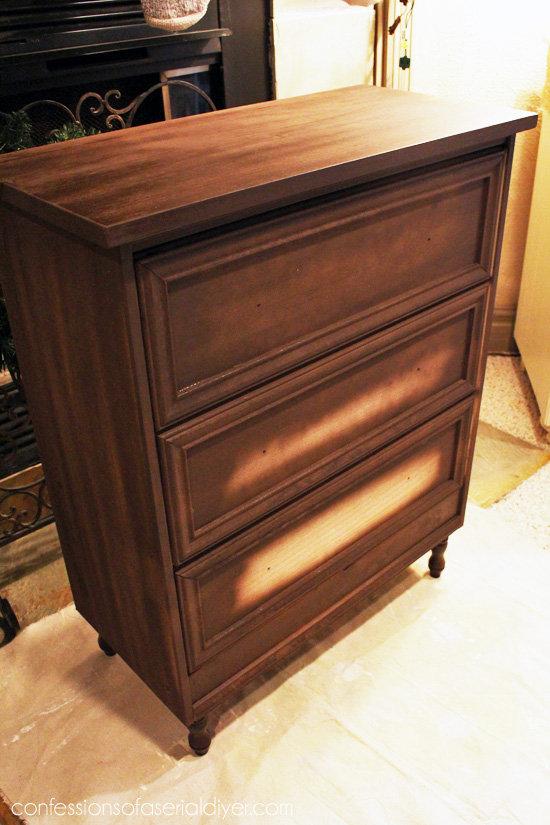
- I spray painted the entire piece brown except the drawer fronts, so the brown would show through just like stained wood, when I lightly sanded later:
- I painted the entire piece with leftover satin latex paint from my kitchen makeover.
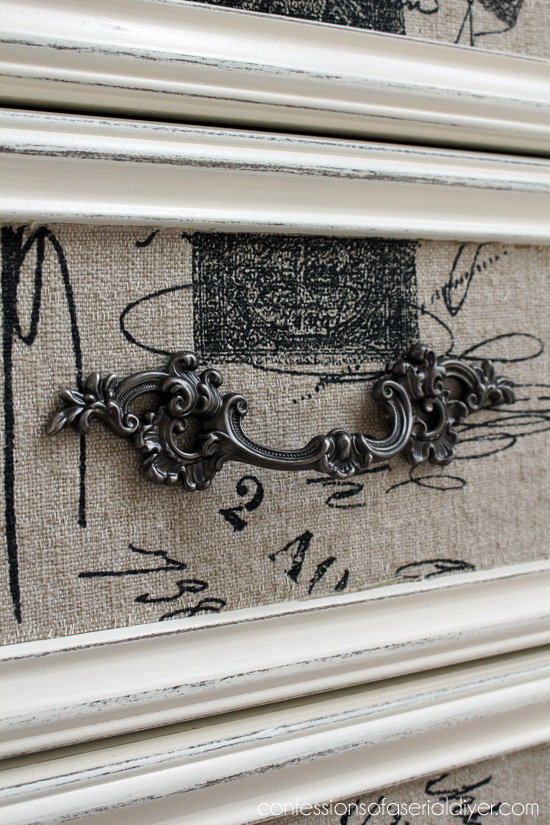
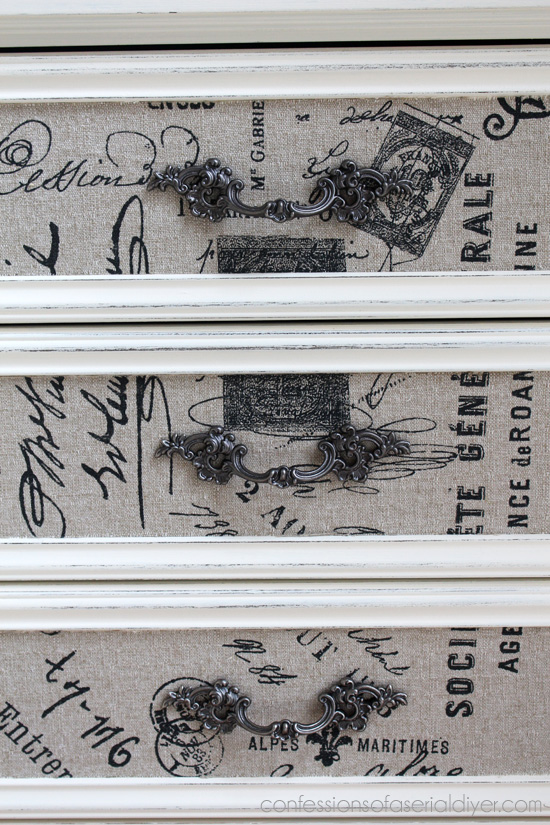
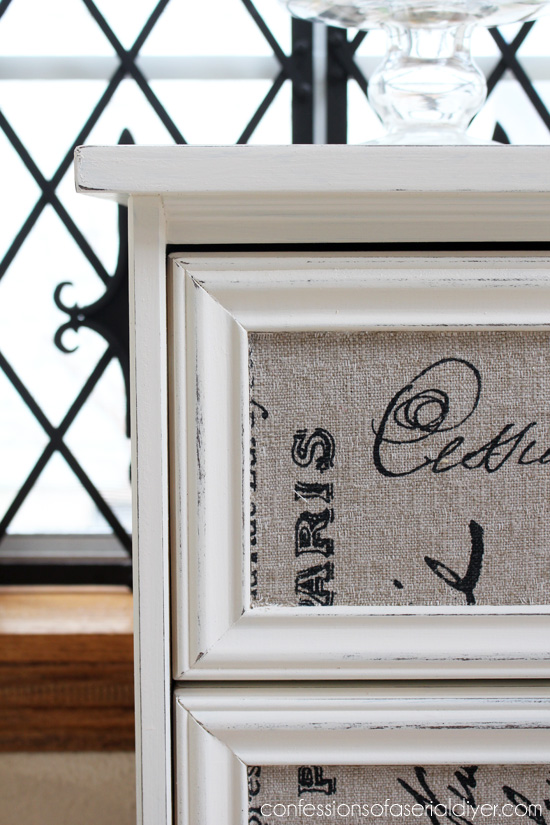
- After lightly sanding to show a little wear, I added fabric purchased at Hancock Fabrics to the fronts, using Mod Podge.
The icing on the cake of this beautiful makeover were these gorgeous drawer pulls from Hickory Hardware:
This makeover was inspired by this dresser makeover I shared a little over a year ago:
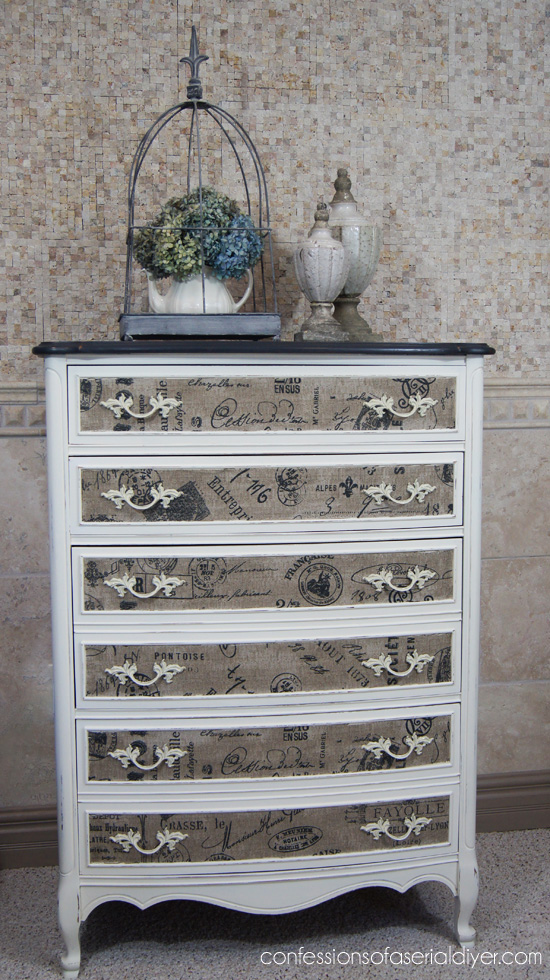
I kept the pulls that were original to the piece because I just loved them. The pulls I chose from Hickory Hardware were very similar:
They are beautiful and very nice quality. They are also something I would not be able to find locally.
I love how this little piece turned out:
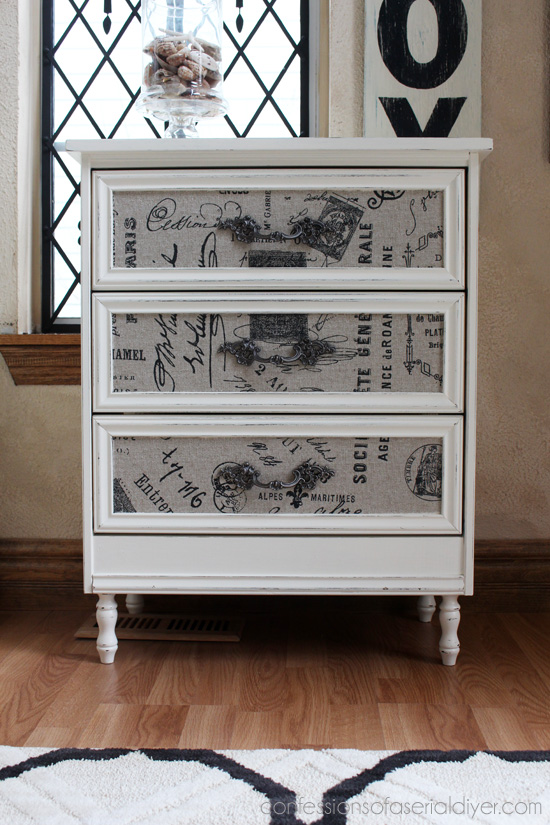
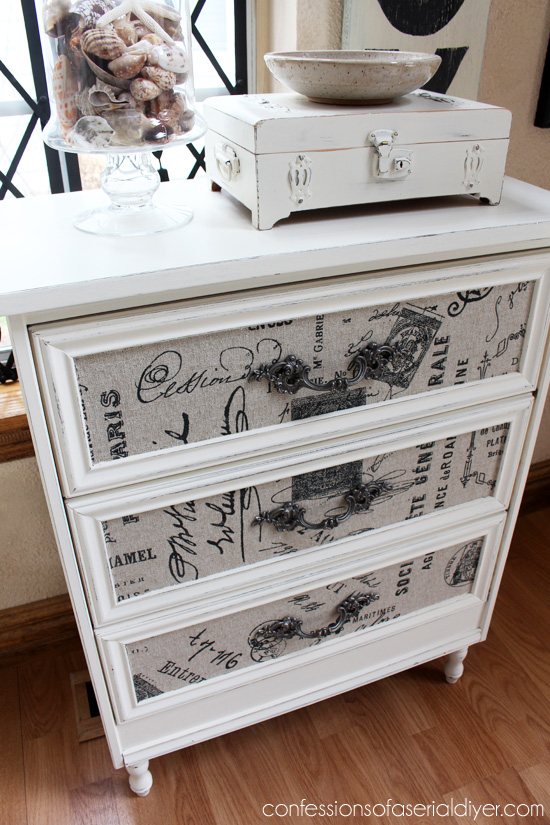
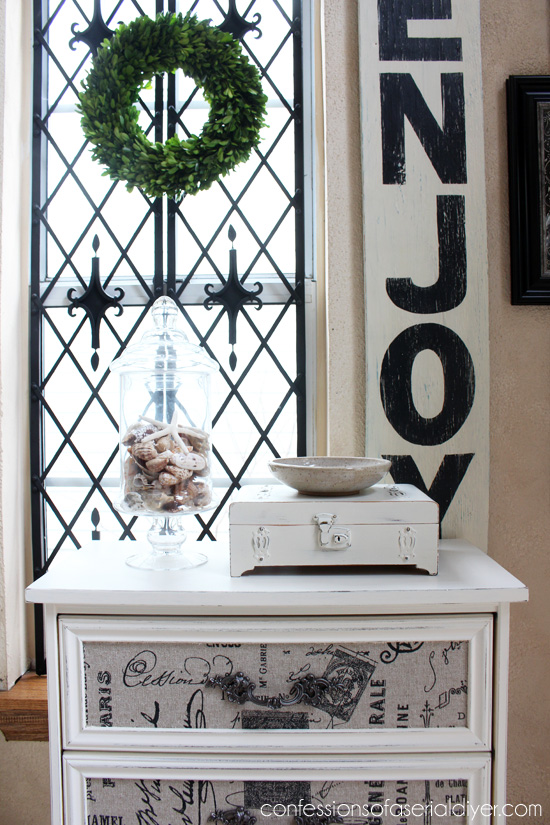
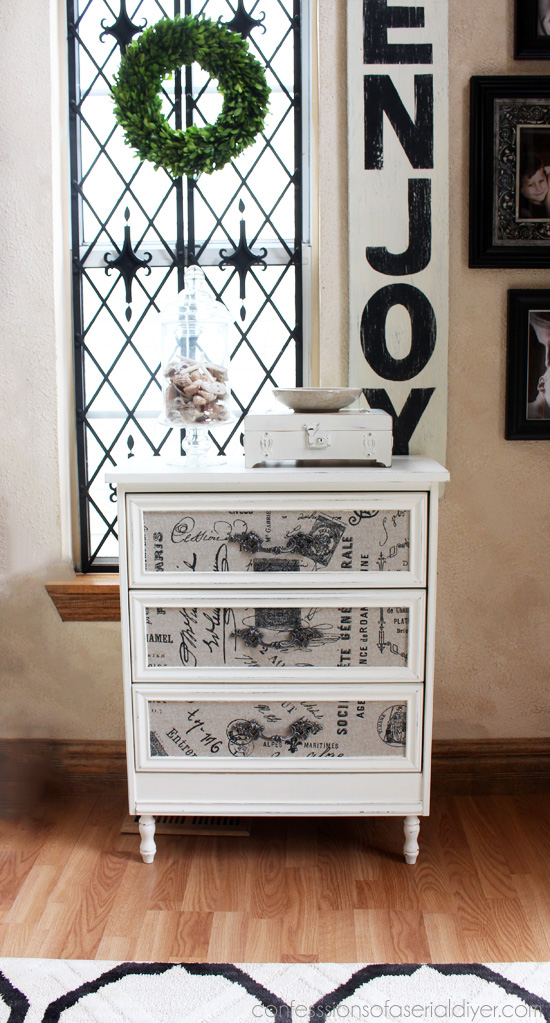
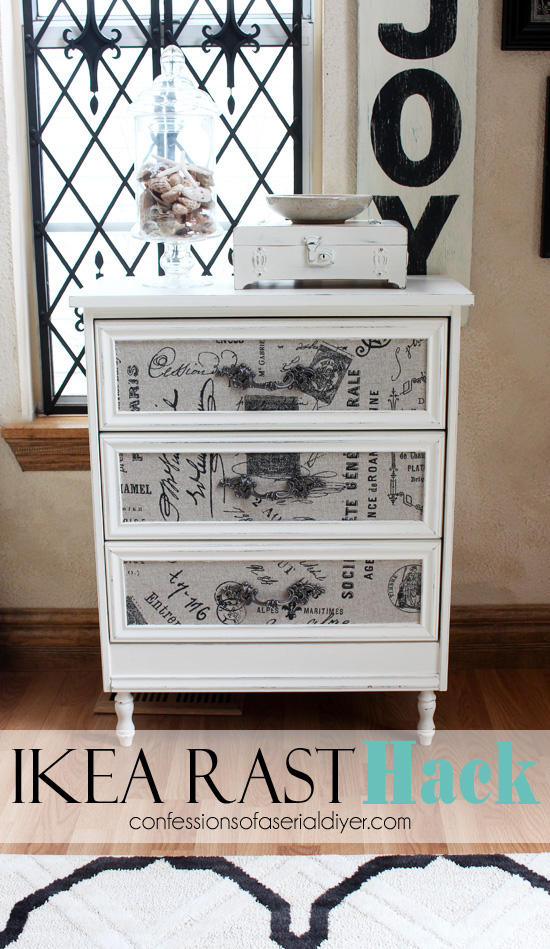
A set of these would make pretty night tables although they are quite shallow. Perfect if you need space savers! I moved mine near my entry as a catch-all table. It’s nice having those drawers there!
Thanks to the folks at Hickory Hardware for inviting me to join in this fun challenge! You can check them out on Facebook here too.
There are so many ways to change these pieces up! Here are six more:

First time here? My Top Posts of 2014 are a great way to see more of what goes on around here:

I hope y’all enjoyed this makeover as much as I enjoyed doing it!
XO,
![]()
If you like what you see, there are several ways to follow along! ![]()
Email * Facebook * Pinterest * Hometalk * Twitter * Instagram
I love to share at some of these great parties:
Home Stories A to Z Not Just a Housewife Kammy’s Korner The Happy Housie Design Dining and Diapers Liz Marie Blog Funky Junk Interiors Savvy Southern Style Tatertots and Jello DIY Show Off Redoux Interiors Between Naps on the Porch The DIY Dreamer Oh My Creative Little Miss Celebration Just a Girl and Her Blog Sand and Sisal Interior Frugalista House on the Way Addicted 2 DIY I should be Mopping the Floor Miss Mustard Seed


Vivien says
Oh Wow! What a difference. It’s unrecognisable. The fabric and drawer handles are beautiful. You did a wonderful job (so did your son!). It’s a piece I would be extremely happy to own and now I’m itching to try it myself. Can I ask if you Mod Podged the fabric before cutting it?
Christy K. James says
Thanks, Vivien! I painted the Mod Podge on the drawer front first, then added the fabric. Normally I would add another coat of Mod Podge over top, but it does darken the fabric a bit, so I chose not to this time. My son loved putting this together for me! 🙂
Heather @ Viral Upcycle says
Christy, I love how that little hack turned out too! IKEA is quite a drive for me so I know it is for you, especially with traffic. Looks like it was worth it. Beautifully done!
Christy K. James says
Thanks, Heather! Yep, its a good three hours from here. Luckily this was shipped to me. Me and my girlfriends used to take road trips to Ikea when we were younger. 🙂
Anne@DesignDreams says
The only thing I love more than that fabric is how you’ve used it! What a great look!
Thanks for sharing the inspiration photo too, I love the white handles…
Cheers!
Christy K. James says
Thanks so much, Anne! I was originally going to use it in the corner of my living room for a little extra toy storage, but I sat it in my entry and there it stayed. Have a great day! XO
Celia says
Hi Christy! Another great project!! I also have a lego expert in the house and I get him to assemble anything I bring home that needs to be put together! Excellent work, both of you!!
Celia
Christy K. James says
Thanks so much, Celia! I’ll be keeping him in mind in the future now. 🙂
Sue P. says
Beautiful job! You made a plain piece look like an expensive piece of furniture.
Sue
Christy K. James says
Thanks, Sue! It was very plain! So plain, I wasn’t sure I could do anything with it, but little by little it came together. 🙂
Susan says
Wow, stunning makeover! You would never know it’s an IKEA dresser. I’m going to Pin this for the future!
Christy K. James says
Thanks, Susan! I did not know if I could pull it off when it was first assembled, but so glad it came together. 🙂
Candyce Blodgett says
What an excellent job you do of distressing your furniture! Too often where people choose to sand to show the wear looks unnatural. You sand just the right amount and in just the right spots. Wonderful work – what a beauty!!
Christy K. James says
Thanks, Candyce! I’m not big on the super distressed look, so a little goes a long way for me. 🙂
Sonya~ at home with The Barkers says
This looks amazing! Love the added fabric. You guys did a fantastic job! ~Sonya
Christy K. James says
Thanks, Sonya! This was a fun project to do! XO
Ed Temple says
Awesome job sis. This is an incredible makeover.
Sue Farmer says
Wow Christy you do some amazing things with furniture!! So wish I had your skills.
andi says
Fantastic! I especially love that your son put it together for you…and that he enjoyed doing it! You’re, like, famous now. 😉
xoxo
-andi
Christy K. James says
My son LOVED putting this together. I just did not feel like doing it and was like, hey! He can build all that crap we buy him, why not this? And he did it! I’m grooming him to be my assistant. He’ll be painting furniture before you know it. 😉
Alexia says
Hi Christy! This is just awesome!! So beautiful!!
Lauren Shaver says
It look amazing, Christy!!! I haven’t attempted an Ikea hack yet, but yours definitely inspires me. I love the fabric you chose for the drawer fronts!
Marie@the Interior Frugalista says
Shut Up!!! LOL That is one sweet IKEA Hack – you’d never know there was a Rast hiding underneath. You did an amazing job on this Christy! I love how you challenged your son to assemble it. He must have been so proud of himself afterwards. Sounds like you have yourself an assistant.
Christy K. James says
Ha ha thanks, Marie! I was so proud of him, but it was how proud he was of himself that melted my heart. I’m grooming my new assistant early! 🙂
Kristi says
WOW! An absolutely stunning transformation!!!
Christy K. James says
Thanks, Kristi!! XO
Heidi says
Oh wow!! What an amazing transformation! I absolutely love it.
Christy K. James says
Thanks so much, Heidi! XO
Julie @ Southern Wild Design says
You are so stinking clever! I was just in Ikea yesterday and so uninspired. Thanks for the kick in my creative pants! ~Julie
Christy K. James says
Ha ha you are welcome! I wish we had an Ikea close than three hours!
Maria says
Absolutely love the transformation!!!! N those handles are gorgeous, I scored 2 at a thrift shop n Can’t wait to use them.
Christy K. James says
Thanks, Maria! Great score!!
janice davies says
This is amazing! You did a great job..
Christy K. James says
Thanks so much, Janice! XO
Shanna Gilbert says
This turned out gorgeous just like all of your projects! Love the fabric and you would never know this was once a cheapy piece of furniture. It will look so pretty in your home!
Christy K. James says
Thanks so much, Shanna! I can’t wait to see yours!!
Rose L. says
Wow, you definitely improved it! I love it!! The hardware is great!!
Christy K. James says
Thanks, Rose!XO
Linda says
What a great job of taking something ordinary and converting it into something special!
Christy K. James says
Thanks, Linda! Those Ikea pieces can be real treasures! 🙂
Cristina@Remodelando la Casa says
Oh wow, what a hack! Love it! The hardware, the fabric, the legs, the trim, Awesome job! I’m going to give the same project to my son, I hope he likes it as much as yours did! 🙂
Christy K. James says
I’m so glad you like it, Cristina! My son was so proud of himself! XO
Luisa says
You have outdone yourself Christy! Truly, you have done a beautiful job. It kinda blows my mind a lttle! 🙂
Have a great day!
Christy K. James says
You are so sweet to me, Luisa! Thank you 🙂
Paula@SweetPea says
You did an incredible job with this! You’d never guess that it started out so plain when viewing your “after” picture.
Ikea is also a long trip for me, so it’s a treat to get to go to one on occasion.
I love that your son helped you with this project. He is learning valuable DIY skills at a young age. 🙂
Christy K. James says
Thanks, Paula! I think the closest to both of us is near DC, right? My son was so proud after putting that piece together, and he did a great job. 🙂 Have a great day, my friend!!
Christy @ Our Southern Home says
It turned out beautifully, Christy! I just love the use of fabric! XXOO Christy
Christy K. James says
Thanks, Christy! It saved me from having to putty the holes 🙂
Jan says
Wow, that is one incredible transformation. I LOVE it! What a great job. I ran across another IKEA Rast Hack and loved that one too. It is so wonderful to be able to get inspiration from such talented people!
Christy K. James says
Thanks so much, Jan! There is so much you can do with these little pieces! 🙂
Lisa @ Lisas Creative Designs says
Beautiful transformation! I love the Frenchie fabric. It makes the piece sooo unique! It totally makes it. 🙂
Christy K. James says
Thanks, Lisa! That fabulous fabric is definitely what makes us forget its a cheapie little chest! 🙂
Denyse @ Glitter, Glue & Paint says
Christy, once I get back from Florida I will be on my way to pick up my beautiful dresser you did for me. LOL
I’ve been wanting to paint and add burlap fabric to the 1930’s bedroom set I have in my garage and just haven’t gotten to it. You always give the urge to get my butt moving.
Christy K. James says
Ha ha It will be waiting for you. 🙂 Isn’t it funny how we are inspired to get things done sometimes? I’m sure your set is gorgeous!!
Amy | Canary Street Crafts says
This is gorgeous, Christy! It doesn’t even look like the same piece of furniture, and the hardware you chose is lovely.
Christy K. James says
Thanks so much, Amy! I love that hardware too! XO
Birgit says
One word – WOW! I will never look at simply Ikea furniture the same way again! 😀 I really adore the vintage look you gave that dresser though I must admit, my secret favorite is the Suitcase Dresser from *Girl in the Garage* (seeing how I love to travel this is no surprise, haha).
Christy K. James says
Isn’t it amazing what can be done with those simple pieces? I love Jen’s suitcase dresser too, that really blew me away when I saw it!
Mei @ The New Vintage says
I have this throw blanket that I have been wanting to decorate a dresser with. Thanks to your tutorial, I know exactly how to do put it together. Thank you for the inspiration!
Christy K. James says
Awesome, Mei! I’m so glad you feel inspired! 🙂
Julie (Being Home) says
Wow! I would have never thought this was he same piece of furniture! Amazing and very creative makeover! You and your son did excellent work! 😀
I had already planned on going to Ikea tomorrow to pick up a couple of small things – maybe I will look at the Rast. Heck, they may be sold out due to all the hacks going on. LOL!
Oh, you should most definitely submit your hack to Jules, at Ikeahackers! 🙂
Christy K. James says
Thanks, Julie! These pieces are very uninspiring as is, but can be fabulous! XO
Donna G says
Those drawer pulls are really gorgeous. I’m heading to Hickory Hardware right now. I’ve been looking for new fittings for a 1960’s kitchen dresser. thx
Christy K. James says
They have so many beautiful options! XO
Aleksandra says
Hi Christy,
Of all the IKEA Rast hacks I’ve seen… this one absolutely beats all of them – so beautiful! I want to make one like yours and have a couple of questions: 1) do you remember how much fabric is needed for this project? 2) what is the length of the hardware you used? I want to order online and just curious about the dimensions.. thank you in advance and thanks for your blog – what a beautiful work you do!!
Christy K. James says
Thanks, Aleksandra! This was a fun project! For the fabric, I would say no more than 1/2 a yard at most. The drawer fronts are 22.5″ X 7.5″ of that gives you a better idea. The hardware is 7″ long. Here is the serial#: 348308044. Hope this helps, and best of luck on your hack! 🙂
Ginger says
I voted for you! Did you win?
Christy K. James says
Thanks, Ginger! I appreciate that. Unfortunately I didn’t win. The suitcase one, which was pretty darned clever, came in first. 😉
Kim Lanctot says
Great job! Love it! I am curious about how/when you attached the fabric. I was wondering why you put the fabric on after the molding, not before, so that the molding holds the fabric in place? I have found that mod podge stretches fabric, so how did you get it in place w/o it getting stretched or overlapping the molding at all? Don’t get me wrong, I love, love how it looks and I would really appreciate any tips you would have. 🙂
Christy K. James says
Thanks, Kim! I have added fabric to a few pieces in a similar way and it isn’t too hard. I wanted to have the Rast completed and painted and first. To me that seemed easier. Also if I ever tire of the fabric it will be easier to remove and replace since it’s not under the molding. The best tip I can give for cutting fabric for panels like this is to use a rotary cutter, a cutting mat, and a straight edge (sold in a kit) as you would for quilting. Then handle the fabric as little as possible as not to fray the edges. The fabric should only stretch if you pull it. Hope this answers your question. 🙂
Nena Tsoureli says
Amazing!!!! Mrs Christy you are an artist!!!!
Christy K. James says
Aww thank you, Nena! 🙂
Vidhya says
Hi Christy,
Love the dresser makeover! I dont own a mitre saw. Does Home Depot cut it to specification just like they cut lumber? Or is there any other tool that can be used to cut the molding trim?
Thanks
V
Christy K. James says
Thanks, Vidhya! You can purchase a miter box like this one here: http://amzn.to/1U6bVrj and use a hand saw with it. You can buy the kits that have the saw included as well. 🙂
Vidhya says
Thank you so much Christy!!!! Really wasnt sure if I wanted to buy an expensive tool 🙂
Vidhya says
Hi Christy,
One more question…..when you say this
“I added a scrap piece of wood to the bottom of the front to make it flush with the drawers.”, how did you achieve it? Nails/Glue?
Thanks
V
Christy says
I believe I used wood glue and my nail gun, but small finishing nails would work too.
Alli says
Hi! I love all of the additions you did to this dresser. Do you have the dimensions for all of the wood pieces you added? Do you think Home Depot would cut all of these for you? I live in an apartment in the city so I don’t have access to tools or space to even borrow tools!
Christy says
Hey, Alli! Unfortunately I sold this piece, so I can’t measure the pieces for you, but you should be able to handle cutting your trim pieces pretty easily using a miter box and handsaw like this one: http://amzn.to/2g6KMKy Home Depot will make straight cuts, but not sure about mitered cuts. Best of luck!