Hey party people!! Today is my kiddos’ first day back at school woohoo yippee yahoo. For them…I am squealing with delight for them of course as I know how totally psyched they have been to get back to school. 😉
Seems like a perfectly good day to share a little thrifty upcycle, don’t you think? It’s Trash-to-Treasure Tuesday so make sure you stick around to see four other fabulous upcycles from my talented and thrifty friends, at the bottom!
I am sharing what I did with this $1.50 thrift store picture and yard sale knobs:
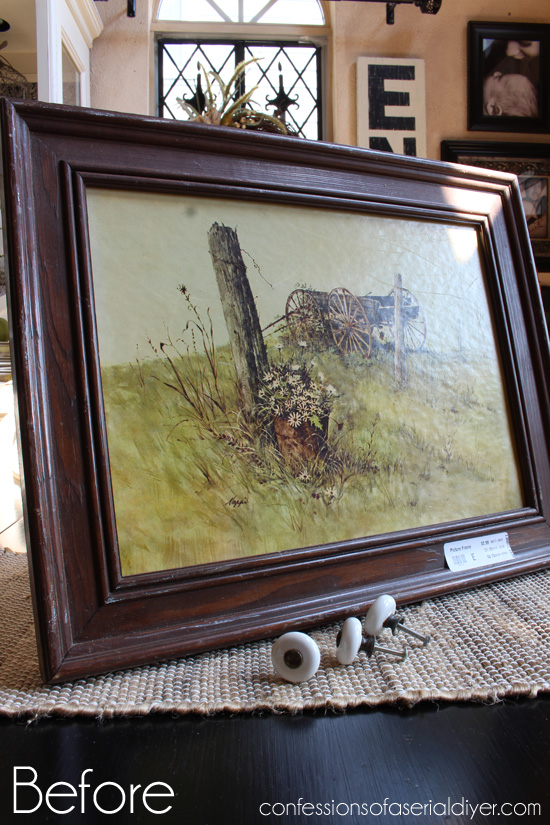
Looking at it now, it matches my Fall décor! The picture was only cardboard though, so I removed it and created this instead:
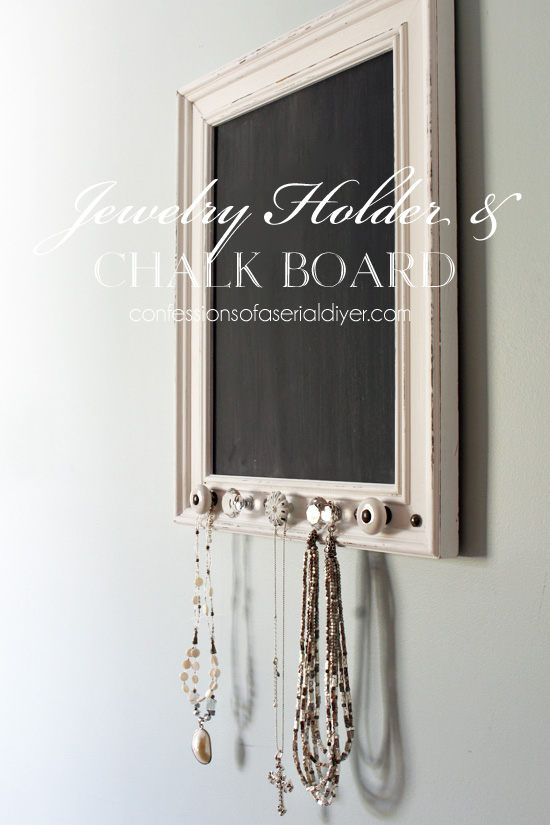
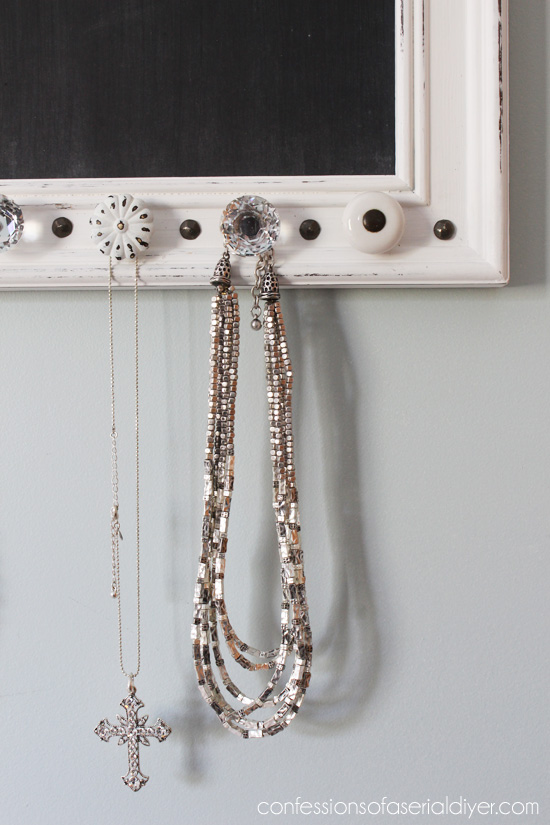
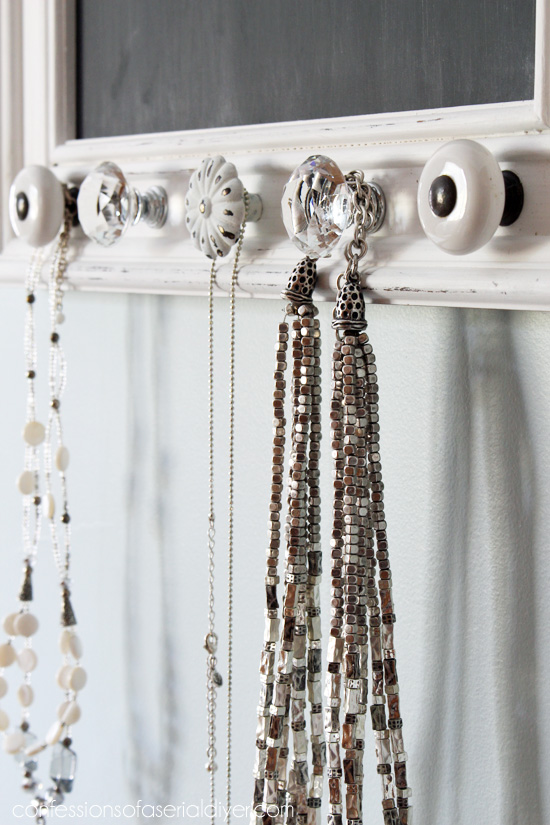
It’s a chalkboard and a place to hang your favorite necklaces…or lanyards…or whatever else might fit on a small knob.
Have you ever made a chalkboard before? If you haven’t, it is so simple. I make and sell a ton of them, but rarely share them because it would be a lot of repetition.
I use hardboard to make mine. It’s like pegboard, but without the holes and I get it from The Home Depot. I’ve included affiliate links so you can see the products I’ve used. Read my full disclosure here.
Here’s a quick how-to if you’ve never made one, but would like to…
I use my cordless jig saw to cut it to the size I need…
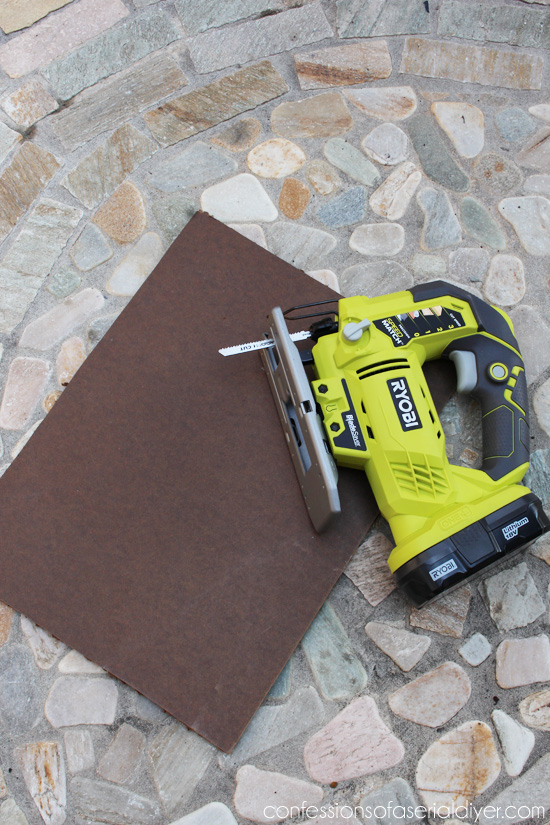
If I’m making several, I will use my table saw. The helpful people at Home Depot will also cut it to the size you need if you don’t have a saw at home.
Then I sprayed it with two coats of Rustoleum’s Chalk Board Spray Paint:
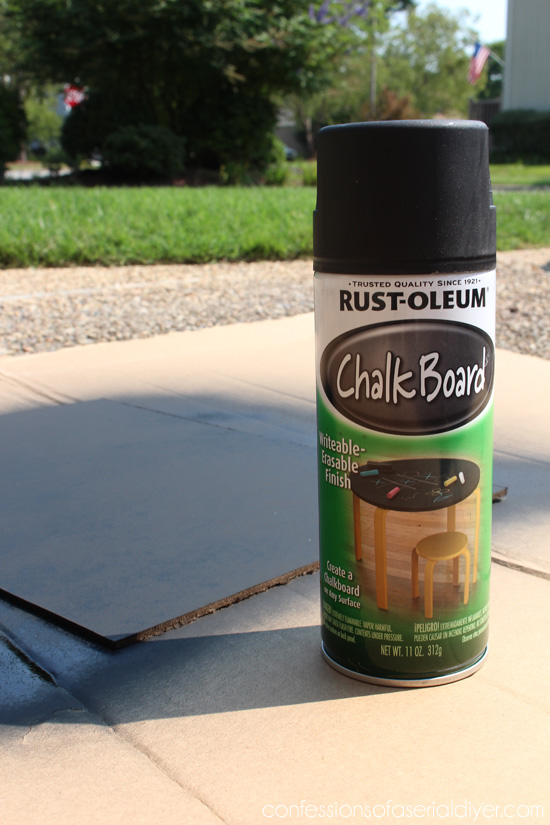
This is the best one I have used. I prefer the spray-on to the brush-on because I like that the spray leaves no brush marks.
When that dries, you need to “season” the surface by rubbing chalk all over, or the first thing you write will be there faintly forever supposedly. I haven’t tested that theory out myself.
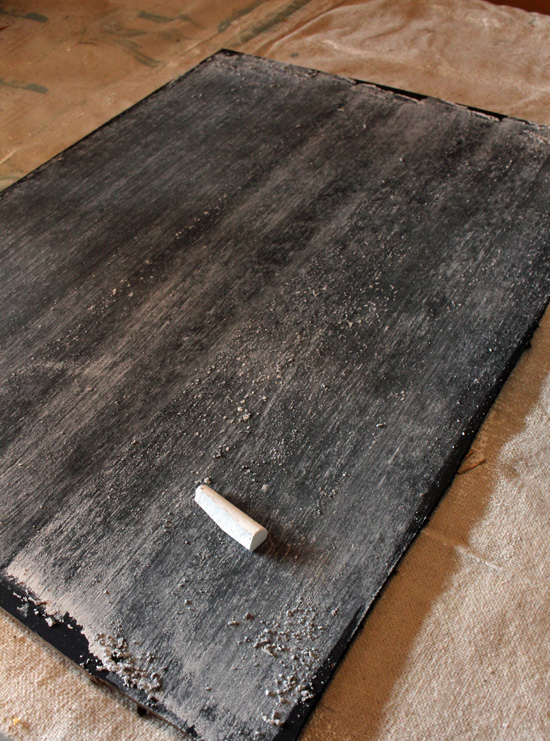
Then just wipe it away with a soft cloth.
Insert the chalkboard into your frame that has already been painted, waxed, etc. This is the Logan Point Driver that I’ve mentioned a couple of times. This thing makes life so easy if you make a lot of these things.
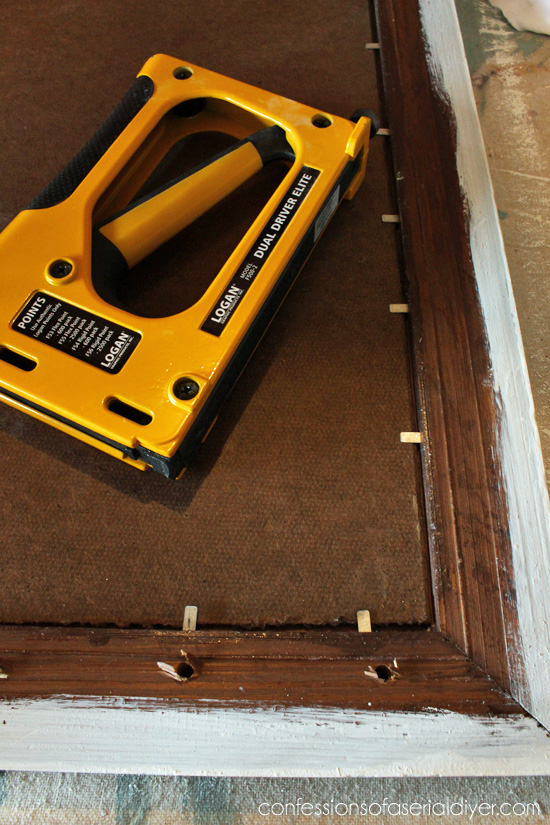
If you don’t have one, don’t worry you can secure it using small finishing nails, hammering them into the frame similarly to how the points are inserted above. And that is it!
I found this bag of knobs at a yard sale for $3 last weekend:
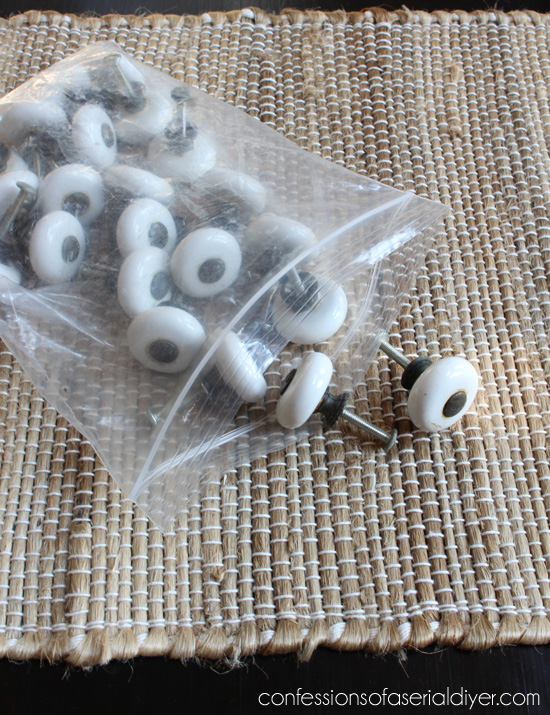
I don’t love them, but thought I could use them here and there since I use a lot of knobs around here.
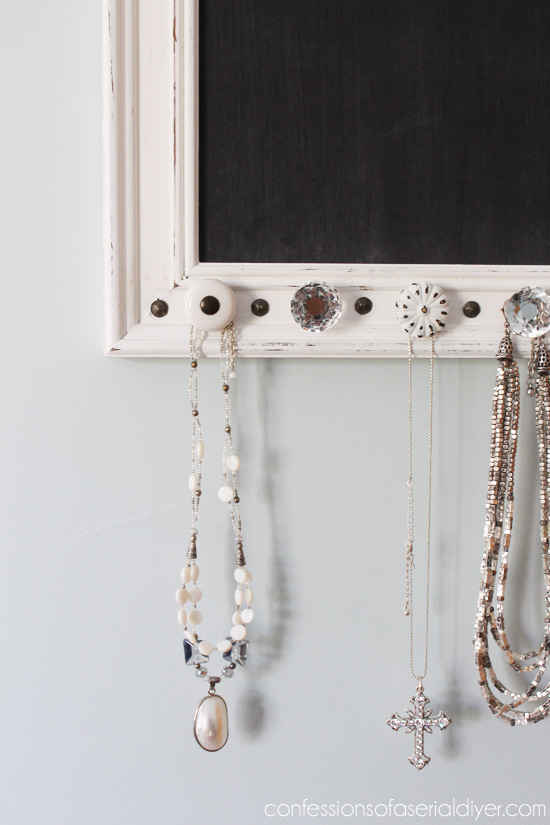
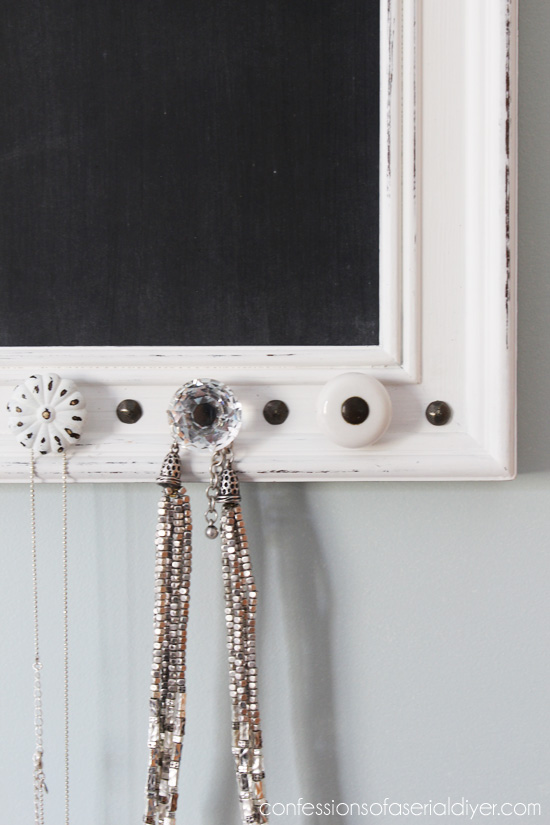
I used two on this project, along with two pretty glass ones, and the older one in the center that I saved from another project. These all screwed in from behind and luckily the frame was just the right depth that the screws fit snugly.
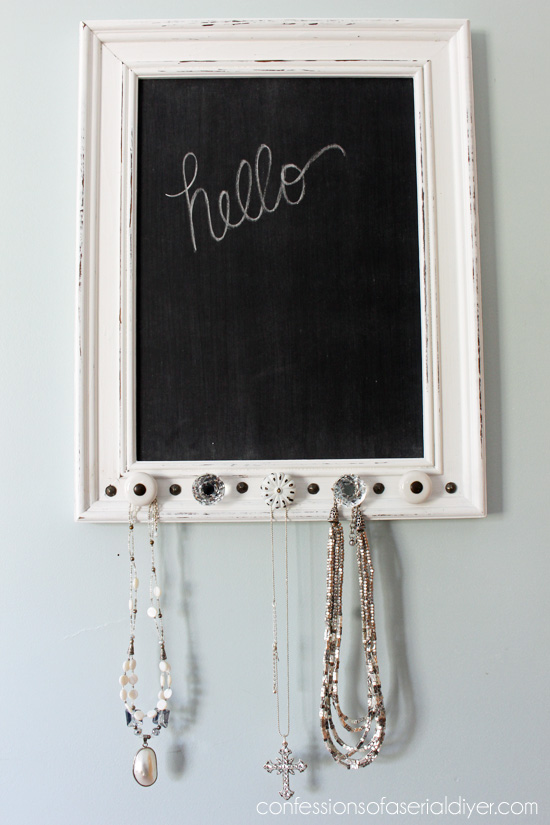
I added upholstery tacks in between for interest. I had planned to go all the way around with them, but those babies are stubborn!
So…along the bottom only!

Love the mixture of knobs…
Simple pieces like this are easy sells at my booth. I think it’s easier to justify a purchase if it’s for something that isn’t just pretty, but serves a purpose as well.
Here it is ready for market:
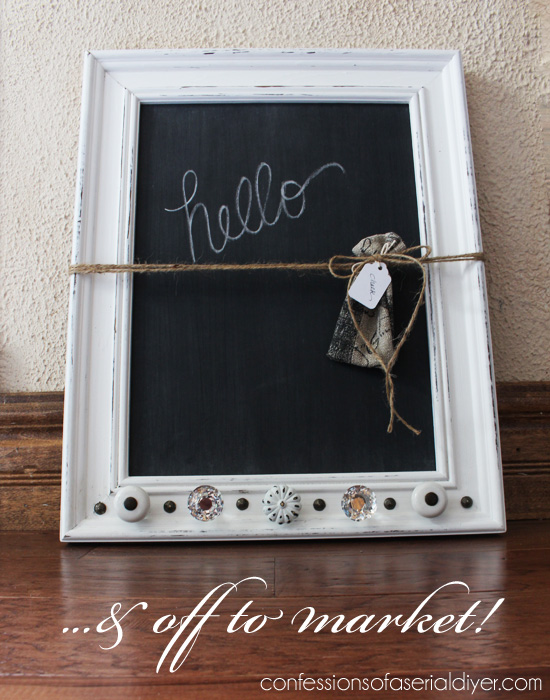
The little pouch is made from scraps and it holds a couple of pieces of chalk.
And we can’t forget to make the back pretty and add hanging hardware:
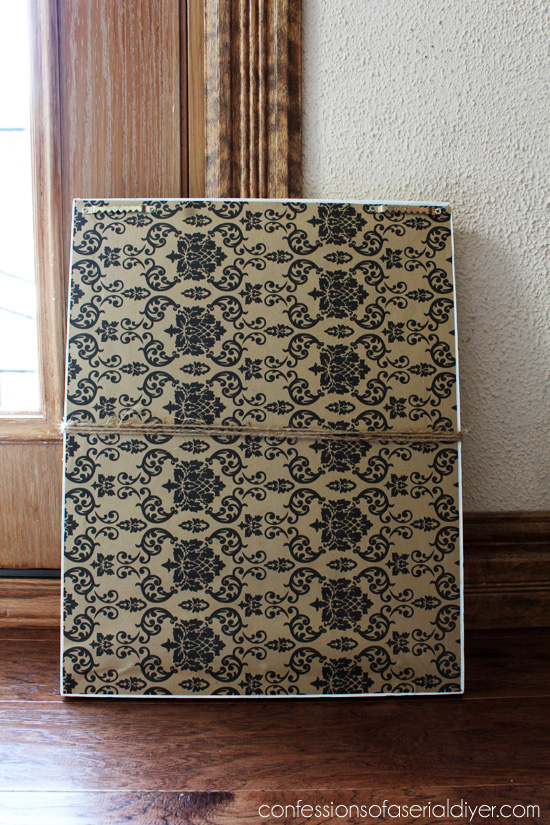
To finish off the back, I use matte Mod Podge like a glue and apply it with a chip brush to the back of the frame all the way to the edges. Then I add my paper. I like brown craft paper for this, but I can often find pretty patterned brown paper at HomeGoods. The one I used here came from Hobby Lobby.
I cut the paper on this one to fit before attaching since it was small, but I usually add the paper to one corner then use sandpaper along the edges to remove the excess paper, or a razor blade to trim the excess paper all around the edge.
I like these sawtooth hangers that screw in place fro hanging.

As promised, here are four more fun Trash to Treasure projects to see from my friends below!
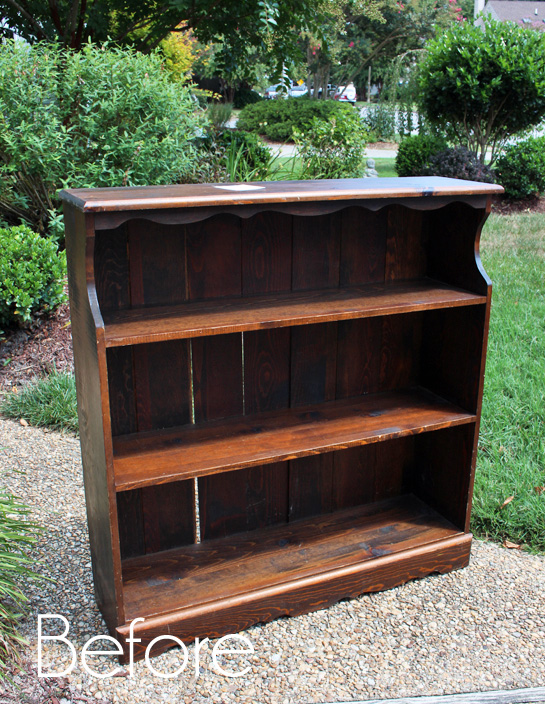
I’ll be back on Thursday sharing this thrift store gem:
See you then! 🙂
UPDATE: Just like magic…see it HERE now!
XO,
![]()
Don’t Miss a Thing!
If you like what you see, there are several ways to follow along!
Email * Facebook * Pinterest * Hometalk * Twitter * Instagram


Larissa ~ Prodigal Pieces says
I swear you are my twin, Christy! We use hardboard and frames around here all the time to make chalkboards. My kids made and sell them and they’re so fun and functional. Great idea on the point driver too! Thanks for the wonderful tips. 🙂
Christy K. James says
Ha ha! Yep frames are probably the thing I drag home the most around here…there are just so many things you can do with them! XO
Jody says
I had that picture in my house during the 70’s. It was from Home Interiors. Funny to see it again.
Christy K. James says
It goes perfectly with the Fall color palette I’m going with this year, so I’ll find a prettier frame for it and reuse it 🙂
Becky says
Beautiful! And yes, frames… it can be a problem. I’ll do something with all mine someday, I really will! : ) I think I might have a great one for this project!
Christy K. James says
Thanks, Becky! I have amassed quite a collection myself lol. Working through them slowly but surely. 🙂
Marilyn says
See? Using the nail head tacks in between the knobs is the kind of small detail that sets your projects apart. I would never have thought of that, but I will now!
Christy K. James says
Aww thanks, Marilyn! You are so sweet to me! XOXO
Nancy @ Artsy Chicks Rule says
Beautiful!! I need a shop to sell all my goodies….close by me! I’m moving in with you!! 😉
Love it and the knobs!
xo
Nancy
Christy K. James says
Thanks, Nancy! Yes you do! You can come sell with me anytime! XO
Marie@The Interior Frugalista says
Very nice Christy and what a nice touch papering the backside. I love the way you package your chalkboards almost as much as the chalkboard itself. I bet they are a hot seller in your booth.
Christy K. James says
Thanks, Marie! Hopefully those finishing details help make sales. 🙂
June G. says
Your projects are always so fun!! I have a ton of frames…can’t pass them up! I’ve never used the spray chalkboard paint but I will now and thank you for the link to the point driver tool. Sure will make the job so much easier! Can’t wait to see what you do with the bookshelf 🙂
Christy K. James says
Thank you, June! I can’t pass up a great frame either as you know! I do prefer the spray chalkboard paint and a couple of coats is plenty of coverage with no brush strokes. That point driver is the best! XOXO
MaryJean says
This is so clever! I’m seriously thinking of doing this with one of my frames. There is a place near me that rents booths and spaces for antiques or vintage pieces. I’m about to find out if I can rent a space to do what you’re doing. I am an artist and have sold dolls and wood crafts at craft shows and would think nothing of doing a painting for someone, but I’m nervous about refurbishing furniture. I sell vintage items in my Etsy shop and go to estate and garage sales all the time. I see furniture I would like to refurbish, but I shy away thinking what if it doesn’t turn out like I envision. Silly, isn’t it? Especially since I’ve done so much in the past and even now. Maybe I should start small like your chalkboard frames, just to get my feet wet and see how it goes. I think I’m afraid that things will not sell because Western NYers can be very picky when buying furniture. I have checked your post where you included prices and I thought your prices were very reasonable. I guess it all depends on how cheap you can get the furniture before you do your magic!
Christy K. James says
You already have an advantage having been in the business of making and selling. I say go for it! Find out how long you have to lease a space for and how much notice they require before vacating the space. My antique Mall only requires 30 days notice and the lease is month to month, so if it tanks tomorrow, I’m not stuck there. Hopefully the same will apply for you and you really have nothing to lose! I used to make and sell dolls for years and years and my parents made and sold decorative painted furniture and home décor, so we did shows and markets together, so it sounds like we have a very similar background! Best of luck with whatever you decide, but I hope you go for it! And yes, my prices are often dependent on what I find items for. I try to buy as low as possible. 🙂
Jen @ Girl in the Garage says
This is so adorable, Christy! I tried Chalk Board paint (not spray paint) once over glass and it turned out terrible.. just peeled right off. I need to get some of that board that you used- I think it would be a hit at my booth too! And of course I love knobs and nail heads! <3
Christy K. James says
Oh no…I have heard of people painting the glass with chalkboard paint all the time, but I’m afraid of it breaking, especially if I sell it to someone who doesn’t know it’s glass under there. I sell a ton of chalkboards, even when furniture is slow moving. Adding the little bag with chalk helps too. By our next thrifty challenge, you should be a Mama of three! (You hope!) XOXO
Victoria says
Just gorgeous !
Could you tell me how you finished the rear panel – I cannot work out how you got the string on it if it is just the one panel on the back ?
Do you ever just screw in those little hooks with circular ends to each side of the frame, then work string through them ?
Thanks in advance
Christy K. James says
Hi Victoria! If you’re referring to the twine you see across the back, that is just how I attached the little back of chalk for selling purposes. If you look closely, the hanging hardware I used is at the top of the back on either side, and they are sawtooth hangers that are attached with tiny nails that came with them, nailed into the frame. You can use the little rings as well, sometimes called “D” rings if you like. Hope this answers your question. 🙂
DeAnna says
Hi Christy… again.. amazed at the things you do. I know this is an old post but I’m relatively new to your blog and am just taking my time drooling thru it. Can you tell me what type of paper you used on the back of your frame? Wallpaper?? Did you apply it with Mod Podge? Thank you again for all your ideas and sharing them with us. I don’t have 1/16 of a stockpile of things to work on like you do… not much in the way of ‘thrift stores’ in the area and have to rely on Goodwill and the selection is not great. I’ll keep searching tho!!
Christy says
Hey DeAnna! I’m so glad you are enjoying looking through my projects! The paper I used is just wrapping paper I picked up at TJ Maxx. It is thicker than regular wrapping paper, and makes for great backing on my frame projects. Hobby Lobby sells a roll that is really pretty too, it is with their wrapping paper. I have attached it several ways…Mod Podge, hot glue, craft glue stick…whatever is handy at the time. Mod Podge works great if you already have that. Good luck in your search for goodies! 🙂