Hello sweet Friends! Thanks so much for the wonderful birthday wishes!
If you stopped by here on Friday you saw what I was greeted with in my front yard, thanks to my sister. You can see it here if you missed it. Her birthday was the day after mine and I knew I had to immediately get her back. Here’s what I did to her:
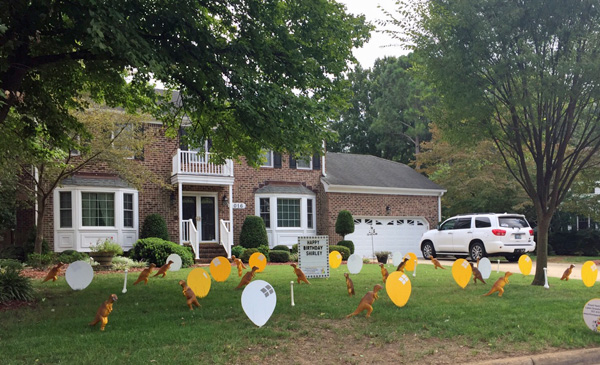
She got up at about midnight to peek out the window to see if her son’s car was home yet, and couldn’t believe I got her right back! Ahh so fun!
OK now for what you came for…
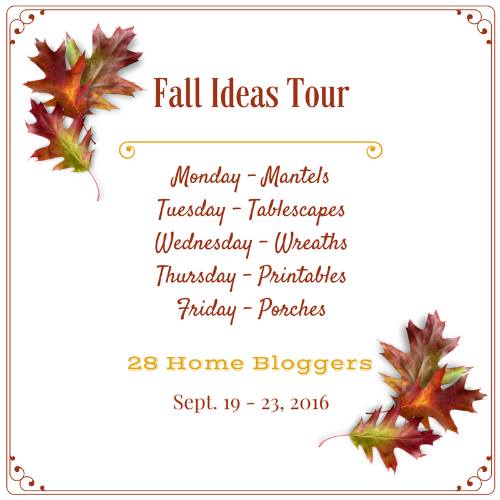
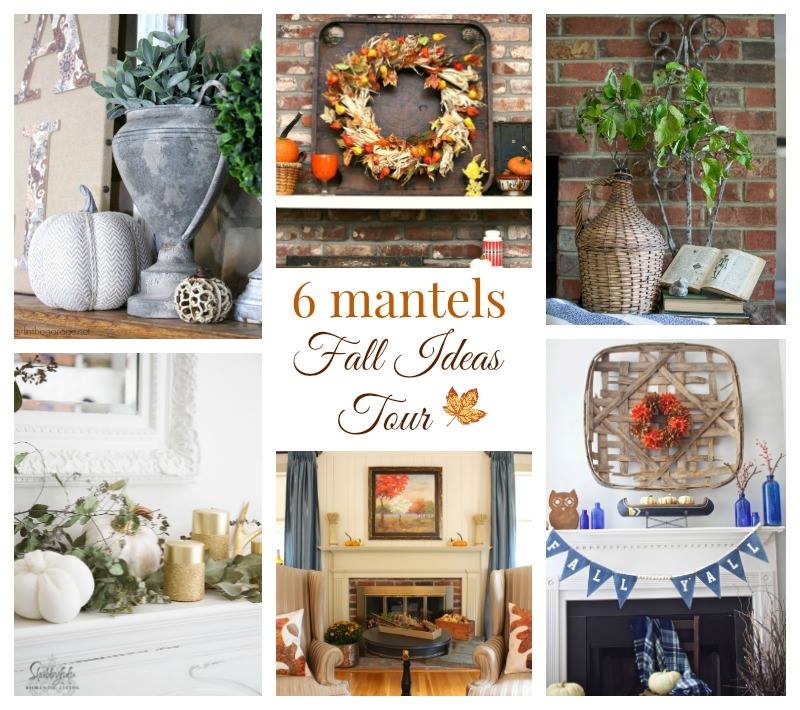
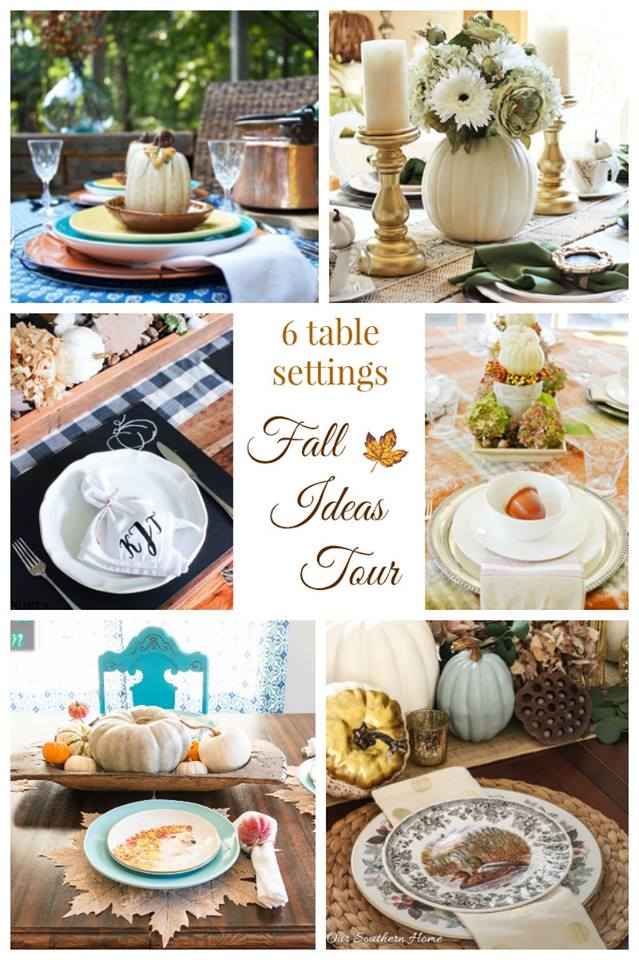
Several of my blogging friends and I are collaborating this week to bring our readers a ton of Fall inspiration! Yesterday was mantels, and today it’s all about tablescapes, with more inspiration on the way each day this week. I’ll be sharing the links to those at the bottom.
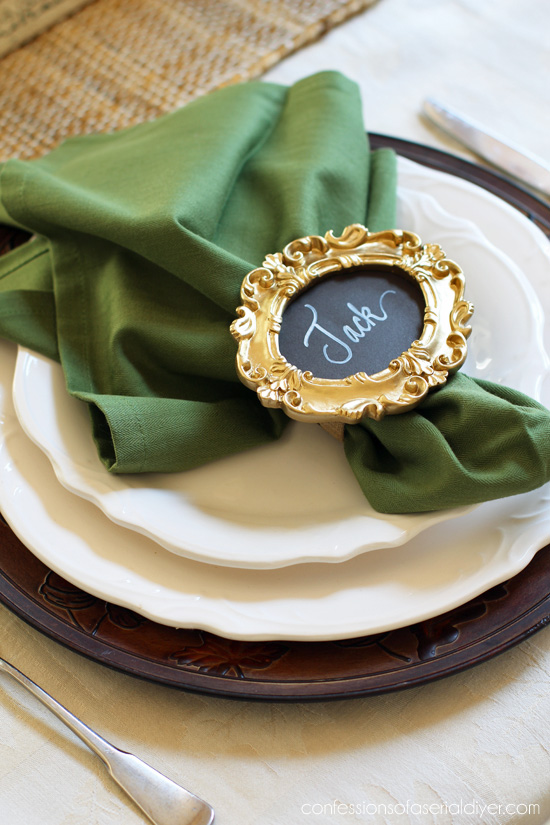
I love to entertain at the Holidays, but I don’t like things too fussy. I prefer to keep it simple. Today I put together a simple Fall table using mostly things I already had. I did make new napkin holders that also serve as place cards, and are so easy to make.
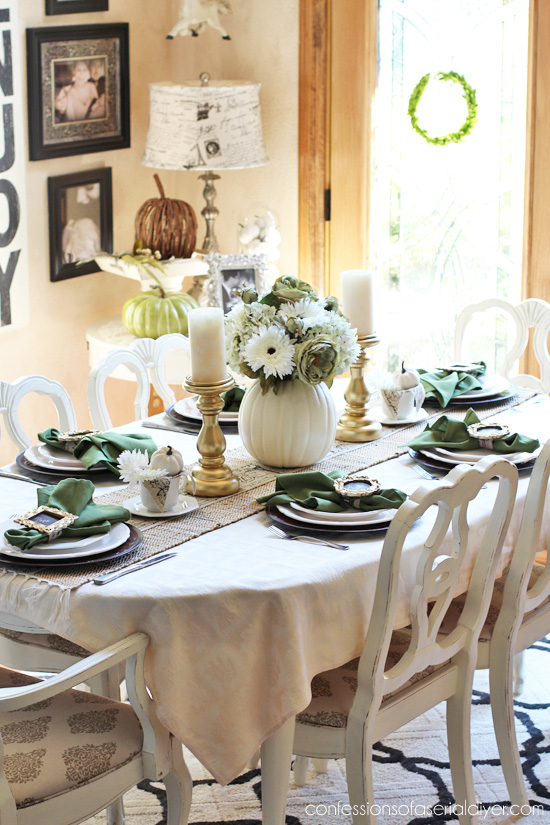
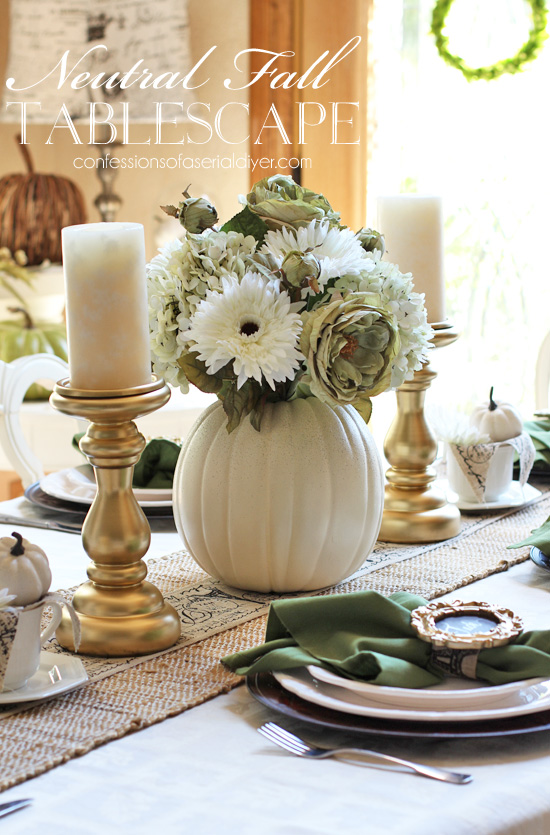
First, here is my table to coordinate with my existing neutral Fall décor:
I shared the pumpkin arrangement centerpiece a couple of weeks ago. You can see the full how-to HERE.
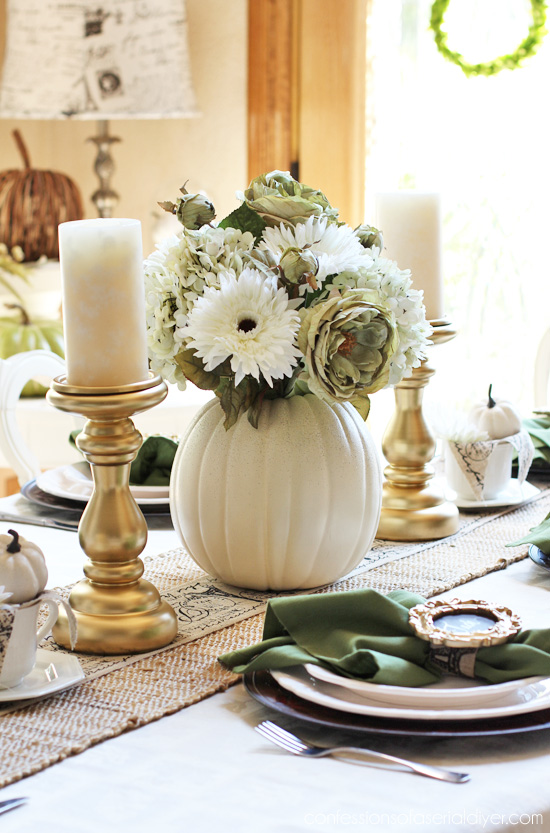
I love the softer hues for Fall and these stems I found at Michaels were perfect for this centerpiece.
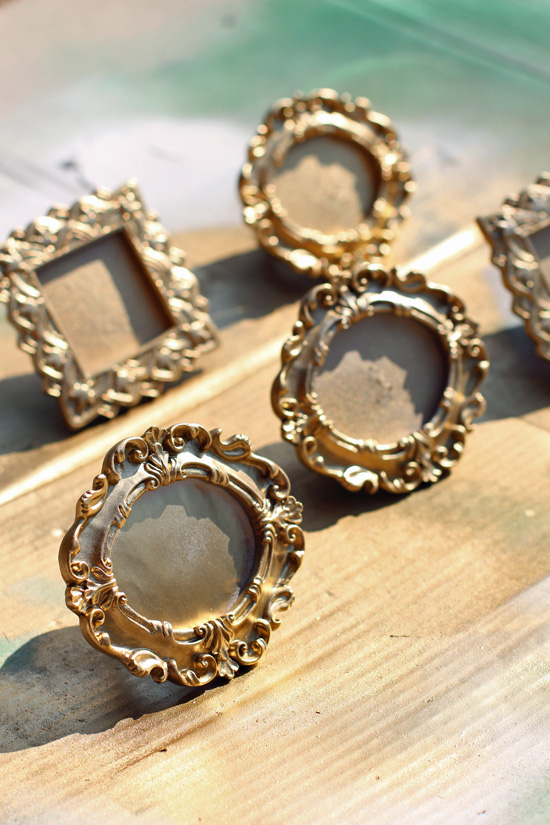
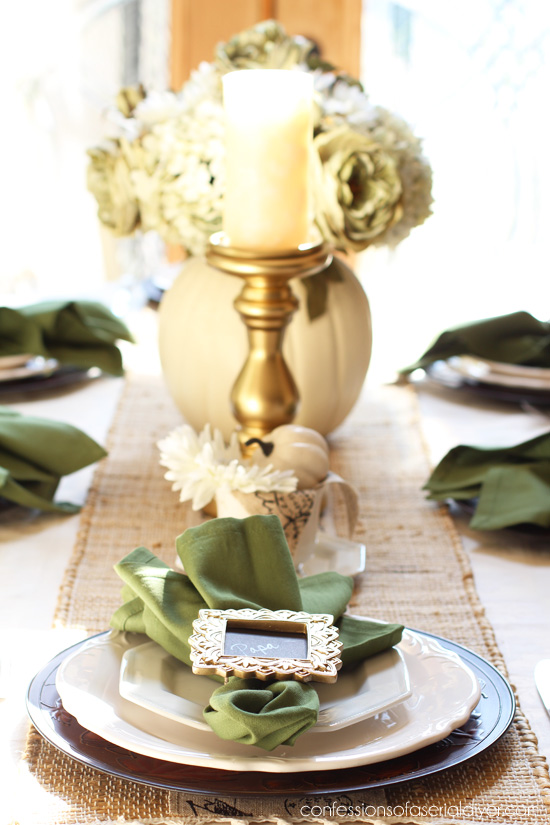
While I was at Michaels purchasing the supplies for the centerpiece, I came across these pretty gold frames in the dollar bins:
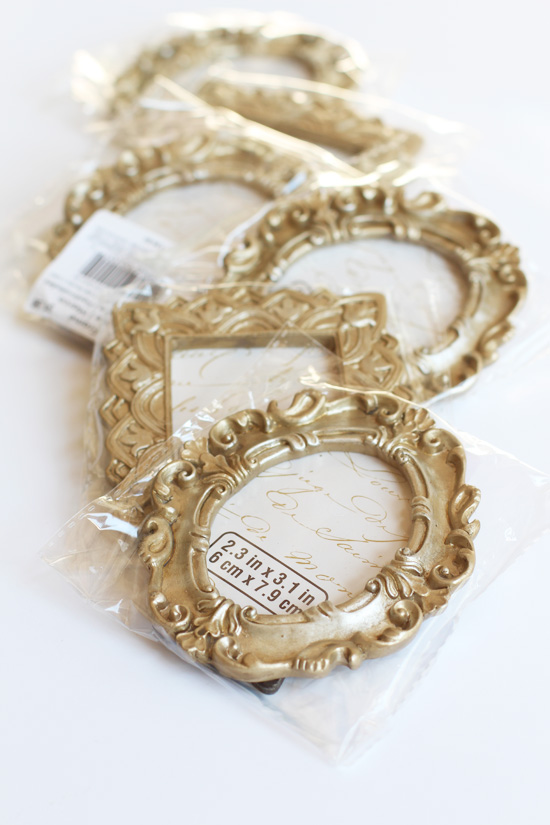
I thought they would make perfect napkin holders that could also serve as place cards. They were the inspiration for the gold in this table setting.
Making them was so simple and only took about five minutes each!
Here’s what I used to make them:
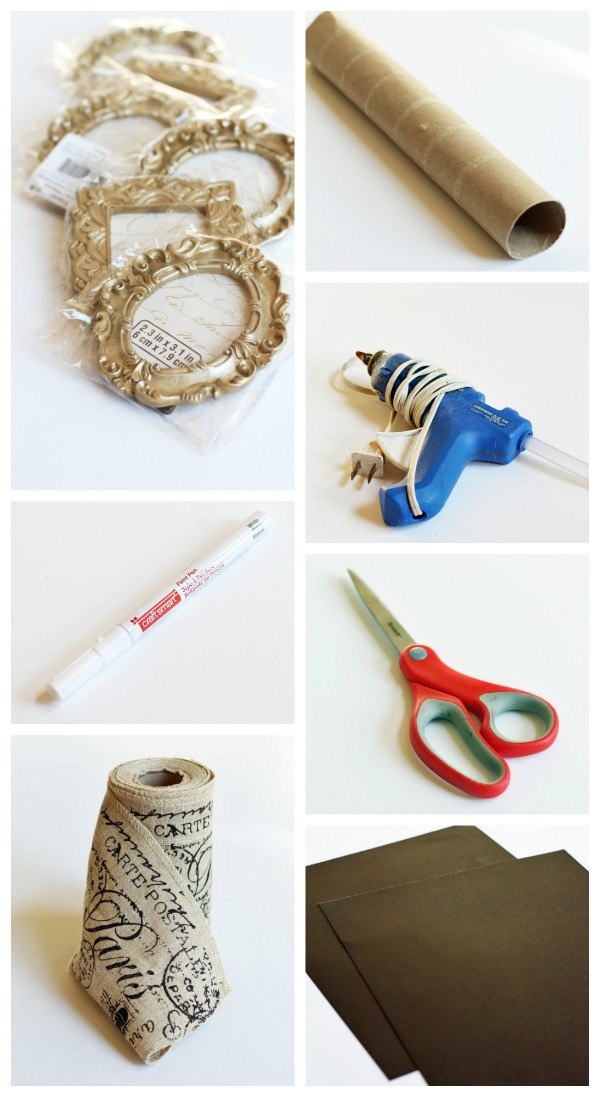
Mini Frames * White Paint Pen * Ribbon * Paper Towel Roll
Hot Glue Gun/Glue * Scissors * Black Card Stock
And here’s how easily they came together:
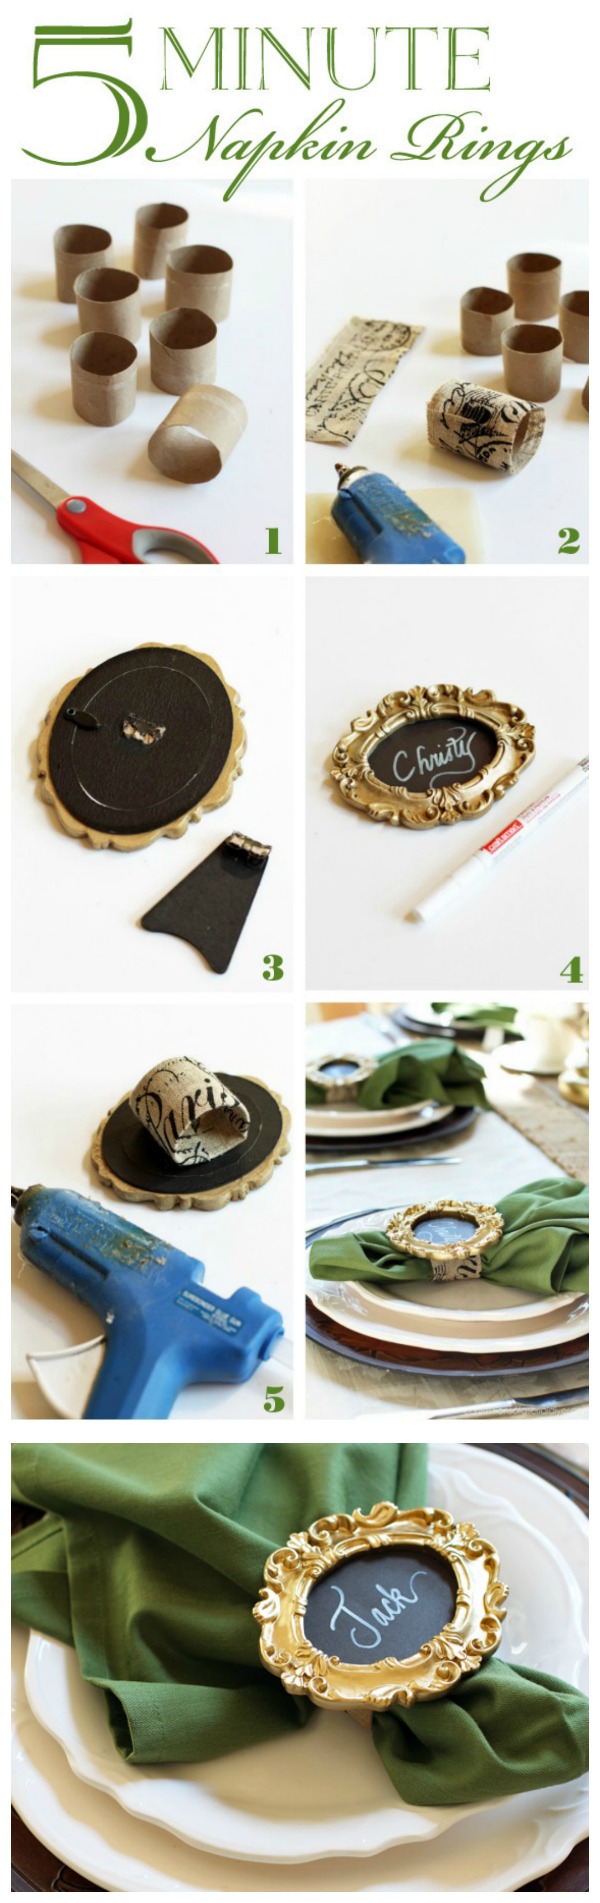
1. Cut paper towel roll into 1 3/4″ pieces.
2. Cut strips of ribbon/fabric wide enough to tuck in the sides, and long enough to cover the roll. Roll in fabric and hot glue in place. Tuck sides in and secure with hot glue.
3. Gently remove the stands from the backs of the mini frames.
4. Cut card stock to fit inside each frame and use a paint paint to write your guests’ names.
5. Hot glue the ribbon-covered roll to the back of the frame.
Now of course wouldn’t ya know that after I had everything assembled, I decided to paint the frames in a bit more vibrant shade of gold…
To match my candlesticks I decided to paint as well:
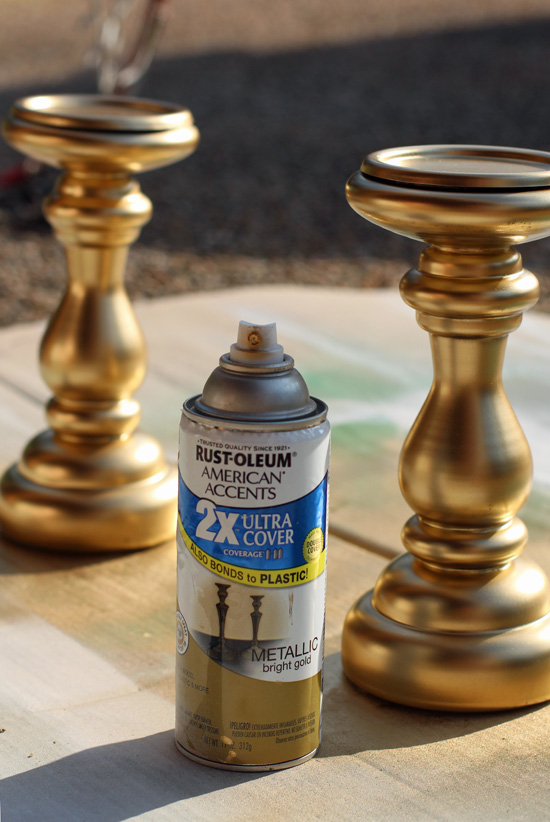
These were mercury glass, but they were more gold than silver and I didn’t love them, so this fixed them right up.
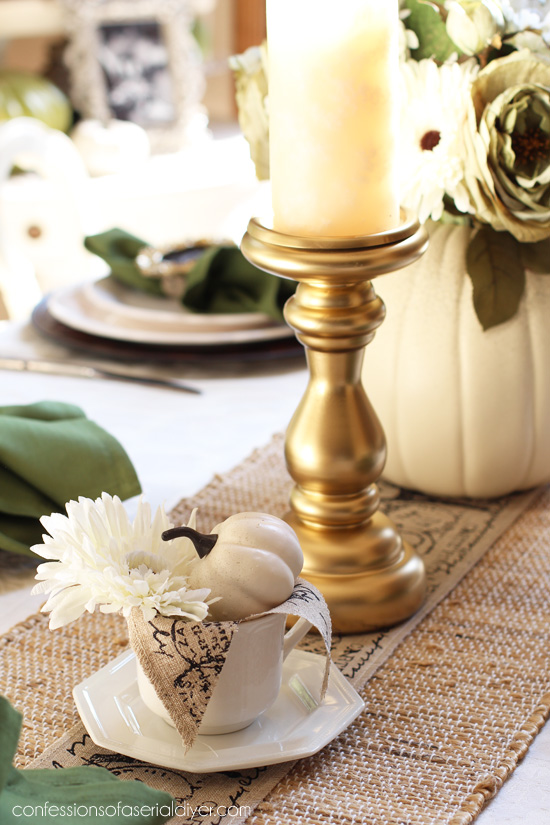
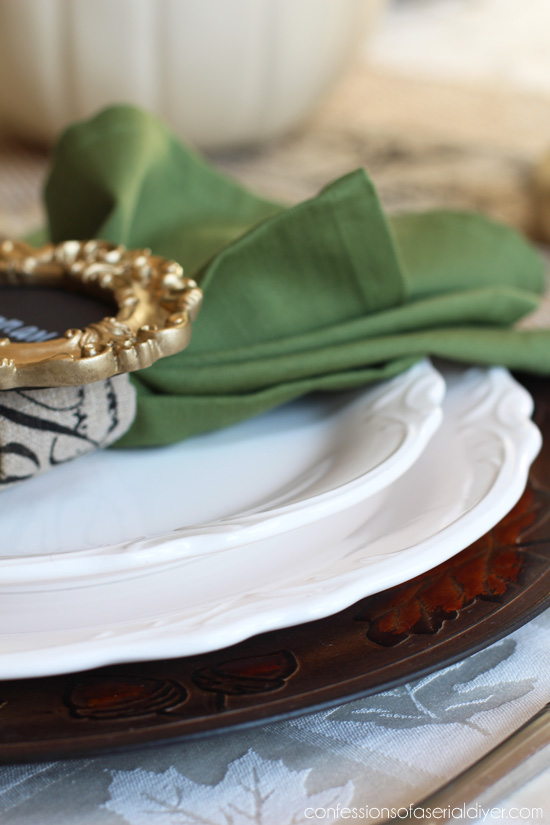
The gold really adds warmth to my Fall table:
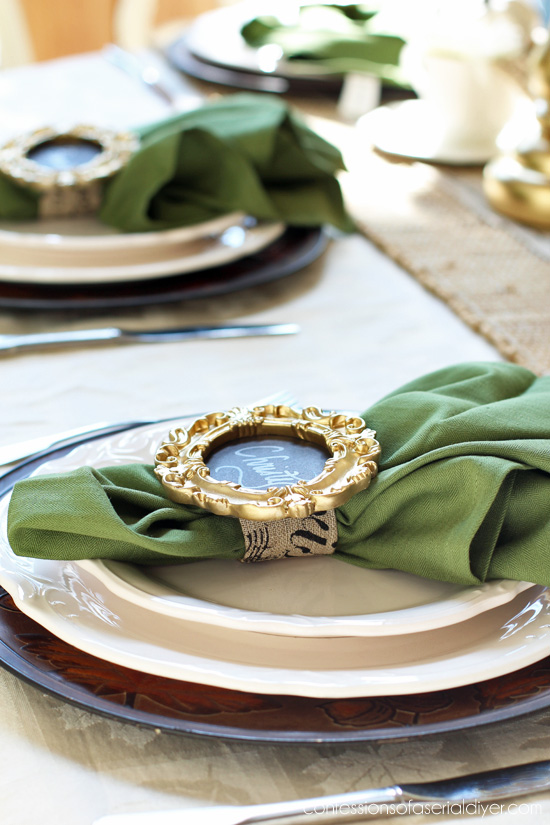
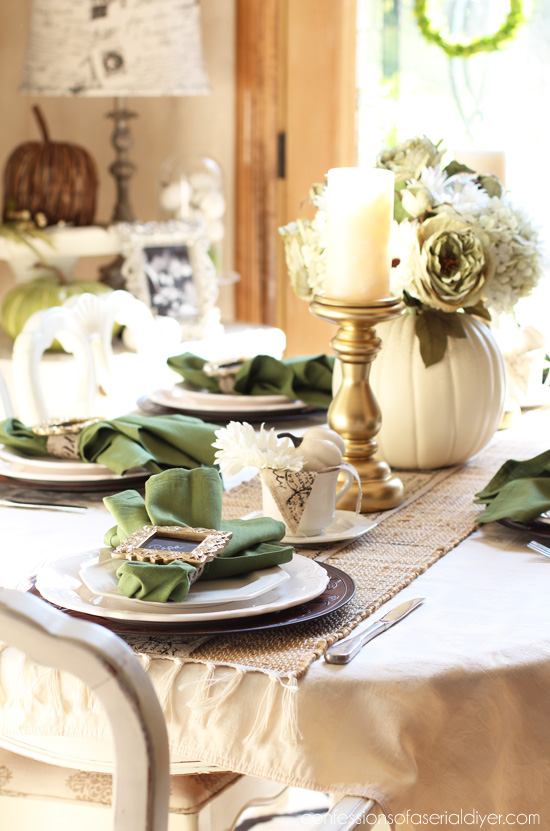
I did purchase the green napkins at Pier One, but I already had everything else.
I started with the chargers I picked up on clearance from Walmart for super cheap a few years ago. They are from the BHG collection and I love them.
The white dishes are my everyday dishes, ironstone from Pier One.
You can also see the subtle leaf pattern on the tablecloth in that photo.
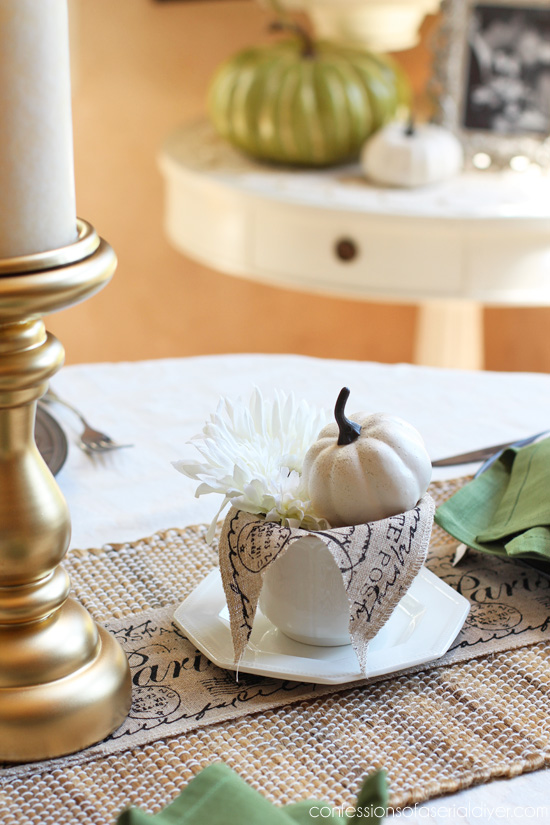
To fill in the empty space on the outside of the candlesticks, I put these little arrangements in a couple of my ironstone cups using leftover ribbon, a mini pumpkin, and leftover flowers from my arrangement:
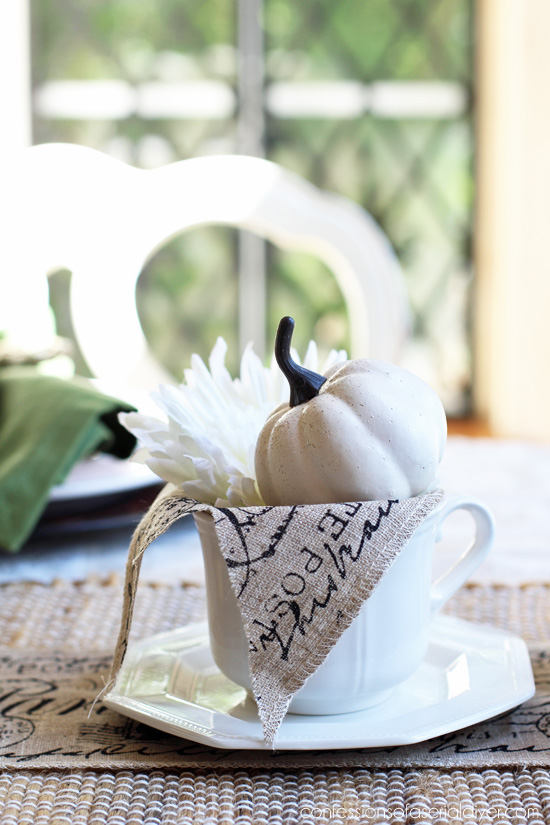
Sometimes you just have to improvise. 🙂
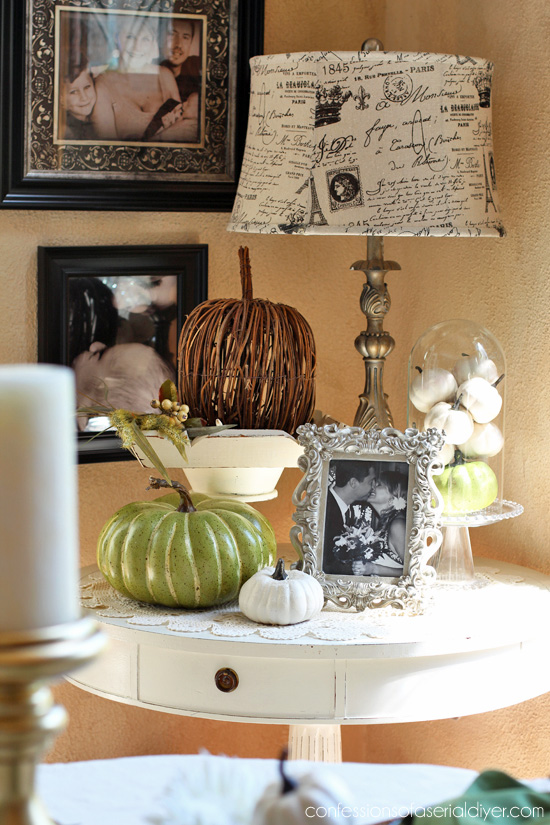
My drum table in the corner got a little decorating as well:
So that’s my Fall table! Everything is easily removable if need be to add bread baskets, etc to the table.
Here’s how it easily came together:
See? Simple!
Pin for inspiration later:
Several other friends are sharing Fall inspiration this week too!
Monday {mantels}
Tuesday {tablescapes}
Wednesday {wreaths}

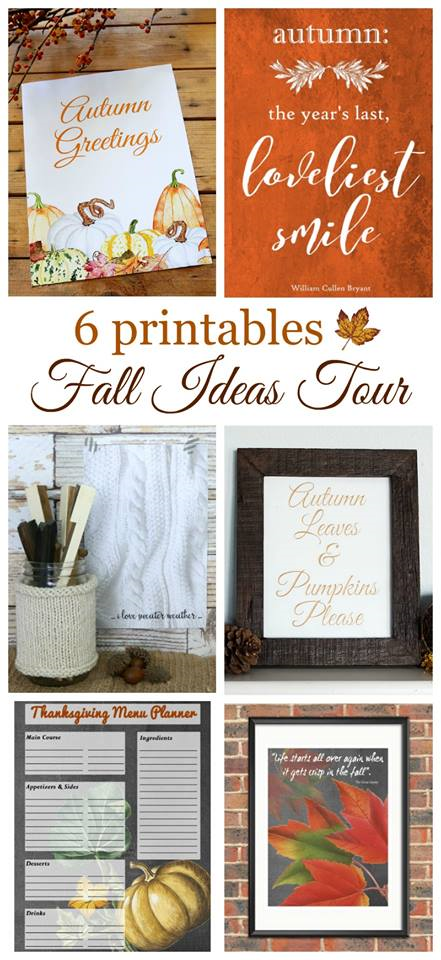
Thursday {printables}
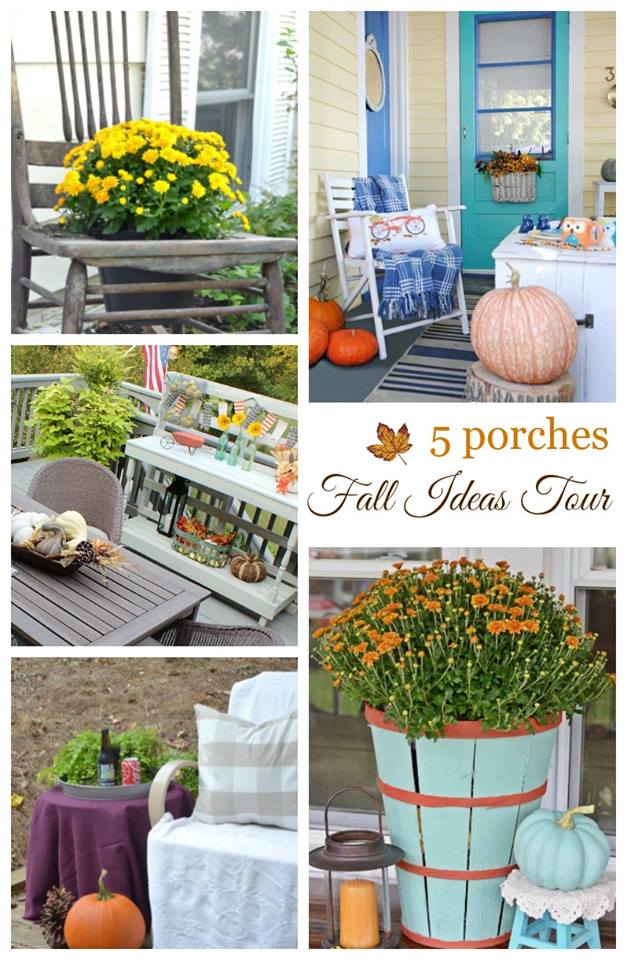
Friday {porches}


Moriah says
First of all, Happy Birthday! I’m sorry I missed that. And LOL on getting your sister back ???? I love this idea….of course, because I love all your projects. I’m actually thinking these would be great for my daughter’s wedding as we didn’t want the napkins to look like a typical restaurant fold. Going to Michaels….again :). ThNks for the inspiration!!
Christy says
Thanks, Moriah! You are so sweet! And wow you have a lot on your plate with planning a wedding! So glad you were able to find inspiration here today! XO
Angie @ Postcards from the Ridge says
Your table is beautiful, Christy! Those napkin rings are so cute and clever. And the centerpiece is so pretty. Thanks for the great tutorials. And happy belated birthday! Have a great week. ~ Angie
Christy says
Thanks, Angie! And thanks for all the work in pulling this fun tour together! XO
Paula@SweetPea says
Your table looks beautiful, Christy! I love the napkin rings that you made and they’ll be handy to use for the upcoming holidays.
My favorite part of your post was the GIF that you created showing how you set the table. Fun!
Christy says
Thanks so much, Paula! I thought the gif would be fun to do here, and yes, these napkin rings will get lots of use. 🙂
Christy @ Our Southern Home says
So very pretty….as always! I have those same frames sitting in a craft drawer. What a wonderful idea! You and your friend are such fun! Happy birthdays to you both!
Christy says
Aw thanks, Christy! That was my sister…it was a lot of fun! Then we spent Friday at the Adventure park here in VB climbing and zip-lining while the kids were in school! It’s fun to take a break from adulting every once in a while! XOXO
Kathy Owen says
Your table display is lovely. I admit to never dressing my table up. Love the gold accents and the photo frame napkin rings. As usual I love your style!
Christy says
Thanks so much, Kathy! I usually host Christmas Eve with my family every year and I always try to have a seat for everyone. I just love a nice sit-down dinner, but I rarely get to do it for the Fall so this was fun! 🙂
Annie (Canada) says
Very pretty Christy ???? ???? ???? I have what I need for my fall tablescape I just haven’t gotten around to putting it together. I guess I better get to it soon!
Christy says
Thanks, Annie!! XO
Doreen @ Hymns and Verses says
Oh my gosh – your tablescape is so pretty! I love the pop of green with the neutrals! Those gold framed napkin rings are perfection! I’ve seen them at Michael’s and thought and thought about what I could do with them – now I know!!!
Christy says
Thanks, Doreen! I just loved those little frames when I saw them! 🙂
Lindsay Eidahl says
5 minute projects for the win! Love these! Great idea and something the kids could even do for their table this year!
Christy says
Yeah, girl!! We do enough 20 hour projects, right? Sometimes these little ones are a nice break! Thanks, Lindsay! 🙂
Gina Keysor says
You are SOOO imaginative!! I would have never thought of the idea for napkin rings, so functional too with the names. I like the candlesticks too, I was thinking of boosting up the bottoms of mine by setting them in a small wreath of dusty miller greenery perhaps with sprigs of gold and creamy white berry picks. That fills up the table area nicely. Love it, very subtle fall color palette.
Christy says
Thank you, Gina!! I love the idea of adding something to the bottoms of your candlesticks!
JoAnne Robinson says
The napkin holders are sublime!….well done!
Christy says
Thank you, JoAnne! XO
Vanessa Hunt says
Christy it all looks so pretty! I LOVED the video! Happy Birthday to you and your sister! 🙂
Christy says
Thanks so much, Vanessa! XO
Nancy @ Artsy Chicks Rule says
Gorgeous, every single inch!!!! Love the gold….perfect accompaniment to the green and cream colors.
xo
Nancy
Christy says
Aww thanks, Nancy!! XOXO
Julie Timmerman says
Hey Christy,
Where did you find your cute tiny white pumpkins? I have looked around for some little ones but no luck. Your tables ape looks beautiful!
Thanks for all your inspiration,
Julie
Christy says
Thanks, Julie! They started out orange actually. You can see how I did them here: https://www.confessionsofaserialdiyer.com/diy-reclaimed-wood-crate/ 🙂
Marie from The Interior Frugalista says
Talk about adorable napkin rings – love this idea and so simple to make! Love how pulled some florals from the centerpiece and the fabric from the runner together in the teacups, really cute. Always fun watching a gif of it all coming together. Pinning.
You got your sister good!
Christy says
Thanks, Marie! These were so easy to make, and I just loved the little frames when I saw them at Michaels! My sister got up to look out her window at around midnight to see if her son’s car was in the driveway and couldn’t believe I had gotten her back lol! XO
Cindy Lee says
Happy belated birthday!! What an inspiration you are to myself and many others. I just went to the thrift store today and found many things to replicate your table decor. It is so gorgeous! Keep on, keeping on 🙂
Christy says
Thank you thank you thank you for your sweet words, Cindy!! It truly makes my day to hear that you were inspired…and that right there keeps me keeping on! 🙂
Debbie @ Refresh Restyle says
Your table is stunning! Love the napkin rings, you rock!
Debbie
Christy says
Thank you, Debbie!! You’re pretty amazing yourself! 🙂
Becky says
You set a lovely table, but the prize winner for sure was the slide show at the end. My little guys were awed (“Mom, how is the table setting itself!?!), and my bigger ones are planning a slide show of some yet-to-be-decided sort to get the same effect. : ) Well done, all of it!
Christy says
Oh that is too cute!! I use an app on my phone called ImgPlay to make those…so fun to see them come together! 🙂
Toni Perry says
Very lovely table setting. I always have trouble with figuring out how to dress my table. Do you leave your dishes on the table once you decorate it or do you only put them out when you are having company? I always wanted to leave the table dressed, but did not know if that would be tacky.
Christy says
Thank you, Toni! If I had a more formal space or a more separated dining space, I might consider leaving my table set. But you know what? It’s your home to do with as you please and if you want to leave it set, do it! I redid my outdoor patio table and chairs this Summer and set the table a bit for the photos, and you know what? I left it set all Summer! It looked so pretty every time I looked outside, and we don’t really use that space for eating anyway! (So go for it!) 🙂
Jennifer @ Town and Country Living says
What a clever idea and a great way to personalize your table setting!
Christy says
Thanks, Jennifer! XO
Sadie Seasongoods says
Gorgeous, gorgeous, gorgeous! Those little frames for the placecards- LOVE!! I’m sooooo not talented when it comes to tablescapes, but I just ooh and ahh over them. Happy Fall tour! 🙂
Christy says
Thanks, Sadie! I have to admit that tablescapes aren’t my favorite to put together really either, but including a fun napkin holder idea helped make this post more me. 🙂
Karen @Graphicsfairy says
I love a cute, quick and easy project! These are adorable Christy! And your home is beautiful!
Christy says
Quick and easy for the win! Thanks so much, Karen! XO
Maryann @ Domestically Speaking says
Love those napkin rings – SO CUTE!
Christy says
Thanks, Maryann! 🙂
Barbara Garrett says
Oh my goodness I simply ADORE those napkin rings!!! How fabulously creative. Your whole table is beautiful.
Christy says
Wow thanks so much, Barbara! XO
Andrea says
I love that runner! Where did you find it?
Christy says
Thanks, Andrea! The runner is from Pier One. 🙂
Shirley@Housepitality Designs says
Oh my gosh…I love those napkin rings…..I have use frames for place card settings but this is amazing!….Gorgeous table!
Christy says
Thanks so much, Shirley! XO
Vicki and Jennifer 2 Bees in a Pod says
Christy – we love your creativity and style! Your napkins rings are so pretty. We love your color palette too!
Christy says
Thanks so much, ladies! XO
Jennifer says
Those napkin rings will be a perfect decoration for fall. And it is not difficult to do at all (even look like it need a lot of skills to be done). Thanks for sharing, Christy!