Hi there sweet friends! Is it still steamy where you are right now? As I am writing this it is 94 ° outside. Nevertheless I am forging onward…with a brand spankin new Fall wreath! I mean it has to cool down soon, right?
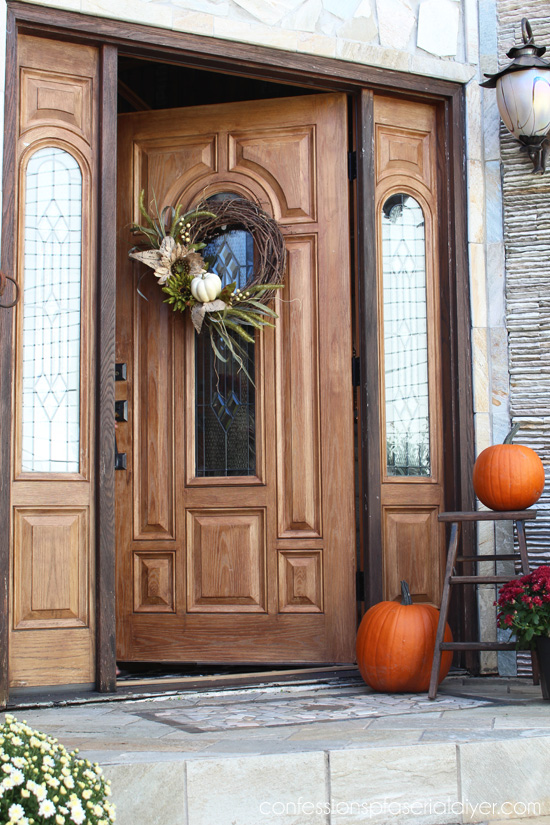
Here she is:
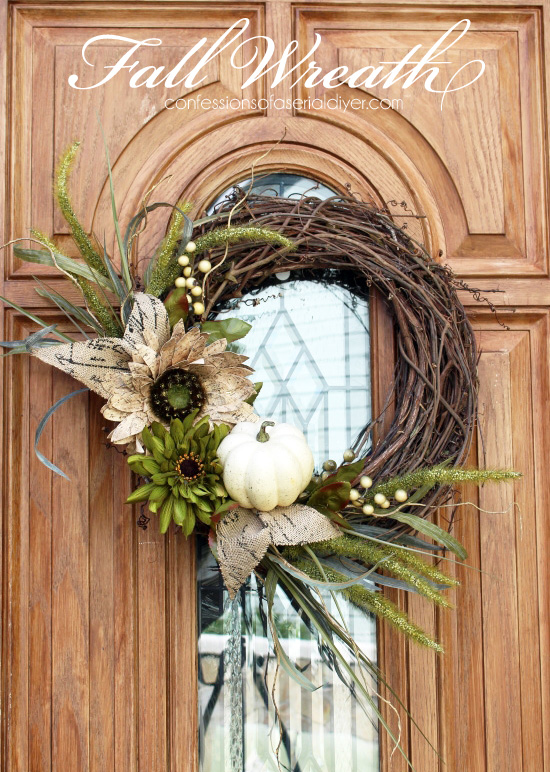
I decided to abandon the oranges and yellows this year in favor of a more subtle palette. What do you think?

Of course because I love y’all so much, I’m going to share how EASY this is to make.
First you’ll need these (All of my supplies came from Michaels.):
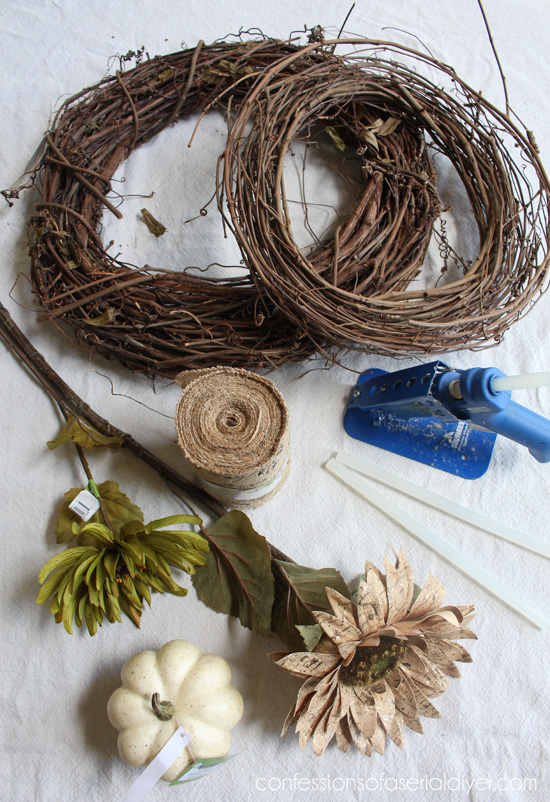
- Grapevine wreath
- Pieces from another grapevine wreath for depth (totally optional)
- Three fun additions to create a focal point. (I used two different flowers and an ivory pumpkin)
- Hot glue and glue gun
- Burlap ribbon
- Floral wire (not shown)
- Needle nose pliers/cutters (not shown)
And some of these:

These are the stems I used. I ended up not using the ones on the far right.
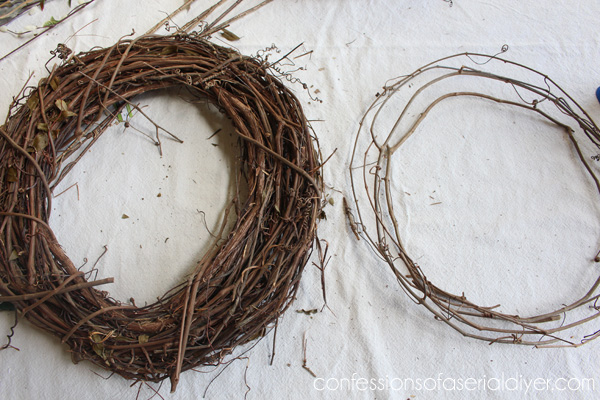
Start with your extra grapevine wreath and pull/cut off a piece like you see here:
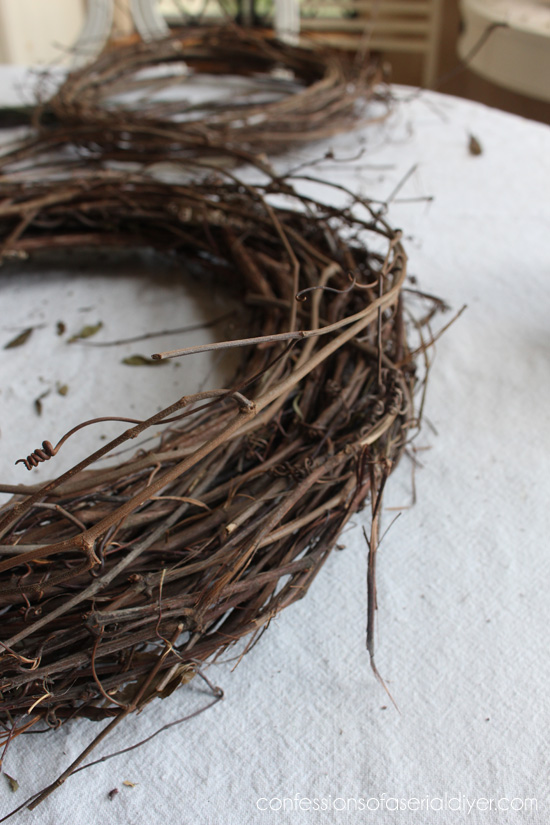
Then attach it to the front of the full wreath to add a bit of dimension. I just tucked it in and secured it with hot glue. See how it adds a bit of depth?
Then I tucked my furry friends in first:
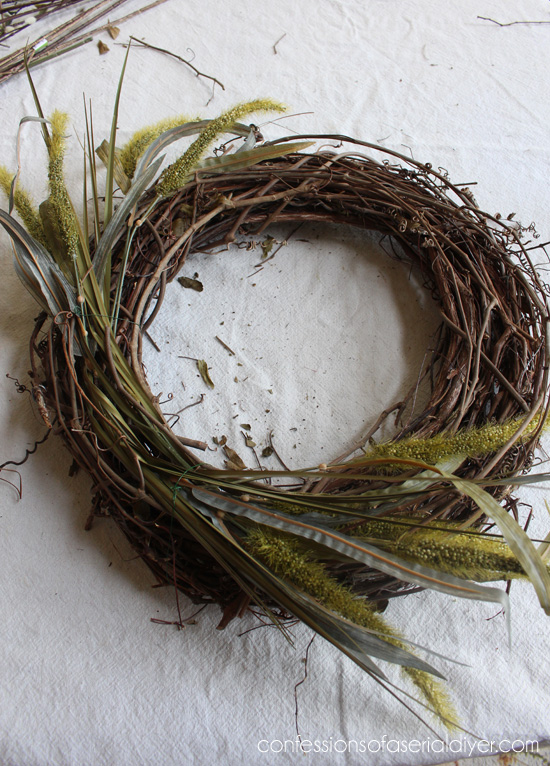
(You can glue all the stems in place or just tuck them in if they feel secured in place.)
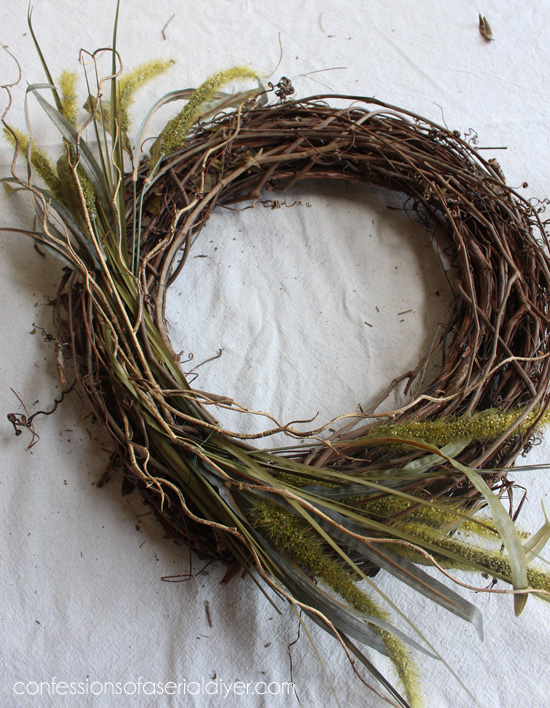
Followed by the squiggly branchy ones which I cut apart…

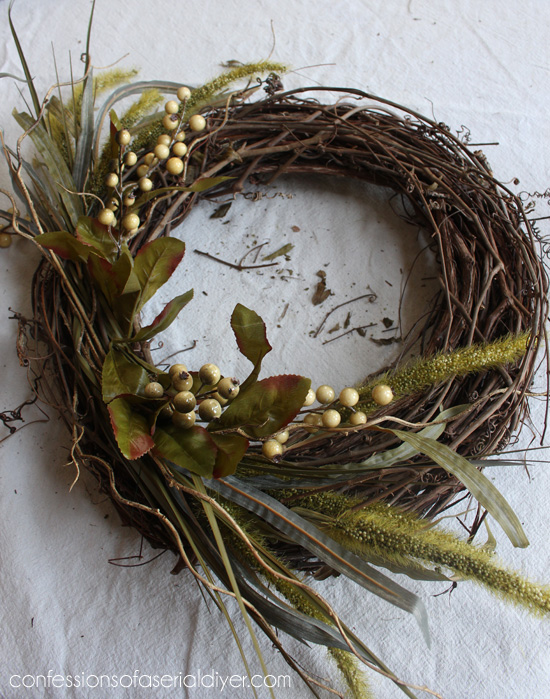
Next I added a couple of the ivory berry pieces:
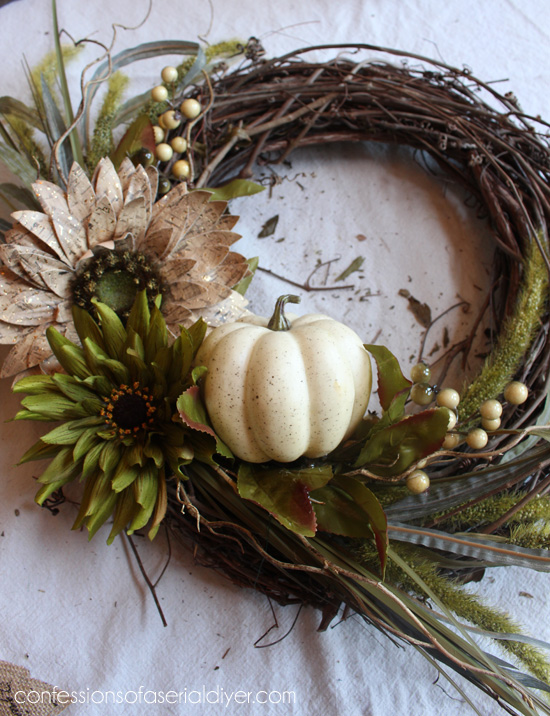
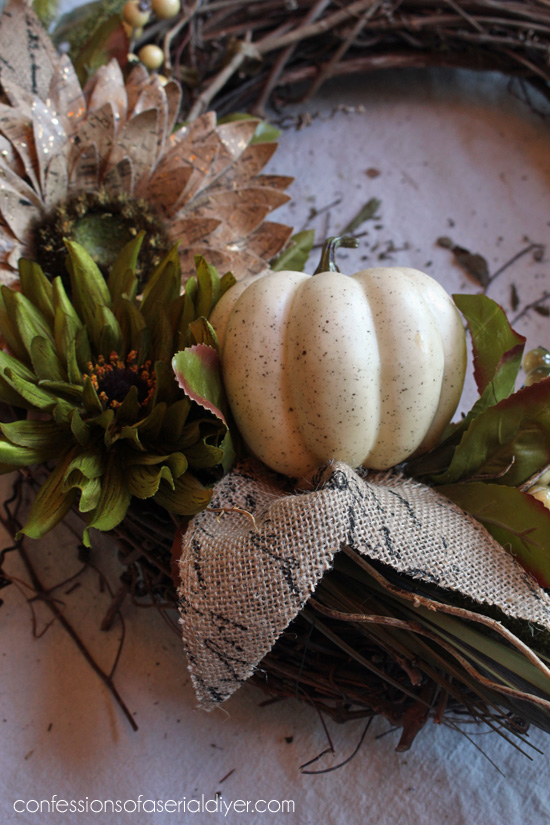
Then I hot glued the two flowers and little pumpkin in place.
To add a bit more texture, I cut two pieces of printed burlap:
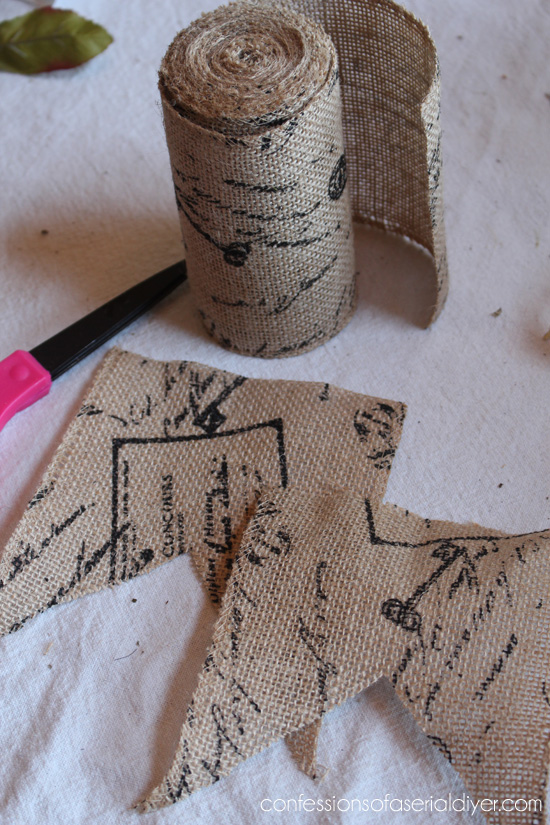
…squeezed the ends together like this:

And tucked in place with hot glue:
That’s it. Pretty simple!

I am loving the muted greens this year with the pop of ivory…
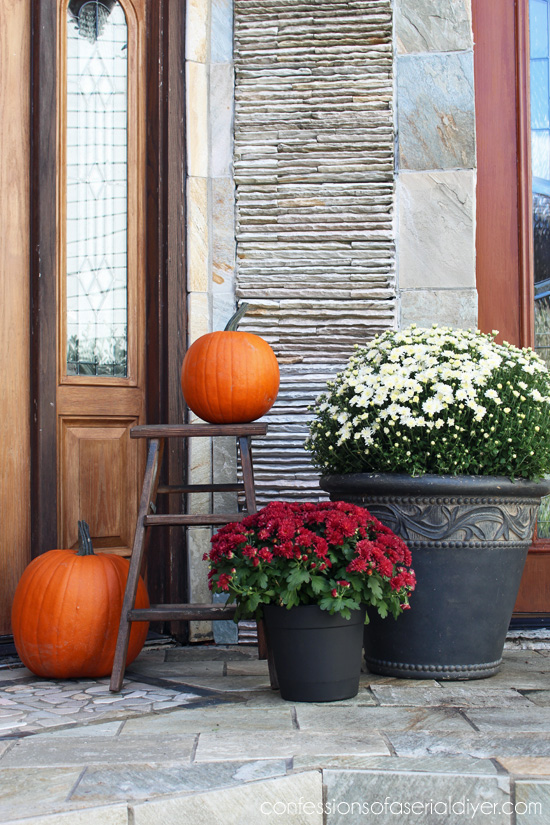
Of course I did break down and buy some regular pumpkins. Can I tell you how hard that was when I was sweating my tooti off?
And Fall wouldn’t be Fall without Mums…

This little ladder was another Lucketts find from last year.
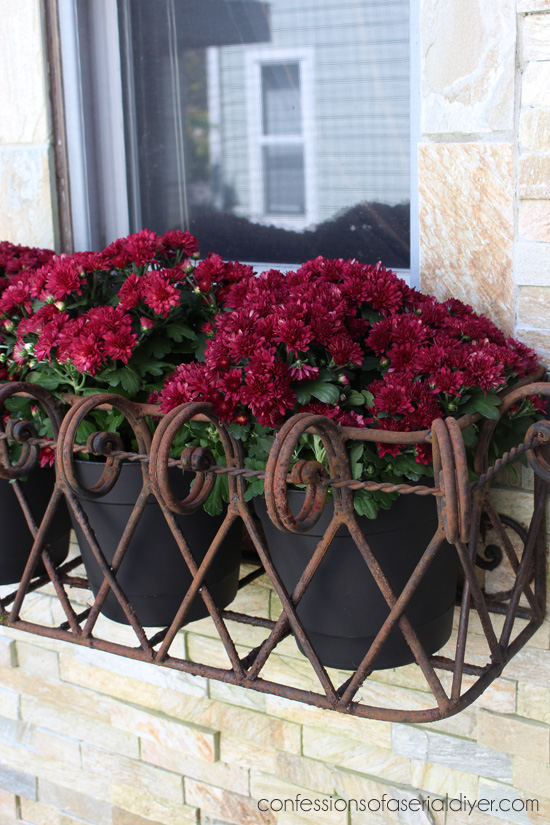
Can you see my window boxes got an update too?

I had those grass liners filled with white Geraniums for Summer, but when I tried to remove the plants, the roots had grown into the grass liner and pulled it out in chunks. It basically had dry rotted anyway, so I found another solution. Add three pots to my boxes instead.


Want more inspiration for Fall? You’re in luck! All this week my blog friends will be sharing more Fall decorating ideas!
[inlinkz_linkup id=444078 mode=1]
[inlinkz_linkup id=444079 mode=1]
[inlinkz_linkup id=444081 mode=1]
[inlinkz_linkup id=444083 mode=1]
[inlinkz_linkup id=444084 mode=1]
Hope you are feeling inspired! Now bring on the cool weather…I’m ready. 🙂
XO,
![]()
If you like what you see, there are several ways to follow along! ![]()
Email * Facebook * Pinterest * Hometalk * Twitter * Instagram
I love to share at some of these great parties:
Home Stories A to Z Not Just a Housewife Kammy’s Korner The Happy Housie Design Dining and Diapers Liz Marie Blog Funky Junk Interiors Savvy Southern Style Tatertots and Jello DIY Show Off Redoux Interiors Between Naps on the Porch The DIY Dreamer Oh My Creative Little Miss Celebration Just a Girl and Her Blog Sand and Sisal Interior Frugalista House on the Way Addicted 2 DIY I should be Mopping the Floor Miss Mustard Seed


Angie @ Postcards from the Ridge says
This is so pretty and you make it look so easy! I already have a grapevine wreath and some burlap ribbon and now I think I see another project in my immediate future! The ladder is perfect on the front porch. Thanks for all of the inspiration!
Christy @ Our Southern Home says
Christy,
I hereby declare you the wreath queen! They are always beautiful!!! ~Christy
Christy K. James says
And I accept ha ha! Thanks so much, Christy. 🙂 Have a great week! XO
Jen @ Girl in the Garage says
I love your wreath Christy – it is gorgeous! You always have beautiful projects. 🙂
Christy K. James says
Thanks so much sweet friend! XO
Shanna Gilbert says
Your wreath looks so simple to make but the result is so lovely! You’re mums looks gorgeous!
Christy K. James says
Thanks, Shanna! I love mums for Fall. I always say I’m going to plant them in the ground after, but I never do. Have a great week! XO
Leslie @ House on the Way says
You did an amazing job on the wreath! Absolutely gorgeous and your front porch is perfect. Have a great week!
Leslie
Christy K. James says
Thanks, Leslie! XO
Marie@The Interior Frugalista says
What pretty and classy Fall wreath Christy and you make it look so easy!
Christy K. James says
Thanks sweet friend! 🙂
Tami @ Curb Alert! says
Still in the mid 90s here too – Ugghh! Your wreath and porch decor looks so pretty. Very welcoming!
~Tami
Christy K. James says
Thanks so much, Tami! I know my neighbors must think I’m nuts with pumpkins out already 🙂
Tina says
Beautiful wreath! I love the colors you chose, subtle but so warm.
Christy K. James says
Thanks so much, Tina!
Nancy @ Artsy Chicks Rule says
You are the wreath queen for sure!! LOVE it!!! I am doing a wreath too (I think lol…had to change gears at the LAST minute..what’s new? lol) I had originally considered neutrals and greens but went with oranges/reds instead! Anyway, love love it!
Nancy
Christy K. James says
Thanks, Nancy!! I kind of missed the oranges after I made it, but I do like it. Can’t wait to see yours! 🙂
Meegan says
Christy,
Every detail is to perfection on your wreath. I love the added touches with the printed ribbon. Thanks for inspiring me every time I visit your blog 🙂
Make it a wonderful day.
Christy K. James says
Thanks so much for your sweet words, Meegan. They really make my day!! XO
cindy@DIYbeautify says
Love it Christy! So pretty (and simple) 🙂
Christy K. James says
Thanks so much, Cindy! Yes…very simple 🙂
Michele @ Our Rosey Life says
I just adore your fall wreath. So pretty in its simplicity and muted fall colors!
Christy K. James says
Thanks, Michele! So glad you like it 🙂
Kelly says
Just love it! Pinning…
Kelly
Christy K. James says
Thanks so much, Kelly!
Jeanette says
Wow! I love your fall wreath! I usually leave out the orange in our fall decor too. Great tip to tuck in the ends of burlap. I would have been trying to tie a bow and then add stuff to the knot bump! What a great welcome to your home! ~Jeanette
Christy K. James says
Thanks so much, Jeanette! Can’t wait to see what everyone else comes up with 🙂
Therese @ Fresh Idea Studio says
All hail, the wreath Queen! 😉 Of course, your new wreath is perfection and I love it! But Christy, can we talk about your gorgeous porch, please?! I just need to hang out there for awhile if you don’t mind!
Christy K. James says
You are so funny, Therese! Thank you, I’m so glad you like it! XO
catherine says
Hi Christy
It’s weird to decorate for fall when it’s hot outside isn’t it? Your wreath looks beautiful. Love the colors you chose–very pretty!
Catherine
Christy K. James says
Yes it is! I know my neighbors must think I’ve gone mad. Thanks so much for stopping by! 🙂
Luisa says
Love!
Christy K. James says
Thanks, Luisa! XO
Paula@SweetPea says
I was hoping that you would share one of your beautiful wreaths for fall. I love how you used neutrals for this instead of the usually orange. I also appreciate the step-by-step instructions that you supply. Awesome job!
Christy K. James says
Thanks so much, Paula! Wreaths are my favorite. I would make more if I had more occasions to do so 🙂
Wendi @ H2OBungalow says
As always you rocked it girlfriend! I love your wreath and tutorial. All of your touches for your front entry look beautiful together. You’re right…whats fall without mums?
Christy K. James says
Thank, Wendi! I am ready for Fall 🙂
Kathy, Petticoat Junktion says
Everything is so beautiful Christy! I really like the color scheme of the wreath. You have everything all decorated. Your entryway is lovely 🙂
Christy K. James says
Thanks so much, Kathy! I’m sure my neighbors think I’m a tad nuts for having pumpkins out already ha ha!
Mandy Hank says
This is stunning Christy! It goes perfectly on your door. Love Love Love it!
Christy K. James says
Thanks sweet friend! 🙂
Kim d says
Love the colors and how you used the burlap ends! Looks fantastic- great job!
Christy K. James says
Thanks, Kim! XO
Susan says
The wreath is beautiful. Simple and yet so elegant. I like your flower selections and the touch of burlap.
Christy K. James says
Thanks, Susan! So glad you like it!
Jeanie @ create&babble says
This is my absolute favorite wreath in all of blogland! Well, the ones I’ve looked at anyway ; ) I gotta make this! Pinned!
Christy K. James says
Thanks so much, Jeanie! Your sweet comment made my night! XO
Krista @ the happy housie says
Beautiful Christy- I love the little addition of burlap!!
Christy K. James says
Thanks, Krista! I saw pics of your kitchen demo’d and I can’t wait to see what you have planned!!
Kim @ Sand & Sisal says
Gorgeous! I mean seriously beautiful! I’m so envious of your pretty door and that stonework!!! Oh my! -PS. We need to get together sometime soon for coffee or drinks girlfriend! (pinning)
Christy K. James says
Thanks, Kim! I love yours too!! Yes, we need to meet up soon for sure 🙂
Maryann @ Domestically Speaking says
Love your wreath! Love that you went with neutral colors. I’m featuring your gorgeous wreath in my Friday Features this week. Thanks for linking up to Inspire Me Monday.
Christy K. James says
Awesome! Thank you! 🙂
Shelley Fosse says
I am so glad you commented on my blog because this wreath tutorial is just what I needed! A bird built her nest and laid eggs (awe, cute), then pooped all over the new $50 wreath I hung up earlier this year (less cute). I had to take it down but I kept it because I knew I could take it apart and re-purpose the non-pooped on parts 🙂 and now I know how! Also, I subscribed because your blog looks AWESOME!
Christy K. James says
Oh no to the poopy bird, but yay…you feel inspired! SO awesome to have you following along! The Harlequin is one of my favorite patterns and I am doing a grey and white harlequin pattern on a bench right now. That’s what drew me to your gorgeous floor. You’ll see it early next week 🙂
Mary Beth @ Cupcakes and Crinoline says
Your wreath is absolutely gorgeous, Christy. I love that it’s not the usual fall wreath. Perfect! I’m so happy to have been a part of the Fall Home Decor Tour with you!
Christy K. James says
Thanks, Mary Beth! I love to be a part of these fun tours. Hope you are enjoying your weekend!
Dria says
Your wreath is beautiful! I love the colors you used for it and how it looks against your door, you did a fantastic job!
Christy K. James says
Thanks, Dria! Hope you have a great week at your new job 🙂
Ann @ My Nearest and Dearest says
Love, love, love that wreath! The green and creamy whites make it look so fresh.
Christy K. James says
Thanks so much for taking a minute to leave a sweet comment! I’m so glad you like my wreath! XO
Maria says
Beautiful wreath!
Christy K. James says
Thanks, Maria! XO
Shelly Bailey says
This wreath is absolutely beautiful and you did such a great job of showing us how you made it step by step. Thank you for that!! New follower from uncommon designs party. Can’t wait to see more of your creations. – Shelly
Christy K. James says
YAY! SO glad to have you following along, Shelly! Thanks for taking a minute to leave a sweet comment! 🙂
Tammy says
Love your wreath and the colors! Beautiful!
Christy K. James says
Thanks so much, Tammy! XO
Katie Goldsworthy says
I love it! Sharing on Twitter! Thanks for linking it up to Monday Funday!
Christy K. James says
Thanks for sharing, Katie!
Kelsey @ Vintage Storehouse & Co. says
This is such a beautiful wreath! I will definitely be pinning this! Your tutorial makes it look so easy, I might have to try one myself! Thanks for sharing!
Kelsey @ the Vintage Storehouse & Co.
PS- Would love to have you share & link up at ReLoved Fridays! The link party is open until Monday!
Christy K. James says
Thanks, Kelsey! 🙂
Katie @ Little House of Four says
Girl, you have some serious talent! I love your fall wreath and your front entrance. Thanks so much for linking up to YDTT!
Christy K. James says
Thanks, Katie! 🙂
Tara @ Anything & Everything says
This wreath is beautiful! I just love everything about it!
Christy K. James says
Thanks so much, Tara! XO
andi says
How did I miss this one?? I saw this posted on Nancy’s site and I knew immediately it was yours. You are a dang wreath genius.
-andi
Christy K. James says
If I could I would make wreaths. Only wreaths. Every day. 🙂
JP says
Miss Chris…every wreath that you do is so amazing! I love the neutral look….I am trying to tone mine down this year, although it is hard because I do love all of those beautiful jewel tones. I am so excited to be back to see all of your fabulous ideas!
Hugs,
JP
Christy K. James says
It’s good to see you visiting! I’m glad you like my wreath. I usually stick to the traditional vibrant colors, but I’m liking the neutrals for a change. 🙂
AnnMarie says
I love making wreaths and this one is so pretty!! Love how Fall it looks without the orange and yellow!!
Christy K. James says
Thanks, AnnMarie! I thought I might miss the vibrant Fall colors, but I really don’t. 🙂
Megan @ Our Pinteresting Family says
You really made a gorgeous wreath, and thank you for showing the step by step photos. It really looks a lot less complicated to put together. Your fall decor is so beautiful.
Christy K. James says
Thanks, Megan! This was a simple wreath to put together. It always looks more complicated than it really is, right? 🙂
Jamie | anderson + grant says
Your entire porch looks so inviting. I love that you chose greens in your fall wreath rather than the typical orange we are so used to seeing. It looks beautiful hanging against your wood door!
Christy K. James says
Thanks so much, Jamie! The greens were a nice break this year 🙂
Taylor says
what exactly do you glue?
Christy K. James says
Great question, Taylor. I updated the post to be more clear on that. My stems were tucked in pretty securely, so I didn’t need to add glue, but I glued the two flowers and the pumpkin as well as the burlap pieces. You may want to add a bit of glue to the ends of yours stems before tucking them if they don’t feel secure. Hope that helps!
Jenn says
Hi there! Thanks for sharing this tutorial. I noticed you said floral wire is needed but it isn’t referenced throughout the tutorial. At which step is it needed?
Thank you!
Christy K. James says
Ha I just realized I never showed that…I used it to make a hanger for the back! 🙂