This is the antique tool caddy that almost wasn’t:

This is how it looked when I found it sitting all by it’s lonesome self at one of my favorite thrift stores a while back:
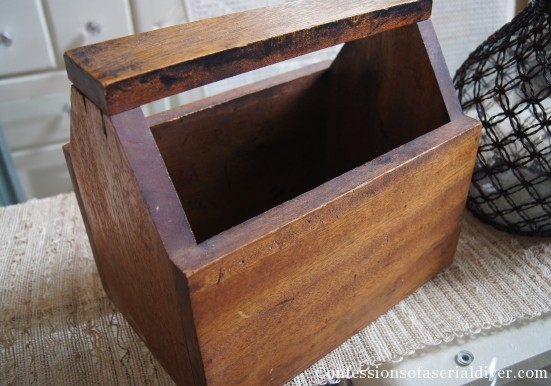
I knew I wanted to paint it, but didn’t really have a plan.
Enter the very talented Kristen, of Sophia’s. I was reading her latest email where she shared a link to her favorite image transfer product. She demonstrated it on tea towels and it was amazing how well it worked. She also said that it works on most surfaces, including wood. Wood, huh?
It was late, I mean really late. During the hours of which I can be sold on pretty much anything. (Like an ironing board that allows you to iron both sides of your garment at once. Doesn’t that sound amazing?) I had to order some of this miracle paper immediately.
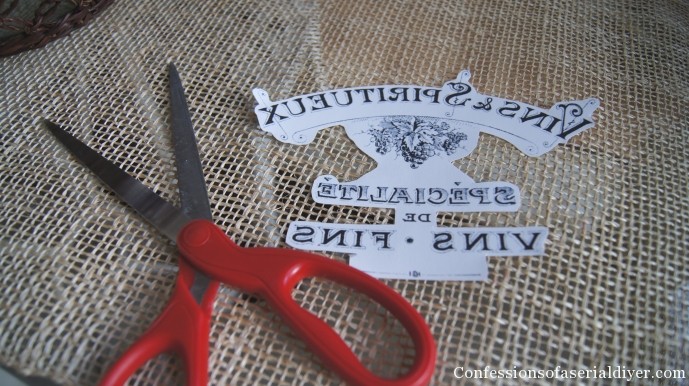
I found just the right graphic from the Graphics Fairy, of course! I was lucky enough to get to meet Karen at Lucketts. She was so nice while I rambled on about what great deals I found!
So I read the directions, but there weren’t any instructions relating to wood specifically, so I did what any other Serial Do-it-Yourselfer would do, I winged it!
I cut the graphic that I had printed on the special paper, close to the edges all the way around.
I laid it face down on my surface and pressed a really hot iron right onto the surface. This is what I got:
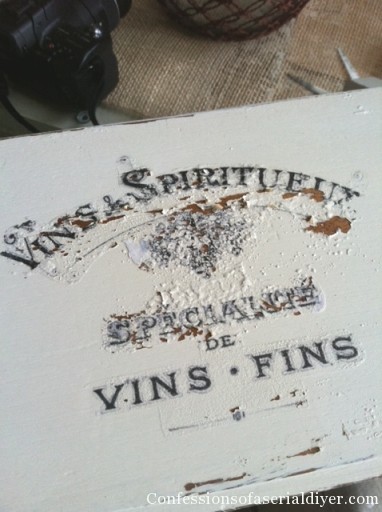
This is a cell phone pic I snapped to show my mom the devastation I created. (Ok maybe it wasn’t that dramatic.)
The paint started to bubble up where I had applied too much heat. Oh no!!
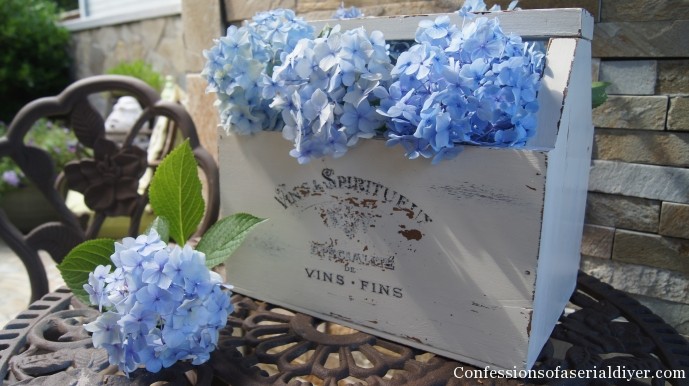
I decided I would have to sand it and start fresh, but this is the effect the bubbling left after I started sanding it:
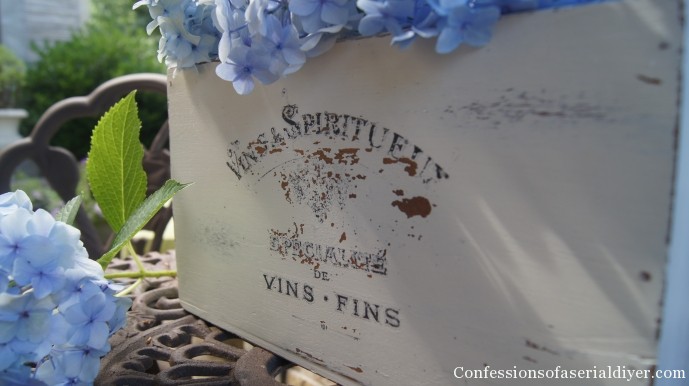
I love it!!!
Do you think you could just use your iron and randomly apply heat where you want your “chippiness” to be to create that effect? That would be awesome, right? Maybe I discovered something new?! Don’t y’all be trying this on Grandma’s good hutch now!
It should have been common sense to use a towel or something between the iron and my wood, but I’m glad I’m such a ditz at times, cause I love it!
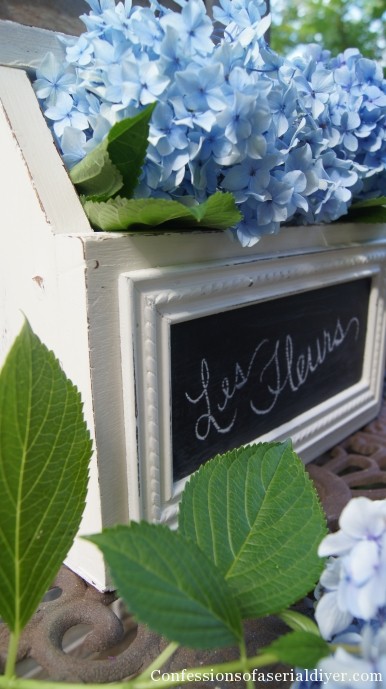
I promised one caddy, two ways, so here is the other side:
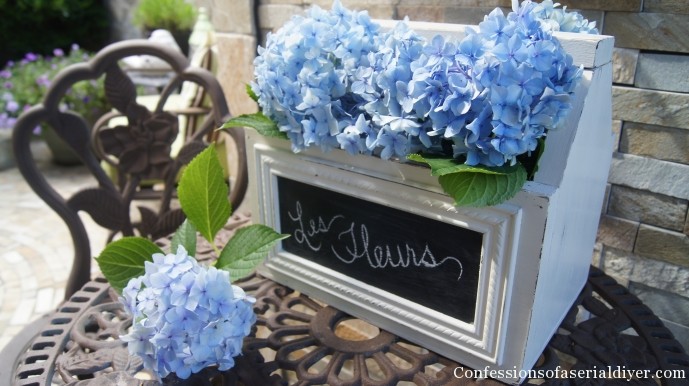
Ooh la la…

I taped off a rectangle and sprayed it with chalkboard paint. It looked naked and I have a very difficult time leaving well enough alone, so I went digging in the garage and found this trim. I cut it to fit and attached it with tiny nails. I think it’s cute!

My little caddy has multiple personalities now… which one do you like best? Have you ever experienced a big flop that turned out to be better than planned? I’d love to hear about it! 🙂
XO,
![]()
If you like what you see, there are several ways to follow along! ![]()
Email * Facebook * Pinterest * Hometalk * Twitter * Instagram
I love to share at some of these great parties:
Home Stories A to Z Not Just a Housewife Kammy’s Korner The Happy Housie Design Dining and Diapers Liz Marie Blog Funky Junk Interiors Savvy Southern Style Tatertots and Jello DIY Show Off Redoux Interiors Between Naps on the Porch The DIY Dreamer Oh My Creative Little Miss Celebration Just a Girl and Her Blog Sand and Sisal Interior Frugalista House on the Way Addicted 2 DIY I should be Mopping the Floor Miss Mustard Seed


Lisa@ Creative Raisins says
That is super cute.
Lisa
Creative Raisins
andi says
Oh sure…tease me with the hydrangeas again! The caddy looks AWESOME! I love both sides. What’s funny is that my epic fail project included the SAME graphic from Karen! What are the odds… 🙂
-andi
Christy K. James says
Ha! That’s too funny!
Linda A. says
Don’t yu just love it when a big goof turns out to be just what you were supposed to do in the first place? Both sides are cute as can be. I left a wood tool box behind at Goodwill; now I’m kicking myself. I’m on the hunt again!
Christy K. James says
I left one behind at an estate sale last weekend and I’m kicking myself, too! I hadn’t done this one yet, so I figured I didn’t need another one! Thanks for visiting! 🙂
Holly says
Hi Christy – thanks for sharing! I have one of these I keep staring at and trying to figure out what I’m going to do with it. I know it’s old but has some much love for it in the future! Hugs, Holly
http://coconutheadsurvivalguide.com/blog/
Christy K. James says
I stared at this one for a while as well. There are so many possibilities with a great little piece like this! 🙂
Chernee's House says
Love the caddy two different ways – that is what I love about DIY projects they are always changing and figuring out ways to make it look beautiful.
Christy K. James says
That’s the fun of doing things yourself, too…they can be whatever you can imagine! Thanks so much for visiting! 😉
Samantha D says
I love it when projects turn out okay – even after a big oops!
Sam
The Kitchen is My Dance Floor
Christy K. James says
Me too!! 🙂
Marty@A Stroll Thru Life says
Great makeover, I love it. I so need to hearn how to do these transfers. Love them. Thanks tons for joining Inspire Me. Hugs, Marty
Christy K. James says
Thanks Marty! I love that you take the time to pay each if us a visit. I know it must take a long time, but it’s really appreciated! 🙂
Cindy says
Turned out beautifully Christy!!!
Blessings,
Cindy
Christy K. James says
Thanks, Cindy!
Julie Corbisiero says
Hi, this is so beautiful. You did a great job decorating it. I saw it on wow me wed.
Julie from julieslifestyle.blogspot.com
Christy K. James says
Thanks, Julie!
Suzie says
Wow… I love this… especially how you finished both sides in different ways… double the decorating! I would love for you to come link up to my first “Clever, Crafty & Creative Linky Party #1”. You can find it at:
http://dorothysueandmillieb.blogspot.com/2013/07/clever-crafty-crative-linky-party-1.html
Hope to see you!
Suzie
Christy K. James says
How fun to be a part of your first party, just linked up! 🙂
Confessions of a Plate Addict says
love it…so frenchy! Thanks for sharing at The Scoop!…hugs…Debbie
Christy K. James says
Thank you, Debbie! 🙂
Jamie says
This is amazing! I love it. You did such a great job.
Jamie
Christy K. James says
Thanks so much, Jamie! I just visited you back and found your party…so I linked up! Have a great day!
Kadee says
Oh, no! You must not make me choose! They’re both amazing! I’m going to go back and read the post about how to do this .. gotta run!!!
Christy K. James says
You’re funny! Thanks, Kadee! 🙂
Jennifer Longenecker says
This is such a fun caddy. I really like the chalkboard side. So glad that everything worked out. I really hate it when I run into mishaps and usually have to remind myself to breath and remember that it will all work out.
Christy K. James says
I should have been smarter than to use a hot iron on my wood surface…
Luckily this blooper worked out ok! 🙂
Maria says
How cute and clever! I love the chalkboard side, so cute!!!
Christy K. James says
Thanks, Maria! I think I’m partial to that side, too 🙂
Nancy @ Artsy Chicks Rule says
Love it! I think it looks great chippy!! 😉
Thanks so much for sharing on Project Inspire{d} Pinning!
Nancy
kim says
This exact same thing just happened to me too! Mine, however, didn’t turn out as well. The whole thing lifted off the project and was a complete mess. I had to use paint stripper to get everything off and start over. I am glad you had much better results!
Christy K. James says
Oh no!! I bet that was so frustrating! Not all my bloopers turn out well, but I’m glad this one did! Did you use the same transfer paper?
Jill Flory says
I love it too! Oh how fun when an almost failure turns into something even better than than what you had in mind originally! Job well done 🙂
Christy K. James says
Thanks, Jill! I was so happy it worked out!! 🙂
katie says
Beautiful job on the caddy!