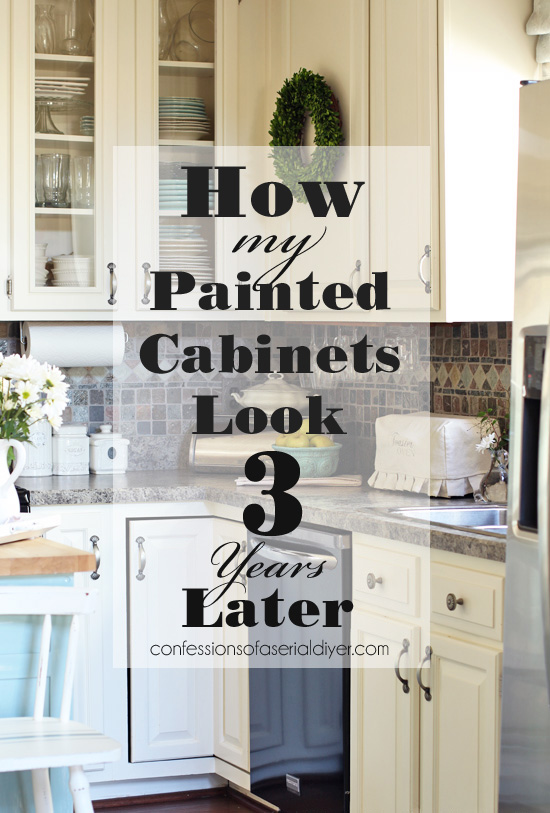
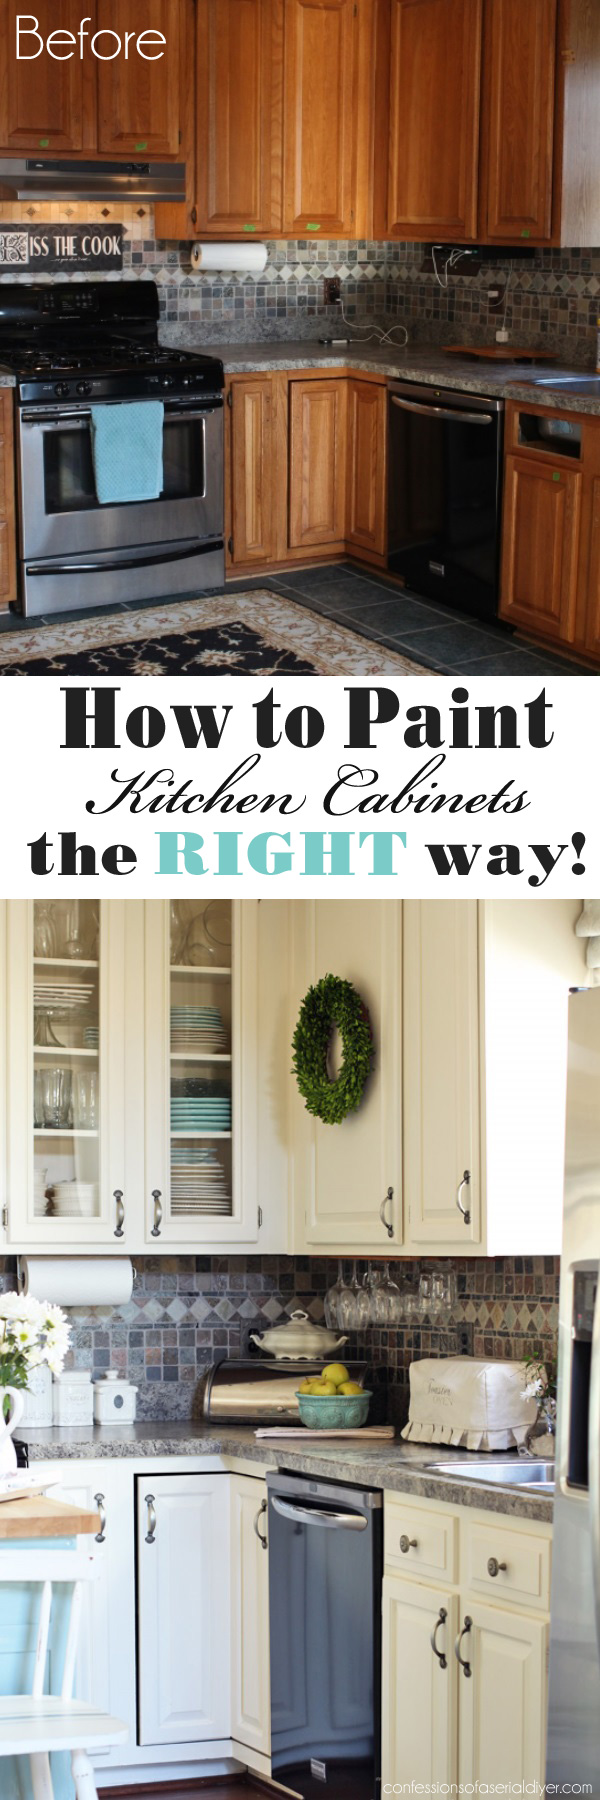
Hey Friends! One of my most popular posts is my kitchen cabinet painting tutorial where I shared step-by-step how I painted our kitchen cabinets three years ago. (Find it HERE.) I didn’t show any short-cut, super easy method to brightening up a dark and dated kitchen, but what I did share is how I painted my cabinets the RIGHT way.
Since then I’ve had several questions about how my kitchen cabinets are holding up. I’ve been wanting to share an update and I finally had the chance!
Today I thought I’d share exactly how my kitchen cabinets look after three years.
First, here’s a reminder of how my kitchen looked before I painted it:
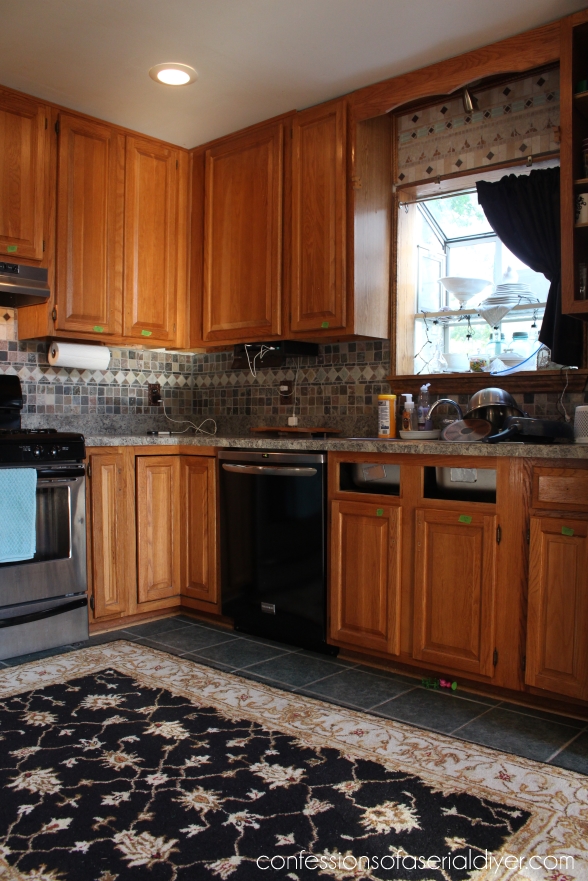
We had nice quality wood cabinets, but this corner of our downstairs was just too dark.
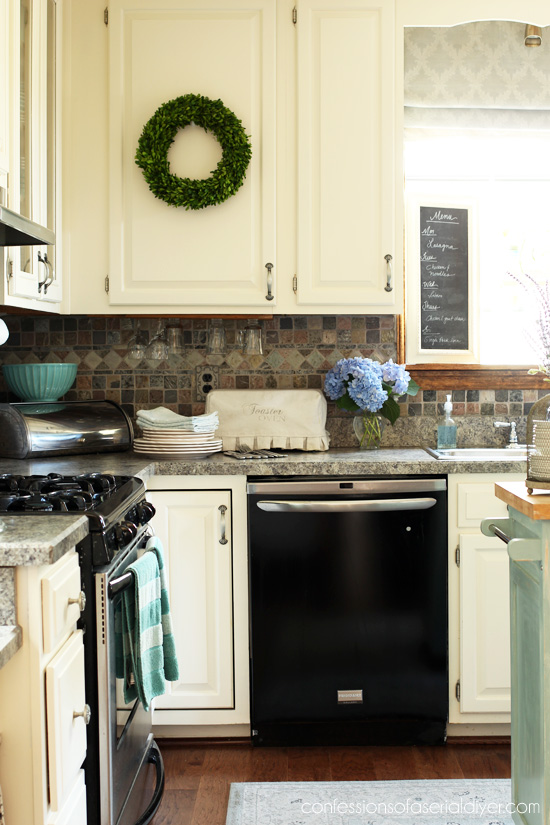
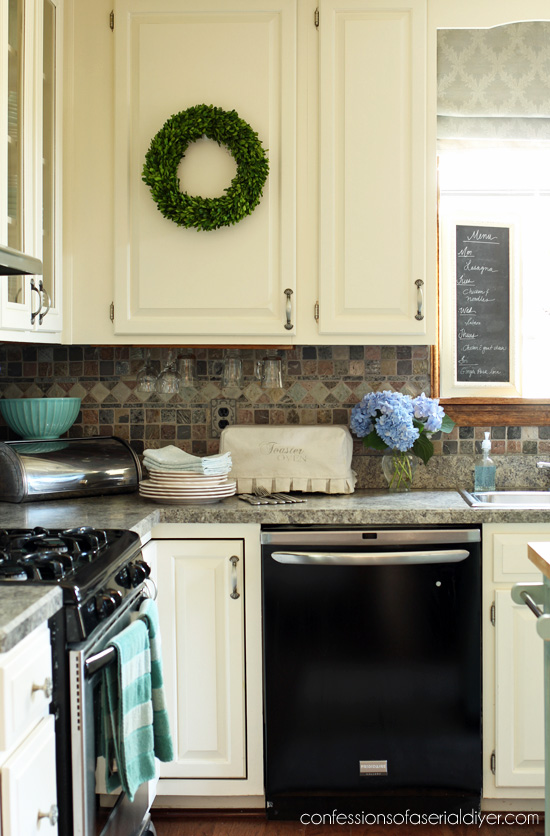
Here is how our kitchen looked after painting the cabinets and adding glass to one set of them:
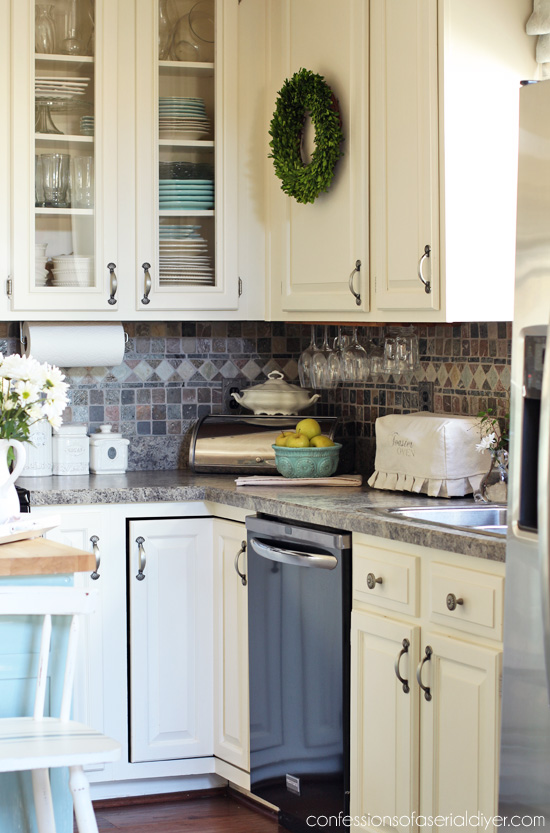
Huge difference, right?? (That photo was actually taken just last year, with my new pretty floors instead of the old tile.)
(See how I added the glass to those cabinets HERE.)
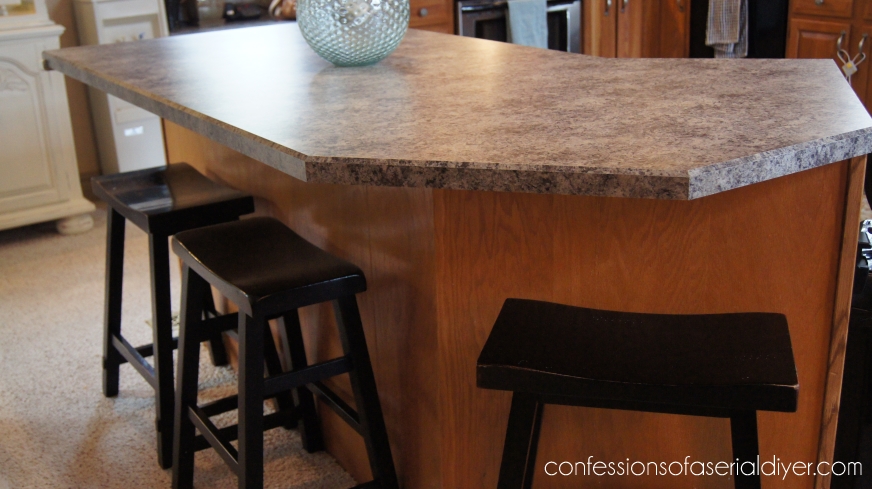
Here is the island before:
Ah and after…
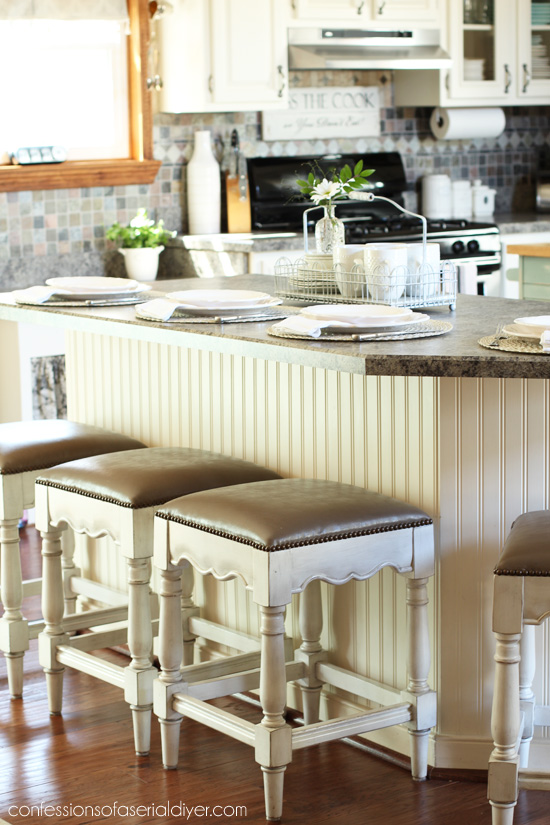
Like a breath of fresh air! As you can see, paint made a huge difference, and adding bead board here as well. Okay and we eventually replaced the carpet and tile with hardwoods, but we kept the same tile backsplash and the same counters. Paint was definitely the major player here.
After three years, how is the paint finish holding up?
Fantastically! In a nutshell, I used a TSP substitute that was also a deglosser to clean the surfaces properly first, Proper prep is KEY!! Then I sanded, primed, and finally painted. (See the full tutorial for a list of all products used and why I chose not to use chalk paint.) I chose not to use a sealer on my cabinets because I did not want any yellowing to occur, and I wanted to easily be able to refresh them when the time came.
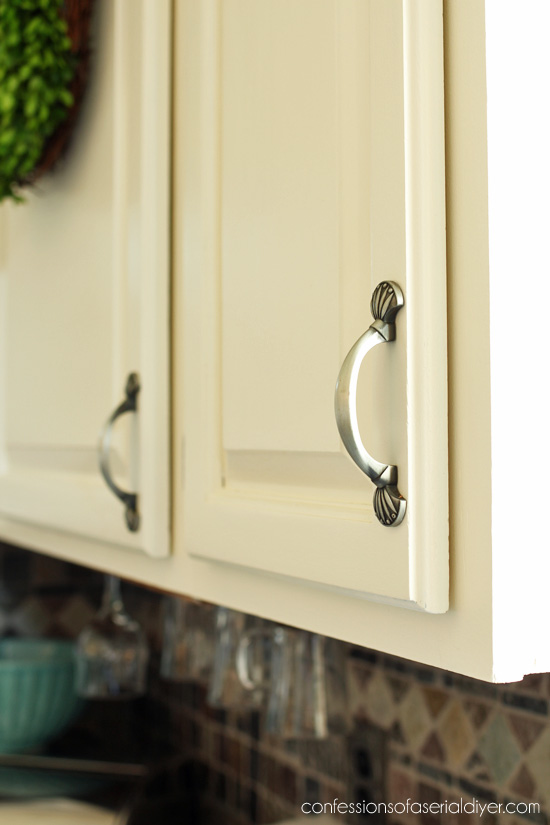
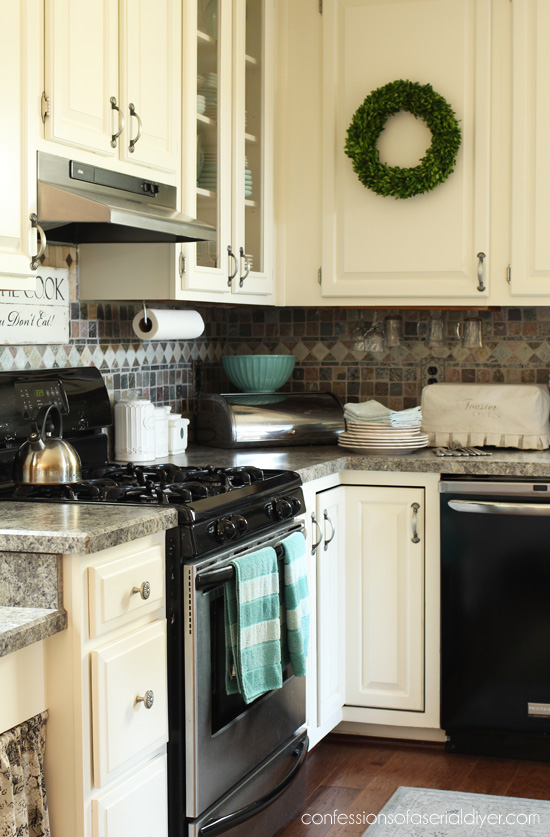
No paint job is bullet proof, but here is what the two most high-traffic cabinets in my kitchen look like after three years of heavy use:
Pretty good, right?
Now let’s get in closer…
Okay so there is a little wear. BUT, that’s the worst cabinet and it is just on that bottom right corner. The rest of the cabinet still looks perfect.
The second most-used cabinet:
And our spice cabinet:

And here is our most-used drawer, the silverware drawer:
 Not bad at all, right? And we cook in our kitchen six nights a week!
I decided to refresh those few areas and do you know how long it took me from start to finish?
Less than 30 minutes!!
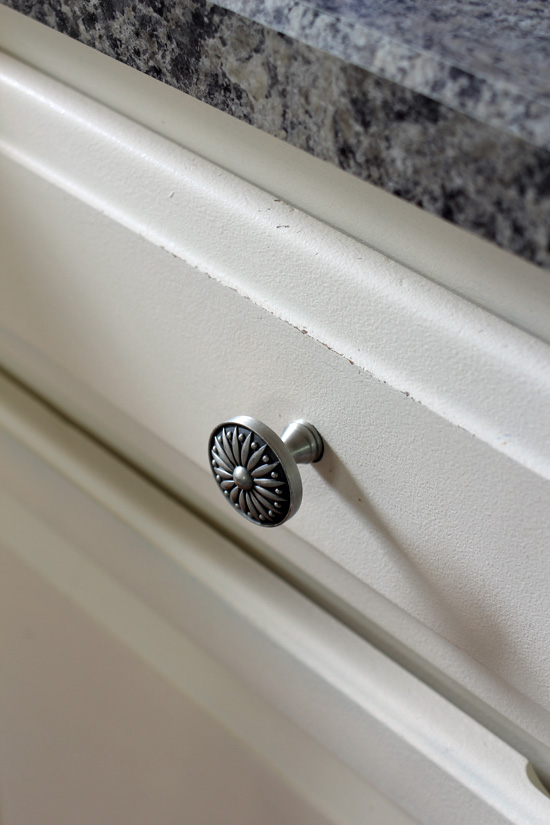
I removed the hardware:
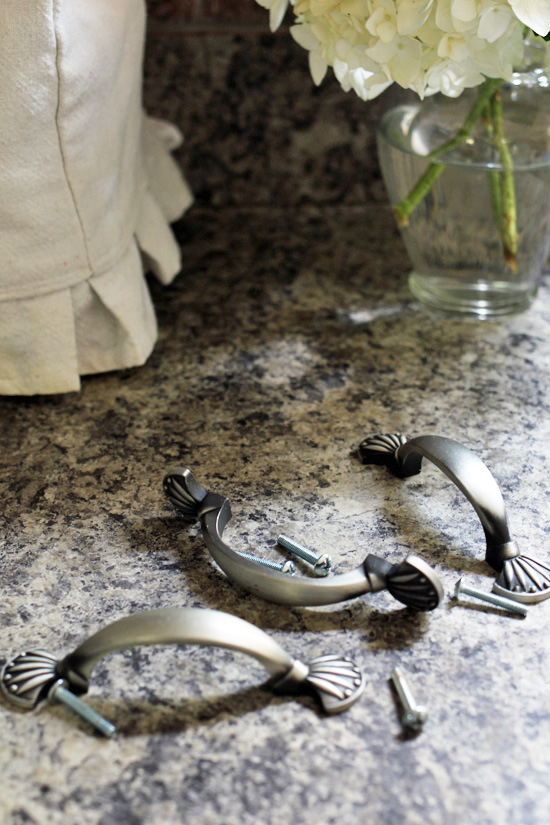
Here’s a close-up of what my most-used cabinet looked like after removing the hardware:
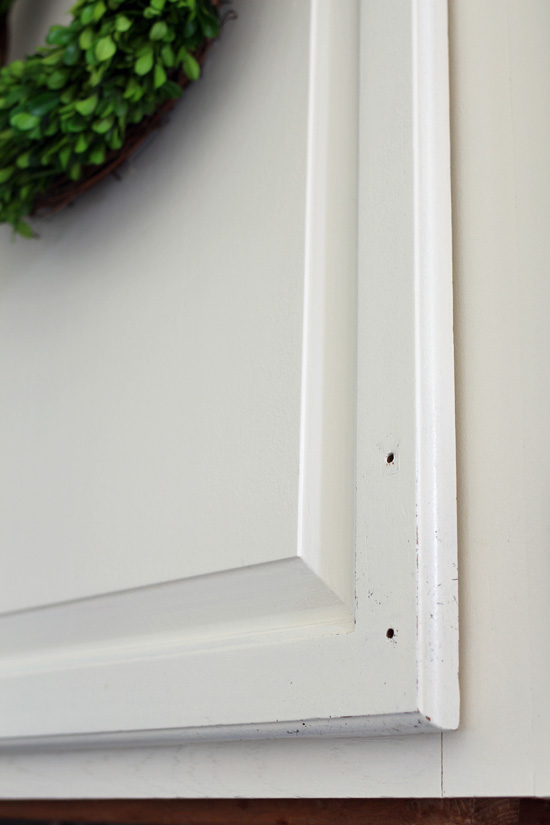
As you can see, the rest of the cabinet is still in perfect condition.
I picked up a 4″ roller for smooth surfaces and a paint tray in a kit from The Home Depot to give these cabinets a refresh.

And that was it! It took me 30 minutes from start-to-finish, including wiping my cabinets down with Lysol wipes before painting.
My cabinets look brand new again!
It only took one quick coat of paint applied with the roller, and I only touched up the corners.
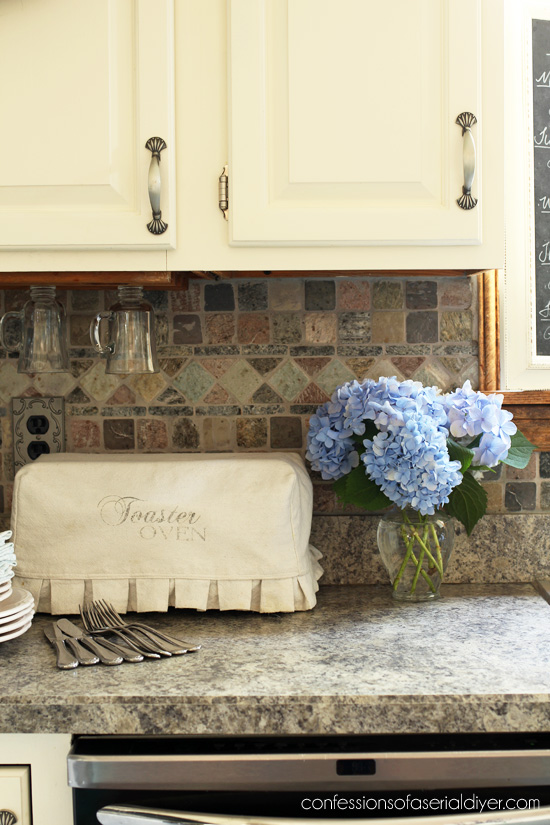
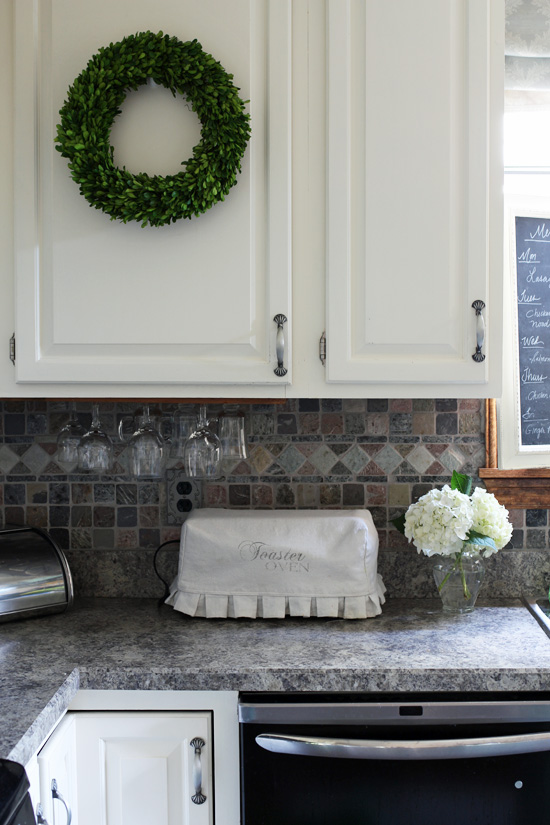
(Find the tutorial for that toaster oven cover HERE.)
Good to go for at least another three years!
30 minutes every three years? I can handle that kind of upkeep!
I had big plans for this kitchen in the beginning, but paint fixed so much about this space.
Are you ready to make some changes in your kitchen?
Here’s my tutorial for how I painted mine to pin for later:
How to Paint Kitchen Cabinets the RIGHT way!
Here’s my tutorial for adding glass to kitchen cabinet doors:
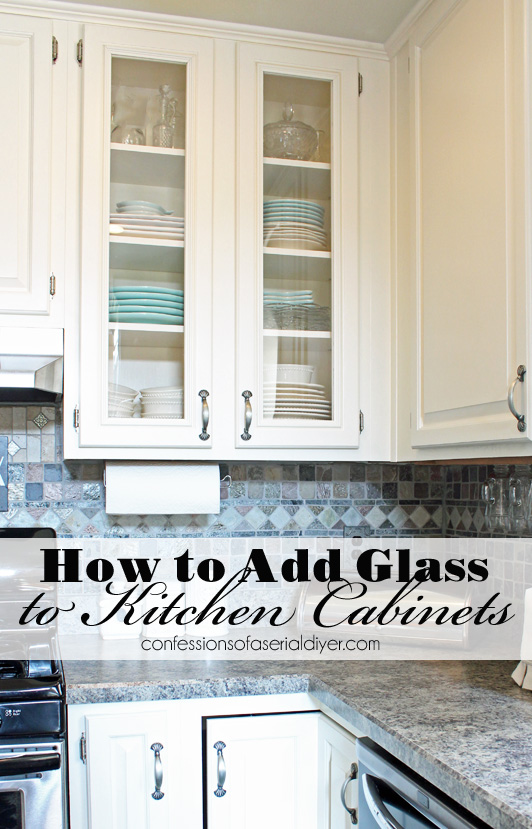
How to Add Glass to Kitchen Cabinets
If you’ve been wanting to tackle those dark cabinets but were concerned with how they would hold up, as you can see, they did great. Proper prep is key!
I’ll be back on Tuesday sharing how I updated this huge flatware box:

You know I rarely pass those up! See ya then! 😀
UPDATE: See how this huge flatware box looks now HERE!
XOXO,
![]()
Don’t Miss a Thing!
If you like what you see, there are several ways to follow along!


Mary Kaiser says
Woo Hoo, thanks for the update, I have just decided what my fall project will be this year. I am convinced that I can do it now after reading your post. Look out orange cabinets, here comes the paint!!
Christy says
MY pleasure, Mary! I have not regretted painting mine one single bit!! XOXO
Heide says
So glad to hear your cabinets still look good. I have been thinking about painting mine. I got the okay from hubby, so now I just need to decide if I do it or I hire it out to a pro. Thanks for all the great tips and info.
Christy says
It is a bit of work, but so worth the effort! Read through my tutorial and I bet you’ll feel better about tackling the project yourself. You can SO do this!! 🙂
Christina in FL says
Christy, your kitchen looks ah-MAZ-ing. 🙂 I had not thought of the yellowing or touch up issues so this great information.
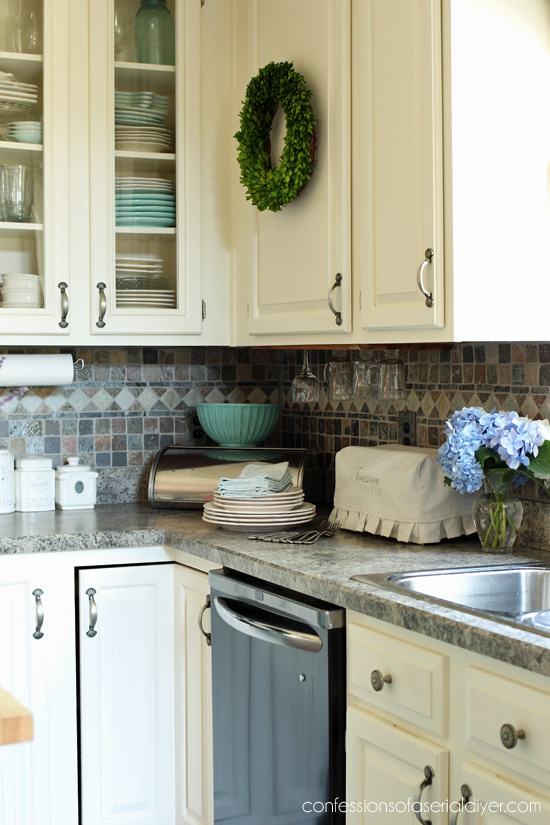
The bead-board on the island looks fabulous.
Way to rock your kitchen!
Christy says
Thanks, Christina!! I wanted to be able to easily touch them up, and not sealing them saved me a step too! 🙂 XO
Jamie Kennemer says
Soo pretty! I have an older home with boring wood cabinets and want to paint them so bad. My hubby loves them like they are ????! I’m praying the good Lord will show him differently ????!
Christy says
Thank you, Jamie! You are not alone…why do men love wood so much?? I think I just wore my hubby down to the point that he finally caved ha ha, but he loved the result. Turns out that he was more worried that they wouldn’t look professional. He was relieved and pleasantly surprised that they turned out so well. 🙂
Nancy @ Slightly Coastal says
Wow! They’ve held up very well. The difference paint makes is astounding. I just posted a tutorial for painting my kitchen cabinets earlier this week. Mine was a little different because I have thermofoil cabinets so I used a different process. I hope mine hold up as well as yours have!
Nancy
Christy says
I’m sure your kitchen looks amazing, Nancy! Hoping they hold up for you too! XOXO
Anne says
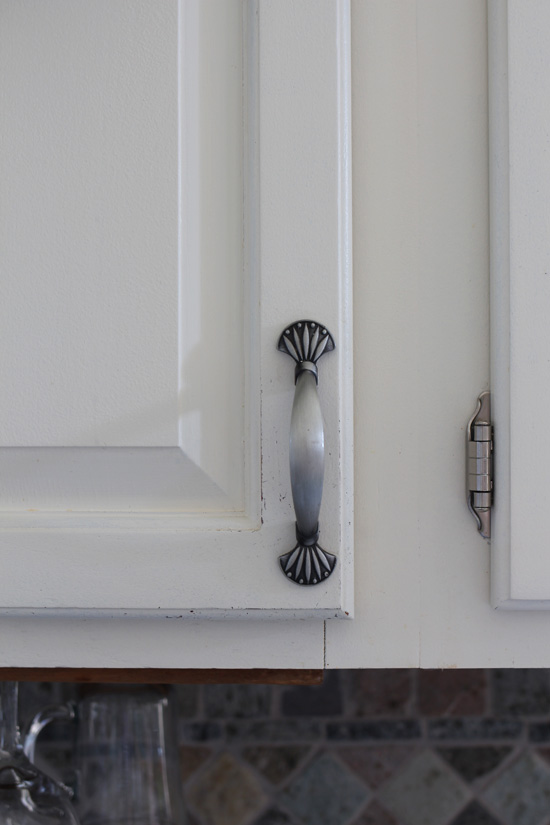
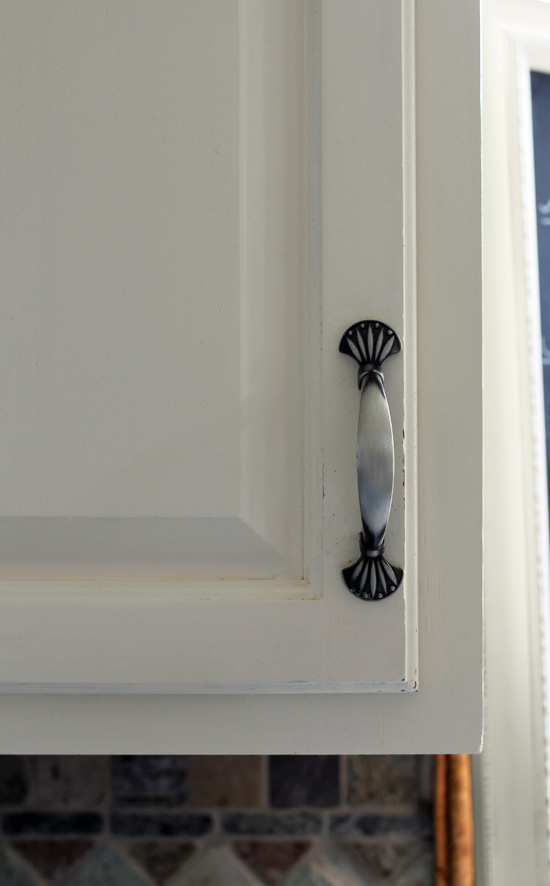
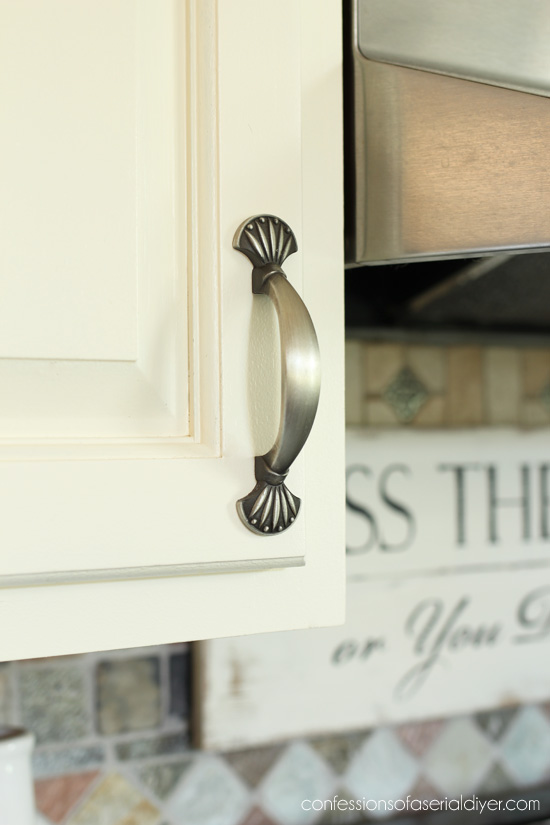
Omigosh I love those pulls! Where did you get them???? Your kitchen is my dream. Sigh…
Christy says
Thanks, Anne!! You are always so sweet!! My hubby ordered them from Lowes about 13 years ago. 🙂 XOXO
Lori says
Looks great! I had mine painted 16 years ago and they need a touch up. Did you have to clean them with something first?
Christy says
Thanks, Lori! I wiped them down with Lysol wipes first. 🙂
Lori says
Thanks Christy – sure will be cheaper than getting them repainted!!
Christy says
Yes!! 🙂
Marcie Lovett says
They do look wonderful, Christy. My cabinets are 15 years old and I’m itching to paint them. It’s a lot of work, but it really made a huge difference in your kitchen. Good to know all that work has held up so well. Did you tint the paint or use Pure White?
Love those stools, by the way. I don’t remember if they were another project of yours.
Christy says
Thank you, Marcie! I am so pleased with how well they have held up. It was a big project, but SO worth the end result! The paint I used is Cottage White by Behr in a satin finish. It is more of a creamy white. The stools were a very generous Christmas gift from my MIL that she ordered from Ballard Designs. She nailed my taste perfectly! XOXO
Catherine says
I painted my kitchen cabinets earlier this year, following your tutorial very closely. Now my kitchen looks so clean and bright and updated. Love, love, love! I didn’t have the confidence to tackle this project until reading your blog so thanks very much!
Christy says
This totally made my day, Catherine!! Thank you so much for the positive feedback! I’m sure your kitchen is so beautiful now!! XOXO
Linda Petersen says
I remember when you did your cabinets & they look so good today! The wear is minimal & the touch up fixed it perfectly! The true test of wearability is the fact that you have three “men” in the house????! Bravo????.
Christy says
Oh yes…that is so true, Linda! My boys put these to the test for sure! I’m very pleased with how they have held up. Doesn’t seem like it’s been three years already does it?? XOXO
Sue says
Oh My Gosh Christy! The cabinets look fabulous for 3 years of wear and tear! Awesome job! I have been contemplating painting mine, and you have convinced me. Thank you so much for the wonderful tutorial. I love your blog and all of your fabulous painted furniture! I wish I lived closer to you so I could shop your makeovers.
Christy says
Thank you so much, Sue, I wish you lived closer too! I am so thrilled with how my cabinets have held up. Just remember to prep properly and you won’t have any regrets, I promise! Good luck with yours! XOXO
Kathy says
I read this article with a former house we owned in the back of my mind. (We had painted those cabinets white too and how it brightened up that dark kitchen!) But that ADORABLE toaster oven cover caught my eye, and I said “I wonder where she bought those!” Ha! A little more scrolling and there’s a link to how you MADE them! Yay! And it got better, cuz it’s easy enough for ME to do! Can’t wait to make my own!
Christy says
Oh yay…that toaster oven cover is one of my favorite projects ever! And yes, it is really simple to make! 😀
Debra says
I love everything I have seen. This is my first time to your site, I have been here an hour.I will probably he back tomorrow. I what to re-read the info on chaulk paint before I start my project.
Christy says
Thank you so much, Debra, and welcome to my little corner of the internet! I share something new (usually a makeover) every Tuesday and Thursday! XOXO
Becky says
Wow. Beautiful! Doing things right pays off! : ) I kind of envy you your lovely white kitchen, but I have a feeling I’d be washing fronts ALL DAY LONG with my extremely active kitchen. It cranks out an average of 33 individual meals a day (with help from some very youthful cooks), which is a LOT of mess, haha! Wood hides a lot, I suspect.
; ) I’ll envy yours from afar!
Christy says
Thanks, Becky! Yep, this is one of those jobs I definitely did not want to skimp on! And my cabinets stay surprisingly clean, but I know the wood hides a multitude ha ha! XOXO
Sylvia says
Cabinets look great. Now if I can get enough courage to do mine. I do not paint andI am afraid I will get into something that will be too much for a beginner. I have oak cabinets and do not want the grain to show. We’re your cabinets oak? I enjoy your blog so much. You are so talented!
Christy says
Thank you so much, Sylvia! Mine were cherry, I believe, and they do still show a slight wood grain through the paint but I don’t mind it at all. I’d rather see a little grain than look at those brown cabinets all day. 🙂
Cecilia says
Paint is amazing! Your backsplash really shines now. And your island! I love the beadboard! Pinning for future reference!
Christy says
You said it, Cecilia! I’ll never stop marveling at the wonders of paint, thank you! XOXO
Rose Lefebvre says
I am so glad it holds up well. I would love to do the same with my cabinets, but at my age and my knee problems, not something I can do myself. Wonder what it would cost?
Christy says
Oh I’m so pleased with how they have held up…I’m not sure how much it would cost to have them done, but it sure would be nice to have someone else do it! 🙂