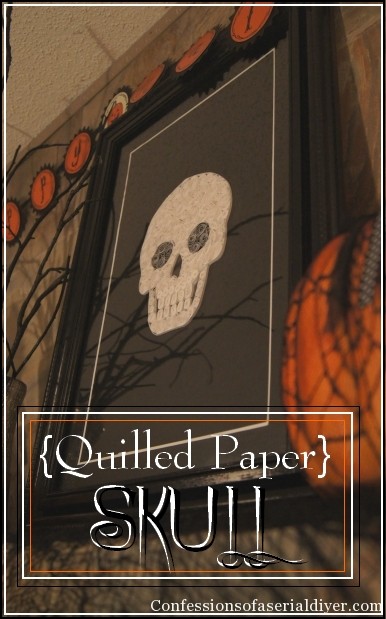
Hello spooktabulous friends mwah ha ha ha! I hope you don’t mind if I share a little Halloween project with you today. I was looking to make something new for my mantel to add to my decorations this year and this is just the perfect piece!
This was a CHEAP project to make, as in it cost me all of $1.63! Unfortunately, I can’t promise that it was quick and easy. Although, it was one of those projects that isn’t labor intensive and you can sit in one place (unlike most of the projects I take on), so I was able to relax and get some good thinkin’ done. Don’t you love projects like that? It seems I’m not alone with my thoughts very often these days.
“Being creative is good for the soul.” -Christy K. James
(Looks like a legit quote when I add my name to it, huh?)
Have you ever quilled before? I had not, and actually wasn’t exactly sure what it was called when I started!
My inspiration came from this framed Victorian print I found at the thrift store. It was the perfect size and I knew I could do something fun with it.
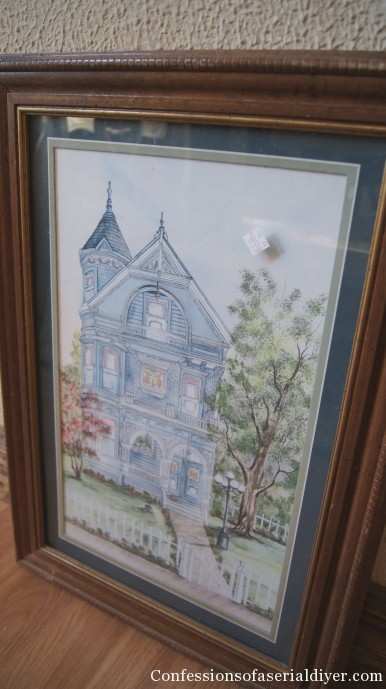
I originally only bought it for the frame. It was $3.25 and half off…love that.
I started by removing the glass and spray painting the frame and picture, including the mat, satin black:

While they were drying, I found a picture of a skull online and enlarged it, then printed it out. Don’t reach for your glasses…it’s a fuzzy picture!

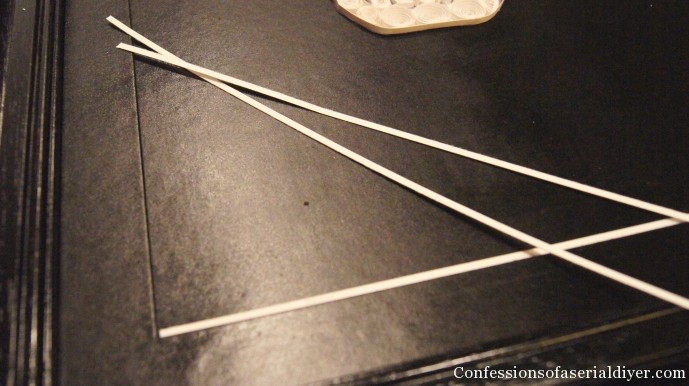
Then I started making my quill strips. You can buy strips of paper made for quilling already cut at your craft store, but I am the serial do-it-yourselfer you see, so I had to make my own 🙂
I used my paper-cutter and cut my cardstock to a little less than 1/4 of an inch wide:

Then I gathered the rest of my supplies:

(Two sheets of white card stock, one sheet of black cardstock, glue pen, scissors, quilling tool or very small flathead screwdriver)
After cutting around the edge of the head, I took my strips of paper and outlined the facial features, starting with the eyes:
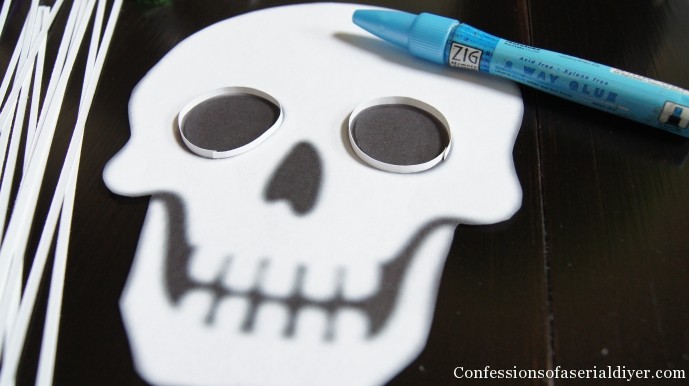
I used the glue pen to secure the paper in place.
After all the facial features were outlined, I started rolling my paper strips. Lots and lots and lots and lots and lots of strips! I only used two pieces of white card stock to fill in the skull, but being so tiny, that is a lot of strips!
To roll the paper, I wrapped the end around the flat head portion of my tiny screw driver and continued to roll the entire strip.

There are several things you can do with your rolled paper to achieve different looks. I started filling my skull in with a flower:
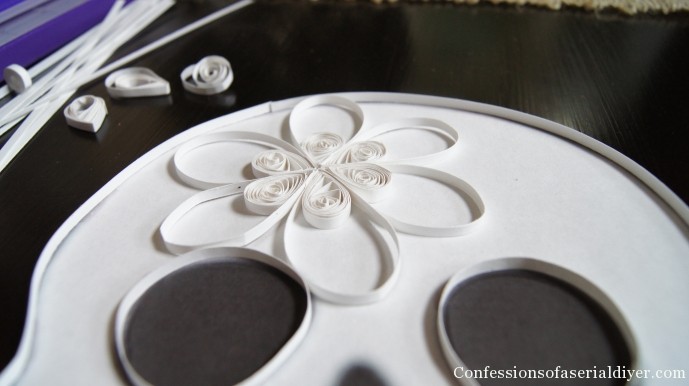
I made my large petals first and glued them in place. Then to make the center pieces, I rolled my paper, let it unwind to the desired size, and added a dab of glue to keep it from unraveling. Then I pinched one side to make a teardrop shape.
You can pinch both sides to make another shape.
If you were using different colors, you could really get creative with it. I did use black for the eye sockets.
After I was finished filling in my skull, I used a few of the leftover to strips to create a thin border to break up all the black:
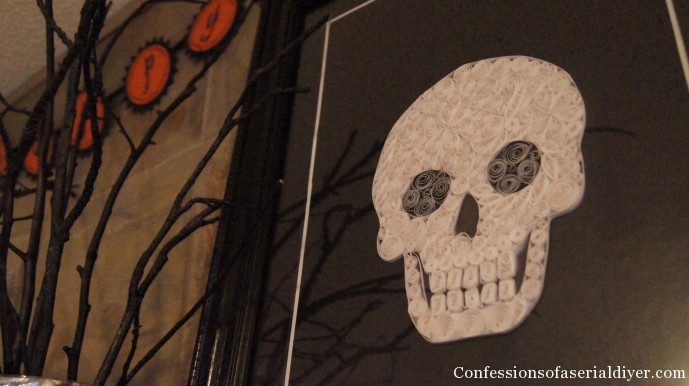
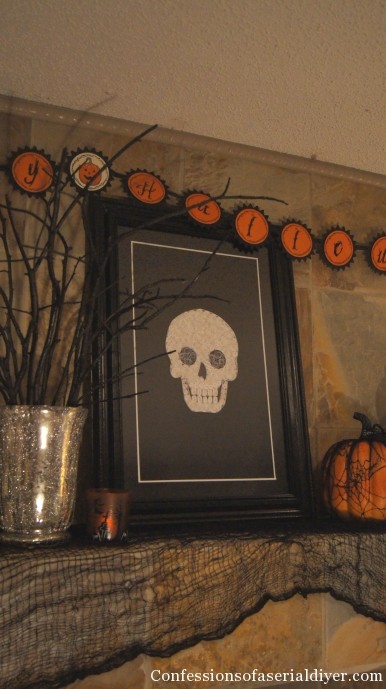
I attached my skull to the spray painted print and replaced the glass. From far away, it just looks white. Up close, you can see the all the detail.
Fun, no? And not bad for $1.63 since I already had everything else to make it on hand.
You can’t see it in these photos, but if you look closely at an angle, you can still see the perfect impression of the Victorian house. It looks like a hollogram of a spooky old house in the background… a really cool unexpected effect!
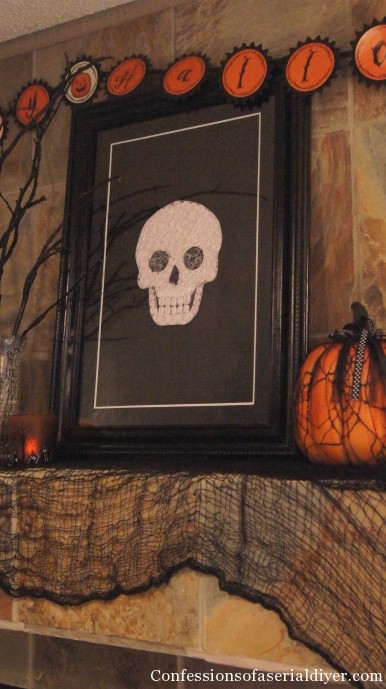
My mantel is very high and shallow, so it’s a bit hard to work with, but here’s a close up:
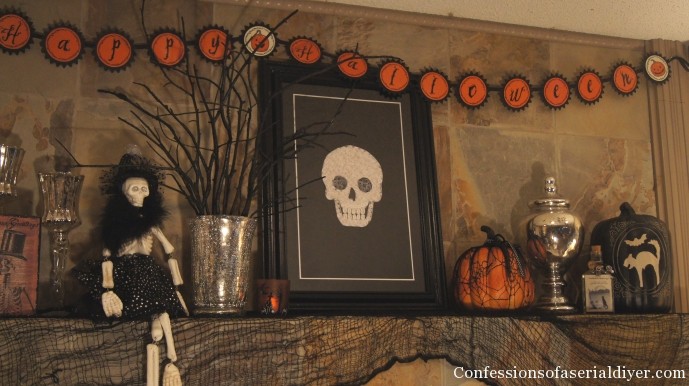
And the full frontal ha ha (The banner came from Target. I was too pooped to make one after making the skull art!):
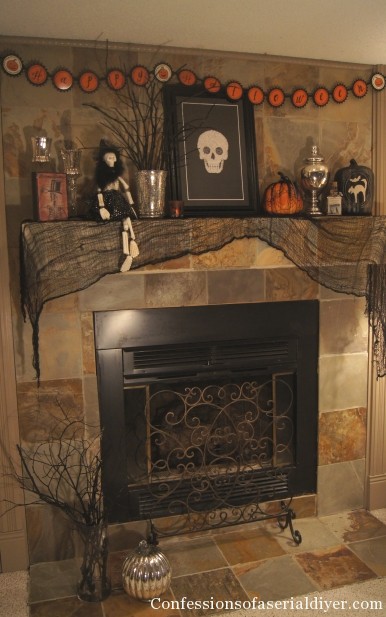
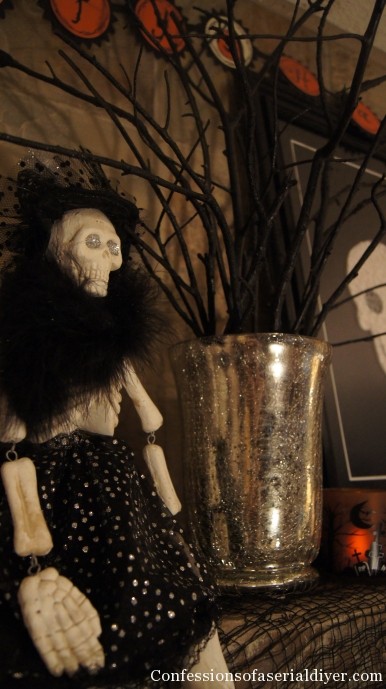
I love this sassy skeleton lady. She was a T.J Maxx find a couple of years ago.
Brennan came over to see what I was up to and when he caught a glimpse of the skeleton head, he just stood there staring at it. I’m not sure what his little mind was thinking.
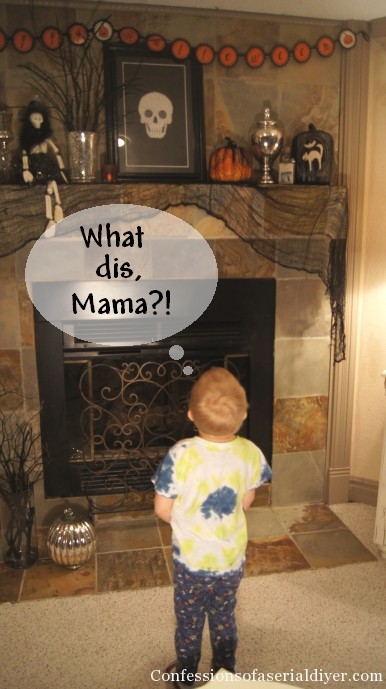
He just went through a phase of pointing to everything and asking me what it is.
This is my project for our Get Your DIY on Party this Sunday(7:00pm EST). Our theme is Thrifty Halloween Projects. You can’t get much thriftier than this that’s for sure!
Here’s a peek at my co-host’s projects. These are some creative gals! Click the links below the pictures to see more.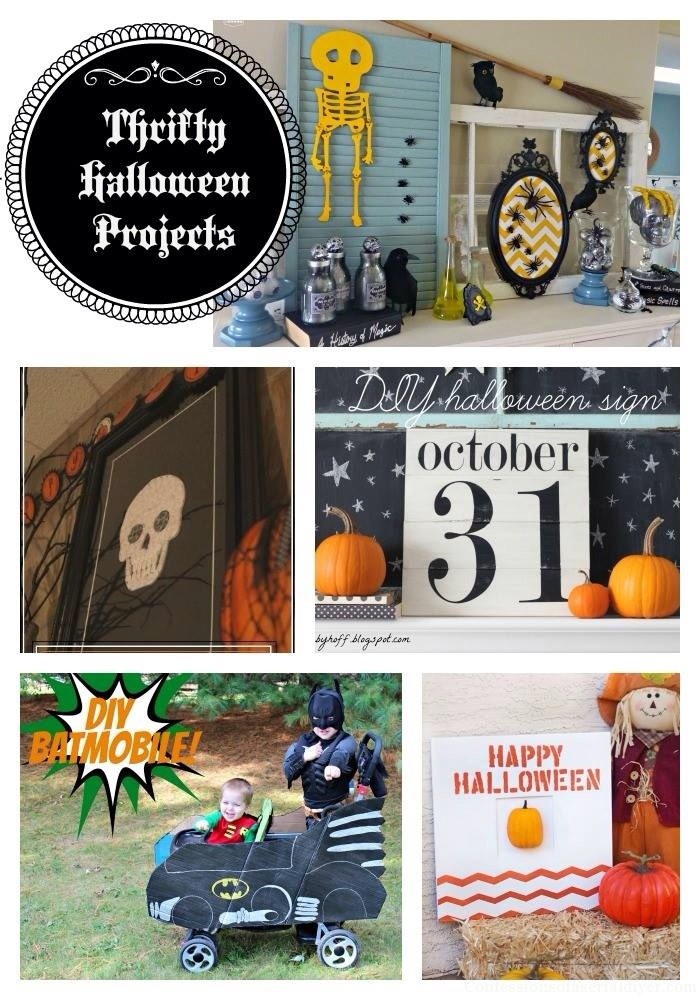
Thrifty Halloween Mantel The Happy Housie
DIY Halloween Sign House by Hoff
DIY Batmobile Just a Girl and Her Blog
Happy Halloween Sign The Hankful House
I know y’all have some awesome thrifty Halloween projects, so don’t forget to come back this Sunday, Octobert 13th at 7:00 EST, and link them up!
Check out all sixteen weeks’ themes for our Get Your DIY on Fall Party Challenge here. Our Chalkboard Party is still open until Friday!
Even if you’re not a blogger, these parties are just as much for you! Come get inspired. This Sunday’s party will be full of fun Halloween decorating ideas!
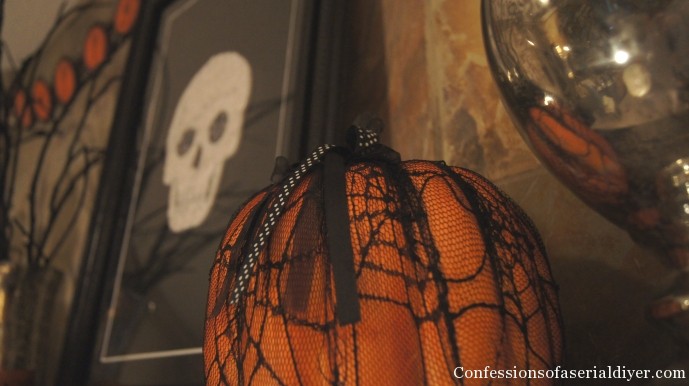
Here’s one more peek at my pretty skull…
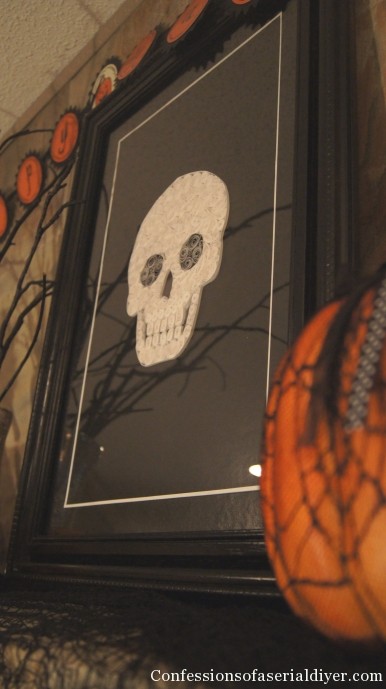
He needs a name, don’t you think? I need to work on that. In the meantime, thanks for visiting! And if I haven’t told you lately…I appreciate each and every one of you! 🙂
XO,
![]()
If you like what you see, there are several ways to follow along! ![]()
Email * Facebook * Pinterest * Hometalk * Twitter * Instagram


Mandy Hank says
This is awesome Christy, it looks amazing!- I love that you pointed out it wasn’t fun. LOL I have yet to try this but you make me really want to. I guess I will have to pick a day I don’t want to have fun, teehee 🙂
Christy K. James says
Lol, you make me laugh miss Mandy! I actually really enjoyed it…a lot. It was a great slow pace project and I feel like I’m constantly on the go these days. You know the feeling 🙂 This did take a while to put together, though. I’d love to try something with some color next time. Have a great day! XO
Dee says
Love it, and the entire mantle looks great too! Can’t wait for the party!
Dee 🙂
Christy K. James says
Thanks, Dee! Can’t wait to see what you link up this week! 🙂
Krista @ the happy housie says
This is sooo cool Christy!! I love it… what a great thrifty idea! Definitely sharing on facebook:) Have a great weekend!!
Christy K. James says
Thanks so much, Krista! It was definitely thrifty 🙂
Cat Colbert says
Great project! I didn’t know what paper quilling was so I learned something new today!
Your mantle decor is amazing. Want to come and do mine?
Christy K. James says
Thanks, Cat! Do you live somewhere where it hasn’t been raining for three days straight? If so, I’ll be right there lol! I love to decorate for Halloween 🙂
Rhonda says
Come visit us at http://obsessiveandcreative.blogspot.com/2013/10/craft-frenzy-friday-8.html
We are having a party and it won’t be the same without your creativity!
Craft Frenzy Friday!
Katie @ Addicted 2 DIY says
That is so amazing! I love how it is spooky and beautiful at the same time.
Christy K. James says
Thanks, Katie! 🙂
JaneEllen says
You are one ambitious gal and patient. I’d love to try the quilling but my old arthritic wouldn’t hack it for five minutes. I have a quilling tool I got with some kind of kit long time ago and never used it. You really did a wonderful job on all those quills, fantastic. Makes me wish I could do the quilling. Your skull looks incredible. Happy weekend
Christy K. James says
Thanks, JaneEllen! I alway appreciate your kind comments 🙂 Have a great weekend!
Abby @ Just a Girl and Her Blog says
What a cool technique, Christy! I had never heard of quilling before, but now I’m going to have to find an excuse to try it. This turned out awesome! Have a great weekend, friend!
~Abby =)
Christy K. James says
Thanks, Abby…it’s a very relaxing craft. I need more of that 🙂
Michele says
AHHHH! You make it look so easy, now I need to try it! LOVE the whole mantel. Oh, yeah!
Christy K. James says
Thanks, Michele! It is pretty easy and very relaxing actually 🙂
Andi says
I have no idea how you do what you do, but this is freaking awesome.
-andi
Christy K. James says
Thanks, Andi…you are so sweet! I actually had to make this for our Fall Party Challenge, but I’m glad now that I did. I’d never quilled before, but I really enjoyed it:)
Holly says
So cute! We found you from That DIY party. Pinning! Thanks for sharing!
Christy K. James says
Thanks, Holly 🙂
Jeanine Okio B Designs says
Your Halloween mantel looks amazing! And that skull is just the coolest thing ever! Coming over from Between Naps on the Porch. =)
Jeanine
Christy K. James says
Thanks for coming to check it out, Jeanine! 🙂
phyllis says
so so clever, I loved your tut on how to recreate, your mantle looks so cool, wish I had that kind of mantle in my living room,, just one in the den…Love your post so much, I am a follower…Phyllis
Christy K. James says
Wow, what a compliment from the queen of Halloween! Just visited your blog and I am blown away by all the creativity! I’ll definitely being making those books next year! 🙂
Jeanette says
Wow! What an amazing skull! I just love the look – elegant and spooky – like a sugar skull!
Christy K. James says
Thanks, Jeanette! Just saw your zombies…incredible!! 🙂
Heather says
This is precious! WOW! What an awesome craft… that skull looks like an expensive holiday decor piece. So creative! I’d love for you to share your mantel with my readers at the party that I and two other bloggers are hosting this week… it’s a “MANTEL PARTY”! Eeeek! Your post would be wonderful! Hope that you can join us… http://stringtownhome.net/?p=632
Christy K. James says
Thanks, Heather! Just linked up! I love a theme party… We are having one right now too that runs through Christmas. This week’s theme is “Thrifty Halloween Projects” and Sunday starts our “Spooky Outdoor Decor” theme! I’d love for you to join us if you have anything 🙂 https://www.confessionsofaserialdiyer.com/get-your-diy-on-thrifty-halloween-projects-features/
Heather says
Thank you so much for linking up!! I’ll have to share my spooky outdoor decor next week! I enjoy theme parties, too, because they keep me accountable, and I tend to get more things done! haha! Thanks again… Love making new bloggy buddies! 🙂
Christy K. James says
Oh that is so true about being held accountable! Blogging in genereal makes me so much better at actually completing projects lol! Glad to link up and share 🙂
Kayla @ Home Coming blog says
Absolutely love how this turned out. Great job! I’m hosting a pillow covers giveaway that you should enter! http://homecomingmn.blogspot.com/2013/10/pillow-covers-giveaway.html
Ann Krucek says
Very cute!! i love your quilled skull! Your Mantel looks fabulous!
Christy K. James says
Thanks, Anne! I appreciate the sweet comment 🙂
Cindy Eikenberg says
Christy, I am so behind this week – but WOW, this is so fantastic and I love your quilled skull! You did such a beautiful on this! Thank you SO much for joining us and sharing at Best of the Weekend! Pinned to my Halloween board and sharing today. Have a happy Wednesday!
Christy K. James says
As always, thanks so much, Cindy! You always bring me lots of repins…I really appreciate it 🙂
Marty@A Stroll Thru Life says
Oh my word, this is amazing and what a great tutorial too. Thanks tons for linking to Inspire Me. Hugs, Marty
Debra@CommonGround says
what a cool idea! so arty and fun! I’ll be featuring your post on Be Inspired this week, thanks for joining in!
Christy K. James says
Debra, that’s awesome! You totally made my day 🙂
Confessions of a Plate Addict says
Just wanted you to know that you have been featured on my blog! Thanks so much for sharing at The Scoop!…hugs…Debbie
http://confessionsofaplateaddict.blogspot.com/2013/10/30-more-fun-halloween-ideas.html
Alaina says
Oh how neat, you can not tell from the link at Debra’s what it really looks like, so glad I came for a closer look. Such detail. Love the Halloween decorations. Alaina
Christy K. James says
I’m so glad you like it, Alaina! Thanks for stopping by 🙂
Florabella says
How lovely it is ^^
Could you please send me the skull picture to my email: kimflorabellaWYJ@gmail.com ?
Thanks so much. =))
Christy K. James says
Here is a link to the skull image I used: http://wallpaperfast.com/pirate-flag-skull-wallpaper.html/