Welcome to my favorite day of the month, amazing friends! It’s Trash-to-Treasure Tuesday and my friends and I are all sharing trashy makeovers! I love it when I actually have trash to share.
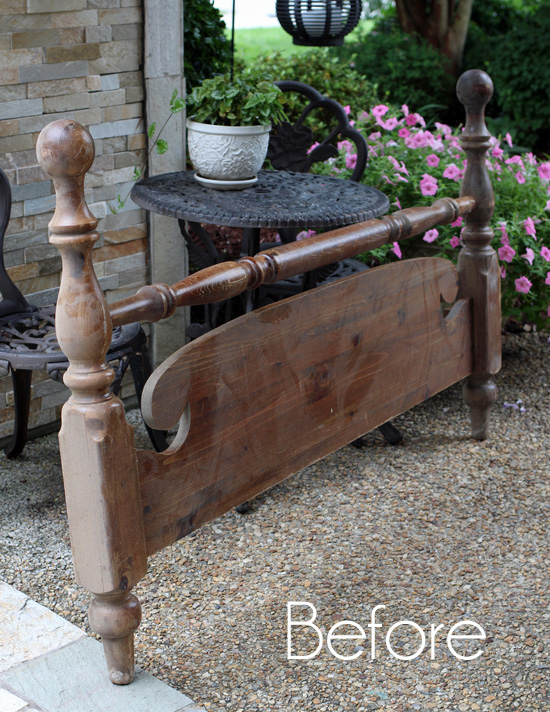
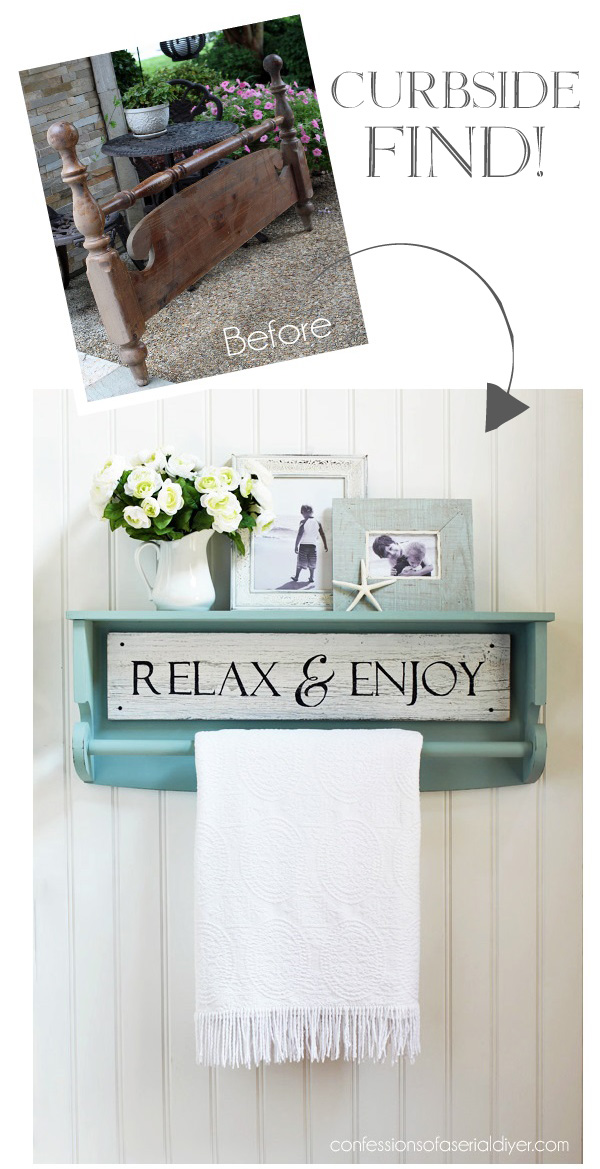
I picked this footboard up off the curb on the way to my Mom’s house in 2014:
The only reason I know when it was is because I shared this picture on Instagram:
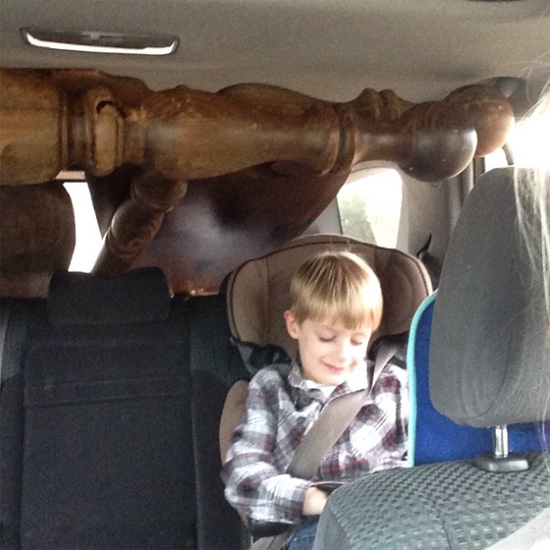
That poor baby. He’s like…no big deal, just a giant bed hanging over my head. There actually was a headboard and a footboard.
My initial plan for these pieces was to cut the center panels out and make signs out of them. In one of my big purges I decided to let the headboard go since it was really just too big and super heavy, and had water damage anyway. I’ve included a few affiliate links so you can find the products I used.
I kept the footboard and I finally did something with it.
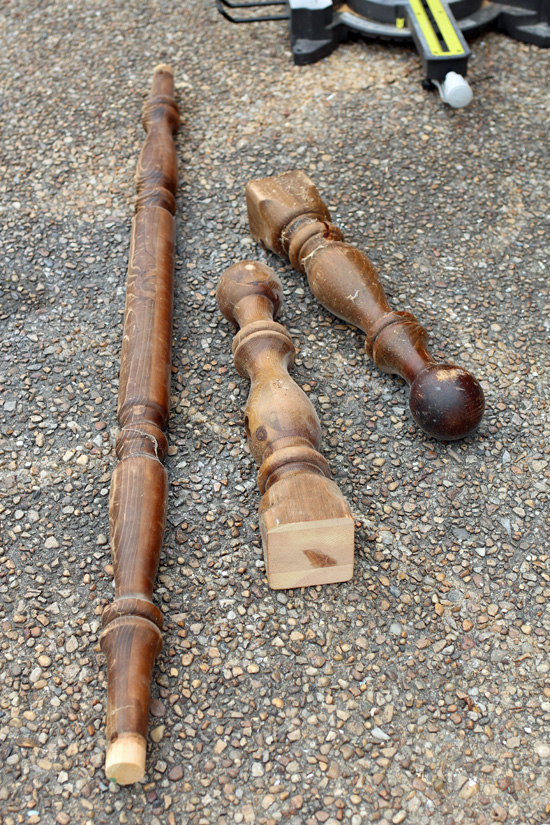
Thinking I might still make a sign out of the center part, I cut it free using my sliding miter saw:
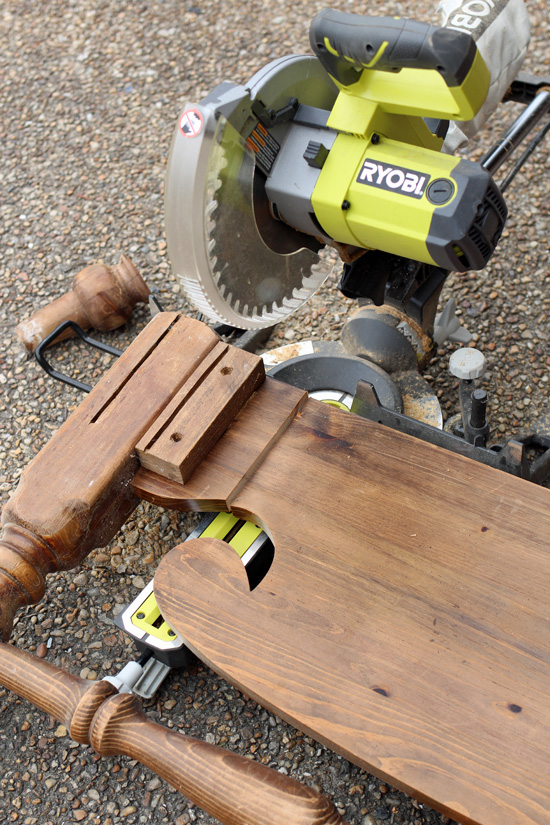
But after seeing it cut, I didn’t love the shape of it for a sign…
So I cut the ends off:
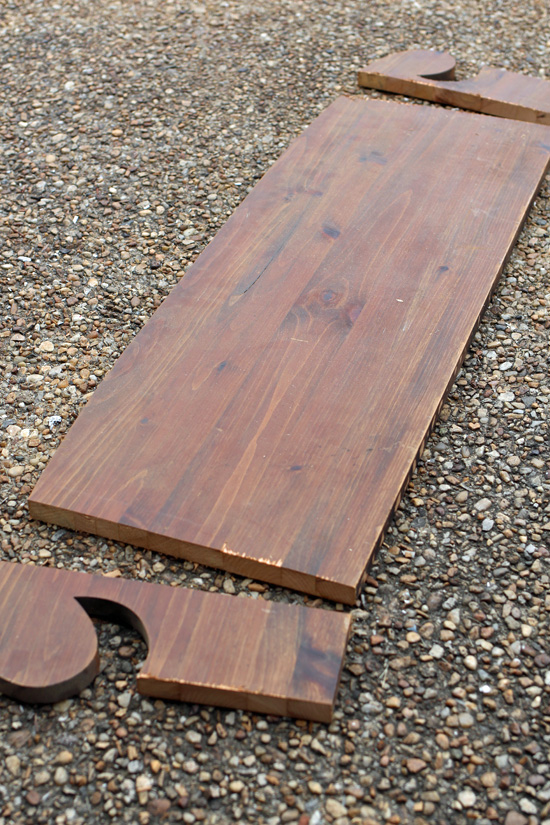
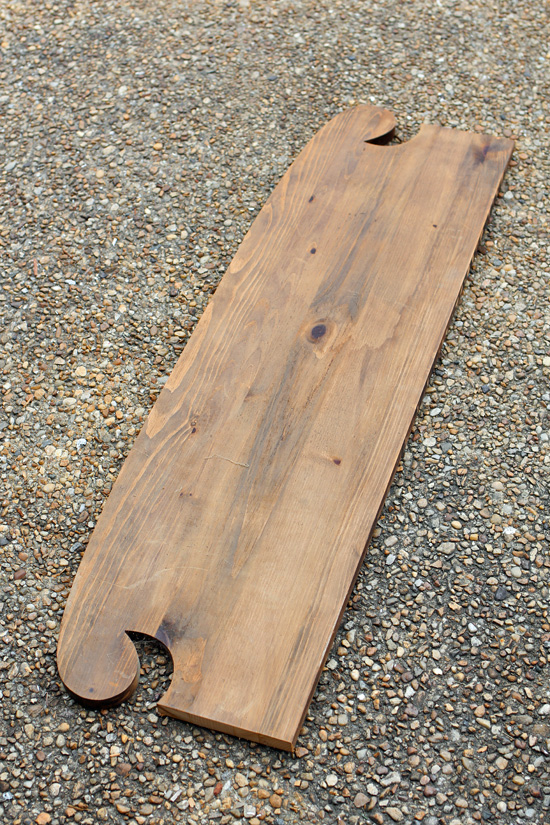
Still not loving it, I played with it a little and came up with this:
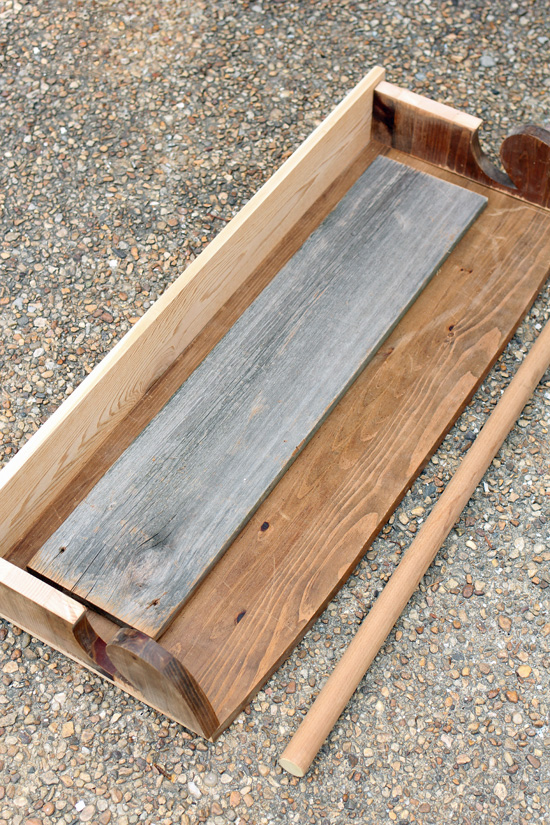
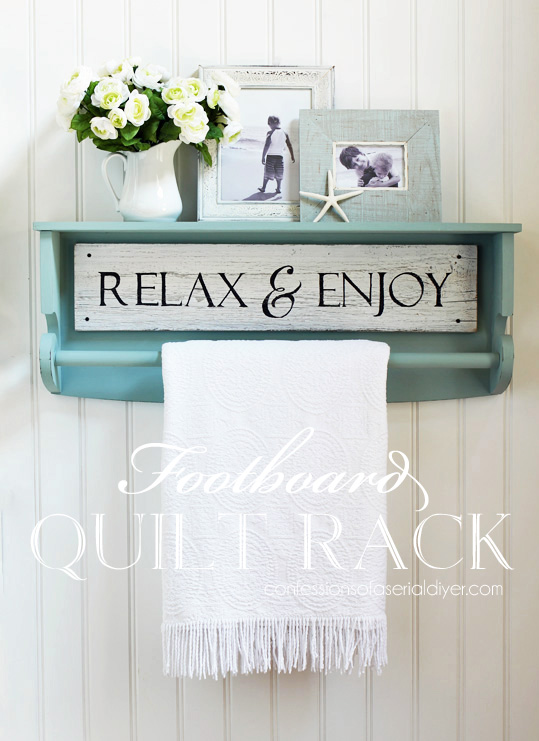
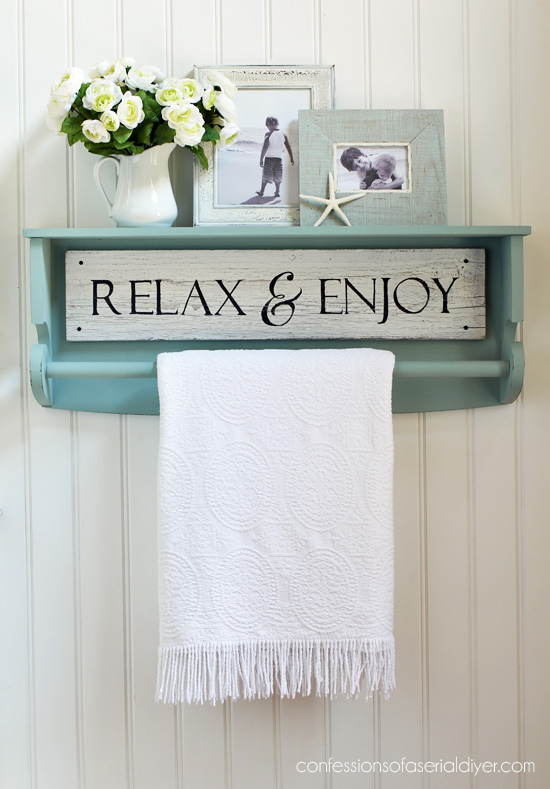
Some wood glue and my nailgun turned it into a quilt rack:
Trash to treasure = free decor!!
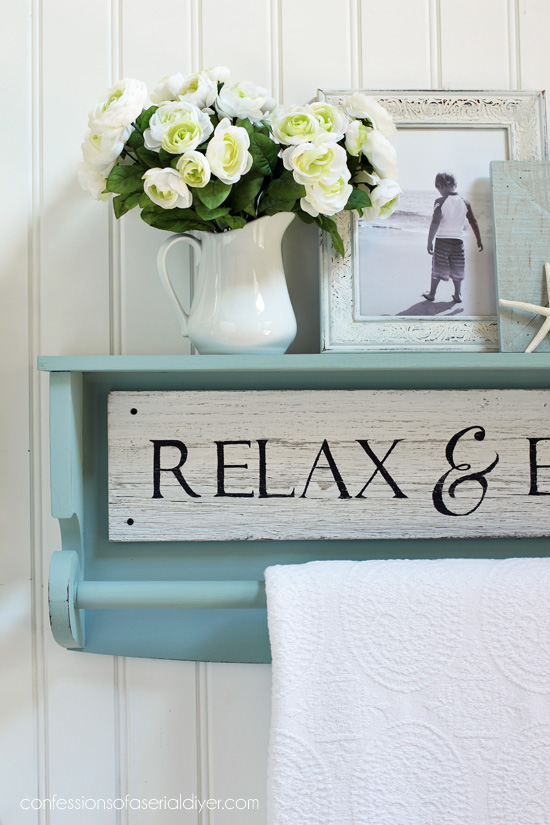
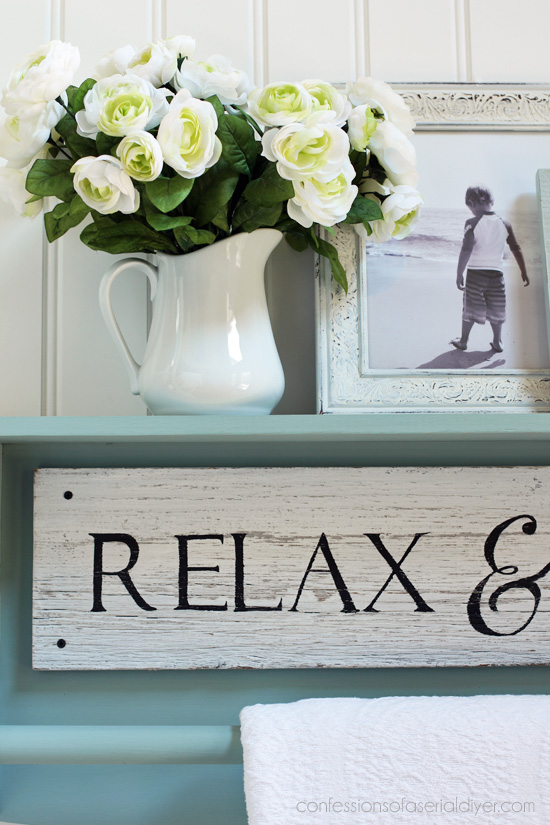
The sign was also trash, a fence picket I picked up from a discarded pile of fencing.
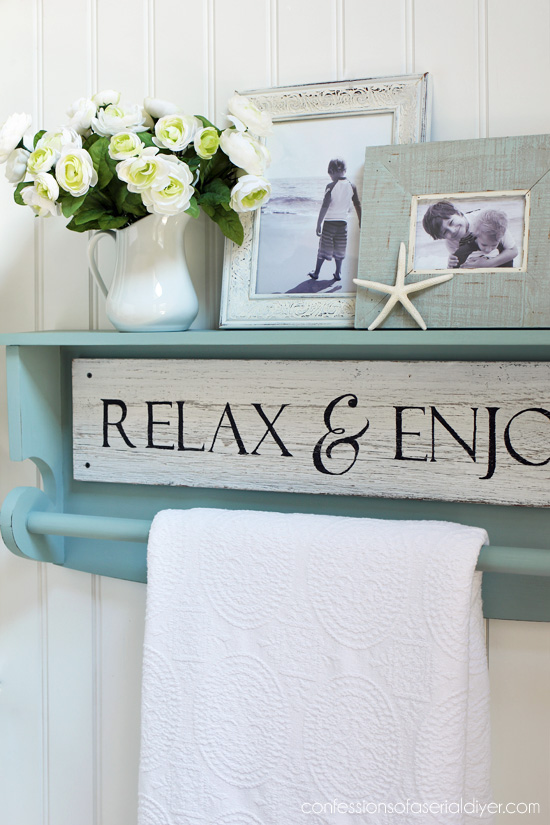
I used this transfer method HERE to add the letters to the sign.

Then I painted them in with acrylic craft paint using a script liner brush.
The blue is Behr’s Gray Morning made into chalk paint. (Recipe HERE.)
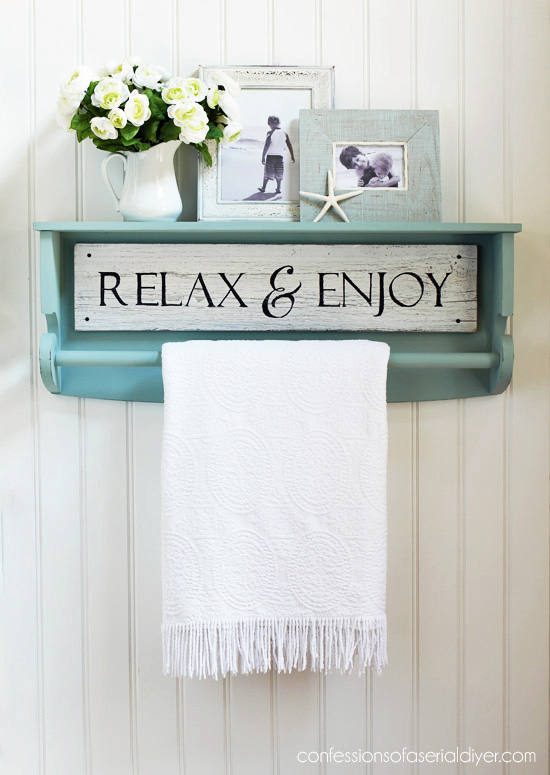
I sealed it with Annie Sloan’s clear soft wax.
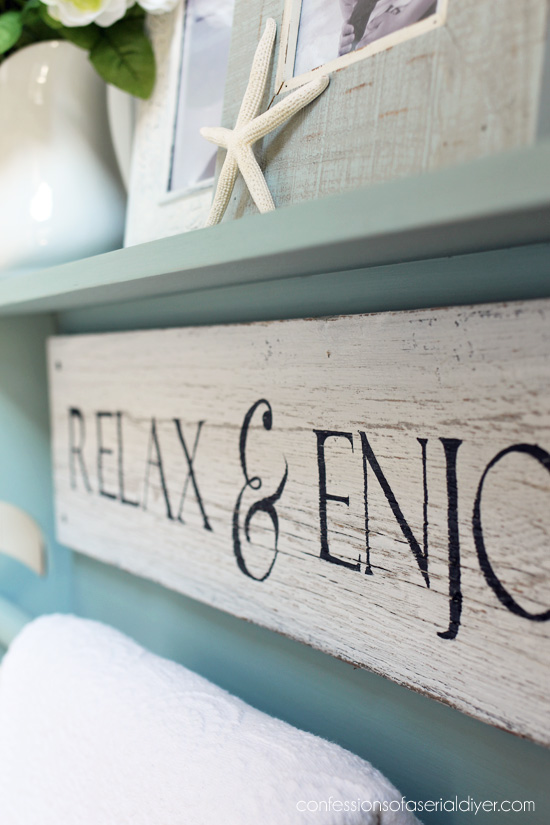
The sign got one coat of Behr’s Bit of Sugar and a light sanding. I lightly sanded again after adding the letters, and sealed with a spray matte sealer before attaching to the quilt rack.
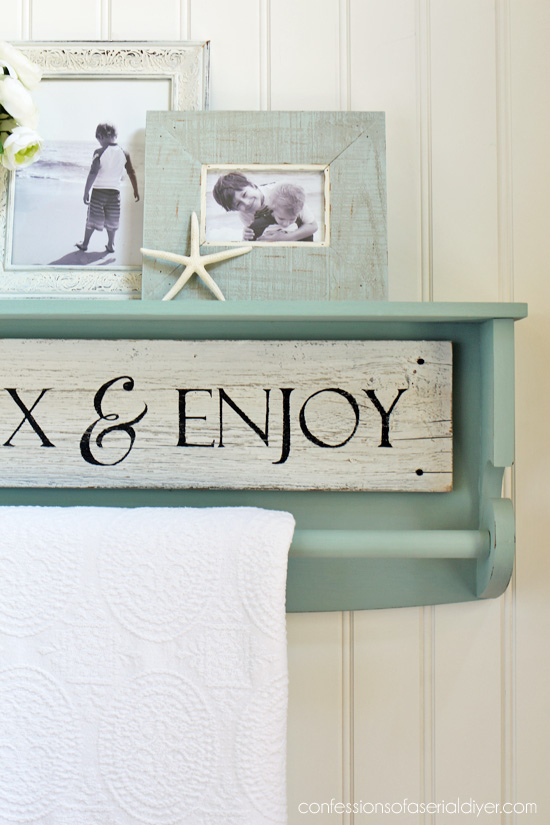
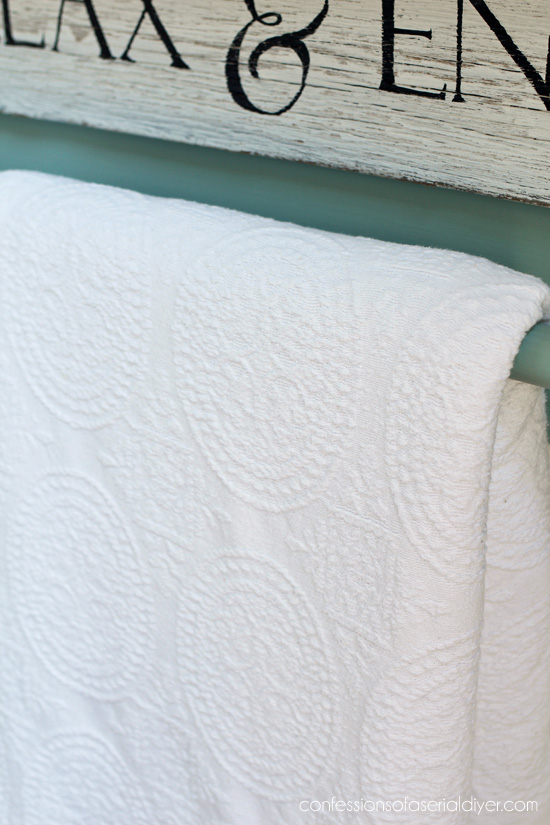
This pretty blanket was a $5 yard sale find…
These rounded pieces are what made me think it would be perfect to hold a large dowel. The dowel I used was a freebie I got from an estate sale!

So it was all free except for the paint and hanging hardware. I used D-ring hardware on the back to hang it.
I still have these pieces to use for something…some day:
This could be used to display a favorite quilt or just to hold an extra blanket or two to cozy up with.
Don’t forget my friends are sharing trash-to-treasure makeovers today too!

Check out the afters at the links below the image!
See all of my previous Trash-to-Treasure Tuesday makeovers HERE!
I’ll be back on Thursday sharing how my painted kitchen cabinets have held up after three years!
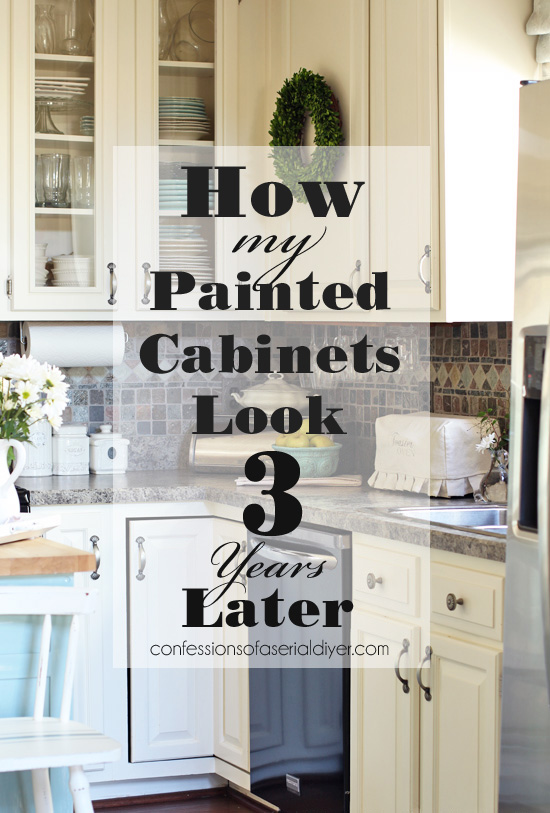
UPDATE: See how my cabinets are looking after three years HERE now!
XOXO,
![]()
Don’t Miss a Thing!
If you like what you see, there are several ways to follow along!


Addie says
You win the award for “turning trash into treasures!!!” This is goodie and I love
seeing one less in the land fills…keep it up!!! Clever as always!!!
AND speaking of awards, treasures and goodies…….WARRIORS WIN!!!!! We in the Bay Area are pretty happy about that!!!
God bless,
Addie
Christy says
Thanks, Addie! And I’m so glad for you that your beloved Warriors came through for you! XOXO
Christina in FL says
Sweet transformation and so creative! 🙂 I love the way your muse works. 🙂
Christy says
Aww thanks, Christina! XOXO
Larissa ~ Prodigal Pieces says
I love this!! ahaha! I had to laugh because you kept on cutting, but then nailed it. I have sooo been there, Christy! And I must say you nailed it again. Great job!
Christy says
Oh my goodness yes…it just did not end up how I originally envisioned at all lol! I kinda love when I’m surprised too. 🙂 Thanks, Larissa! XOXO
Carol Whewell says
This is gorgeous, what an original idea!
Christy says
Thank you, Carol! XO
Debrashoppeno5 says
Love this.
Christy says
Thanks, Debra! XO
Vicki says
This turned out great. As I was scrolling I was a little in shock you cut it down so much and was wondering what it would be; but love the end result and the color you chose. Sharing today on Entri Ways’ facebook page.
Christy says
Thanks so much, Vicki! I was surprised too when I kept cutting, but figured I had nothing to lose! 🙂
Anne says
Sheer awesomeness! What a fabulous repurpose!
Christy says
Thanks so much, Anne! SO glad you like it! 🙂 XO
Beth says
Christy this is so awesome and has come at such a great time! We recently bought a fixer upper (and that’s putting it lightly!) and my bathroom is the last room to be touched. I bought some vintage hooks for towels but needed an idea for mounting them and you just provided that! Instead of a dowel rod, I’ll attach my hooks!! The color is perfect and the shelf on top is just the added touch I was looking for. Thanks so much for sharing!!!
Christy says
Oh yay! Yes that would be a great idea!! Good luck with it! XOXO
Robin says
That was just pure genius!
I am soooo laughing about your jam packed car with the kid I have soooo been there many times ! Lol when he gets older you can just sit in the car and have HIM get out and load your junk into the car! I am guilty of that! Hahaha. I think I made him get out and help when he was about 12. Oh he hated every second of it. Hahaha he is now 23 and out of the house. Now I have helper # 2. She is 16. And I will be breaking in a new sidekick eventually. My grandson will be a year old in July. Lol!
Christy says
Ha ha my 14 year old was mortified when he was in middle school and I stopped just down the street from his school to grab a curbside find! But hey that’s like finding free money lol! 😀
Cathy says
Love this project. I have a basic build question. How did you attach the dowel to the sides?
Christy says
Thanks, Cathy! I used wood glue and then attached it from the outside with my nail gun. Or you could drill a shallow hole just slightly bigger than a screw head, and screw it in place on either end. Then fill the shallow hole in with wood filler. 🙂
Kimberly says
You did a great makeover with your trash! I see that a couple of your leftover pieces look like chess pawns. 🙂
Christy says
Thanks, Kimberly! Oh yes they totally do now that you mention it! 🙂
Annie (Canada) says
I never would have thought that was a footboard if I hadn’t read your blog! Where your brain must go to come up with that…ingenious 🙂 🙂
Christy says
Aww thank you, Annie!! XOXO
Janice says
What a great idea to take the ends of the footboard and put them on the sides. Turned out beautiful.
Christy says
Thanks, Janice! I love that it evolved that way…I never would have thought of that to start! 🙂 XO
Suzanne Grecco says
This has got to be one of my favorite foot board transformations! I see lots of benches, etc., and while I love those, too, this is so creative! I love how you kept changing your mind as you went along. That’s exactly how I work – so I’m glad to see I’m not the only one! Great job!
Christy says
Aww thank you, Suzanne, I’m so glad you like it! It definitely didn’t end up how I originally planned, but it was fun to see where it ended up when I changed my mind! XOXO
Cate says
I really love what you did with the footboard! Excellent idea. A friend did something a little similar and attached it to the inside of her guest closet door with a quilt hanging on it. Love seeing what you do. Thanks for doing it! 🙂
Christy says
Thank you so much, Cate! XOXO
Cecilia says
Christy,
You always come up with the best repurposes! Love how this turned out. It looks wonderful!
Christy says
Aww thanks so much, Cecilia!! XOXO
Kathy E. says
I do love this project! It would look awesome in my guest bathroom to hold towels! Now I just need to find the perfect headboard…
Christy says
Thanks, Kathy! And yes this would be a fun way to display towels as well! 🙂
Marie|The Interior Frugalista says
I have to admit I gasped audibly when you hacked the ends off the cut footboard. I should know by now that your reason why would transform into a fabulous upcycle and you didn’t disappoint. Clever, cute, and functional!
Christy says
Thanks, Marie! Ha ha…I figured it was free so if I messed it up, I had nothing to lose. Glad it turned into something eventually lol! XOXO
Marcie Lovett says
What a satisfying ending to an uncertain piece of wood! You never fail to surprise me, Kristy.
Christy says
Thanks, Marcie! Glad it finally became something ha ha! XOXO
Marcie Lovett says
And it would be nice if I could spell your name correctly, Christy. I guess I got distracted due to the amazing project.
Christy says
No worries AT ALL! If only there weren’t a dozen way to spell my name lol. 😉
Claudine says
Well! How clever is that?! I love it! I never would have come up with that in a million years. Beautiful!
Christy says
So glad you like it, Claudine, thank you! XO
Jen @ Girl in the Garage says
Another creative repurposed makeover – love it Christy! Haha the headboard looks massive in your Instagram pic!!
Christy says
Thanks, Jen! The headboard was HUGE! Ha ha that’s partly why I got rid of it and just kept the footboard. 😉 XOXO
Carole says
This is a very nice and useful re-do. You always do such a wonderful job and explain your process thoroughly.
Christy says
Thanks, Carole! I appreciate that! XOXO
Rose Lefebvre says
LOVE how you used this piece! It was smart to use the end cutoffs to reshape it.
Bravo!
Christy says
Thank you, Rose! I loved how it evolved ha ha! XOXO
Coleen says
OK, I didn’t see that one coming at all. You are just crazy creative! And how fantastic that the only cost were paint and hardware. Love finished project!
Christy says
Thanks, Colleen…so glad you like it! Nothing better than an almost free project! XOXO
Nancy @ Artsy Chicks Rule says
I love it Christy! And sometimes those original visions don’t work out as planned, I know it well! 😉 xo
Christy says
Thanks, Nancy! Ah yes, me too, my friend, me too!! XOXO
Becky says
Well, didn’t that come out cute?!?! If I had a guest room I’d be building me one of these to hold extra blankets right now! : )
Christy says
Thanks! I wish I had a guest room, cause I’d be keeping it! 🙂
Holly says
Christy – my hero – you are one truly amazing and creative goddess!! You amaze me with everything you do but this one takes the cake! You are so creative – I can’t believe this one – I just love it 🙂
Christy says
Oh wow you are so sweet, Holly, thank you so much!! XOXO 🙂
Holly says
Christy – it’s Holly again – this time not fawning all over your amazing work but hoping you don’t mind a quick question. I finally got to Hobby Lobby 🙂 and bought some of those adorable small crystal knobs you use on some of your great jewellery boxes and I was wondering if you cut any of the long metal screw part off? I don’t see much sticking through in your boxes but mine seem really long. Also, a while ago I followed your link and bought some of that great calcium carbonate and have been making my own chalk paint ever since and it is the best paint I’ve ever worked with! So many many thanks!!
Christy says
Hi Holly! I use a coping saw similar to this one: http://amzn.to/2t01WyD to cut the ends where I want them. Mine has really fine teeth on it. I cut through a little less than half way and can usually just snap it off with needle nose pliers at that point. I did just buy a dremel to use for that in the future but haven’t tried it yet. I’m so thrilled to hear that you like the CC chalk paint recipe! I love it too!! XOXO
Holly says
Thank you very much Christy! I will see what my hubby has that is similar 🙂 xo
Zefi Famelis says
Fantastic recycle job! 🙂
Christy says
Thank you, Zefi! 🙂
Kerryanne - Shabby Art Boutique says
You never cease to amaze me with your beautiful trash transformations Christy. Totally love this one!!
Thank you for sharing it at Create, Bake, Grow & Gather. I’m delighted to be featuring it at tonight’s party and pinning to several boards as well.
Hugs – Kerryanne
Christy says
As always, thank you SO much, Kerryanne! I truly appreciate it! XOXO