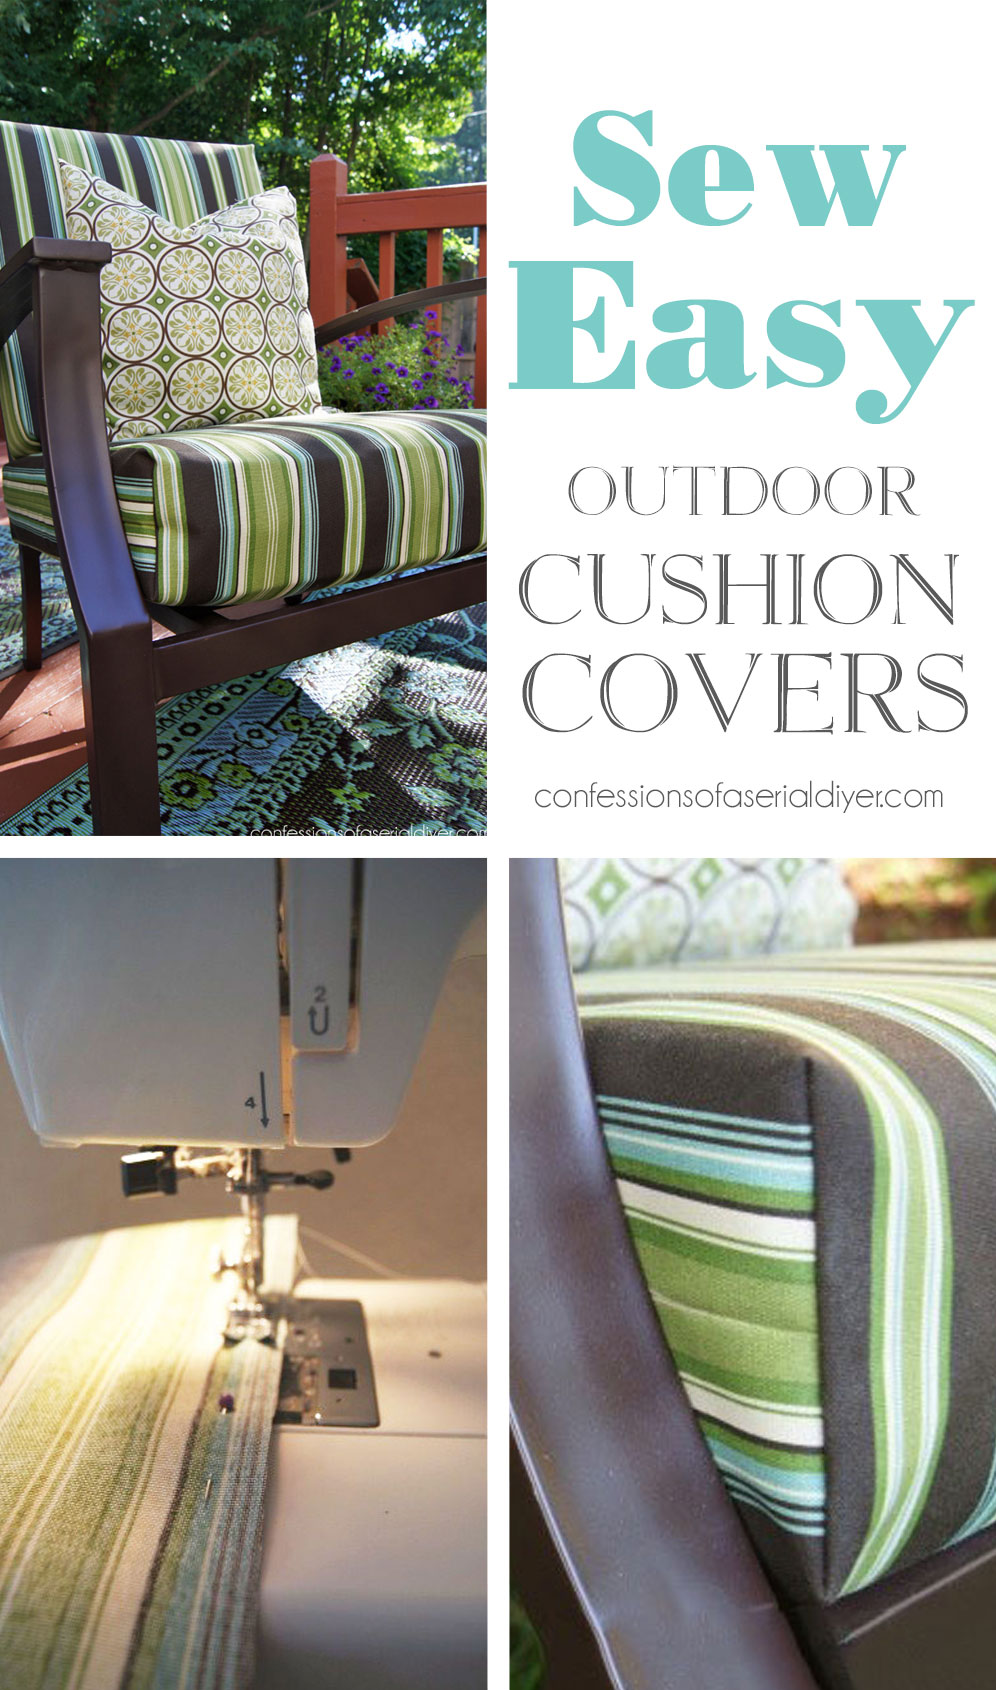
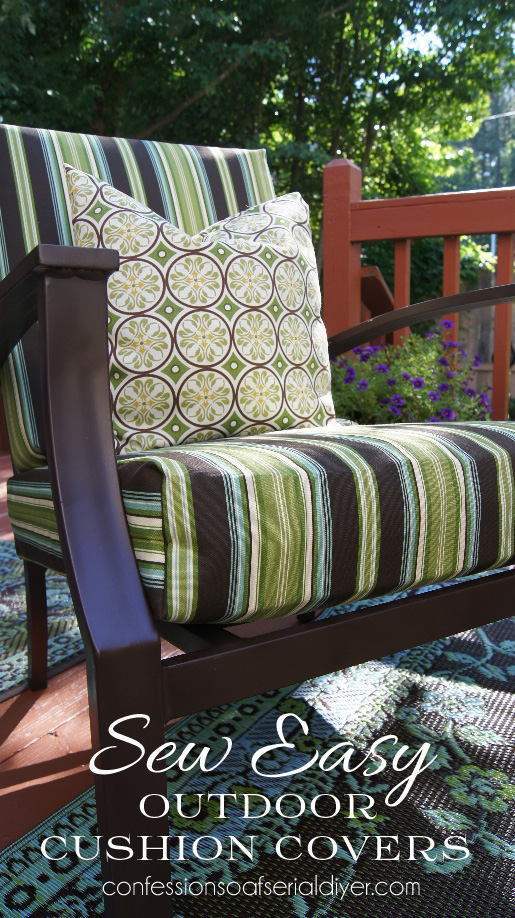
Looking to replace your outdoor cushion covers? You’ve come to the right place!
I’m going to show you step-by-step how easy it is to make new covers for those faded, time-worn, covered in bird poop and who knows what else, outdoor cushions!
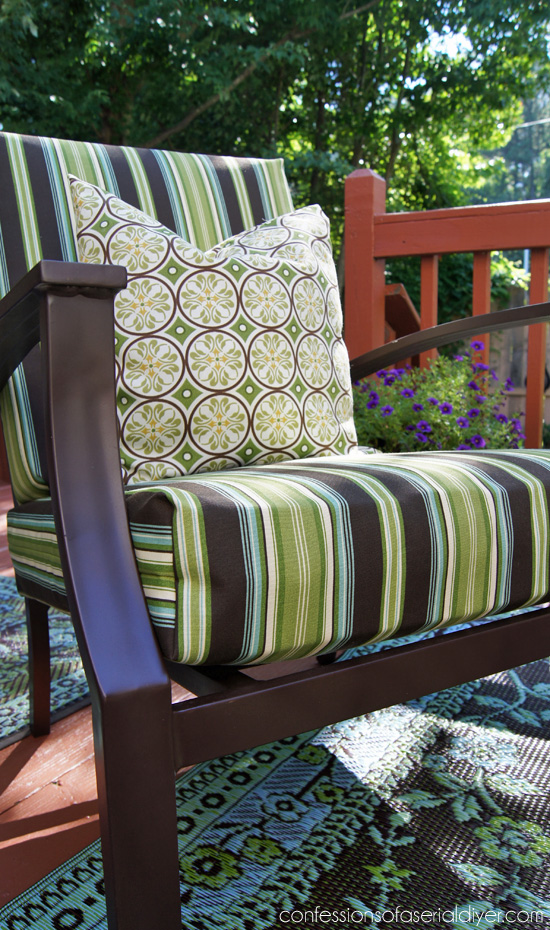
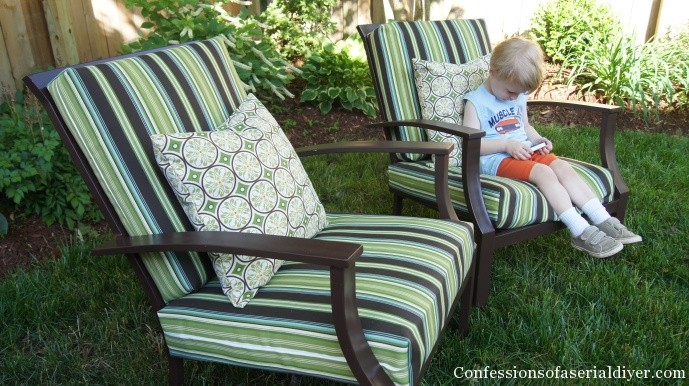
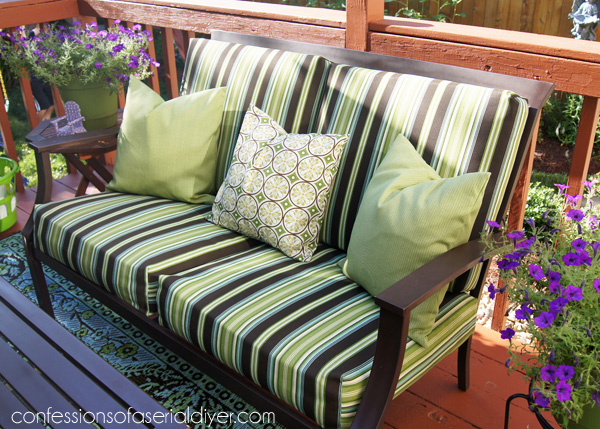
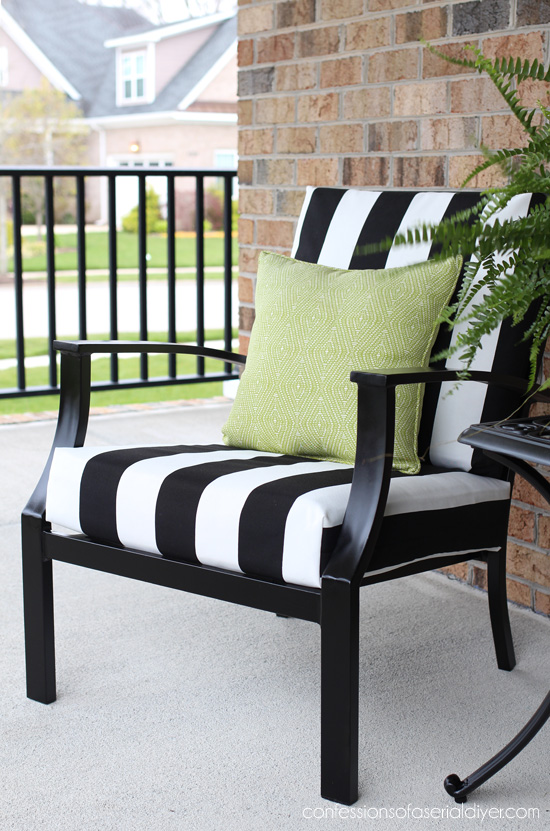
Making new covers made my outdoor furniture look brand new again! (Plus I spray painted the actual chair, again…good for another year!)
I purchased this set at Target years ago. It came with several pieces and the price was right, only then it was white with light green cushions.
Since then it’s had two wardrobe changes, not including this one, and a new paint job. I give it another light coat of spray paint each Summer to freshen it up.
Maybe some day I’ll get a new set, but when it still looks this good, why bother?
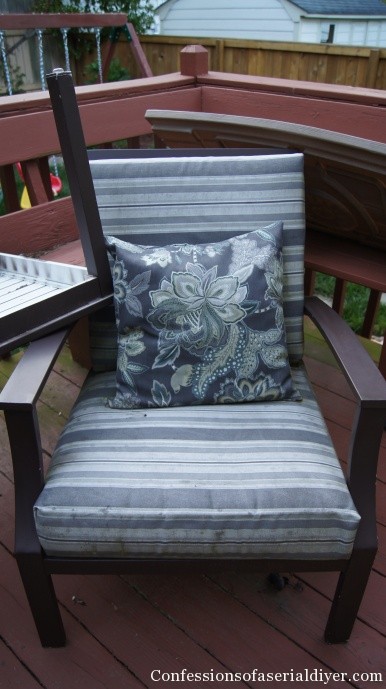
The before was really just so sad…downright embarrassing:
And the deck…gross! Not to worry though, I spent the past three days out there. (And believe me, my arms are not happy right now!) A little demo and lots of elbow grease and it’s looking so much better. How does it end up like this??
UPDATE: You can see the deck HERE now!
Ok so here we go!
-
Select your Fabric
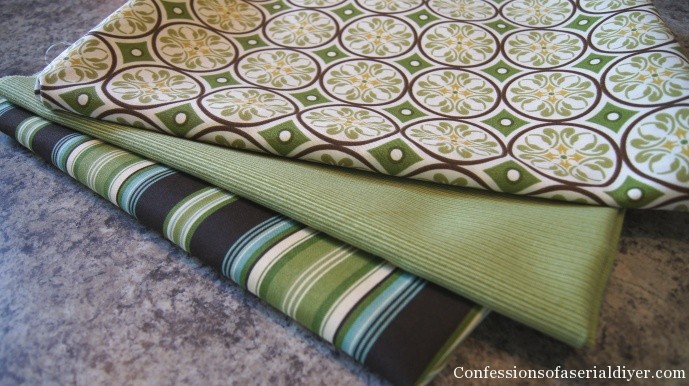
I prefer to use stripes or something with a geometric pattern to make cutting a straight line easier. These are outdoor fabrics I found at JoAnn Fabrics.
-
Cut your fabric
Next you’ll want to lay out your cushion so that folded over, the fabric covers the cushion from top to bottom. (Here I removed the old cover, but I didn’t remove them all. They actually keep their shape better if you keep the old covers on.)
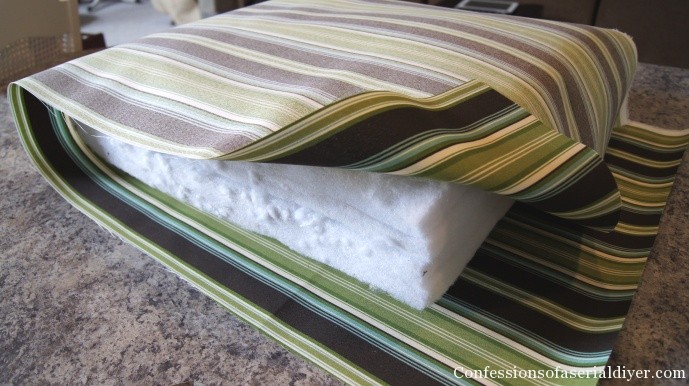
This fabric is 54″ wide. I was barely able to cut enough for two cushions side-by-side. Your sides only need to be long enough to meet each other in the middle with a 1/4″ seam allowance for both top and bottom.
You’ll want them snug so they lay nicely!
-
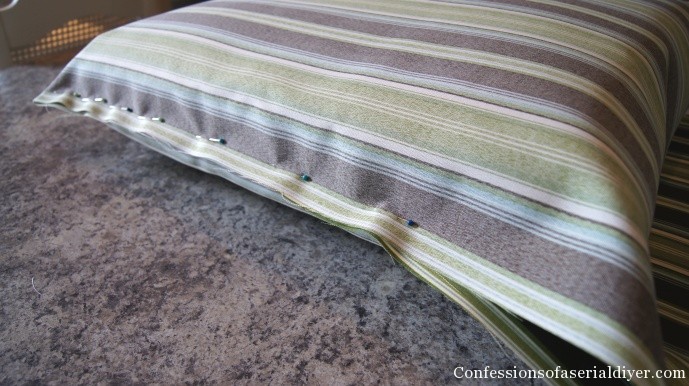
Pin Fabric
Next, with right sides together (back of fabric facing out), I pinned the side seam on both sides:
-
Time to Sew
Then, also starting at the folded edge, I sewed straight from folded edge to the open edge on both sides:
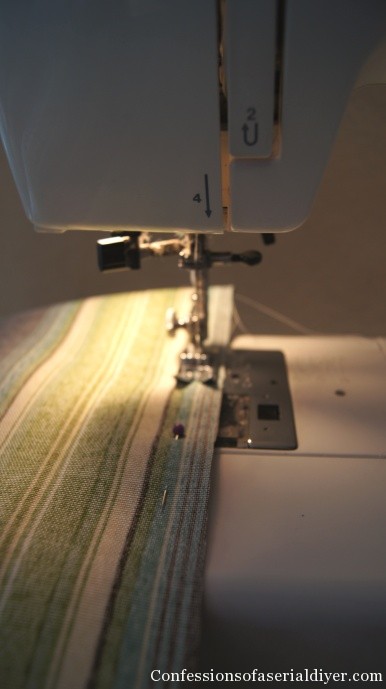
I’m not sure why I bothered pinning it all the way. After about a third of the way, I took out the rest of the pins and followed the line of the fabric. (See why stripes are the way to go?)
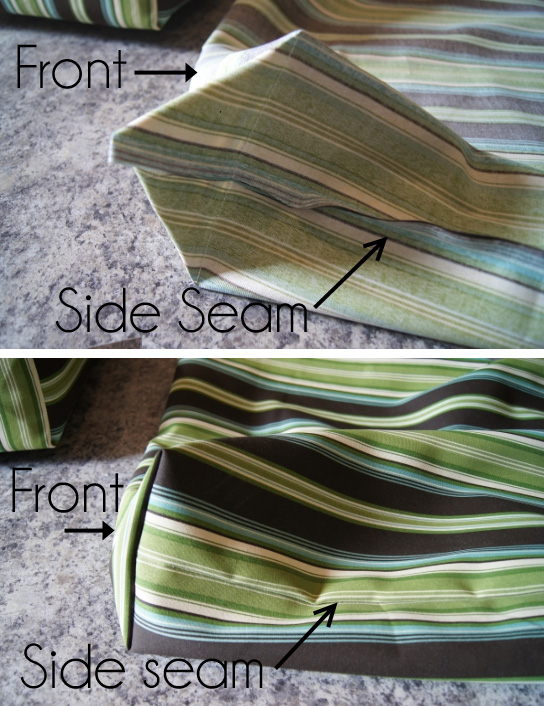
Next you’ll need to put your cover back on the cushion (still inside out) and put a pin on each front corner like the photo below, where the corner of the cushion beneath stops:

You will sew along this line to create your front boxed corners. Remove the cover and sew those seams: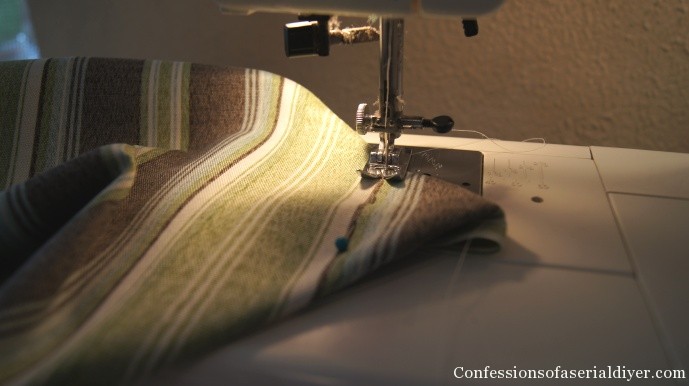
Here’s your corner seam after sewing, both inside-out and right-side out:
You can trim the extra fabric, but I didn’t bother. I didn’t reinforce my seams either because I don’t plan on removing them to wash them. I’ll just make new ones again when these have had it.
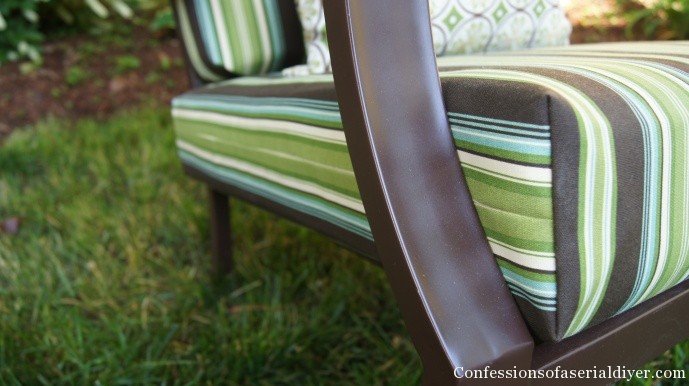
Insert your cushion again and tada! Perfect!

Just look at that beautiful corner! And you can barely make out the side seam because of the stripes!
-
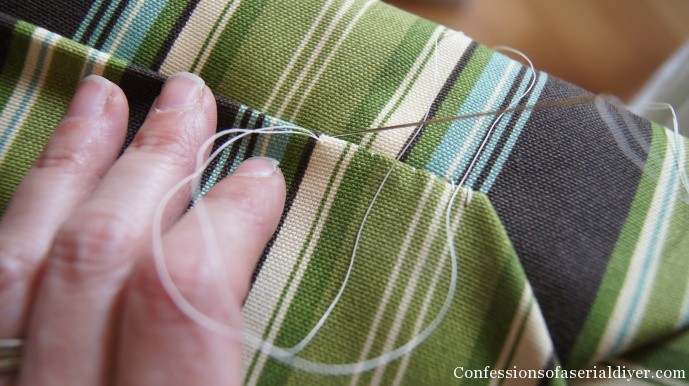
Stitch the new cover closed
To finish off the back of the cushion, fold it like you’re wrapping a present:

And hand sew it up:
Here’s to another fabulous year!
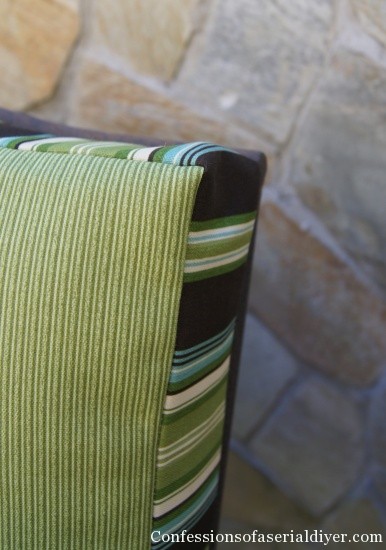
My pillows got a makeover too…
Before:
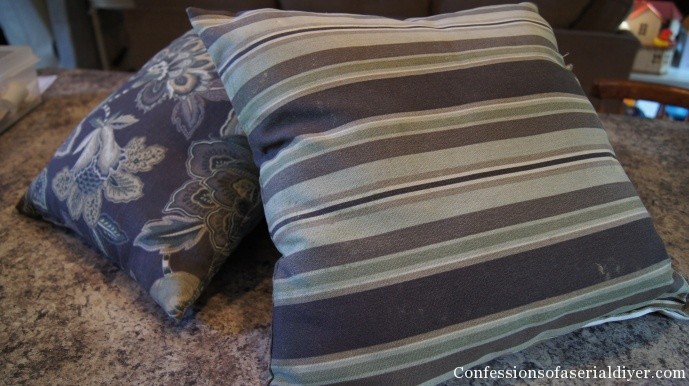
Ahh…
Oh how we love the after:
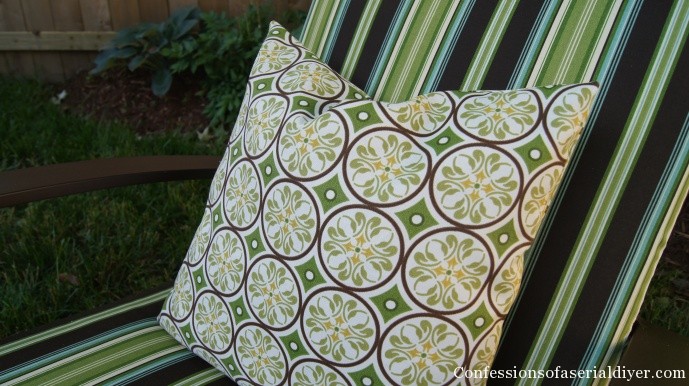
So new!! (But we know better!!)
I wasn’t crazy about the stripe at first because I used a stripe last year. I really wanted to use the geometric fabric I used on the pillow for the cushions, but there were only two yards left on the bolt.
The stripe is so classic, though and it is really easy to sew with, so I’m happy with how it turned out!
It took me almost eight yards to cover all the cushions. That includes a total of eight cushions.
That’s approximately one yard (54″ wide) per cushion, but I was able to cut two side-by-side in my fabric. These are quite thick so you should be able to do the same.
This is only part one of my sew-easy outdoor cushion lesson.
I kick it up a notch with our settee cushion covers.
Here’s a sneak peak:
I’m sharing those in a separate post HERE.
And here is another set I updated more recently:
See more of this set HERE!
Here are a few more outdoor posts you might like:
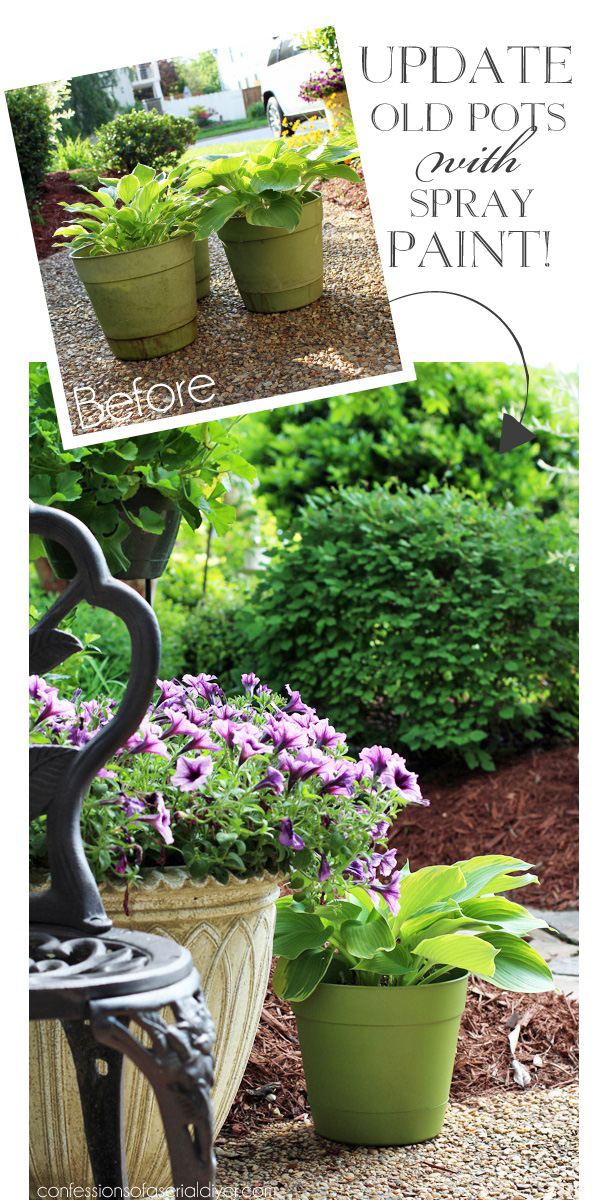
Cheap Planter Update and my Favorite Filler
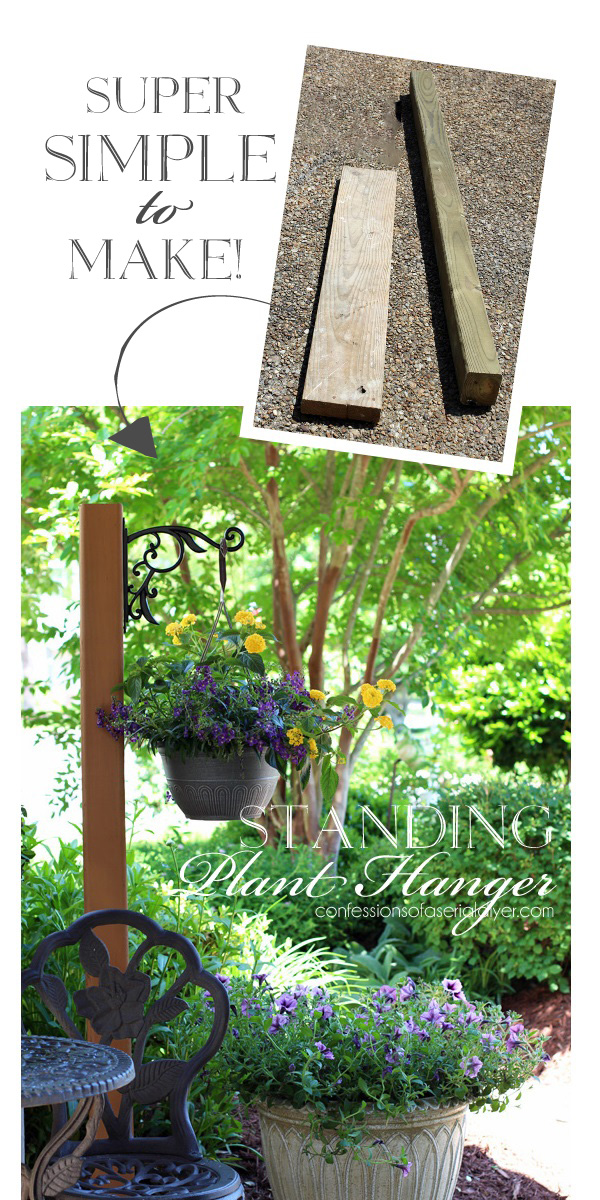
DIY Standing Outdoor Plant Hanger
Good luck…you can do it!
XOXO,
![]()
Don’t Miss a Thing!
If you like what you see, there are several ways to follow along!
EMAIL * INSTAGRAM * FACEBOOK * PINTEREST * TWITTER


")


Dianne says
The chairs are very lovely with their new cushions! I think it is so great if we can repurpose and reuse, it saves money and keeps things from the landfill.
Christy K. James says
Thanks, Dianne! I’m with you in reusing what we have plus it saves money! 🙂
Chris says
This is by far the best explained guide for this type of project I’ve found ! I have a question of you had a second. I don’t sew much at all so I confused a bit with the side seam part. can you explain that any other way maybe my hard head can understand ?! Please help!! Thank you
Chris says
I mean the front corners.. I think it might make sense when I do it tomorrow!
Chris says
I did it ! Thank you so much ! One more tomorrow !
Christy says
Awesome!! 🙂
Christy says
Thanks, Chris! This tutorial is so easy to follow, and those corners will make more sense when you are actually making the covers. I did update one of the photos to make it more clear though. Good luck!
Cindy Eikenberg says
Christy, your chair covers and pillow look fantastic and you make it look SO easy!! Ok, I seriously need to take the cover off the new sewing machine and learn how to use it. Yes, you are inspiring me! 🙂 Have a happy Sunday!
Christy K. James says
You are funny, Cindy! Sometimes for me, it’s dragging out the machine that deters me from starting a sewing project. That so silly, right? I hope you try these, they are really easy and well worth dragging the machine out for!:)
Manuela@ A Cultivated Nest says
Your cushion look so great! Cushions don’t last long outside in Georgia. It seems mine need to be replaced almost every year. I’ll remember to try this next year!
Christy K. James says
Thanks, Manuela! I’m so glad you stopped by! 🙂
Mel says
Such beautiful fabric and your instructions are fantastic! Thanks
Christy K. James says
Thanks, Mel! 🙂
Jill P. (@MamaGing.com) says
Your cushions look great! Thanks for sharing the post, found it at Mop It Up Monday! Will be pinning this for future use… I need to redo my cushions but haven’t decided what color scheme to go with yet. I’m a new follower – love your blog!
Christy K. James says
Thanks, Jill! There are so many choices when you are choosing fabric to make your own…a blessing and a curse! 🙂 So glad to have you here!!!
Christine says
What a great tutorial, man do I wish we were neighbors. My sewing machine and I got a divorce years ago…lol I was forced to buy store bought ones….Great job.
Christy K. James says
Ha ha! Sometimes it’s all I can do to drag my machine out, but once I finally do…I’m usually glad I did! Thanks for taking the time to comment 🙂
Kim says
This is a great tutorial! I pinned it! I have new cushions now (because I afraid to make them), but next time I need (or want a new look) I have super directions that look easy enough for me to tackle! I like your other post too, with the how to on the back cushions! Thanks much and I love your fabric choices, the furniture all looks so fresh and enticing!
Christy K. James says
Thanks, Kim!! I had a hard time finding replacements that weren’t so expensive…this is a really simple alternative! So glad you stopped by 🙂
Krista @thehappyhousie says
Wow, Christy – totally awesome cushions. I love them, the fold over on the edge looks perfect!! Such a fabulous after:) Can’t wait to see the rest!!
Krista
Christy K. James says
Thanks, Krista!! Part 2 is up now! Thanks so much for stopping by 🙂
Andi says
Oh yummy….I want to do this with my patio furniture now. But I think I’ll wait till I get a patio first! 🙂
Christy K. James says
Haha! That might be a good idea! Have a great day, Andi 🙂
Lora @ Craftivity Designs says
So excited to find this! I have a few cushions I’d like to cover just for a different pop of color. Will have to enlist my mom’s help on this one, but it looks pretty achievable! Pinning!
Christy K. James says
Awesome! I hope this is helpful. I’d love to know how they turn out! 🙂
Lora @ Craftivity Designs says
Hey, Christy! I just finished my patio cushions and they look great 🙂 I ended up doing the lumbar cushions instead of the big seat cushions since it saved a little money and I don’t mind the big cushions too much. My mom is a fantastic seamstress so she did her thing with the pattern, but your post totally inspired me to get on the ball and do it!
Here is how they turned out: http://craftivitydesigns.blogspot.com/2013/06/covered-patio-cushions.html
Thanks so much! Have a great week 🙂
– Lora
Cristina@remodelandolacasa says
Wow Christy, it looks like a totally new patio set! I love the fabrics you chose. yeah, stripes are much easier to work with.
Christy K. James says
I know, right? This is a project I was REALLY not looking forward to because the old ones were so dirty with pollen and whatever else! So glad they’re done and good for another year…or two ! 🙂
Anu@MyDreamCanvas says
Wow, you are a genius. These look great. I am so glad I stopped by. I am hosting a giveaway via Arcadian Home on my blog. It would be great if you could stop by. Have a lovely day!
Christy K. James says
Thanks, Anu! 🙂
Victoria Lavender says
Wonderful post, I’ve enjoyed it very much. My chairs are still ok..but now I know what to do. I hope you don’t mind that I’ve reposted it at my linky gallery “The Blog POST OFFICE”. It’s a Reverse Linkly. The gallery is a lovely place being filled with great blog posts like yours and other fab bloggers. Drop by, I hope you’ll enjoy the POST OFFICE too. If you place a backlink of “The POST OFFICE” with your post, you may be considered for the “First Class Post” award.
Thank you, have a SUNNY day, Victoria Lavender
Christy K. James says
Thanks s much, Victoria! I’ll be sure to add your button:)
Nancy @ Artsy Chicks Rule says
Oh you make it look SO easy for this non-sewer ! 😉 Love, love, love the fabric you chose!! Thanks for sharing on Project Inspire{d}…Pinning! 🙂
Nancy
Kim: Too Much Time says
Thank you SO much! I keep looking at my washed out old cushion covers and thinking I need new ones, but they are so expensive! I always find good deals at Hancock and you totally convinced me that I can make my own…and that I simply must have stripes:)If you get a sec this weekend, I am hosting a Linky party and would be super excited if you stopped by to share this awesome post!
xxx
Kim @ Too Much Time
http://too-much-time.com/2013/06/get-schooled-saturday-80.html
Christy K. James says
Thanks for telling me about your party! I linked up:)
Sharon @ Life After Empty Nest says
Wow! Awesome tutorial! Thanks for sharing! “pinned!”
I’ll be trying this!
Christy K. James says
Yay! I think you’ll find this pretty simple!
Kelly Palmer says
Thank you so much for sharing this and for making it so easy to understand! I have had some new fabric (striped) 🙂 since last year that I planned on using to recover a cushion for our porch swing. I felt so intimidated to try it until now!
Christy K. James says
Great! You’re already one step ahead, Kelly!! This is really simple so dust of that machine and get to it! Thanks for taking the time to comment, it really does make my day 🙂
Dawn @ We Call It Junkin says
Great tutorial! We recently bought an old metal patio set (bouncers and a glider), and once we sand, weld, and repaint them, I’m going to make cushions for them. This will be very helpful. Thanks! Take care – Dawn @ We Call It Junkin
Christy K. James says
Awesome…I hope you find this to be helpful! Now welding…that’s way out of my league! Good luck with your patio set! 🙂
lilly says
Hi, Christy!
I love that I was searching for sewing cushions and your blog came up! I remember seeing it a few weeks back on FB. Awesome job! I’m going to be making some covers for some pation chairs that were given to us and these look perfect. Can’t wait to start!
xo,
Lilly
Christy K. James says
That is crazy awesome!! These are really easy to make! What’s funny too is I was searching for glass knobs online and my china hutch( which has glass handles) came up. I came up in my own search ha ha! Good luck with your cushions! 🙂
Christy K. James says
Ok so I checked out your site and I am blown away by the beautiful sound that you and Megumi make as a team!!! Really beautiful!! How amazing is it that you get to do something you love that you are obviously so talented at???! 🙂
B says
I live in Az and the dust is terrible in the desert! I need a better color for my outdoor set! I have a sewing machine but I don’t really sew. However I think I can do this after reading your post. Thanks very much for sharing your skills! Blessings, B
Christy K. James says
Yes, you CAN do this!! Put that sewing machine to work, it’s all straight lines!! I’m excited you feel inspired…good luck! 🙂
Leslie Baker says
I am so glad I found this! Last night I almost lost my mind trying to sew new covers for my outdoor furniture. I was using a much more difficult method but can’t wait to get home and try this. Even with my limited sewing abilities I KNOW I can do this.
Thanks!
Leslie
Christy K. James says
Great, I’m so glad you found me…and it sounds like it was just in time! Good luck! XO
christine says
I did this same thing for our outdoor chair cushions. It is incredibly easy. I slip stitched the top ‘opening’ so that I could wash them if need be. Though I think I will take your suggestion and just make new ones when these have had it! Heaven knows I have enough fabric stashed!!
Christy K. James says
I have been covering mine like this for years too, but decided to share it this year. I was really surprised to see how much positive feedback this post received. Some people are terrified of sewing, but I wanted to show how simple it could be! 🙂
sabrina says
Thank you for your tutorial I am going to try and get mine done before my sons birthday bbq this weekend. Yours look great ! I am inspired. I read on another blog to use shower curtains for fabric to save some money 🙂 thought your readers might like that idea. Happy diy-ing
Christy K. James says
Thanks for sharing that tip, Sabrina! Hopefully you’ll find this tutorial helpful 🙂 XO
Gloria says
I bought some greatly discounted Smith & Hawkins chairs years ago but the cushions fabric has finally rotted. I tried to find replacement cushions but the prices were so outrageous that my husband wants to get new furniture. The chairs are still great and it would be a shame to get rid of them. I am so glad I found your tutorial. My next decision is to find some affordable fabric and wipe the dust off the old sewing machine.
Christy K. James says
I’m so glad you found me, Gloria! This tutorial is super easy and your set will look new again! I’d live for you to share a picture when you’re done…good luck 🙂
Deborah Breeding says
Dear Christy, love your tutorial, the pictures are beautiful, all so easy to understand. My elderly father needs new cushions, shopping around I was blown away at cost to replace. How would you cover a cushion with top and bottom connected? Thankyou for the inspiration. Deborah
Christy K. James says
Hi Deborah, thanks for your sweet comment! I wonder if you could lay the two-piece cushion flat and make a cover for the entire thing, but make it a tad bit longer. Then sew a seam where the cushions connect once it’s in place? I haven’t tried to make one for that type of cushion before. Good luck 🙂
Paula@SweetPea says
This is such an awesome tip! I don’t have any chairs with cover but I’ve pinned this “just in case” for the future.
Rita says
Your tutorial was perfect! Winter in VA-now is the perfect time to get started.
Christy K. James says
I’m in Va too…but it’s getting down into the twenties tomorrow brrrr. 🙂
Kate says
I am so inspired by this post and keen to revamp my outdoor setting with new cushions. I am looking to buy my first sewing machine. Any tips for this sort of DIY job? I would like to use outdoor fabric similar to yours. Does the machine need to be heavy duty. As its my first machine I’d like it to be something I can grow into but also not too pricey. Any suggestions would be great!
Christy K. James says
I’m so glad you feel inspired, Kate! You just need a basic machine. I like Kenmore and Singer. A simple machine will sew outdoor fabric no problem. If you were to sew so with something really heavy like a denim, you would just change out the needle for a more heavy duty one. Good luck 🙂
Hermilie smith says
Thanks for the blog. The cushion cover is pretty and the color of that is also amazing. This is a way we can deliver a new look to our house but the best part is that we can do by ourselves the work of cushion cover sewing.
Ali says
Can you sew these pellows by hand and still work I plan on makeing some cousions for my outdoor couch because I can’t aford them at 25$ a pellow so I was wandering if I could sew these by hand and they will hold up?
Christy K. James says
If you only have a couple of cushions to sew, you could do it by hand. I think they would hold up just fine.
flower delivery phoenixville pa says
What a great tutorial, man do I wish we were neighbors. My sewing machine and I got a divorce years ago…lol I was forced to buy store bought ones….Great job.
Christy K. James says
Aww, sorry to hear about your divorce lol! These are SO easy to make, maybe you need to start dating again 🙂
Kimmy says
Thanks for the tutorial. Have you tried this over cushions with welting? My current cushions have welting, and I don’t know how this will look.
Christy K. James says
My original cushions had welting and the new covers looked great. Outdoor fabrics usually have pretty patterns too which helps. You can also consider removing the existing covers and just recovering the old inserts, but I don’t think it’s necessary. Hope this helps 🙂
Cathryn d says
Hi, love this tutorial! I wasn’t sure where to post this question. Our cushions are cheap and not comfy. I’m thinking of getting a cheap couch on craigslist to salvage the cushions to use on our outdoor furniture. Is this a good idea? Would love to hear your thoughts! Thanks!
Christy K. James says
I’m thinking you’re a genius! You can buy foam, but it is a bit pricey. I think as long as the material you cover them with a decent quality outdoor fabric (water and weatherproof), that should be fine. 🙂
Cathryn d says
Awesome! Thanks, I’ll give it a try and let you know how it goes!
Christy K. James says
Oh yes! Please do! 🙂
Crystelle says
Oh Christi, your pillows are so gorgeous! I need to recover oour cushions but am hesitant…. It looks like so much work…..
Yours are so pretty…!!
Hoping you have a terrific week…. 🙂
xx Crystelle
Crystelle Boutique
Christy K. James says
Thanks, Crystelle! This tutorial is super simple 🙂
Cathryn d says
Hi, I’ve been researching fabrics. I don’t want to do all this work and the next year have to redo it. If I’m using old sofa cushions do I need to get special waterproof fabric or would general “outdoor” fabric be okay? It seems like Sunbrella is the best but so pricey. Thanks for your advice!
Christy K. James says
As long as it’s ‘outdoor’ fabric, it should work fine. I don’t think what I used was any fancy brand, but it was made especially for outdoors and I found it at Joanne Fabrics. They have a great selection. 🙂
Cathryn d says
Great! Now to find an old couch on craigslist! I actually also just found this sight which has Sunbrella fabrics for less. I haven’t ordered yet so I don’t know first hand but the prices look great. http://www.outdoorfabricsdirect.com/ 🙂
Christy K. James says
Awesome! Thanks for sharing the link. 🙂
Marie @ The Interior Frugalista says
Christy, I remember this post from last summer. So glad you shared it at the DIY Sunday Showcase party this week!
Shelly-Minettesmaze says
Great idea! And awesome tutorial!! I’m pinning this one to our talent board on DIY Sunday Showcase! Thanks for sharing!
Shelly-Minettesmaze
Christy K. James says
Awesome, thanks, Shelly! XO
Rachel says
Hey! I love these chairs. You done a fantastic job redoing them. I was curious though, if you don’t mind my asking. What type of material is this? And where did you get it? I’ve been searching for something similar but I haven’t had any luck. Hopefully, you’ll be able to help me out! Thanks 🙂
Christy K. James says
Hi Rachel, I purchased this fabric at Joanne Fabrics last Spring. It’s an outdoor fabric that runs around $10 a yard on sale. Any outdoor fabric will do and they had a great selection last year. Hope this helps. 🙂
Nicole says
I am looking to do this to my dreadful cushions and I’m wondering what type of fabric your using!?! I was looking at outdoor types and they can be pricey :/ . Could I use any fabric and just be sure to store them when not in use (This way would be much cheaper)
……..?
I am soo confused with ordering online. Swatches seem to coast 3.00, but one yard 59.99 ?..or is it the bolt ( it just doesn’t really say or I am seriously missing something )?….. Buying online seems to be harder than in person, but such a better verity. Please help lol
Christy K. James says
Hi Nichole, I used indoor/outdoor fabric I found at Joanne Fabrics. I believe it was originally 19.99/yard, but I had a 50% off coupon making it around $10/yard. The outdoor fabrics are more water resistant and fade resistant than regular fabric, so I would try to find something recommended for the outdoors. You can try Joanne’s online. Sunbrella fabric is very pricey, which is probably what you are seeing for $59.99, but you don’t have to spend that much. And yes, that is for one yard. Crazy, I know! I’d be happy to answer any other questions, good luck!
Nicole says
Thank you! I found some really cute indoor/outdoor fabrics. I began to worry this was going to be just as pricey as buying new cousins, but I found some really cute fabrics on sale at fabric.com. I was able to order enough fabric to cover 8 chairs, a bench and a few pillows for under 80 bucks. including the thread!! Can’t wait till it arrives, so I can show how they turn out!! Thanks again!!
Christy K. James says
Yes! Awesome!! I think that’s about what I spent, can’t beat it! And can’t wait to see them. 🙂
Karin says
I’m a newbie at sewing and I cannot for the life of me figure out exactly what you did at the corners to make them look so perfect! Could you go into a little more detail please? You put the cover back on after sewing the two side seams, and then what? I’m just not getting how you pin the fabric at the corners.
Thanks in advance!
Maraleta says
Hi Christy! I was wondering how thick your foam cushion was? Hard to tell in the pictures.
Christy K. James says
Maraleta, the bottom cushions are the thickest at about 4.5″ thick.
Karin says
Christy, could you explain exactly how you pin the fabric at the corners? I’m just not able to visualize this for some reason. Thanks for any help you can give a newbie!
Christy K. James says
Hi Karin! I replied directly to your email with a photo to better explain the corners, in response to your last inquiry. Did you not receive it? Maybe it went to your spam? I’m unable to attach a photo here, so I’m going to update the post with a photo that should help. 🙂
Erin says
Hi Christy. I had the same question about the corners. Would you mind going into more detail? I am having a problem visualizing it. It all sounds so easy except for the corners, which is the part that makes them look more professional. Excited to get started!
Christy K. James says
I added a couple more photos to the tutorial that will hopefully make it easier to visualize 🙂
Christy K. James says
Ok, I just updated the post. Let me know if this helps. 🙂
Karin says
Ah ha!!! Thank you so much for that. I was sewing horizontally instead of vertically. Now it makes perfect sense. I appreciate it, thank you! 🙂
Christy K. James says
Glad I was able to help! 🙂
Cindy says
Hi Christy
Thanks for sharing this tutorial. You make it look so easy! I just bought outdoor fabric and will be using it to cover 12 new, bare cushions for 6 chairs. It looks like your back cushions are the same shape as your seat cushions, with the box corners. My back cushions are shaped a little differently – more like your accent pillow but larger. So I’m trying to decide if I should do square corners on those or not. I’m also wondering if it’s worth making matching ties to tie the cushions to the chairs. Do your cushions stay put without them? 🙂
Christy K. James says
Hi Cindy! I would not do square corners on the back cushions. Instead, I would make a cover more like a pillow case, but with the opening across the bottom. If the corners are rounded, you can put it on inside out and pin the corners to get a more tailored fit. Then sew where you’ve pinned. As for the ties, my cushions originally had ties, but I covered right over them and did not add new ones. Because mine are a bit on the large side, they tend to stay in place pretty well. You could easily add them if you decide you need them. Hope this is helpful! Good luck 🙂
Kaitlyn says
This looks so easy! What I can’t figure out is how, after you folded and pinned the fabric on the cushion, you got it back out to sew and then back on again. Thanks for sharing!
Christy K. James says
Thanks, Kaitlyn! I pinned the side seams, took the cover off and sewed the side seams. Then I put it back on (still inside out) and folded the corners down and pinned. Removed it again and sewed the corner seams, then turned it right side out and put it back on. Then I hand-stitched the back closed. Hope this explains it better 🙂
Kaitlyn says
Ahh, I think i get it! I now realize the back is open and the corners you sewed were the front where the fabric is folded around. Makes way more sense, thanks for the response!
Christy K. James says
Sure! Good luck 🙂
Kassi says
I love this tutorial! I have two great big standard poodles, who are wonderful!!!! But they needed good beds so looked around and got my hands on some couch cushions, one was to small and two was to big so I cut one in half. Then covered it in batting and covered it in a nice easy to wash cotton. They love their new beds and they look so much better than ugly store beds.
Thanks again
Christy K. James says
Awesome! I bet the couch cushions are so much more comfy too! 🙂
Tiffany says
I have a silly question. What kind of thread did you use? Is it necessary to use outdoor thread? Love your tutorial by the way!
Christy K. James says
Thanks, Tiffany! I used all
purpose thread and it’s held up fine. 🙂
Tiffany says
Great! Thank you for getting back to me so soon!!
Christy K. James says
You’re welcome! Good luck 🙂
Tamra says
Hi. I didn’t have time to read ALL the comments, so please forgive me if you’ve already answered, but I am going to do new cushions for our outdoor furniture. The foam is WAY more expensive than I thought it would be, but that’s okay b/c I think our old ones may be kinda moldy! ANyhow, I was just wondering since the outdoor fabric is kind of thicker, do I need to be using a thicker needle on my machine? Also, do I need thicker than average thread to sew them? THANKS!
Christy K. James says
Hi Tamra! I used a regular need and all-purpose thread and they worked just fine! The foam is ridiculously expensive, open up one of yours and see if it can be saved. Mine were pretty bad this year before I recovered them, but they were perfect inside. Good luck! 🙂
Tamra says
Hey Christy–Yeah, we did open one up and it was NASTY!! Amazing what ten years (or so) can do!? GROSS! So, unfortunately, we are replacing them. So far, it’s about $20 PER cushion. It’s less than upgrading the furniture anyhow! ANd..I LOVE picking out the EXACT fabric that I like!
Christy K. James says
Sorry to hear they’re a loss, but you really can’t beat picking exactly what you want! 🙂
JJ says
Christy,
The chairs and cushions look awesome! What color spray paint did you use for the chairs? (I apologize if you already posted that and I missed it.)
Christy K. James says
Thanks, JJ! Unfortunately I don’t have a can right now, but it was Rustoleum. (My favorite!) It was just a basic brown in satin finish.
Nancy Cannell says
Last year, I painted my chairs and table set the same – I used Rustoleum Oil Rubbed Bronze. I think yours are the same colour. Now thanks to you, I’ve just ordered some beautiful outdoor fabric from Joan’s for $83. and that includes shipping it to Canada! I’m hoping to get 12 cushions out of it. But I’ll be happy to get 6 seat cushions – I priced them at the stores and the cheapest (price and quality) were $120. You are the best!
Christy says
Oh awesome!! It’s amazing how a little DIY action can turn an old faded set into a brand new looking showpiece. Have fun!! 🙂
Clazi says
Thanks… I needed that…I make dog collars by hand, but needed a little assistance on sewing up some fresh cushions and pillows for my airstream trailer. Best to you for sharing
Christy K. James says
My pleasure, Clazi! Glad I could help! XO
Leesa M says
Thank you so much for this tutorial!! I can barely turn on my sewing machine and I managed to update my deck cushions in around 4 hours!
My cushions were too large and I couldn’t get the material to wrap correctly with the stripes going perpendicular, but I still managed to sew somewhat straight lines even without the stripes as a guide! 🙂
http://www.smugmug.com/photos/i-RwrT6QS/0/O/i-RwrT6QS.png
Christy K. James says
You rock, Leesa! That’s awesome! Doesn’t it feel so good to know that you did them yourself and they turned out great?! 🙂
Jesmond Goodliff says
Hi,
Just to say thanks for the tutorial! I have been looking for a simple way of making a box cushion for a window seat and this worked a treat, the corners look really smart and I’m very pleased with how it came out – thank you!
Jes
Christy K. James says
That’s great! Thanks so much for the feedback! 🙂
Lisa L. says
I’m excited to gives this a try! I just bought material (not striped) lol and I’m ready to go. It sounds like I’m recovering the exact cushions. My patio furniture set was also from Target with white frame and light green cushions. Wish me luck!!!
Christy K. James says
Yes, it was probably the very same set! Good luck, you’ll do great! XO
mercy says
Love the cushions and I’m so glad I found this post it has inspired me to redo my set which I have been putting off. Great tutorial!
Christy K. James says
Awesome, Mercy and thank you! Good luck on your cushions, these are not difficult at all 🙂
Robin says
Thank you Christy! I have not sewed in decades. Your directions were so easy to follow. The only problem I had, was operating my sewing machine….one trip to the shop fixed that!
Had the tension on 0…he set my tension and the machine purred.
I have mentioned you in my blog. Again, thank you for AWESOME directions and your patio is beautiful!
http://mystateofserenity.blogspot.com/
Christy K. James says
Thanks for the shout out, Robin! Your cushions turned out great!!
Janice says
Christy–thanks so much for your tutorial! I used your directions to recover my outdoor cushions and love the results. Here’s where I wrote about it:
http://scrapperjann.blogspot.com/
Christy K. James says
WOW! Just checked your chaise out and your cushions look perfect! I appreciate the link back and the positive feedback. SO glad I could help! XO
Caron says
Thank you so much for this great article on recovering patio furniture. We went to a discount fabric store in Phoenix called Fabric by the Pound and found great outdoor upholstery fabric for $4.99 a yard. We got three yards which was perfect and even with the strong upholstery thread and new sewing machine needle, we only spent $20 to do four cushions. The transformation is amazing!
Christy K. James says
That’s great! Such a huge savings if you’re willing to try it yourself. Good for you and thanks for taking a minute to share! XO
Ashlin says
Thanks for the tutorial! I made some cushions for a large indoor chair we have been needing to update. Your tutorial made it very easy and manageable! Made both cushions in under an hour. Thanks!
Christy K. James says
That’s awesome, Ashlin!! I really appreciate the positive feedback! 🙂
Andrea says
Hi Christy, I haven’t sewn anything in years and I have no idea how to measure for fabric. I quoted you below:
“That’s approximately one yard (54″ wide) per cushion, but I was able to cut two side-by-side in my fabric. These are quite thick so you should be able to do the same.”
I have two cushions per chair, a shorter back (about 2/3 the size of yours) and a separate bottom. Should I be able to get just one chair covered per yard of fabric or will I be able to cover two chairs (4 cushions total). I am confused about your total of 8 yards, as it looks like you covered new throw pillows, too. Would the 8 yards include enough for six chairs and the pillows?
Christy K. James says
I am guesstimating you will need about a yard and a half for one chair (two cushions) if you use 54″ wide fabric. You should be able to cut two side-by-side. I did use around eight yards for mine, but that probably included my throw pillow fabric also. You can always take a cushion or the measurements to your fabric store, and the associate will be able to help you figure it out if you want to be sure. I apologize for not being clear in my post. Good luck with your cushions!! I’d be happy to answer any other questions you may have along the way. Figuring out how much fabric you need is the hardest part. 🙂
Andrea says
Christy,
Here we are a year later and I FINALLY got around to making these cushions! I ended up taking my old cushion covers off as they were shredded, and I found garage sale chair cushions and used the inside padding of those to beef mine up a bit. My box corners are not perfect, but good for a first-timer. Those are a lot harder than they look! I wish I knew how you got yours squared off so perfectly.
I am just about to hand sew the backs and I realized I did not leave enough material to do a nice big envelope fold like you have. I am pinching to cover and it is causing some puckering in the material, but I will make it work. Perhaps you could update your tutorial to reflect 1/4″ – 1/2″ overlap on the sides for stitching and 3″ or so extra to allow for the envelope close on the back.
Did you do anything special to get the smoothness and the nice high point in the middle of your cushion? Mine seem to be a little wavy and not so smooth all the way around. I sewed them snug, like you suggested, but they do not look as good as yours. I made extra throw pillows with new cushions and they are full and beautiful.
Thanks for any suggestions before the stitch these closed. 🙂
Christy K. James says
Hi Andrea,
I’m so glad you got going on your cushions! My cushions were originally very boxy in shape. I think that’s why they are squared off so nicely. I wish I could say it was my expert sewing skills ha ha. As for the wavy areas, I used a striped pattern so I was easily able to sew very straight seams by following the stripes in the pattern. If the seam is not perfectly straight, you may see a few ripples. I struggle with that sometimes, so I know a stripe will be a huge help for me there! I guess maybe take a look at your seams and see if there are areas that are not straight? Without seeing them, I’m not sure what else might be causing the waves. We are always our own worst critics though, and I am sure they look amazing! And certainly better than before! With the seam allowances, I was hoping the photo showed how much over I was with mine, but I might just add a note in there. Thanks for the suggestion, and I hope you are able to get them finished up without much trouble! Take care! XO
Kathryn says
Excellent tutorial! Your project looked so great you inspired me to move forward with recovering my cushions too. I completed the task in an evening and the results are phenomenal. I appreciate the tip about keeping the original covers on, it really made a difference.
Christy K. James says
That is so awesome, Kathryn!! Doesn’t it feel so good to make things beautiful again? Thanks so much for stopping by to let me know!! 🙂
Kim says
Thank you for this tutorial…you helped me a great deal. I tackled some smaller cushions…but with you instructions, they came together fast. And they look great. Thank you again!
Christy K. James says
Yay! It’s so nice to hear positive feedback! Thanks for sharing, kim! 🙂
Donna says
Did you use a special type of material? I know that outdoor cushions usually have a type of material that repels water and dries easily. Just wondering if that is what you used. If so, what is it called? Thanks.
Christy K. James says
Hi Donna, I think I answered this in an email, but just in case…yes it is outdoor fabric I purchased from JoAnn Fabrics and it is just called outdoor fabric. 🙂
Christy K. James says
Hi Donna, I think I answered this in an email, but just in case…yes it is outdoor fabric I purchased form JoAnn Fabrics and it is just called outdoor fabric. 🙂
Jill Neuharth says
Thanks so much for the tutorial!!!! I’ve been wasting tons of time shopping around from store to store trying to find cushions for my new patio set as well as replacement cushions for my old set. I found replacement ones for about $200 but no luck for the new set. After frustration set in I stumbled upon your post. My sewing skills are basic at best but your technique makes it SUPER EASY!!!! I made a test cushion out of some scraps. Not only am I going to sew cushions for my new patio set, I’m returning the $200 replacement set I just bought. Thankfully I saved all my old cushions and with a bit of trimming I can re-purpose the cushions from an even older set to fit my new set. When I’m done I plan to share the results and your blog with my 200 member ladies group! I’m off to Joann’s right now!
Christy K. James says
YAY!!!I’m so happy you found me!! It really is pretty darn easy to cover those old cushions, even with minimal sewing skills! I hope you’ll send me a pic when you’re done, good luck! 🙂
Beverly says
Thanks for the tutorial. Your cushions look beautiful. I love stripes too.
Saying G’day
Have a great weekend,
Bev
Christy K. James says
Thanks for stopping by, Beverly! 🙂
Corky says
Thank you!!!!! For doing this !!!!!!
I actually am sitting here with a smile on my face cause I did something that looks good!!!!
I am recovering the cushions in our RV…
And my corners I just can’t quit admiring them!!!!!!
Thank you!!!!!!
Christy K. James says
YAY!! I know that feeling of pride! It feels so good to tackle something yourself and have it turn out great! Thanks for stopping back by to let me know I was able to help!! 🙂
tck says
I think this project is FANTASTIC! I don’t know how to sew and I was even able to do this. Thank you!!! Do you have a tutorial of how to cover the pillows? thanks!
Christy K. James says
Awesome, so glad you found this helpful! My friend Krista, from The Happy Housie has a super simple pillow tutorial here: http://thehappyhousie.com/simple-speedy-stuffed-sewing-tutorial-diy-envelope-pillows/ Thanks for stopping back by, I really appreciate your positive feedback! XO
Stacia says
OMGosh!!! I have the exact set of furniture and decided to recover the cushions because 8 years of being outside and kids have destroyed them. I love the set and am so so excited that my first search on how to do this came to you!!
Thank you for the easy to follow directions. Im thrilled!! I sort of wish I had picked striped fabric because that does look a lot easier but I didn’t and already paid for it so Here Goes!!
Yay! Excited!!!
Christy K. James says
Awesome, Stacia! I’m excited for you! It’s amazing how great your set will look with sparkly new cushions, not to mention how satisfying it will feel because you did it yourself! Feel free to share a pic or two when you’re done 🙂
Erin B. says
Even though you posted this last year, I’m so glad I found it. I covered my extremely over-sized patio cushions yesterday by following your tutorial. It saved me a lot of money and they turned out great.
Christy K. James says
Awesome, Erin!! Thanks so much for stopping back by to share with me! 🙂
Megan Ball says
I used your Easy Sew Outdoor Cushion Tutorial to rehabilitate my patio set. Worked like a charm! Thank you so much! The only modification I made was on the back envelope enclosure for the cushions. Instead of sewing them shut, I sewed velcro along the entire length of the “envelope flaps”, so that the covers can be removable and I can wash the covers when needed. Velcro is cheaper and easier than sewing zippers. I am a huge fan of all your projects… thanks for all the inspiration!! Looking forward to trying more!
Christy K. James says
That was such a smart idea, Megan! I’m glad the tutorial worked well for you and I appreciate your letting me know. Who knew it was so easy to cover them, right? Thanks for following along! XOXO
Rave + View says
This post is so timely. I’m delighted I found your blog. Thank you so much.
Christy K. James says
Great! I just power washed my cushions last weekend and they are good to go for another season. Glad you found me too! 🙂
Shonda says
I have a dumb question… I’m new to all forms of DIY stuff and I really need to re-do the cushions on my back patio. My current cushions have piping around them. Your pictures didn’t look like they did. Would these instructions still work to cover cushions with piping or should I cut that off first? Love your blog! I’m totally inspired to update my whole house! 😉
Christy K. James says
That’s not a dumb question at all! Mine did have very thin piping, and I just covered right over them. You could also remove the old covers, which I did to a couple, but I found it easier to get the cushion in and out of the new covers easier when I left the old covers in tact. I don’t think you will have to remove them though, try one and see how it looks. Good luck!
Micole says
Thanks so much for this. I found it on pinterest and just covered my living room chair this way. I have only sewn twice before.
Christy K. James says
That is awesome! Thanks for sharing! 🙂
Kelly says
I love this. I have looked through many tutorials and this HAS TO BE my favorite one! I am currently taking a break from doing my outdoor cushions! Thanks!
Christy K. James says
That is so great to hear, Kelly…soon you’ll have a whole new set! Thanks for the positive feedback! 🙂
Karyl Panion says
Your cushions are lovely! I too am a hopeless (I-just-can’t-stop) diy-er; I just re-covered some of my outdoor cushions the other day for the second time. I think you made the right choice doing the cushions in the stripe and using the other pattern for the pillows. Going to check out your deck re-do now!
Christy K. James says
Thanks, Karyl! I need to redo my front glider cushions this year. I bought the fabric, but now I need the motivation. 🙂
Dave says
I loved this article so much I did it. But for the back instead of hand sewing the whole thing, like the front corners I did the same for the back and sewed in a few inches and left the whole about two thirds to stuff the cushion in. Also instead of putting the cushion back in to pin and sew the corners I took half the thickness of the cushion and drew a line parallel with the side seem. Then measured up half the thickness. I did this on all four corners on both sides. Then you pull it open pin it and sew the line.
Christy K. James says
Clever changes! I’m sure they look great!
Tania says
Hi Christy- Thanks so much for this awesome post. I “claimed” a 60”s Danish wood living room chair from my parent’s house that had the most worn cushions. Went to Joanne’s, bought new foam and striped fabric and voila, a new chair! Yes, the hand-stitching was a pain but so worth it! My son now has a “new” chair for his room at our beach house! Wish there was a way to import the pic so you could see!
Christy K. James says
Yay!! I’m so glad my post helped! I’d love to see. Feel free to message me a pic on my FB page if you are on FB! https://www.facebook.com/ConfessionsOfASerialDoItYourselfer 🙂
Lisa says
Thank you so much for this suggestion! Such an affordable way to replace outdoor cushions! I did all 6 for only $40 and I love the fabric! Great instructions too!
Christy K. James says
Awesome!! Saving money is the best, unless you count covering six cushions perfectly all by yourself…that’s even better! Glad I was able to help! 🙂 XO
michelle says
Thanks for posting this idea! I was going to buy a new set of cushions and have been putting it off because of the expense. But I tried it and they look great. I’m not the best seamstress, but it’s really not that hard. I did mess up the corners the first time because I sewed them in the opposite direction if you can picture that, like two dimensional it worked out because it was the back upright cushion and it gives the cushion some shape. I also decided to try a different color and my husband hated it (says it was hospital blue)! But they were in expensive enough to remake in a color he likes plain ole beige. I am really happy with this project. Thank you!
Christy K. James says
Awesome!! So glad this tutorial came in handy. I appreciate the feedback! 🙂
Elizabeth says
Thank you so much for this tutorial! I was going to recover my patio furniture cushions in a much more complicated way, but then I found your directions. The cushions turned out great! Thanks again!
Christy K. James says
Awesome!! So glad you found me! 🙂
Sheena says
Christy! Thank you for this tutorial! It’s the only reason I could muster up the courage to tackle some cushions of our own! http://www.beaninloveblog.com/2016/03/my-couch-baby.html
Christy K. James says
Awesome!! SO glad my tutorial was helpful! I just checked your sofa out and it is fabulous! Pinned to the BHG Pinterest Board and shared on FB! XO
Scott Schada Glenview Illinois 66 yrs old says
I have been trying to nurse an outdoor four chair set with the most comfortable filled cushions along for over ten years, but the nylon? faced seating and back surfaces ares finally disintegrating. I found the green speckled spray to touch up the frames, and the webbing is still strong and flexible, but I couldn’t afford to have those wonderful filled cushions recovered. As I can operate a sewing machine to do repairs and hem pants and jeans, I’m sure I can follow your instructions. I can’t wait to try this, Christy; I feel it was a stroke of luck I found you!!
Christy K. James says
If you can sew a straight line, you can definitely do this. Your set will look brand new again! Good luck!
Cindy says
Thank you so much for this! I was way over thinking my project. Your directions were easy to follow and my cushions came out great.
Christy K. James says
You are so welcome, Cindy! I’m so glad this was helpful! XO
Marisa says
Everything looks great! I’m definitely trying this to spruce up my blah-looking cushions. I’ve been thinking about spray painting my chairs too because the paint on them is faded. Do you find that the spray paint scratches or chips easily?
Christy K. James says
Thanks, Marisa! The spray paint holds up fantastically outdoors!
Michelle F. says
I was looking for an outdoor cushion tutorial and opened your blog to see my exact target outdoor seating set (mine is white and looking much more hmmmm rustic shall we say than yours! ) I love my set and also got it at a steal more than 10 years ago! Needless to say, you have given me the measurements & guidance I needed to do the job! Thanks for the inspiration!
Christy K. James says
Oh how funny! This set was absolutely perfect around my pool when it was white, but when I moved and no longer had a pool, it looked out of place in my back yard surrounded by trees, so I spray painted it and it took the paint amazingly well. I just freshened the whole set up again for this year and it’s still going strong! Have fun updating yours…it will be like a whole new set! 🙂
Stephanie says
I used your tutorial to cover my cushions and I love how they turned out. Thank you so much!
Christy says
I’m so glad you found it helpful, Stephanie! 🙂
Ann says
I bought some great patio chairs at a thrift store that had cushions that were in pretty good condition…. Or so I thought, until I started spraying them off. I didn’t want to buy new cushions because they can be very expensive and would probably cost more than the chairs! Sewing is not my thing…. at all. (Either is posting comments). But I thought I’d at least look and see
if there was a tutorial easy enough for my lack of sewing skills! Yours was so simple and so easy to follow and I just wanted to say thank you for putting something out there that anyone can do!! I’m having a blast making these cushions!
Christy says
Thank you SO much for taking the time to comment, Ann! I truly appreciate it. Sounds like you will have a brand new looking set in no time! 🙂
Carol M says
Thanks so much for your fabulous tutorial. I have a very similar Target set with cream cushions that had seen better days. I could never find replacements the correct size and I am so glad I didn’t! I followed your advice and used a striped fabric. Your corners are genius. This was no more difficult than making a pillowcase and hand sewing the opening closed. Thanks again, I love my “new” cushions.????
Christy says
Awesome, Carol!! I love hearing such positive feedback for this tutorial…it really IS easy! So glad you found me…enjoy your “new” set! 🙂
Angela Surginer says
Just finished recovering my porch swing cushions & they turned out great. For those of you nervous to try this, don’t be. This is my first sewing project ( I had to get out the manual just to put on the thread and bobbin – that is how much of a newbie I am!). The corners are genius. Thanks so much for the tutorial!!
Christy says
AWESOME, Angela!!! I love the positive feedback and the encouragement to hesitant sewists! SO glad you found the directions easy to follow! XO
Ann Drennan says
What size were the cushions? I saw this yesterda and went and bought fabric today – 54 wide as well – And I don’t think it is going to work. My cushions are 5 deep, 26 long and 24 wide. I think I am either going to have to take a layer of the cushion out or cut the cushioning? Any suggestions? Thanks, Ann
Christy says
My largest cushions are 22″X 22″X 5″. I think it would be easier to just add a strip to widen your fabric a bit. The seam should end up on the side of your cushion so it shouldn’t be too noticeable, especially if you chose a patterned fabric. Good luck!
dc says
Thanks a BUNCH for this….Exactly what I was looking for help with!
…I too had issues with fighting out how you got those corners so sharp…but after watching this: https://youtu.be/ji_o6IqmVnk it all made sense!
Christy says
Glad you figured it all out! 🙂
Susan Hines says
Thank you!!! Just ordered some outdoor material for our swing! Can’t wait to make the cover after the hideous makeshift ones I have on there now!
Christy says
You are so welcome, Susan! These are seriously simple to make, and your swing will look like new…have fun! XO
Christy says
You are so welcome, Susan! These are seriously simple to make, and your swing will look like new…have fun! XO