If you read my last post, Sew Easy Outdoor Cushion Covers (Part 1), you know how easy it is to give your outdoor furniture new life. You don’t need to be an expert with your machine to make simple covers for those old cushions, just a willingness to try!
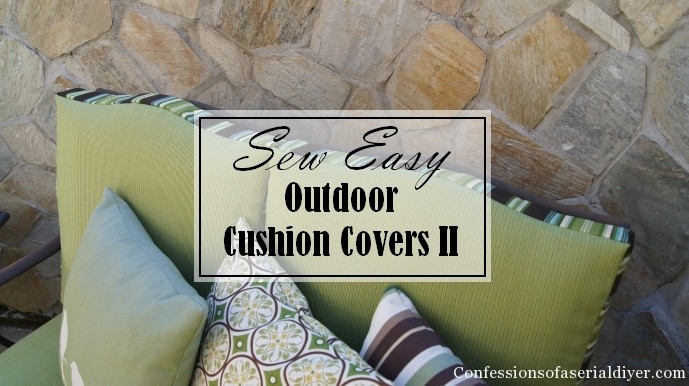
In this episode (sounds like I’m ready for TV now ha ha ), I am kicking it up a notch. I’m sharing my new outdoor settee cushions. This is a tiny bit more difficult, but still really simple!
Take a look:
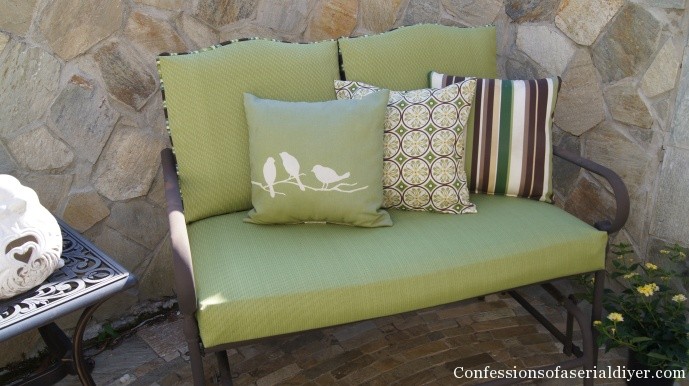
Cute, huh? (I need to think of more adjectives…darling? Adorable? How about pretty? Yes!)
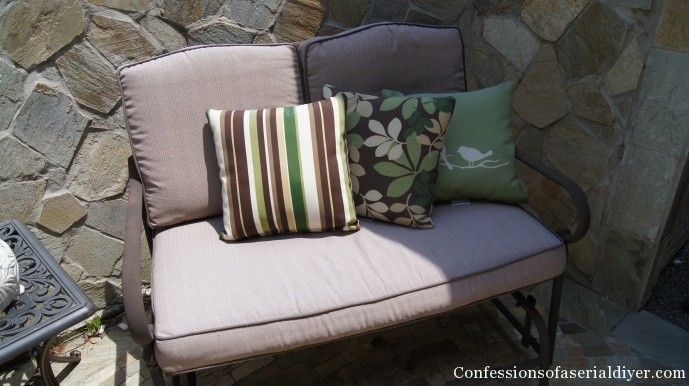
…especially as compared to the before:

Oh the poor “before”, it didn’t stand a chance. She was crying out for some love, too!
As you can see, I covered the bottom cushion using the method shown in part 1. It’s just a little longer, but the steps are the same (and did I mention really easy?!)
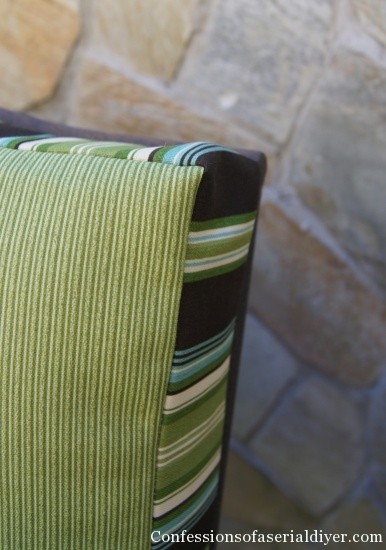
However, the top of the back cushions have a curved detail that required a bit more work.
Note: This method is for any shape of cushion, even if yours have no curves.
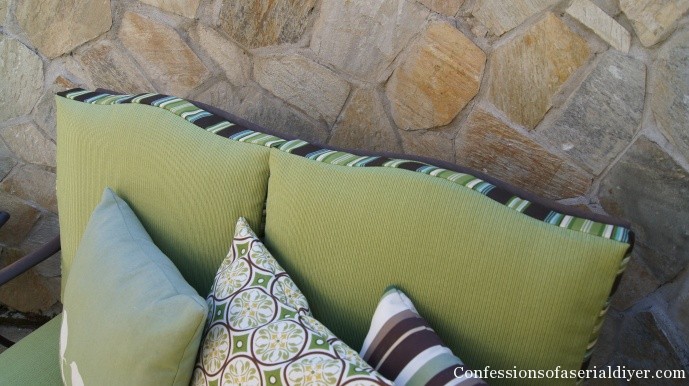
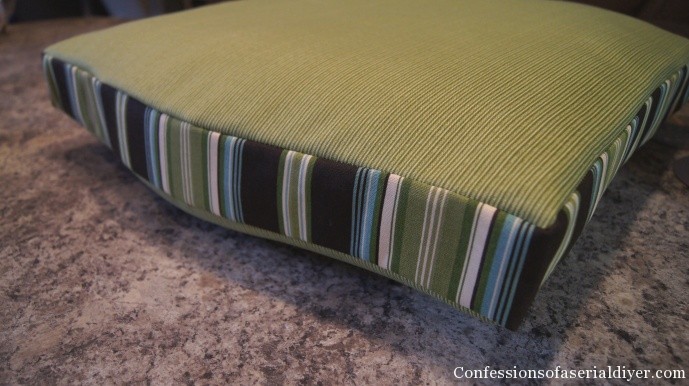
Because this requires a separate piece for the sides, I decide to take advantage of the opportunity to liven it up with a coordinating fabric. I kind of wish now that I had done that with the bottom cushion also. Maybe next time!
To make this cushion cover I started out a bit differently:
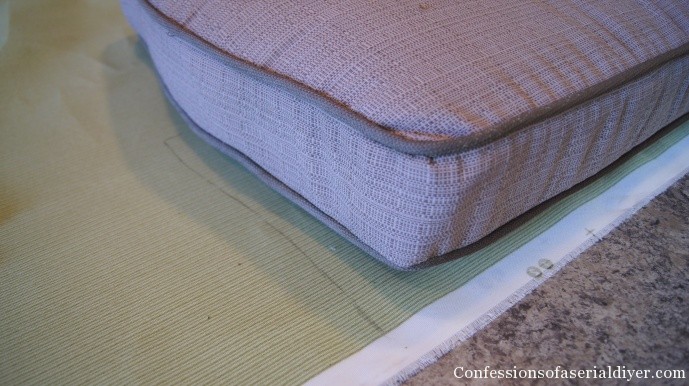
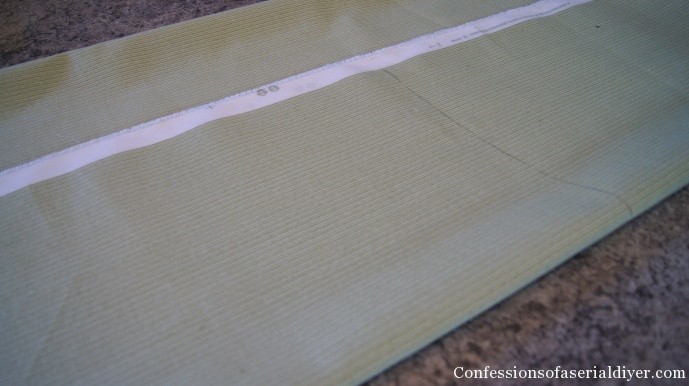
With my fabric flat (two pieces together: one for the top and one for the bottom), I laid my cushion on top. This cushion is 20″ wide. I penciled the outline of the pillow stopping at 10″ (the center point). I also added 1/4″ to the sides for seam allowance.
If you have square cushions, you can just measure the length and width of the top of your originals and add 1/4 ” to each side!
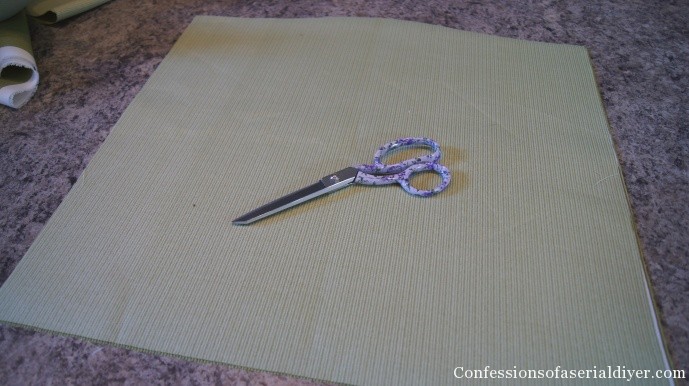
Then I folded my fabric down the center lengthwise.
When I cut along the pencil lines and open it up, the curved part at the top is even on both sides:
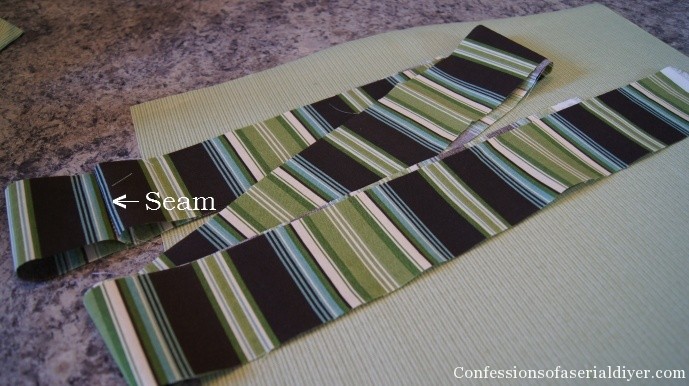
Next I cut my side piece. The side of my cushion measures 3″ so I cut two 3 1/2″ wide pieces and sewed them together to get one piece long enough to wrap around the outside of the cushion plus about 1/2 an inch overlap.
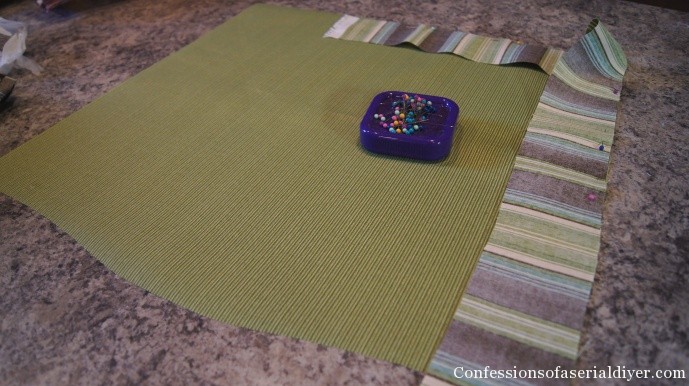
Starting at the bottom, I pinned the side piece to the cushion right sides together (front and the back are the same so it doesn’t matter which one you start with).
I’ll be honest, I pinned this for the picture, but I preferred leaving it unpinned to avoid weird gathers. I just guided it through the machine together.
When I got to the corner, I sewed up to 1/4 ” from the edge then rotated my fabric, folded the flap at the top over to the left, and continued sewing down the next side:

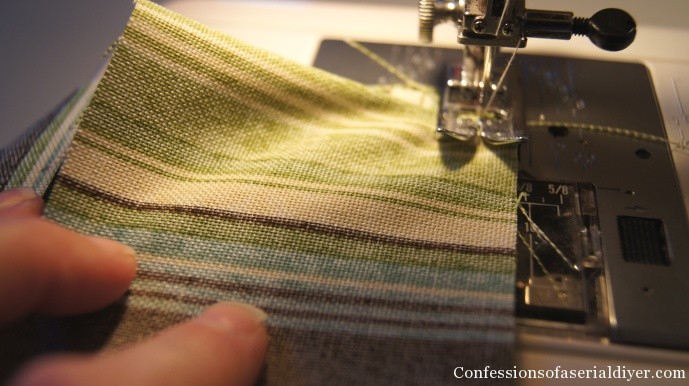
If yours have a curved edge, try to keep the fabric lined up along the edge as you sew:
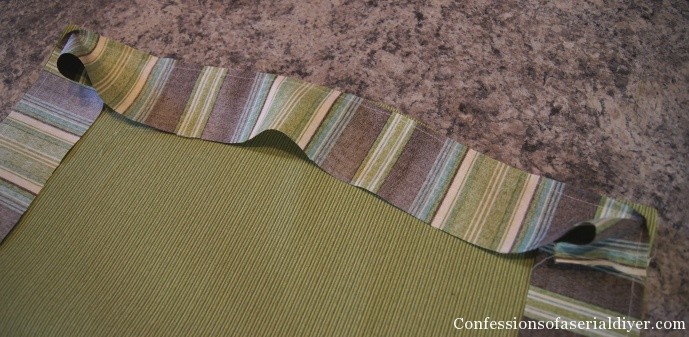
After attaching the side piece all the way around, I sewed the bottom seam where the two pieces met, together:

Now it’s time to attach the other side! Line up your other piece, remembering to put right sides together:
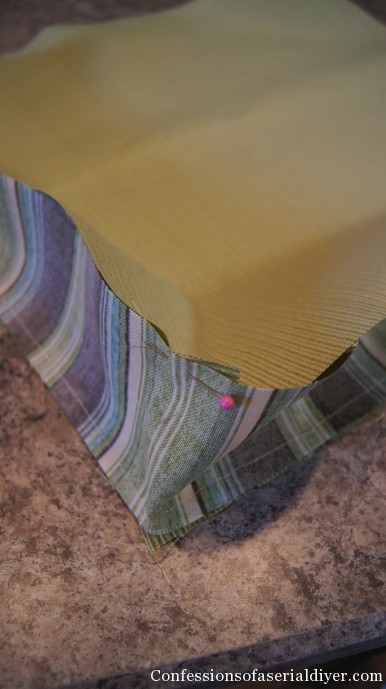
Another nice thing about using a stripe, is that you can use it as a guide to line up your fabrics. I can see that the bottom corner is right on that thick stripe, so I made sure the top corner lined up in the same spot.
Again, I did not pin it, I guided it all the way around to avoid any puckering.
I started at the bottom here also, but this time instead of starting in the middle, I started about 3 ” from the edge to leave an opening to insert my cushion. I sewed all the way around and stopped about 3″ past the other bottom edge.
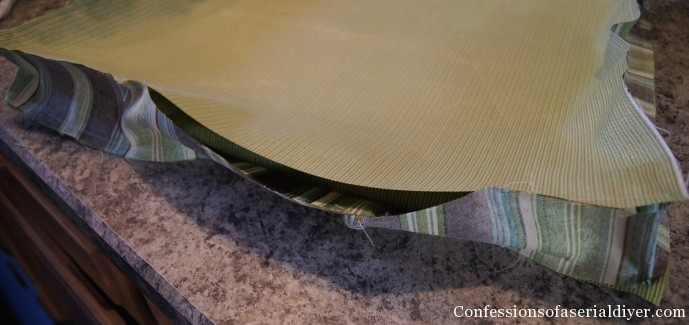
I turned it right side out and reinserted my cushion, then hand sewed the opening closed.
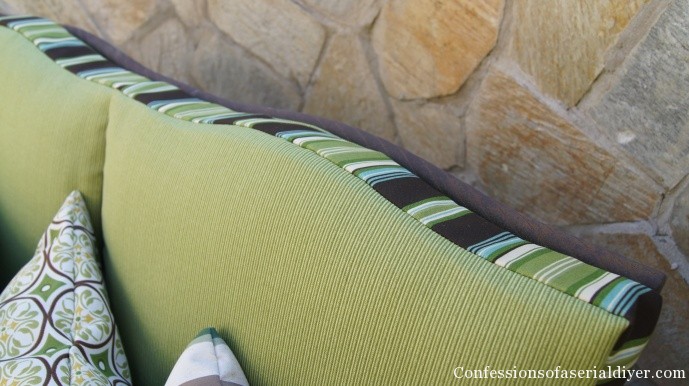
So pretty!
And here it is again before:
And now:
We’re always talking about how paint can change a piece drastically. Sewing is no different! And honestly, it wasn’t that hard, was it?
If you’ve got awesome sewing skills, it’s not too much more difficult to add a little piping. For my outdoor cushions that I replace pretty often, this simple cover suits me just fine!
I’ve shown you two very simple ways to give those old faded outdoor cushions a new life. I hope I’ve inspired you to dust off that sewing machine and get started!
Soon I’ll be sharing this outdoor space. This is part of the walk up to our home. I’ll share what ‘s so special about this unique space then, too!
See you again soon 🙂
XO,
![]()
If you like what you see, there are several ways to follow along! ![]()
Email * Facebook * Pinterest * Hometalk * Twitter * Instagram
I love to share at some of these great parties:
Home Stories A to Z Not Just a Housewife Kammy’s Korner The Happy Housie Design Dining and Diapers Liz Marie Blog Funky Junk Interiors Savvy Southern Style Tatertots and Jello DIY Show Off Redoux Interiors Between Naps on the Porch The DIY Dreamer Oh My Creative Little Miss Celebration Just a Girl and Her Blog Sand and Sisal Interior Frugalista House on the Way Addicted 2 DIY I should be Mopping the Floor Miss Mustard Seed


")


Sandy says
Thanks so much for the cushion cover tutorials. I sew but somehow making new cushion covers just seemed overwhelming. I guess I was overthinking the process 🙂 Anyway, I’ve saved your instructions and now feel comfortable making covers for my outdoor cushions when they get soiled or worn. New cushions are expensive but your method is very cost-effective. Thanks again!
Christy K. James says
I’m so glad you found me! These are really simple when you see how they come together 🙂
kristin says
So pretty, I love the green! Thanks for linking up.
Christy K. James says
Thanks, Kristin! Happy to link up!!
Madonna/aka/Ms. Lemon says
The word you are looking for is fabulous. This is just fabulous.
Christy K. James says
You are so funny…yes, I like that!! Fabulous 🙂
Cristina@remodelandolacasa says
I love the contrast on the fabrics and those curves 🙂 Great tutorial!
Nancy @ Artsy Chicks Rule says
Those are fabulous, really! Sadly I have no sewing skills, so not only with there be no piping but there will be no sewing at all for me! 😉 But you do make it look easy I must admit. Pinned! 🙂
Christy K. James says
Lol! Sure you aren’t tempted to try? Sewing opens up a whole lot of DIY possibilities! 🙂
ingrid@nowathomemom says
Great tutorial! I really love the colors, very, very pretty! 🙂
Ingrid
Christy K. James says
Thanks, Ingrid! So glad you stopped by:)
Mel says
You make it look so easy. I sewed a box cushion once and vowed to never do it again 🙂
Great fabric choices, they look smashing!
Christy K. James says
Thanks, Mel! I think lining the top and bottom properly is what’s really tricky. Using a stripe really helps with that. Thanks for stopping by!
Deidre says
Where do you get your outdoor fabric? Any advice for how to choose it? How much should one pay for it?
Deidre says
Sorry… got straight to the questions without saying I think the transformation is amazing! A (relatively) simple way to get a real change. Great job! I am so glad I found your blog. Keep it up
Christy K. James says
Oh you’re funny! Thank you!!
Christy K. James says
I found this fabric at Joanne Fabrics. It was $19.99/yard to start, but it was 50% off when I bought it. So around $10/yard is probably the most I would pay. I like colors that blend with my trees and plants so they coordinate nicely with the surroundings. I also try to choose something that isn’t going to show everything. To make 8 fairly thick cushions, I spent around $75. That’s less than $10 a cushion. You couldn’t buy replacements for that. I hope this is helpful! I’d be glad to answer any other questions:)
Kay says
This is a wonderful tutorial, I love the fabrics you have chosen. But my favorite thing is the pillow with the bird!! I have a “thing” for birds. Did you paint her? Please tell me where you got the bird pattern. Love your blog!
Christy K. James says
Thanks, Kay! I found the pillow last year at Lowes of all places. I loved it too and it actually held up pretty well…just starting to see some fading. Not sure if they still have it, but I have seen a stencil almost just like this at Michaels. Hope this helps 🙂
Jamie says
Ah, thank you so much. I have been sitting here and got half way on my own thinking through this process and just couldn’t bring together how to attach to back and what to do with the excess in the corners to get it to wrap over. Thank you soooo much!!!!! I had the sides and top all cut when I found this and now I can finish as you brought it all together for me!
Christy K. James says
So glad I could help, Jamie!
Beth says
Love this!! Now that winter is fast approaching, I’ll be checking out the fabric stores for my new patio cushions for next summer! I been all over the internet looking for replacements, right! $200.00 dollars for a set of four? For the birds to … well you know and the grandchildren’s popsicles, wet dogs and, an occasional hotdog drop? I’ll be scotch guarding them as well! 😀
Christy K. James says
This is probably a great time to get a good deal on fabric. This is a great way to save the cushions you already have and for so much less than purchasing new ones! Good luck and thanks for visiting 🙂
Lynne says
I’ve been sitting on enough fabric to cover my 4-chair patio set and it turns out that the fabric is the same fabric that you used. I was so inspired (after a year of looking at the bolt of fabric) that I sewed up the covers for the for seat cushions. I have enough leftover striped fabric to add to (the same) almost solid green fabric so I think the finished back cushions will look great. thanks for your detailed photos and instructions, they were perfect.
Christy K. James says
I’m so glad you found my tutorial helpful! I’m sure your set will look fantastic (and new again) when it’s finished! Feel free to share a photo when you’re done, I’d love to see it 🙂
Elham says
Hi Christy
I,m from Iran, young girl try to find an art business. congratulation you are a creative person. I want make a website for online shopping so I search everything about art at home.
good luck
I know I,m not good in English 🙂
Elham
Christy K. James says
Glad you stopped by, Elham! Thank you. You’re English is just fine 🙂
Nicole says
Great makeover! You inspire me! My only question…is there an easy way–or trick–to getting the cushion back into the cover?
Christy K. James says
Thanks, Nicole! If you’re referring to getting the cushion back inside the new covers you are making, it’s just like sliding a pillow into a pillowcase. I hand wrapped the fabric like a package after inserting the cushion and hand stitched it closed, so there’s nothing awkward about inserting the cushion into the new cover.
Susan says
I was thrilled to find your cushion slipcover tutorial! I have a long veranda with a lot of wrought iron furniture and have long planned to slipcover all 18 cushions in matching fabric. Making boxed cushions takes so long, I really wanted to try slipcovering the existing ones and your tutorial was by far the simplest I have seen. I have some fabric, like yours actually but the wide stripe is black, not enough for all of them, but now with an actual plan in mind, I’ll head to Joann’s for some complementary fab and decide how to use it.
Perhaps the back cushions on all the chairs in one fabric, and the seats in the other. Who knows, the store might have more of my (2-year-old) fabric! I think I may incorporate an idea from another site and use velcro to close the cushion covers to make it easier to remove and wash and put back on. There is so much junk in the air in our area, I really need to wash them at the end of each season before putting them away.
Thanks again! I am finally motivated now that it looks like it won’t be quite as long a project as I thought it would be!
Christy K. James says
I love it that you’re inspired to tackle your outdoor cushions, Susan! So glad you found my tutorial 🙂
Wendy says
Beginner sewer here. I have these exact cushions for my patio chairs. Can you share what size needle, type of thread, needle tension, stitch length you used? I know all machines are different, I just want to make sure I’m using the right materials and settings. Thanks!
Christy K. James says
Sure, Wendy…My needle is just a regular duty needle. I’m not sure of the exact size. I use all purpose thread by Coats and Clark. My stitch setting is usually on 3 on my Kenmore machine and I keep the tension set at 3 also. All machines differ though, so you can test your settings on scrap fabric before getting started. Good luck 🙂
Nancy Hilliard says
Thank you for your tutorial…..I usually have my seamstress do new cushions for me but my teenage daughter wants to give sewing a try! I think this is a wonderful first project for her! We are going to give your method a try!
Christy K. James says
Sure! This would be a great project to try! 🙂
Catherine says
Hello Christy! WOW! You did a beautiful job! I have this exact set with the curve at the top of the back cushions. I did a decent job on the bottom cushion, but the curve on the back is making me crazy. I don’t have the patience to add the 3inch inset piece. How can I cover the back with the curve without using the added piece?
Thanks so much for sharing!
Christy K. James says
I don’t think so, Catherine. Adding the 3″ piece really wasn’t too bad. I think you really need it to get a nice fit. Although another option might be to take off your old cover and cut the foam straight across at the top, then recover? I think it might lose the charm though and it won’t follow the curve of the back of the frame, but it would be easier to cover. Good luck! 🙂
Catherine says
Hi Christy,
I had to write you again to let you know that I finally finished recovering
My cushions. It took a lot of perseverance to complete this project. I am very happy with the way they look. I did add the 3 in. Piece to the back cushion as you did and it turned out very nice. It certainly wasn’t easy for me, but I did it! Thanks so much for the step by step instructions, they made all the difference!!
Thanks again!!
Christy K. James says
Yay!!! Thanks so much for the update, Catherine! Adding the extra fabric is more work, but it makes a big difference in how nicely they turn out. Good for you for persevering!!! XO XO
Julie Goddard says
Hi Christy,
Thank you so much for sharing your knowledge, your tutorials were so straight forward and easy to follow, I have made these this weekend, I was a bit daring and made them with zips!!!
Thanks again x
Christy K. James says
Wow, that’s great to hear! You’re more adventurous than me with the zips! So glad I could help, I really appreciate your positive feedback! 🙂
Penny Massey says
I sew a lot, clothing, costumes & home decor, but I am stumped on my latest project. I am recovering the cushions on a boat & can’t seem to figure out how to do one at the back that will get wet a lot. I want to do it without a top seam but have boxing on the sides & bottom. That would seem easy, except that the frame is curved at the corners & recessed a bit. I’m using vinyl so it has less “give” than regular cloth. I just can’t seem to get the corners to lie right. Any ideas/ suggestions would be greatly appreciated. Thanks!
Christy K. James says
Is it possible to share a photo? I replaced the cushions on my little settee in the front of my house and did a separate piece for across the top since it had some curve to it. Not sure if it will help but here is the link: https://www.confessionsofaserialdiyer.com/sew-easy-outdoor-cushion-coverspart-2/
Lindloop says
Looks beautiful. I hope it’s still holding up. Thanks for the tutorials! Going to try the part 1 right now for a chair I’m reupholstering in the bedroom (more for looks than for any real use, other than the odd item of clothing), so hopefully I don’t stuff it up, and thank goodness I’ve already had the sense to pick striped fabric 😉 thanks again.
Christy K. James says
Thanks! They are holding up fantastically, just starting to fade a bit…almost time to make new ones. Good luck on yours! 🙂
Brigitte says
Thanks, your cushions look great! I’m a beginner sewer, and the only thing I couldn’t figure out was how you tucked the corners on the cushion in tutorial one. Everyone else here seems to understand, but I think if you can add one or two more photos, it would be very helpful. 🙂
Marie, The Interior Frugalista says
Love the vibrant print you reupholstered this in – so pretty! Thanks a bunch for the tutorial for sewing along curves – pinned to share and refer back to. Your yard looks beautiful! Can’t believe how green and lush everything is already. We’re just getting buds on our trees now.
Christy K. James says
Thanks, Marie! It’s quite a bold pattern, but I am loving it in my outdoor space! I covered the chair pads from my patio set out back with it as well. Still have a settee and two chairs to go, but I ordered a different fabric for those online. And yes I am loving all the lush greenery, it just came all at once it seems a couple of weeks ago! Have a great weekend! XO