Happy Thursday, Friends! Today I’m sharing another favorite from the archives. I spied this antique cabinet at the thrift store near my house last year. It was $79 and probably totally worth that, but the door was missing the glass and didn’t close real smoothly so I passed. I went back a week later and it was marked to $49!
I just couldn’t pass it up the second time:
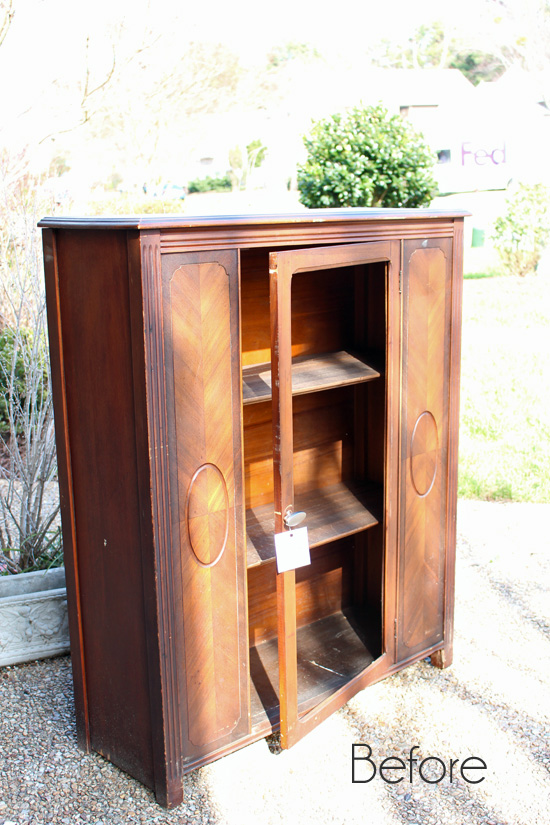
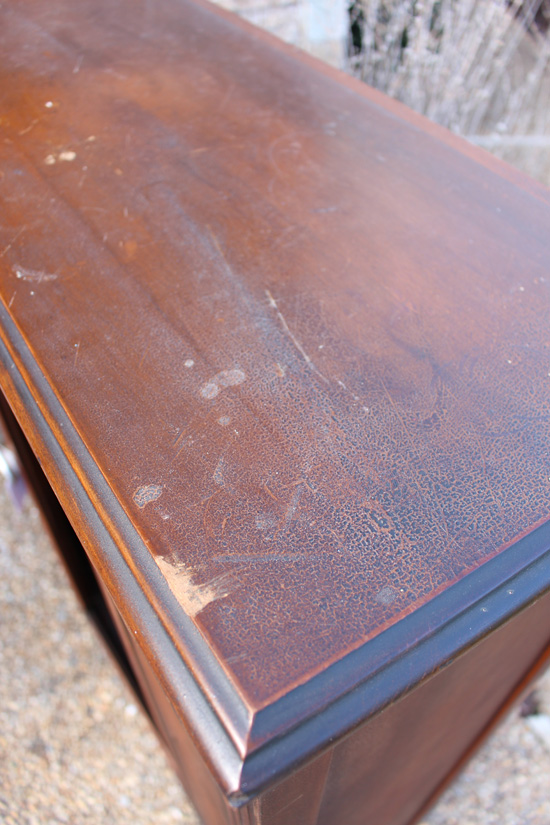
It doesn’t actually look too bad in this photo but it wasn’t great in person. I’m not exactly sure what was built up on that corner there, but there were a few places like that…
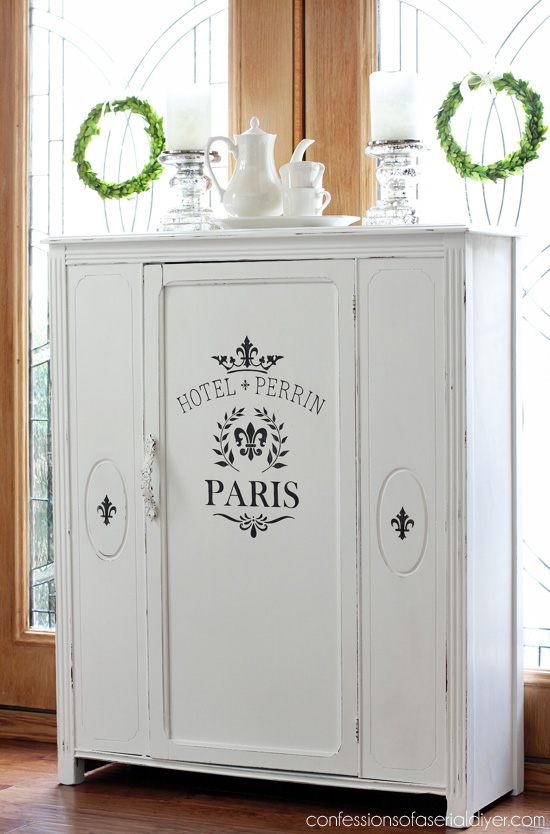
I opted to go with a simple white makeover:
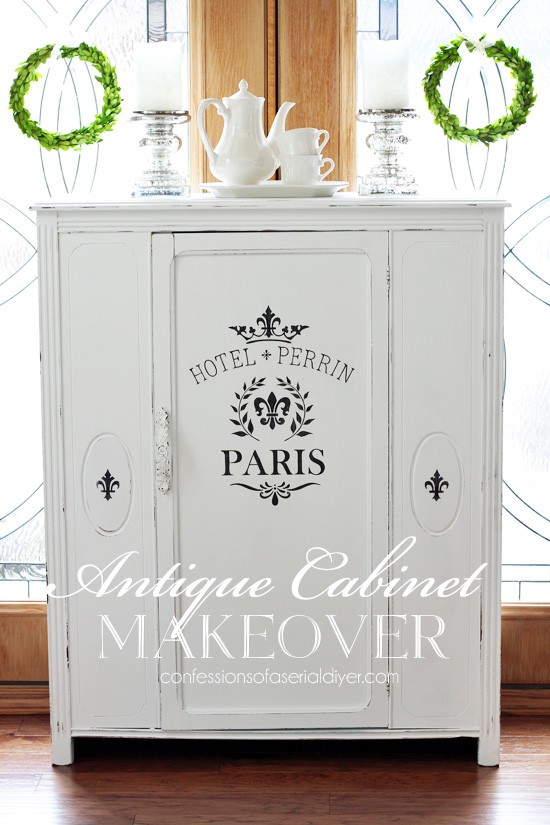
Hey! There’s a door now!
I knew I wanted to add a panel to the door instead of replacing the glass so it could provide closed storage. (Cheaper too!)
The door panel is hardboard. It’s like pegboard but without the holes and I find it at Lowes or the Home Depot. (This is the same thing I use to make chalkboards.) It is super smooth and paints up beautifully. I’ve included affiliate links in this post for your convenience.
I attached it to the inside of the door frame with my Logan Point Driver. (Seriously one of my favorite tools in my toolbox!)

This piece gave me quite a bit of trouble though. I was almost out of my tried and true Bulls Eye Clear Shellac, so I was headed to the store to pick up some more since I knew this older piece would likely be a bleeder. It was unseasonably cold for our area when I was painting it, so I was reading the recommended minimum temps to be used in when I saw on the label that they had another product they suggested for painted pieces. It was their shellac-based white primer. Perfect!
Oh no it was NOT perfect at all. I applied a coat of that first, then my DIY chalk paint in Pure White (Behrs Ultra Pure White right off the shelf). Bled through. Pink splotches everywhere! I gave it another coat of the shellac primer and a coat of chalk paint, bled through. I gave it a coat of regular old white Zinsser Primer and a coat of chalk paint and guess what? It STILL bled through. Know how I fixed it? I finally decided to wax the darn thing with Annie Sloan’s clear wax, and then applied my chalk paint over that and the heavens opened up and the angels sang! It worked.
I could have kissed that wax! It might have just been this particular piece and whatever that gunk was that had accumulated on the surface, but next time I’m going straight for my regular ole clear shellac!
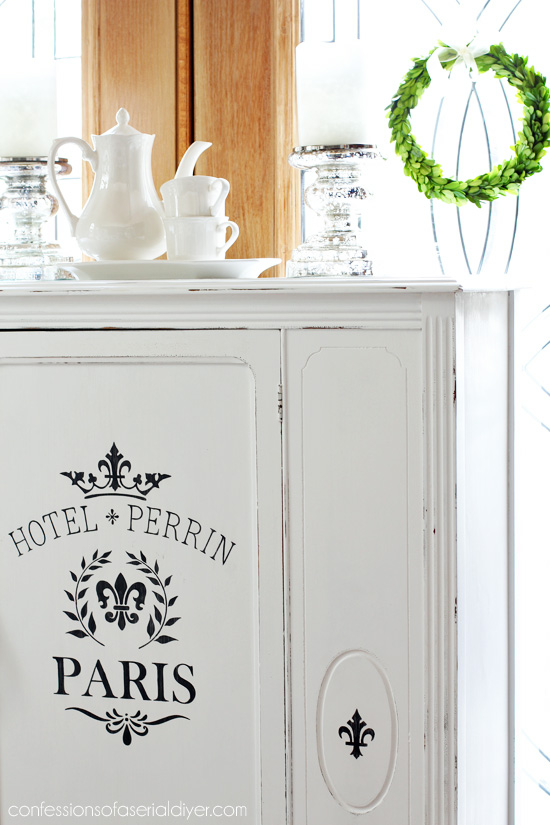
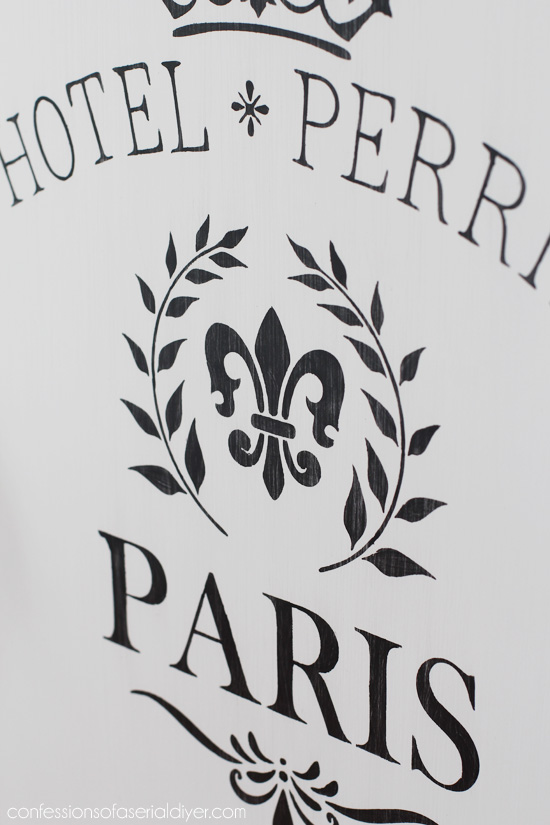
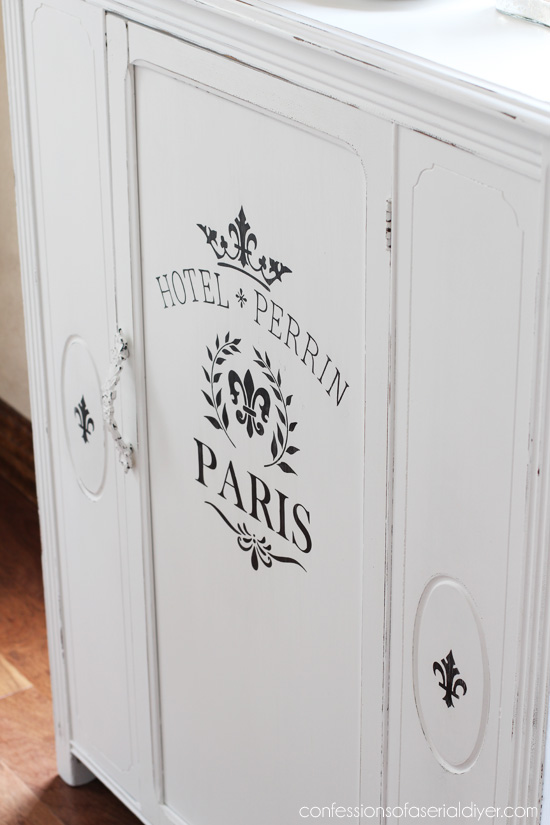
I used a mix of two stencils for the door. This one and this one.
Stencils are the easiest way to achieve this look for the least amount of effort. I used spray adhesive to temporarily adhere my stencil to the surface of my project. (Spray the stencil, not the project surface.) It should not stick permanently or leave any sticky residue. Then I used the smallest brush from this 3-piece nylon brush set
to fill in the stencil using acrylic paint
, brushing away from the edges.
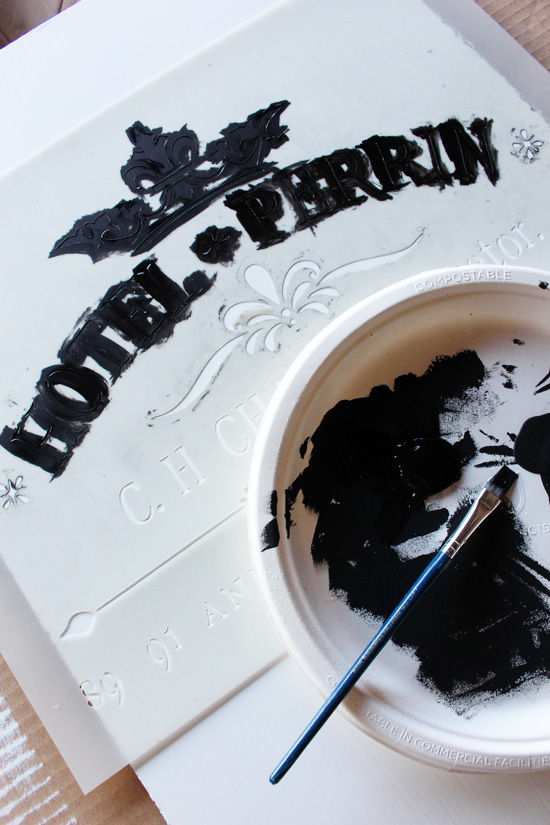
After I removed the stencil, I had a couple of areas to fix here and there which I used a script liner brush for. This time it came out really well thank goodness! I also filled in all the gaps in the lettering that gives it away as a stencil using the same brush. (Rinse your stencil right away with warm water. Allow the sticky back to air dry.)

After allowing the paint to dry to completely, I sanded using 220 grit sand paper and sealed with Annie Sloans’s clear soft wax.

Does the handle look familiar? It’s just like the ones I used on the dresser I reshared on Tuesday, from Hobby Lobby.


And for the inside…
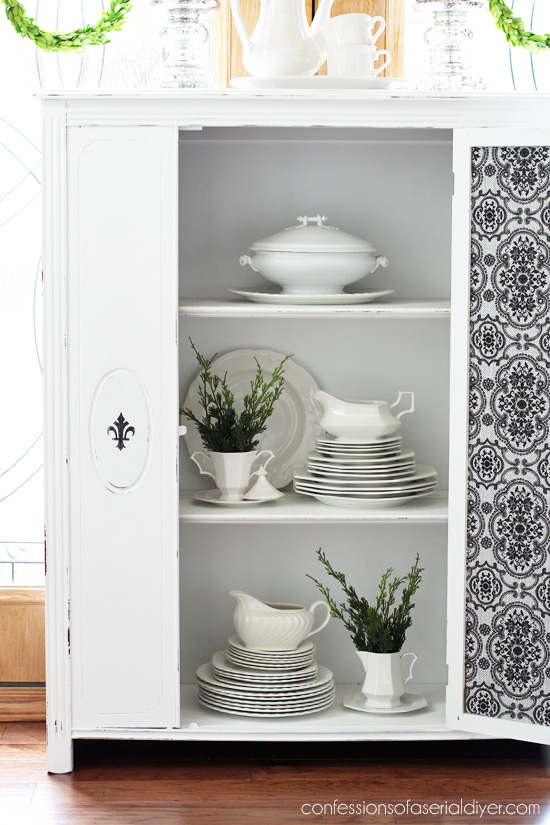
Ooh la la. I decided instead of just painting the ugly brown hardboard on the back of the cabinet door white, I would cover it in fabric instead. This also covered the points (from the point driver) that are holding the panel in place. I had this in my fabric stash…
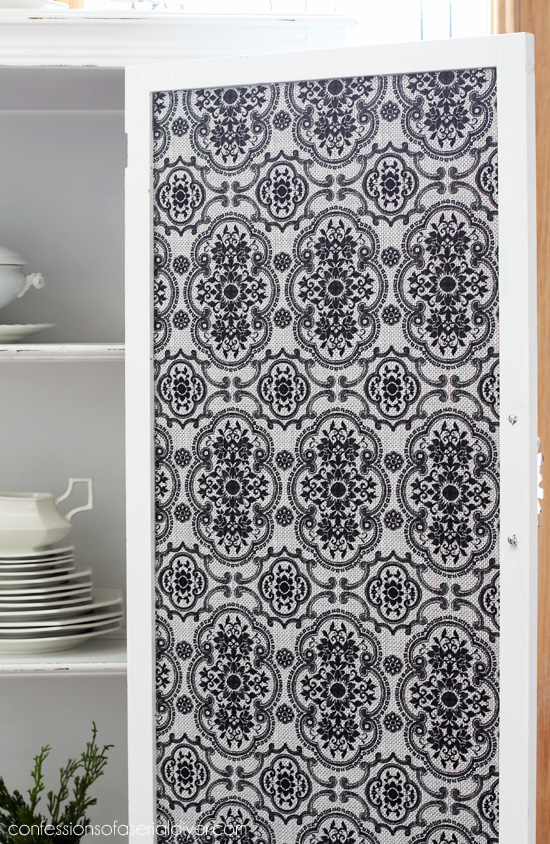
I adhered it with matte Mod Podge, brushing it on like a glue, and added the fabric over top. To make it easier to cut the fabric straight for panels like this, I always use my rotary cutting set.
I kept the rest of the inside a simple white. My thrifted ironstone looks so pretty in it…
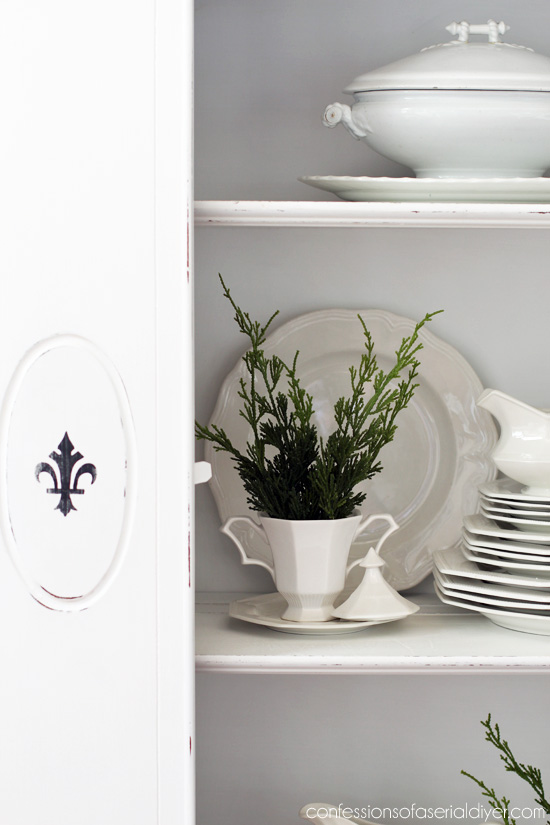
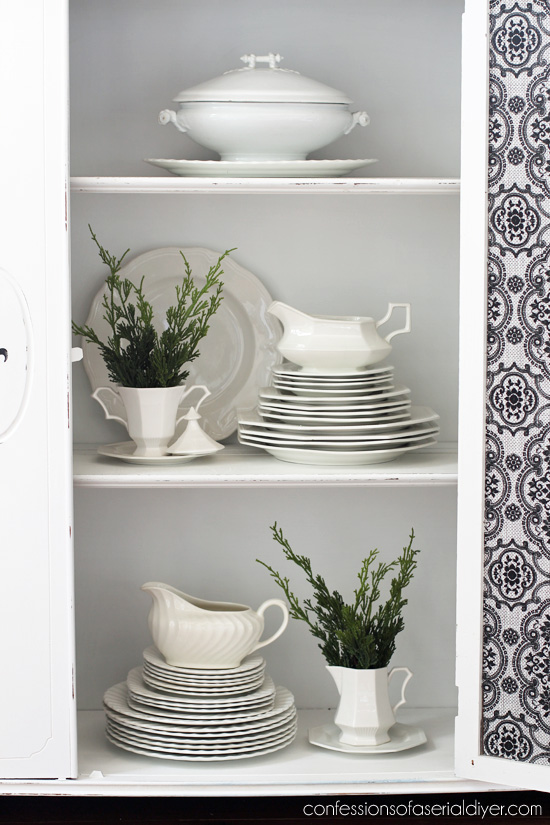
But you could use it in just about any space to store just about anything!

I was so pleased that the idea to replace the glass with hardboard worked out. It was a great inexpensive alternative to replacing the glass. This is one piece I considered bringing back home and keeping, but it only lasted a week before it sold. Probably just a well! 🙂
Hope you have a fantastic weekend!
I’ll be back on Tuesday with this kitchen dinette set that got a cottage-inspired makeover:

Can you picture it??
UPDATE: No need to imagine! Check it out HERE now!
XOXO,
![]()
Don’t Miss a Thing!
If you like what you see, there are several ways to follow along!
Email * Facebook * Pinterest * Twitter * Instagram


Christina in FL says
Christy, I love the solid door versus glass also! Thank you for the tip about the shellac plus primer. Oh my stars, that was hell on a stick for you! I had no idea you could paint over Annie’s wax. Brilliant.
This turned out so well. I know the new caretakers are thrilled.
I keep meaning to tell you how I adore the distressing you apply to your pieces. Just a tad. I see so many pieces which, after the reno, look like they need a reno. Your touches are gentle and loving to the pieces.
Create on!
Christy says
This one was a trouble-maker for sure…why does that always happen with the prettiest pieces? Glad I was able to fix it though and I learned that wax trick! And I agree…I want my painted pieces to look like they’ve been cared for and kept clean, not left on the back porch for a couple of years lol! A little distressing goes a long way. 🙂 XOXO
Christina in FL says
Very well said Christy. And I forgot to say thank you about the tip using the point driver. I’m going to have to get one of those eventually.
XOXO
Christy says
You’re welcome…a very hard working tool in my workshop! 🙂
Jamie Kennemer says
Well now isn’t that just perfect! ❤️❤️ Love love it! I’ve never heard of a point driver! Thanks for the tip! I’ve gone through at least 3 staplers myself! The board insert is beautiful! I may have to get me some of those gorgeous handles. I love how they distress! I would have wanted to keep this one! Such cute storage! I’m on the hunt for something similar! Thanks so much for all the great pics and detail! Can’t wait til your next update????
Christy says
Thanks so much, Jamie! I love my point driver! My hubby bought it for me for Christmas one year…best gift ever. Good luck in your search! XOXO
Candy Walsh says
This would look beautiful in a bathroom for storage!
Christy says
Ooh yes it sure would! 🙂
Jody says
Just so pretty. You did an excellent job. I love repurposing instead of new. We people who care are a dying breed.
Christy says
Thanks, Jody! You are a girl after my own heart…I would much rather repurpose/Upcycle an older piece than buy new any day! XO
ColleenB.~ Tx. says
What a Beautiful piece; both inside and out.
Christy says
Thanks, Colleen!! XOXO
Kira M Sayler says
This is a beautiful makeover. Thank you for posting. I am learning a lot from you, I appreciate that you share so thoroughly! I also appreciate that you share the problems you encounter, great learning tools!
Christy says
Aww thanks, Kira…that makes my heart so happy!! And yes, I have my fair share of problem pieces too, believe me…just glad I can share how I worked out the issues! XOXO
Cecilia says
Very nice! I liked it with the solid door. Would definitely make a great storage piece!
Christy says
Thanks, Cecilia! This is one I wish I would have had a spot for, but it wasn’t meant to be. Hopefully the new owner has put it to good use! XOXO
Elise Howell says
Dear Chrissy,
Thanks for bringing the armoire back from your “archives.” I love the beautiful results (and I don’t think I knew about the original time you did it) I love how you detail your step by step progress; including the temporary setbacks. Don’t ya know, I read every word——-I especially enjoy how you do the EXTRA pretty
on the inside and take the time to stage it so our eyes even get a bigger treat! I always get a big smile, when I see there is a post in my e-mail from your workshop. Please know your hard work and creativity is ALWAYS being thoroughly enjoyed in San Diego. I think you subscribe to the saying, “It’s good to go the extra mile, it’s never crowded out there.” 🙂
Christy says
Thank you SO much, Elise!! I always like to read the words when I visit my favorite blog too, just so I don’t miss anything! 🙂 Your sweet comment really made my night…I love that you enjoy the staging. That is my favorite part! Love that saying too, and thanks for following along with me!! XOXO
Kimberly says
Christy, hope you are having a good summer with your boys. Mine turns 18 next month, so believe me, squeezing out any family time before they start flying solo is precious!
Thanks for taking the time to give us “reruns” instead of radio silence. I know that I can (and do) look through the archives on my own, but there is something exciting about seeing them in an actual post on Tuesday and Thursday. What can I say, I am a creature of habit! 🙂
Christy says
Thank you, Kimberly! As much I love rehabbing all my pieces, it can be very time-consuming, and it has been so nice to be able to give some of that time to my boys. We have really been enjoying it, but guess what my oldest and I did together today? We went thrifting and each bought pieces to paint lol. Hard to get away from it completely, I guess. 🙂 And I wouldn’t dream of radio silence. I love meeting ya’ll here every Tues and Thurs, even if it’s just for a quick hello and a rerun. 🙂 XOXO
Kathy E. says
Oh, this is a gorgeous piece! The moment I saw it, I knew I’d use it in my sewing room to store supplies. So smart of you to add hardboard to the front panel! (Having a glass door just means things need to be kept tidy behind it.)
Christy says
Thank you, Kathy!! I always imagined it to hold fabric! 🙂
Marie|The Interior Frugalista says
My guess is this gorgeous armoire is worth far from $49 now! Beautiful makeover, as always and swooning over the pretty surprise inside.
Christy says
Thanks, Marie! Ha ha yes, for sure! I can’t believe it was still there when I went back! XOXO
Cyndy says
I love your projects and I love getting an email so I know when there’s a new post! How many hours a week do you usually work on these projects? You seem to have an amazing output!!!
Christy says
Thank you, Cyndy! It seems like I am probably always working on something, right? I am taking a bit of a breather now by sharing a few older projects so I can enjoy some downtime with my boys since they’re out of school. During the school year, I treat this pretty much like my full time job and work about five days a week. 🙂
Anod Nostaw says
I love the work you do! Is there any chance you might start using some color paint?
Christy says
Thank you, Anod! I usually paint what I love which is mostly light neutrals, but I do throw a pretty blue piece in the mix here and there. Honestly, I don’t usually stray too much from that since I have to sell everything I redo, and bold pieces just don’t sell for me nearly as well unfortunately. I do try to give my pieces a unique look with stripes, stencils, etc. Just curious though, what color would you like to see? Maybe I’ll do one just for you! 🙂
Anod Nostaw says
Christy, thank you for your reply. I understand your answer. People do tend to stick with neutrals because they are scared of color. I love color. I used to work in the paint department at Home Depot and tackled my fear of color. I have several painted pieces of furniture that I have done myself and have bought. I see how creative you are and was wanting to see your take on color on furniture. I do love your blue pieces. They are very handsome. I especially love Ralph Lauren Red that was sold by Home Depot. Keep up the creativity. Thank you. I will continue to keep an open eye to your pieces.
Christy says
It sure would be fun to throw caution to the wind and paint a few bolder pieces! 🙂
Annie says
Another awesome transformation Christy! Love the inside 🙂
Christy says
Thanks, Annie! XO
Rose Lefebvre says
Adorable! Such a great save for a piece that may have been destroyed. Recycling at its best.
Christy says
Thank you, Rose! I’m so glad it was still there the second time around. And yep…saving all the furniture, one piece at a time! 😀
Monica says
I love the pieces you paint and the beautiful white pieces are my favorite. Can I ask you a question? When you mix your own chalk paint, do you always use the sprayer or are you able to achieve that look when you paint by hand? I purchased all the supplies to mix my own paint, and I even bought the sprayer, but it seems a little overkill, as far as the sprayer goes, for the small table I have to makeover. Any tips?
Christy says
Hi Monica and thank you!! I actually hardly ever use my sprayer to be honest. While the sprayer does a great job and it is super fast, I prefer to paint by hand with a brush. There is just something so relaxing to me about it. Here is my chalk-painting tutorial you may find helpful: https://www.confessionsofaserialdiyer.com/how-to-paint-furniture-using-chalk-paint/ Have fun!! XO
Via B Design says
I love the inside of the dresser. The handle looks soooo perfect! Your lucky to have gotten a deal on the dresser. Love what you did with it.
Christy says
Thank you! 🙂
Tracy Hall says
Wow!! So beautiful. I’m a new email subscriber and I’m a big fan of your stencils. Have you ever posted a video tutorial? If not, I’d love to see your stenciling in action. I had no idea that you should brush away before I found your blog! Thanks.
Christy says
Thank you, Tracy! I appreciate you following along with me! I haven’t done a video tutorial (I should though, right?) but I show a little more detail about how I add my stencils in this post: https://www.confessionsofaserialdiyer.com/curbside-suitcase-makeover/ 🙂
Sandi Biquet says
Hi Christy,
This armoire is precious! I love everything that you did to it. I have not attempted to chalkpaint a major piece of furniture. The part that scares me is the stenciling part. I would love to use stencils but I’m so afraid that the paint will bleed through the stencil and look horrible. Do you have any suggestions for a first timer? I will check out the link that you posted under Tracy Hall’s reply. Thank you.
Christy says
Thank you, Sandi! This was one of my favorite makeovers ever. I used to think of myself as stencil-impaired, but I came to learn that I just didn’t like the stippled look you get with a stencil brush. I prefer a regular small paint brush. Check out that link, I think you will find it helpful! XOXO