Hello amazing Friends! I have a fun makeover and a how-to to share today. I am including a few affiliate links so you can find the products I use and love too. Read my full disclosure here.
Ya’ll know I love my Silhouette Cameo for adding fun graphics to my pieces, and I’ve gotten several questions about how I use my Silhouette to cut my own designs, as well as how I cut larger designs with my Silhouette.
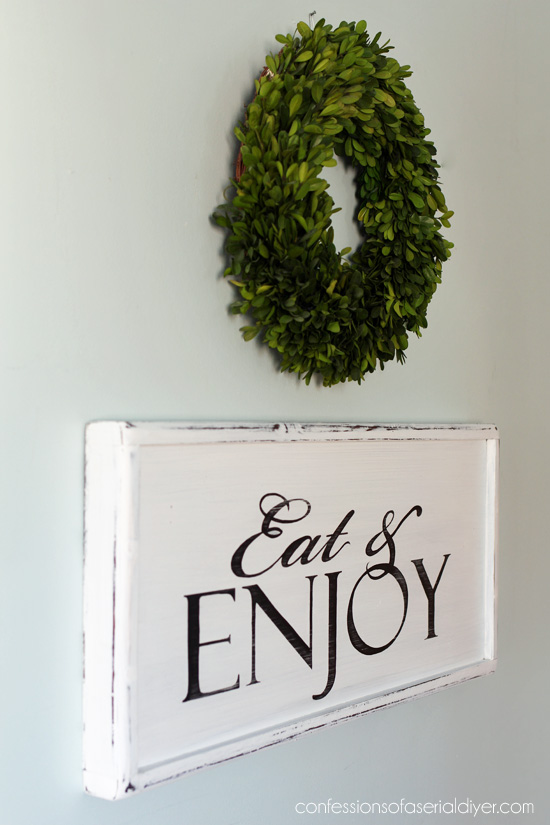
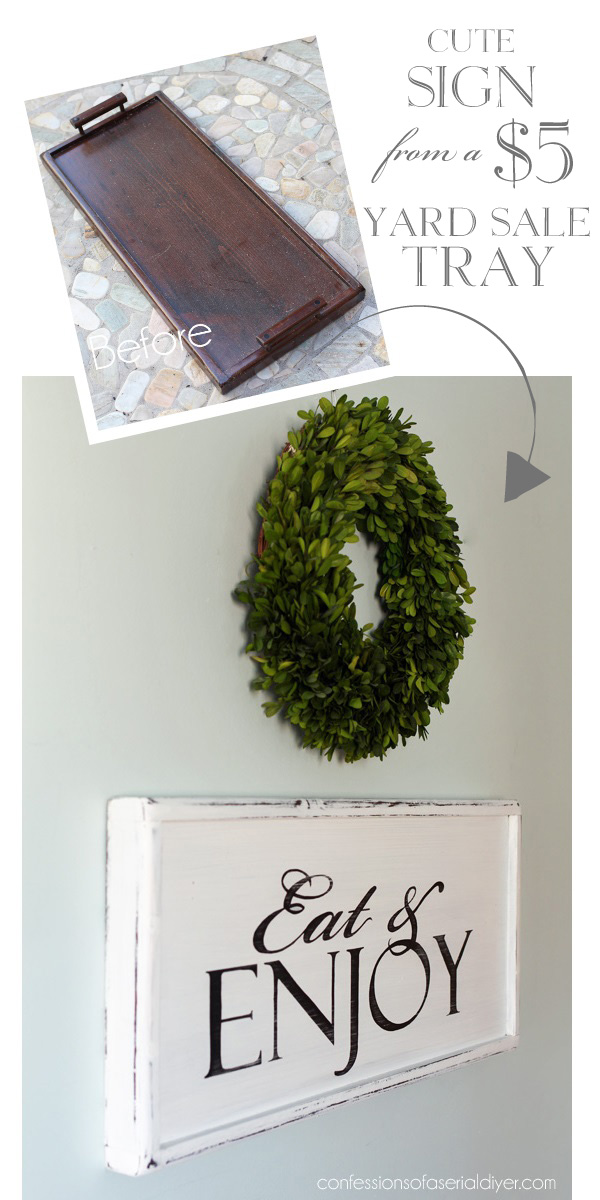
Today I’m sharing a tray that I’ve had hanging around my garage since the Summer before last, that I repurposed and added my own design to. Then I’ll share how I did it with my Silhouette.
First here is the tray before:
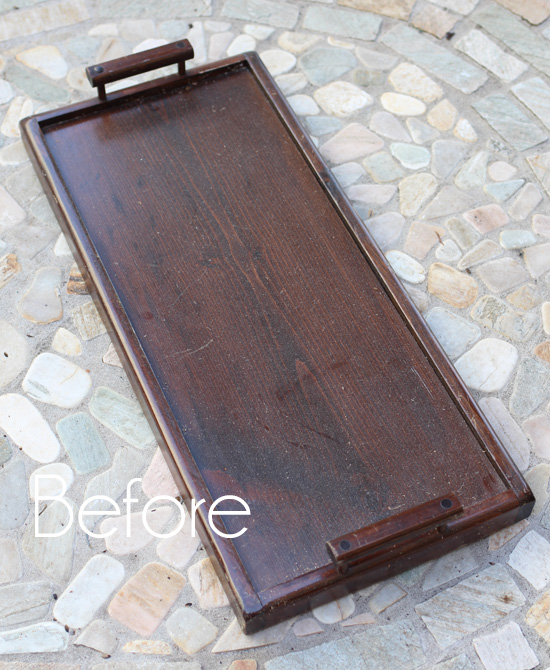
I picked this up at a yard sale for $5, but the ugly handles kept throwing me off. I mean there is nothing cute about this at all in its current state, am I right?
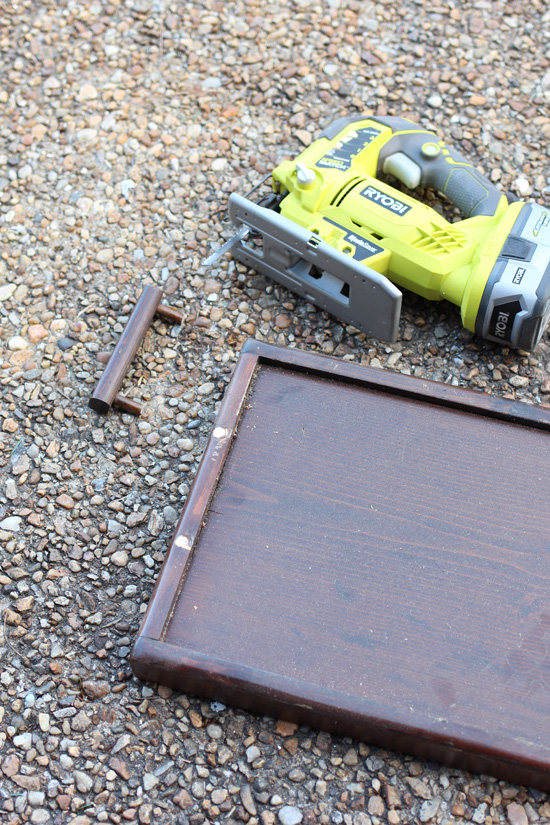
Finally I decided to cut those ugly handles off with my jig saw:
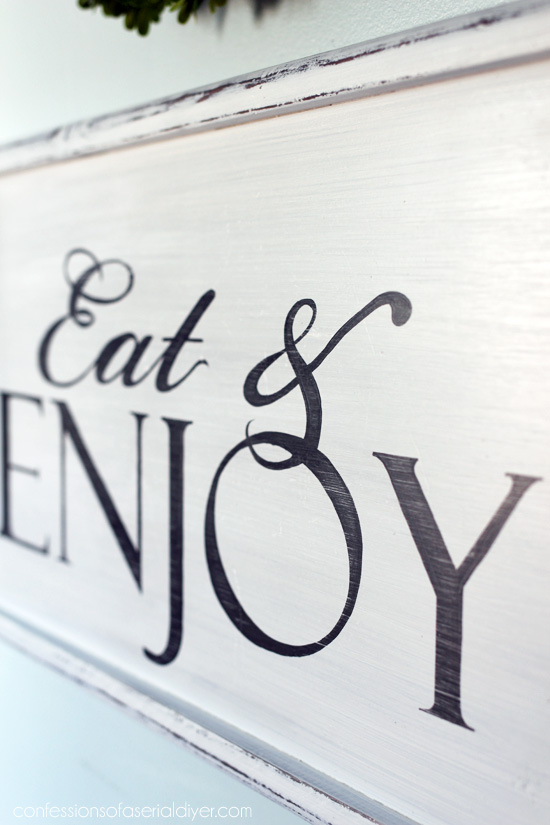
…and turn it into a sign instead!
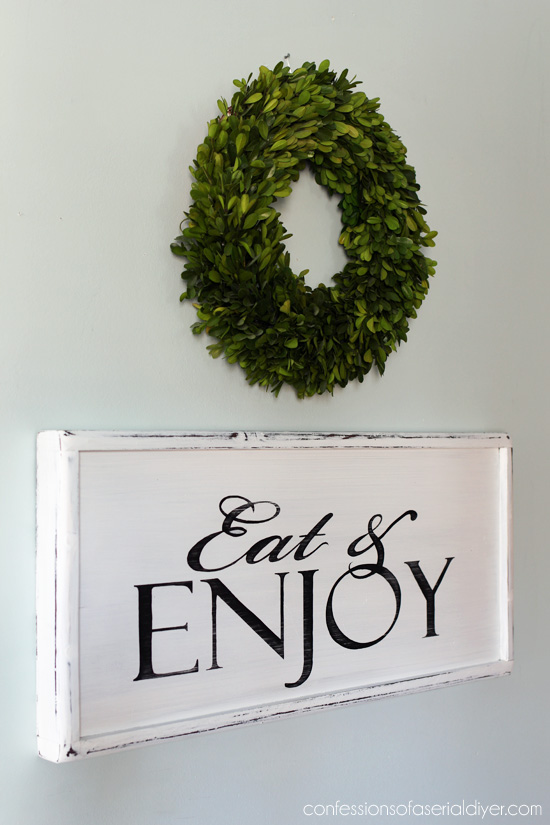
I had to use a little wood filler to fill in where I cut off the handles, but I love it as a sign so much more than I did as a tray!

And here is your tutorial on how to get the Silhouette to cut your own creations. {I have this Silhouette Cameo.}
Before we dive in, let me clearly state that I did not go to Silhouette college, and we did not get along for the first year we were together, but this is how I figured on my own how this works…
- First you need to create your design. I use Photoshop Elements, but I have also used Paint.net which is free and Pic Monkey, which is also free.
- Save your design to your pictures folder.
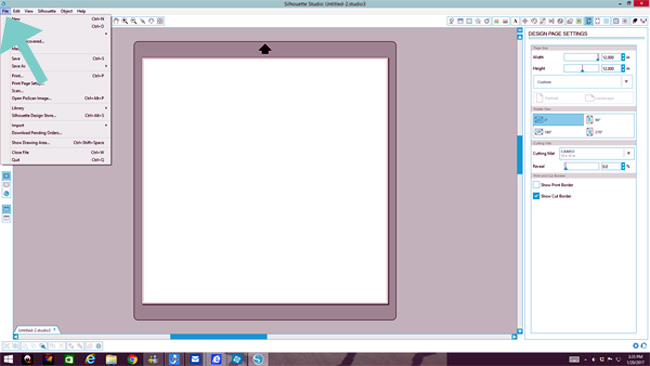
- Open the Silhouette Design Studio and click “File”
- Then click “Import”, and “Import to Library”
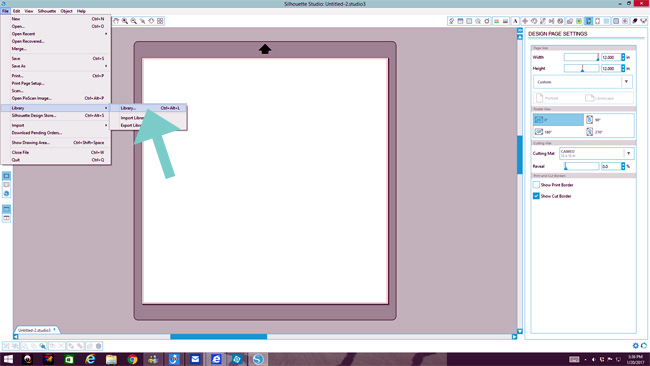
- Select the file you want to import, found in your pictures file if that’s where you saved it, and it will bring it into your Silhouette Library:

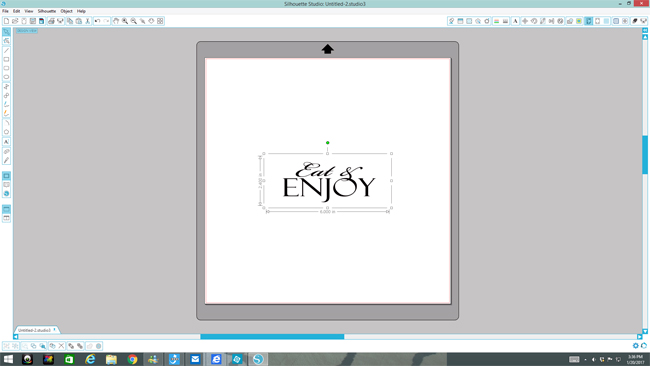
- Double click the image you want to use and it will open in Silhouette:
- Drag the corners until you get it to the size you want to use, and center it in the cutting area where you want it to cut first.
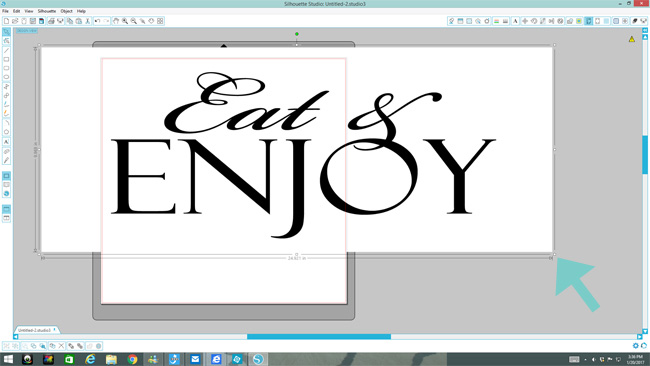
I use the original 12″x 12″ cutting mat that came with my machine so I have to make two different cuts for this sign, but there is a 12″x 24″ cutting mat available that would have cut this design in one pass. (I finally just broke down and ordered one from that link. 😉 )
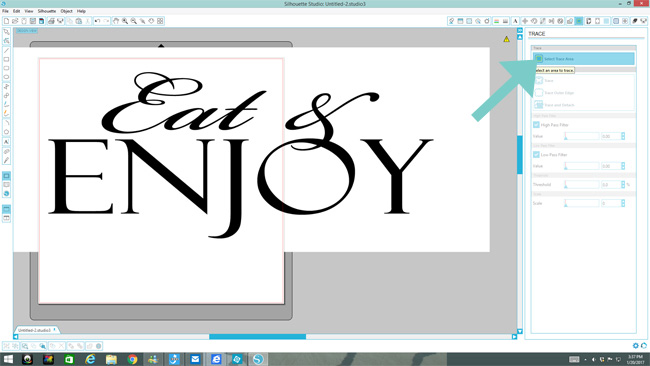
- Next, select the “Trace” button on the top right menu:

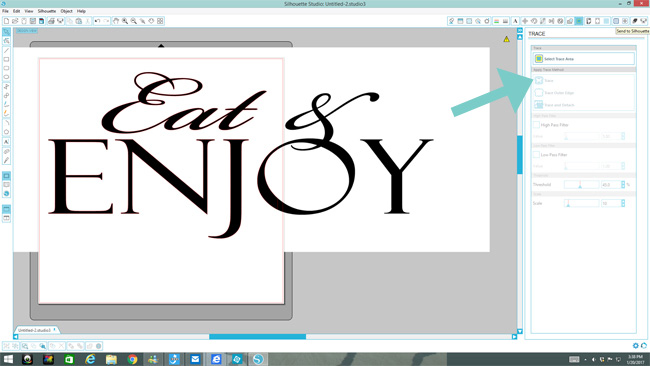
- Then select “Select Trace Area”:
- Right click, hold, and drag your mouse until the area you want to cut is highlighted. Only highlight areas that are showing on the cutting mat:
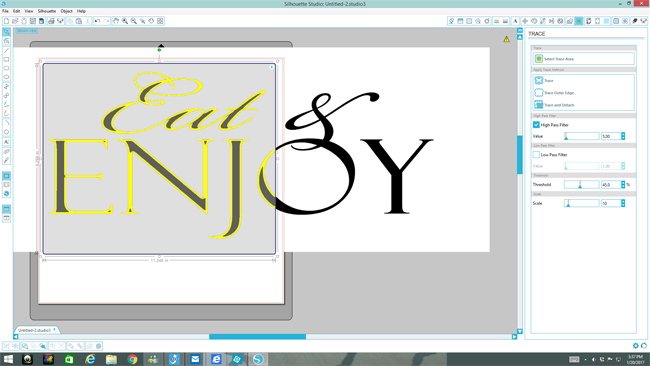
- Deselect “High Pass Filter”:
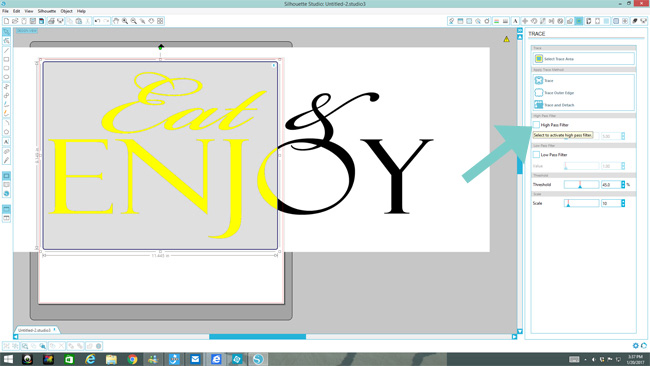
- Select the “Trace” button:
You will see the areas that you want cut are now outlined in red.
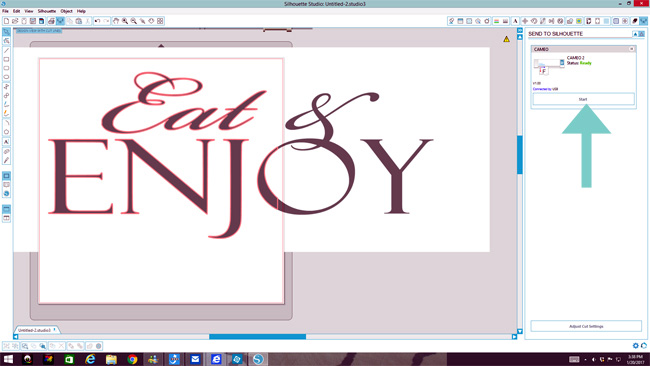
- Load your cutting mat and vinyl/contact paper into the cutting machine.
- Select the silhouette printing icon on the top right:
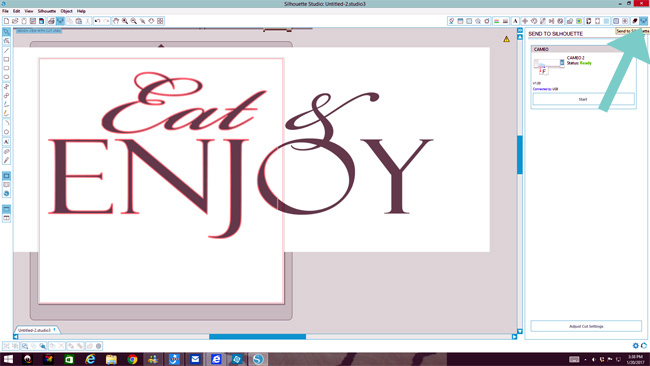
Your silhouette should already be set to cut vinyl on #2 setting. If not, click the “Adjust Cut Settings” tab at the bottom right and configure properly for vinyl.
- Select “Start” to start cutting:
If your design exceeds 12″x 12″ like mine did, you’ll need to move your design over so that the next portion you want to cut is on the mat on the screen. You can undo your actions by clicking “Ctrl” and “Z” at the same time until you have undone all the tracing actions. Then move your design over and repeat the steps above. (See below how I overlapped each page just slightly, so I could match them up more easily.) **It is important to note that if you have a design that will take several pages of cuts, that you cut them all before closing out the program so they will all be the same size, unless you make note of the dimensions you used before closing.
- Once your design is cut, you’re ready to add it to your project.
If you wanted to add vinyl letters to a project, you would need vinyl and transfer paper, but because we are using the negative space left behind as our stencil, vinyl or contact paper alone works just fine. I was out of contact paper so I used this transfer paper for this project. My favorite is Peel & Stick Shelf Liner by Duck Brand that comes in 12″ wide rolls, and I buy it at The Home Depot.
I laid out my design, trying to keep all pieces in tact, then went back and pulled the letters away:
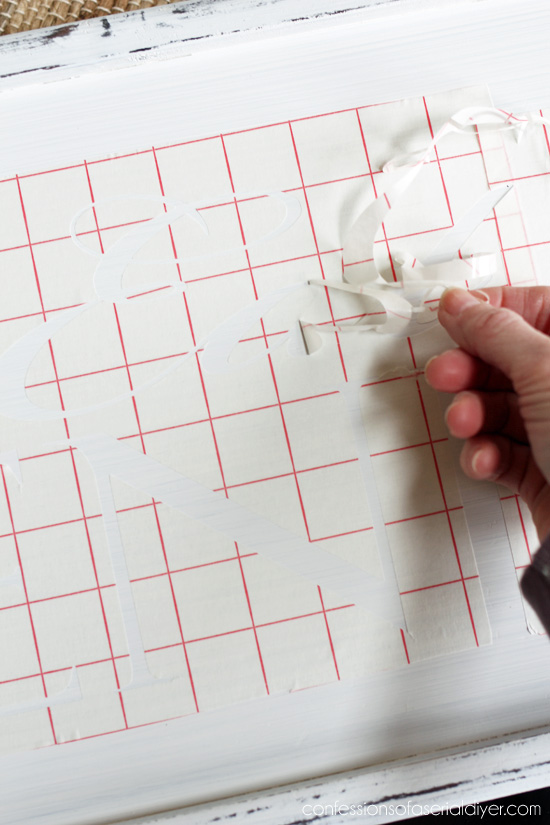
You can see here, that I let just a tiny part of the “T” on top and the “O” on the bottom overlap on the first piece, so I could line up my second piece:

And that tool is awesome for removing smaller pieces, especially after painting.
- Now paint in the design:
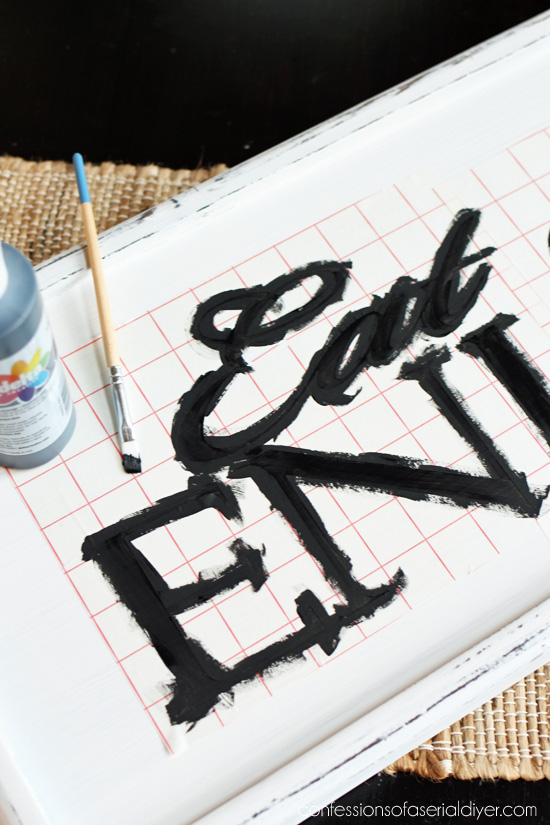
I used a small craft brush and Delta craft paint in Black. I try to brush away from the edges as much as possible.
When I remove the “stencil”, there are sometimes areas that need a little touching up. I use this script liner brush for those minor fixes.
- After the paint has had plenty of time to dry, I lightly sand across the entire surface to smooth out any raised areas, and voila:
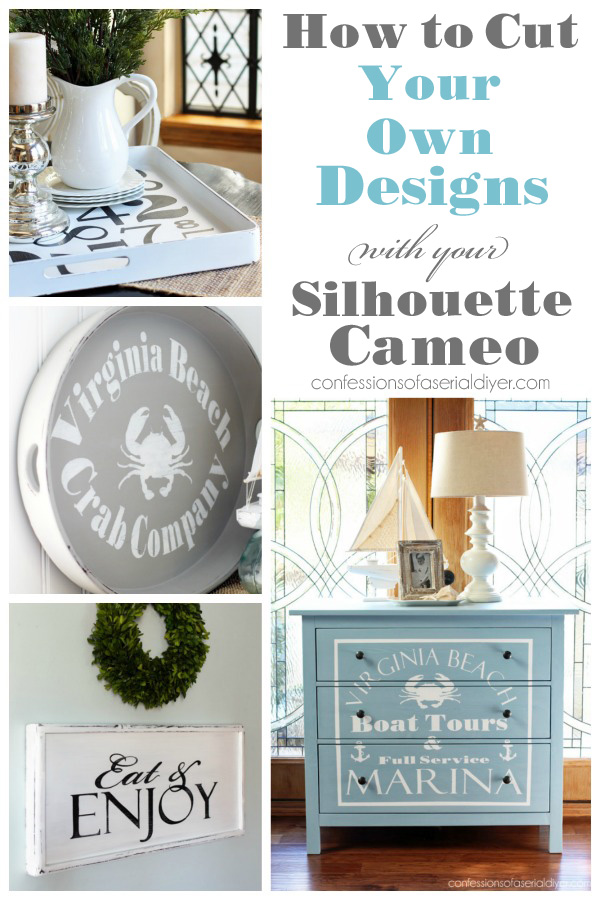
This is the largest project I’ve done using this method with my Silhouette:
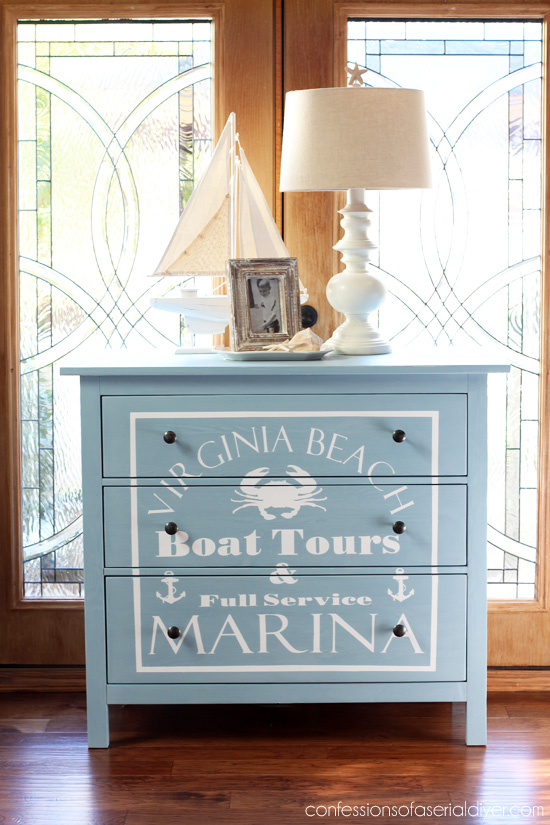
Jack’s $30 Thrift Store Dresser
I’ll admit it took some time and patience to set that one up, but the results were pretty cool. And it quickly found a new home.
A smaller piece like this sign is a great place to start:
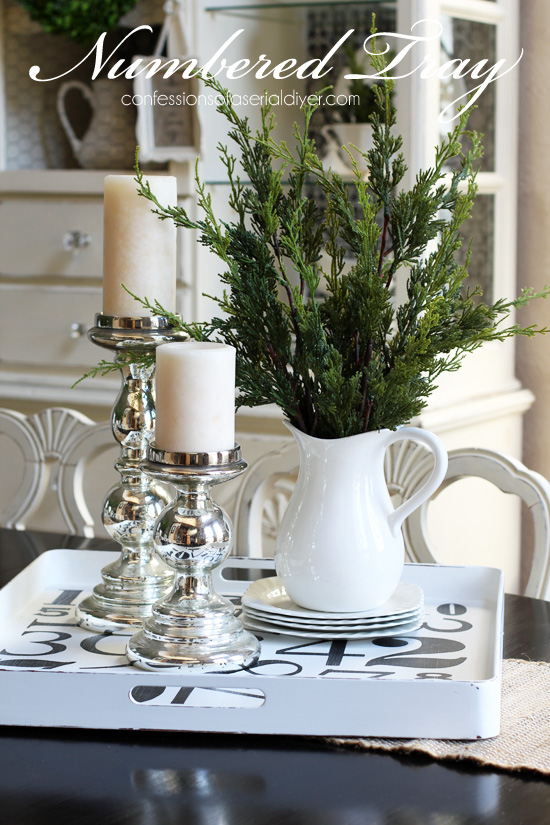
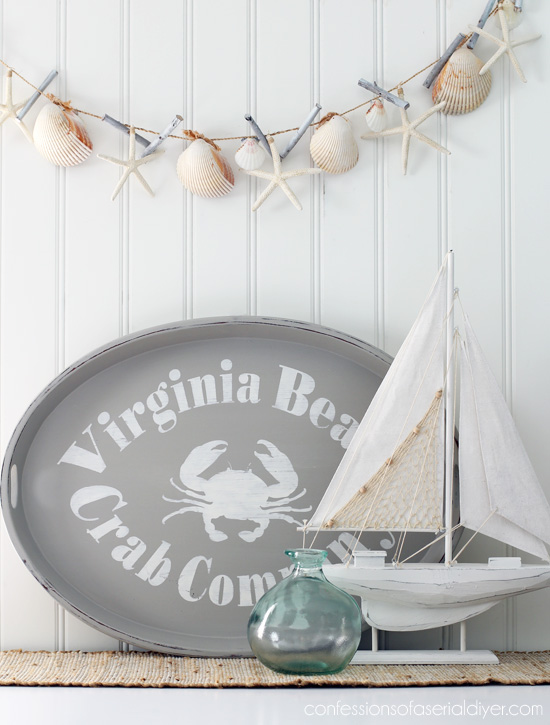
I also used this method for this tray:
And this tray:
I used that same design on this coffee table:

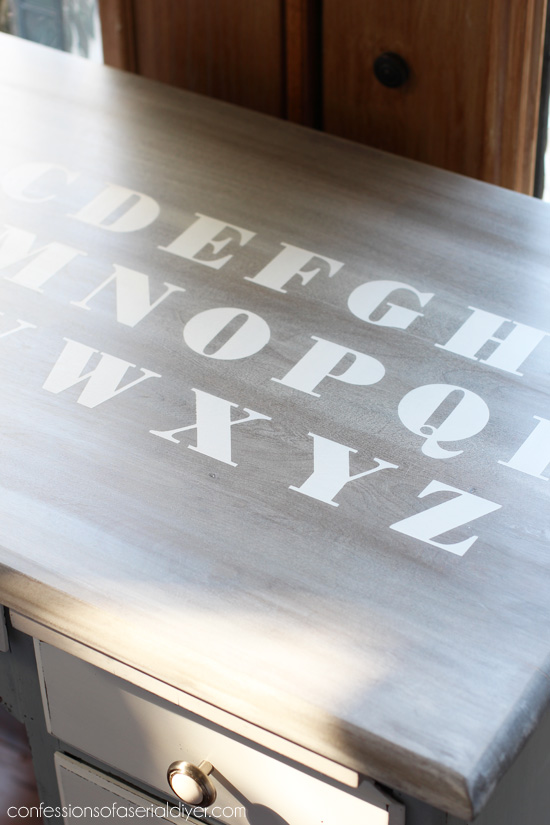
I also used my Silhouette to add letters to the top of this child’s desk:
There are so many ways to use fun graphics to update ordinary pieces. I hope you are feeling inspired!
If I missed any details or if you have any other questions at all, ask away in the comments or reach me through the “Contact Me” tab at the top.
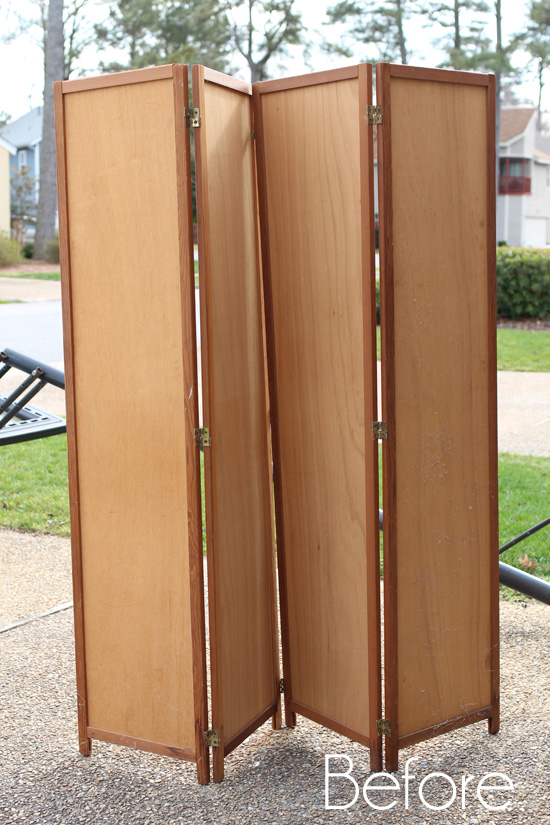
I’ll be back on Thursday sharing how I updated this fun thrift store find:
See ya then! 😀
UPDATE: No need to wait! See how I transformed this screen HERE now!
XO,
![]()
Don’t Miss a Thing!
If you like what you see, there are several ways to follow along!
Email * Facebook * Pinterest * Twitter * Instagram


Janice says
Love the tray turned into a sign. You never disappoint us. Can’t wait to see what you do with the room divider Thursday. Me and my 3 sisters are going thrifting today. So excited.
Christy says
Thanks, Janice! Hope you find some goodies today!! XO
Christina in FL says
Hi Christy! I liked the handles on the tray and didn’t think I would like the makeover… yet I do! :))) Very much!!! I admit I would want to put some distressed white handles on the outside of the ends of the tray… and have the option to use it as a tray again. You were SO right to cut off those funky handles. lol
Thanks for the details on cutting your stencils. :)))
I also use my 12 x 24 mat to secure fabric from shifting when I am stenciling on it. 🙂
Christy says
I’m glad you like it, Christina!! I did consider adding new handles at first, but decided I liked it as a sign…I should have added some anyway! Can’t wait to get my larger mat and play with it! 🙂
Amy says
This couldn’t come at a better time! I absolutely love this and I’m going to make one for some very dear people for their 50th Anniversary. Thanks so much for sharing!! I can’t wait to get started!
Christy says
Thanks, Amy! I’m so glad this came at just the right time!! XOXO
Laura says
I love your sign! And all your lettered projects! The Cricut 12×24 mat will also work in your Cameo and they are often on sale at local craft stores. I’ve started always using a mat when I cut vinyl, even though you don’t “technically” have to, because as soon as I turn my head away, the vinyl sans mat tends to go wonky…
Christy says
Thank you, Laura!! I have tried to cut longer designs without the mat, but was never successful. Mine too always messed up while cutting! Definitely need the longer mat and good to know that the Cricut mats work with the silhouette! 🙂
Marcie Lovett says
Marvelous makeover, Christy. I thought you’d do something cute to the tray, but it’s even better as a sign! I am having a hard time falling in love with my Scan n Cut, so I’m looking forward to the day I feel inspired to create something like this.
Christy says
Thank you, Marcie! I’m sure my Silhouette sat collecting dust for the better part of the first year I had it! Once I started being able to do my own thing with it, that made me more excited to use it. 🙂
Suzan says
Thanks for the inspiration! I recently purchased the Cricut Explore Air and wanted to cut stencils for painting projects. I know the machines are different but I enjoyed seeing your process. I found two wooden trays at Goodwill the other week. They were bundled together for 4.97 so I snatched them right up! I am going to paint with a little sample pot of chalk paint I have in my stash and some white “chalky” paint that I mix myself. Just need to figure out what I want to say and I will be off to the races!
Christy says
Oh yes, I’m sure the Cricut works much the same way. Great deal on the trays, I would have grabbed them up at that price too…have fun with them! XO
Kaycee F says
Christy, that is great makeover, I love the graphics you chose! I do not own a Silhouette, but it certainly looks like it takes a lot of uninterrupted time, patience, and probably a bit of trial and error, my hat is off to you!!
Christy says
Thank you, Kaycee! My Silhouette and I had a love/hate relationship for a while until I finally figured it out lol. XO
Lisa Cullett says
Love this! What is the white paint you used on the tray itself? In the picture it looks like it has a sheen. Did you topcoat the entire piece with something?
Christy says
Thank you, Lisa! The white I used is Ultra Pure White by Behr made into DIY Chalk Paint. I followed with Annie Sloan’s clear soft wax. 🙂
Zovesta says
Oooh! Can’t wait to see the room divider. =) I didn’t expect you to make this into a sign – gorgeous!! And thanks for the tutorial on the Silhouette Cameo. I don’t think I can justify buying one, but I was always curious how people made those fancy designs. 😀
Christy says
Thank you, Zovesta! Sometimes it’s fun to see the behind the scenes…glad you enjoyed that! See you Thursday!! XO
Cindy says
Did you piece in the interiors of the circular areas? Or did you cut it as a stencil and fill in the lines? This is the problem I have with cutting my own stencils.Yours looks perfect!
Christy says
Thank you, Cindy! Usually when I cut the letters, those middle pieces are cut completely apart and I have to go back and place those in. With this transfer paper, I was able to transfer the entire stencil to my surface, keeping all the letters in place until I had it lined up correctly. Then I went back and removed the letters, leaving the middle pieces in place.
Marie from The Interior Frugalista says
Yet again Santa didn’t bring me a Silhouette machine – that’s 4 years now. I think I must be on his naughty list. Pinned your awesome tutorial for that special Christmas when I finally get one!
Christy says
Oh no Girl, you better start behaving! LOL! I have grown to really love mine! XO
Becky says
Thank you for rescuing that poor ugly tray. It’s so cute as a sign! On the stenciling stuff… wow. I sometimes wish I had a cutter, and then I think about how much effort must go into learning how to use one, and I’m OK again, haha! I hate learning how to use new tools! Good for you! Well done!
Christy says
Thanks, Becky! I have no idea why I picked up that tray in the first place lol, I never did like the handles. Glad it is done and out of my garage ha ha, and I am SO with ya on learning new tools ugh!! I am the worst lol. XOXO