
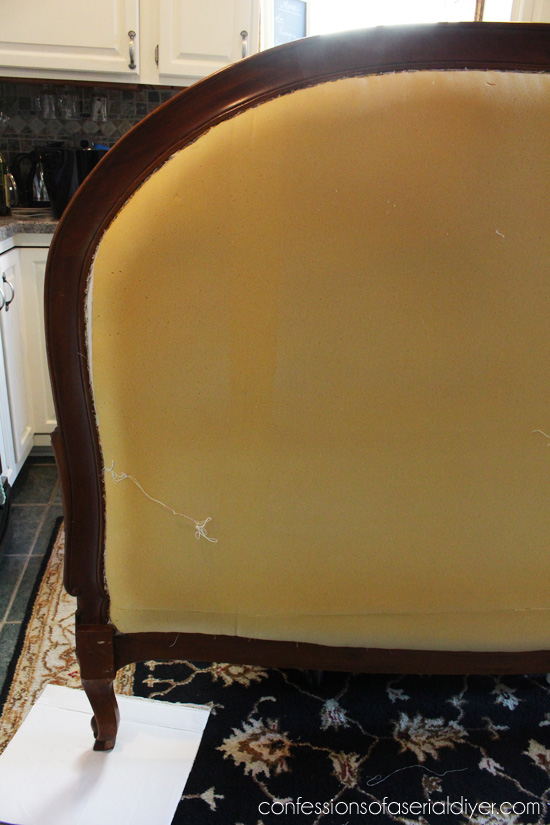
Hi all! I found this gorgeous upholstered headboard on a Facebook yard sale group a couple of months ago and had to go see it.
A local upholstering company was selling it out of their warehouse. As soon as I saw it, I knew it was coming home with me, only it was four days later. It was so big, there was no way it was going to fit into my SUV, so I had to end up picking it up with my hubby’s truck…on my birthday!
It was listed at $75, but the girl selling it took my offer of $60. What a steal!
It’s been living in my dining room for nearly two months! Here is how it started: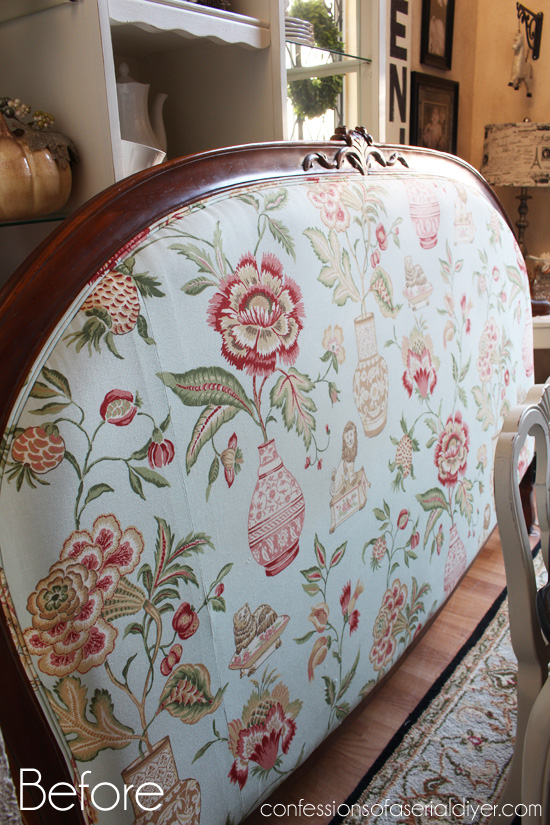
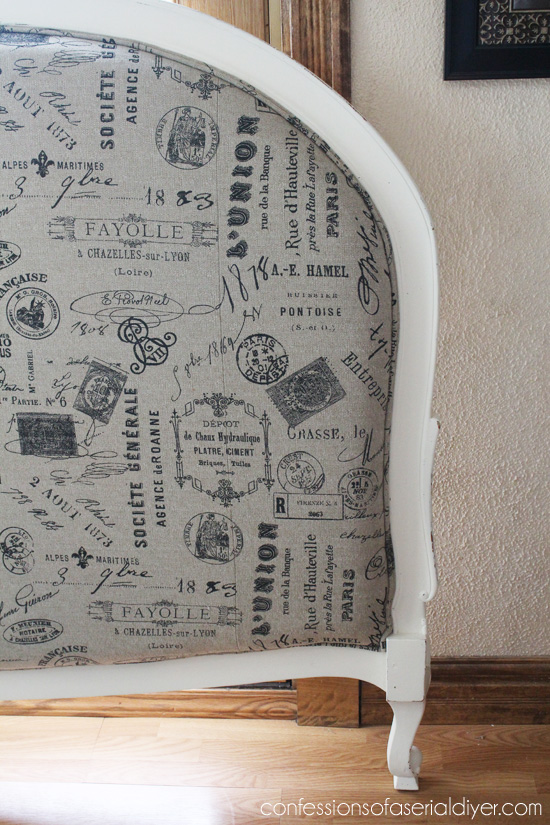
Isn’t it grand??
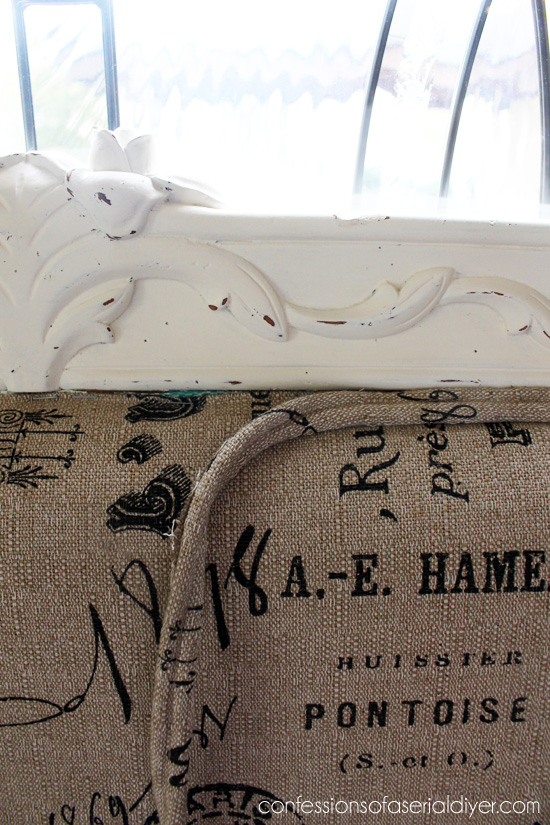
They had just upholstered it in this pretty fabric, but since I was in the market to flip this beautiful piece, I thought it would sell faster if it were more neutral.
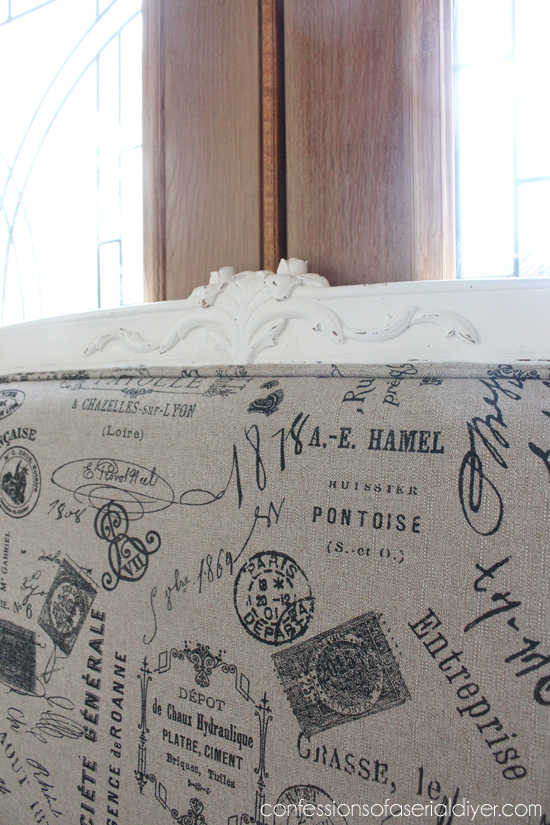
I was originally going to redo it in black and white toile. It’s such a pretty look for a bedroom, but after recently upholstering my French Provincial chairs, I decided to upholster this headboard to match.
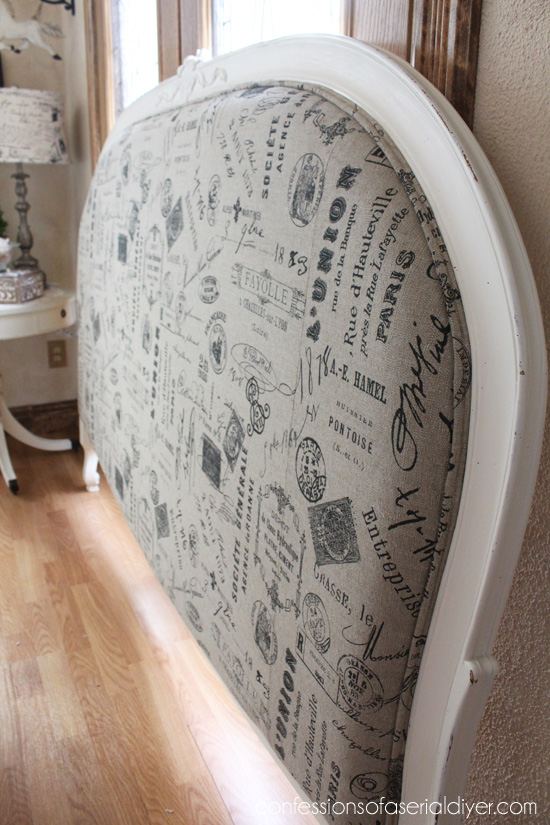
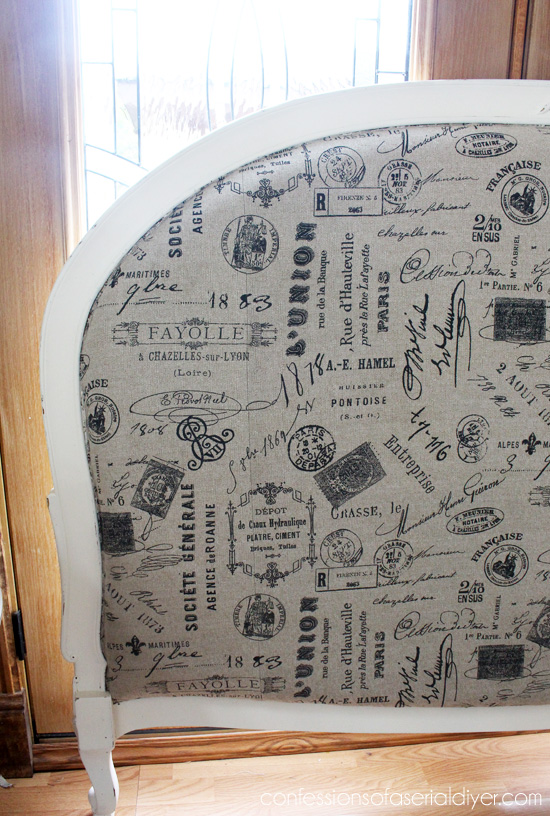
As you can see, I also painted it to match the chairs. I really wish I could keep this, but I already have a bed that I love.
I had a ton of requests for a tutorial on the chairs, including the double welting (that’s the corded trim that finishes the edges off nicely). I’ll be putting tutorials for both of those together very soon, I promise!
The hardest part of this upholstery project was getting the fabric to line up!
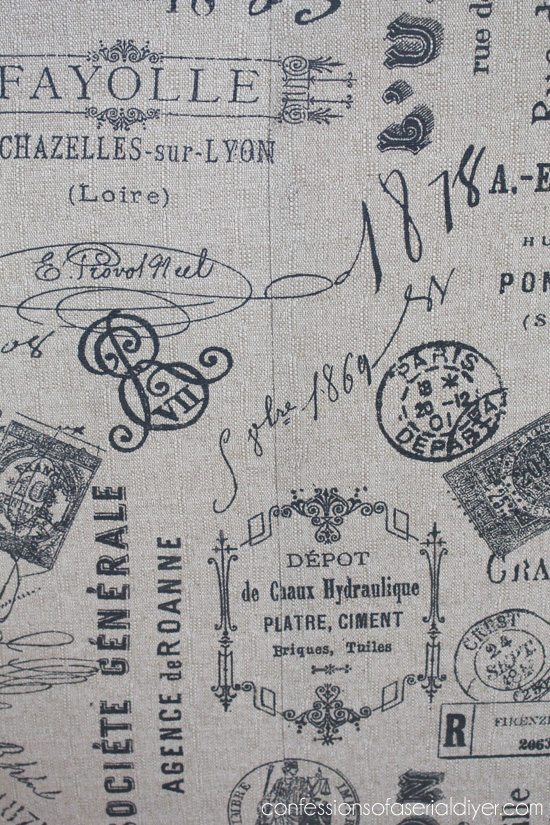
Of course I’m such a pro at it (no I’m not) that it lined up perfectly the very first time…bahahahaha…my pants are SO on fire. It took me about four times to redo this to get it right!
The fabric (from Hancock Fabrics), is 54 inches wide, so I centered that and added the additional width I needed to either side.
The foam underneath was still in perfect condition since it had just been upholstered…
So I just centered my fabric and stapled it close to the edge all the way around, folding the edges under as I went…
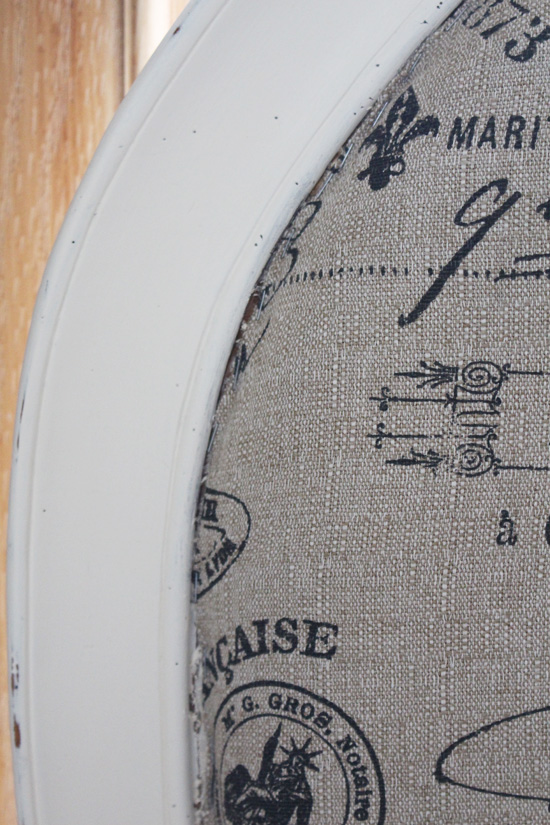
I used my $8 light duty Stanley staple gun from Walmart. It works perfectly!
Here is the double welting I made to cover the staples: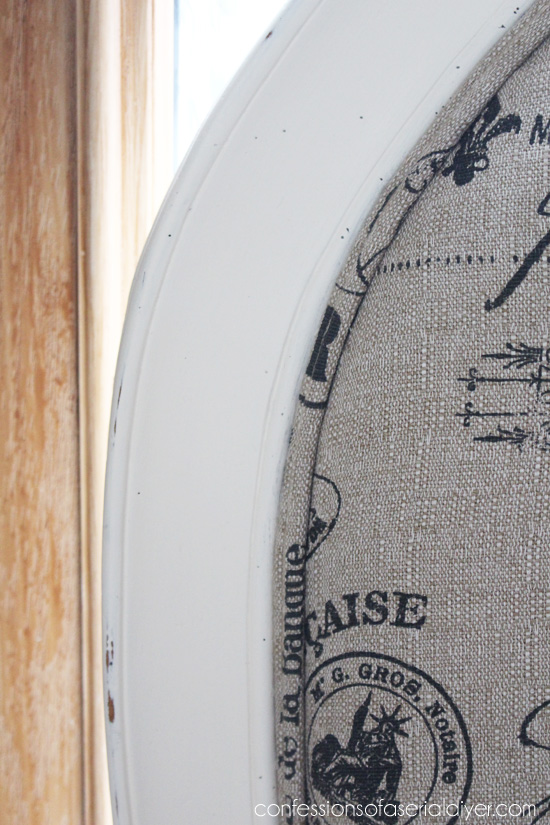
Here it is going on. I just hot glued it in place.
You can see how I make double welt trim HERE.
I planned on sharing the how to for the welting with this post, but there are so many pictures, I decided to break it up.
This ivory shade complements the fabric nicely, but black would have worked too!
This was taken in the corner of our dining room:
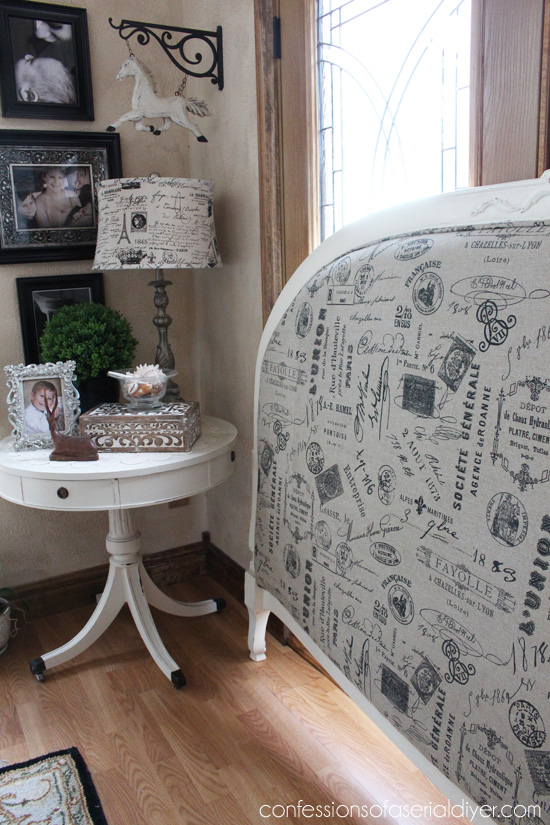
Think I could convince the hubby to move our dining table upstairs, so I could set up my new bedroom in here?
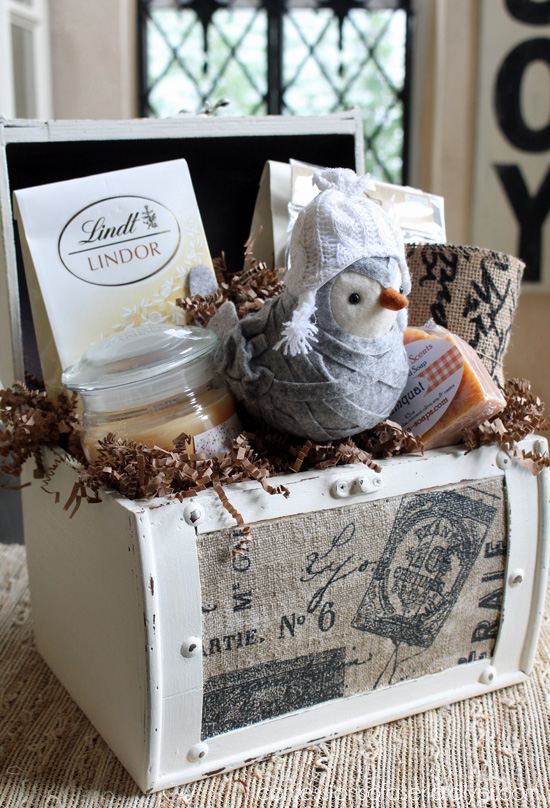
I also have this fun giveaway still going on until the 17th, that includes a storage case I redid in the same fabric, along with a few of my favorite things!
I’d love to know what you think of the headboard, and what you thought about the original fabric?
I delivered the chairs to the shop last week and took this piece in on Monday and the chairs had sold! So much for upholstering this to match. Oh well, maybe the buyer will be back. 🙂
XOXO,

Don’t Miss a Thing!
If you like what you see, there are several ways to follow along!
EMAIL * INSTAGRAM * FACEBOOK * PINTEREST


Robin Stephens says
Gosh, I so wish you lived next door. I’m a great baker (read: cinnamon buns to die for!). I’d bake for you night and day if you’d share your upholstery habit with me! LOVE what you do. Good job, Chicka!
Christy K. James says
Ooh yes that sounds like a great arrangement. Thanks, Robin! 🙂
Jacqueline says
You are amazing… you make it look so easy and I know from some past experiences that it isn’t. I love your style, love the fabric and always enjoy coming here to visit. Oh, and thanks for a chance at your lovely giveaway.
Christy K. James says
Thanks so much, Jacqeline! This wasn’t too bad to do after finishing the chairs. They nearly did me in! SO happy to have you here and good luck on the giveaway! XO XO
Sue Farmer says
Another great job Christy!! Wish I could buy all three pieces!!
Christy K. James says
Thanks, Sue! I wish I could sell them to you. 🙂
Marie@The Interior Frugalista says
Girl do you ever stop? What a beautiful headboard – your makeovers always blow me away! Looking forward to your tutorial on double welting (without a piping foot). I have a chair waiting for a makeover but I’m too chicken to teach myself how to do the double welting so I’m holding off until your tutorial. No pressure! LOL
Have a great weekend 🙂
Christy K. James says
Ha ha it feels like I just keep moving! It’s the neverending quest to tackle my to-do pile. It will never end unless I stop dragging stuff home lol! I’ll do the welting post early next week. I was going to include it in this post, but there were too many pictures! Have a fantastic weekend!! XO
Rinny says
Christy
This is so beautiful – wish I lived closer because it would be sold now. Just love your work.
Christy K. James says
Thanks so much, Rinny! I would love to have sold it to you. 🙂
Cindy@DIYbeautify says
Wow, gorgeous piece Christy! Great job, I love its makeover.
Christy K. James says
Thanks, Cindy! So glad to have it out of my dining room lol. Have a great weekend!
Heather @ Viral Upcycle says
Christy you have such beautiful taste. Maybe you can consider attaching a wooden bench to it so you can leave it in your lovely dining room. Have a great weekend.
Christy K. James says
You are so sweet, Heather! Thank you! That would actually be a marvelous alternative, but it’s 84 inches wide, maybe if it were a bit smaller. That’s a great idea, though. 🙂
Addie says
Oh! and you make it look soooo easy!!! I am a BIG “line-up fan” no matter the project….so I appreciate that.
Love the new look you gave it.
Addie
Christy K. James says
Thanks, Addie! I’m such a perfectionist when it comes to those little details, I just had to keep trying to get it just right. 🙂
Lisa says
Hi Christy,
Your work is absolutely stunning! And it inspires me. I have certainly started viewing different pieces of cast off furniture in a different light. On another note, where did the cute little bird with the hat come from in the last picture? He’s absolutely adorable and what a cute display!
Christy K. James says
Thanks so much, Lisa! The bird came from Target. I’m giving him away along with the box and other goodies around him for my favorite things giveaway. 🙂
Pamela says
I love this fabric. I have checked the Hancock’s website and they have two fabrics listed. There are two different prices and one has the 54″ width listed. What’s the difference between them and which did you choose? Thank you for the inspiration.
Christy K. James says
I see the two swatches listed under drapery fabrics on their site. The one I purchased was originally $29.99, on sale for $14.99, and it was 54″ wide. The one priced on sale at $12.49 looks more like the background ground color I used though. I called my store and got the sku number if you’d like to call a store and order it over the phone. The sku# is: 3669926. They also have an extra 20% off your entire purchase coupon on their site right now you can grab the promo code from. Hope this helps! XO
Trish says
This is gorgeous. I love it. And the matching lamp. I think I feel a French fever coming on…haha!!!
Christy K. James says
Thanks, Trish! I’m a sucker for anything French inspired 🙂
missy says
Lovely headboard! Impeccable upholstery…
Christy K. James says
Thank you, Missy! I appreciate the very nice compliment. 🙂
Betsy @ Happily Ever After Etc. says
I love this re-do, the upholstery was gorgeous before but I am partial to the french print. I try to shy away from prints that don’t line up easily but you made it look so easy! Great job!
Christy K. James says
Thanks, Betsy! I was so glad I was able to get the prints lined up! 🙂
Tami Wilson says
I like the original upholstery job and fabric but are not my decorating style. Your re-do is absolute perfection again. A little help on the fabric matching…learned this from making curtains that about caused my hubby to institutionalize me. After you match your patterns and pins well, use stitch witchery tape to lock the pattern match in place by “hemming” in the selvedge edges along the match. Then I ironed a crisp line to guide sewing and everything is still. This prevented the fabric from slipping especially as it is prone to do the further you get down the length of fabric. Then you can easily pull apart the ironed together portion or cut it out if you choose and iron out the line that guided your sewing. That little light-bulb moment worked like a charm for me and believe me I did lost of grumbling, groaning and probably a little bit of hissy fit throwing for a grown woman while tackling curtains for my home last year.
Anyway, I love all of your projects.
Christy K. James says
Thanks so much, Tami! And thanks for the tip! That was the hardest part of this redo. 🙂