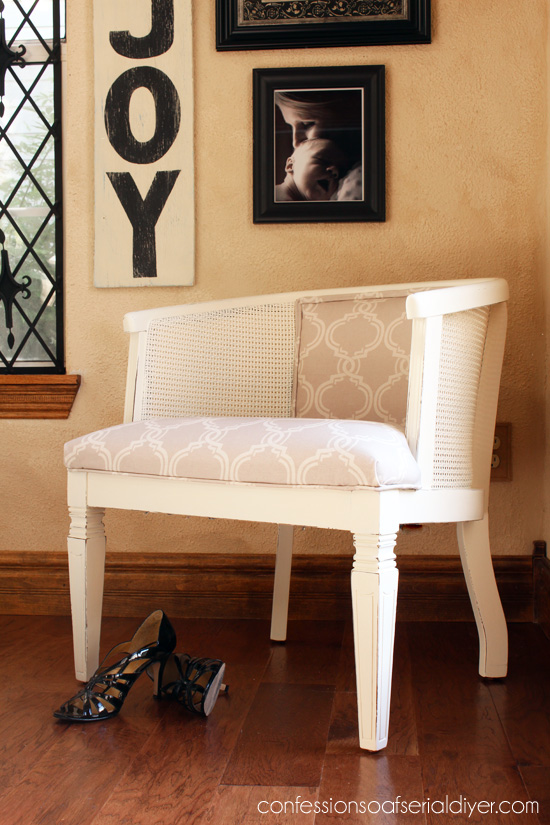
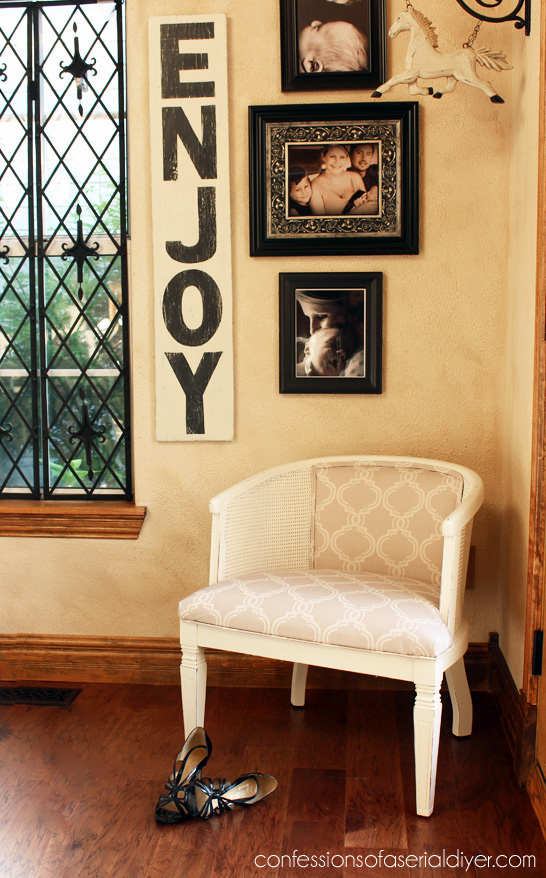
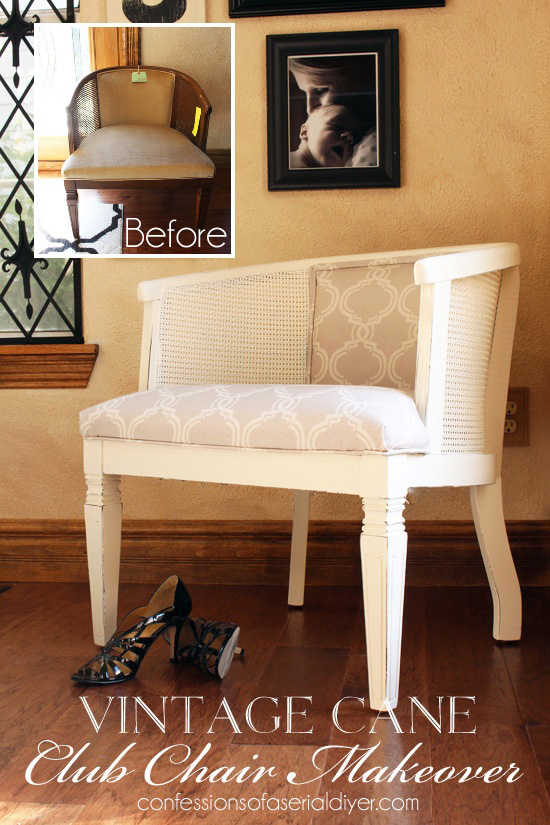
Hi Friends! Up for a little furniture redo today? How about this pretty little cane club chair I picked up recently at the thrift store?
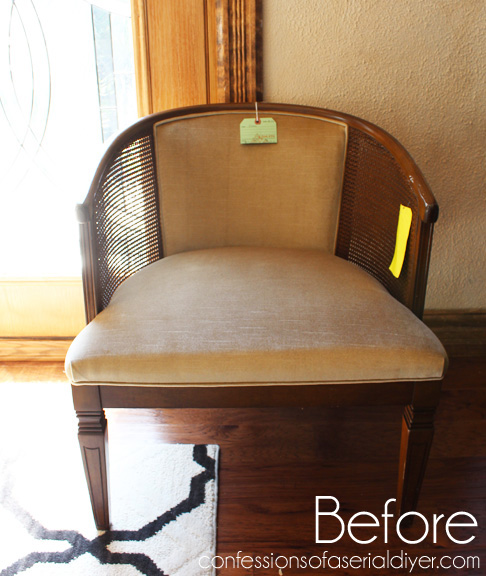
I spied it at the Salvation Army on a Thursday for $44, and I really liked it so I asked the gal if they were having any sales any time soon. She told me that all furniture would be 50% off on Saturday. Luckily it was still there! It ended up being only $22! Woo hoo.
Now you might think you already know what fabric I used, right? Not this time. 🙂
Surprise!
I was tempted to use my favorite French-inspired fabric since this chair also has the same lines as the dresser I recently redid using that fabric.
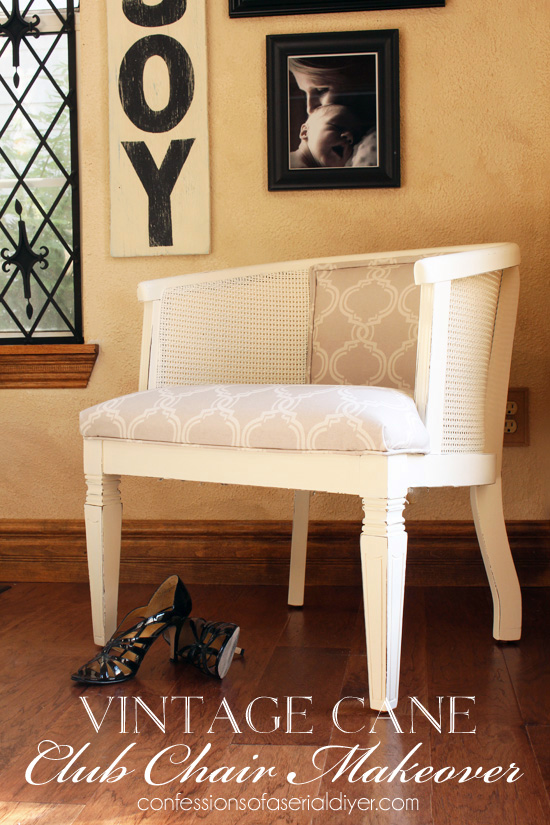
But I had this left over and thought it would be pretty. It started out as a curtain panel from Homegoods!
This is what I purchased it for initially:
Remember that set? It sold quickly!
I took pictures as I went just in case anyone out there has a similar chair they’d like to reupholster.
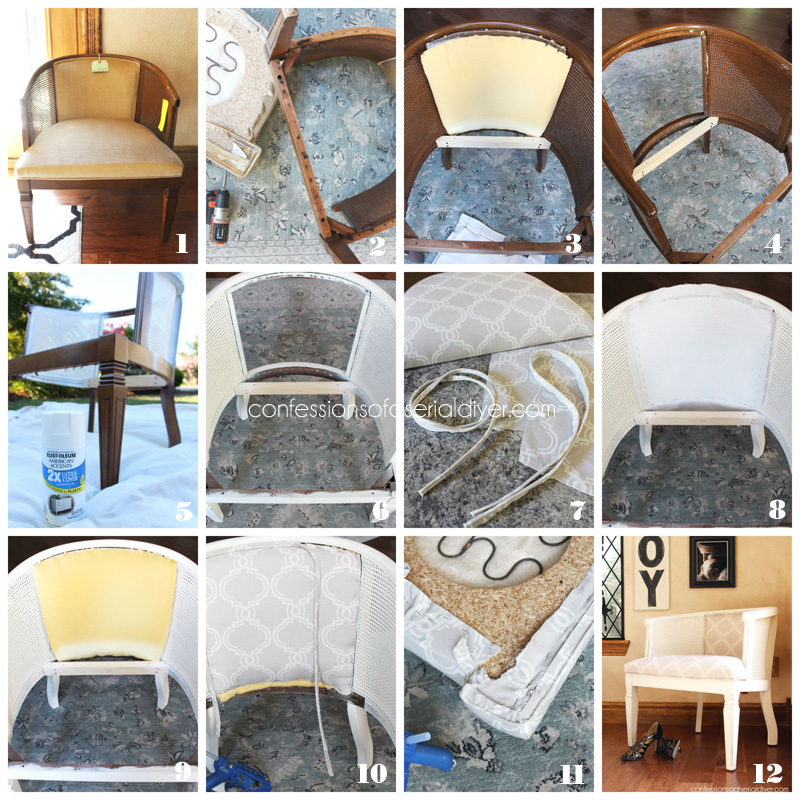
- Clean well. I wiped mine down with Lysol wipes.
- Remove the seat cushion that should be screwed in place from the underside.
- Remove the inside back panel of fabric first.
- Remove the foam and outside back fabric panel.
- Spray prime the cane portion, then follow with spray paint. I used Rustoleum’s Heirloom White.
- Paint the rest of the chair. I used my go-to DIY Chalk Paint in Behr’s Cottage White.
- Cover the seat using a staple gun. (I did not remove the old upholstery since it was in perfect condition.) Make double welting (tutorial here) for around the inside back panel. Make piping (tutorial here) for seat portion.
- Use the old upholstery panels as a pattern for the new fabric. Attach the outside back fabric using a staple gun.
- Attach the foam , also using a staple gun. I reused the original foam.
- Attach the inside back panel using a staple gun. Attach double welting to hide staples, using hot glue.
- Attach piping to underside of chair using hot glue.
- Reattach seat and voila!
Hopefully you get the general idea. This was not hard at all, and don’t be frightened by words like double welting. If you can sew a straight line and you have a Walmart nearby, you can totally make that.
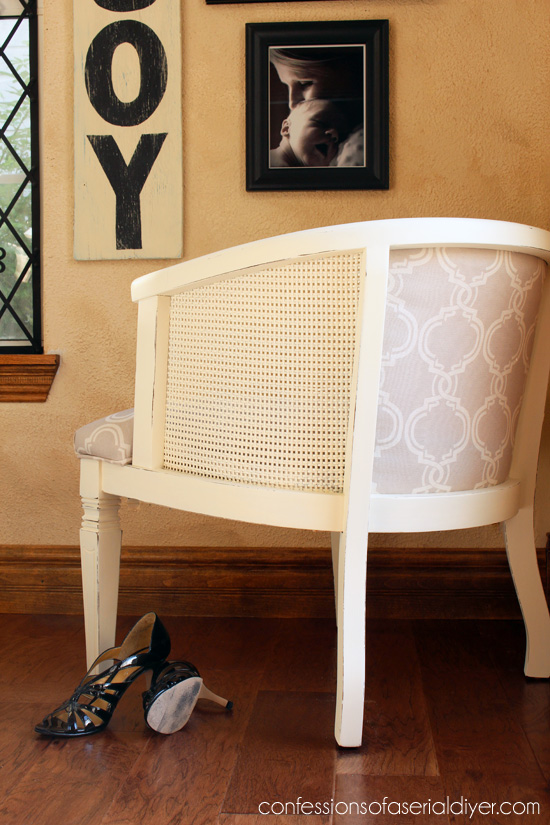
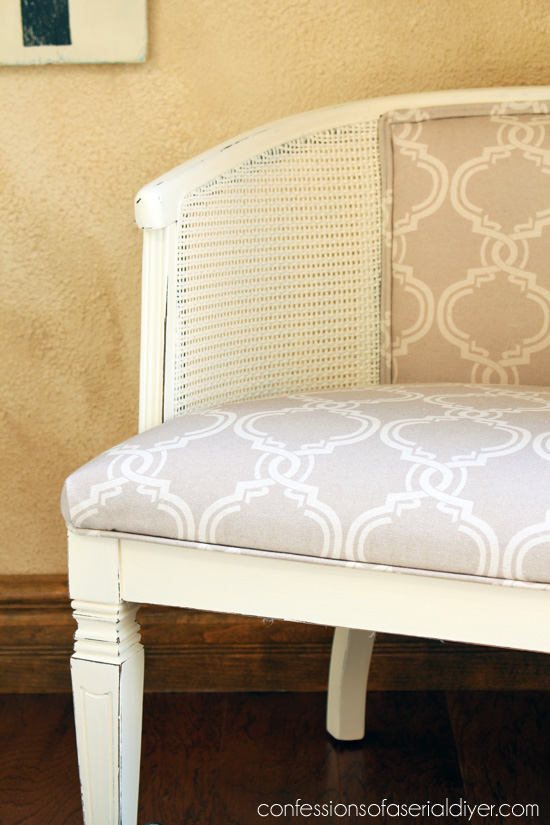
I would have liked to have something contrasting in the back panel, but I had a hard time matching up this fabric. The back is still pretty though:
And the front again…
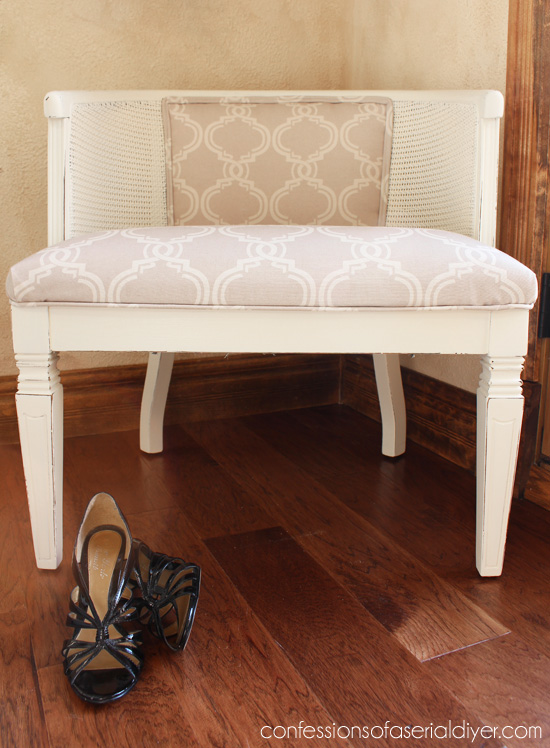
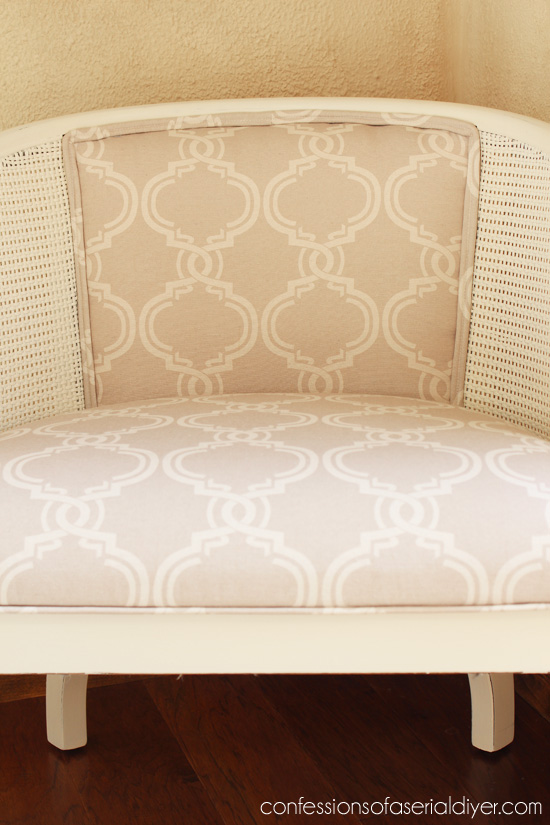
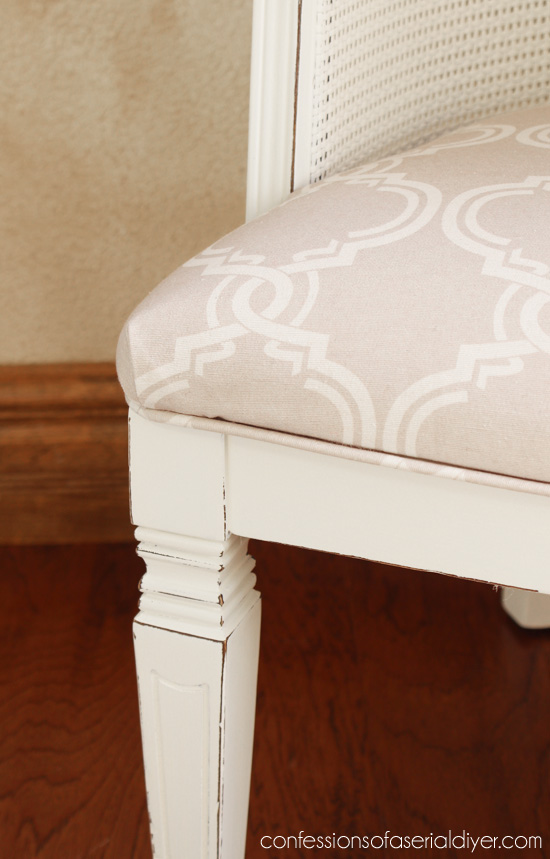
That picture makes it look really wide ha ha. The piping is a small detail that is really easy to add:
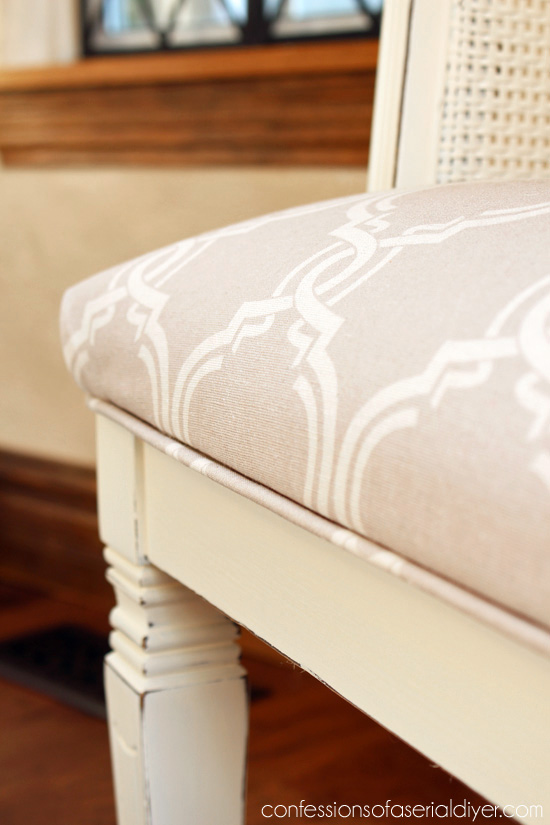
I folded the corners this time around since that’s how they were before…
Our theme this month for our Get Your DIY On party is Fabric DIYs so I thought this would be perfect!
My super crafty cohosts also busted out some fabric for this month’s theme:
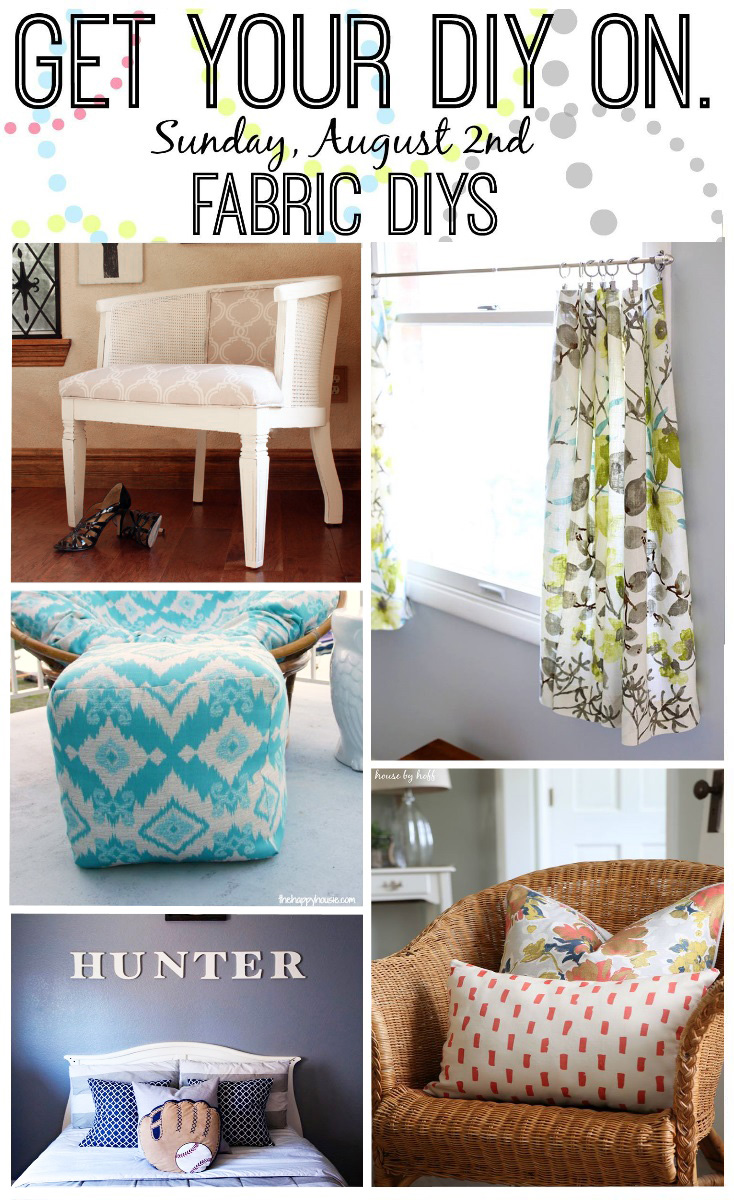
Vintage Cane Club Chair Makeover by Christy at Confessions of a Serial Do-It-Yourselfer (Me!)
Super Simple DIY Cafe Curtains by Abby at Just a Girl and Her Blog
How to Sew a DIY Pouf Ottoman by Krista at The Happy Housie
Envelope Throw Pillows by Mandy at The Hankful House
Tea Towel Throw Pillows by April at House by Hoff
The party fun starts this Sunday, August 2nd, at 7:00pm EST.
Bloggers, come share your FABRIC DIYS, so we can inspire our readers!
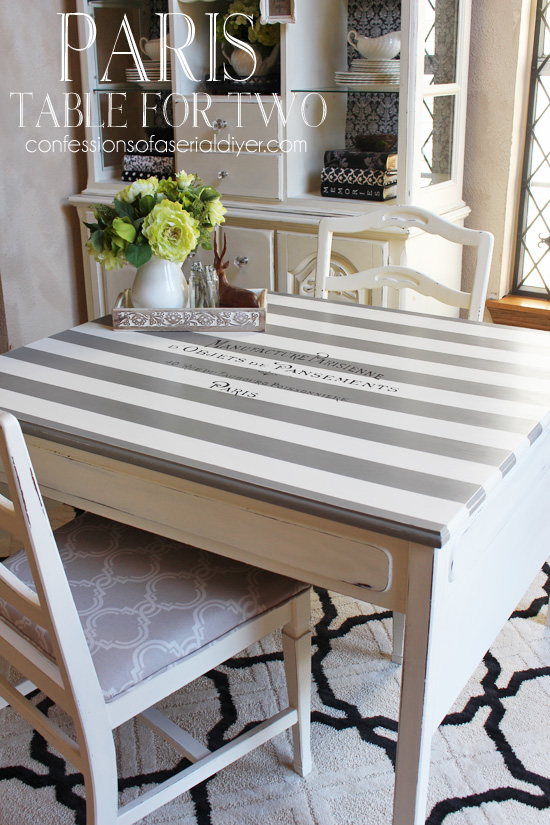
Here is one more super easy thrifty project I did using this fabric:
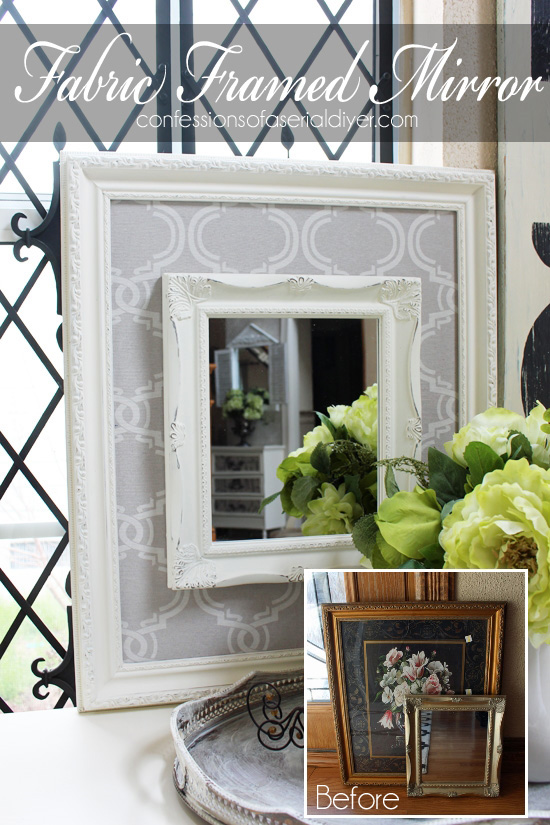
I got a lot of mileage out of that one set of curtain panels. I’m using the last of it on a chair for my neighbor.
Have a fantastic weekend!!
XO,
![]()
If you like what you see, there are several ways to follow along!
Email * Facebook * Pinterest * Hometalk * Twitter * Instagram
I love to share at these great parties:
The Happy Housie Design Dining and Diapers Liz Marie Blog Funky Junk Interiors Savvy Southern Style Tatertots and Jello DIY Show Off Between Naps on the Porch Just a Girl and Her Blog Sand and Sisal Interior Frugalista


Kim says
Wow! This is gorgeous what a great job!
Christy K. James says
Thanks, Kim! 🙂
Jessica says
Hi Christy!
Thanks for this post! Love what you did with the chair! It looks like you distressed it a bit. Did you use sandpaper? Any antiquing glaze? I have only chalk painted once, so any tips you can provide are appreciated!
Thanks,
Jessica
Christy K. James says
Thanks, Jessica! I used 220 grit sandpaper to lightly sand and show some wear on the raised areas. Then I sealed it with Annie Sloan’s clear soft wax. That’s it. 🙂 XO
Tania says
It turned out beautiful! I think the sign on the wall “JOY” says it all about this chair! :o)
Tania
Christy K. James says
Thanks so much, Tania!! XO
kathy burgess fabre says
The chair looks wonderful. Have never really cared for the open-weave cane, but the white makes it look light and airy. the upholstery job looks professional…my mother did a good bit of upholstery work years ago and I was always amazed at what a great job she could do just by reading articles and books from the library. I am renovating my house with the help of the Internet and great people who share their ideas with us.: )
Christy K. James says
Thanks, Kathy! I don’t care for the cane in its original state either, paint does wonders. Good luck on your renovations! 🙂
Norma says
I was just curious what you would put on a redone chair like this if you had a booth (like I do). Just wondering if it is worth the time… (I would totally do this for me or a friend as a gift!) Thanks for any input–you can email me privately if you don’t want everyone knowing how you price items. Thanks, Norma D.
Christy K. James says
Hi Norma! I will probably price this chair somewhere between $159 and $179. My Mom says that’s too low, but I got a great deal on it and I like to keep things moving. Sometimes I start on the high side knowing that I can always come down. Hope this helps! 🙂
Charisse says
That chair is perfect to replace the one my dog chewed up!
Christy K. James says
Oh no! That sounds like my husband’s recliner that the cat has chosen as her personal scratching post!
Paula@SweetPea says
Looks great, Christy! I know you were thrilled to score this pretty chair at such a good price. One of these days I will tackle upholstery!
Christy K. James says
Thanks, Paula! I was! You know it’s all about the bottom line. 🙂
Jen @ Girl in the Garage says
Awesome job, Christy! I love the soft colors you chose. And the step-by-step photos are a big help! xo
Christy K. James says
Thanks, Jen! This one wasn’t too bad to redo at all. 🙂
Addie says
I am not worthy to read your blog!!! YOU are AMAZING!!!!
luv ya, Addie
Christy K. James says
Ha ha your comments always make me smile, Addie…great way to start my Monday. 🙂
Tara @ Anything & Everyting says
Great job! Love the color of fabric that you chose! Thanks for the step-by-step pictures as well. I will definitely be referring to this post when I decide to finally tackle an upholstery project!
Christy K. James says
Thanks, Tara! Hopefully this will come in handy when you need it.:)
Jeanne says
OMG I LOVE this AND I have two of these chairs the hubs ‘rescued’ from the trash for me (occasionally he follows MY INSTINCTS LOL). The back is tufted so I’m not sure if I’m up to the challenge. They are in excellent condition other than the dog drool our late English Bull Mastiff garnished on them. I took to local shop and it will be > $300 EA to have them redo and I would provide fabric. Wish I lived closer to you!
Christy K. James says
Thanks, Jeanne! Wow, $300?? That sounds crazy! This was not nearly as hard as I thought it would be. If you replace your foam, maybe you could skip the tufting? Mine didn’t have any to start. Good luck with yours, my friend…and good hubby for looking out for you! XO
Jeanne says
Hi Christy, thanks for your comments and I think I will give it a whirl at least a test on one chair. I think the cost is high as I am in Boston.
Totally in love with your blog and your projects. Hope summer is being good to you. I am off to Martha’s Vineyard for September; projects after our return. xoxo
Christy K. James says
You are most welcome! We have had a really hot Summer, but it has been good for water activities! Enjoy Martha’s Vineyard! 🙂
Marie@The Interior Frugalista says
Whaaaat, no French burlap!!! LOL Another beautiful upholstered chair – love this fabric too. Can’t beat $22.00 – I bet you were happy to see the chair still sitting there. The matching double frame mirror is so pretty too.
Christy K. James says
Ha ha I know, right? Decided to change things up this time. 🙂
Shayla Martin says
Love how you redid this chair! Fabric and paint color look so nice together. What kind of stapler did you use?
Christy K. James says
Thanks, Shayla! I used a cheapo light duty Stanley stapler from Walmart. 🙂
Nancy @ Artsy Chicks Rule says
You are the upholstery queen!! You made that chair a beauty Christy. Love it. 🙂
xo
Nancy
Christy K. James says
Thanks, Girlie! This one was seriously not that bad. 🙂
Krista @ the happy housie says
This is awesome Christy – such a pretty makeover. Sorry it took me so long to get over here – crazy life right now:)
Christy K. James says
Thanks, Krista! I can only imagine how crazy things are for you right now, but you’re building up a ton to blog about I’m sure! Can’t wait to see the finished reno! XOXO
andi says
I have almost this identical chair waiting for me to rip it to shreds and give it a makeover. Thank goodness you just taught me how to do it! 😛 Of course, I’m plastering mine with owl fabric. Beautiful!
xoxo
-andi
Christy K. James says
Awesome! Owl fabric…equally awesome 🙂 XO
Loves the Find says
Stunning!! Great job!! Can’t wait to tackle my own chair project and love the frame/mirror project as well. Thanks!
Christy K. James says
Thank you! Good luck with yours! XO