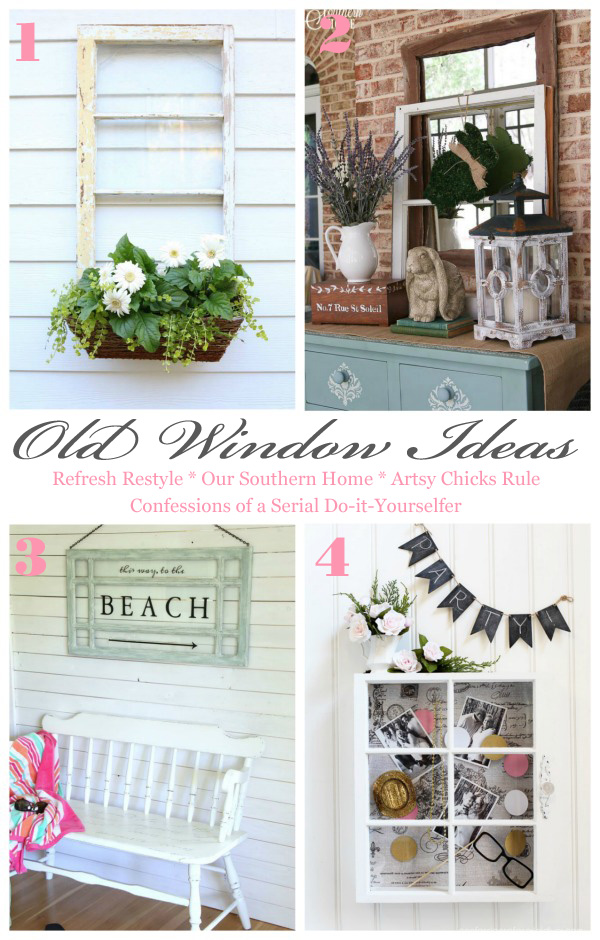
Hello lovely Friends! Today I’m back with my Décor Enthusiast girls! We usually share something décor-related as a monthly challenge, and this month we are sharing how we use windows in our décor and window projects! I have about 8 old windows that I picked up for supa cheap at a yard sale a couple of years ago so I chose to make something with one of them for this month’s challenge! I’ve included a few affiliate links so you can find the products I use.
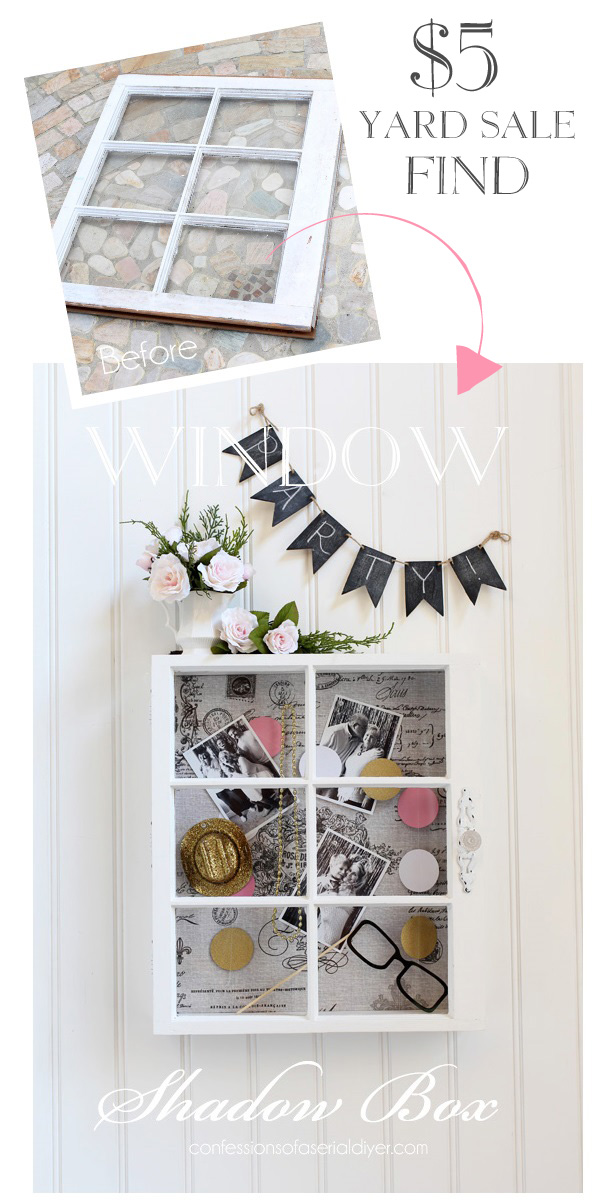
I started with this smallish window that cost me $5:
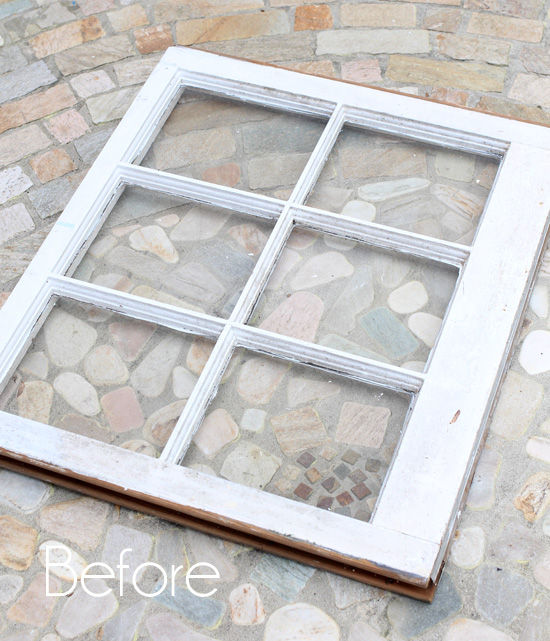
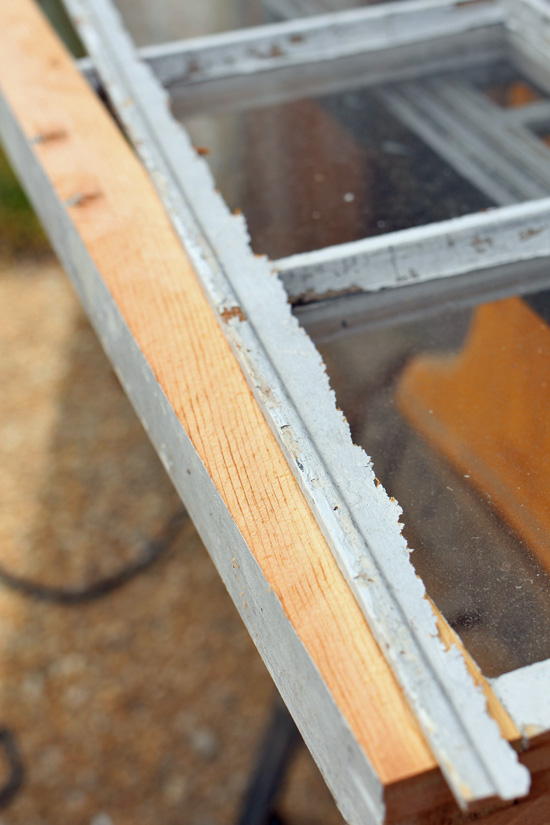
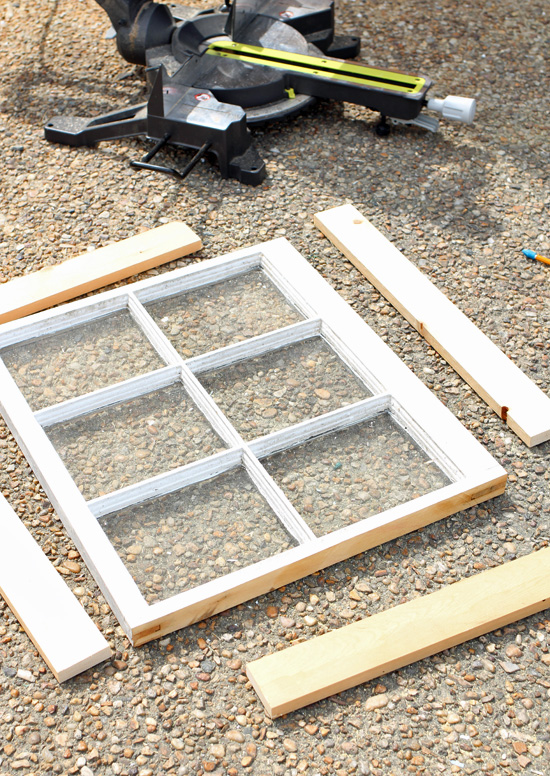
What you can’t see is that inside that groove on the bottom was full of green mold. Yuck! I decided to use my table saw to cut three of the weird window edges off, including the moldy one:

That gave me nice clean edges to create a door for my Window Shadow Box!
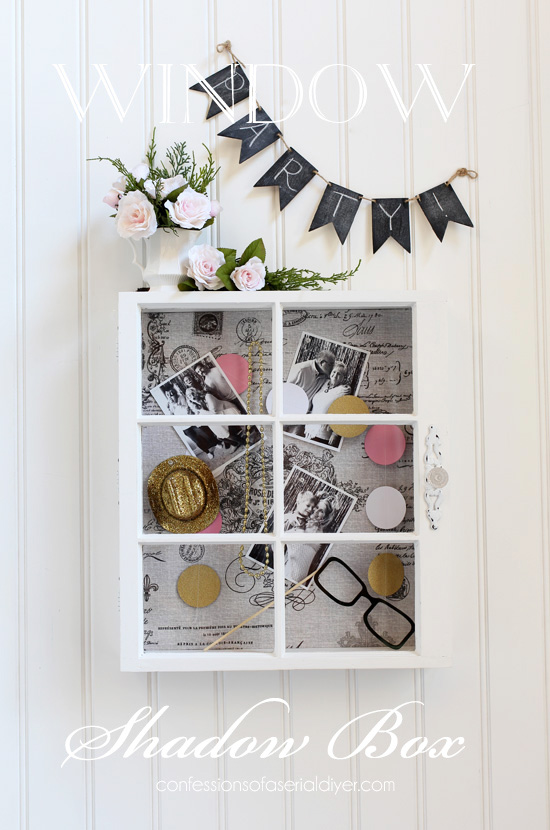
…or fancy bulletin board!
A fun way to use an old window, right?
Here’s how it came together…
After cutting the outer edges on the three odd sides with my table saw, I stood my window upright and ran it through my table saw as well to remove the lip that was sticking out on the one side:
Then I used a wire brush to remove any flaking paint, cleaned the window frame, and taped the panes off using FrogTape. I painted the frame on both sides using Behr’s Bit of Sugar that I made into DIY chalk paint. (Recipe HERE.)
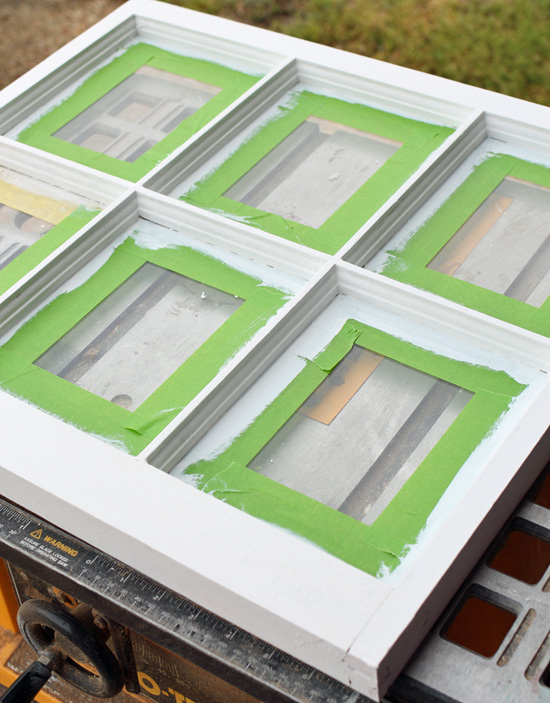
Then I sanded lightly and sealed with Annie Sloan’s clear wax.
Next I cut a piece of 1 X 3 I had in the garage to create a frame for the box:
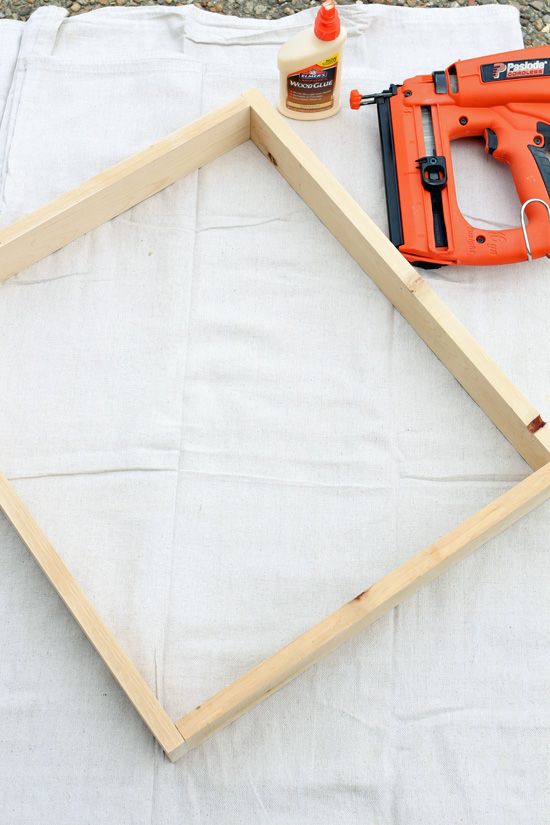
I attached it together using wood glue and my nailgun:
Then I painted, sanded, and waxed the frame as well.
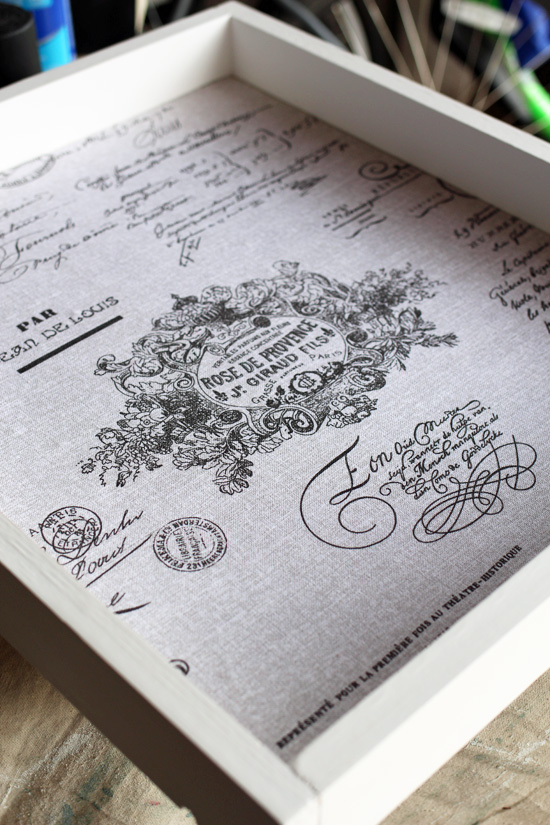
For the inside backing I used this cork board I found at the thrift store:
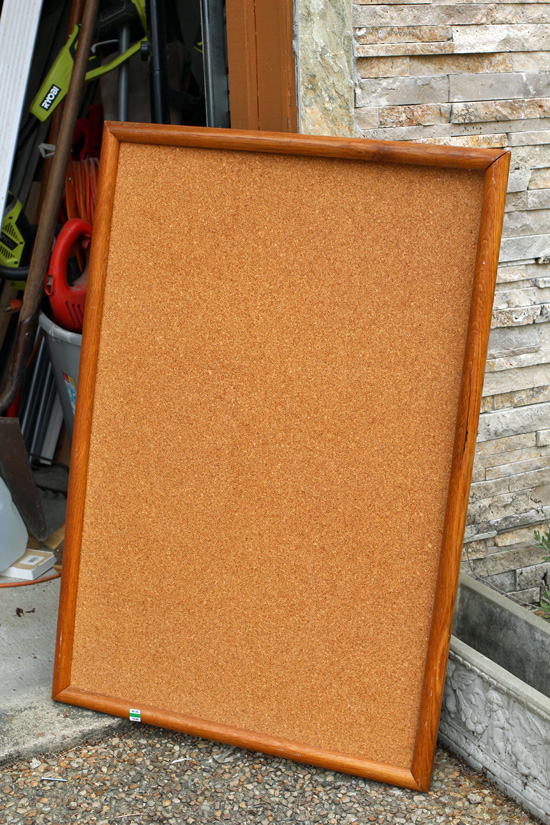
I cut it to fit the inside of the frame using my table saw:

It was nice and thick, and that’s why I bought it.
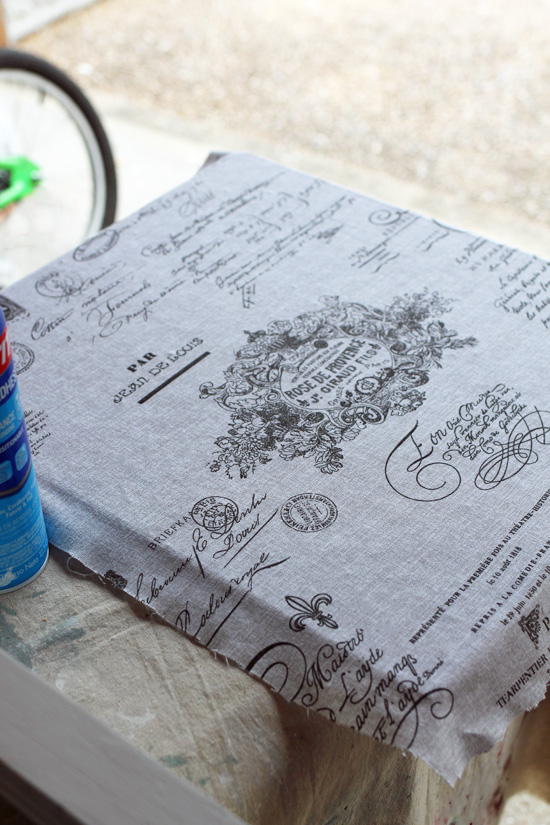
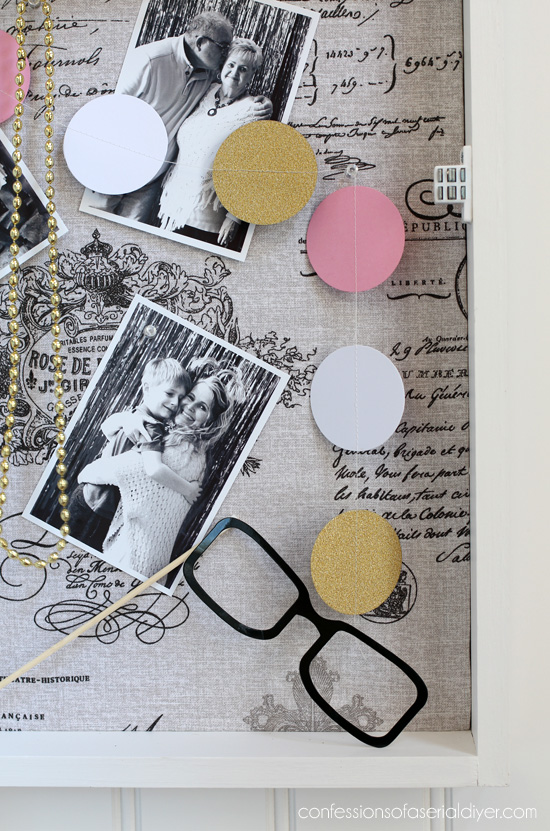
I decided to use the same fabric that I used on this oval vanity stool, that started out as curtain panels I picked up at HomeGoods. (Great source for fabric!) I attached it using spray adhesive, then pulled it taut and secured it on the back with hot glue.
I also used hot glue to attach it to the inside of the frame:
Next I needed hinges and a door pull, so I found these in my stash:
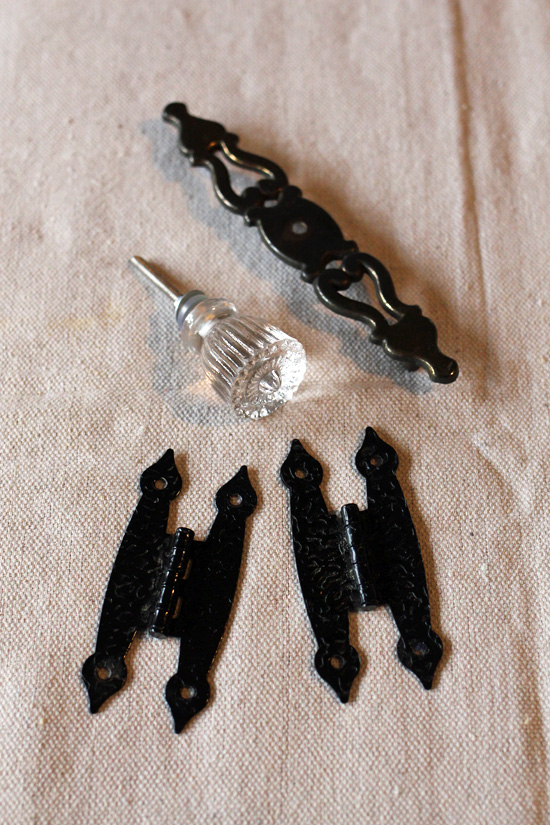
Three of those pieces got painted in chalk paint, and distressed a little.
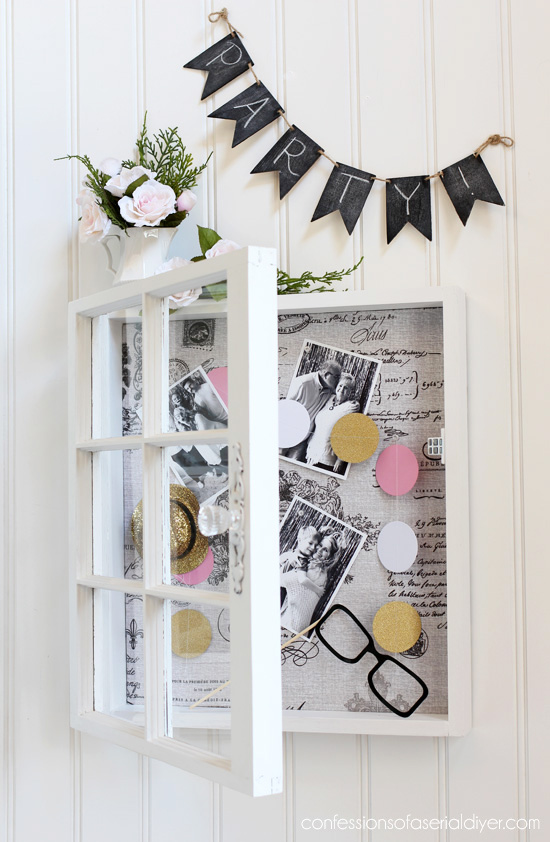
Then I attached the window to the frame with the hinges. I ended up adding one more hinge for added strength.
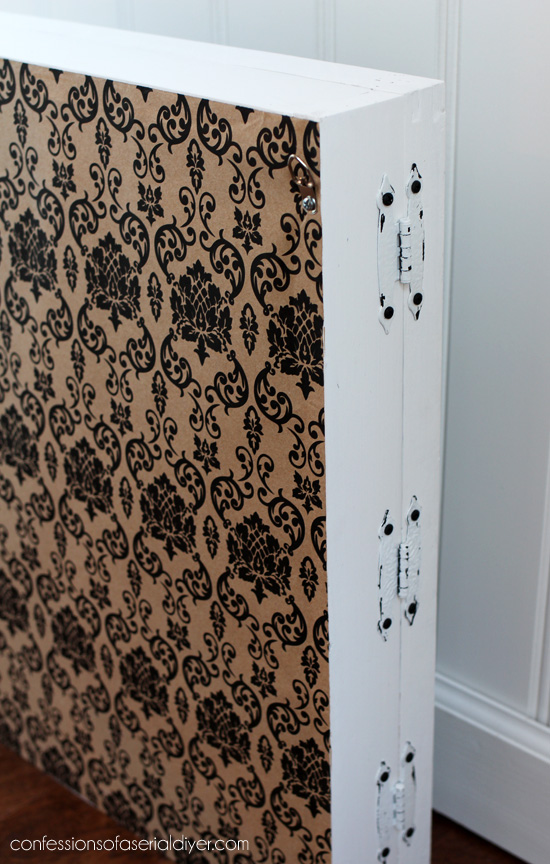
I also covered the back in this pretty paper from Hobby Lobby and added D ring hardware for hanging.
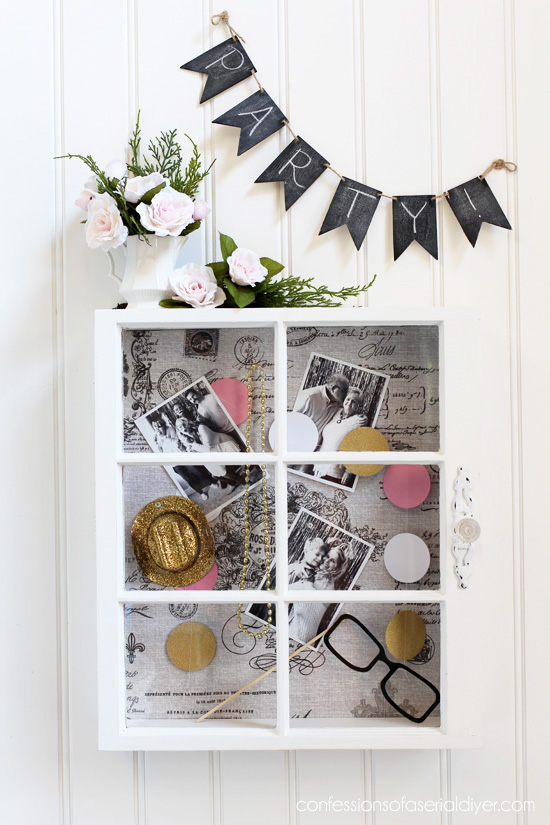
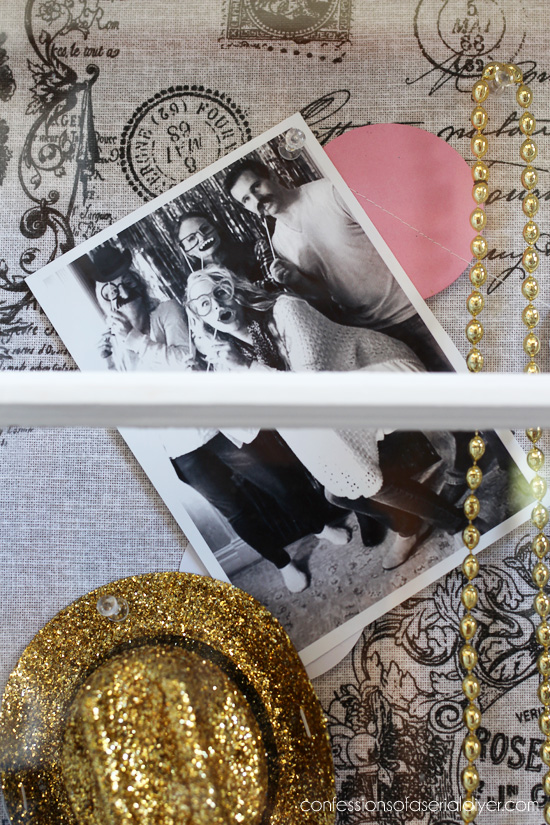
I filled it with photos and mementos from my Mom’s surprise 70th birthday party…
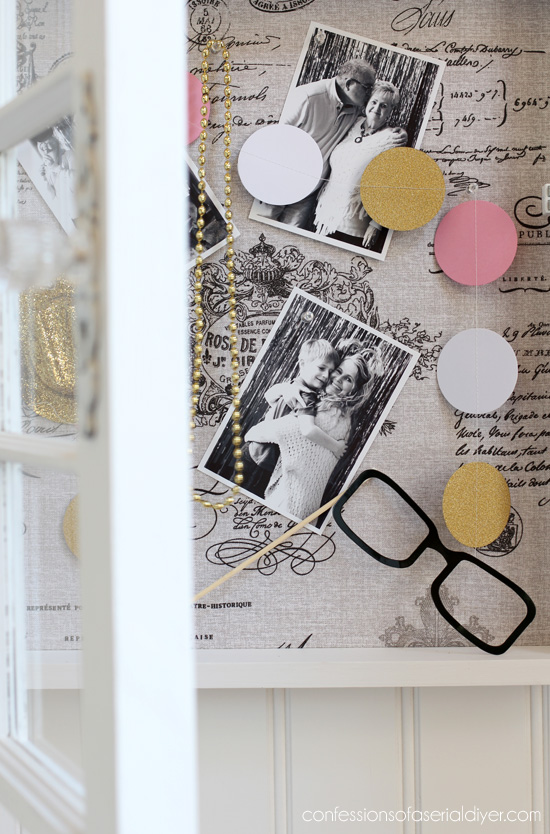
Me and three of my siblings having some photo booth fun:
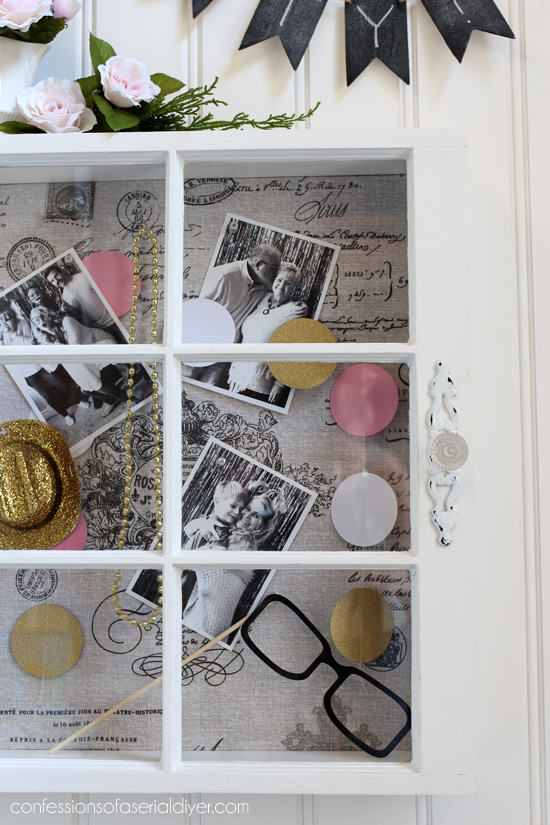
This glass knob was one I picked up at Hobby Lobby for another project but ended up not using:

That backplate came off of another piece and adds a little more detail.
I added a magnetic closure to the inside…
This would be fun to change out seasonally with favorite photos from each season!
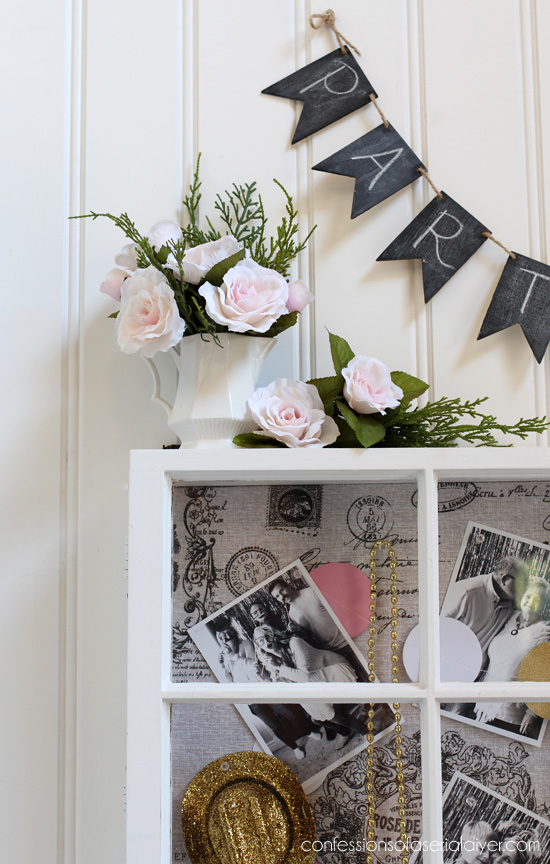
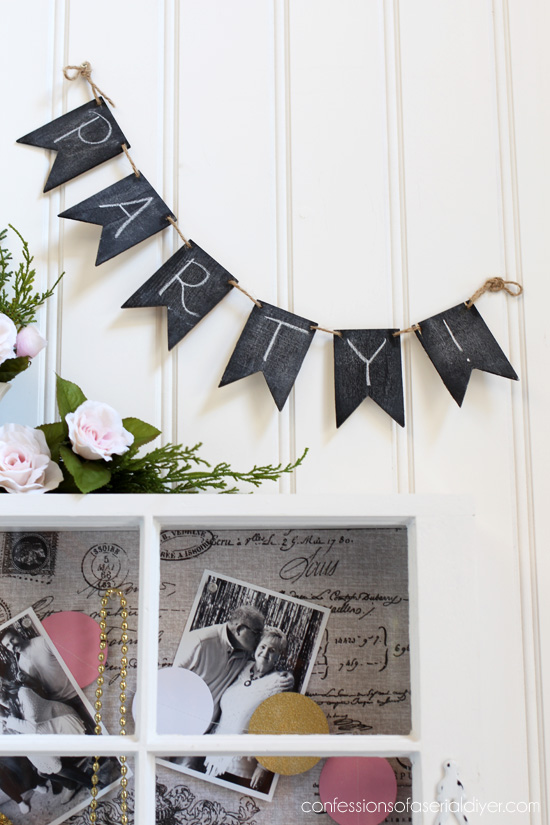
For my Mom’s party I used this little chalkboard banner above the drink station that I had parked in front of an old door I have near my kitchen. It was still hanging on the door with “Party!” on it ha ha, and it was a nice finishing touch for this photo. (Here is one similar all ready to put together.)
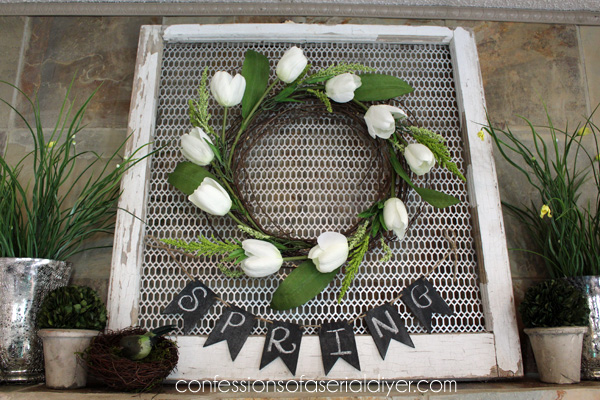
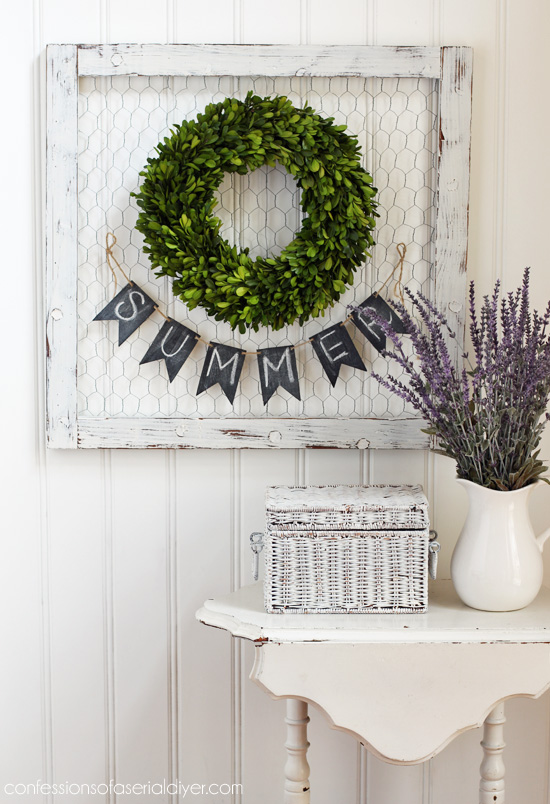
Here’s another way to use an old window. This one had no panes in it when I found it, so I added the metal sheeting to it to make the perfect backdrop for wreaths on my mantel. Here it is on my Spring mantel from a couple of years ago:
One more use for an Old Window
This was not a window to start, but you could use the same concept of adding chicken wire with a paneless window:
I also added a small shelf to this window a couple of years ago to create a simple window shelf:
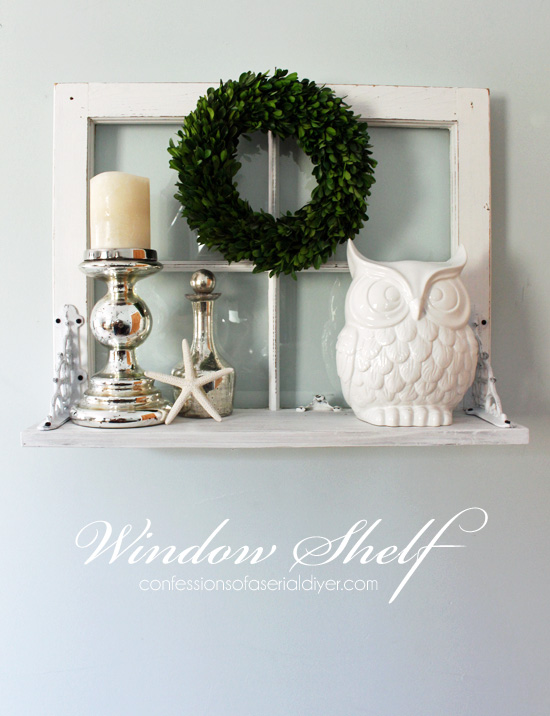
Oh and hey looky there, I hung a wreath on that one too!
But I think today’s window project is my favorite!
I hope you enjoyed it too!
Some of my Deocor Enthusiast Girls are sharing window ideas and projects today too!
Visit them at the links below the image:
4. Me! 🙂
You can visit all my previous Décor Challenge posts HERE, but this one might be my favorite:
You can see more of this post HERE.
Are you a member of our Facebook Forum yet?
We created the Decorating Enthusiasts DIY Forum on Facebook not only so you could participate in our monthly decorating challenges (the second Thursday of each month), but also so that you have a judge-free zone to share your projects any time, ask questions, and hang out with other creatives just like you! Click on that link to join in the conversation today. It’s free, and we’d love to see how you use old windows too!!

Next month’s theme is anything outdoors…easy! Be sure to join our group so you can share your outdoor spaces and projects with us next month!!
I’ll be back on Tuesday hopefully (and finally!) sharing how this suitcase turned out:

UPDATE: I got it done yay!! Check out how I updated this suitcase HERE now!
Have a great weekend. 😀
XO,
![]()
Don’t Miss a Thing!
If you like what you see, there are several ways to follow along!

 with Decorative Sheet Metal!")

Mary Kaiser says
That is so adorable. I love how cute that turned out. I would love to see your stash box, I can’t believe the awesome things you pull out of it every week, simply amazing!!
Christy says
Thank you, Mary! I save every. single. thing. ha ha! You just never know when you’ll find a use for it all! XOXO
Janice says
Love the window shadowbox but when do I not love something you do.
Christy says
Aww thank you, Janice!! Enjoy your weekend! XO
Joanne Taggart says
The shadow box is lovely Christy. The fabric is beautiful. Homegoods is a great place to buy drapery panels and then reinvent them another way. Don’t they just have the most awesome fabric panels! The details of the distressed hinges are really nice. Thanks for sharing.
Christy says
Thank you, Joanne! Yes, I love HomeGoods and TJ Maxx for their draperies…even to use as draperies! XOXO
Sherry Stuifbergen says
I liked YOUR project the best. You are a very imaginative, talented craftswoman, whose projects always look professional.
Christy says
Aww thank you, Sherry, I appreciate that! XOXO
Candy Walsh says
I love your idea! I have an old window I’ve been holding on to and think this might be the reason, lol!! Thanks for sharing~you’re the most creative person I follow!!
Christy says
Thank you, Candy, you are so sweet!! Yes go make one! 😀
Nancy @ Artsy Chicks Rule says
That is so creative Christy! I just love it so much! xoxo
Christy says
Thanks, Nancy!! It was a fun project to make too! XOXO
Christy @ Our Southern Home says
So pretty! You’ve got some serious DIY skills my friend!
Christy says
Aww thanks, Christy!! I’m glad this challenge pushed me to finally do something with one of those windows!! XOXO
Kaycee says
I love your shadow box Christy, it came out beautiful! I love your idea of adding the fabric and decorative paper to up the fancy factor!! 😉
I agree with all who’ve said that TJ Maxx is an awesome source for so many things that can be repurposed! I find that the clearance prices for, brand new items, are much cheaper than purchasing thrifted items in my area!
Christy says
Thanks so much, Kaycee! Yes…love love love TJ Maxx!! <3
Julie B. says
You are amazing… just that simple. >.< I didn't see this posted on Decor Enth, yet. I'll be watching for it!
Christy says
Aww thank you so much, Julie!! XOXO
Marie|The Interior Frugalista says
Such a brilliant idea for repurposing an old window! As always, your attention to detail is astounding. Happy Easter, Christy!
Christy says
Thank you so much, Marie!! This was a fun one to work on too. Happy Easter to you and yours as well!! XO
Rose Lefebvre says
Love that you made it into a small cabinet.
Christy says
Thanks, Rose! So glad you like it! XO
Bonnie says
You did such a great job on transforming the window into a keepsake box for your mom. I know she is going to LOVE it!! I love being able to see what you do with all of the odds and ends that you pick up. Thank you for providing tutorials with your projects.
Christy says
Thank you, Bonnie!! This was a fun one to work on, and I’m glad you like the how-tos too!! XOXO
Michelle says
This is adorable! What a great way to display treasured photos! 🙂
I’d like to invite you to share this at the brand-new Farmhouse Friday link party which kicks off this Friday at 6:00 am PST! I am giving away a $50 Amazon gift certificate to celebrate, and I will also share your linkup on DIY Farmhouse Style Facebook group where I admin, which at this writing has over 130k members! 🙂
Hope to see you on Friday!
Michelle
The Painted Hinge
http://www.thepaintedhinge.com
Christy says
Thanks, Michelle! 🙂
Jeri says
Love the shadow box, did you do any distressing on the sides???
Christy says
Thank you, Jeri! I didn’t really distress this one too much. 🙂
Kerryanne - Shabby Art Boutique says
You never cease to amaze me with your clever make-overs Christy. This one is totally adorable!! Thank you for sharing at Create, Bake, Grow and Gather this week. I’m delighted to be sharing your sweet shadow box at tonight’s party and pinning it too!
Christy says
Aww thank you so much, Kerryanne! I truly appreciate it! XOXO
Nette says
Beautiful and very clever. Props also to spelling “memento” correctly. 🙂
Christy says
Ha ha thank you, Nette! 🙂