Hello amazing friends and welcome back! It’s Furniture Fixer Upper day…one of my favorites!! So not only do I have a fantastic furniture flip to share today, so do the awesome ladies in my Furniture Fixer Upper crew! Be sure to look for their makeovers at the bottom!
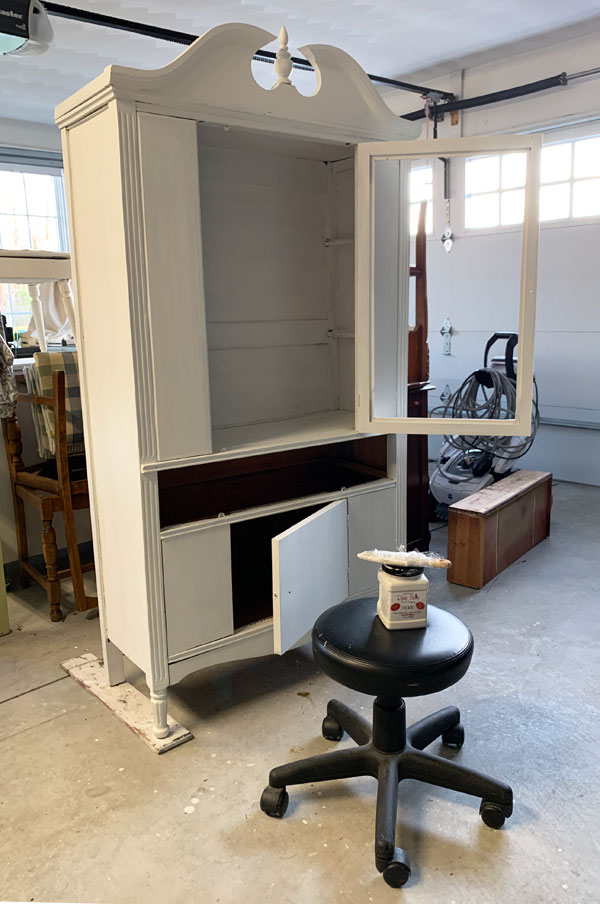
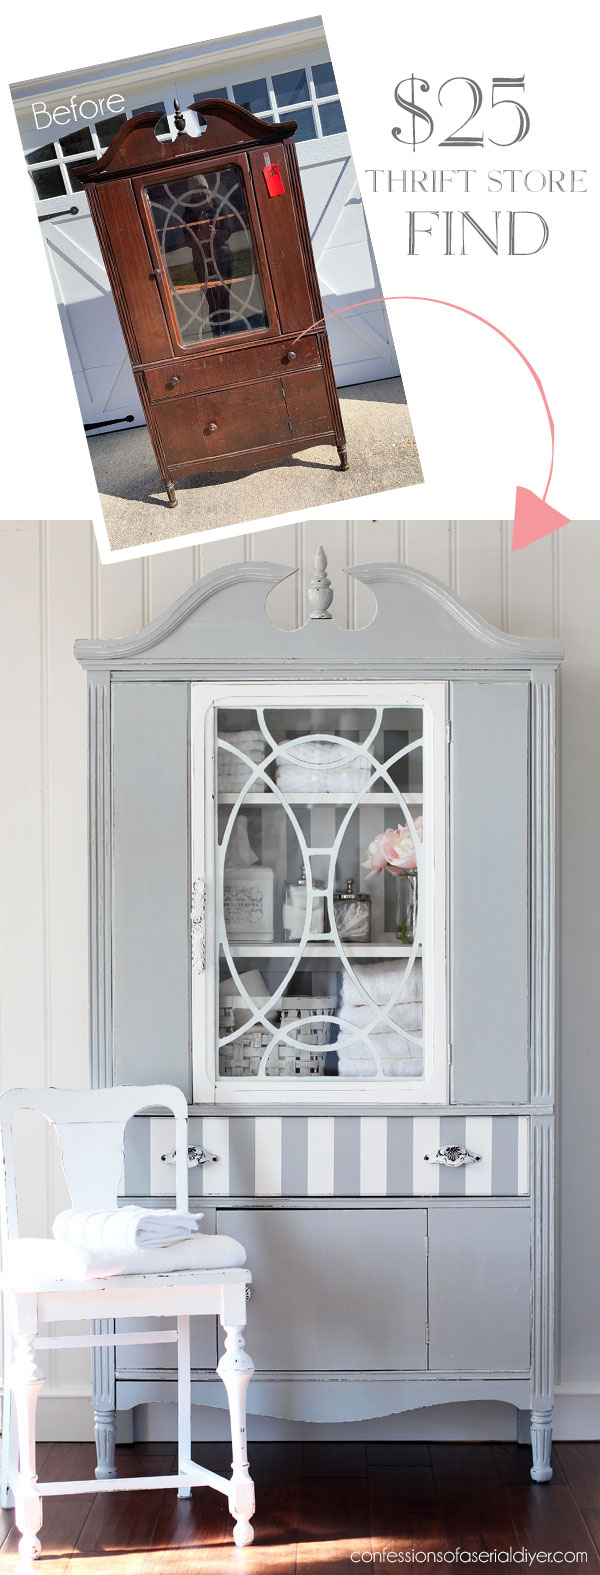
Today I’m tackling this china cabinet that I picked up for a steal at the thrift store for only $25:
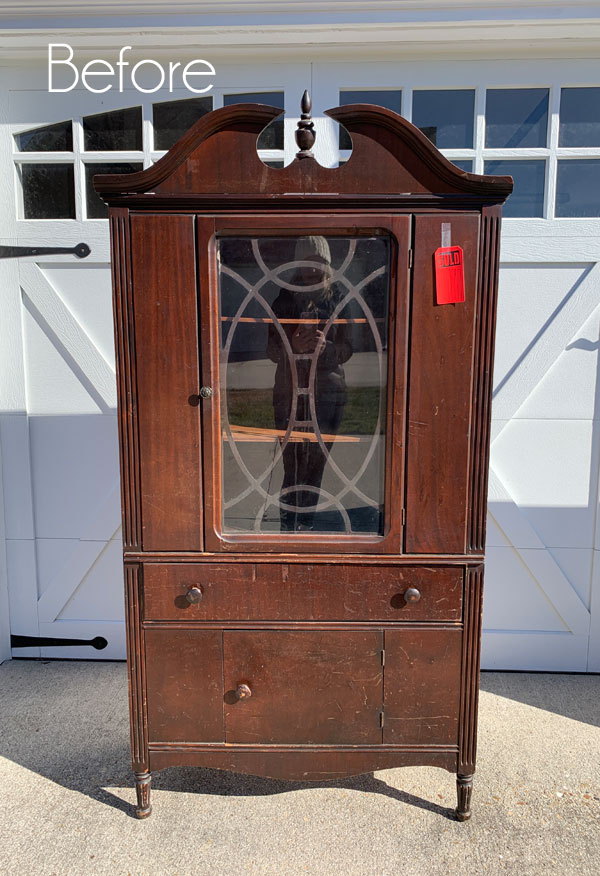
I couldn’t grab the tag fast enough! It had definitely seen better days, but luckily, only the drawer had missing veneer. If just a small amount is missing, but the rest is intact, I will usually just fill those areas with wood filler. However in this case, much of the veneer was starting to come loose. I’ve included a few affiliate links so you can find the products I love.
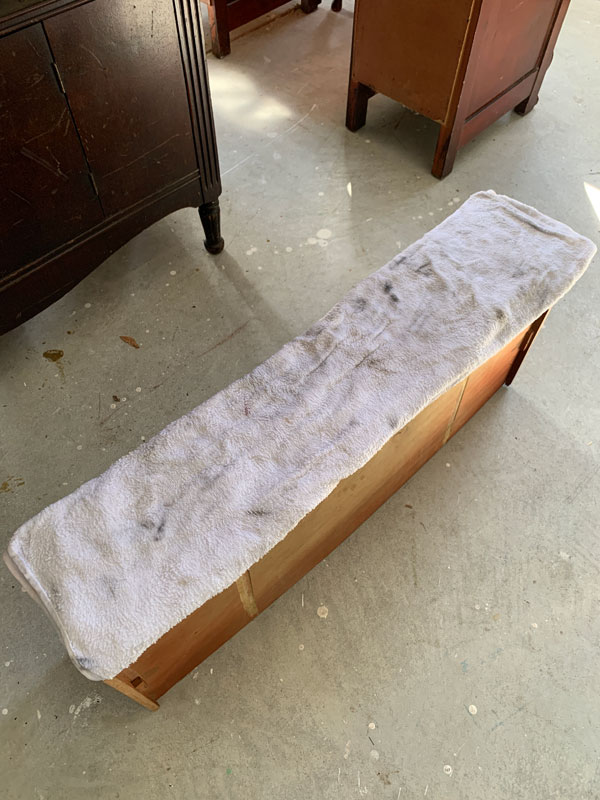
Thanks to my friend, Larissa from Prodigal Pieces, removing the rest of the veneer was easy! I have painstakingly chipped away at veneer before, but she swears by the towel soak method, so I decided to give it a try.
You basically soak a towel in water and let it sit on your surface overnight:
This worked so well. I was able to easily remove the rest of the veneer using a metal putty knife:
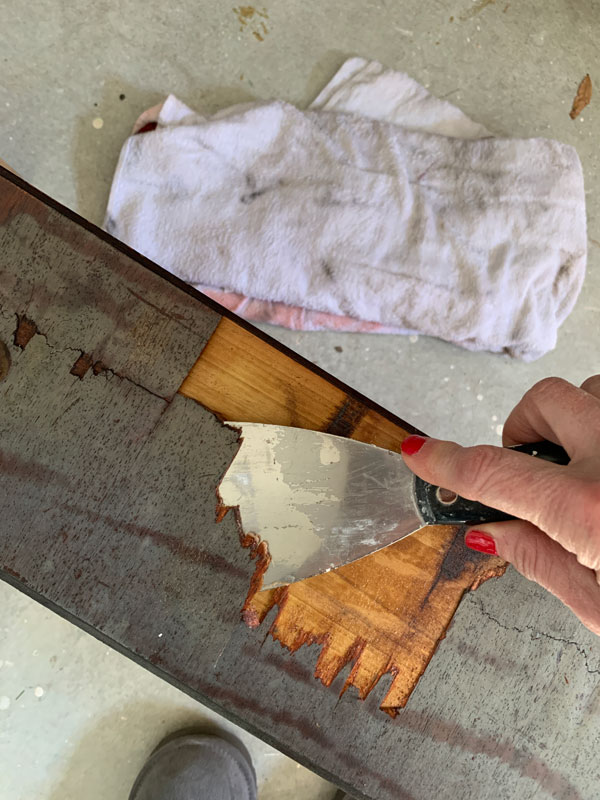
Thanks, Larissa!!
Once I had it all removed, I used my rotary sander to smooth out the surface…
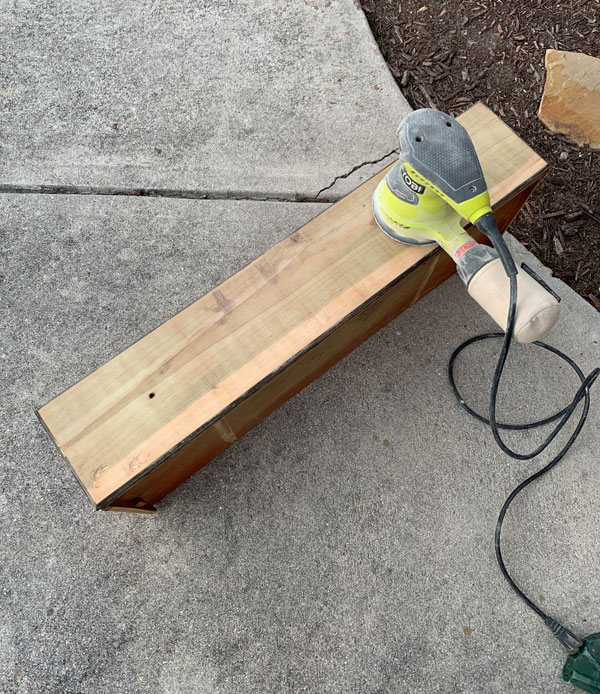
Then it was good to go!
After giving the cabinet a really good cleaning with Walmart brand cleaning wipes, I decided to give it and the drawer a coat of Dixie Belle’s BOSS in white since it has some age to it and likely would be a bleeder. I let it sit overnight, but when I started to paint the inside the next day, I was still getting a little bleeding here and there, so I decided to give it another coat both inside and out and let it sit again overnight.
That did the trick!
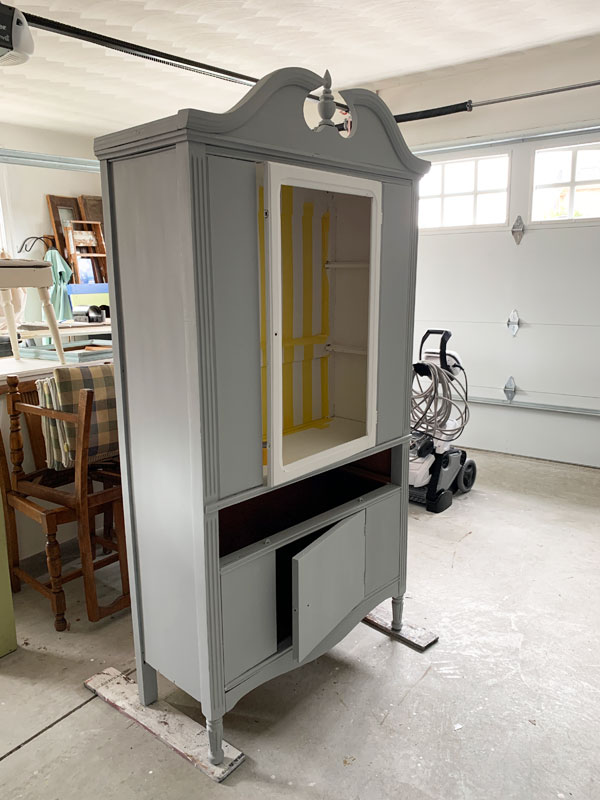
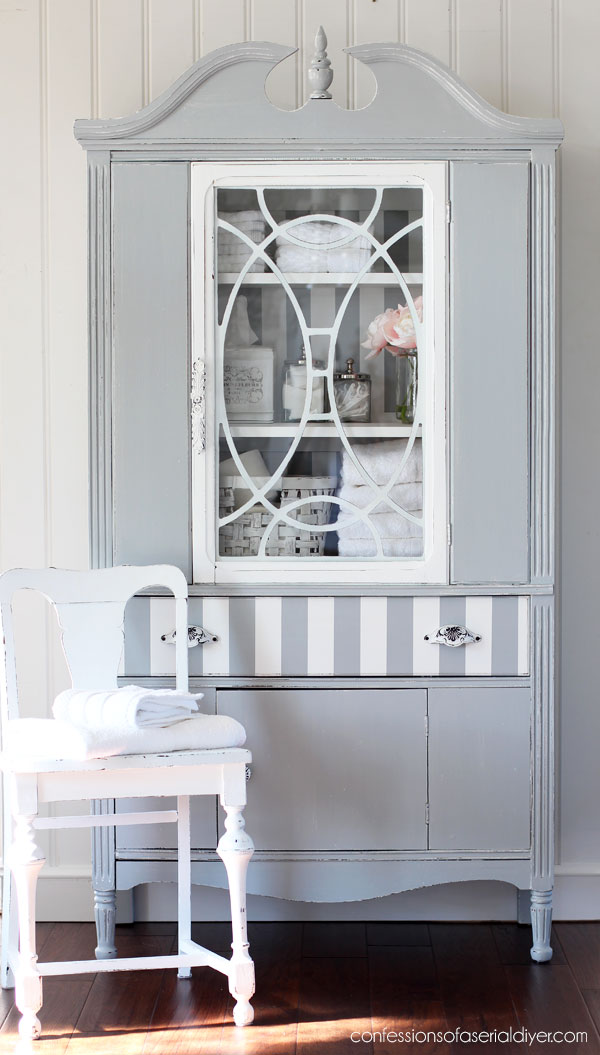
Then I gave the inside, the drawer, and the door one coat of Dixie Belle’s Cotton and painted the outside in one coat of a 50/50 mix of Cotton and Manatee Gray…
You can find my tutorial for How to Paint Furniture using Chalk Paint HERE!
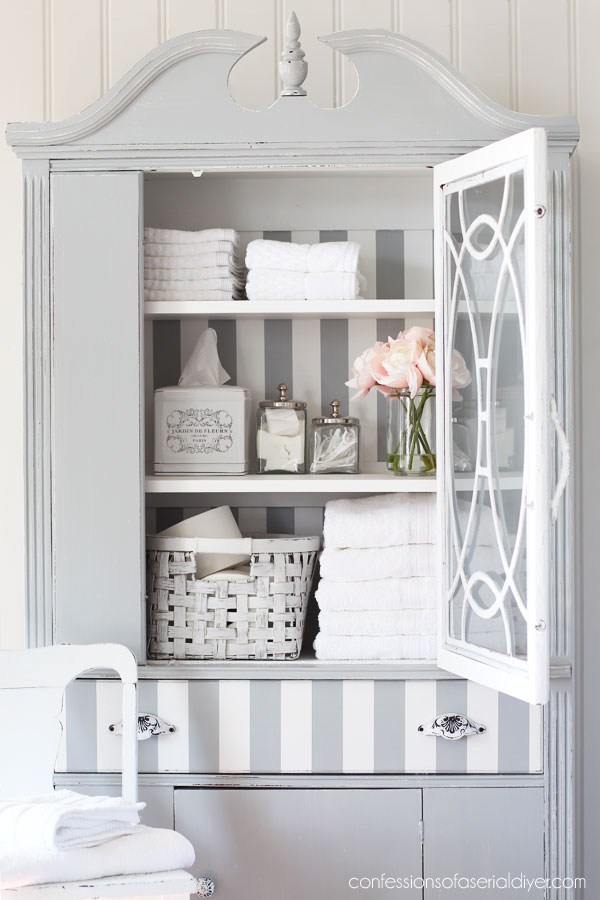
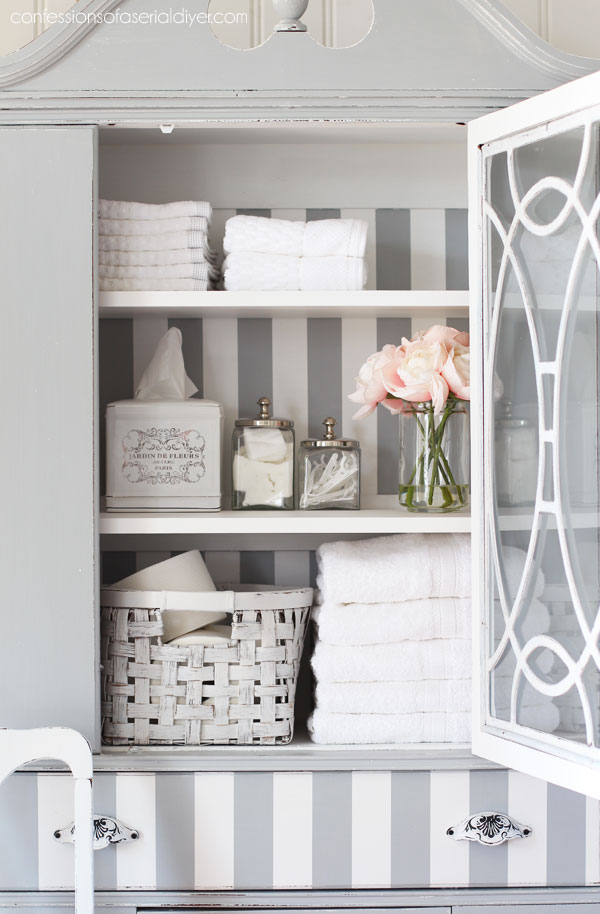
I like to paint the insides of these pieces in white or something else light, especially if there is no light. Otherwise they are just too dark inside. You’ll also notice I decided to add a little character to the inside with my favorite…stripes!! I taped them off with Frogtape for Delicate Surfaces and painted just one coat of the white and gray mix:
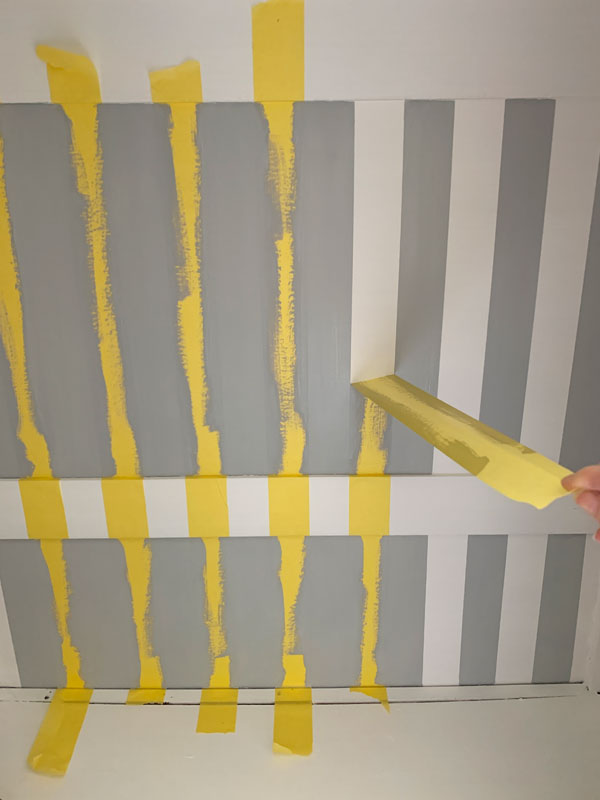
Then I removed the tape right away while the paint was still wet. I hit the drawers while I was at it.
See how I space out my stripes the easy way HERE!
I sanded all over using 220 grit sandpaper and then sealed with Dixie Belle’s Clear Coat in Satin using their blue applicator sponge.
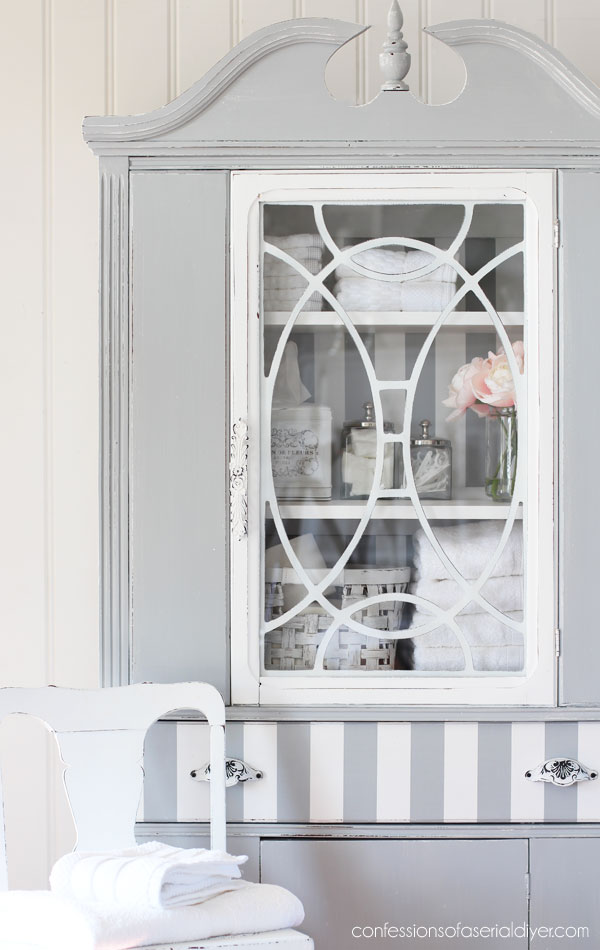
I love how this sweet piece turned out!

I thought it would be fun to stage it for a bathroom. I wish I had enough space in our bathroom for it!
It could hold all kinds of toiletries!
I removed the fretwork and the glass from the door frame so I could paint everything. The fretwork got primed with Rustoleum spray primer, followed by a coat of Cotton on both sides. I sanded it with 220 grit sandpaper but didn’t bother to seal it.
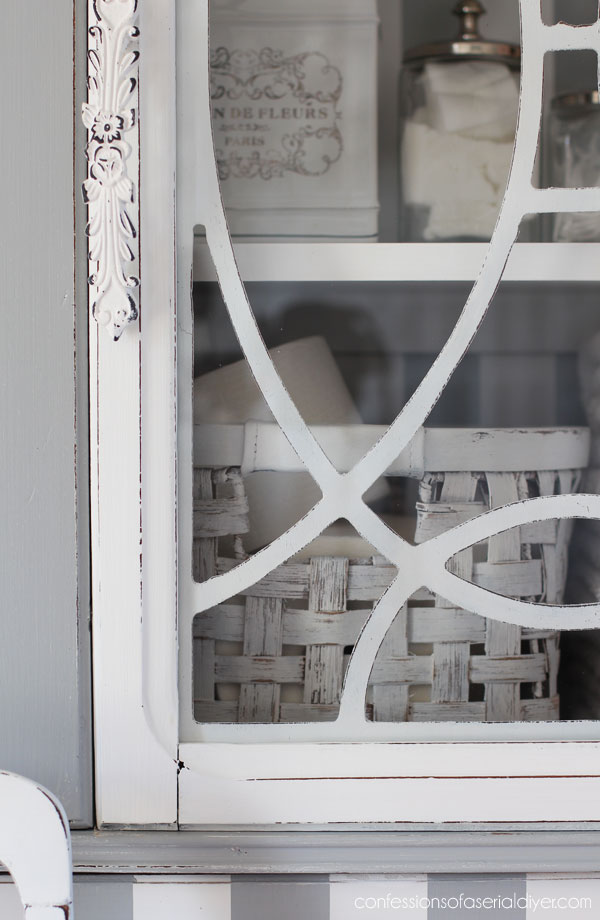
I liked the cabinet without it, but it does add a pretty detail to the door. The fretwork and glass were being held in place with narrow pieces of trim and small nails. I painted the trim and reused the nails to put it all back together just how it was.
The original shelves were thinner and were sagging quite a bit in the center, so I had the guy at Home Depot cut two new shelves to fit for me. Then I primed with the BOSS and painted with a coat of Cotton. They were sealed with the Clear Coat in Satin as well.
These look much better and are much more sturdy, and I love the striped detail at the back peeking out from behind them when the door is open…
And do you spy the other small I told you I would share today?
It’s this basket I picked up at the antique mall where I have my booth, for $6:
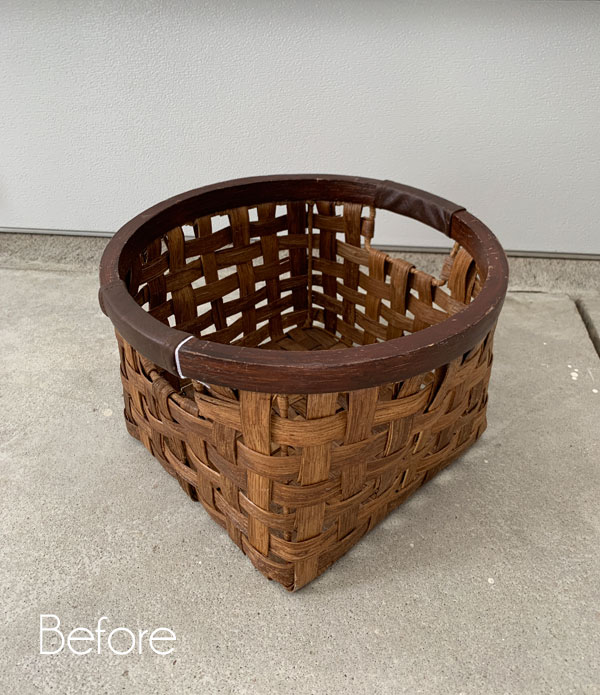
It was another quick redo done in two coats of Cotton:
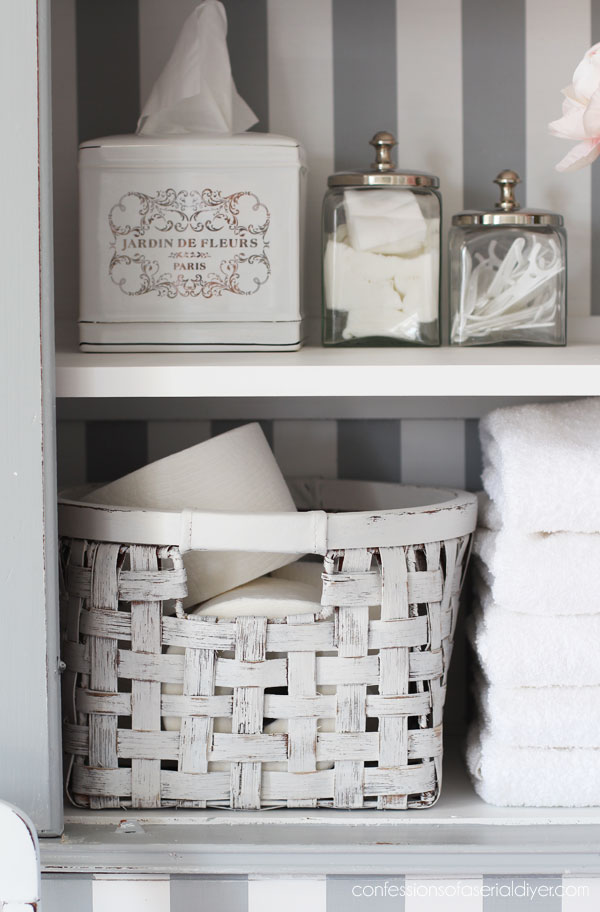
I think it was raining when I was working on this, or I probably would have done its first coat with Rustoleum spray primer. I sanded with 150 grit sandpaper on this one to distress it a bit more than usual and decided not to seal it. I had planned on painting this one for my booth, but I think I’ll be keeping this one!
If you missed the rest of the smalls I shared on Tuesday, you can see them HERE.
Ya’ll know I love a painted basket!!
The drawer got a pretty new liner in fabric I picked up at JoAnns:
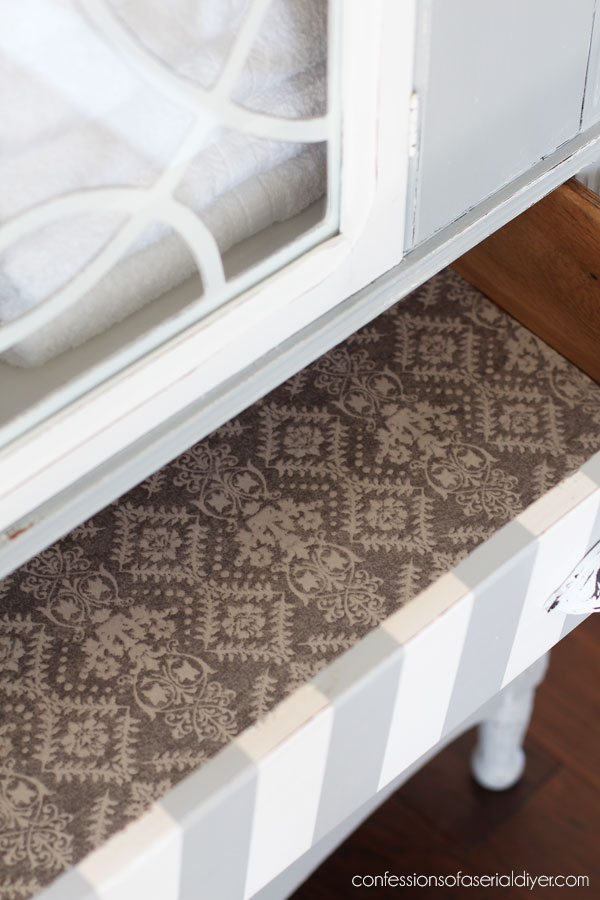
You can see how I line drawers with fabric in this video:
If you have trouble viewing, find it on YouTube HERE.
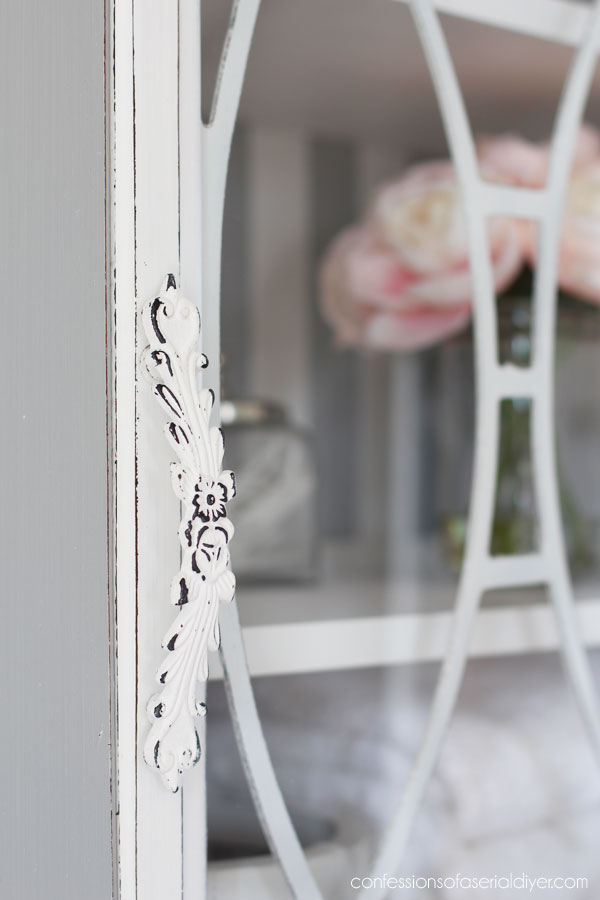
I changed out the hardware as well…
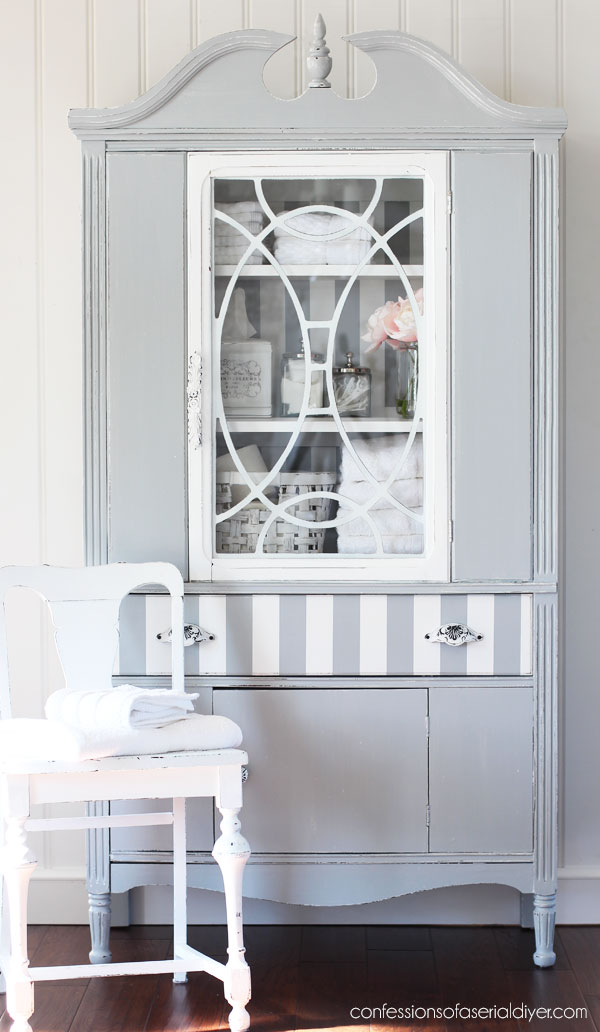
This pretty handle is one of my favorites from Hobby Lobby:
The knob on the bottom door, which is hard to see, also came from Hobby Lobby, and the drawer pulls came from a set of about 12 that I recently found at HomeGoods:
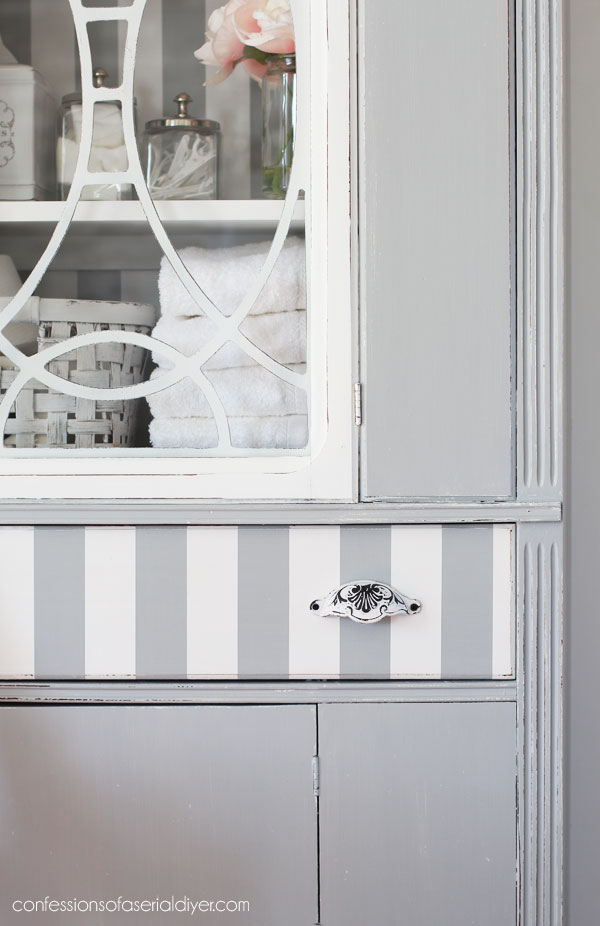
They were perfect for the drawer, and I just covered right over the existing holes instead of filling them.
Priming with the white BOSS and only painting one coat of the gray mix allowed for pretty distressing:

My booth is a bit understocked at the moment, so this should help. It would be so pretty paired with a white dining set!
Don’t forget my girls are sharing furniture makeovers of their own today! Click the links below the image to see what they became:

(Marie from The Interior Frugalista will be back next month! )
And that’s another project completed!!

If there’s anything you missed, you can catch up below:
$3 Lamp Makeover (& How to Rewire a Lamp)
Windsor Chair Makeover (& Drop Leaf Table Take Two)
How to Wet Distress (& a $5 Lamp Makeover)
$5 Thrift Store Chest Makeover
I still have nine pieces left! Think I’ll finish before Spring?? I don’t think so ha ha!
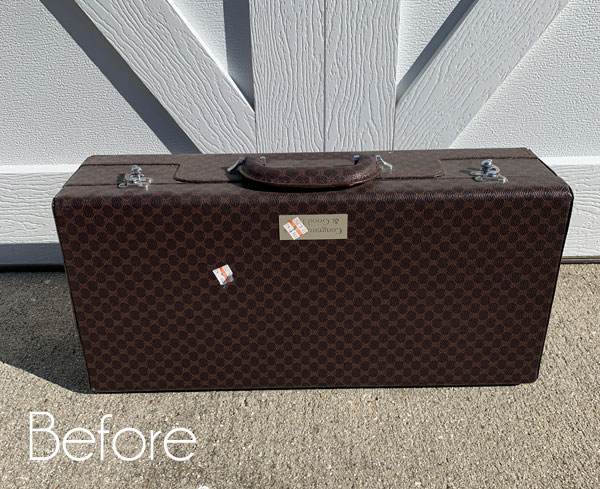
I’ll meet ya’ll back here on Tuesday…I’ll be sharing what I did with this case:
See ya then! 😀
UPDATE: See how this case didn’t go quite as planned, and what I did to turn it around HERE now!
XOXO,
![]()
Don’t Miss a Thing!
If you like what you see, there are several ways to follow along!
Email * Instagram * Facebook * Pinterest * Twitter


ROSE LEFEBVRE says
I like the stripes inside the cabinet but not on the drawer. Do like all the rest though. That is just my taste. You do great work!
Christy says
Thank you, Rose! Funny you say that because I originally painted the solid drawer white like the door just for some contrast first, but it looked out of place to me, so I followed up with the stripes lol. XOXO
Judy says
Christy , it’s
Beautiful!
once again showing us how to do a good “make- up “over ,
only on furniture .
Judy
Monroe
Wi
incredibl
Christy says
Thank you, Judy!! XOXO
Petra says
I really like that you did white and grey on the outside as well as the inside, and the new handles really make it don’t they? Well done Christy on another very nice majestic piece 🙂 xo
Christy says
Thanks so much, Petra! I haven’t done a gray piece in a while, so it was nice for a change! I love picking out the handles…like icing on a cake! XOXO
Mary Kaiser says
Absolutely stunning. Best $25.00 you ever spent!!! I LOVE how that turned out, it is amazing! You are so talented!!!
Christy says
Thank you so much, my sweet friend! Yes…this is quite possibly the best $25 dollars I have ever spent ha ha! XOXO
Sandra Long says
What a tranformation!!!! I love it. I think this made the list of my all time favorites. There’s just something so refreshing about grey and white. The stripes were the perfect touch!
Christy says
Aww yay!! Thanks so much, Sandra! I do love grey and white together also!! XOXO
Nancy says
I love what you did with that pretty china cabinet. That was such a great price!
That basket is great. I don’t blame you for keeping it.
Christy says
Thank you, Nancy! It was a steal for sure! And yep, I’m such a sucker for a painted basket, I just had to keep this one! XOXO
Wendy says
Great job as always Christy. This would be a sweet piece for an antique bathroom redo, in a period home.
Christy says
Aww thank you so much, Wendy! Oh yes…I can see this in an older bathroom with a beautiful claw-foot tub! XOXO
Ann says
Where is your booth? I want to visit. This is one of my favs!
Christy says
Thank you, Ann! My booth is in the Virginia Beach Antique Mall here in Virginia Beach! XOXO
Christina in SW FL says
Christy, this is redonkulously beautiful! Seriously, you knocked it out of the park!!
Christy says
Ha ha…I know you like it when you say “redonkulously” lol! Thank you, my friend! XOXO
Cheryl Atkinson says
Christy, i absolutely LOVE it!! You put your signature stripes on it and i just love it. I have not seen one with the bottom part to it. Such a pretty color and that door hardware is perfect!
Christy says
Thank you so much, Cheryl! I originally planned to use fabric on the back and keep the drawer white, but well…that’s just how plans change lol! XOXO
julie says
Fabulous transformation!! Love it all. I’ll be back to see the case!
Christy says
Thank you, Julie!! I’ll see you Tuesday! XOXO
Kathy Owen says
Your China Cabinet makeovers are always my favorites. You are a pro at stripes. I can’t believe that cabinet was only $25, a steal. Beautiful job Christy.
Christy says
Aww thank you, my dear friend! Yes this was such a steal, I could hardly believe it! I was afraid to walk away from it lol! XOXO
Janice Holt says
Great job on the cabinet. Love the stripes (and basket also). I do believe you will get the winter haul done by spring; I have confidence in you.
Christy says
Thank you, Janice! I’m surely going to try ha ha! XOXO
Sue Duffy says
LOVE the stripes!
Christy says
Thank you, Sue!! XOXO
Ange Mills says
The cabinet turned out beautifully. And great job lining up the stripes on the front of drawer and inside cabinet the way you did. ❤️
Christy says
Thank you so much, Ange!! I centered the first stripe on each, so that helped! XOXO
Kelly Howard says
Christy, I have followed you for a long time now and I have yet to find one single piece you do that I don’t love! This piece is high on the list of ‘loves’! I would adore a home filled with your lovely re-do’s and have learned to SEE things with a different pair of eyes when thrifting. I appreciate your talent and your vision so very much!
Christy says
Well now you just made my day, Miss Kelly!! Thank you so much!! XOXO
Kellie says
I have been waiting for this china cabinet. Love Love Love it! I have been searching for my own to refinish but can’t find a cheap enough one here where I live. Can’t wait to see what you do with the case on Tuesday!
Christy says
Thank you so much, Kellie!! I am super cheap, so I usually pass on these pretty cabinets because they are always priced out of my range. You know I ran to the check out with the ticket from this thing ha ha! See ya Tuesday! XOXO
LeAnn says
That is so pretty, I bet it will sell fast! With all the new moms going for gray for nurseries… I know, we just had our first grandbaby and both our daughter and my great-niece have gray all over their baby registries!
Christy says
Thank you, LeAnn!! I hope so! Wouldn’t this piece be so chic in a nursery for holding all those little things?? XOXO
Denise - Salvaged Inspirations says
What a sweet makeover! LOVE the stripes! XOXO
Christy says
Thank you, my talented friend! XOXO
Addie says
Another save from the landfill !!!! It makes you wonder how DID go to the landfill when they could have been saved…..and Oh so cute and useful!!!
I have a question for you…. I just painted a small desk with Dixie Bell, I can “faintly” see yellowing bleed through…is it too late to use Boss? Should I just try another coat of Cotton? I never thought it would come through because the wood is so light…is it bleed? or just needs another coat?
PLEASE any help!!!! I am so discouraged and sad 🙁
Christy says
Girl, if I could stand at the landfill entrance and check every vehicle for possible saves, I so totally would! It is not too late at all to use BOSS. Sounds like you have some bleed through. I fear that if you paint another coat of Cotton, you will likely still get some yellowing. Let the BOSS dry at least overnight. It works even better if you give it plenty of dry time, then follow up with Cotton on one side and see how it does. Rarely do you need a second coat of BOSS, but just in case. It will be fine!! XOXO
Addie says
Thank you Christie!!!! I am so bummed!!! Just to clarify I had only done 1 coat of the cotton…..then said, “YIKES!!!!”
Have a great weekend!!! Yellow bleed…who knew??? I always thought it was the darker mahogany colors.
Christy says
Sure! It is very frustrating when that happens, but luckily, there is a pretty easy fix! Enjoy your weekend too!! XOXO
Kathy L Bowles says
I really love this one! I’ve been reading your posts for a long while now. I’d love to paint my old china cabinet but I still have fear that something will go wrong! I keep saving your posts and hope to take all your tips and give it a go one day!
Christy says
Thank you, Kathy! I run into problems all the time, but I haven’t met one I couldn’t fix! Find a small piece to practice on and go for it! XOXO
Robyn Wright says
I LOVE it! So elegant!
Christy says
Thank you, Robyn!! XOXO
Cecilia from Georgia says
Stripes get me every time! I like that you put stripes only on the drawer. It’s a busy piece and didn’t need a bunch more going on. You did a great job! I’m working on a china cabinet and it is like a lifelong project! Also, do you have any ideas about replacing the fret work on a cabinet? Thanks for such a lovely inspiration and the process you went through to get it done! XOXO
Cecilia from Georgia says
OMG!! I just read another comment about the stripes on the inside!! I didn’t even notice them so they really work good with the drawer!!
Christy says
Oh ha ha! I started with just stripes on the back, and kept the drawer white, but it looked too plain to me, so I added the stripes to the drawer too! 🙂
Christy says
Thank you, Cecilia! I took this one in baby steps so it wasn’t too bad to do. Is your fretwork damaged? Unfortunately, I don’t have any ideas on how you could replace it, but if the fretwork on this one were damaged, I would just leave it off as I liked the clean look with out it as well. XOXO
Cecilia from Georgia says
Hellooo again! I’m still working on the cabinet from HELL! I have bookmarked this post and read it over and over. I don’t know why I didn’t notice that you left the door attached and removed mine. Well, I now have the pleasure of finding the hinges and painting them. I thought maybe the paint wouldn’t stick and maybe spray them gold. It’s terrible to obsess over such minor details but details are important…right? Also, when I put the shelves back in they wouldn’t fit!! (hair being pulled out). So what is up with that? Any way…just wanted you to know your blog has so much good information and especially this one!!
Christy says
Oh no! It is so frustrating when a piece takes way longer than expected. Yep, I just kept the door on to make it easier to paint and I paint right over the hinges, but some prefer not to paint over the hinges and that is ok too! Did you try rearranging the shelves? Sometimes they only fit back where they started. I hope you are seeing a light at the end of the tunnel…you will be so pleased when it’s done. Hang in there! XOXO
Kim says
$25? What in the world!? It’s gorgeous. If I had a big bathroom It would definitely go in there to show off pretty toiletries and towels, love it!
Christy says
I know, right?? I couldn’t grab the tag fast enough! Thank you, Kim!! It would be awesome to have a bathroom big enough to house it! XOXO
Debra says
Love this soo much. I have an older china cabinet at home and have been looking for an inspiration! Now I have one.
Gorgeous!
Christy says
Oh good…glad I could inspire a bit! Thank you, Debra!! XOXO
Lizzy says
I absolutely love it! The colors are perfect. Thanks for the veneer tip. I will definitely be using it.
Christy says
Thank you, Lizzy! The veneer came off so easily! XOXO
kandice kullmann says
this looks amazing and I can’t believe you got it for so cheap!! What a great save!
Christy says
Thank you, my friend! Yes..super cheap and right in my budget ha ha! XOXO
Candy says
Beautiful job! You put so much thought and love into your projects. Wish I had room for this as it would make a beautiful linen closet as you have staged.
Blessings, Candy
Christy says
Aww thank you so much, Candy! This job is truly a labor of love for me!! I wish I had room for this as is too!! XOXO
Leslie Delanty says
Christy, I love ALL your work, big and small, but especially the SMALLS! I’ve recently moved into a new studio space that has a wood shop. Soooo, bring on the smalls, more smalls please!
Christy says
Thank you, Leslie! I am so glad to hear you love the smalls! They are what keep my booth going sometimes, but they are not always very exciting to share. I will share more in the future for sure! XOXO
Becky says
That is a very pretty piece and only $25!
Christy says
Thank you, Becky! I could hardly believe the price! XOXO
Jen @ Girl in the Garage says
What an amazing deal! A few things I love:
1. The stripes
2. The fabric in the drawer
3. I cry a little inside whenever I see someone remove the fretwork from this type of piece, so I’m sooo happy to see that you kept it here. (thank you, thank you)
Beautiful work Christy! xo
Christy says
Aww thanks, Jen!! I actually did love it without the fretwork, but I too cry a little inside when someone removes it lol! It adds such a unique detail that you just don’t see anymore! Have a an amazing weekend!! XOXO
Gret H says
This is so lovely. The stripes “peeking through” from the back of the cabinet add such a whimsical touch. Where did you find that glorious fabric that you used to line your drawer. It’s so elegant!
Christy says
Thank you so much, Gret! I found that fabric at JoAnns…it has a velvety soft texture to it! XOXO
Gret says
Thanks, Christy. It’s perfect for your gorgeous piece!
Christy says
You’re welcome and thank you! XO
Laura says
Your hard work really paid off on this one. Such a magical transformation. I love it!
Christy says
Thank you so much, Laura! XOXO
Karen B. says
Oh my goodness! The timing for this post couldn’t have been more perfect! I used thre damp towel to loosen the veneer on a piece I’m working on and PRESTO! I was so dreading that part! Thank you so much for sharing! It made a world of difference!
Christy says
Oh Yay!! Perfect timing!! It really is so easy to remove with this method, right? Thanks to my friend, Larissa from Prodigal Pieces who showed me! XOXO
Carmen says
As always…..lovely!
Happy Painting 😉
Christy says
Thanks so much, Carmen!! XOXO
Rosie says
Beautifully done!!
I love how you staged it for a bathroom, wish I had room for it in my bathroom ☺️
Christy says
Thank you, Rosie! I wish I had room for it in my bathroom as well!! XOXO
Marie says
I would be doing a happy dance if I found a china cabinet at that sweet price. Love how you echoed your signature stripes to the outside of the cabinet too. Such a pretty makeover! I bet it doesn’t last long in your booth if it hasn’t sold already.
Christy says
I’m sure there was some happy dancing involved when I found this piece ha ha! Thank you, Marie!! Hope you enjoyed your vacay!! XOXO
Karen says
Hi Christy, I just found you! And glad I did. So this project had a veneer. U took it off the drawer. Did u replace it with something or just painted? Was the rest of the piece veneer as well? The paint goes over veneer ok? I hv a round table that the veneer is coming off. I’ve had it in my basement for a year scared to move forward, but now I may have hope!
Christy says
I’m so glad you found me too, Karen! After removing the veneer from the door, I just gave it a sanding to smooth it out and then painted; no need to replace the veneer. I’m assuming the rest was covered in veneer as well, but it was all intact. And yes, you can absolutely paint over veneer! Good luck with your table! XOXO