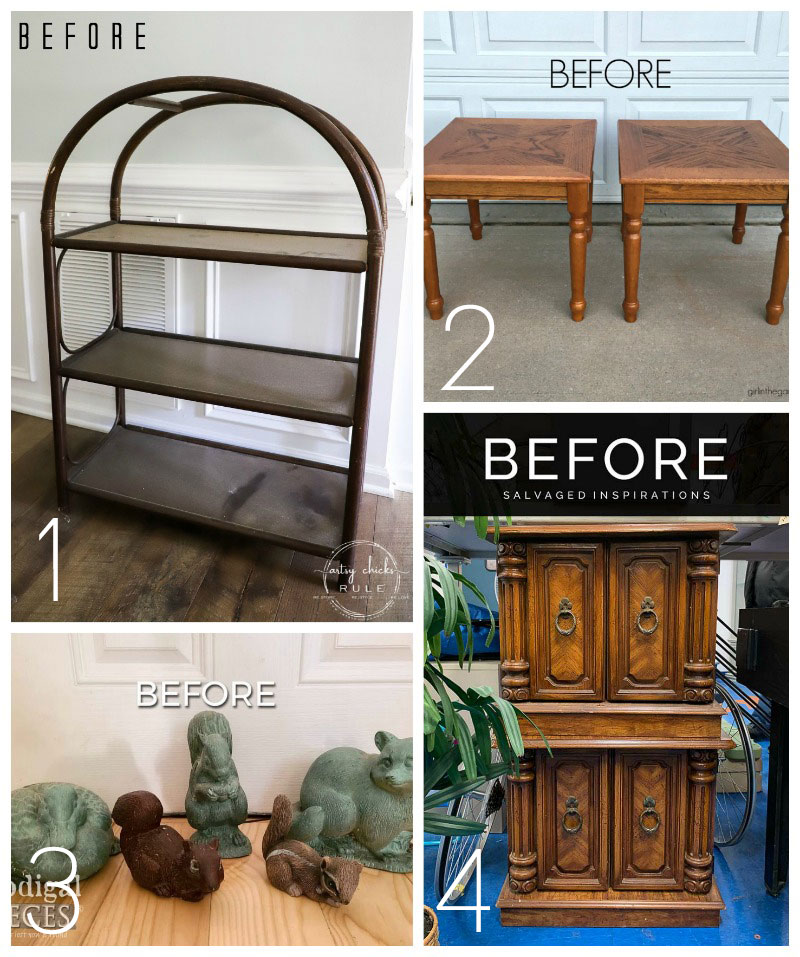
Beautiful friends, welcome to Trash to Treasure Tuesday!! I share thrifty makeovers all the time, but today I am being joined by some of my favorite treasure-maker friends! Be on the lookout for links to their posts at the bottom! I brought out the big guns last month with this antique dresser makeover.
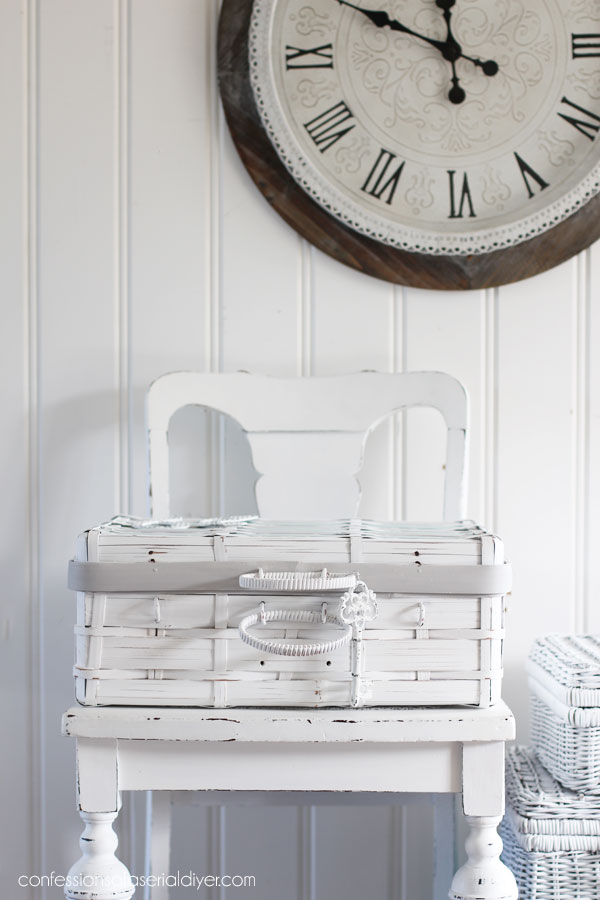
This month, I have something a bit smaller to share…this ugly duckling basket I picked up on clearance at the thrift store for $2.98:
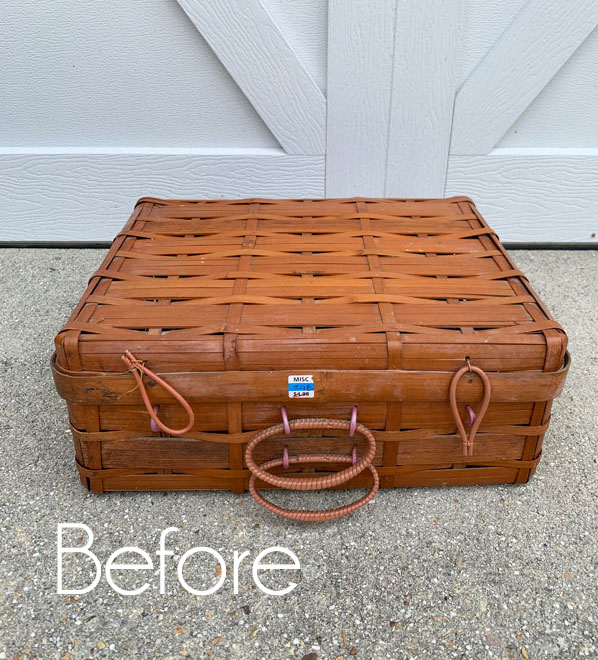
I purchased this a while ago and it has just been sitting in my storage room ever since. I finally decided to add it to my latest thrift store haul so I would finally do something with it! I’ve included a few affiliate links so you can find the products I love.
I started this one with Rustoleum Spray Primer:
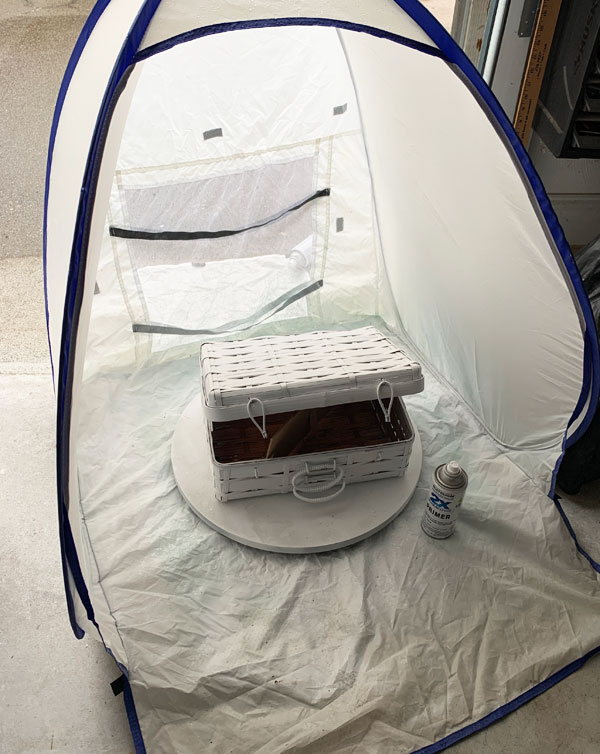
That’s my smallest spray shelter, perfect for smaller projects.
I gave it two coats for solid coverage.
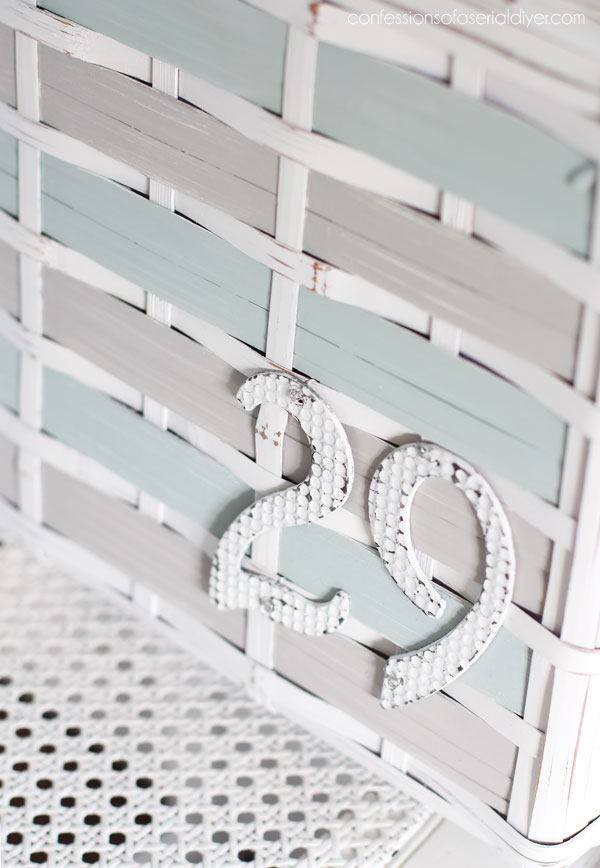
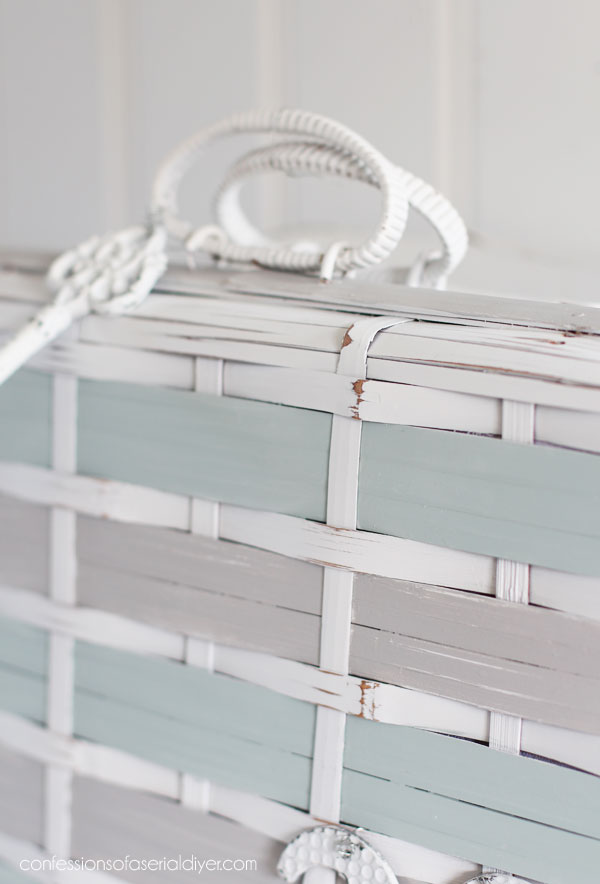
Then I went back and filled in some of the weave with Dixie Belle paint and a small brush:
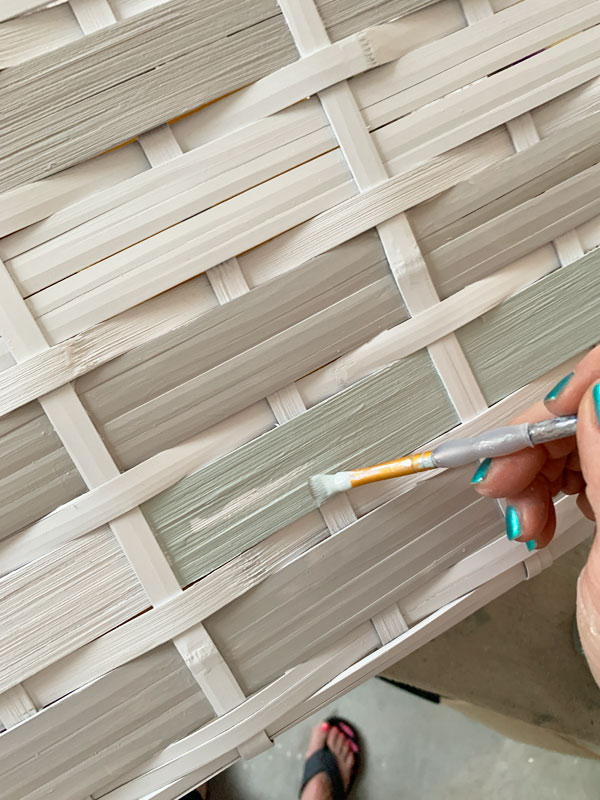
The gray is 50/50 Hurricane Gray and Cotton, and the Blue is 50/50 Vintage Duck Egg Blue and Cotton. I love these subdued hues.
I applied two coats and then sanded all over with 220 grit sandpaper wrapped around an old sanding sponge.
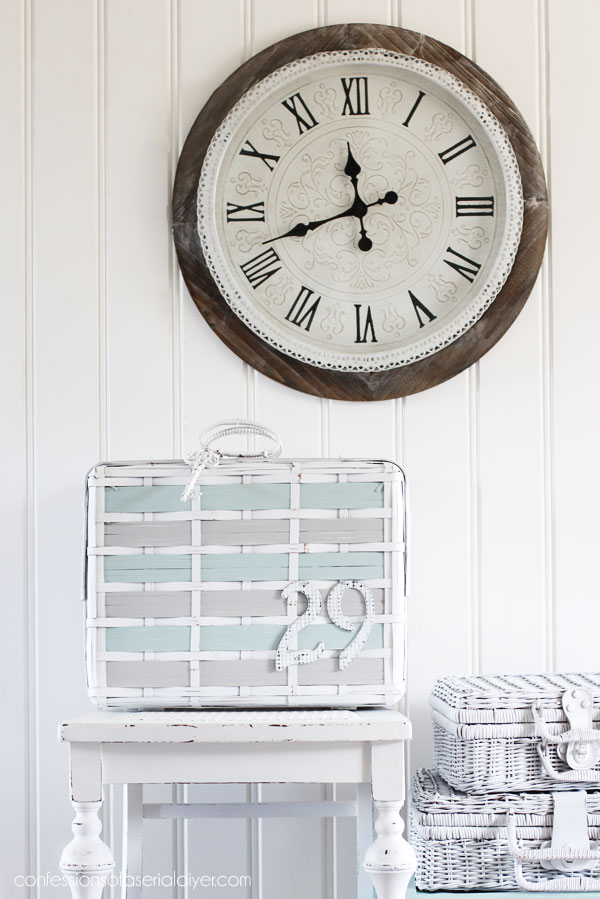
I chose not to seal with anything. I did add a couple of things to add a little personality though:
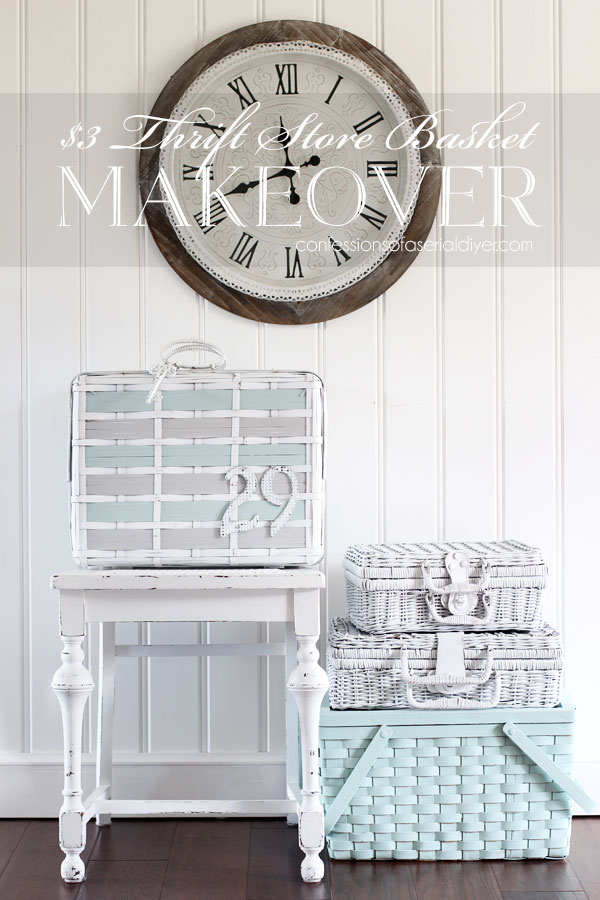
Those numbers came from the old number sign for our house that I replaced last year:
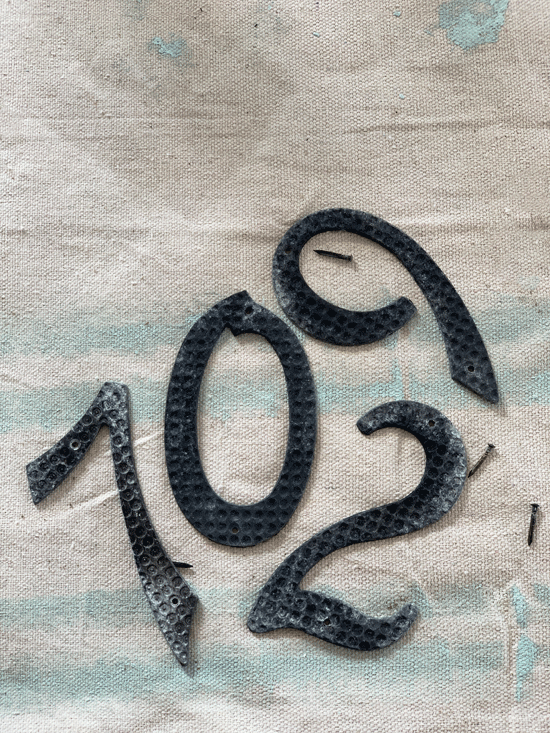
You can see what I replaced them with HERE!
I painted them with two coats of Cotton and sanded them to shabby them up. They are attached with fine wire.
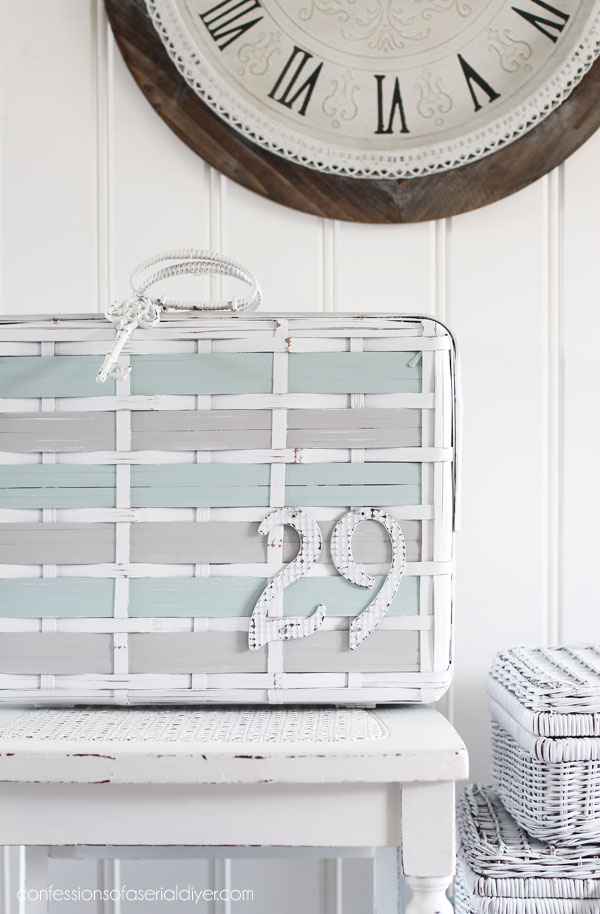
I also added this fun key:

I found it on the clearance after last Halloween at Michaels. It came from a ring of keys that were green and were supposed to be spooky. I cut the ring and saved them for future projects like this one. This was also painted in Cotton and sanded.
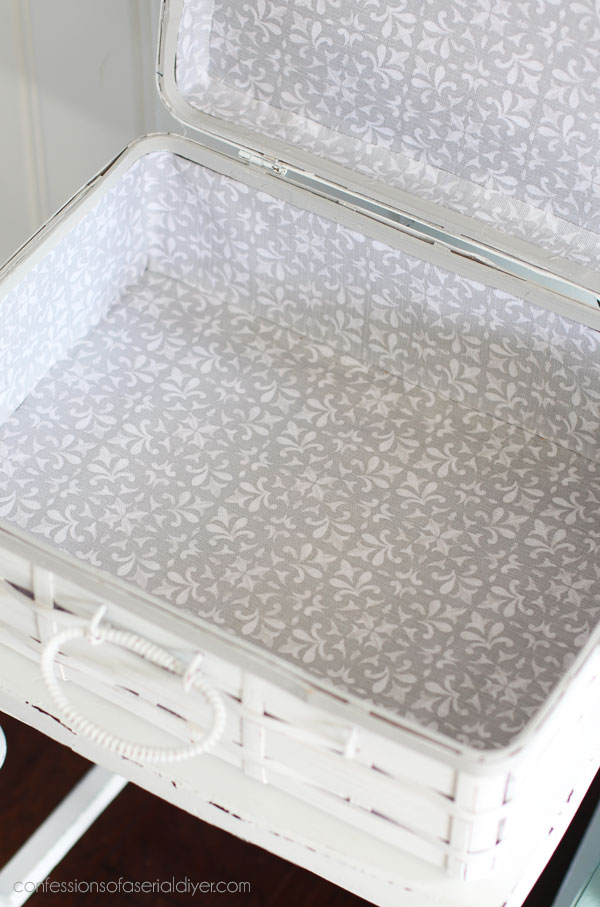
For the inside, I decided to add a liner with this pretty fabric I actually found on a small bolt at HomeGoods:
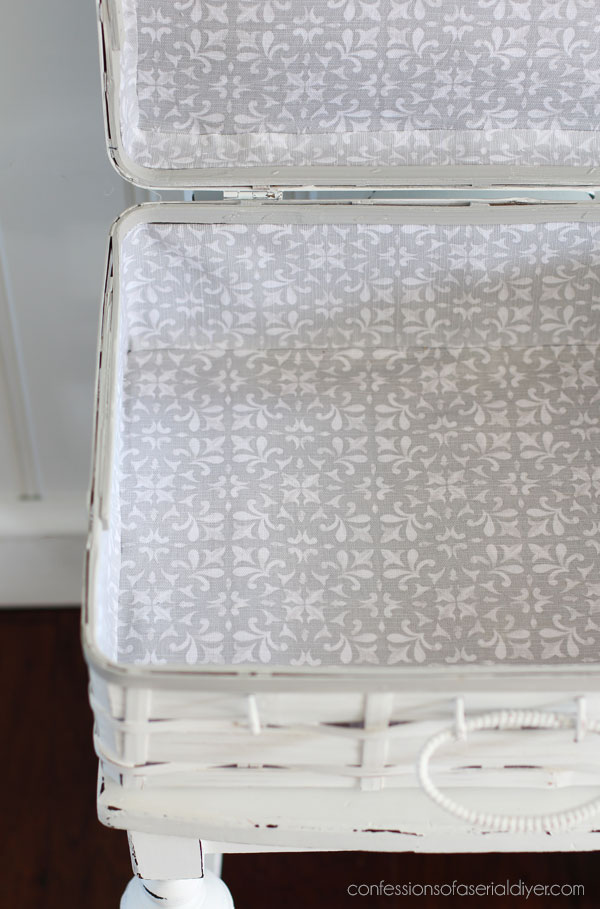
I was just going to link to another post I wrote on how I line baskets, but it wasn’t until I was writing this that I realized I did it completely different this time lol. I did happen to take a couple of photos though!
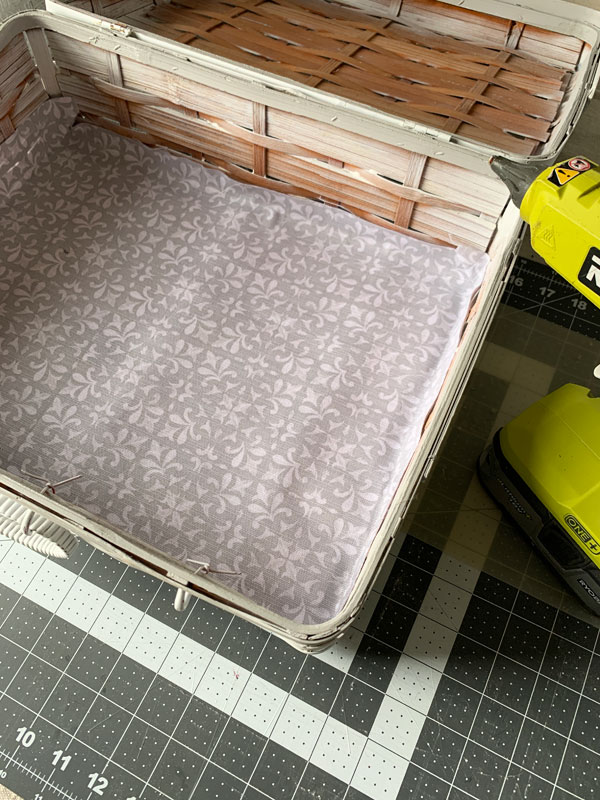
For this one, I cut a piece of fabric that was just about a bit bigger than the bottom and hot glued it in place along the inside edges:
Then I measured the height of the sides and cut a strip about an inch bigger that was long enough to wrap around the entire inside perimeter. One of the edges was a finished edge and I ironed the opposite edge to get a nice neat edge and then glued it in place also all the way around:
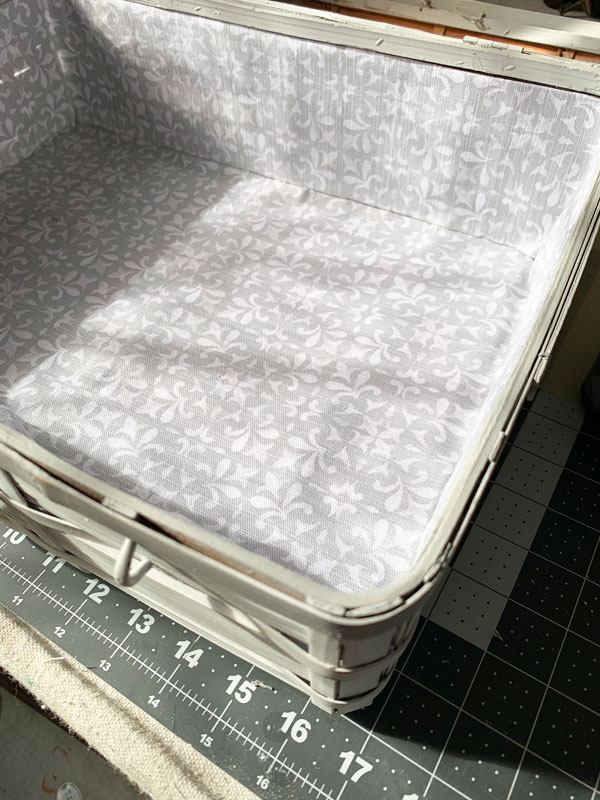
I did the same for the top, but if I had to do it over, the top was so shallow that I would have just sprayed that also.
I decided to just use the primer because it covered great, and I figured there was no need to follow it up with paint. It takes a bit more effort to shabby it up than chalk paint, but it can still be done.
The spray is very flat compared to the texture you get with chalk paint, but it worked out just fine for this basket.
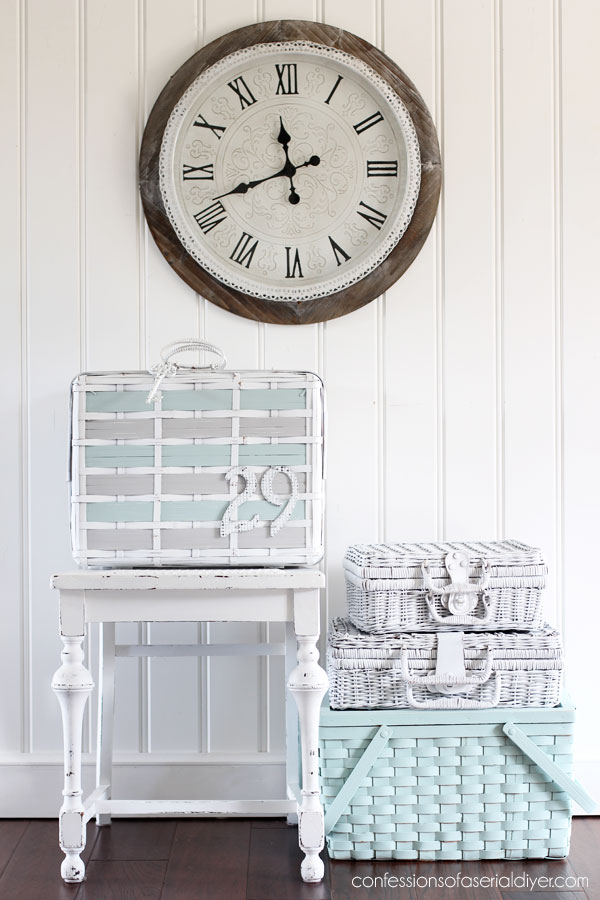
And that is the third of my trio of baskets in this haul complete!
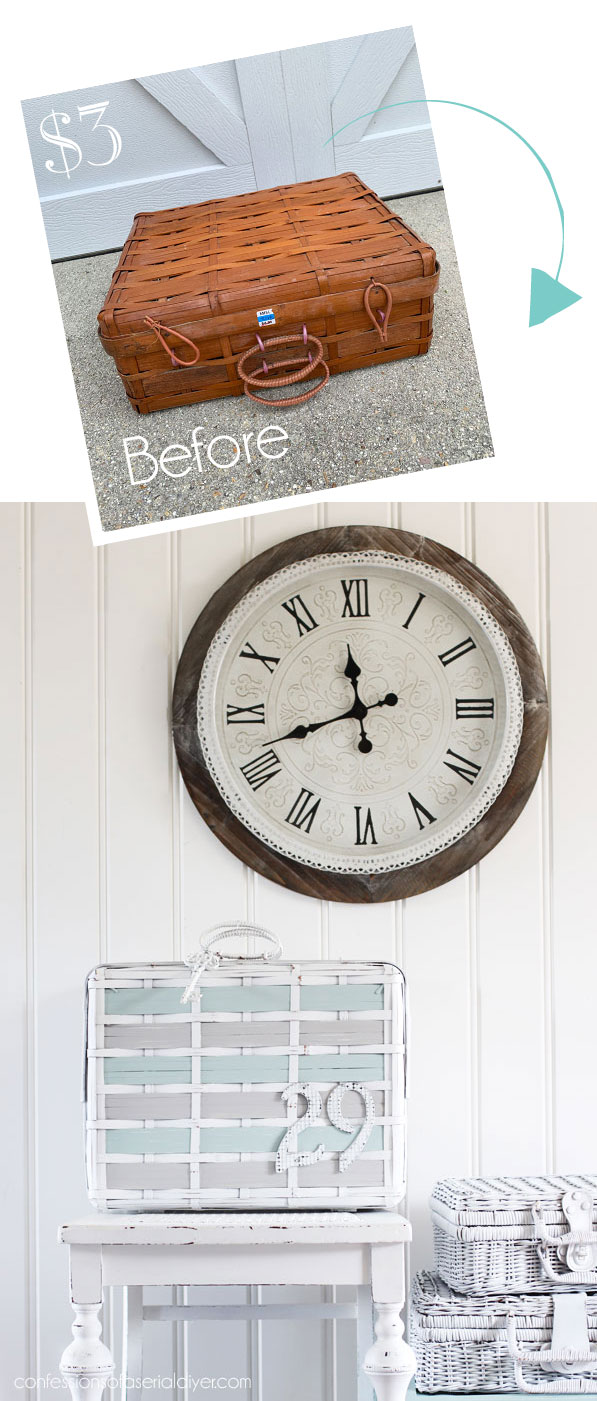
Not bad for $3!
Don’t go anywhere just yet. My friends have some trashy makeovers to share today as well!
Ahh…it’s always so nice to cross another project off the list, especially one that’s been hanging around awhile like this one!
You can visit the first two baskets I made over as well as all the other pieces from this haul that I’ve already made over at the links below!
$6 Picnic Basket Makeover with Transfer
$60 Thrift Store Dresser with Transfer
$4 Thrift Store Flatware Makeover
Thrifted Buffet Lamps Makeover
Yard Sale Sewing Machine Table Makeover
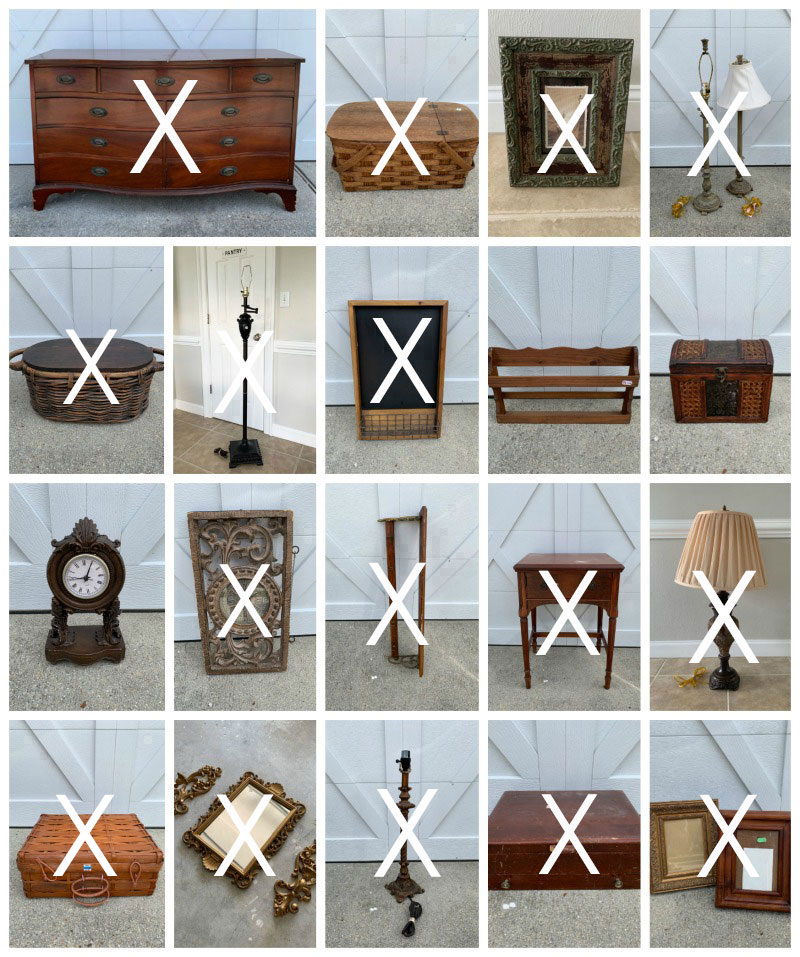
There are three small items left to check off. I’ll be back with all three and another piece or two for another round of smalls on Thursday:
UPDATE: See how this dated crew turned out HERE now!
XOXO,
![]()
Don’t Miss a Thing!
If you like what you see, there are several ways to follow along!
EMAIL * INSTAGRAM * FACEBOOK * PINTEREST * TWITTER


Mary Kaiser says
Oh I love how cute that turned out. Love that you put the pretty fabric inside. It is a great basket now, not an ugly duckling any more.
Christy says
Thank you, Mary! There weren’t too many options for this one, but I’m so glad it’s done! XOXO
Larissa ~ Prodigal Pieces says
What a fun twist to that tired basket. My favorite is the lining. Love it! 🙂
Christy says
Thank you, Larissa! XOXO
Cheryl Atkinson says
Hi Christy!. I love this basket. Very different than the norm. I may have to try this. Thank you.
Christy says
Thank you, Cheryl! It was raining this weekend, so it was an easy rainy day project! XOXO
Christina says
Christy this is such a lovely makeover! The lining is wonderful as are the added, colorful stripes! The key and numbers are a whimsical addition. This is not going to last long in your booth if you choose to sell it. 🙂
xo
Christy says
Thank you, Christina! This will be heading to the booth today! XOXO
Rosie says
It turned out great! I would be a kid in a candy store if I were in your booth of goodies lol. Always enjoy your makeovers. Have a great day!😊
Christy says
Aww thank you so much, Rosie! Enjoy your day also! XOXO
Kathy W F says
This basket is perfect. I love the key and number accents. I feel the same way about baskets…one can never have too many! I’m actually thinking about painting for a couple of mine that I’ve had for years. Have a great rest of the week.
Christy says
Thank you so much, Kathy! Absolutely…they are so versatile! XOXO
Linda Petersen says
Totally adorable!💗
Christy says
Thank you, Linda! XOXO
Joni says
Hi Christy, it’s crazy how you find new and very cool ways to spruce up baskets. This looks great! Will you be doing your Halloween display this year?
Christy says
Thank you, Joni! Absolutely! We decorated on Friday woohoo!! XOXO
Denise Zdziennicki says
I always love your basket makeovers Christy! Those numbers are so unexpected and really take it up a notch!! 💙💙💙
Christy says
Aww thank you, Denise! XOXO
Cecilia from Georgia says
I love the big key! I saw a great basket when I was in Houston and was dying to just carry it on the plane. After seeing how cute yours is, I am even more sad that I didn’t bring it back. Oh well, something to look for! Have a great weekend!
Christy says
Thanks! Oh darn…yes, it is always nice to have something to search for! Enjoy your weekend too! XOXO
Jen @ Girl in the Garage says
Christy, this basket is super cute with the soft stripes, the key, numbers, and fabric inside – it’s all just darling! xo
Christy says
Thank you, Jen! Glad to have this one done lol! XOXO
Michele M. says
You really do amaze me. You are so stinkin’ clever. Where do you come up with these brilliant ideas? I just do not have that gene. You got a double dose, that’s for sure.
Christy says
Aww you are so sweet, Michele!! Thank you! XOXO
Sandi Allen says
This is so Beautiful. Love the new transformation..
Christy says
Thank you, Sandi! XOXO
Nancy @ Artsy Chicks Rule says
I love it! And the colors too… of course! 😉 xo
Christy says
Thank you, Nancy! Of course lol! XOXO
Marie-Interior Frugalista says
Beautiful basket upcycle from the inside out, Christy. Love the muted stripes! Very cute embellishments too.
Christy says
Thank you, Marie! I hope you are having a great weekend so far, my friend! XOXO