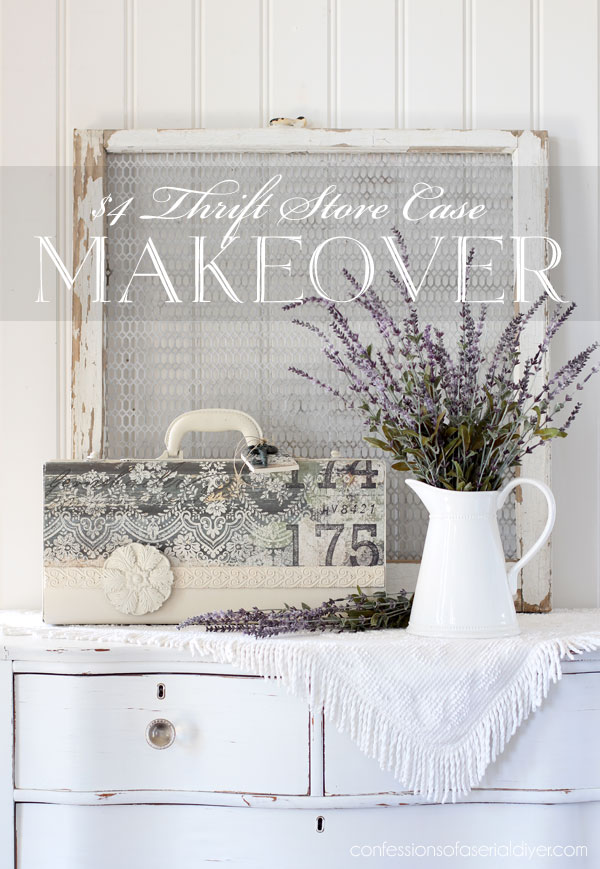
Hello beautiful friends! I’m back today with another piece from my Winter thrift store haul! This is a project that didn’t go quite as planned but luckily, I was able to find a fix!
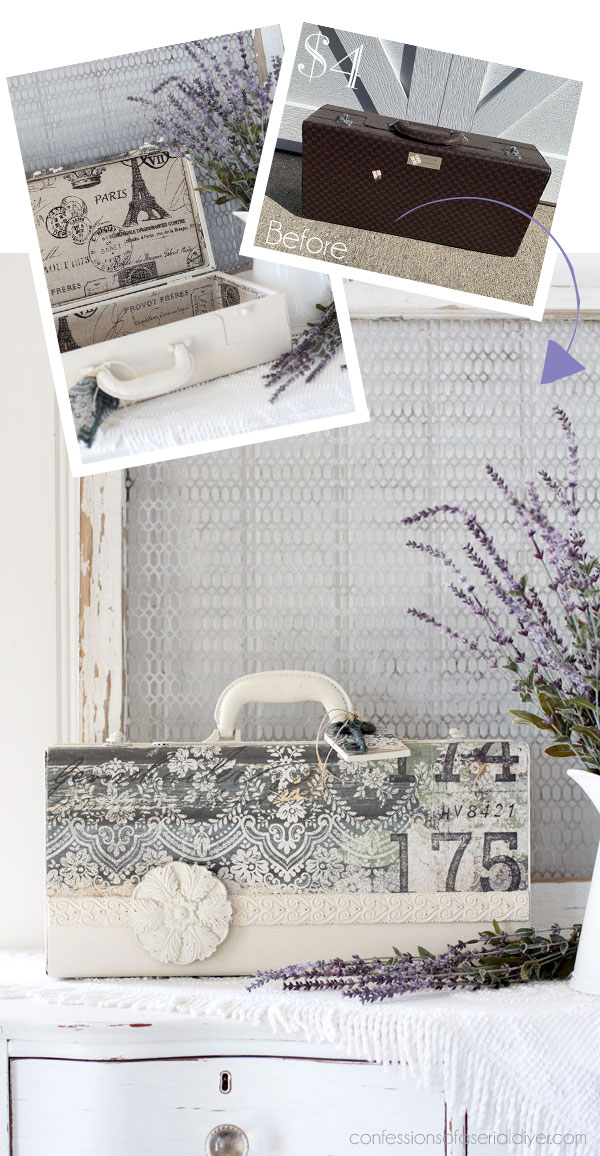
I picked up this case for $4.25:
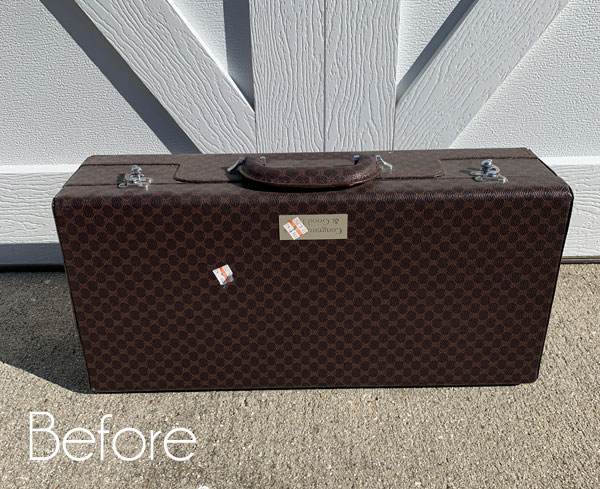
I didn’t even know what to call it in the title, but it looks like it might have originally held a gift of wine and a set of stemless glasses:

But the serving utensils in the lid threw me off a bit. It had an engraved tag on the front that I ended up removing. It read CONGRATULATIONS & GOOD LUCK which makes me think it was probably a retirement gift.
Anyway, I rarely pass up any sort of case as they can be used to store all kinds of things!
I went in a different direction with this one, starting with using this creamy color, Drop Cloth by Dixie Belle, rather than my usual white:
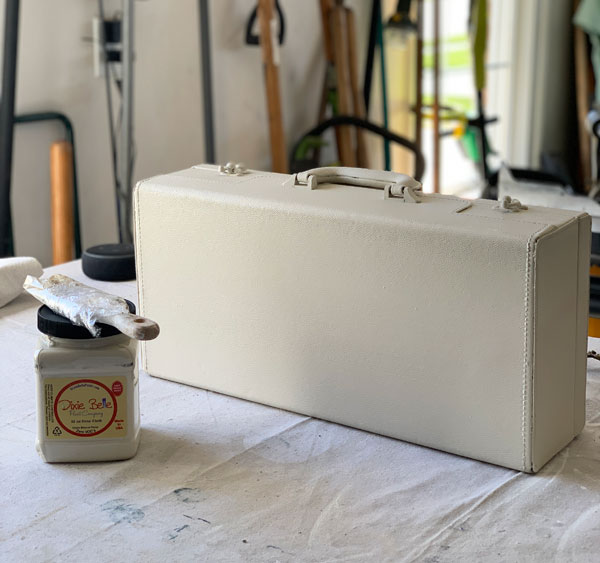
This is my best selling ivory shade.
I had planned to do a black and cream look, but remember this vintage picnic basket where I used a transfer on the lid?
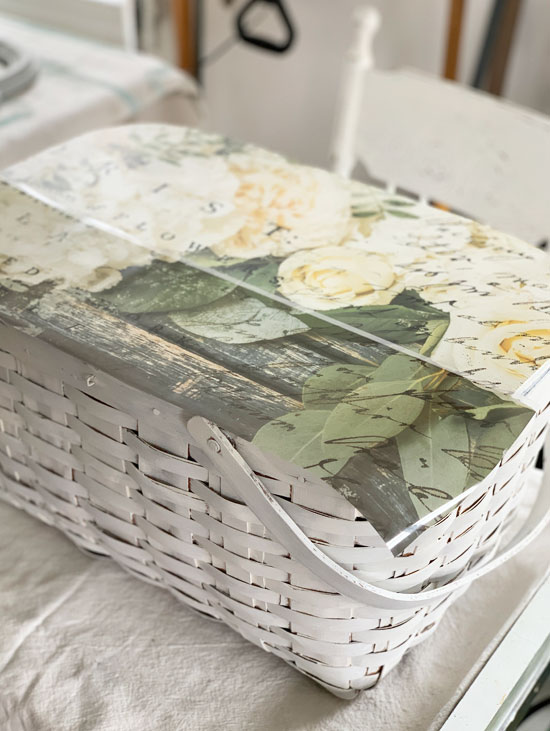
This transfer is called White Fleur and it is no longer available on Amazon, but you can still find it on eBay or Etsy if you search it.
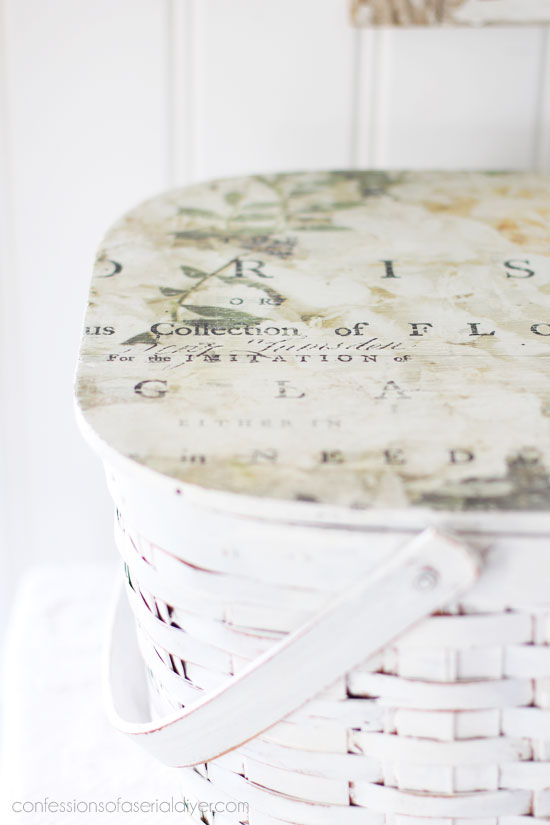
Well there were three rows of transfer in this one that made up one large image. I used the top two with the pretty yellow florals on the top of the basket, but still had the the third row that I had never used. I decided to try it on this case.
However, I wasn’t thrilled with it after applying the transfer:

Okay time for plan B. I decided it was the bottom edge of the transfer that wasn’t working for me and I had to find a fix. I knew I needed to cover it in some way. Then I remembered I had a mould for decorative trim pieces that might just work. And so I decided to give it a try!
Those three pieces you see in the photo above were made using the Elegant Borders Decor Mould by re-design:
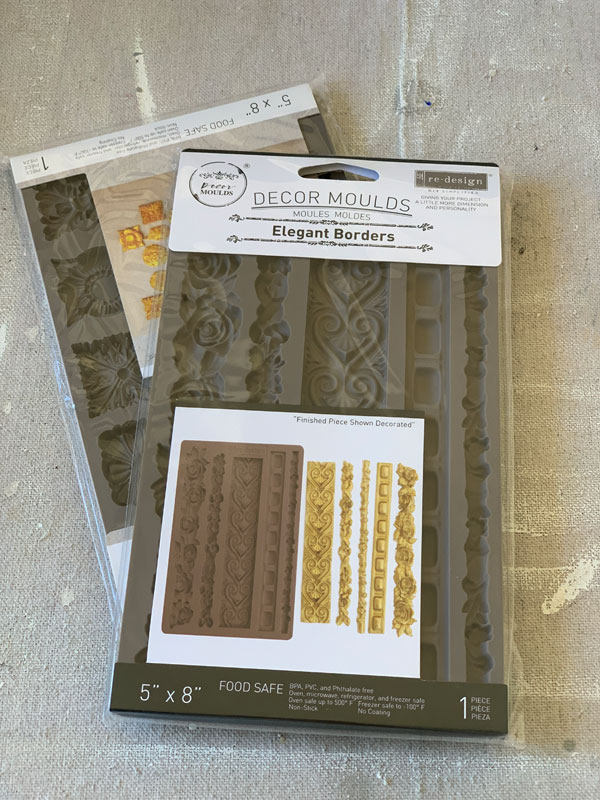
I have been hanging on to several of these moulds for a while now, but just hadn’t found the right piece to try them out on. I figured this was a great time to give them a go. I used Amazing Casting Resin to make my new trim pieces:
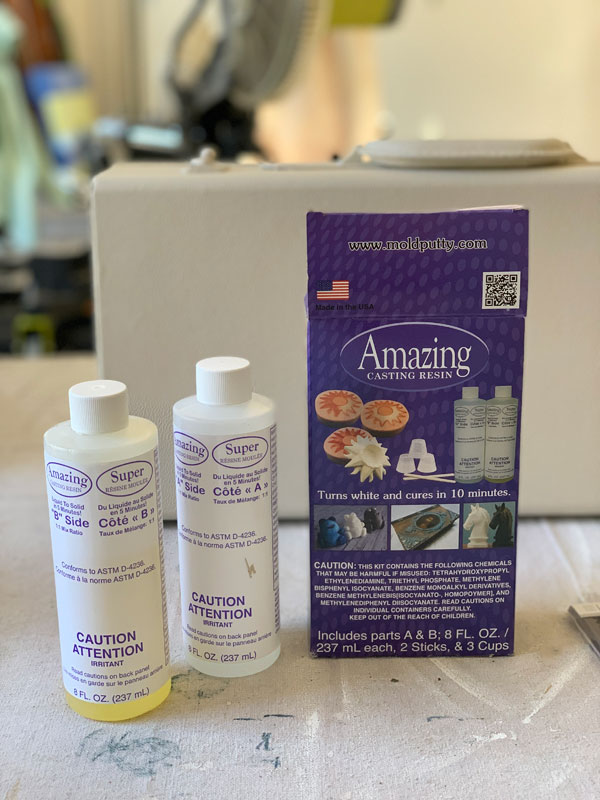
It is super user friendly! It comes with two small medicine-like cups and you just measure out equal parts of each and mix them together in a disposable cup until they’re clear. Then, just pour the mixture with a disposable cup into the mould:
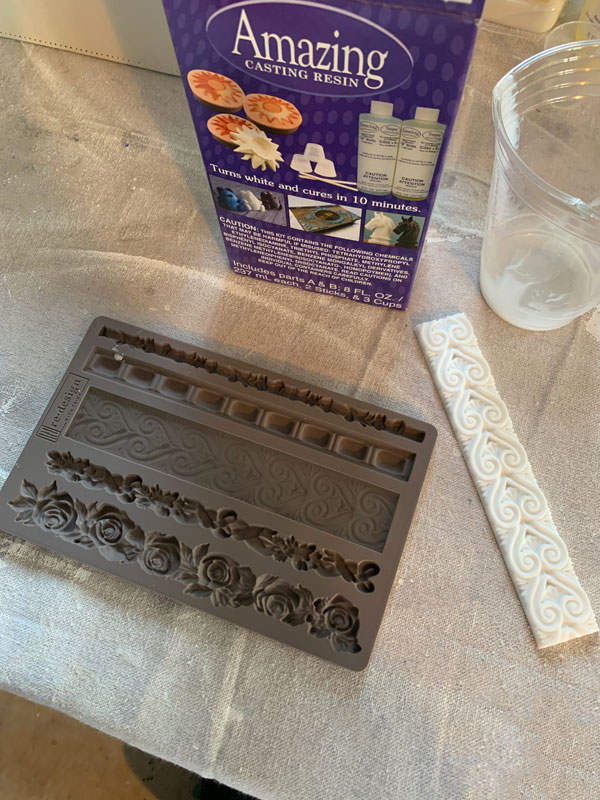
It only takes about 10 minutes or so for each piece to completely set up, and then you just pop it out of the mould. It is warm and flexible when you first pull it out and you can cut it then if you need to like I did. I just used regular old scissors. Then it will completely harden within the hour.
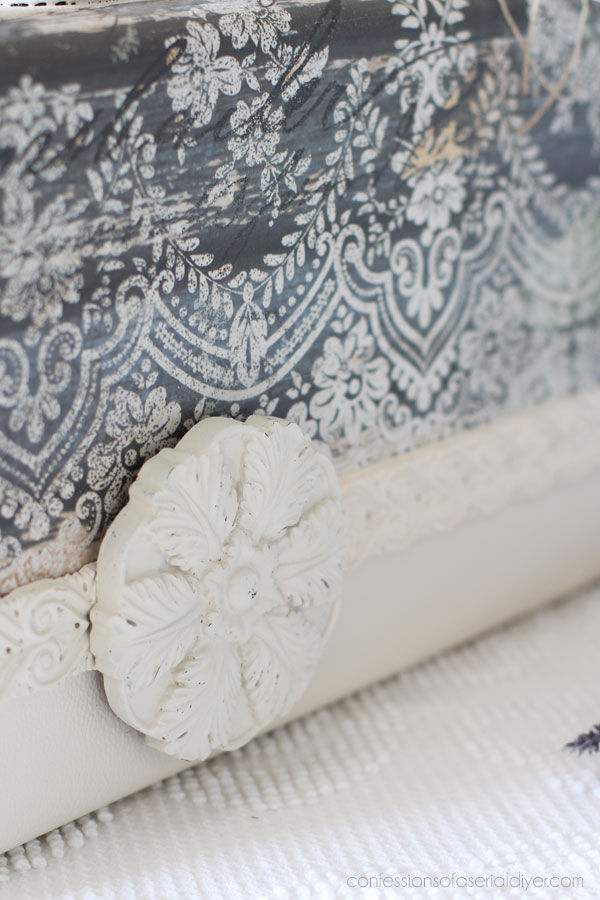
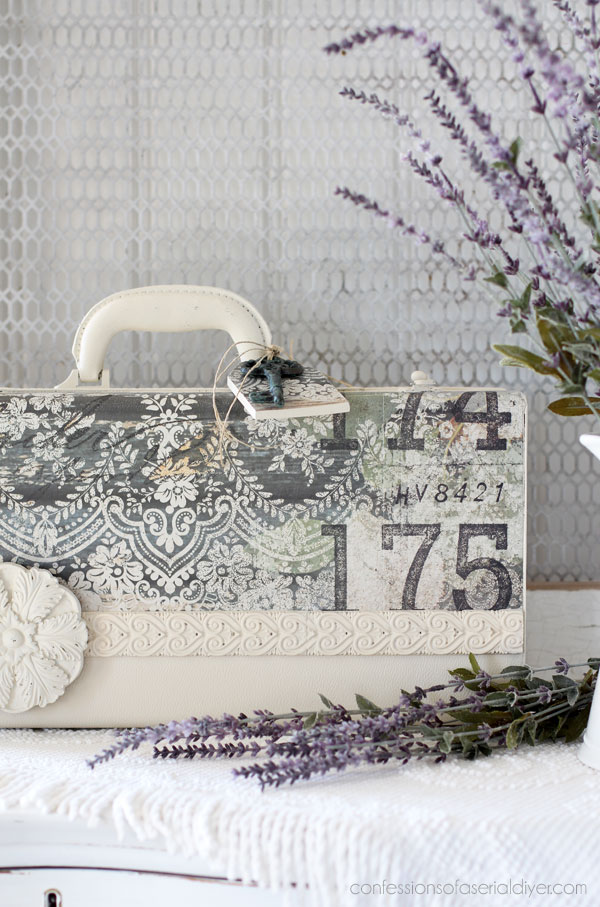
These were perfect to fix that funky line across the bottom and save this project!
I just attached them with E6000 glue and let them dry overnight:
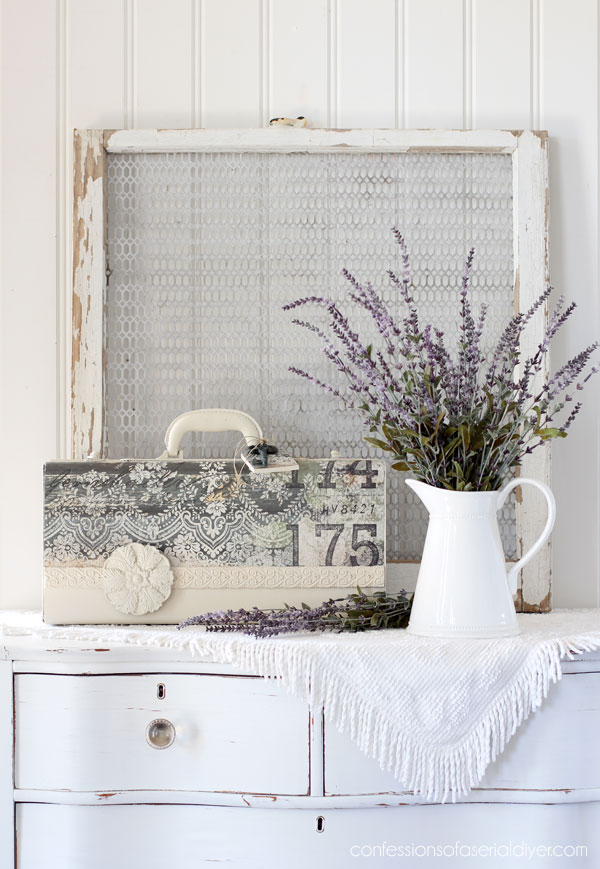
Much better, right?
That floral piece is one of two medallions I picked up at the thrift store for 45¢ each a couple of years ago…
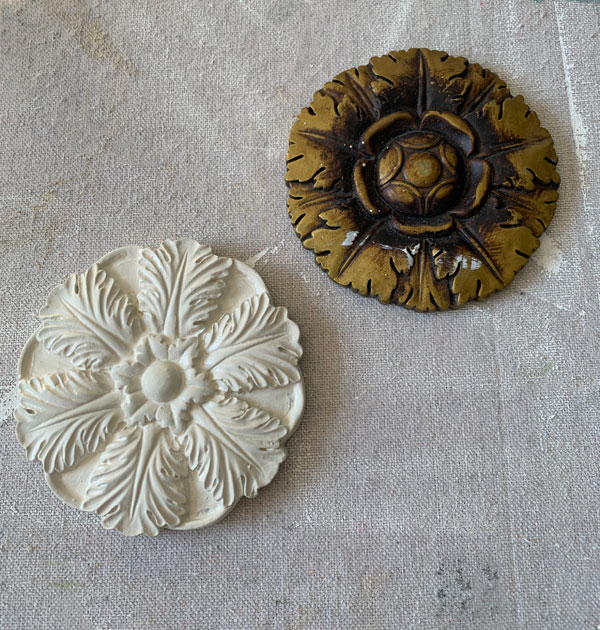
I’m so excited to have finally found a use for one!
I attached that with e6000 glue also.
As for the resin trim pieces, I had to join three together…
That left seams where each piece met one another, so I used a little wood filler to fill those seams.
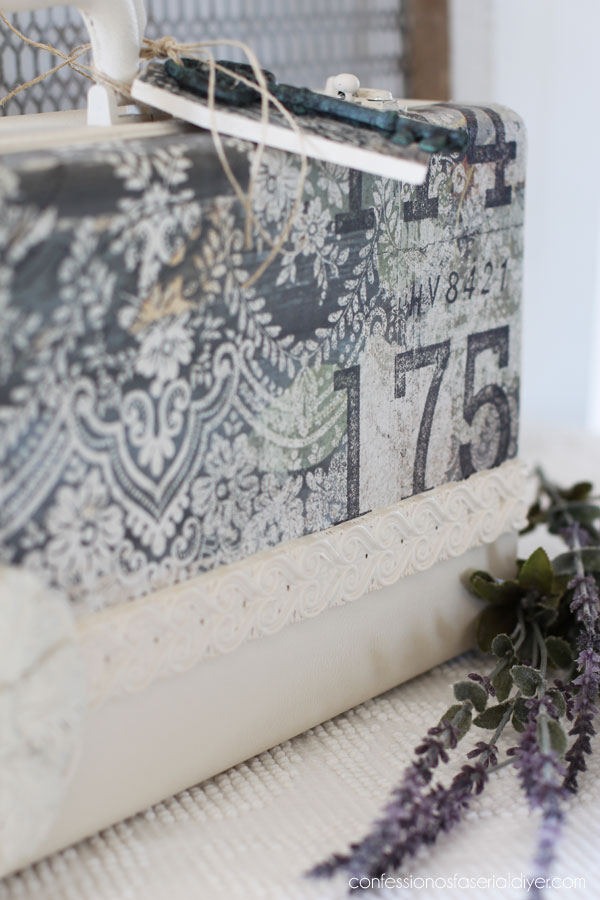
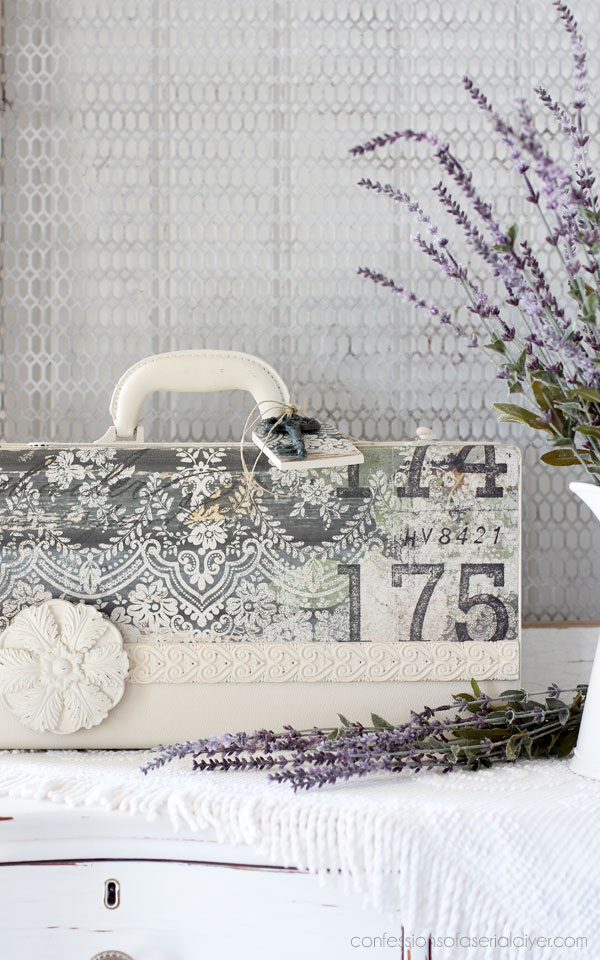
I decided to add a little something to the handle for some interest. I cut a piece of a poplar strip into a small tag shape and applied some of the leftover transfer to it. The key is one from a ring of keys I picked up on deep discount after Halloween at Michaels.
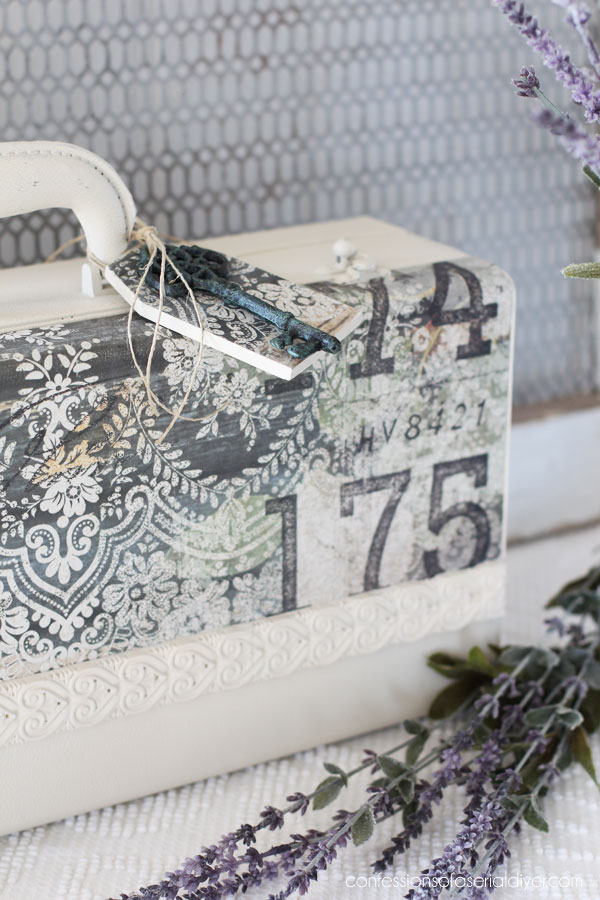
I wrapped the transfer around the topside of the case:

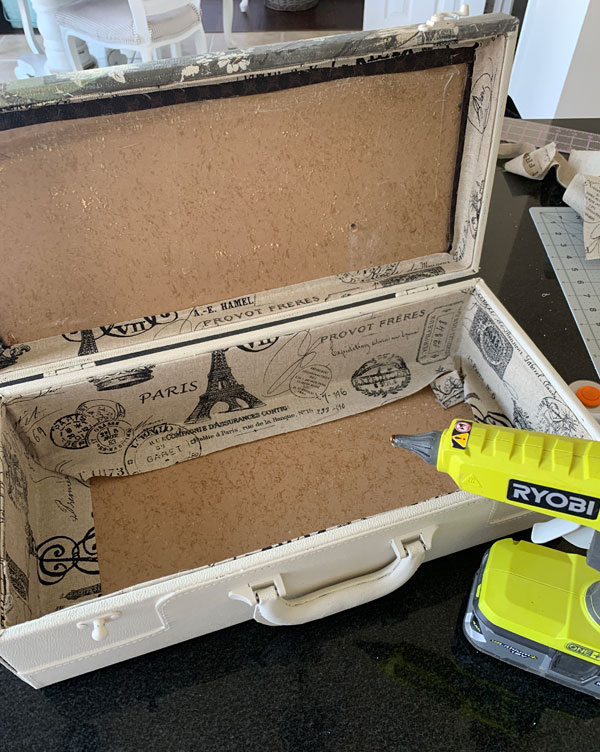
Of course, I lined the inside as well:
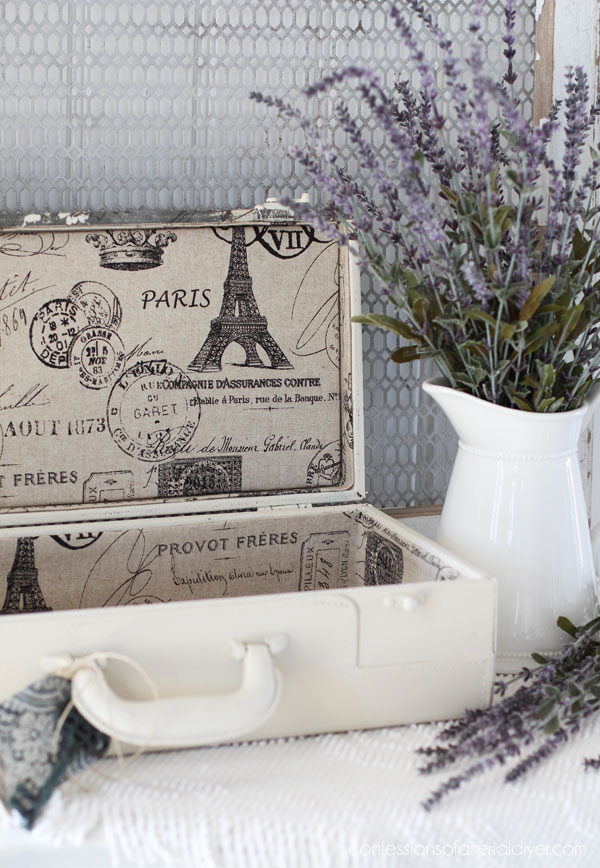
I pulled all of the old lining out first and luckily, that came out pretty easily. Then I found this fabric in my stash that I originally purchased at Hobby Lobby…
Visit my complete tutorial for how to line a box with fabric HERE.

This could hold so many things!
I went in a little different direction using colors that I don’t normally use this time. If you like a more creamy white, Drop Cloth is a great color!
I told you I rarely pass up a case…if you liked this one, you might also like seeing what I did with this Trumpet case in 2018:
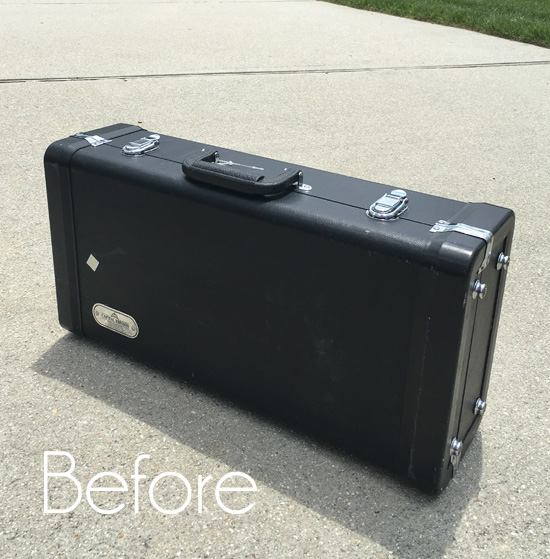
See how this one turned out HERE!
You might also like this travel case I redid back in 2017!
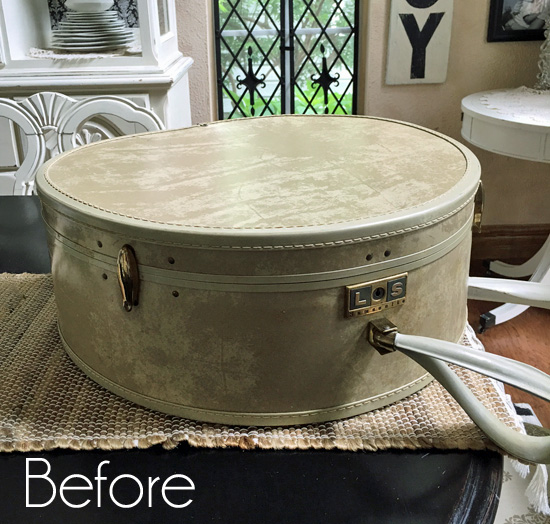
See how it turned out HERE!
I actually kept that last one. It sits in my office holding cards, travel mementos, and other treasured memories!
I had to change directions in the middle of redoing the case I shared today, but things don’t always go as planned and you just have to roll with it sometimes! I’m thrilled to be able to cross one more piece off the list!!

If there’s anything you missed, you can catch up below:
$25 Thrift Store China Cabinet Makeover
$3 Lamp Makeover (& How to Rewire a Lamp)
Windsor Chair Makeover (& Drop Leaf Table Take Two)
How to Wet Distress (& a $5 Lamp Makeover)
$5 Thrift Store Chest Makeover
I’ll be back on Thursday using a brand new color on this night table:
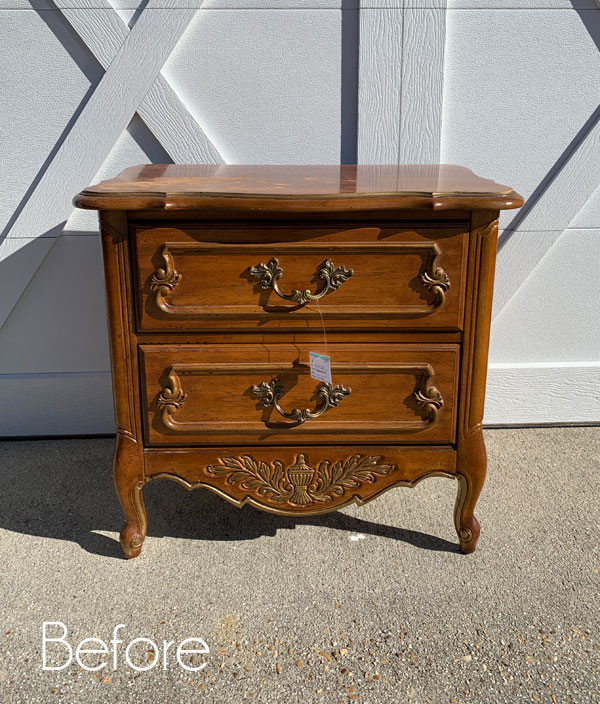
UPDATE: See how this pretty little lady looks now HERE!
See ya then!
XOXO,
![]()
Don’t Miss a Thing!
If you like what you see, there are several ways to follow along!
Email * Instagram * Facebook * Pinterest * Twitter


Robin Stephens says
Perfectly perfect, per your usual! LOVE this one! Well, I love all you do….so that was a given! 😉 So pretty!!
Christy says
Aww thank you so much, Robin!! XOXO
Mary Kaiser says
Wow it is beautiful now. You are so creative, you totally amaze me. Way to stay with it and find a great solution for your problem, I love how it turned out!!
Christy says
Thank you, my dear friend! I’m so glad I was able to make it work! XOXO
Maryellen Webber says
This case is simply beautiful! I would have never thought of adding the molding trim ! I love the tag and key in the handle, it really completed the case! Wonderful job Christy!!
Christy says
Thank you so much, Maryellen! XOXO
Betty Bilnoski says
It’s lovely!
I look forward to Tuesdays & Thursdays just to see your posts. You can take the simplest old thing and completely transform it.
Christy says
Thank you, Betty! I appreciate that so much! XOXO
Christina in SW FL says
Christy, I adore this little case! I think I would just use it empty as a decoration in its own right. Just beautiful. Great creativity with the trim, medallion, tag and key. Wonderful. I bet it doesn’t last long in your booth!!
Christy says
Thank you, Christina! I’m so glad it worked out! XOXO
Stacey says
Wow!! What a beautiful transformation! You are amazing!! 🙂
Christy says
Aww thank you so much, Stacey! XOXO
Jeannie Scott says
Hi, I love this transformation!!! Actually love all you work!! What is the name of the transfer you used? I LOVE IT!!!!!!! Thanks!!!
Christy says
Thank you, Jeannie!! This transfer is called White Fleur. I don’t see it on Amazon any longer, but you may still be able to find it on eBay or Etsy! XOXO
Janice Holt says
Now this is a very pretty unique case and such a good job. Nothing going to get the best of you is it (ha). Love determination and you have that for sure.
Christy says
Thank you, my friend! And no way…I refuse to be beat ha ha! XOXO
Cate says
It’s just PERFECT!!! What a great “save” you did at the bottom, too. Just simply ACES!
Christy says
Thank you so much, Cate! I’m thrilled that worked out and that I was finally able to play with those moulds! XOXO
Nancy says
This is one of my favorites cases you have ever done! I love the details on this one. I love the medallions you found. They finish it off. You know you can make a resin cast of that medallion so that you can make them over and over again. I’m in the middle of doing two silverware boxes. The insides are the worst. I had to set them aside to come back to when I have more patience. Your attention to detail is amazing. Have a great day friend!
Nancy
Christy says
Aww yay!! I’m so glad you like this one, Nancy!! Thank you! I never even thought to make a cast of that medallion…brilliant idea!! I hope you have an amazing day as well!! XOXO
Cynthia says
Once again you have taken something simple and made it into something spectacular.
Cynthia
Christy says
I’m so glad you like it, Cynthia! Thank you! XOXO
Luana says
A beautifully transformed piece. Personally, I kinda liked the scallops on the transfer, but that’s just me. The molding is very pretty, too. Everyone has different preferences! You make it look so-o-o easy. Thanks for all your ideas.
Christy says
The transfer originally was straight across at the bottom and I cut the scalloped edge myself. It wasn’t quite perfect, and I think the perfectionist in me just wanted to cover that lol, but thank you!! XOXO
Lani says
Wow! You are SO creative. Your mind just thinks outside the box and it works beautifully. I liked the look of the stencil and would have left it as is (if I even thought of using one) THEN you took it over the top!!! I love all of your work. Can you come to my house please 🙂
Christy says
Thank you so much, Lani! It’s funny how hitting a snag can make you think outside the box lol! XOXO
d brossy says
gorgeous!!!
Christy says
Thank you, D!! XOXO
Candy says
Beautiful job this is gorgeous. You always add just the right little touch to make it extra special!
Blessings, Candy
Christy says
Thank you, Candy!! Sometimes plan B works wonders lol! XOXO
Mary says
Oh my…what a sweet project! I believe that is the most gorgeous case I’ve ever seen! You never cease to amaze and inspire! I have my mom’s old silverware case, (not so pretty) and want to pass the silver to next generation. Your case projects have inspired me so – thank you, thank you!
Christy says
Aww thank you so much, Mary!! I love to redo silverware cases and why should they have to be so boring? Have fun with personalizing yours! XOXO
M. Constance Colvin says
Just perfect as usual Christy!
Christy says
Aww thanks, Connie! XOXO
Suzan Oxenreider says
Hi Kristie! Did you Slick Stick before painting or just clean and go? I have a couple of small suitcases in the studio that I want to paint but needed a push. This did it! Love the transformation!!
Christy says
Hi Suzan! No slick stick needed…just clean and paint! Slick stick is for surfaces like laminate that are really slick. These cases take paint beautifully. I say go for it and have fun! XOXO
Julie Timmerman says
Wonderful job Kristy! As always you gave us something totally out of the box! It’s great when you take us on your journey because you always think of something I wouldn’t think of but at the same time you inspire us not to be defeated if our original plan didn’t pan out
The way we wanted👍. Thanks for the inspiration and helping stretch our wings💗.
Christy says
Thank you, Julie! I was definitely not going to be defeated lol. Sometimes hitting a roadbump can really make you think outside the box! XOXO
Marcie Lovett says
Maybe it was a picnic/wine and cheese kind of thing? Not that impressive before, but looking so fun and fresh now, Christy! I rather liked the edge of the transfer but adding the moulding took it up a notch. And OF COURSE you lined it 😉 Beautiful storage case that someone is going to be very happy to have now.
Christy says
Oh duh…yep, that totally makes sense! You are so smart! Thank you, Marcie! XOXO
Jane says
I just love how you kept going until it was a winner! I just love the moulding, too! Quick question: do you use your Silhouette to cut out those wooden tags you make or was it a specific saw? Thanks!
Christy says
Thank you, Jane! The tag was made from a poplar strip that was already the right width. It was left over from when I added a board and batten look to my boys’ bathroom. I used my miter saw to cut it to length and chop a corner off of each side at the top to resemble a tag. Hope that helps! XOXO
Donna Gonzalez says
I love how this turned. Wish I had your vision for seeing what things can become.
Christy says
Thank you, Donna! Sometimes I have no clue where a piece will end up when I start, but the ideas come as I go! XOXO
Robin says
Great job, love the transfer. If one didn’t have the resin kit or a medallion then a stencil could be used? Also, which sealer did you use? (I’m assuming that you did not apply it over the resin strip or medallion.)
Christy says
Thanks, Robin! Absolutely…or even a piece of lace trim or wood trim! I used clear wax on this one and went over all surfaces except the resin. XOXO
Phyllis says
Wow! You always take things over the top. What an eye you have! I would have stopped at the transfer and missed out on all the gorgeousness you added. Job more than well done, as usual!
Christy says
You are so sweet, Phyllis thank you! XOXO
Cecilia from Georgia says
This suit case is beautiful! You commented once that suit cases do not sell well in your booth. I’m curious, how did the trumpet case you made a couple of years do? I love your cases and can’t imagine them not flying out of your booth. Let us know when this one sells! I have a trombone case I found on the curb and it is a long sucker! This post gets me thinking of ways to transform it. Don’t know what anyone would do with it! But it will be good practice. Great job!
Christy says
Thank you, Cecilia! The trumpet case sold almost right away! That one was a great size and the coastal style I redid it in was very much my customer as well. A trombone case might be fun to do and definitely good practice! Have fun with it! XOXO
Jerri says
This is adorable! I love the transfer, moulds, tag, and color choice. I would never have thought of this but now you have inspired me. The wheels are turning for a small wood trunk. Thank you, thank you for sharing all your great ideas and talent!
Christy says
Thank you, Jerri! I love that you are feeling inspired!! XOXO
BJ says
I love how you come up with creative ways to transform thrift store purchases. I have similar molds but was only planning to use them on furniture. Great idea.
On your website, you show us how to use your items. My guess is that if potential customers saw your incredible website pictures and staging . . . items would fly out of your booth.
Have you ever considered using an inexpensive digital photo frame with a thumbnail drive to show potential customers your staging in a photo slideshow? The slideshow would draw people into your booth and help customers see how your items could be used in their home.
Also, you could sell other services if you wanted to on the slideshow. You are blessed with many talents.
Christy says
Thank you, BJ! That is a great idea! I used to print out color photos on card stock of my staging photos and attach them to the tags of my larger pieces, but I love the idea of a digital photo frame slide show…super smart! Thank you!! XOXO
Susana says
Muy, muy bonita transformación. Me encanta todo lo que haces y de verdad, tienes muy buen gusto. Felicidades y un saludo desde Galicia, España
Christy says
¡Te lo agradezco mucho! ¡¡Gracias!!
Rosie says
I really like the transformation, beautiful!!
Cannot find deals like that in our thrift stores here in Canada🙁 So creative!
Looking forward to seeing your next project as I have a night stand similar to yours that I will be doing as well. By the way was wondering in your stage photo is that real lavender? I really like your staging photos once you complete your projects😊 Keep up the great work!!!
Christy says
Thank you, Rosie! The lavender is faux, but it looks real, right? I found it at Hobby Lobby. I really enjoy the staging part…thank you! See ya Thursday! XOXO
Jacy says
I couldn’t get either post to open on FB in Tuesday, so I made a mental note to come to your blog to see it…you did not disappoint! Question: does the E 6000 stay flexible, or will it harden? Great piece. Love it.
Christy says
Oh no! My friend was having trouble with her own page last week…some FB glitch, but I am so glad you stopped by to see it!! Thank you! The E6000 should dry hard. XOXO