Hi beautiful friends!
Thank you to those who joined Nancy and me while we were thrifting last Thursday! We had a great time and even found a few treasures. If you missed our LIVE video, you can watch the replay on my Facebook Page HERE, and Nancy shared a short LIVE video on her Facebook page HERE too! (One of those may or may not include some bad dancing.)
I also want to let y’all know, in case you don’t scroll all the way to the end, that I will be back TOMORROW instead of Thursday this week. I’m joining the Seasonal Simplicity Tour hosted by my friend, Krista once again so I’ll be back with a brand new Spring project!
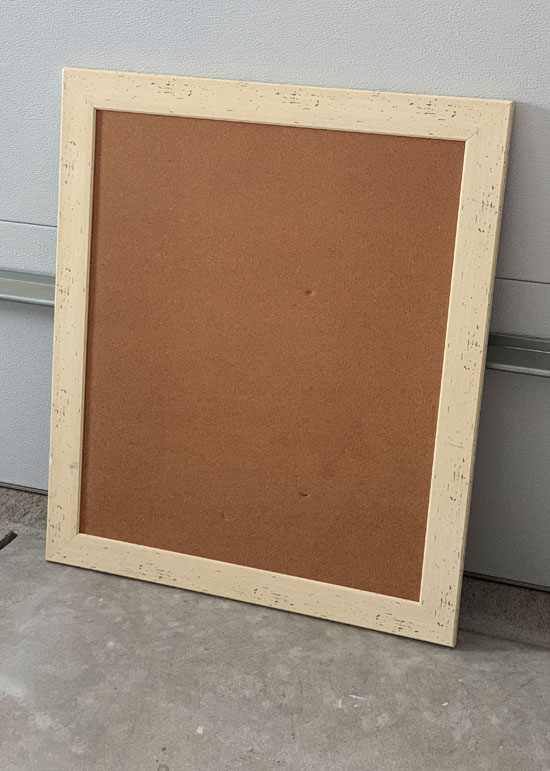
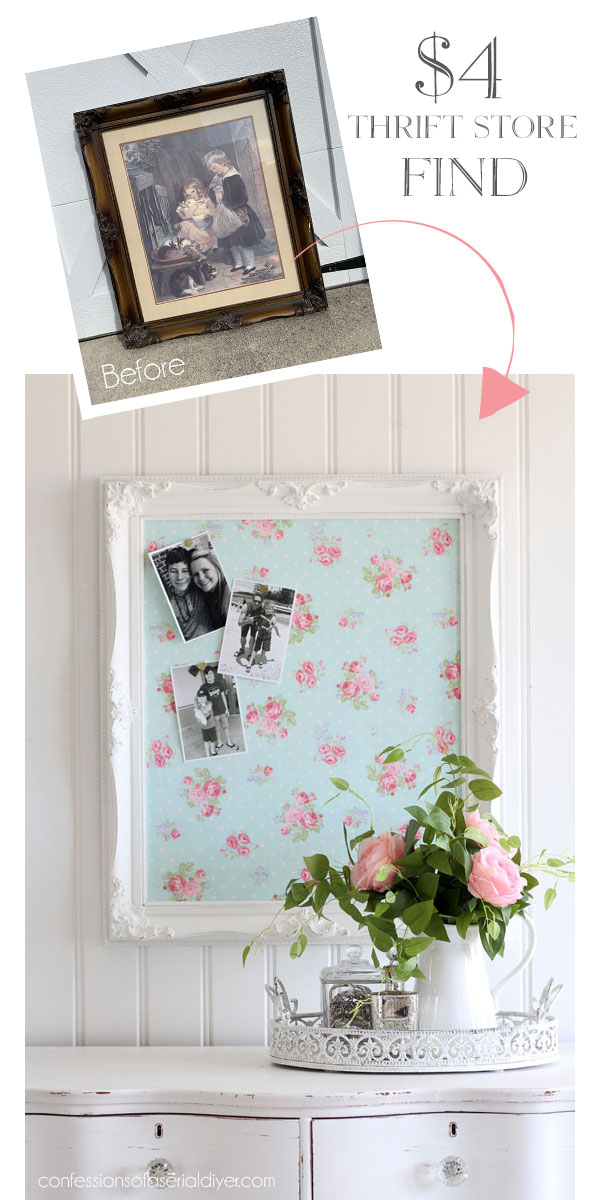
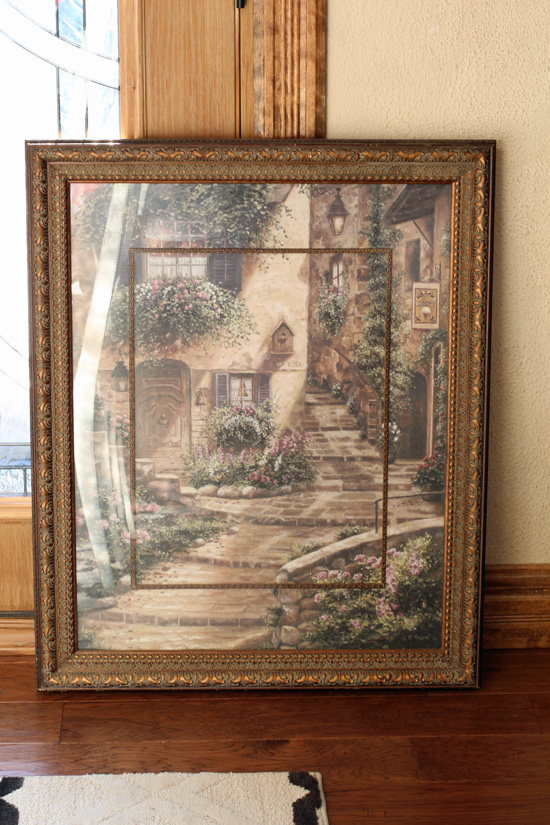
Today I’m back to tackling one of the last few pieces from thrift store haul #2, this picture I picked up for $4.25:
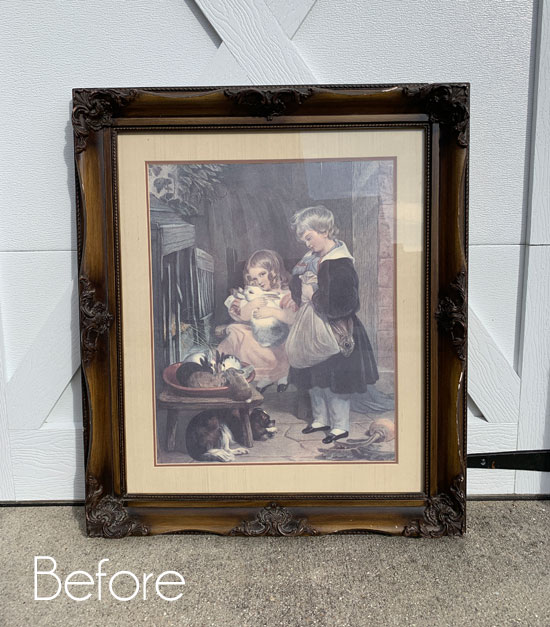
I don’t know about the picture, but how gorgeous is that frame? And for less than $5? A steal!! Yes, please! I grabbed it right away.
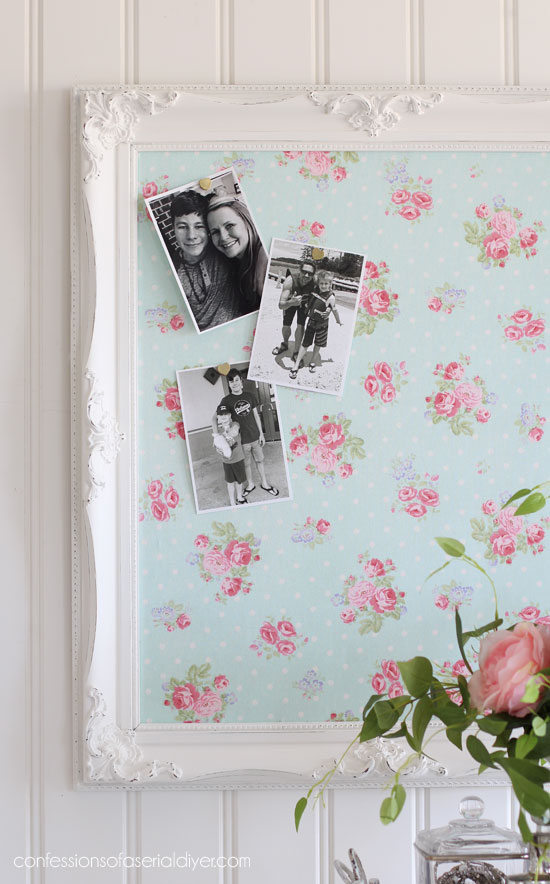
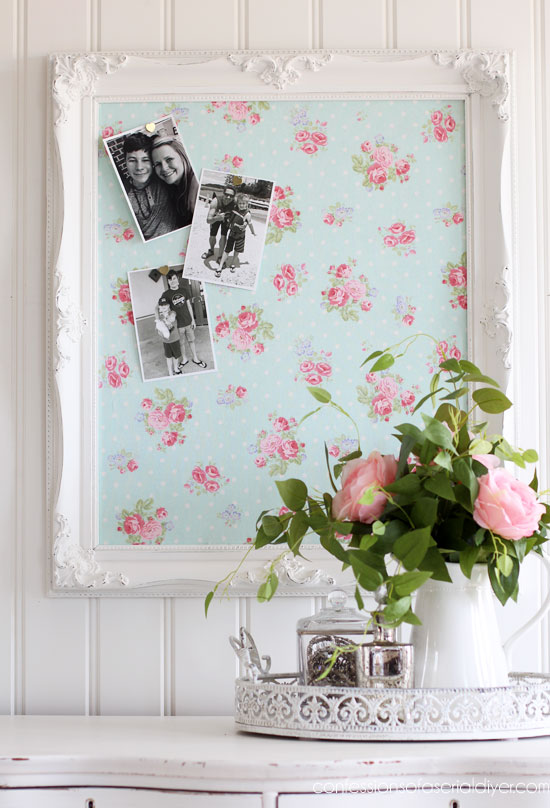
After sharing vintage suitcase #2 on Thursday (See that HERE if you missed it.), I still had some of that pretty floral fabric from Hobby Lobby left. I decided that I would use the rest on this project…to create a pretty new bulletin board:
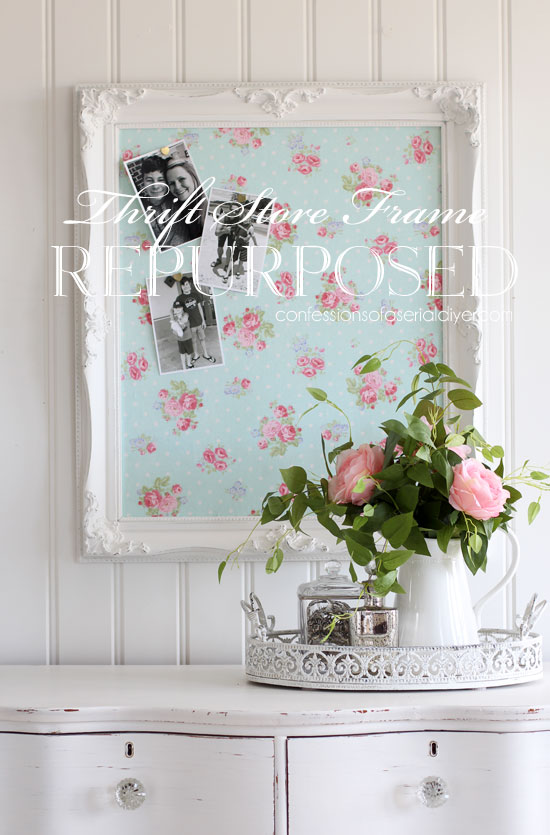
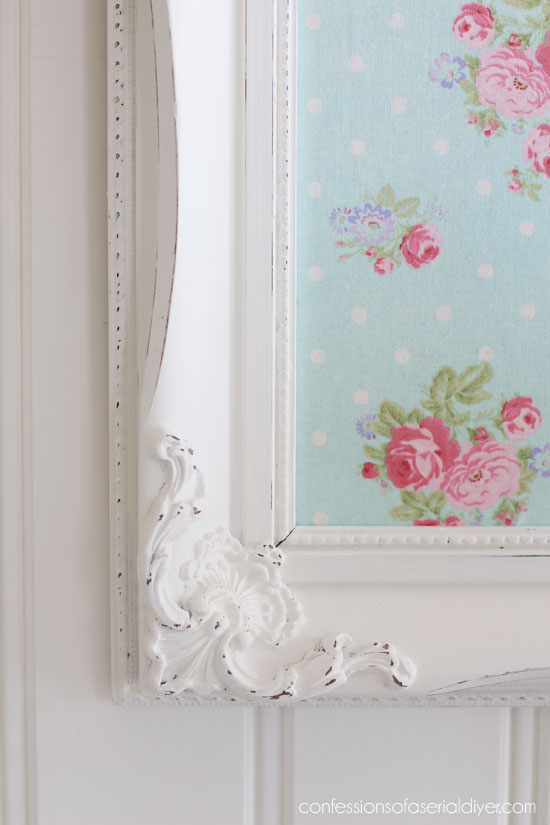
Didn’t the frame paint up so pretty? I love all those curvy details! I’ve included a few affiliate links so you can find the products I love too.
Want to know how to make one?
To turn my frame and bulletin board into a fancier framed bulletin board, I started with painting my frame in Behr’s Bit of Sugar, made into DIY chalk paint. (Recipe with video on how to mix HERE.)
Then I sanded lightly with 220 grit sandpaper wrapped around an old foam sanding block, and sealed with Behr’s clear wax that I picked up at the Home Depot.
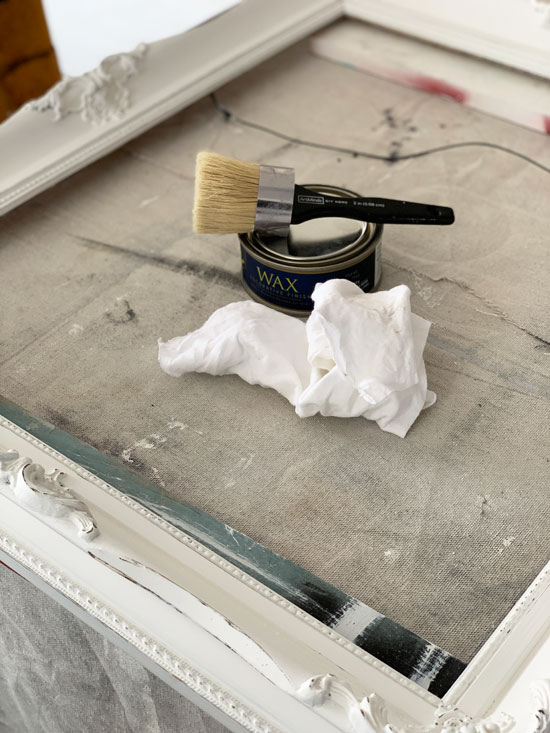
I usually use a clean cloth to apply wax because I feel like a wax brush uses a lot more wax, but it is much easier for projects like this that have all the details. Cleaning the brush is easy with warm water and dish soap.
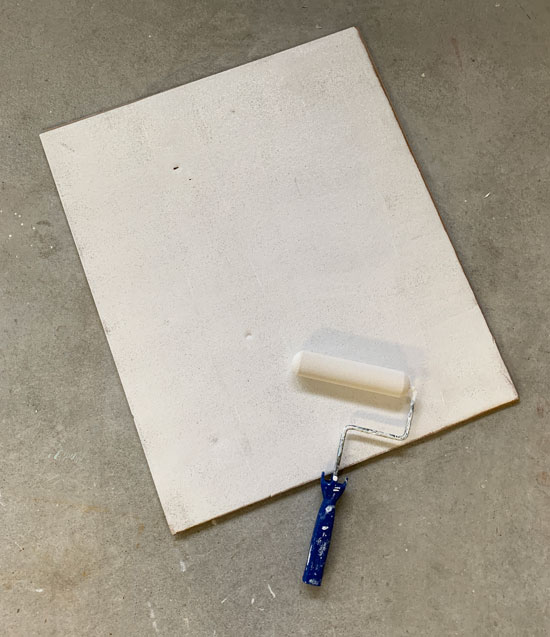
You’ll need a cork board also, and I just happened to have one in my stash that I picked up for a couple of dollars a while back:
I see these at thrift stores all the time.
After removing this one from this sad frame, it just happened to be the perfect size to fit my new frame. If not, cork can be easily cut down to fit.
Next I painted my cork board white as a better background for the fabric than the original brown color. Conveniently I had a roller and tray of white paint nearby from a house project my Hubby and I are working on on the side….I’ll be sharing that project when we’re done!
Then I grabbed my spray adhesive, and following the instructions for a more permanent adhesion, I sprayed both the cork surface and the fabric and waited 60 seconds…
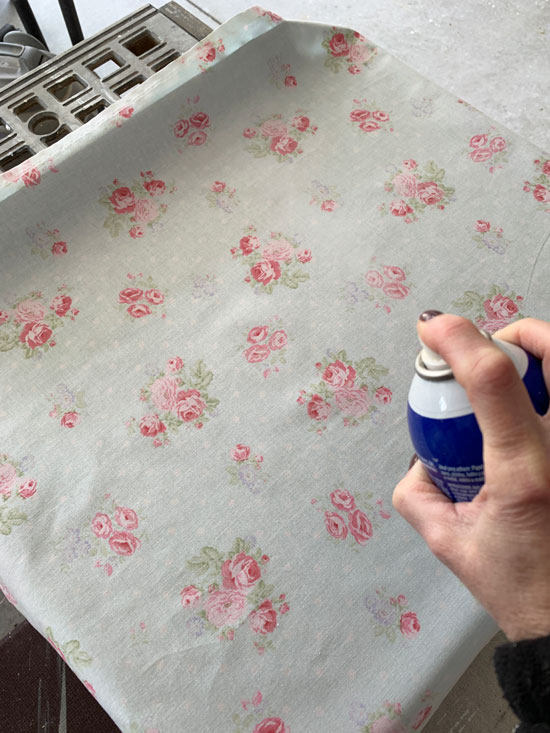
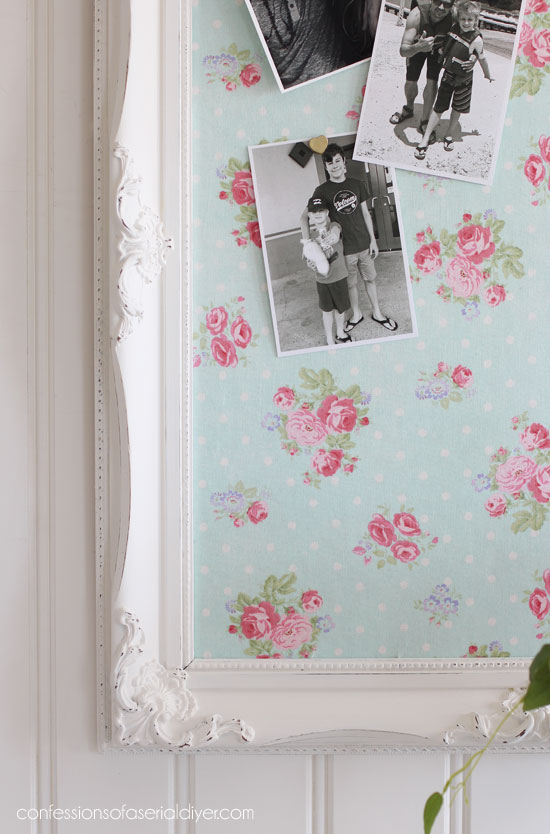
Then I applied the fabric (already ironed) over the cork, smoothed out any wrinkles, and secured it on the back with hot glue. I inserted it into the frame and used my staple gun to secure it in place…

My cork had this hard backing behind it which made that step easy.
To finish off the back, I applied matte Mod Podge liberally all around the edge of the frame using a cheap chip brush…
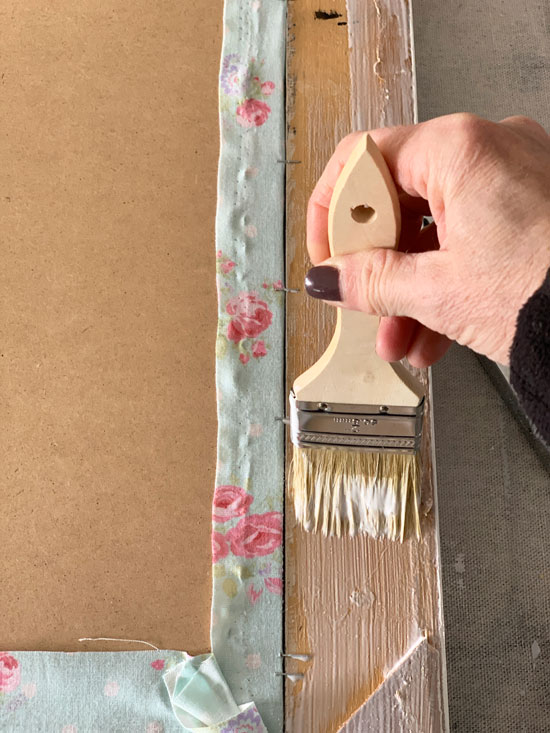
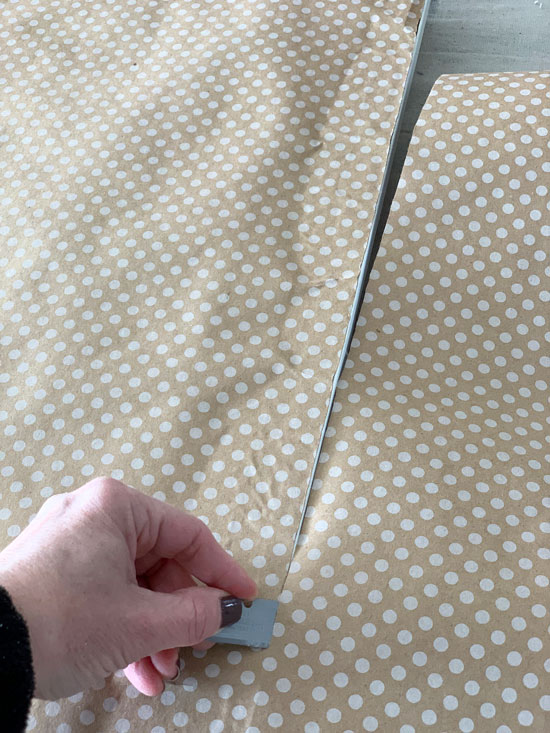
Then I used pretty brown kraft style wrapping paper I found at HomeGoods to cover the back, lining up the straight top and side edges of the paper with the top left of the frame, then trimming the other two sides with a sharp razor blade. I suggest using one that is actually in a holder, but I’m used to doing it this way.
I added sawtooth hanging hardware at the top and that was that!
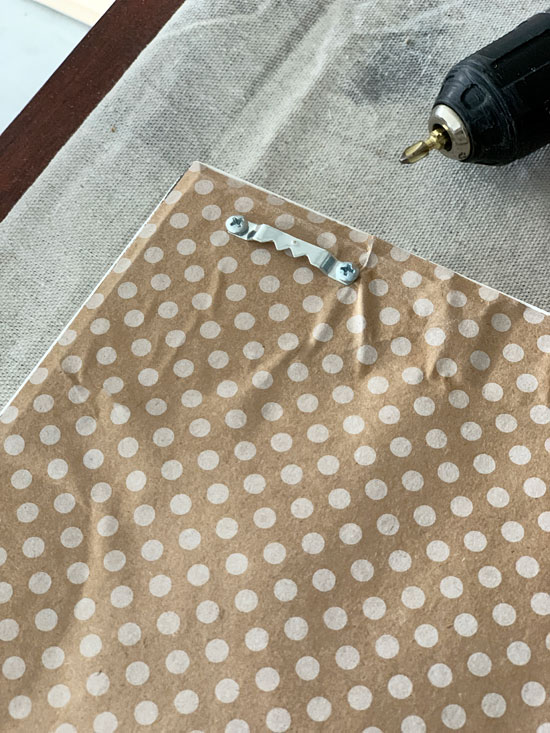
This is how I finish the backs of my chalkboards, so they are finished nicely from the back as well. Don’t worry if the paper wrinkles from the Mod Podge, that is to be expected when you apply it more liberally, and holding it in place is more important.
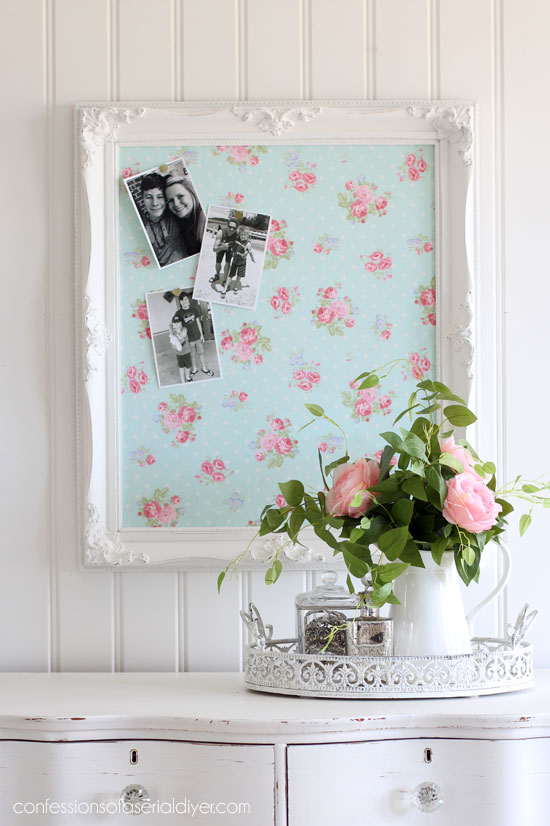
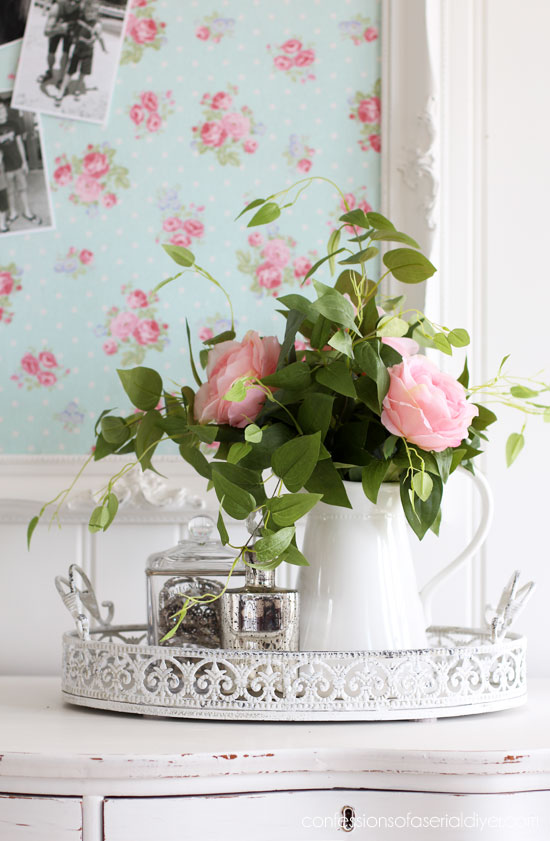
How sweet is this now?

A sweet new bulletin board to hold pictures of my sweets!
I’m not keeping this though I am tempted. I just dropped it off at my booth yesterday.
If you liked this, you’ll love what this one became as well:
See the after HERE!
Let’s cross another of this list, shall we?

Woohoo!
If you missed any previous makeovers from this group, you can find them all here:
Drop Leaf Repurposed (Corbels)
How to Recover a Tufted Footstool (The Cheater’s Way!)
$30 Thrift Store Coffee Table Makeover
Don’t forget…I will be back TOMORROW this week instead of Thursday!
UPDATE! Check out what I made for my front door to welcome Spring HERE!
See ya soon!! 🙂
XO,
![]()
Don’t Miss a Thing!
If you like what you see, there are several ways to follow along!
Email * Facebook * Pinterest * Twitter *Instagram


Mary Kaiser says
That turned out so cute! Amazing what some paint, fabric, and a little creativity can do! I love that!!
Christy says
Thank you, Mary! Yes, yes, and yes!! XOXO
Sheila DelCharco says
Ohhh that turned out so pretty with that gorgeous fabric!
Christy says
Thank you, Sheila!! XOXO
Christina in SW FL says
Christy, this is so fun! I adore that you finish the back so well also. It was meant to be considering the size of the cork and the frame. 🙂
I’m looking forward to the newest video of you and Nancy shopping! 🙂
Have a great week!
Christy says
Thank you, Christina! I do like to finish the backs off nicely as well, but if I plan to keep it, I rarely do lol! Hopefully we can get our video put together soon! XOXO
Janice Holt says
Such a sweet and pretty bulletin board. Looks so shabby chic.
Christy says
Thank you, Janice! XOXO
ColleenB.~Tx. says
I thought the photo was rather adorable. That frame; well I loved it right away.
Bulletin board; what a cool idea. I have an empty frame that has been sitting around here and I sure could use a bulletin board in my craft / storage shed. Thank you for the great inspiration.
Christy says
The photo was very sweet but super faded unfortunately. That frame though…swoon! Sounds like you have a project on your hands, my friend! XOXO
Larissa ~ Prodigal Pieces says
This is so cuuute!! ♡♡
Christy says
Thank you, Larissa!! XOXO
Paula says
Your pile is dwindling! Love what you did with this frame and I’ll bet that it will sell in a heartbeat.
Christy says
I know, right?? Yay! Thank you, Paula…I hope so! XOXO
gwen says
christy – what’s not to love about anything made with this print fabric! and the painted frame is sweet!
i do have two things that i would want to do differently – i can never manage to get two nails level on the wall, so if the piece isn’t too heavy, i like to use only one centered sawtooth hanger – then my chances of hanging it level improve greatly! and i although you have great pushpins, both on this and your previous pegboard, if i could find a lightweight piece of metal, i’d use that instead of cork and use cute little magnets – i hate punching holes in photos! just some of my thoughts!
Christy says
Thanks, Gwen! Great points indeed! XOXO
Cecilia from Georgia says
Just in time for Spring!! I bet it flies out of your booth! Do you mind telling what you priced it for? Pricing is so difficult for me. Can’t wait to see the video of your latest shopping spree with Nancy!
Christy says
I sure hope it sells since I priced it a bit steep at $49. That frame was just so nice and well made so hoping I get that for it! Nancy is in charge of the video this time, so I can’t wait to see it either ha ha! XOXO
Beth Holt says
I love this project! You completed the back too! Awesomesauce!
Christy says
Thank you so much, Beth! XOXO
Donna says
So cute! I think I have that exact frame. When digging around in the closet, I found a nice frame that I would like to make into a chalkboard. Need to scope out some of your past projects.
Christy says
Thanks, Donna! I shared how I make my chalkboards here if that helps:https://www.confessionsofaserialdiyer.com/mirror-turned-chalkboard/ Have fun! XOXO
Joan says
Another beautiful makeover! Love the fabric – so sweet!
I have a little tip for you in regard to your paper backing on the frame. I learned this in a frame making class. I have only done this with kraft like paper so don’t know if it works for thinner wrapping paper or the like but after you have glued the paper backing on as you did here, you let it dry thoroughly and then mist the paper on the back with plain water in a spray bottle. Some thicker papers require a heavier misting but as it dries you will see if it does. As the paper dries it shrinks up perfectly tight and flat to the back of the frame and looks nice and finished like magic! Then you can add your hangers over the paper.
Christy says
Joan, you are the best! Thank you so much for sharing that tip…I am definitely going to give that a try next time. The paper I used does have some weight to it so hopefully it will work! XOXO
Lizzy Leff says
It’s so pretty now. That frame was a major score. I have a couple questions, do you finish the back so it doesn’t scratch what it’s hanging on? Also, when looking at Bit of Sugar on the Behr Whites chart, I noticed that it has a tinge of pink. Is that why you use it, or am I seeing things?
Christy says
Thank you, Lizzy! I finish the back just to make it look pretty for selling. As for the Bit of Sugar, it does have a very slight pink tinge when comparing it to other whites by Behr, but it does not appear pink at all. I like to say it looks more like a vintage white. Hope that helps! XOXO
Lizzy Leff says
Thanks! That was very helpful. 🙂
Christy says
You bet! 🙂
Angela Garner says
Frame is beautiful. You always do a great job of illustrating how you did each step. Thank you for that.
Christy says
Thank you, Angela, and you are so welcome! XOXO
Marcie Lovett says
It looks fabulous now, Christy! Coincidentally, I have an old frame and cork board waiting to be paired. They’re rather unattractive now, but filled with potential. I love how these detailed old frames can be improved with a little paint. The picture yours came with, on the other hand…. no hope for it, I’m afraid!
Christy says
Thanks, Marcie! I love how a cheap cork board can be made to look so fancy just by putting it in a pretty frame! Yours will be fabulous I’m sure! Yeah that picture was sweet but it was super faded and it just didn’t really do it for me either! XOXO
Nancy @ Artsy Chicks Rule says
That really did turn out so sweet, Christy!! ???? xo
Christy says
Thanks, Nancy!! XOXO
Becky says
What a beautiful frame/board! All that beauty was lost with its previous color and “art”. ????
I’m making a pile of stuff right now for my sister to give as gifts to people who help out at her wedding, and I keep remembering what I’ve learned from you: white always sells, haha! Thanks for always providing such pretty inspiration!
Christy says
Thank you, Becky! You are such a sweet Sister! Yes…white always matches! XOXO
Sarah Roberson says
The makeover is wonderful! BUT….I collect prints of Victorian children and I love this one. Would you be willing to sell the print to me?
Christy says
Thank you, Sarah! I would have been glad to pass it on, however I did not save it. It was actually quite faded as if it had been sitting in a window, so I’m not sure you would have wanted it. XO