Hello amazing friends and Happy Valentine’s Day! Of course I love my Hubby, but seriously, there are few things I love more than taking forgotten treasures and giving them new life again! Who’s with me?
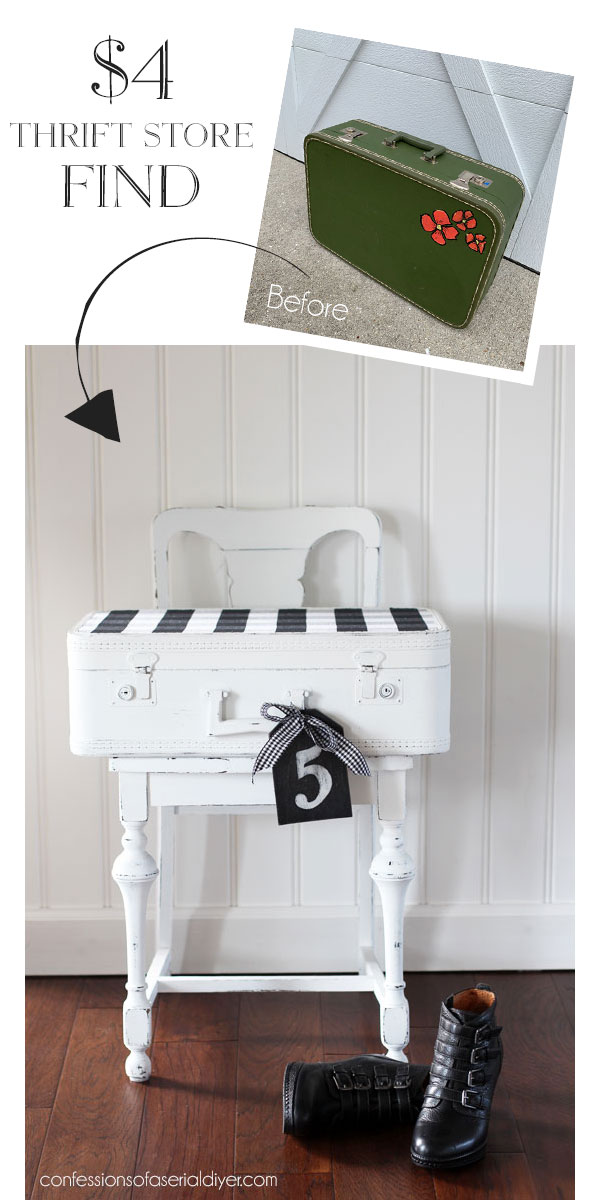
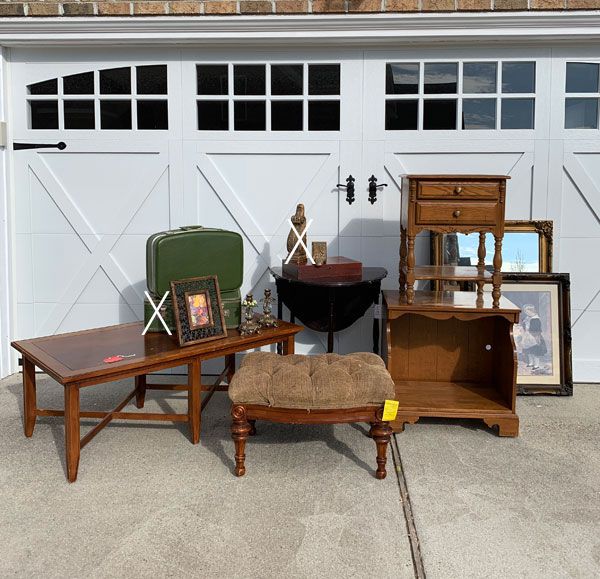
Today I’m continuing through my new thrift store haul with this vintage suitcase I scored for only $4!

I actually found two similar green suitcases together that day and both were only $4 each. Funny thing, the young girl ringing me up didn’t know how to open them ha ha!
I am always on the lookout for vintage suitcases, but don’t find them too often.
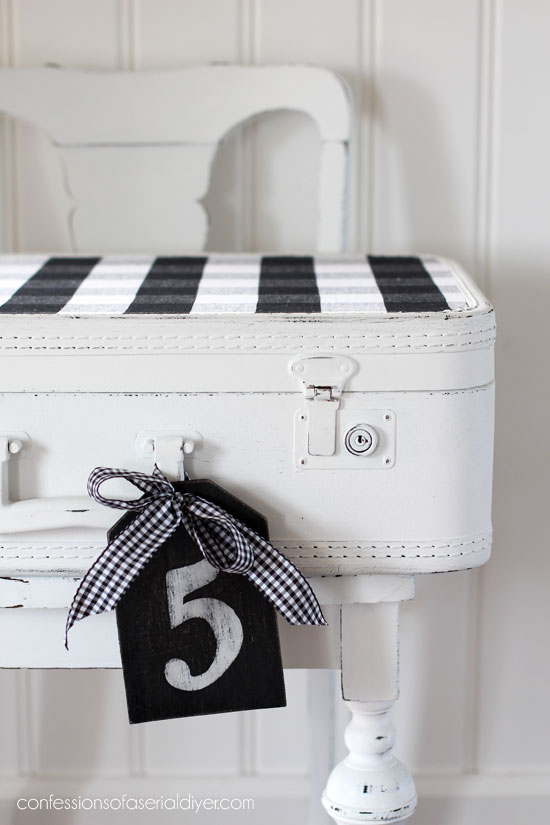
Here is how I reimagined this one:
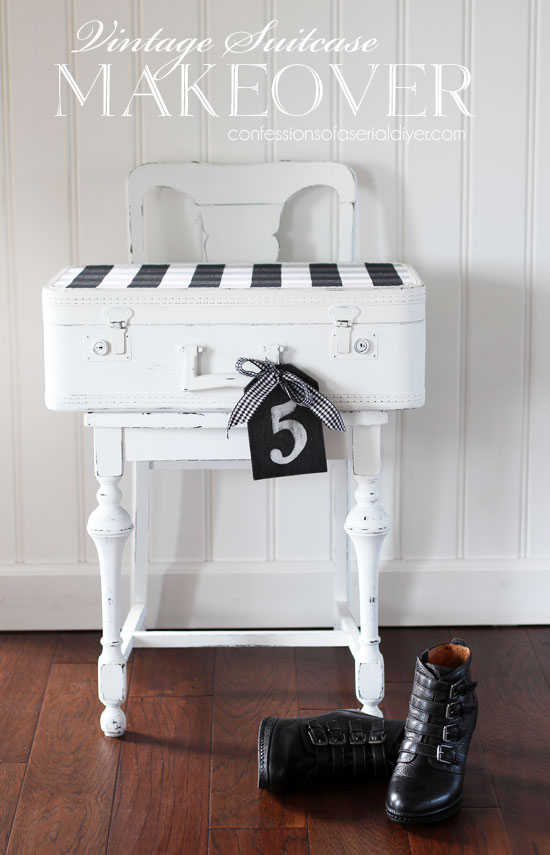
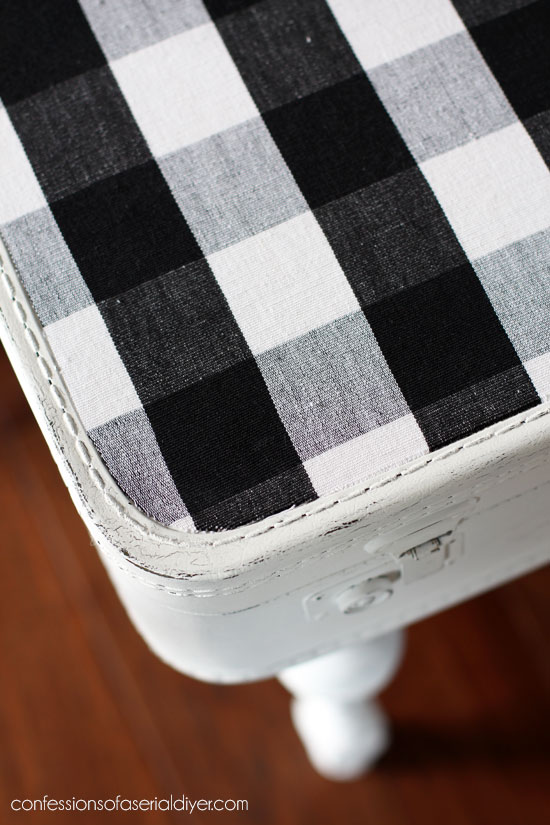
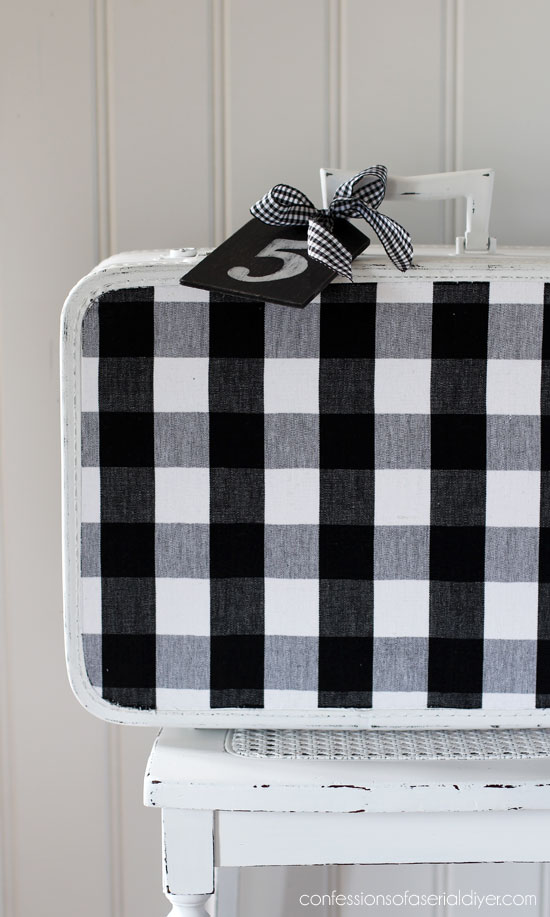
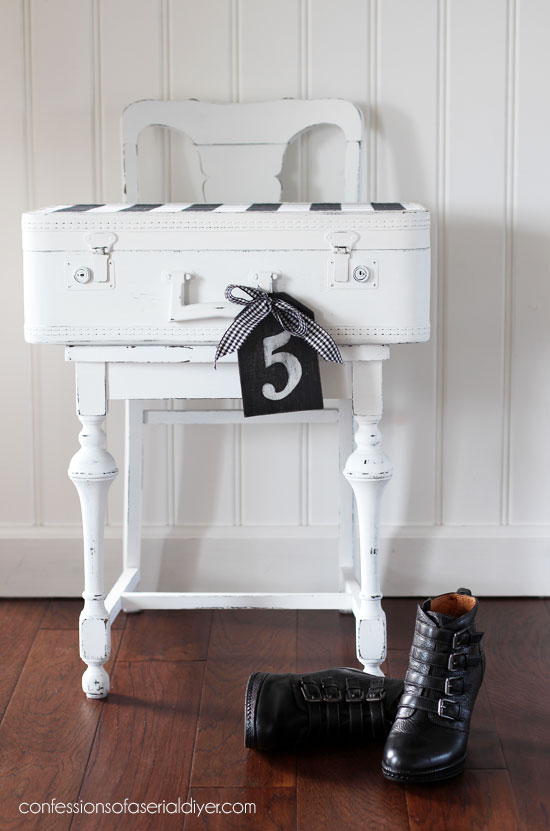
From that angle, it looks like I added stripes to the top, but nope!
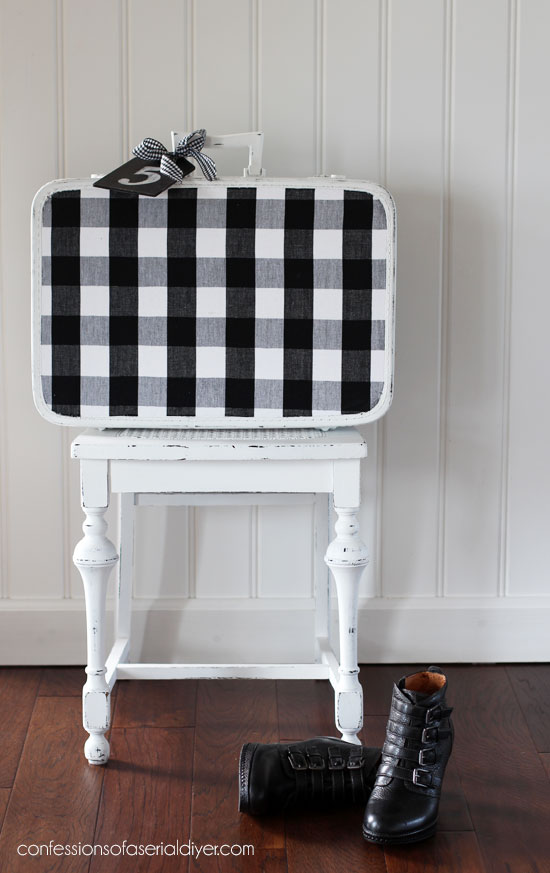
That would be buffalo check fabric!
Would you believe I actually found that fabric at the thrift store as well?
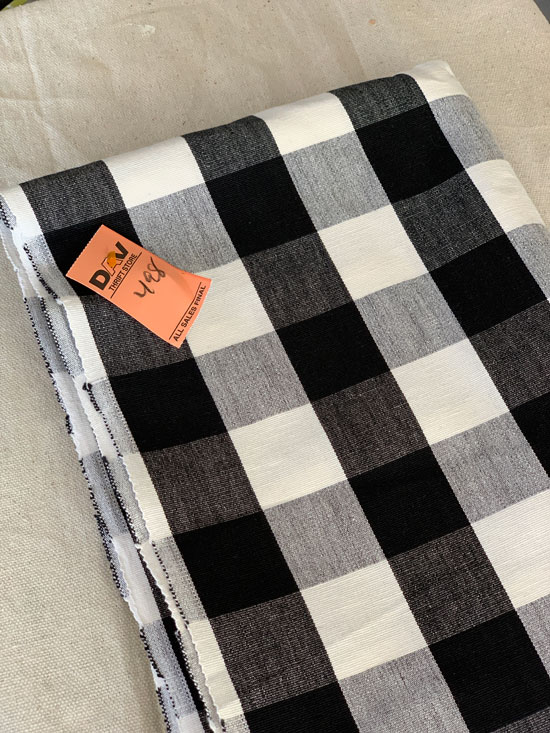
That was a few months back. I found several pretty pieces of fabric on that trip.
I’ve included a few affiliate links os you can find the products I love.
To make this suitcase over, first I needed to cover the green with black so it wouldn’t show through when I sanded. To do that I busted out my small spray shelter and a can of black spray paint:

I knew the top and bottom would be covered in fabric so there was no need to spray it.
Then I gave the suitcase three coats of DIY chalk paint made with Bit of Sugar by Behr. (Recipe HERE.) I did paint the top and bottom so the white would be a nice bright backdrop for the new fabric. I followed with a light sanding on all the raised areas using 220 grit sandpaper.
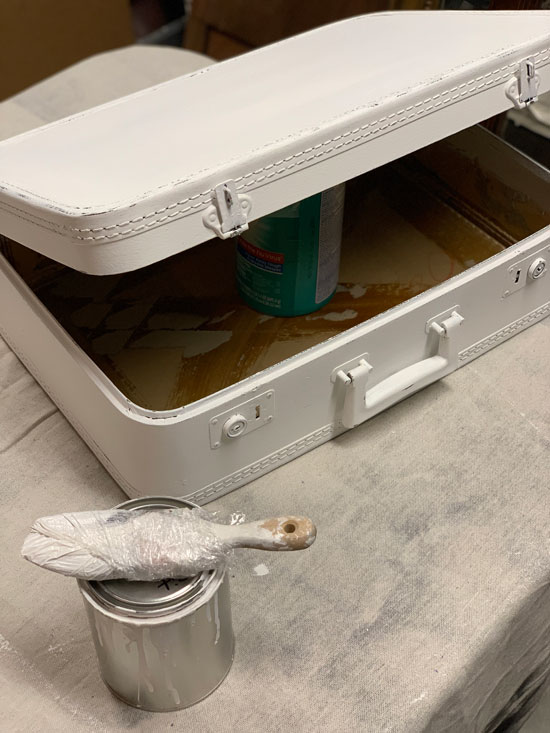
I went ahead and sealed the painted finish as well before adding the fabric. To seal it, I found something new to try! When I was picking up a new gallon of Bit of Sugar this weekend at The Home Depot, I spied a new-to-me wax made by Behr! It is intended to be used with their brand of chalk paint, but it worked great with my DIY version too, AND it had almost no smell to it! I’ll have to try it on something larger next time, but so far so good.
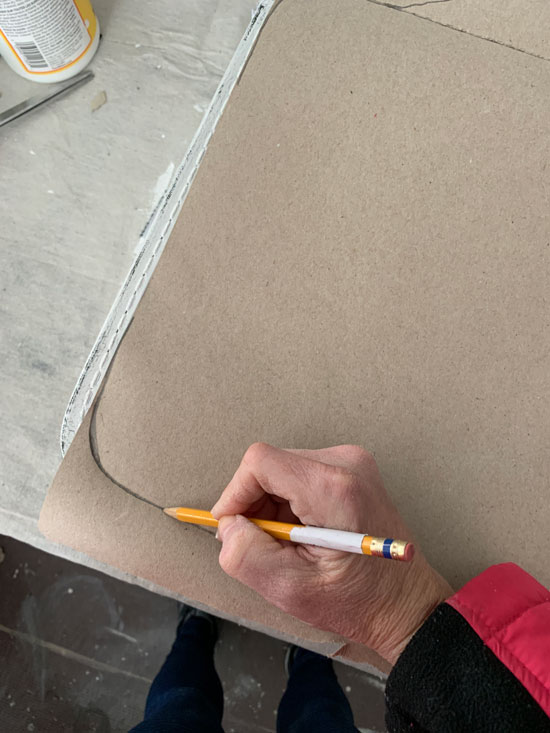
Next it was time to add the fabric to the top and bottom. To do that, I first made a pattern using brown paper and a pencil:
Then I used my rotary cutter and cutting mat to get nice cuts with minimal fraying:
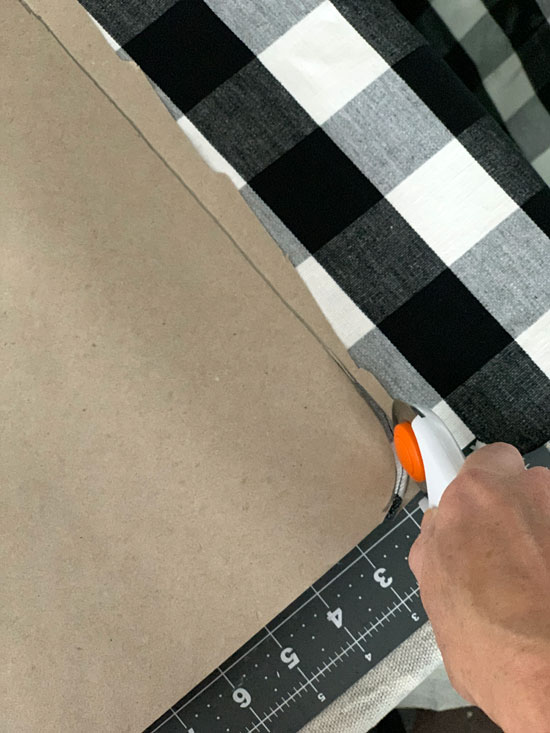
I attached the fabric with matte Mod Podge, spreading it on the surface of the suitcase with a cheap chip brush.
I did not apply another layer of Mod Podge over the top as I don’t expect this suitcase to be used for actual travel.
It would be great for storing all kinds of things right out in the open, though…like your kids’ or grandkids’ toys! Remember the set of three baskets I made over when we first moved into this house? Those baskets now hold a bunch of Brennan’s toys he plays with often. Cleaning them up quickly is a breeze.

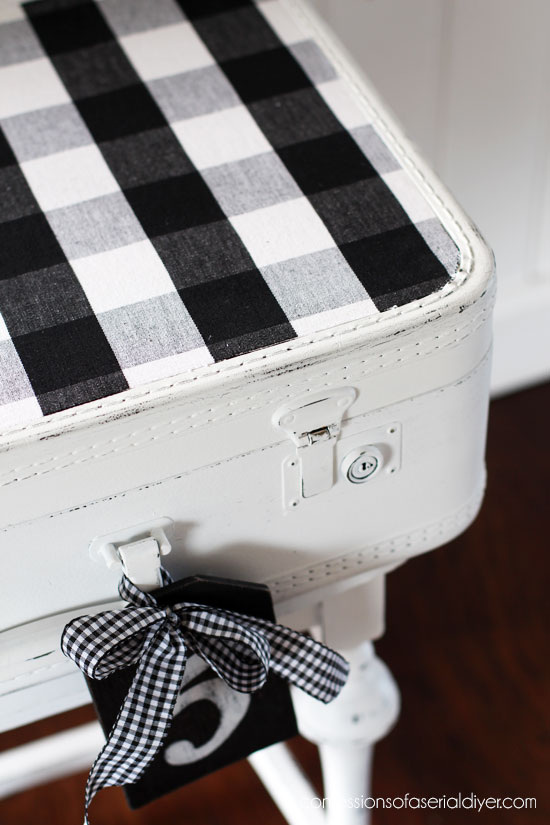
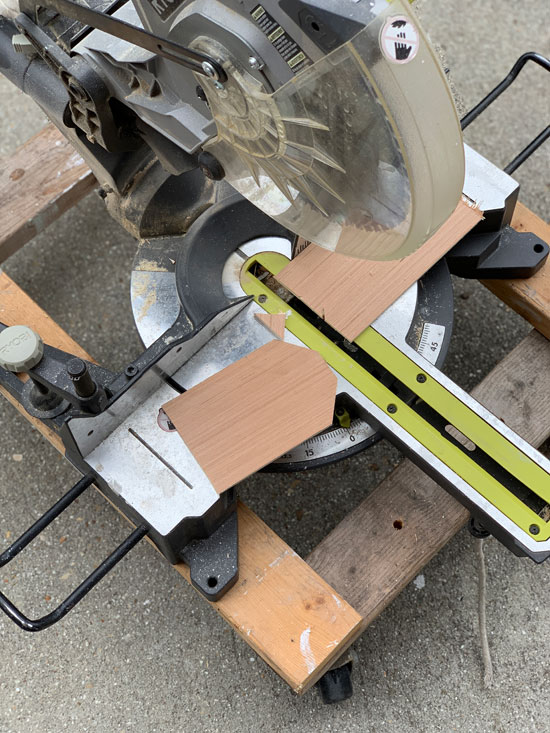
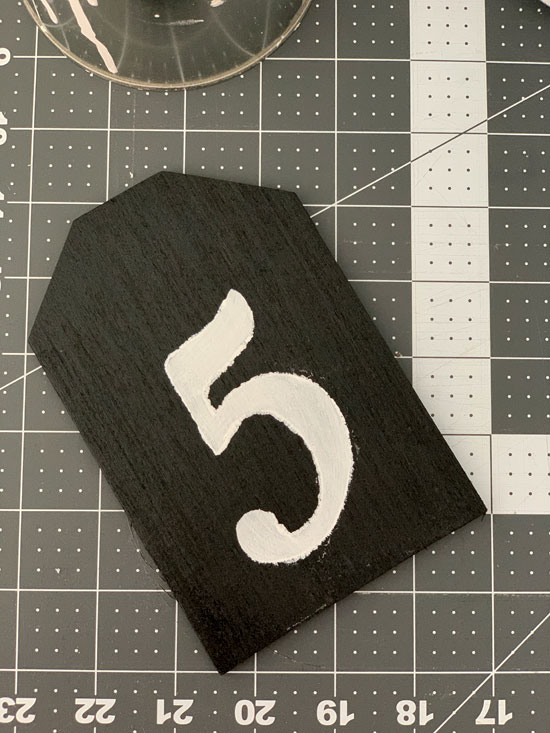
I added the #5 tag to give it a little something extra. I cut it out of a scrap piece of luan I had in the garage using my miter saw:
I sanded the edges smooth and then while I still had my spray shelter up and spray paint out, I gave it a couple of coats of black paint. I used this stencil and a small brush to add the number five:
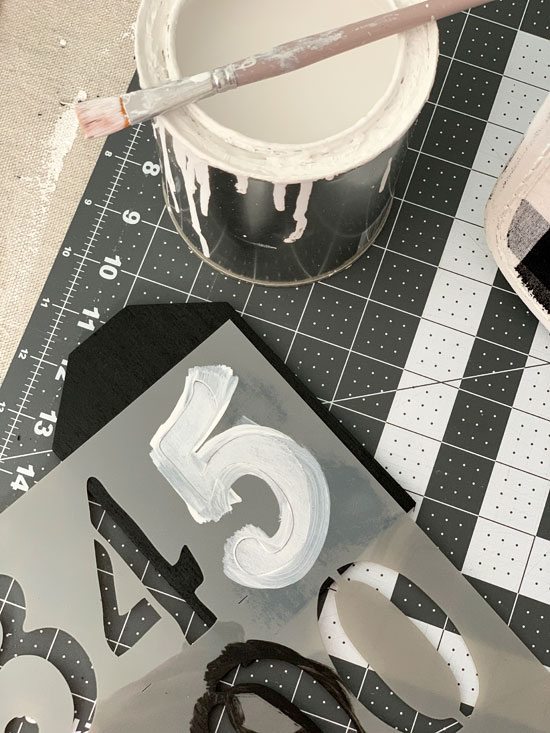
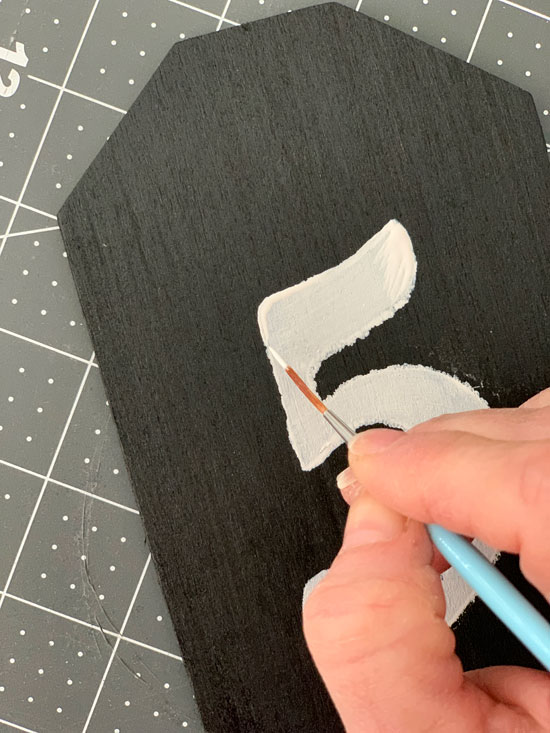
But uh oh!
I had a little too much paint on my brush…proving that things don’t always go as planned around here, but I just keep going.
I grabbed a liner brush to smooth out the edges:
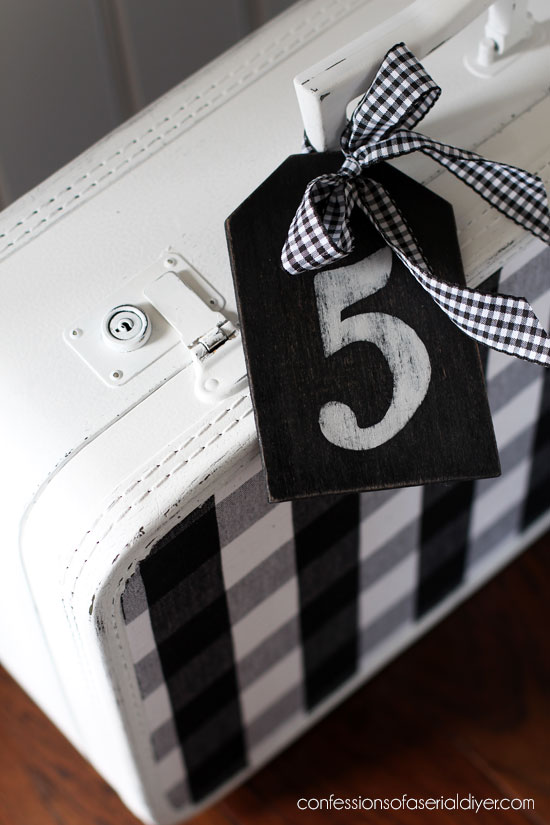
When the paint was dry, I sanded all over with 220 grit sandpaper to smooth it all out. I used the same Behr wax to seal, drilled a hole, and attached it to my new suitcase with ribbon:
Ready to see the inside?
I couldn’t leave the inside circa 1960:
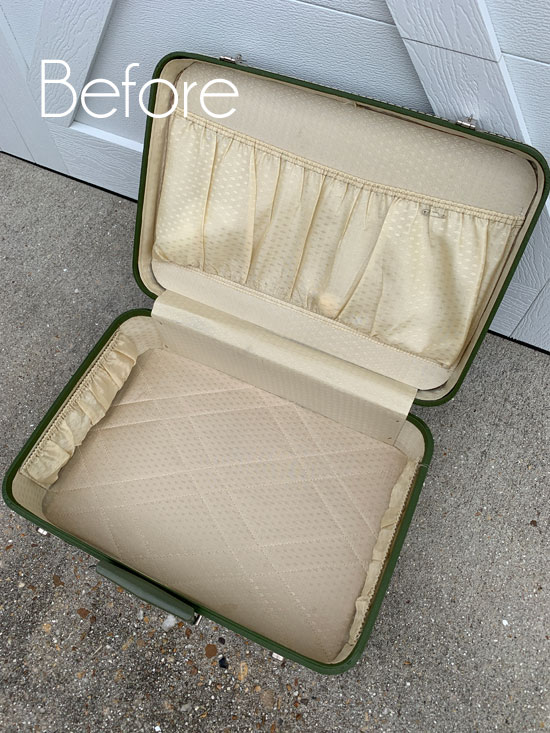
Although it was in very good condition, I replaced it with something to better match the buffalo check on the outside!

This isn’t too hard to do at all, I promise.
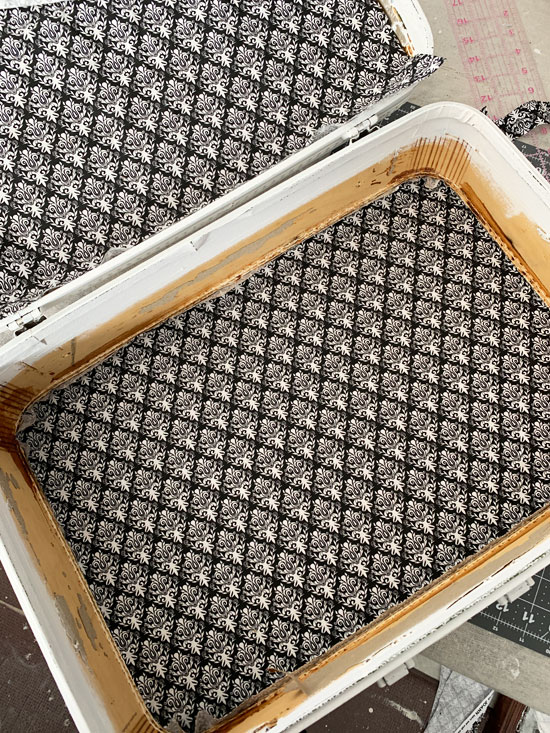
I first cut a piece of fabric just a tiny bit larger than the bottom of the inside, and I did the same for the top of the inside. I glued those pieces in place where the sides meet the bottom, all the way around using hot glue:
Then I cut a band of fabric the same depth as the sides plus 1/2″ or so. I folded the top and bottom 1/4″ or so and used my iron to hold the folded edges in place.
Then I attached it the sides with hot glue:
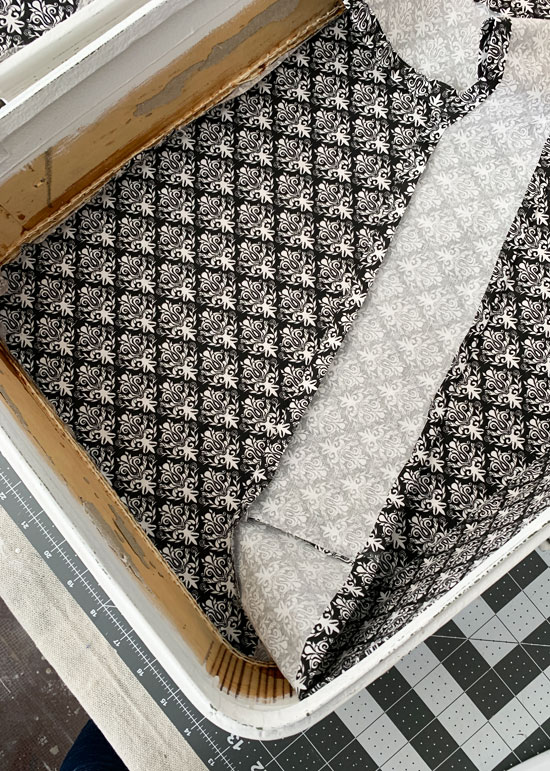
That seam you see in the band of fabric above? I did that with hot glue too so no sewing required!
I did the top the same way.
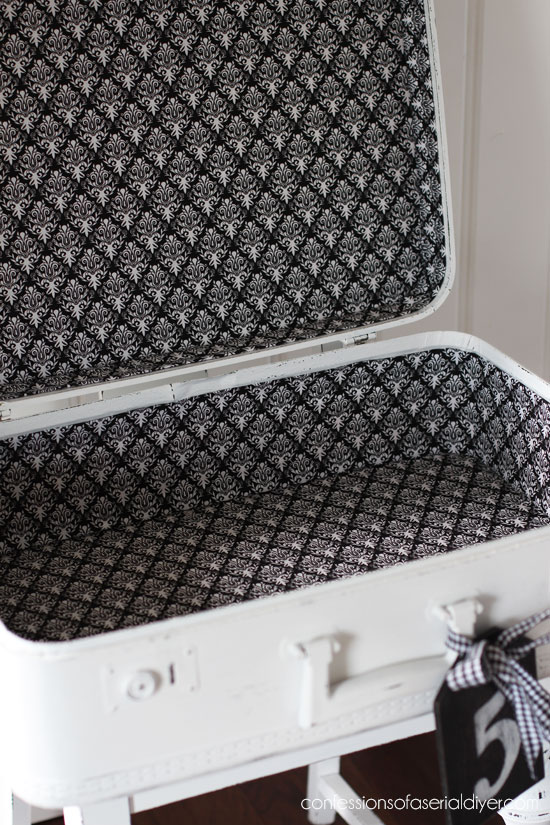
Darker fabrics hide a multitude of flaws. Just sayin. 🙂
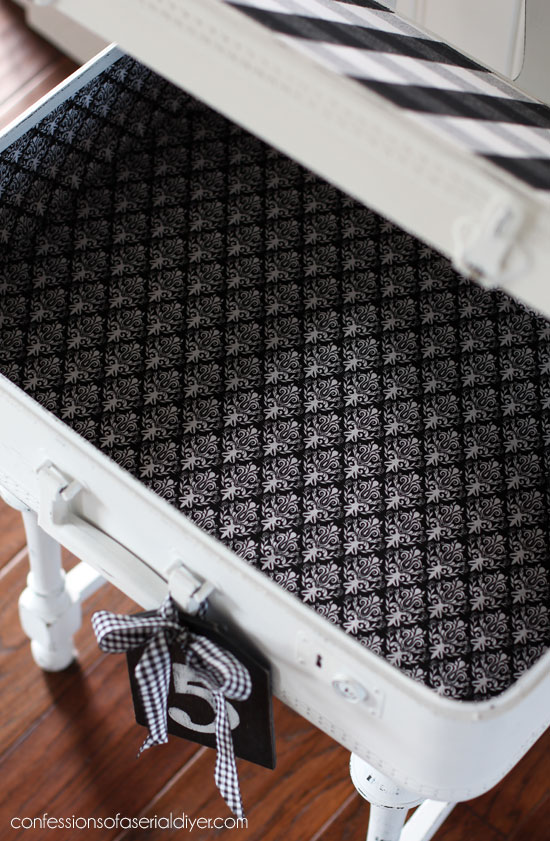
I hope you enjoyed this little makeover! The vintage green wasn’t bad, but now it has buffalo check charm!
That’s two pieces down!
If you liked this makeover, you’ll enjoy this one too:
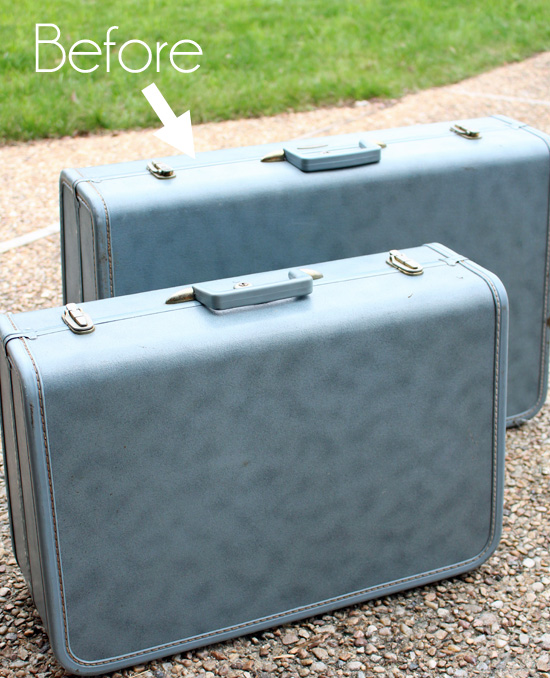
See how the larger of these two suitcases turned out HERE!
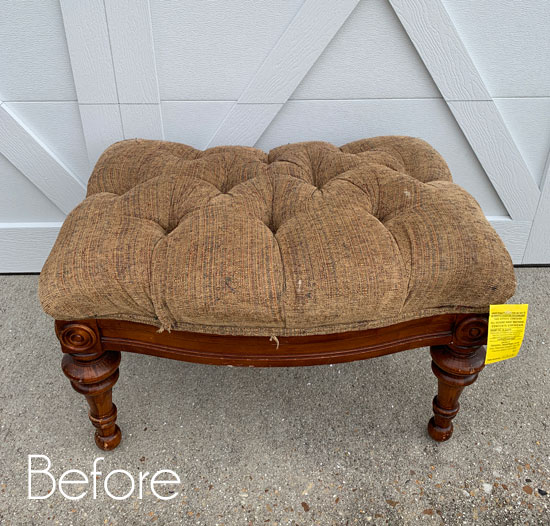
I’ll be back on Tuesday with this footstool I scored for $12!
Have a beautiful weekend!
UPDATE: See how I totally cheated the tufting on this stool HERE now!
XO,
![]()
Don’t Miss a Thing!
If you like what you see, there are several ways to follow along!
Email * Facebook * Pinterest * Twitter *Instagram


Petra says
Oh I just can’t believe how perfect this is 😮 🙂 I’m sure it will be whipped up! xo
Christy says
Thank you so much, Petra!! XOXO
Mary Kaiser says
Wow, so amazing. I LOVE how that turned out. Now for me to find a old suitcase….I will because I love how this turned out. Looking forward to seeing the foot stool! Thanks for such a great tutorial!
Christy says
Aww thanks, Mary! Lots of luck in your search, my friend! XOXO
Janice Holt says
Love the suitcase. It really was in good shape but looks so much better now. Love the buffalo print on it also.
Christy says
Thank you, Janice! I’m a sucker for buffalo check! XOXO
Christina in SW FL says
Christy, this is a WOW! You really made this suitcase sing with style. Love the fabrics and the tag is a lovely touch as well.
Have a great weekend yourself!
Christy says
Aww yay! Thanks, Christina! I always enjoy getting to play with fabrics so this was a fun one. Happy weekend to you as well! XOXO
Kimberly Wollmer says
Wouldn’t this make a cute display for an entryway? You could stencil your house number on the tag and place it on a covered porch if you have one. I love the black and white colors. Cutest suitcase makeover I’ve ever seen!
Christy says
Yes it sure would, Kimberly! I love that idea! Thank you! XOXO
Carolyn says
Too cute. Happy Valentine’s Day!
Christy says
Thank you, Carolyn! Happy Valentine’s Day to you as well! XOXO
Barb says
I loved how it turned out especially love the buffalo check on the outside. I bought the same fabric you used for the interior except I’ll be using it for a wall in a dollhouse. It’s a great crafting pattern!
Christy says
Thank you, Barb! That fabric is perfect for “wallpaper”! What a fun project to use it on! XOXO
Kimberly says
Too cute! Thanks for all the tips. One of my vintage suitcases has developed a crack on one side. I am now hoping that I can camouflage it with some home dec weight fabric.
Christy says
Thanks, Kimberly! Yes…fabric might be just what you need to fix yours right up! XO
Cecilia says
Very nice! Love the buffalo check – really updates the sweet suitcase!
Christy says
Thanks, Cecilia! I love some buffalo check! XOXO
vicki says
Sooo cute! I love the fabrics you used! Did you get the inside fabric at the thrift store too??
Christy says
Thank you, Vicki!! I found the inside fabric on clearance at my JoAnns when there were moving locations, but I did find a pretty damask black and white print that I almost used for the insides at the thrift store. It’s a nice weight so I decided to save it for another project instead, but I get do get lucky with fabric at the thrift store sometimes! XO
Marcie Lovett says
Too stinkin cute! What a great idea, Christy! Of course, I thought you painted it but this is even better. I see old suitcases all the time and I have a few I’ve been holding on to, inspired by you to make something fabulous. You make it look so easy but I know that yanking out the insides and relining is time consuming, so I put them back in the corner ????
I predict this one will be gone from the booth before you get home.
Christy says
Thank you, Marcie! Yes, the fabric worked out great and it really wasn’t too hard at all. Getting the fabric to fit the panel was the hardest part. Also, removing the insides of the suitcases I’ve done so far has been fairly quick and easy unlike those dang flatware boxes…now those are a pain! XOXO
Brenda says
That is adorable!
Christy says
Thank you, Brenda!! XO
Nancy @ Artsy Chicks Rule says
That suitcase was rocking the 70’s vibe!! lol And it’s just adorable now, Christy! I love the buffalo check and the inside! 🙂 xoxo (and yes, I thought it was painted stripes at first!! haha)
Christy says
Ha ha yes it was! Good bye 70’s!! Thanks, Nancy! I couldn’t believe it when I found this fabric at the thrift store…it was at the DAV on VB Blvd that we always go to. I found a few good pieces of fabric that day! XOXO
Cathy says
How did you ever score that fabric at the thrift store??!!! You are one lucky duck and the suitcase is just adorable!!!
Christy says
I know, right??? I found a few good pieces of fabric at that same thrift store that day, including a blue and white ticking fabric and a beautiful cobalt blue and white patterned fabric. Score! Thank you!! XOXO
Mary says
Great project! That suitcase is ready for another 25 years of pretty service. Well done.
Just love it that you made the inside gorgeous too!
Christy says
Thanks, Mary, and yes it certainly is! XOXO
Cecilia from Georgia says
Happy Valentines Day! That suitcase is just the perfect storage container for so many things. Love the buffalo check fabric! When I first saw the suitcase with the checks I thought I would never be able to paint those! The tag is so clever, I thought about making a luggage tag. It was nice to see how you fixed the stencil when it bled–easy peezy! Looking forward to seeing all the makeovers from you latest pickins’! XOXO
Christy says
Happy Valentine’s Day to you too, Cecilia! Yes this could store all kind of things for sure. I agree that this would be a tough one to paint, but fabric was a great way to cheat it. When I stencil, there is almost always a few areas that bleed a bit and the liner brush fixes those areas right up! Have a great weekend! XOXO
Lisa Cain says
I just went to Home Depot a few nights ago to get a quart of the Behr Bit of Sugar you speak so highly of. And while there, I also spied the Behr Wax and brought it home to. I used it on a table that I redid using a Non Behr paint, as I was waiting for my Calcium Carbonite to come in to make your chalk paint recipe. Anyway, it worked well on that chalk paint as well. No smell, easy application. Now, that my CC has arrived (yay!) I can’t wait to make your chalk paint and use it on this old cabinet that was given to me to be redone by a friend. The cabinet/table thingy has a square wood piece on top that spins round. Very different. LOVE THE SUITCASE~
Christy says
Oh funny! I had never seen that wax before, but I like it so far. SO much better smelling than the Annie Sloan version! If you like chalk paint, you will love this recipe…just exactly like the big name brands and you can make any color you like! Good luck with your cabinet and thank you! XO
Debbie in TX says
Boy, seeing that old suitcase really takes me back! You did a fabulous job fixing it up, and I especially like the fabrics and detailing. That poor old suitcase is actually useful now. Way to go!!
Christy says
Thank you, Debbie! It was in really great condition inside, but I’m not sure the flowers did anything for the outside lol. Have a great weekend! XOXO
Beth Holt says
I love your projects! Your transformations of items is amazing!
Christy says
Aww thank you so much, Beth! I really appreciate that! XO
Julie Briones says
So pretty! Love the buffalo check fabric, and the cute tag! Wish I could fit all of these types of projects in MWA! Sigh!
Christy says
Thanks, Julie! If only you had an extra thousand square feet, right? But then you would hoard…like me lol!! XOXO
Ella Marie says
Christie,
I absolutely fell in love with the buffalo check siutcase. I know what I ‘ok be doing this weekend with my old suitcase. Thanks for sharing all your amazing projects. You bring not to my crafting bug.
Christy says
I’m so glad you like it, Ella Marie! Thank you so much!! And good luck with yours! XO
Brenda Johnson says
That is so darn cute! One of my favorites, but I love buffalo checked fabric and suitcases.
Christy says
Thank you, Brenda!! I’m a sucker for both too!! XOXO
jean says
Christy,
As usual, You did a wonderful job!!!! You can take anything and make it look like a Million!!!! I wish you would do a blog on upholstering a chair or ottoman that would have you doing a welt around it. You may have already done something like that and I just missed it; it so, you can let me know. I can’t wait til Tuesday so see the little footstool. Maybe you can add welting?????? Keep up the good work and I found a ottoman but it needed welting so I didn’t purchase it because I’m not sure how to get that sewned/attached. Needless to say, I didn’t purchase it but if it was meant to be I hope we go by there this weekend. I love watching your videos when you and your friend go thrifting!! Ya’ll are a HOOT!!
Your blogger friend,
jean
Christy says
Thanks so much, Jean! I do happen to have a tutorial on how to make your own double welt trim! You can find it here: https://www.confessionsofaserialdiyer.com/how-to-make-double-welting-for-upholstery-without-double-welting-cord/. Seriously, if you can sew a straight line, you can totally make welt trim! And you are in luck again because the stool I am currently working on has it as well! I hope that stool is still there if you stop back by. Glad you enjoy the videos too, we have a ball making them!! XOXO
Paula says
Great makeover, Christy! I know someone will buy this quickly once it hits your booth.
Christy says
Thank you, Paula! I was planning to take it to my booth, but I just haven’t been able to part with it yet lol! XOXO
Debra A Wise says
So cute! Love that buffalo plaid. It’s one of my favorites! Thanks for sharing.
Christy says
Thank you, Debra!! I sure do love some buffalo check too! XOXO
Marie says
You always do such a beautiful job on these old suitcases, Christy. This might be one of my favorites – love the buffalo check fabric!
Christy says
Thank you, Marie! This one might be my favorite too! XOXO
Carol C. says
I think the white night table with the black drawers would be so perfect in a teen girl’s room with the white chair and black striped suitcase. Maybe an old white iron head and foot boards and a black and white print for the bed spread. Very grown up! Beautiful pieces!!
Christy says
Ooh yes! Maybe a buffalo checked comforter or bedspread? Thanks, Carol! XOXO
Sandy says
Love the suitcase, turned out so darn cute. Also love the boots in your picture. I read through all the comments thinking someone would ask you where you bought them but no one did, so I guess I will ask… LOL. Love all your make overs, thanks for sharing.
Christy says
Thank you, Sandy! I bought those boots several years ago at Macy’s. I don’t have anywhere to where fancy boots much these days, but they sure do make for a great prop ha ha! XO
Pat Wright says
How creative!! I have four of these vintage suitcases. I can’t wait to get started. Just think I started to toss them. Thanks for the great idea!!
Christy says
Thank you, Pat! I’m so glad you found this just in time! Have fun reimagining yours! XO