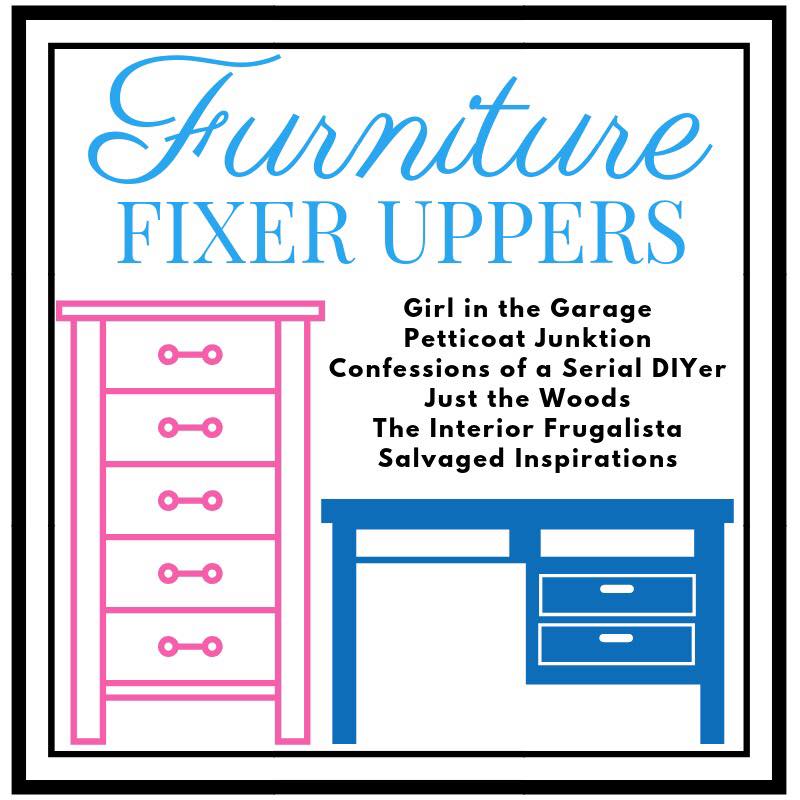
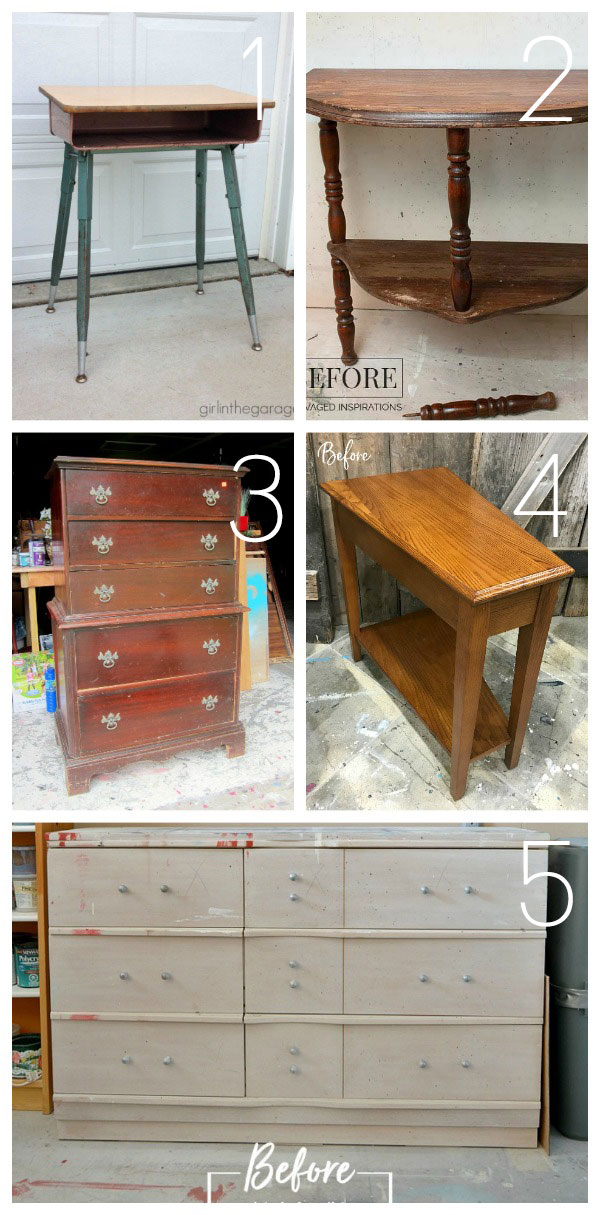
Amazing friends welcome back! I am so excited to share today’s project with you! It’s a perty one! It’s also Furniture Fixer Upper Day, so there are five more fabulous furniture makeovers for you to see at the bottom!
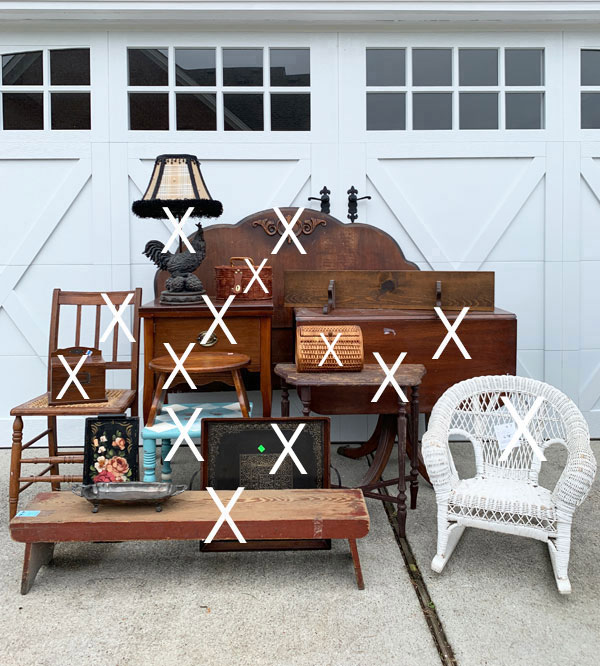
Okay here is today’s project piece before:
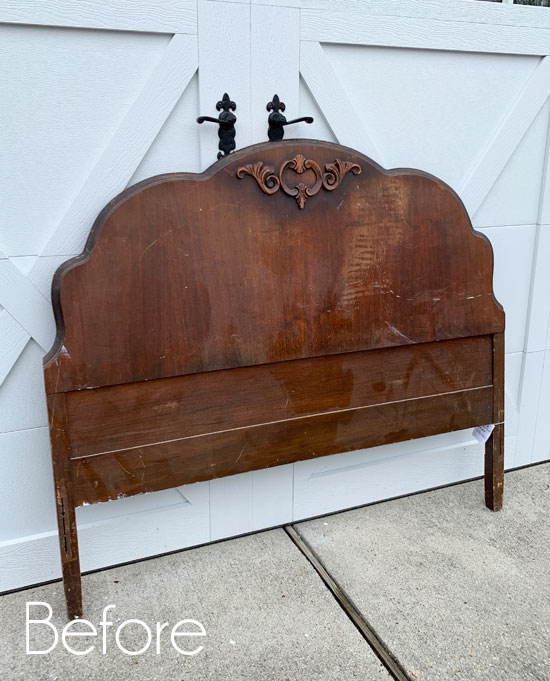
You would not believe what I paid for this gorgeous antique headboard…ready for it…$7!!! Can you believe that? I found it when I was thrifting with Nancy last year… you can actually see me finding it in this Thriftshop Shakedown video:
If you look closely, you’ll see a sign as we entered that read something like, “50% off all furniture if you take it home today.”
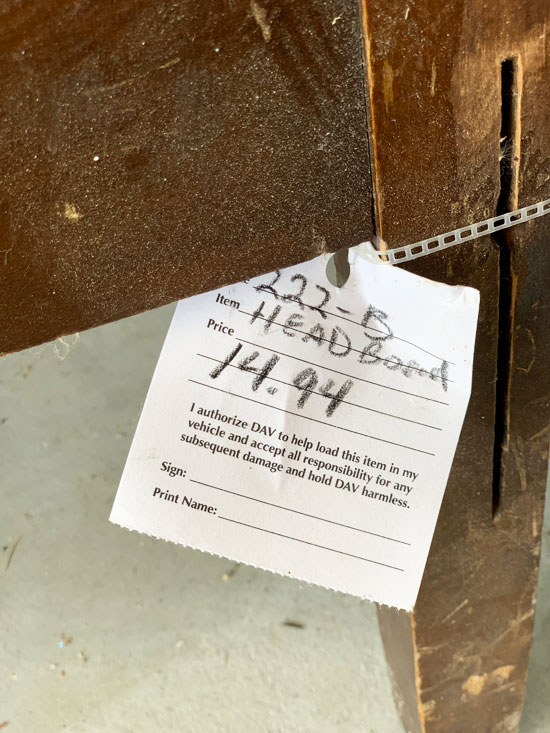
Here’s the tag:
Deal of the century! Of course, I’ll be taking that sweet thang home today! Then I let it sit…for a year and a half! The shame!
I knew that if I added it to this pile of treasures that I would HAVE to do something with it, and I finally did!

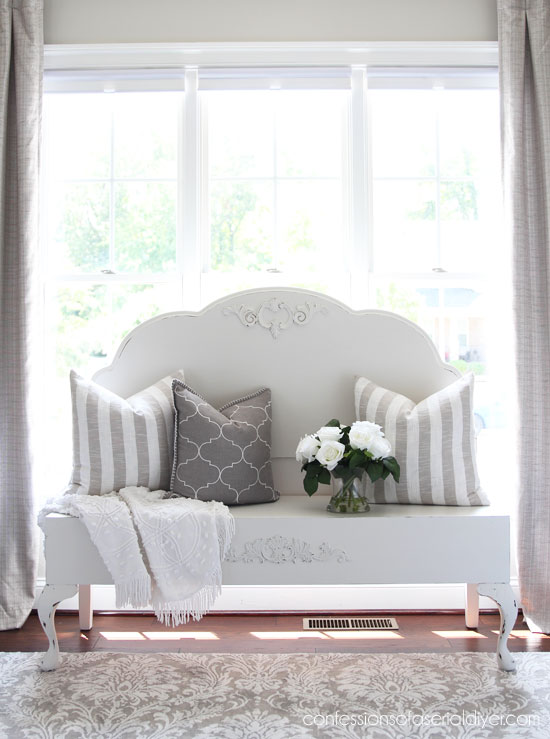
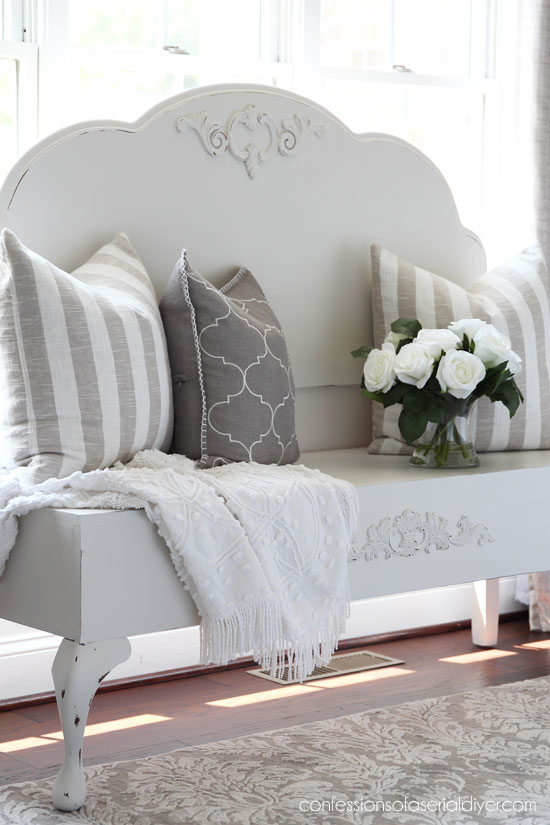
I’m sure you already guessed I would make a bench with it, right?
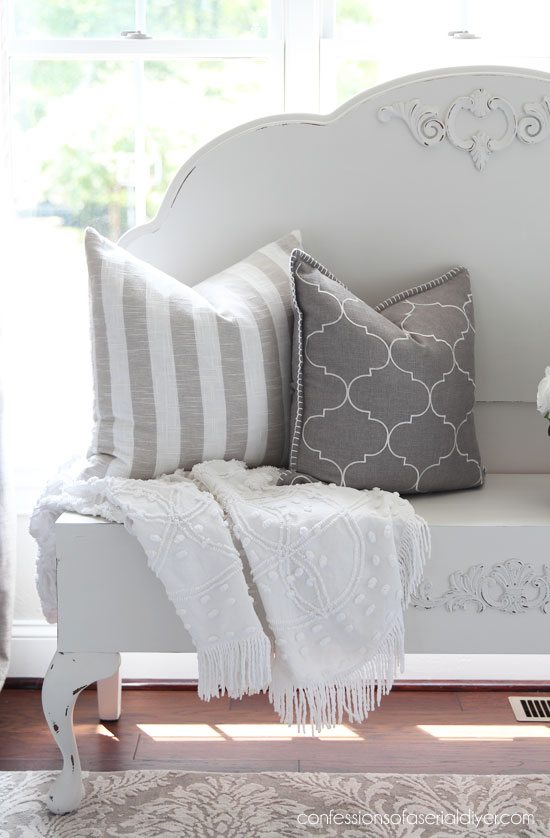
I have a thing for headboard benches and have done several in the past. However, this one was without a footboard. I have never attempted to build a headboard bench without the matching footboard before, and that right there is probably why it took me so dang long to make this one! I’ve included a few affiliate links so you can find the products I love.
First, I knew I needed to find some legs, so I headed to my favorite thrift store to see if I could find a chair or table that I could steal parts from.
I got lucky with this chair I found for $14.96:
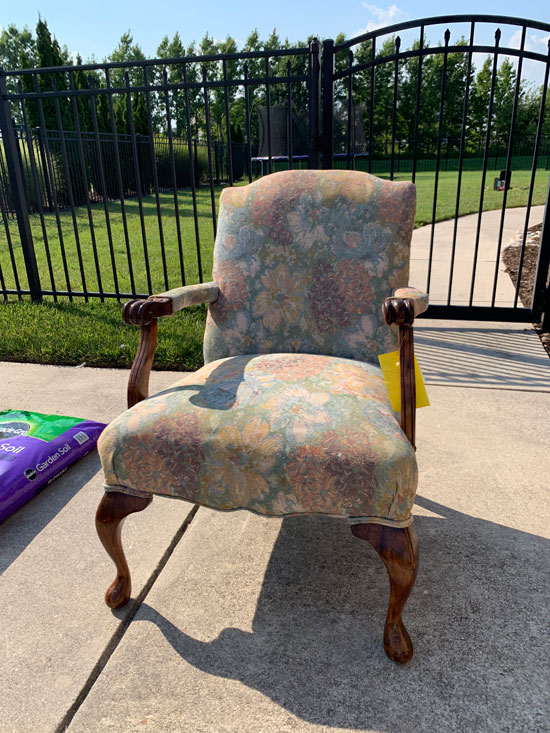
The legs were perfect! I was able to wrangle them out of there with the help of a sledgehammer:

One of them looked like the top of it had been exposed to water or something, but I cut those parts off anyway using my miter saw so I would have a flat edge across the top:

I was excited when I first saw it because I thought I might be able to use the arms as well. As you already know, that didn’t work out. That pretty wood on the arms stopped where the fabric started:
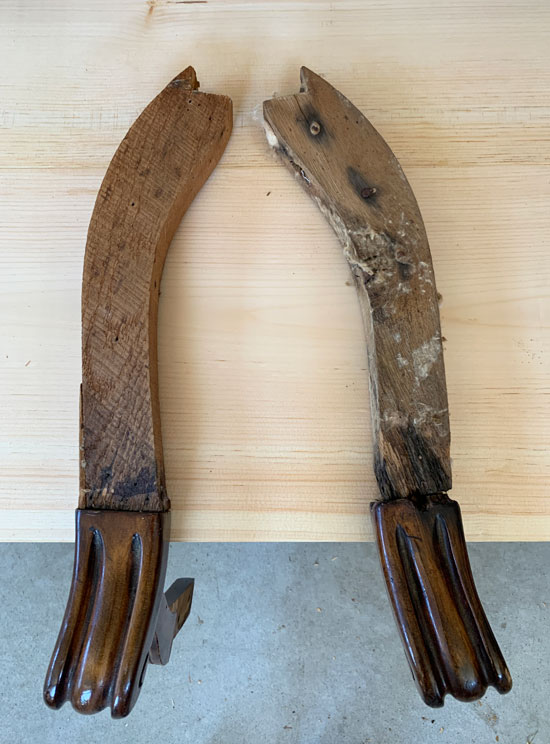
Um…no. Boo! I half considered trying to wood-fill/sand, etc, but it was 100 degrees outside that day and I had already spent about 30 minutes removing all the fabric and nails.
At least the legs worked. Next, I needed to build the seat. This is what I used:
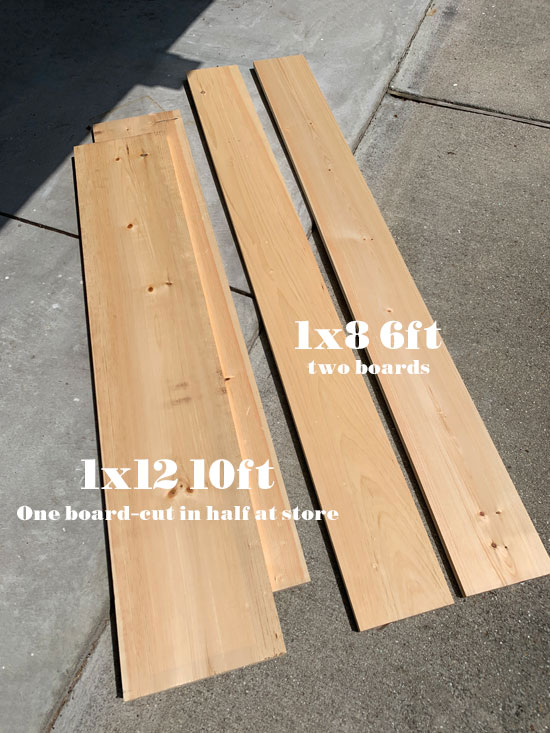
I started with the sides of the seat, cutting one of the 1×8 pieces into two 17″ pieces with my sliding miter saw:
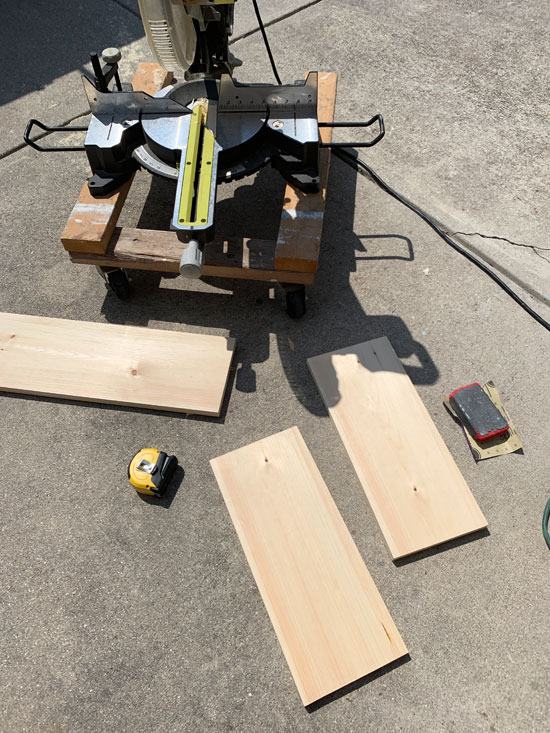
After every cut, I sanded the edges smooth with 220 grit sandpaper.
Then I used my Kreg Jig Pocket Hole Kit to create pocket holes so that I could attach them to the headboard and to the front of the seat to create my frame:
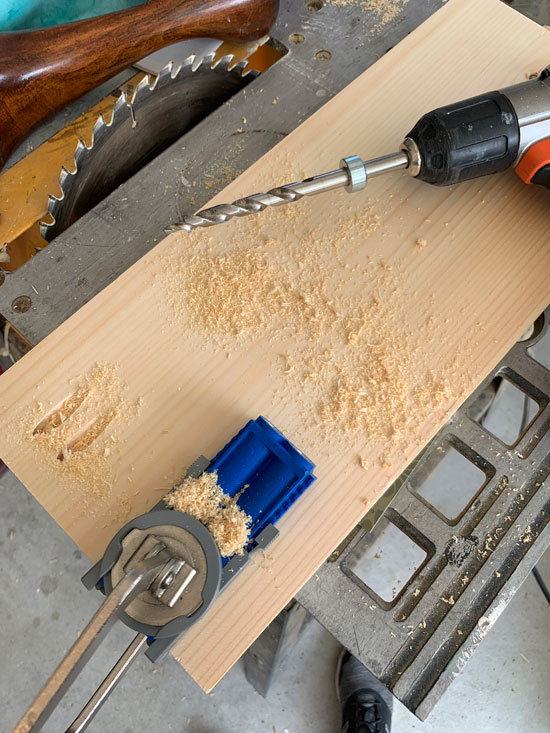
Don’t let this scare you! If you have a drill, you can totally do this! All you need is the Kreg Jig kit. (The one I linked to includes the clamp as well.)
(Ya’ll I had NO clue how this bench would turn out…I was seriously making it up as I went and hoping for the best…seeing these photos reminded me of that lol!)
Next, I cut the front of the seat panel to the width of my headboard. Then I attached the feet. I added pocket holes to either side where the feet would attach, added some wood glue, and screwed those to the bottom of either front corner of my bench seat:
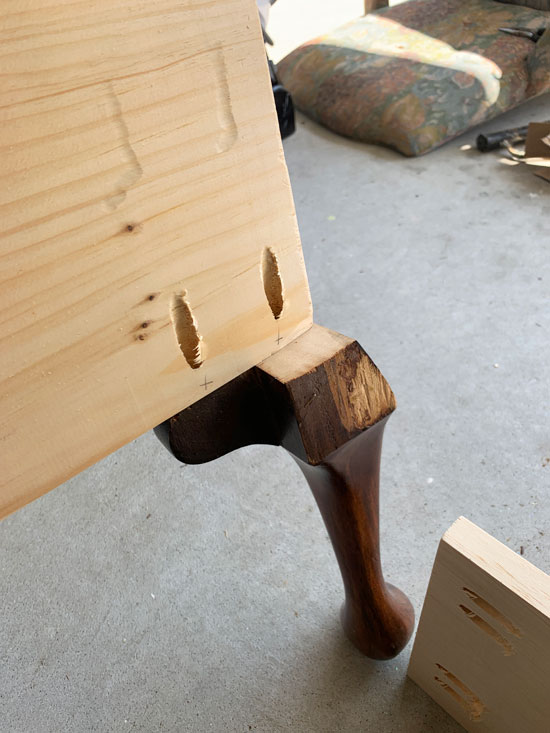
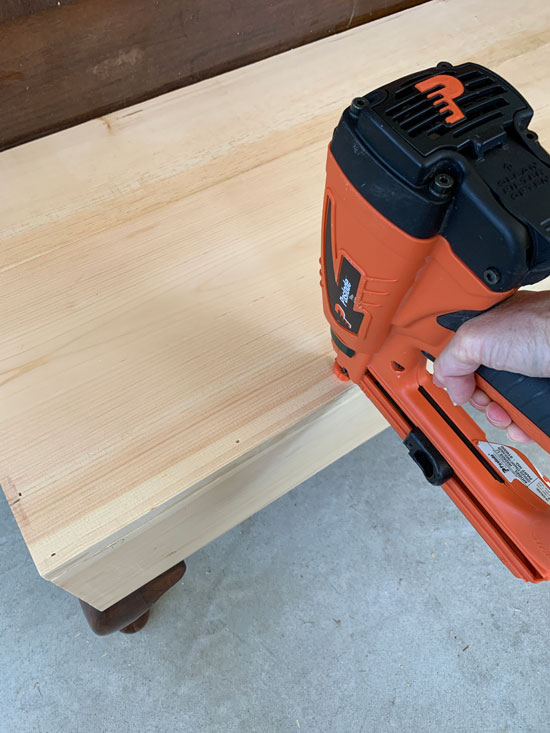
Here’s what they looked like from the front:
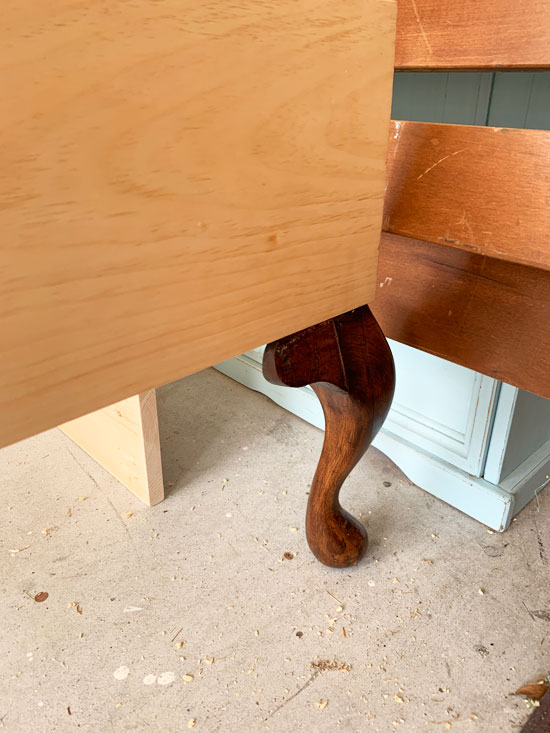
I ended up adding a few nails from the side with my nail gun as well.
Always be sure to use wood glue in addition for added strength:
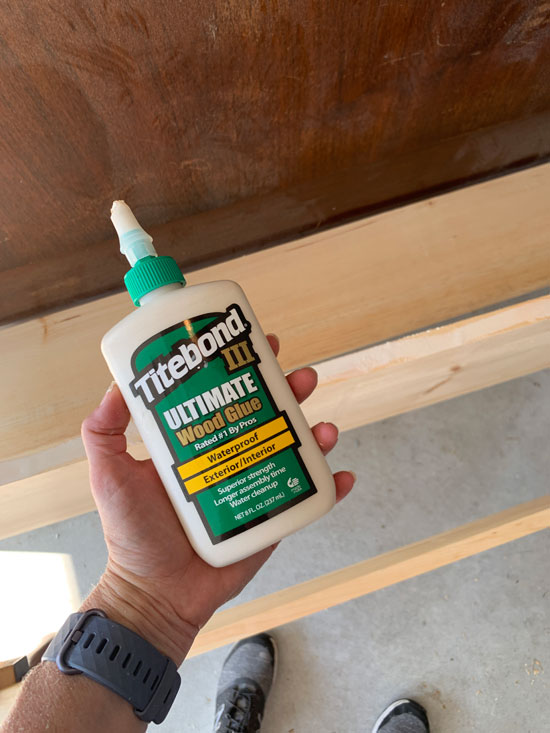
I added wood glue to the end of each side piece before screwing them into the front panel through my new pocket holes. I also added it the other of both sides before screwing them into the headboard.
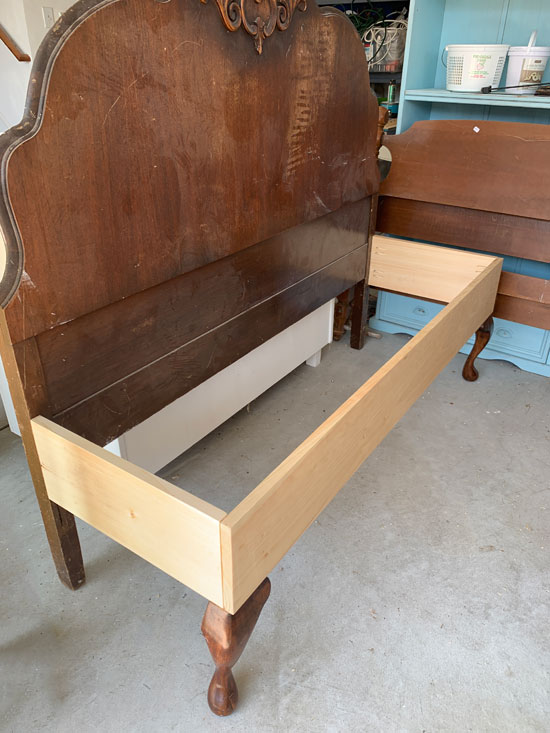
Be sure to grab a level and make sure your seat is level before attaching.
Hey, it’s starting to look like a bench:
At this point, I thought about creating storage inside the seat. That would have meant another trip to Home Depot for wood though and like I mentioned before, it was 100 degrees outside on the day I was building this, so I really just wanted to see it done.
To make the top of the seat, I cut my 1×12 boards to length using my sliding miter saw. Then I ripped one of them down with my table saw to make it fit the top. I used wood glue and clamps to hold the boards together while the glue dried. I wanted the seat top to look like one solid piece:
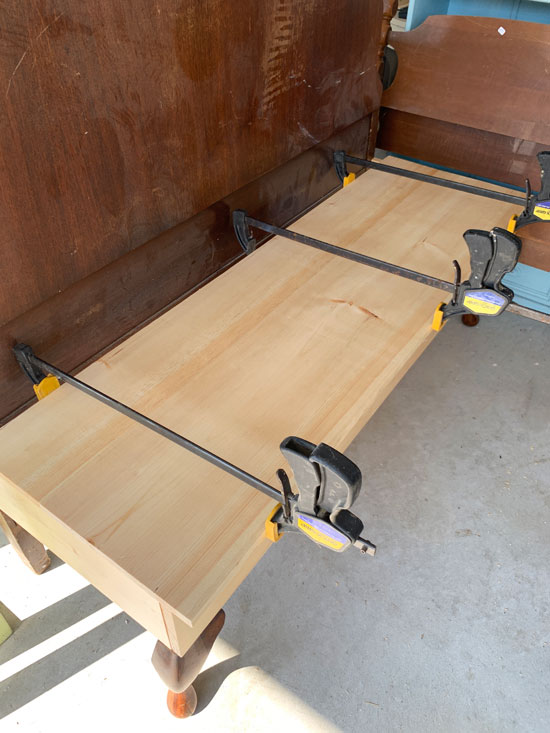
When the glue was dry, I used wood glue and my nailgun to attach it to the frame:
I added wood filler to the holes and all the seams to get a nice smooth look. When it was dry, I sanded everything smooth with my rotary sander and 220 grit sandpaper and that was that!

Find those furniture wheels HERE. They are a lifesaver when you have to move pieces around while working!
The next step was to stain the seat. I did that using Minwax staining cloths in Dark Mahogany since they dry super fast. (That is so that when I sand the painted surface, stained wood will show through the edges and not raw wood.)

Pretty ugly at this point and it was about to get even uglier!
I primed the whole thing with Dixie Belle’s BOSS in white to prevent bleed-through…
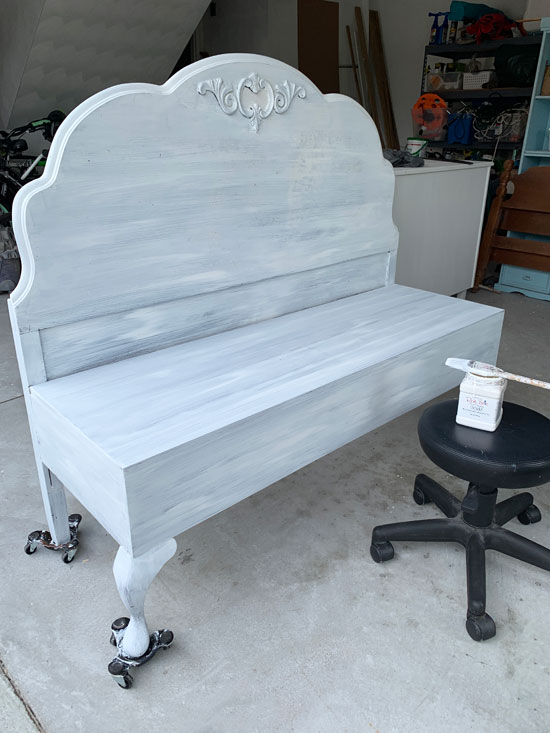
This stuff WORKS, y’all! Be patient though…let it dry at least overnight before painting.
Then I gave it two coats of Dixie Belle’s Fluff:

NO bleed-through!! TIP: Dipping your paintbrush in water before dipping it into your paint every once in a while will help your paint to glide on super smoothly.
I used my rotary sander this time to sand it smooth all over and give it a bit of distressing.

I sealed with Dixie Belle’s Clear Coat in satin using their blue sponge applicator. SO easy! You can see how I do that in the video below:
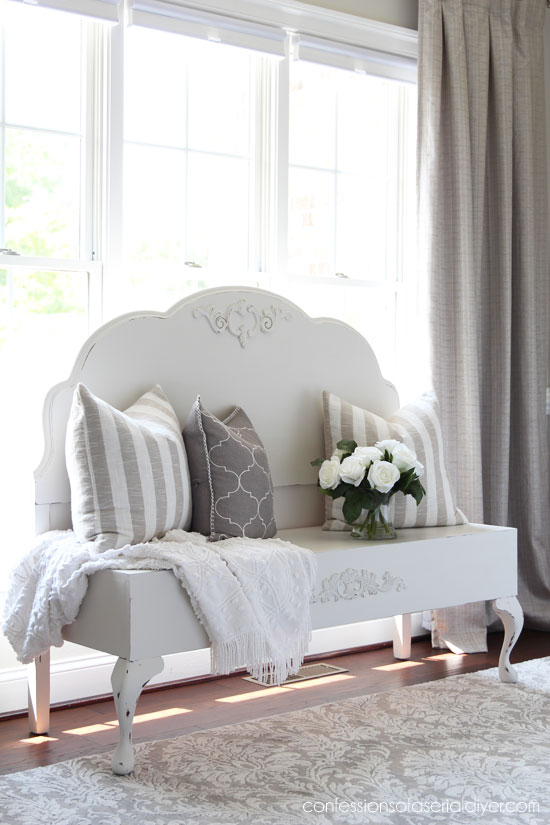
I considered adding stripes to the seat all the way around or some kind of saying or stencil to the back, but in the end, it needed to be simple to allow the accessories to play it up.
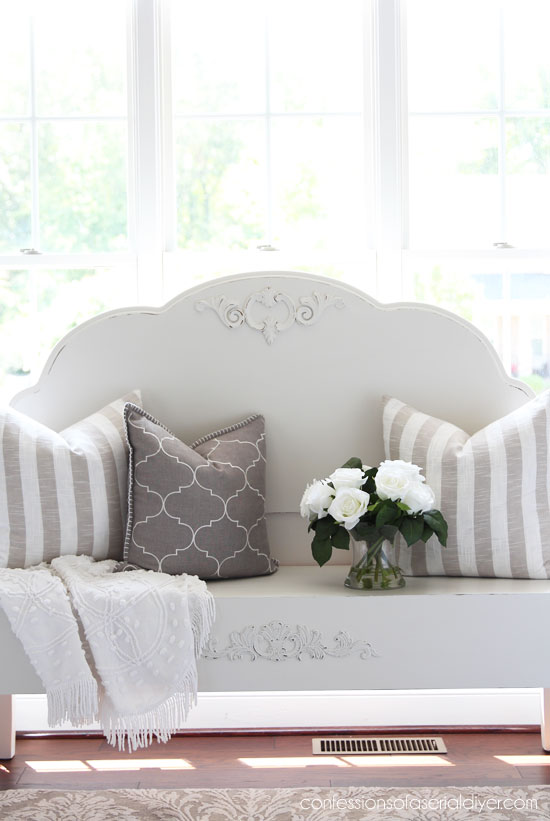
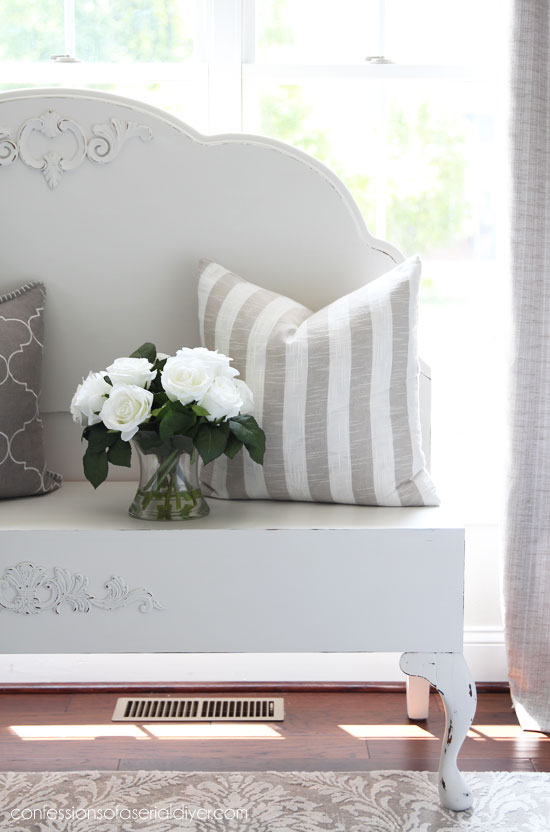
I did add the scrolly piece across the front of the seat:
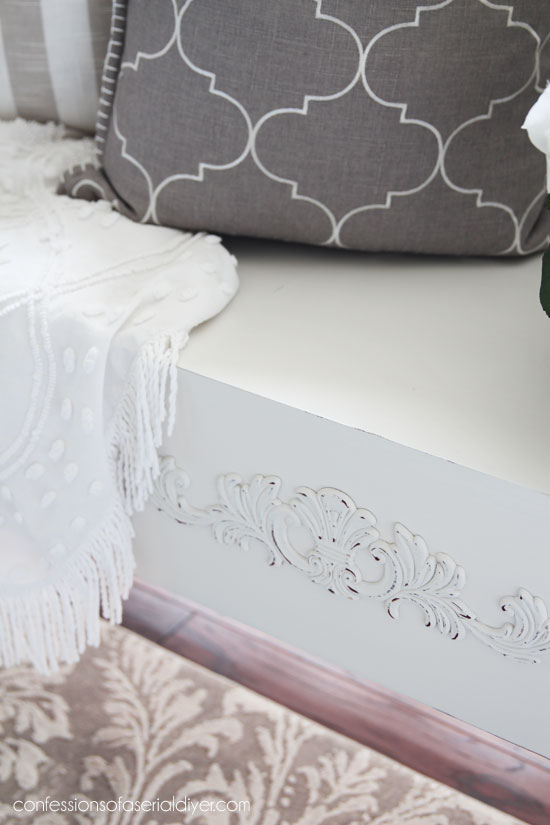
I found that at Home Depot. I stained it first as well before painting it in Fluff. I added it with wood glue after sealing the bench.
I wish I had a place for this in our own home! I realized after building it that it won’t fit in my SUV lol. I’m hoping it fits in my hubby’s truck or I might have to find a place for it here ha ha!
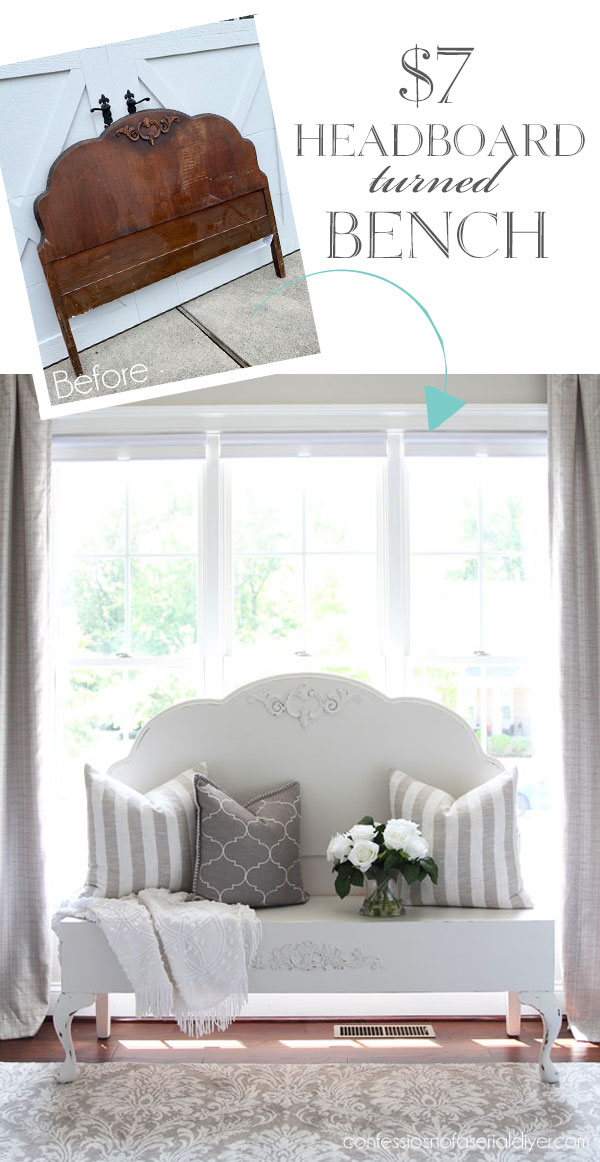
The total cost for this project, including the headboard, thrift store chair, wood, and wood applique was around $85. Not too shabby!
Don’t forget my friends have more awesome furniture makeovers to share with you today!
I only have three items left from my Haul of Shame!!
If you missed any, you can see them all at the links below:
$6 Thrift Store Bench Makeover
Drop Leaf Table Makeover & How to Apply Sealer with a Sponge
Thrift Store Step Stool Makeover ( & How to Whitewash!)
The next project on the list is this tray I picked up for $3:
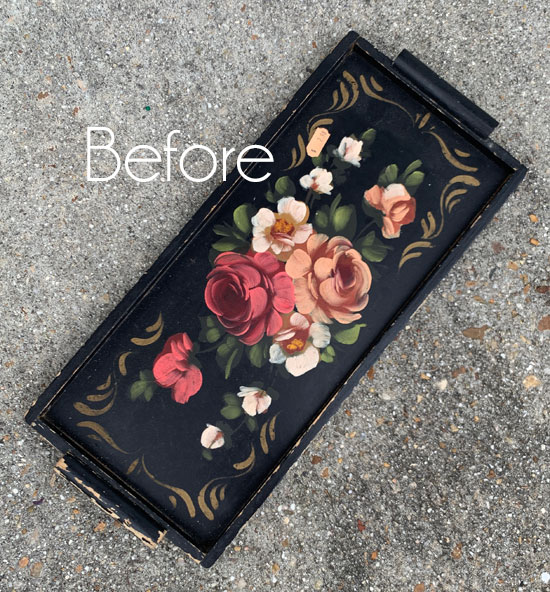
I think you might be surprised to see how I repurposed it!
UPDATE: See what it’s being used for HERE now!
XO,
![]()
Don’t Miss a Thing!
If you like what you see, there are several ways to follow along!
Email * Facebook * Pinterest * Twitter *Instagram


Petra says
Yep, I knew you would do something marvellous with it 🙂 I’m not as “handy” as you with the tools even tho’ I like to think I am, but I’m not haha. I bet you’re feeling a real sense of relief getting your “haul of shame” done! Happy travels.
Christy says
Aww thank you, Petra! I can’t tell you how good it feels to be knocking that pile out!! Have a great weekend! XOXO
Mary Kaiser says
Well how beautiful that turned out!! I knew that you were going to make a bench out of it, I love how it turned out. You could take anything and make it beautiful again, maybe more beautiful than it was the first time. You certainly di that with this piece, great job!
Christy says
Thank you so much, Mary!! Of course…you know me well ha ha! I just love headboard benches! You are the best! XOXO
Denise Cox says
WOW!! It’s lovely!!
Christy says
Thank you, Denise! XOXO
Tina Pineiro says
Beautiful bench!
Christy says
Thank you, Tina! XO
Christina in SW FL says
Christy, your creativity with this makeover is mind blowing! Wow! Love the legs in the front and the extra scroll on the front as well. I’m sure your hubby will help you out moving it. 🙂
Have a great weekend!!
Christy says
Thank you so much, Christina! Hoping this fits in his truck lol! XOXO
Janice Holt says
What a beautiful bench. You are so talented. Love it.
Christy says
Thank you so much, Janice! Have a great weekend! XOXO
Tracy says
This is gorgeous! You always do great work but this one really stands out for me. Wowsers!
Christy says
Thank you, Tracy! I really appreciate that! XOXO
Gail says
Gorgeous!
Christy says
Thank you, Gail! XO
Candy says
Absolutely gorgeous! Love this!
Christy says
Thank you, Candy!! XOXO
Gale Joiner says
Thank you. I was given a chair in distress, also a fine oak cabinet that lost its legs before it knew me. Now I can afford to repurpose both.
Christy says
Awesome! It’s fun to use the parts to create new and beautiful things! XOXO
gwen says
this headboard bench is so cute! that ‘scrolly thing’ on the seat really completed the project! good job!
Christy says
Thank you, Gwen! That scrolly thing was a lucky match! XOXO
Larissa ~ Prodigal Pieces says
Great score and even more awesome build! 🙌🏻😍
Christy says
Thank you, Larissa! XOXO
sharon austin says
That’s totally awesome; I love it. And damn if I didn’t just pass up a headboard! LOL
Christy says
Thank you, Sharon! Oh no…isn’t that always the way? XOXO
Cecilia from Georgia says
Oh Christy! You went over the moon with this one! It could fit in any style of decor. Also, I absolutely love my wheelies that I found from reading your blog. I highly recommend them for saving the back! Have a wonderful weekend!
Christy says
Thank you so much, Cecilia! I’m glad you are enjoying your wheelies…I even use them to load pieces into my booth from the car! Hope you have a great weekend as well! XOXO
Kimberly says
Christy, I am AMAZED. Your vision for these pieces is incredible.
Christy says
Aww wow, thank you SO much, Kimberly!! XOXO
Cheryl says
Very beautiful!!
Christy says
Thank you, Cheryl! XOXO
Marie Lavender says
I just bought this EXACT same antique headboard to make over for my niece’s bedroom. Hers came with a gorgeous footboard – it’s even more ornate than the headboard and I can’t wait to make it beautiful for her. It’s my weekend project!
Love the bench you made – the feet are perfect.
Christy says
Oh I bet that will be gorgeous, Marie! I wish this had the footboard with it. If you feel like sharing, I’d love to see it when you’re done! Have fun! XOXO
Nancy @ Artsy Chicks Rule says
Oh my! I think this might be the best bench you’ve done yet!! I love it!! xoxo
Christy says
Aww yay! Thank you SO much!! I wish I had a place to put it in my house lol! XOXO
LeAnn Hileman says
So pretty Christy! You did a lot of work on this one and all worthwhile, I hope it sells for a big price and quick!
Christy says
Thank you, LeAnn! I hope so too! XOXO
Jackie C says
Oh my Lord this is gorgeous!
👏🏼👏🏼👏🏼👏🏼👏🏼❤️❤️❤️
Christy says
Thank you, Jackie!! XOXO
Victoria Golojuch says
The bench is absolutely beautiful. I will be saving this idea for sure.
Christy says
Thank you, Victoria! XOXO
Marianne says
Girl;
What a beautiful bench!
Thank you for the inspiration – I’ll be watching out for headboards, now!!!
Christy says
Thank you, Marianne! It certainly helps when you have a beautiful headboard to start! XOXO
Marie says
You rock the power tools, Christy! I can’t believe what you paid for this headboard, I’d be ripping that tag off real quick like too. Gorgeous headboard bench and you’re right, the simplicity of it just painted white makes those curves shine and the decor pop.
Christy says
Well you know I got so tired of waiting for my Hubby to cut things for me ha ha! I would never get anything done! And yes, it was a STEAL! Thank you, my beautiful friend! XOXO
Addie says
Very pretty!!! Great for a girls’ room…..me have no girls. Keep going. I love to see the before pile and then the items “X”ed off. I don’t know how you can be motivated to do anything in 100 degree weather…..not me!!! Give me a seltzer water, a big hat and a pool!!
Christy says
Thank you, Addie!! Me have no girls either boooo. And YES! I am so excited to cross each project off…even if it takes working in extreme conditions ha ha…Saturday I went and jumped in the pool when I was done…with all my clothes on lol! XOXO
Lizzy Leff says
So pretty, and I love the little ornate touches. I have a headboard turned bench, too. I liked it so much, I kept it. 🙂
Christy says
Thank you, Lizzy! There’s just something so charming about a headboard bench! XOXO
kandice kullmann says
Absolutely beautiful! A lot of worked totally paid off on this one. I love it
Christy says
Thank you, Kandice!! So thrilled to call this one done!! XOXO
Ivana Carmon says
Love,Love,Love it!!
Don’t have the tools or knowledge to use them, but would buy the bench in a heartbeat 💗!
Christy says
Thank you, Ivana!! XOXO
sharon austin says
Love the way this turned out! And dang it if I didn’t just pass on a headboard.
Christy says
Thank you, Sharon!! Isn’t that always what happens?? XOXO
Denise - Salvaged Inspirations says
Simply gorgeous and I can’t believe you got that headboard for $7. I wish I lived closer because you better bet you and Nancy would have a 3rd wheel on those shakedown days! 😉
Christy says
Thank you!! Wasn’t that a steal?? We would all have a blast thrifting together!! XOXO
Julie Briones says
You never cease to amaze me, Christy! Perfect headboard makeover, and I love the accent piece you added to the front seat!
Christy says
Aww thank you, Julie!! Have a great weekend!! XOXO
Joanne says
Christy, You are amazing! Headboard turned bench is totally awesome!
Christy says
Thank you so much, Joanne! XOXO
Marcie Lovett says
I thought it would be a bench, but with no footboard, what would you come up with? This is a masterwork, Christy! I was disappointed about the arms, too. I actually envisioned you recovering them. Ha! Sometimes you have to know when to leave well enough alone, and this is more than well enough!
Christy says
Thank you, Marcie!! I honestly thought I could wood fill those arms and make them work, but yes…sometimes you gotta know when to fold ‘em Ha ha! XOXO
JODY GILBERTSON says
Just so beautiful. What a great job. Thanks for sharing.
Christy says
Thank you so much, Jody! My pleasure! XOXO
Naomi Shelton says
Christy, that is so, so gorgeous! Just beautiul. Wish I had a place to put it in my house!
Christy says
Thank you, Naomi! I wish I had a spot for it in my own home ha ha! XOXO
Christ'l Beyers says
I like your blog a lot. I read it every time you post a new message.
But! You call this headboard ‘antique’; here in Belgium it would be just ‘old’. As a child a had a bed like this. My parents bought in it in 1959 . That would make me antique as well 😉 and no, I’m just 65 🙂 Hahaha!
Christy says
Thank you!! Ha ha…how about we call it Vintage? 🙂 XO
Norma says
OMG Christy! you are a genius. this is gorgeous!!! ❤️
Christy says
Aww thank you so much, Norma!! XOXO
Jen @ Girl in the Garage says
Christy, I have seen quite a few headboard benches but this might be my favorite! It’s absolutely gorgeous! ❤️
Christy says
Thank you so much, sweet friend!! This is definitely one of my favorite projects! XOXO
Sheila DelCharco says
I really thought that the scroll-y thing was the footboard! You sure fooled me! Seriously beautiful!
Christy says
Oh yay ha ha! Thanks, Sheila! XOXO
Rose Lefebvre says
Such a great one-of-a-kind bench! I adore it!
Christy says
Thanks again, my friend! it is still sitting in our dining room because it wouldn’t fit in my car lol! XOXO
Kerryanne says
Such a beautiful and useful transformation Christy. I really need to stop passing up those headboards!!
Thank you for sharing your lovely shabby bench made from an antique headboard at Create, Bake, Grow & Gather this week. I’m delighted to be featuring it at tonight’s party and pinning too.
Hugs,
Kerryanne
Christy says
Thank you so much, my friend!! XOXO
Cindy Davis says
Hey Christy,
I confess, I didn’t even realize I’d subscribed, but there it was in my inbox: your post! But, glad I did! lol
You do incredible work! Congrats on your imagination! …and, your ability to fulfill what you imagine! 😀
Christy, I’m beginning a diy facebook group. I still have to get it set up, but, would you consider joining? It’s based on my website diybohemian.com , which is about clothing and accessories, but, in my group, I’d like to also add in decor. It’s centered on creativity. I want to encourage women to not just think about creating, but to create! I’m thinking of having a monthly challenge and encourage each member to post what they’ve made each month. Plus, more, which i will delineate on the group description.
Blessings,
Cindy, creator of DIYBohemian.com
Christy says
Thanks, Cindy! I just backed out of a FB group I loved due to time constraints, so I’m no in the market to join another, unfortunately. Thanks for reaching out though and good luck!
Shirley says
Browsing through today and happened upon this. It’s gorgeous! I think I would have had to find a way to incorporate those beautiful arms from the chair into this bench. Well that’s just me 😊
Love your work!
Christy says
Thank you, Shirley! I sure do wish I could have used the arms too! XOXO
Woodco says
Wow, the transformation is just amazing, I love it. Is very beautiful i must say and am inspired too. Thanks for sharing.
Christy says
Thank you!