Hello, amazing friends, and welcome to the final Fixer Upper Day of 2021!
Today, we’re sharing our favorite makeover from our Furniture Fixer Upper series from the past year as well as our favorites from one another! You’ll find links to my personal favorites from my friends at the bottom!
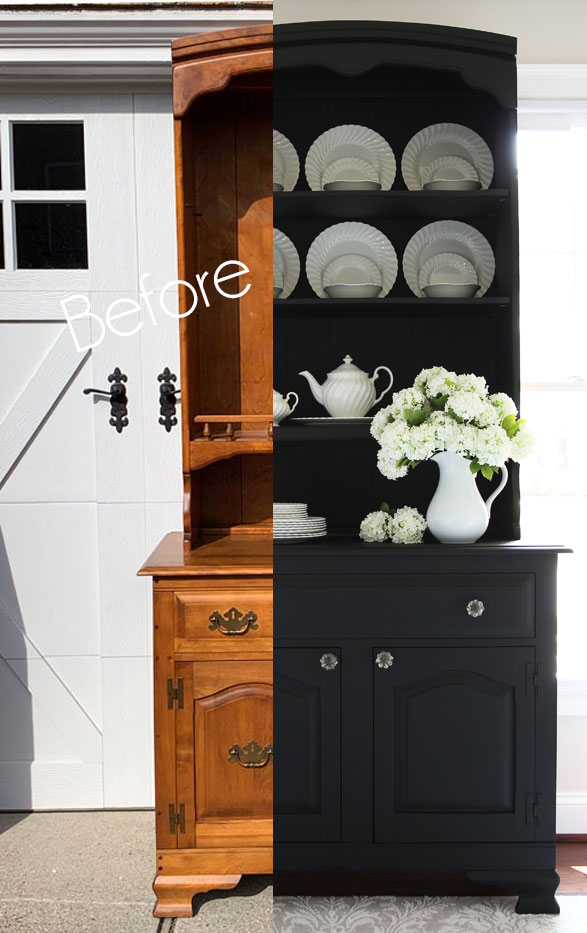
As much as I love white-painted furniture, this black painted hutch is my favorite of all our Fixer Upper flips! If you’ve followed along with my 30 Thrifty Makeovers in 30 Days series, you may have seen this one recently!
It belonged to the grandparents of my sister’s husband:
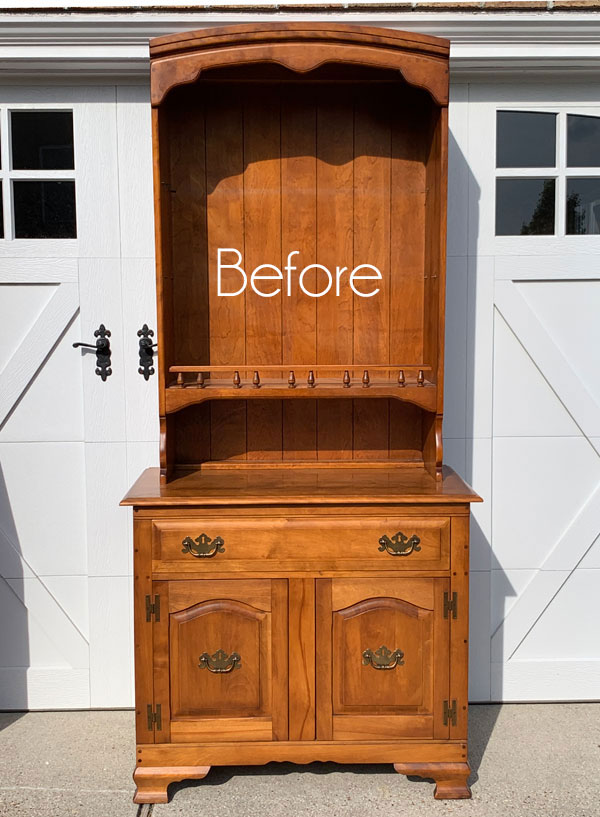
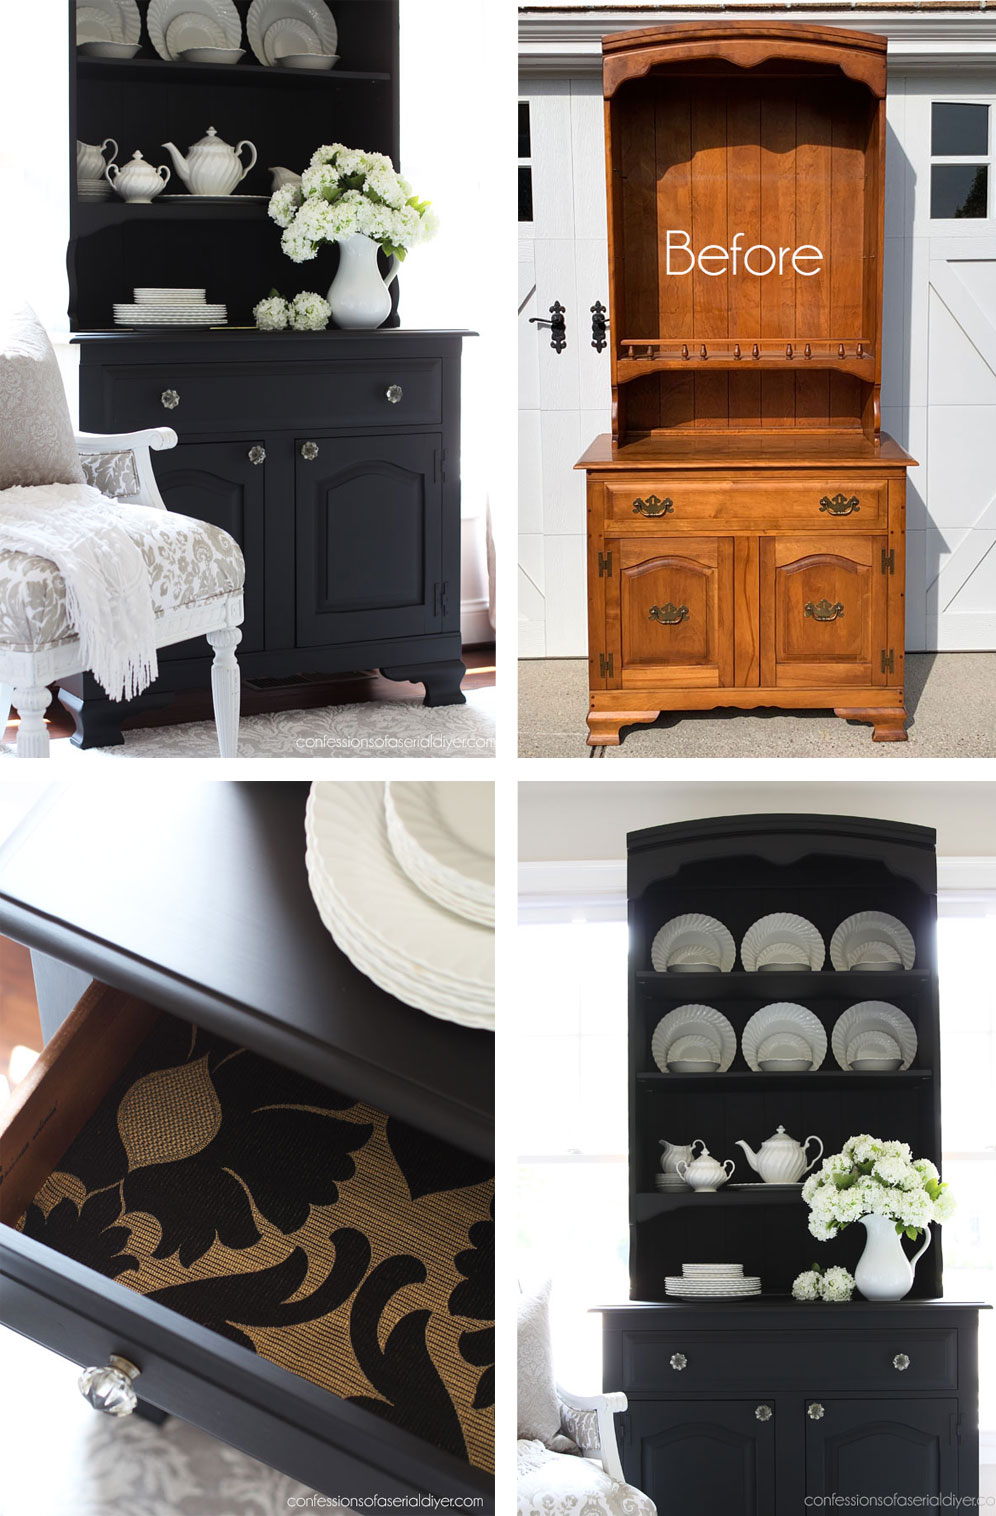
It’s Ethan Allen and it was in pristine condition. What I loved so much about this makeover is that a simple coat of paint added so much charm and sophistication to this very dated piece!
I wrestled with the idea of ditching the hutch since it was so incredibly tall, but I already did that with its brother, the secretary desk, so I ended up keeping it.
If you remember that secretary desk, it is one I painted for my sister’s MIL, and in return, she gave me this hutch.
The Prep
Before I could start on this hutch, I knew that I wanted to get rid of the dated spindles across the top piece. To do that, I used a maul hammer to whack them out.
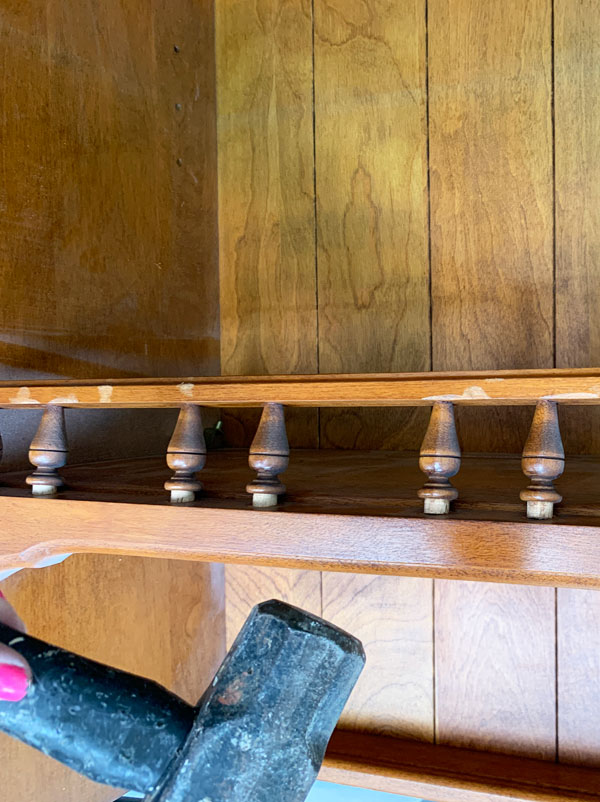
They actually came out pretty easily, on about the third whack. I’ve included a few affiliate links so you can find the products I love.
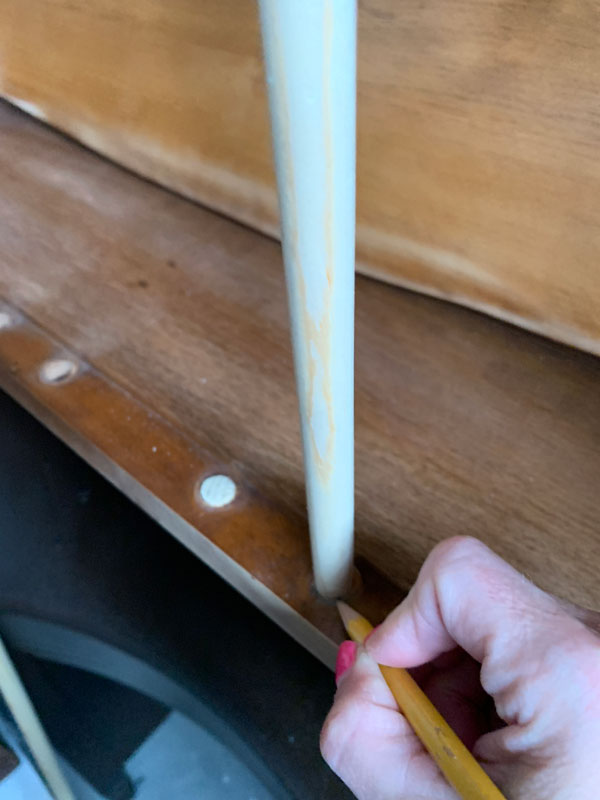
Then, I needed to fill the large holes that were left behind.
The best way to fill large holes like this is to purchase a dowel the size of the holes and cut pieces of it to fill in the holes.
I stuck the dowel in each hole and marked it prior to cutting:
Then, I used my miter saw to cut each piece:
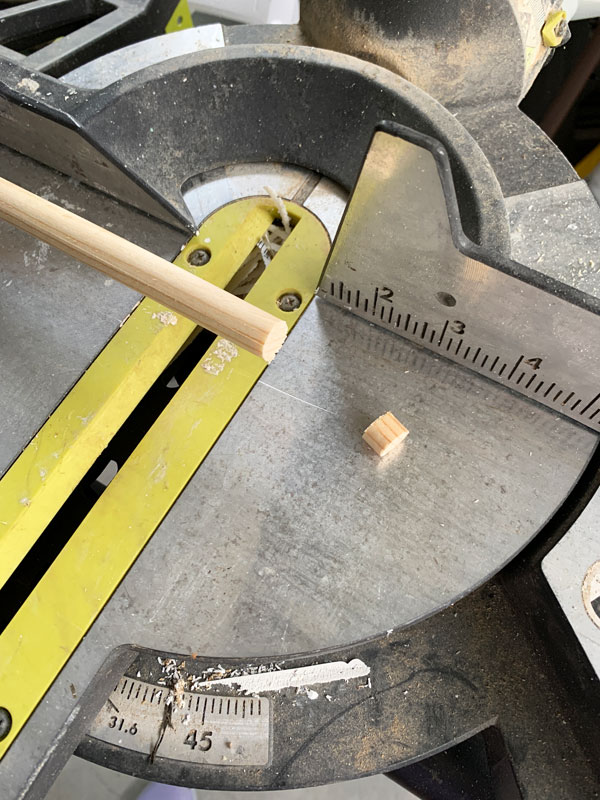
Be sure to always wear eye protection…these little pieces flew everywhere!
Then I hammered each one in place and used my rotary sander and 220 grit sandpaper to smooth them out.
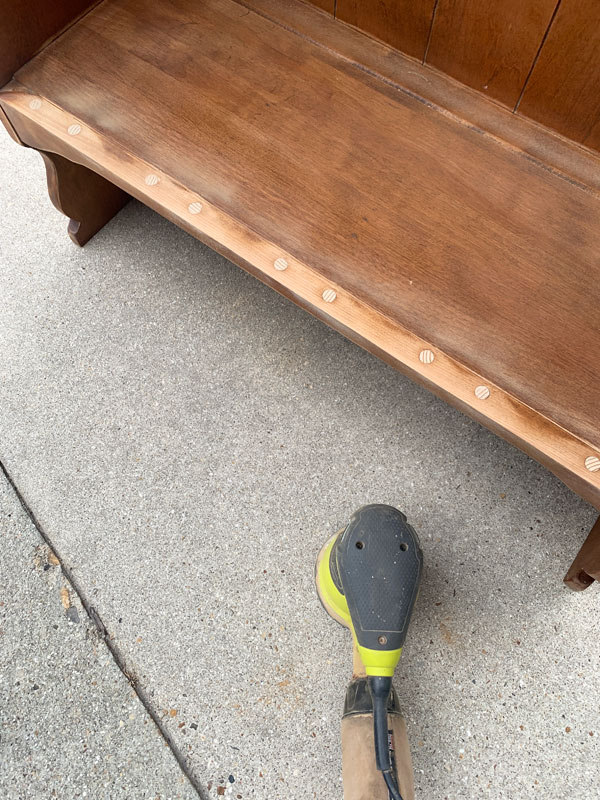
This worked perfectly to fill those large holes left by the spindles!
Because I planned to use Dixie Belle’s Silk paint on this hutch, I needed to sand the entire surface first.
Again, I used my rotary sander and 220 grit sandpaper.
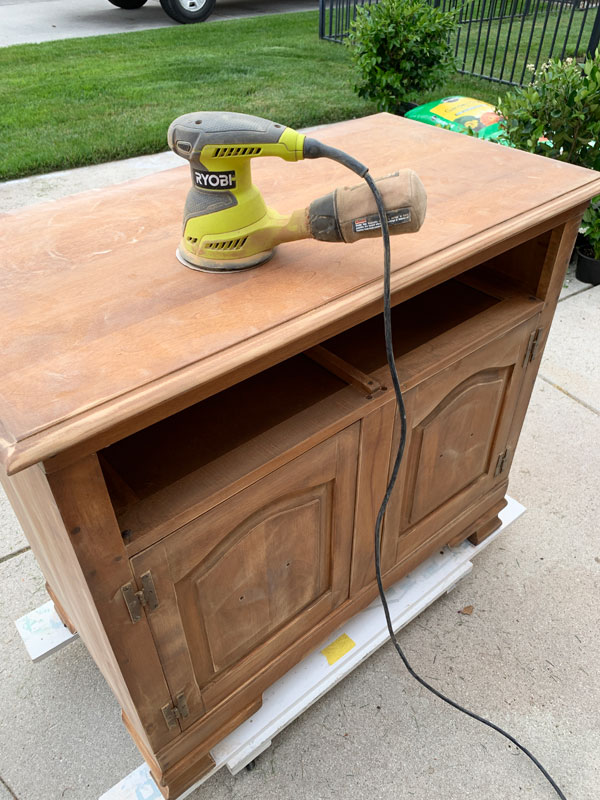
Silk paint requires something to grip onto, so sanding is key! However, you can substitute the sanding by prepping with Slick Stick instead.
See more about how to use Slick Stick HERE.
It was at this point that I realized I should have filled the hardware holes.
I wanted to change out the pulls for prettier knobs, so to do that, I filled the previous holes with brown Dixie Mud:
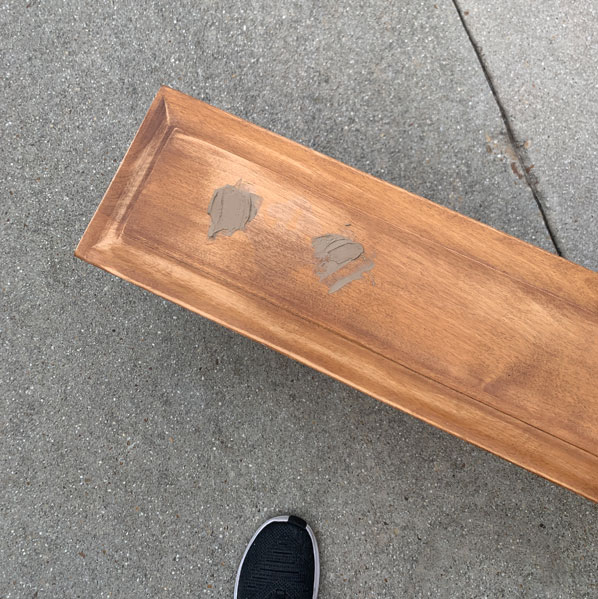
I let it completely dry overnight. Then, I sanded the holes smooth.
Once all the sanding was complete, I used my shop vac to vacuum up all the dust and gave it a good wipe down with White Lightning. I then swapped out my water, and gave it another wipe down with clean water. Once it was dry, I was ready for paint!
Time to Paint
For this hutch, I chose the color Anchor, which is a true black.
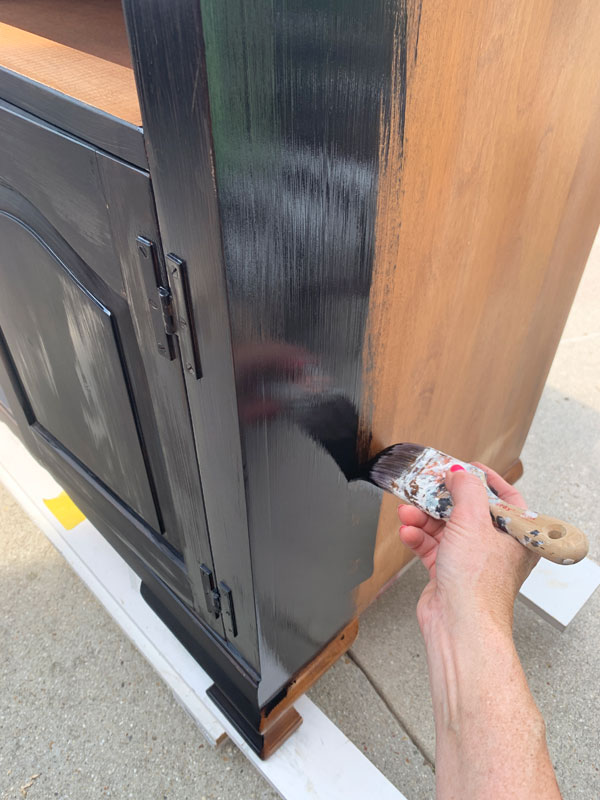
Here it is after one coat:
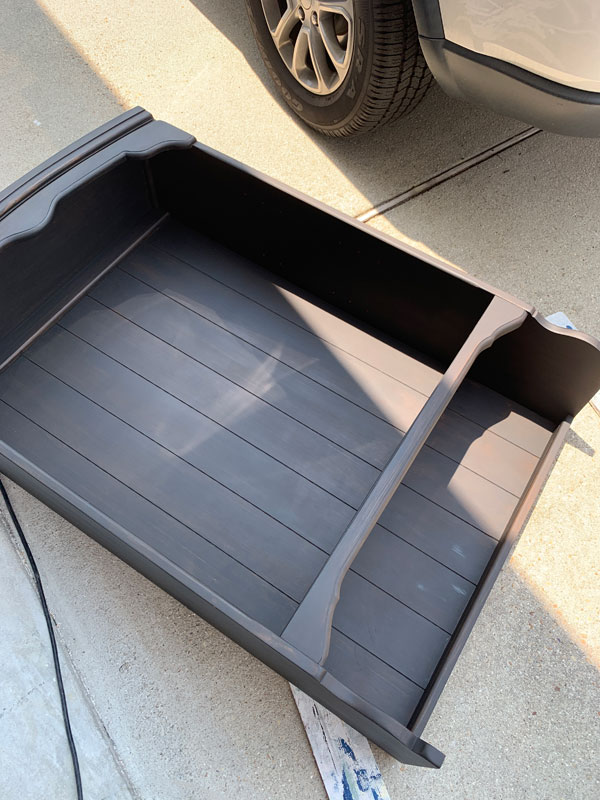
By the way, I do not recommend painting in the sun, especially black! The temps had dropped here this past weekend, and I was enjoying being able to paint outside without melting, but I had to keep moving out of the sun.
I gave this piece two coats. No sanding is needed in between or after…it dries smooth as, well, Silk.
No Sealer Required
Although Silk Paint requires sanding to prep, the beauty of Silk is that it does not require a topcoat! Can I get an amen? It has the equivalent of one coat of Clear Coat in it. The finish is somewhere between flat and satin. You can add additional topcoats if you prefer a different sheen, or if you want more protection for a piece that will get heavily used.
The hutch I’m sharing today will probably be used more as a display piece, so this should be plenty of protection.
Be sure to use your newly painted Silk pieces with care for the first 30 days, until it cures and hardens completely.
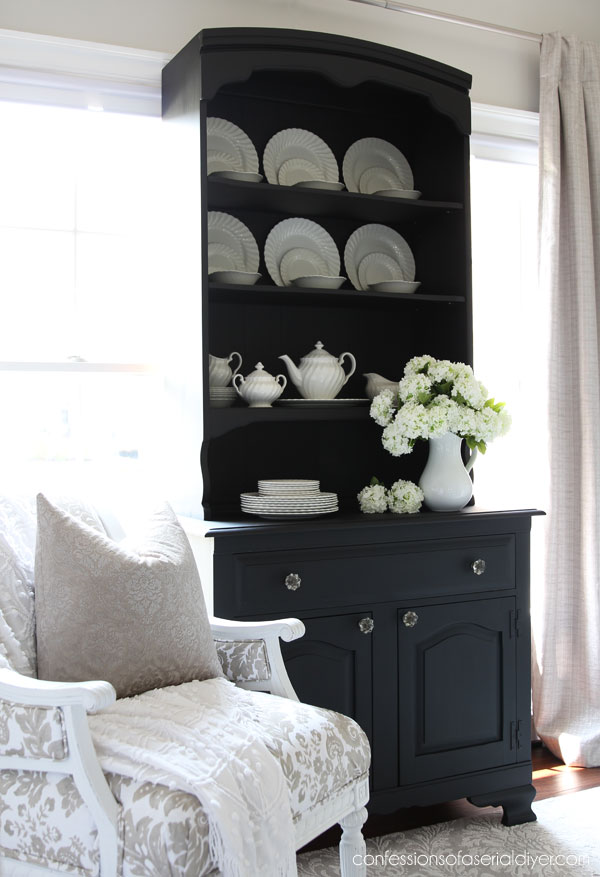
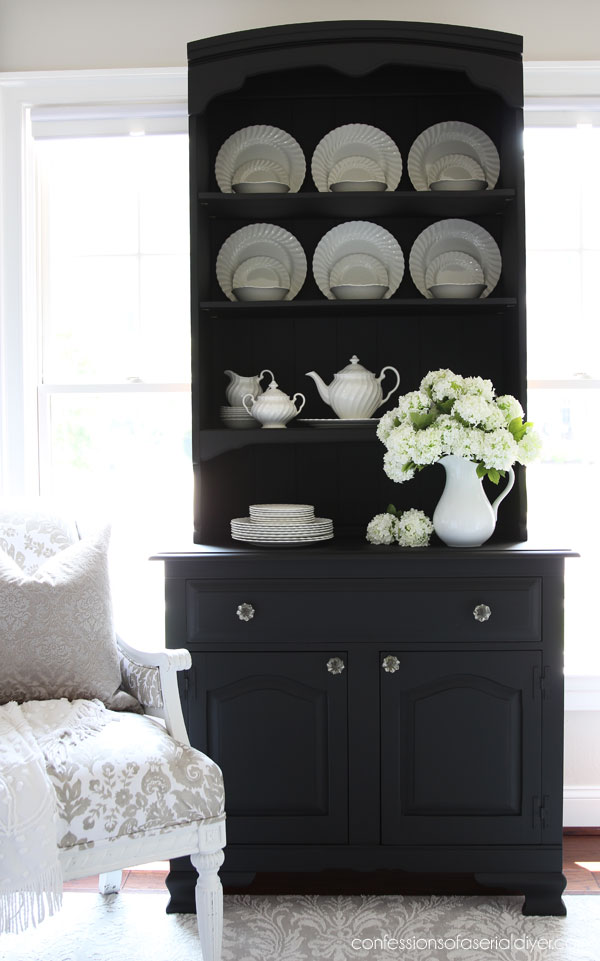
THe End Result
This piece went from dated and awkward to a true farmhouse Beauty!
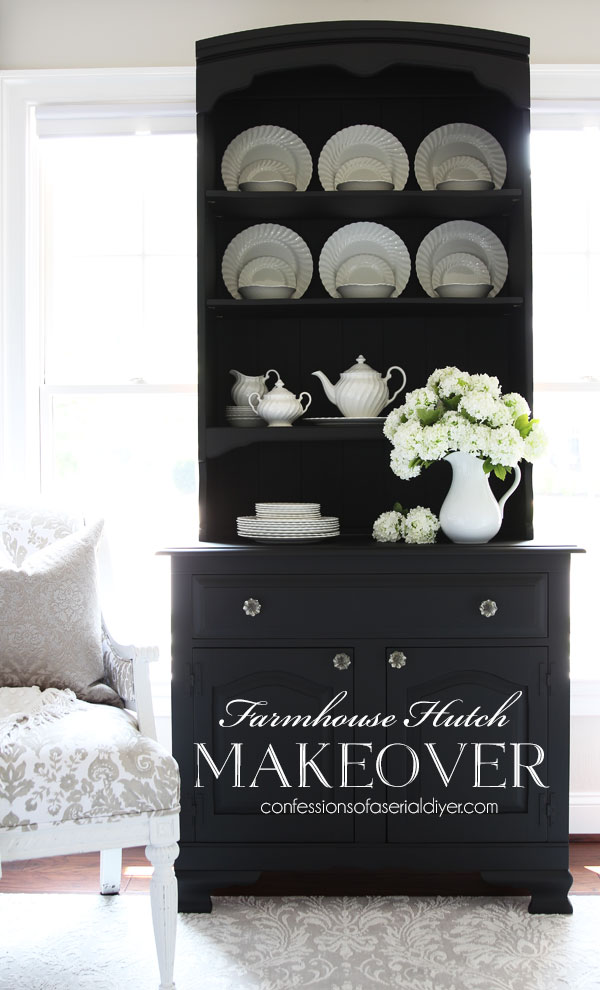
It was still very tall, but I think it worked out great!
What do you think?
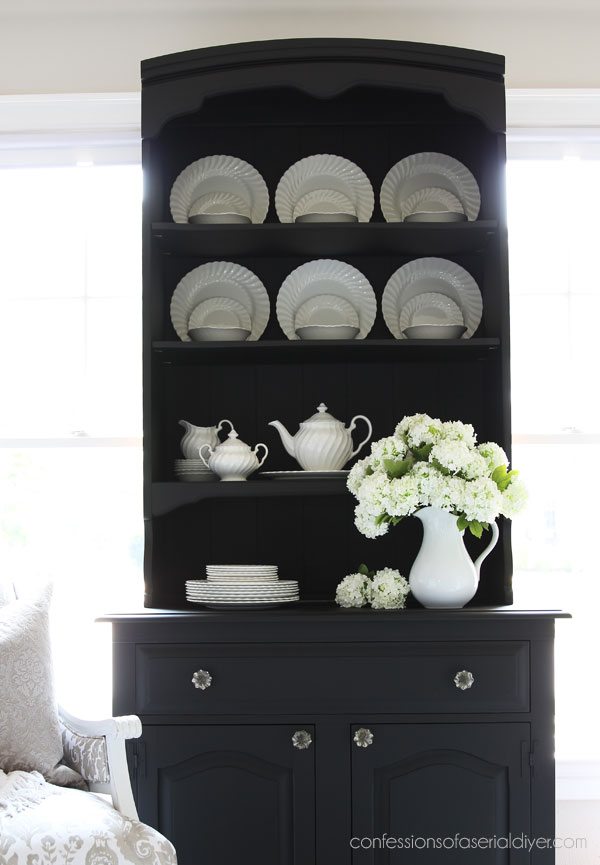
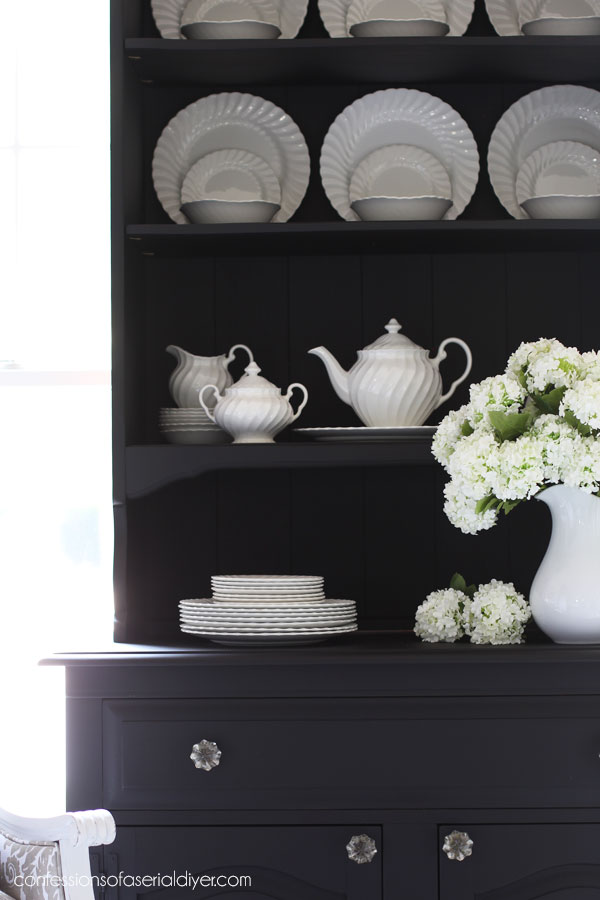
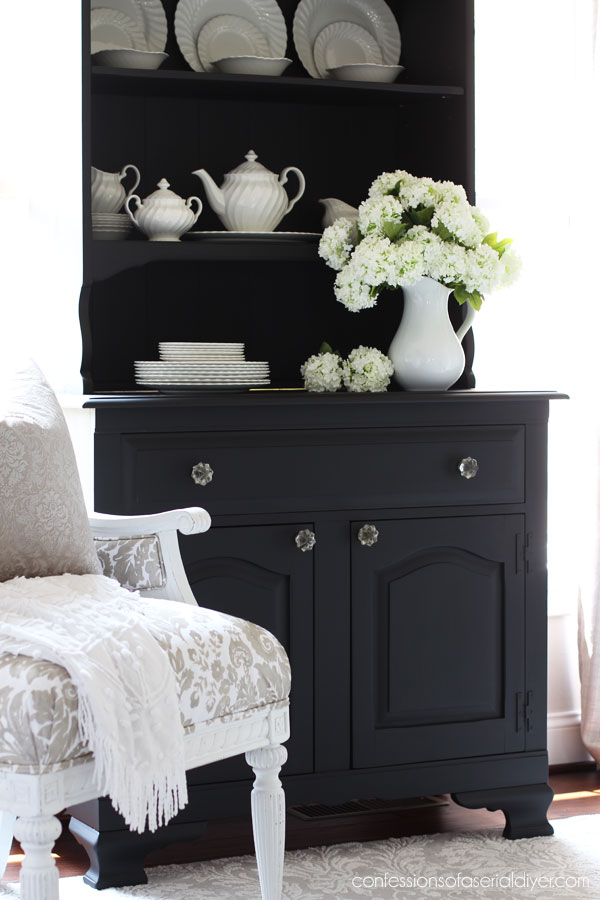
This beautiful black made for the perfect backdrop for my white ironstone!
I left the bottom cabinet unpainted inside since it was in such nice condition:

And the drawers got this beautiful gold and black fabric:
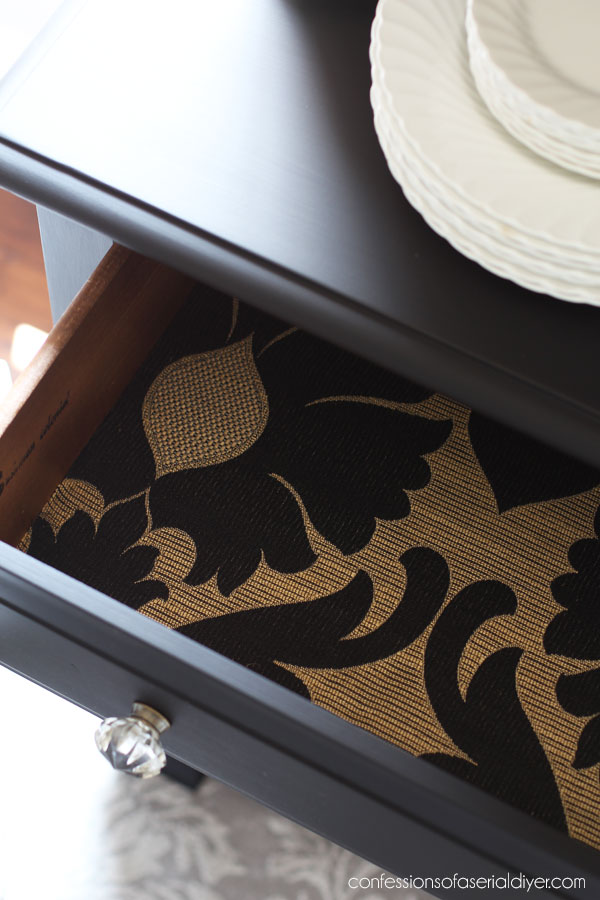
I ordered this fabric online for a steal many years ago to use on my dining room chairs, but when I got it, I thought the pattern was way too bold. It’s hard to buy fabric online! It was perfect to go with this hutch though.
And it was fabulous with this dresser that I redid many years ago.
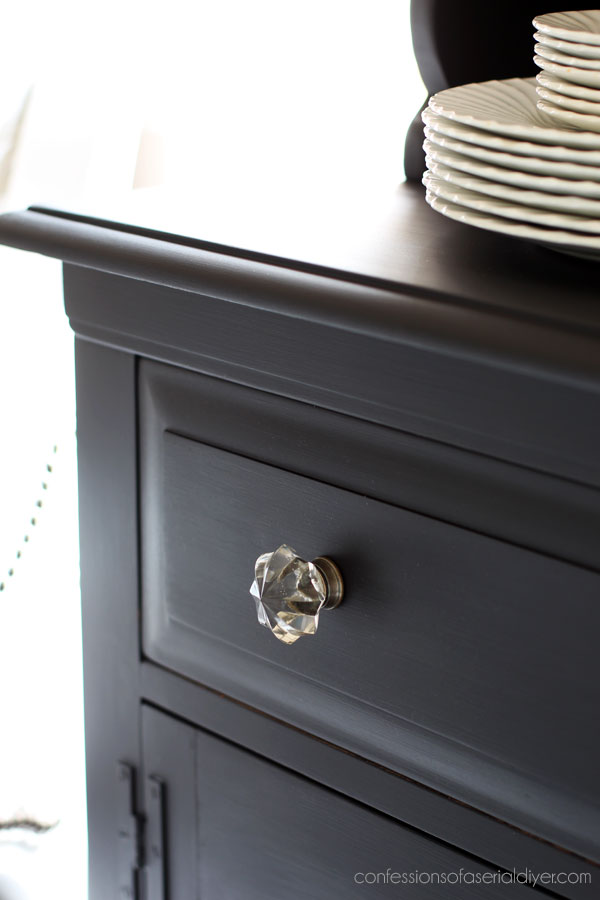
The new glass knobs I chose were so pretty against the black.
I found these at Home Goods. I had bought them for another piece but ended up not using them.
That worked out great because they were perfect here!
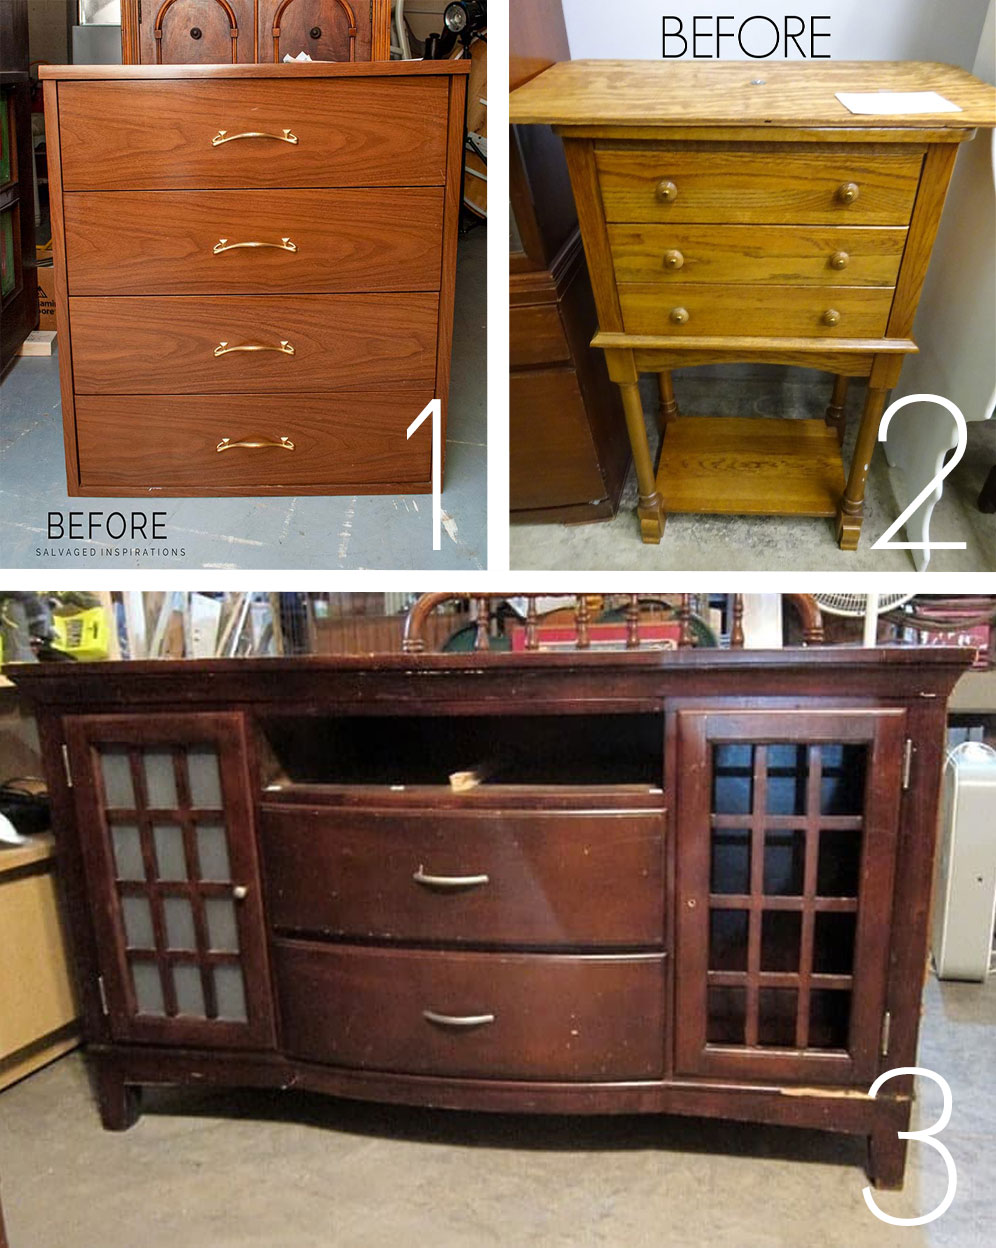
And here are my favorite furniture fixer upper makeovers from each of my friends this past year…
I’m always attracted to the ones that are a long way from where they started, which these all are!
And if you want to see what my friends chose as their favorites from each of us, you can see them at the links below:
Girl in the Garage’s Favorites
Salvaged Inspiration’s favorites
Petticoat Junktion’s Favorites
With the holiday so near and so much to do to prepare, I will not be working on any more new projects until after Christmas, but I will still be showing up in your inbox with thrifty makeover insp, starting with the BEST way to paint furniture WHITE using this beauty:
Have a fantastic weekend, and I’ll see you back here on Tuesday!
UPDATE: It’s here! See what this gorgeous piece looks like now AND the BEST way to tackle painting furniture white HERE!
XOXO,
![]()
Don’t Miss a Thing!
If you like what you see, there are several ways to follow along!
Email * Instagram * Facebook * Pinterest * Twitter


Mary Kaiser says
I LOVED how this one turned out. I see why it was your favorite! I love seeing it again!
Christy says
Thank you, Mary! I think I had such low expectations for it that the after really surprised me ha ha! Have a fabulous weekend!! XOXO
Robin Stephens says
Gosh! I bet you’ll have a hard time parting with this beautiful, sexy gal! My goodness! Your heart and soul went in to this one. You are one mighty woman-of-detail! I love it. I want it! LOL.
Christy says
Aww thank you so much, Robin! It was hard saying good bye to this one for sure! XOXO
Denise Zdziennicki says
Great minds 😉… this is such a gorgeous and classic makeover Christy – I absolutely love how it all came together and your styling… perfection! Happy Holidays and BIG hugs from Toronto! XOXO
Christy says
Thank you so much, my friend! This one surprised me for sure…the magic of paint!! Have an amazing holiday!! XOXO
Wendy says
I am a huge fan of black furniture and I live to see your projects in black. Fantastic job!
Christy says
Aww yay! Thank you, Wendy! I couldn’t imagine this one in any other color! XOXO
Lynn says
OMG! I love the Farmhouse hutch makeover!
Thank you.
Christy says
Thank you so much, Lynn! XOXO
Christina says
Absolutely stunning Christy!! Very elegant out of folksy. Way to go!!
Christy says
Thank you, Christina! Yes…it was so dated before, right?? XOXO
Sandy says
I enjoy receiving your make overs each week and thank you for making them available to us. I am happy also to see some colors! It is easy to just paint everything white, but venturing into color can be challenging. Let’s see more of those colors and keep them coming.
I painted a corner cabinet with red inside and out, then black over the red on the outside only. I distressed the edges lightly and it is the prettiest piece of furniture in my house.
Christy says
Thank you, Sandy! I’m so glad you enjoyed this one! I bet your cabinet is lovely! XOXO
Ashley says
Tall is beautiful!
Christy says
Yes!! Thanks, my friend! XOXO
Peggy says
Beautiful. Stunning. Simple. Elegant. Hard to beat black with crystal knobs. 🖤🤍🖤🤍🖤 Christy, your energy is amazing!
Christy says
Aww thank you so much, Peggy!! Yes…I too love the black and crystal!! XOXO
Toni DeBenedictis says
Absolutely STUNNING!!! I love it so much! Well done, Christy!
Christy says
Thank you so much, Toni!! XOXO
Sandi Allen says
Beautiful! I Love it!
Christy says
Thank you, Sandi! XOXO
Jen @ Girl in the Garage says
I love that cabinet, Christy! It’s so fun seeing what we each picked for our favorites! Have a fabulous Christmas, my friend! xo
Christy says
Thank you, my friend! I really enjoyed seeing what everyone picked too!! Merry Christmas!! XOXO
Toby Peplow says
I can’t love this one enough Christy! Such a clean, sleek piece!
Beautiful!
Christy says
Aww thank you so much, Toby!! XOXO
Becky says
This one came out SO classy/pretty! It was meant to be black.
Christy says
Thank you, Becky! Yes…I just couldn’t imagine it any other color! XOXO
Rose Lefebvre says
Another one hit out of the park! Even tho I am not big on black it does work here!
Christy says
Aww thank you, Rose! XOXO
Petra says
Yep, I too love that huge black hutch of yours. I love silk paint too, it’s almost too perfect to paint with!! 😊. Have a lovely weekend.
Christy says
Thanks so much, Petra! The Silk paint is wonderful! Enjoy your weekend also! XOXO
Robin says
I recently painted a china cabinet with the same “outdated” finish. I used black oil bronze and painted the knobs gold. I left the top of the bottom piece as it was, a dark blackish brown stain.
Just as elegant as yours!
Christy says
Ooh that sounds like a lovely combination!! XOXO
Judy says
Stunning, simply stunning.
Christy says
Thank you so much, Judy! XOXO
Mary says
Oh my…what a transformation Christy! It doesn’t even look like the original piece – so beautiful! May I ask did you just keep the hinged doors on when you painted and paint over the hinges? Or did you spray paint them black maybe? At any rate it is absolutely perfect and such an inspiration! Thank you! You have convinced me time and again, painting furniture is the way to go!
Christy says
Thank you so much, Mary! I did keep the hinges in place and just painted right over them. I usually distress my pieces, so if some of the paint comes off at the hinges, it works fine with the distressed look. I wasn’t thinking that I wouldn’t be distressing this hutch when I was painting the hinges this time, but if a little paint comes off with wear, they hinges are dark underneath and shouldn’t be too noticeable. If you don’t plan to distress, it might be a better idea to remove the hinges and spray paint them. And yes, paint can work wonders!! XOXO
Anita E says
You do amazing work and have such a vision for each piece!! I was wondering why you didn’t just cut off the peg railing and holes are already filled. Thanks so much. I love reading your blog!
Christy says
Thank you so much, Anita! That is a great option also, but I don’t have a saw that would get that close without damaging the surface. A reciprocating saw would probably be a great option for that if you had one! XOXO
Marie B. says
Oh my, Christy, it’s stunning in black! Wishing you and your family a Merry Christmas. xo
Christy says
Thank you so much, Marie!! I had my doubts about this one, but paint worked its magic once again! Merry Christmas to you and yours, my friend! XOXO