Hello sweet friends! I have a quick makeover for y’all today!
I have been working on a few outdoor projects recently and was hoping to photograph them this weekend, however the weather has not been on my side for taking photos! So instead I worked on a couple 0f projects in between rain showers, including this chair:
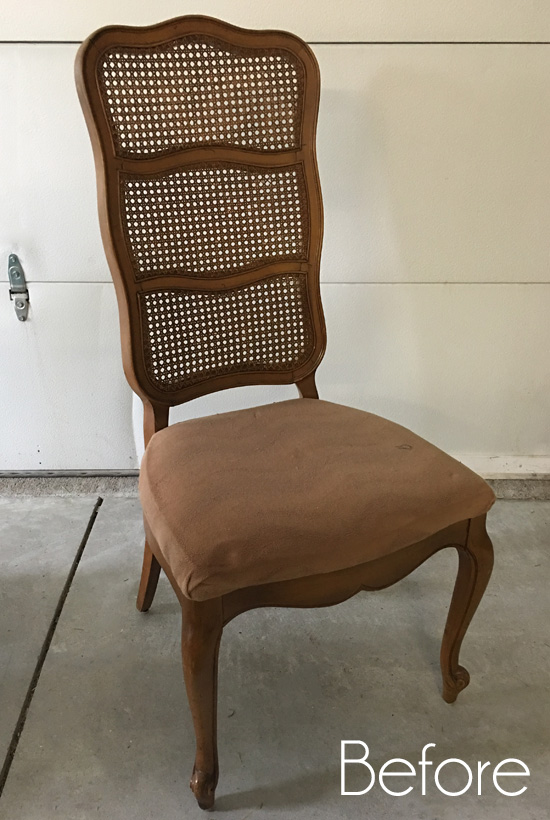
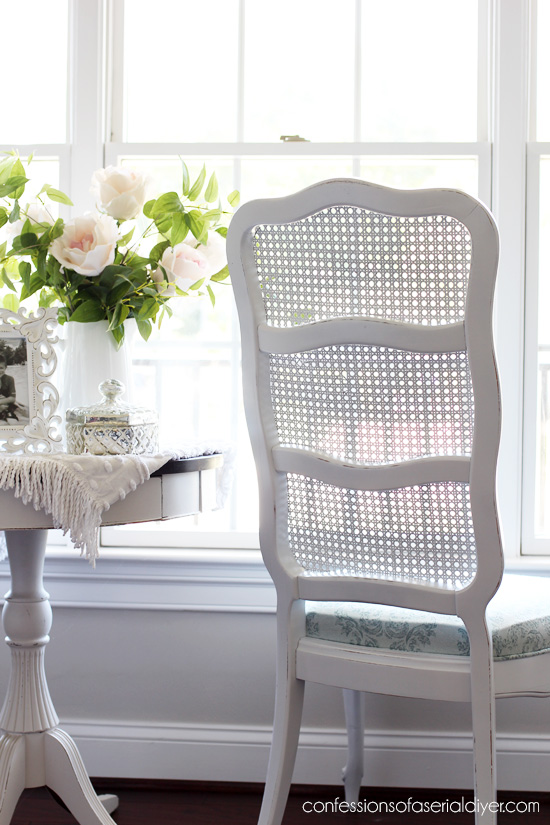
Perty, eh? This is one of two chairs I bought to use in our Halloween display last year, as part of a dining table set up:
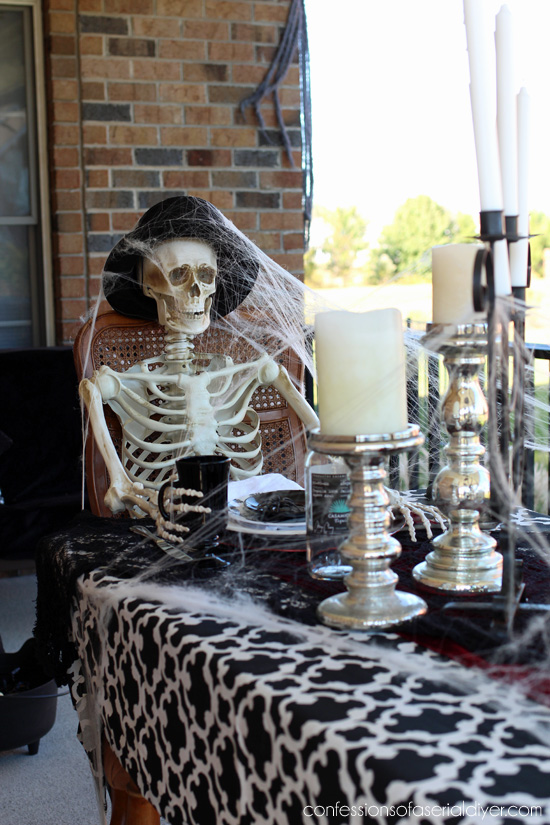
Ooh spooky! (See more of our Halloween tour HERE.)
The price was right, and I figured I could just redo it and sell it when Halloween was over.
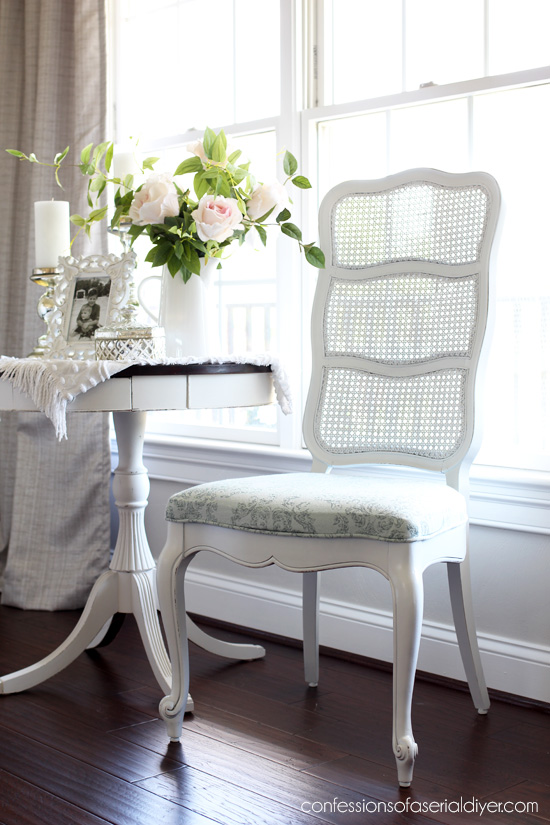
Fast forward eight months and here we are:
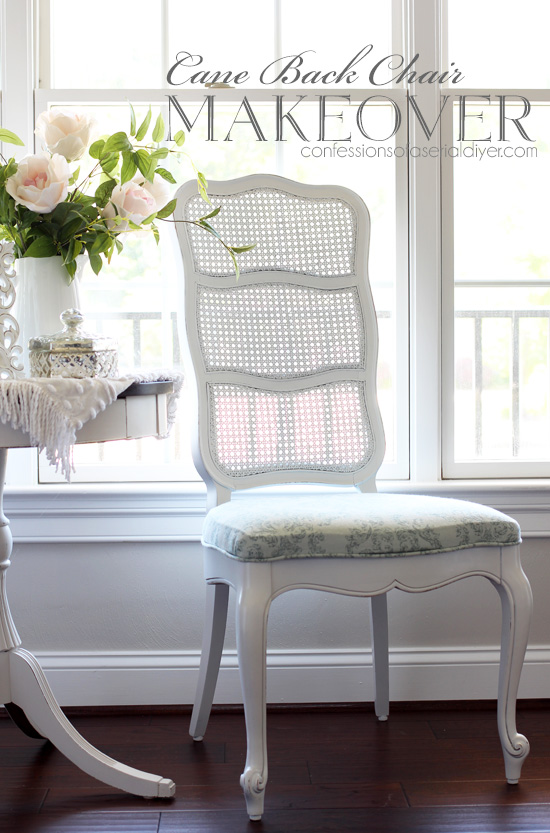
Not so spooky now!
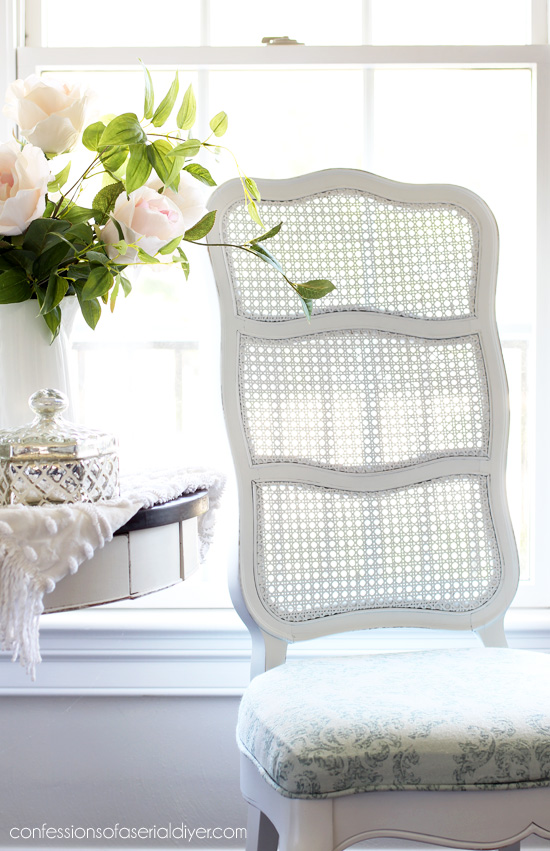
I can’t resist white painted cane. I just love the fresh cottage-inspired look it has:
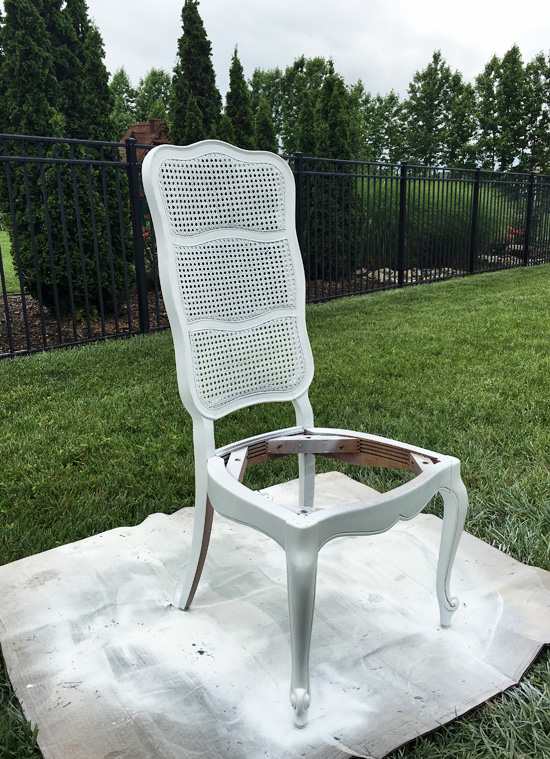
For this makeover, I busted out the spray paint! I always spray prime the cane part first (learned my lesson the hard way) and then spray paint the cane, and usually follow up with a couple of coats of chalk paint on the rest of the chair. However this time I went ALL spray paint!
I had to remove the seat first of course. It was held in place with four screws…

And here is the chair all primed minus one side of a leg:
This is my favorite spray primer HERE. It doesn’t leave a gritty texture like some others do.
You can see in that photo that it looked like it was going to pour any minute. I had to run out and bring this in a couple of times when it started raining.
I was determined to get it finished though!
I did one coat of primer and two coats of Rustoleum spray paint. This is my favorite spray paint for painting larger pieces like this:
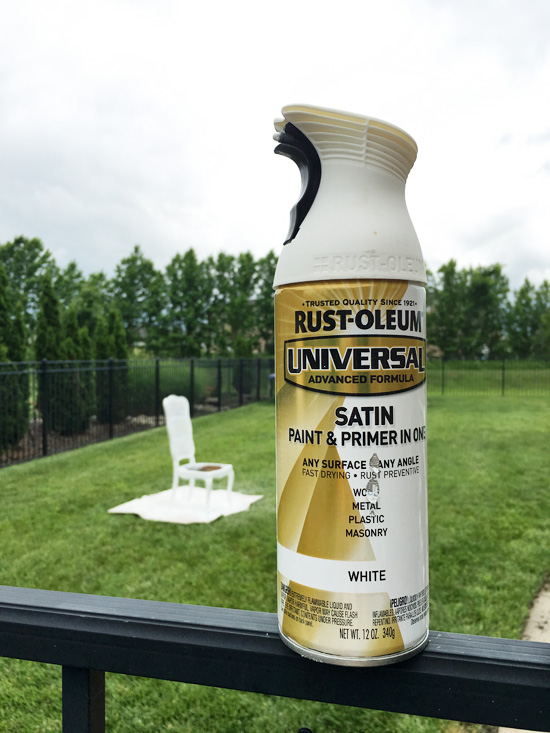
It has a longer stream than regular spray paint so the coverage is fantastic.
Next was the cushion. It needed some serious help! Here is what was under the top layer of fabric:
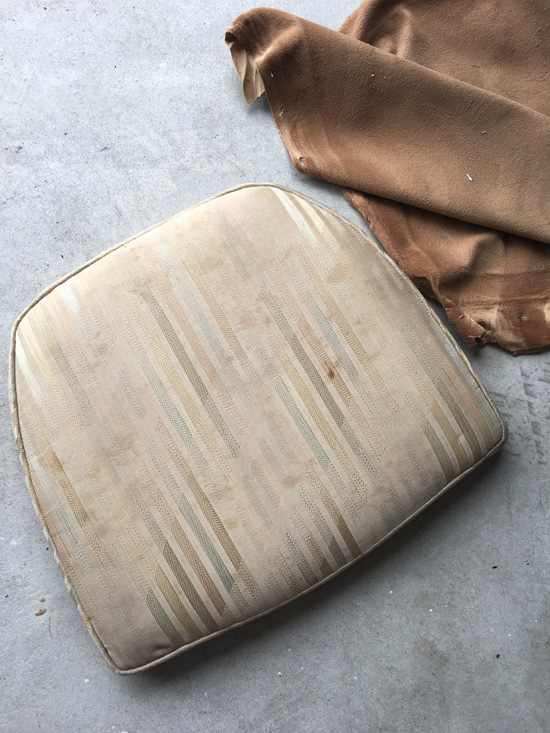
Pretty gross! I should have removed this layer as well, but I cheated and just covered right over it.
The fabric I used was a curtain panel I found on clearance at the thrift store:
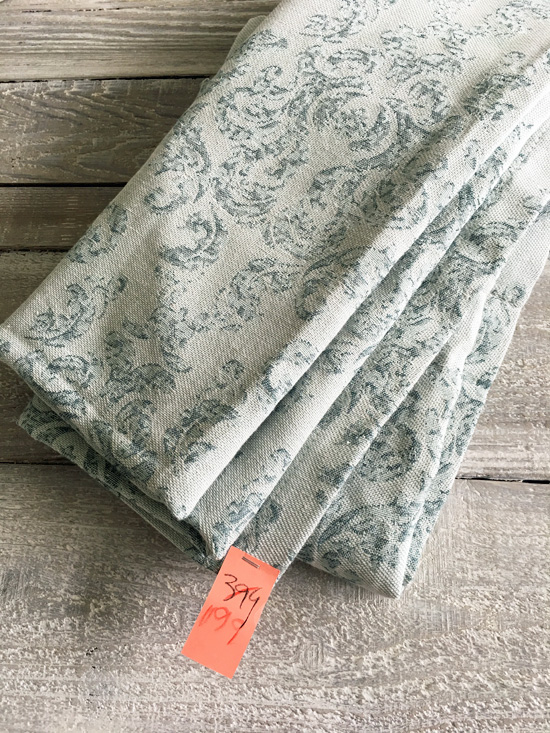
I always check out the linen aisle because you can find great fabric hidden in there!
I used my light duty staple gun for this job:
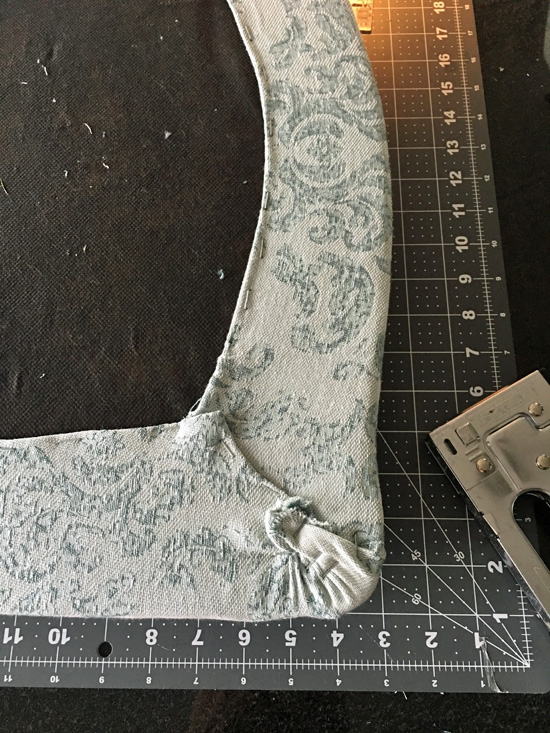
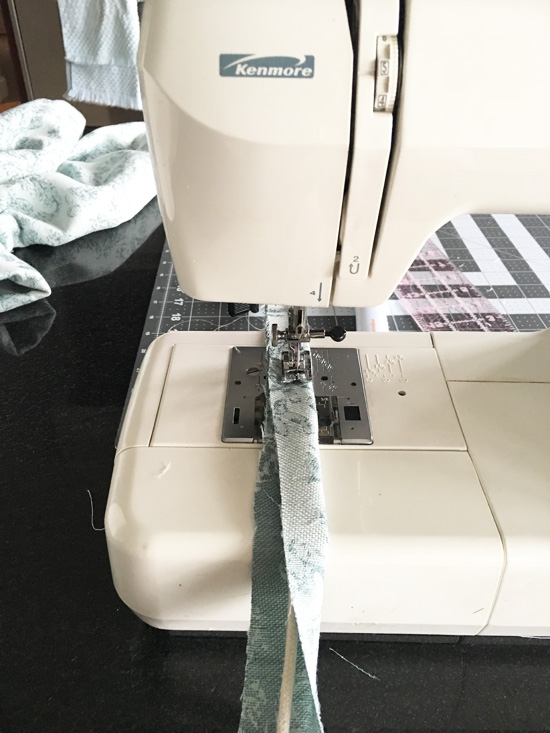
Then I gathered what I needed to make some piping to add a nice finishing detail:
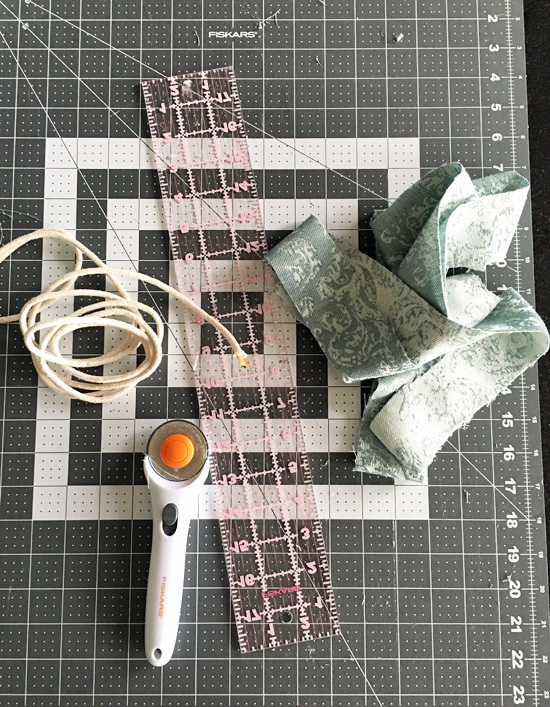
See my SEW and NO-SEW tutorial for making piping HERE.
If you can sew a straight line, you can do this:
For real.
I didn’t even switch out for my zipper foot.
You can make piping with hot glue as well if you don’t sew…refer to my tutorial link above for that.
I hot glued the piping in place before reattaching the chair pad to the chair and that was it!
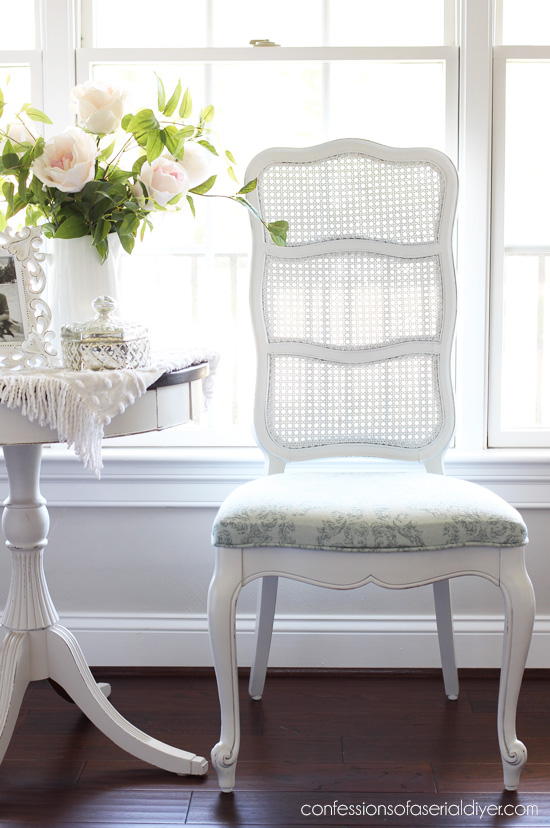
You don’t have to add piping, but it adds such a pretty detail, and gives a professional-looking finish:
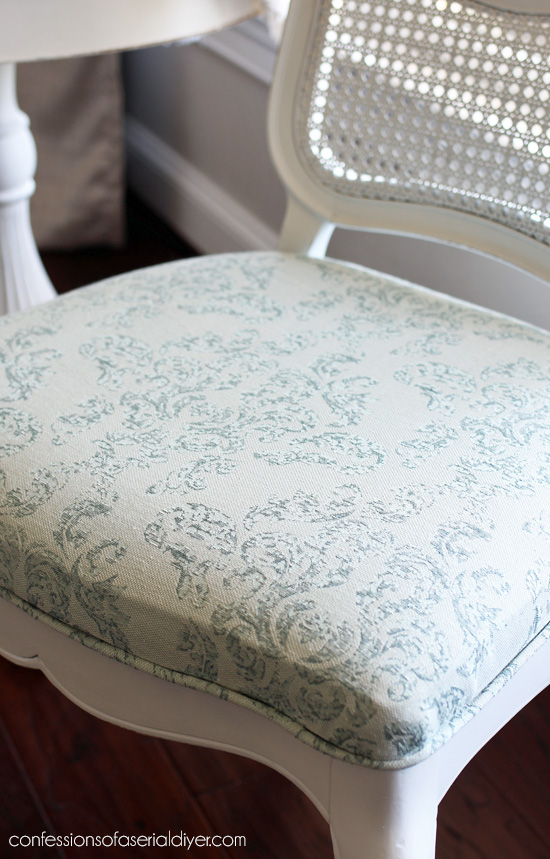
Now a professional would have removed the layer with the piping underneath as you can see where it is showing through the new fabric. I never claimed to be a professional though lol.
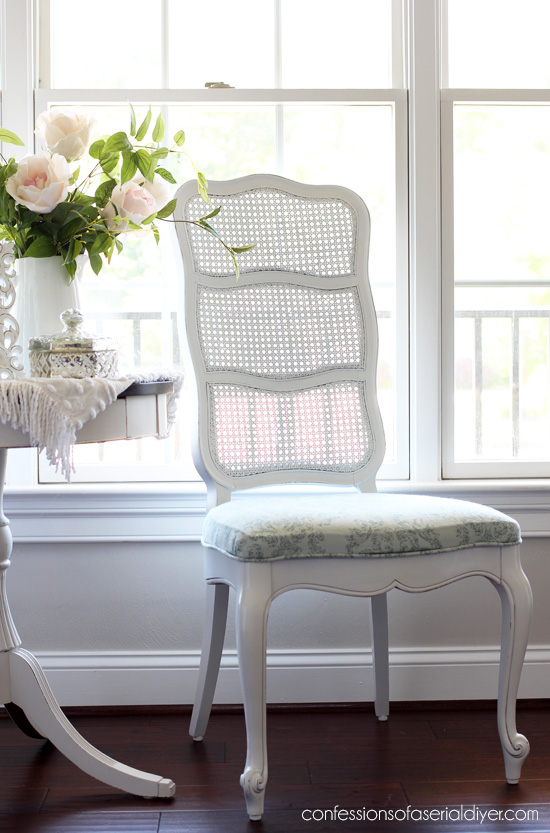
And yes you can still distress a bit when using spray paint. Just stick to the edges though. If you run sand paper over the flat surfaces, you will scratch the paint finish…
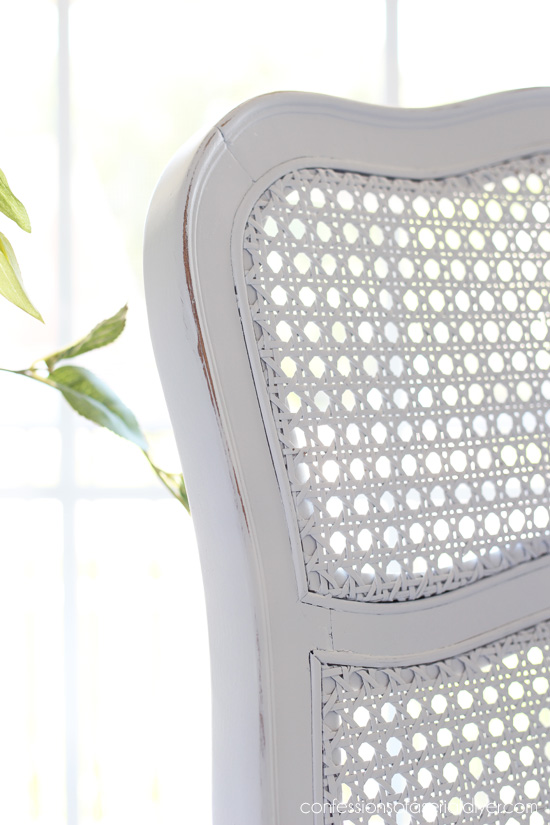
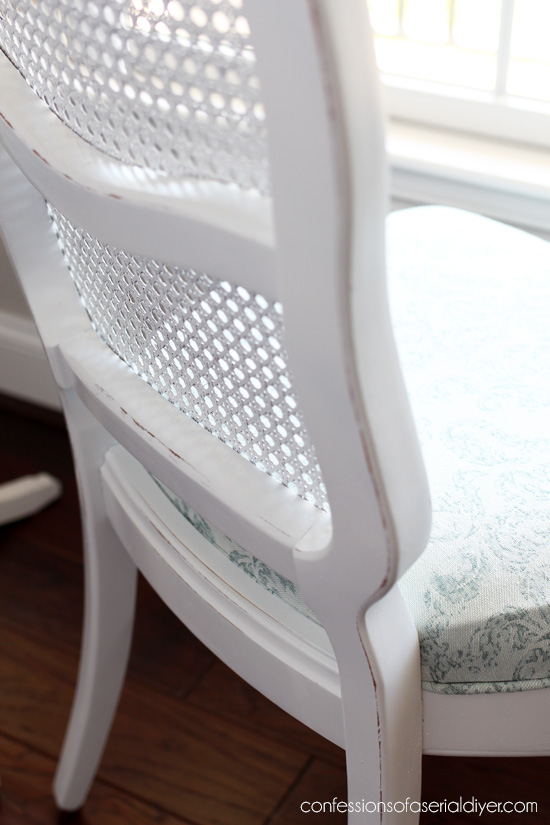
Yummy! Just look at that scrumptious cane back!
Not too bad for a rainy day project!

You might remember what I did with the other chair I bought for my Halloween display:

Revisit that makeover HERE!
I’ll See y’all Thursday with this kids’ table and chair set that was due for a redo:
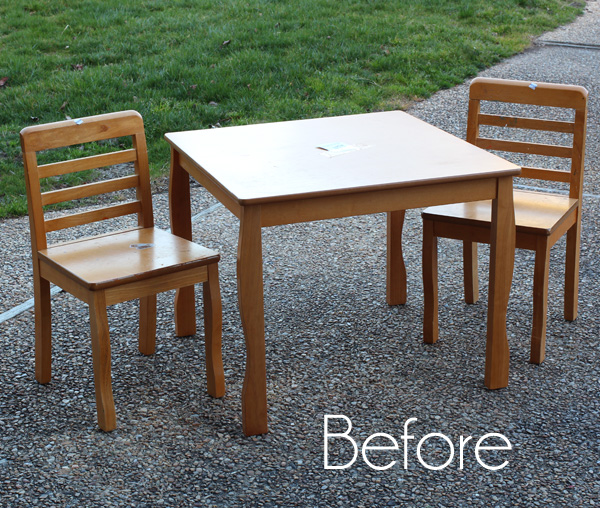
UPDATE: See how cute this set turned out HERE now! 🙂
XOXO,
![]()
Don’t Miss a Thing!
If you like what you see, there are several ways to follow along!
Email * Facebook * Pinterest * Twitter * Instagram


Mary Kaiser says
Wow that is Beautiful now. I love the cane back also, it looks so cottage looking to me. Now I just have to find a chair with that cane back. I love how cute it turned out.
Christy says
Thank you, Mary! I love anything that has a cottage feel to it. Have a great day! XOXO
Christina in SW FL says
Christy, your vision, combined with your skill set, makes for some amazing makeovers! This chair is beautiful again. 🙂 I adore the fabric and piping. That’s a great tip about the curtains in a thrift store. 🙂
Have a great week!
Christy says
Thank you so much, Christina! This chair has been sitting on my work table in the garage since last Fall…so glad to finally check this one off! Enjoy your day! XOXO
Becky Ruse says
Beautiful! I really like the fabric choice! So pretty and light now!
Christy says
Thanks, Becky! I think anything was better than that brown faux suede? Velour? ha ha XOXO
Marcie Lovett says
So lovely now! I picked up a very similar chair recently and it’s waiting for a burst of inspiration. I thought I might paint it white, and after seeing yours, I’m definitely leaning in that direction. Isn’t it fun performing upholstery archaeology? It’s interesting (and sometimes gross!) to see what’s underneath when a chair is recovered.
Thanks for the tip on the primer – I love the ease of spray paint, but not that gritty texture. I bought some chalky spray paint that I’m itching to try, too. I would use my HomeRight sprayer more often, but just the idea of cleaning it makes me reach for a paint brush ????
Christy says
Thanks, Marcie! I just love cane painted white…so fresh! And yes, I always at least remove the top layer just out of sheer curiosity! One time I redid a bench and there were several layers…one that perfectly matched each decade lol. You can see what I mean here if you like: https://www.confessionsofaserialdiyer.com/dressing-table-bench-makeover/ That was a fun one! I’m with ya on reaching for a paint brush…it’s the thought of setting up the spray tent too. It really isn’t hard at all and I know it would save so much time, but it is just easier to grab my brush and go! Have a great day! XOXO
Marcie Lovett says
Oh, yeah, that bench was pretty bad! I removed four layers from a very old chair and on bottom of the seat someone wrote “Reupholstered by Fern Harris January 1954.” Won’t it be marvelous when someone finds your note with all the scraps? (Certainly better than finding all the crusty layers!)
Christy says
Oh I love finding markings like that! XO
MaryJean says
That is one beautiful chair, even before your makeover! I love the tall back with the caning. It came out great looking. I use the same primer paint and Universal paint too. For the same reasons you do.
FYI, I finally got my kitchen done! I’m so tired of painting! ☺️
Christy says
Thanks, MaryJean! It really did have beautiful curves even before. I know it feels so good to have that kitchen done! XO
Kimberly says
Pretty! I think I have one very similar out in the shop waiting for its turn.
Christy says
Thanks, Kimberly! Spray paint made this a really quick makeover! XO
Debbie Mayfield says
What a beautiful chair!!! It looks like a professional did it. 🙂 Great job and thank you for sharing. Hope you have a wonderful day!
Christy says
Thank you, Debbie!! 😀 XOXO
Angela Garner says
The chair turned out beautiful. I love how all your projects have turned out. I’m getting motivated to try a makeover project and am looking for the right headboard. The Habitat Resale store has cool stuff. Thank you for sharing your ideas.
Christy says
Thank you so much, Angela! Our Habitat Restore is a bit of a drive, but I usually find good stuff when I visit! XO
debbi siebert says
I love your chair. I spray paint anything I can and Rustoleum is my favorite brand.
Christy says
Thank you, Debbi! Love some spray paint! XOXO
Lizzy Leff says
I love it!
Christy says
Thank you, Lizzy! XOXO
A Malowany says
That is really nice. I have 2 cane back chairs, but haven’t dared to take the upholstery off as I thought it was glued on….it probably was. It’s going on my to-do list!
Christy says
Thank you! Give it a go…hopefully it will come off easily for you! XO
Julie Briones says
So pretty, Christy. Love the satin-y finish (with the touch of gloss! 😉 ) The fabric was perfect, too! Now I have another area to check at the thrift stores! Woot!
Christy says
Thanks, Julie, and congratulations on your precious new grandbaby! Yes…don’t pass up that aisle…I have found great fabric there! XOXO
Robyn Wright says
Gorgeous!
Christy says
Thank you, Robyn! XOXO
Jane says
Beautiful and the piping makes all the difference!
Christy says
Thank you so much, Jane! XO
Mary says
HI! Great tutorial, thank you. I’m wondering how the paint on the cane portion of the chair is holding up? I so want to paint my kitchen chairs but with the heavy use they get I’m nervous the paint will fail in the area.
Christy says
Thanks, Mary! This chair is for sale in my booth, but I also painted cane-backed chairs to go with our kitchen table that we use daily. They have held up perfectly! You can see them here: https://www.confessionsofaserialdiyer.com/cane-back-chairs-makeover/
To get a paint finish that will last, use a spray primer on the cane first. I believe I used spray paint on this chair, and for my kitchen chairs, I used Fusion mineral paint which requires no topcoat either. Hope this helps!