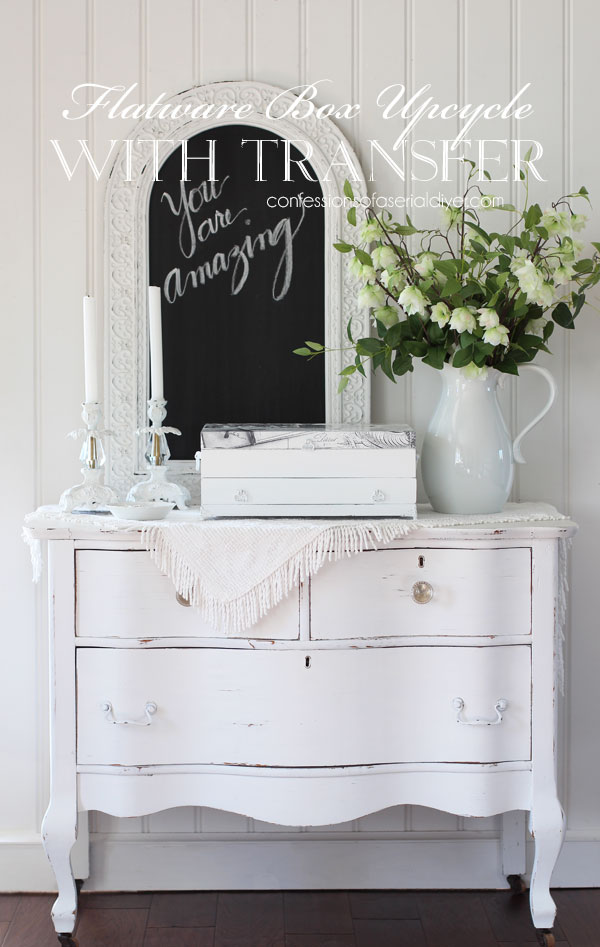
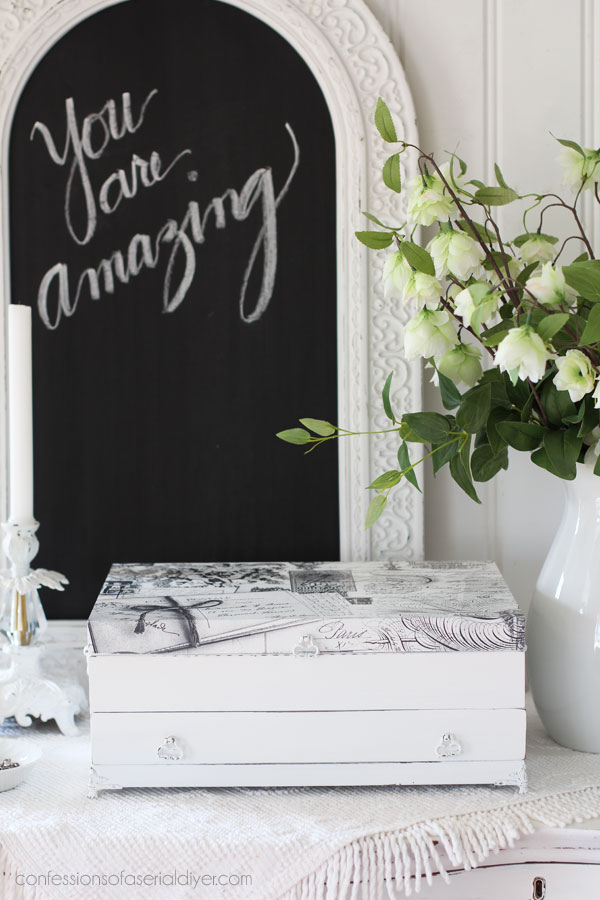
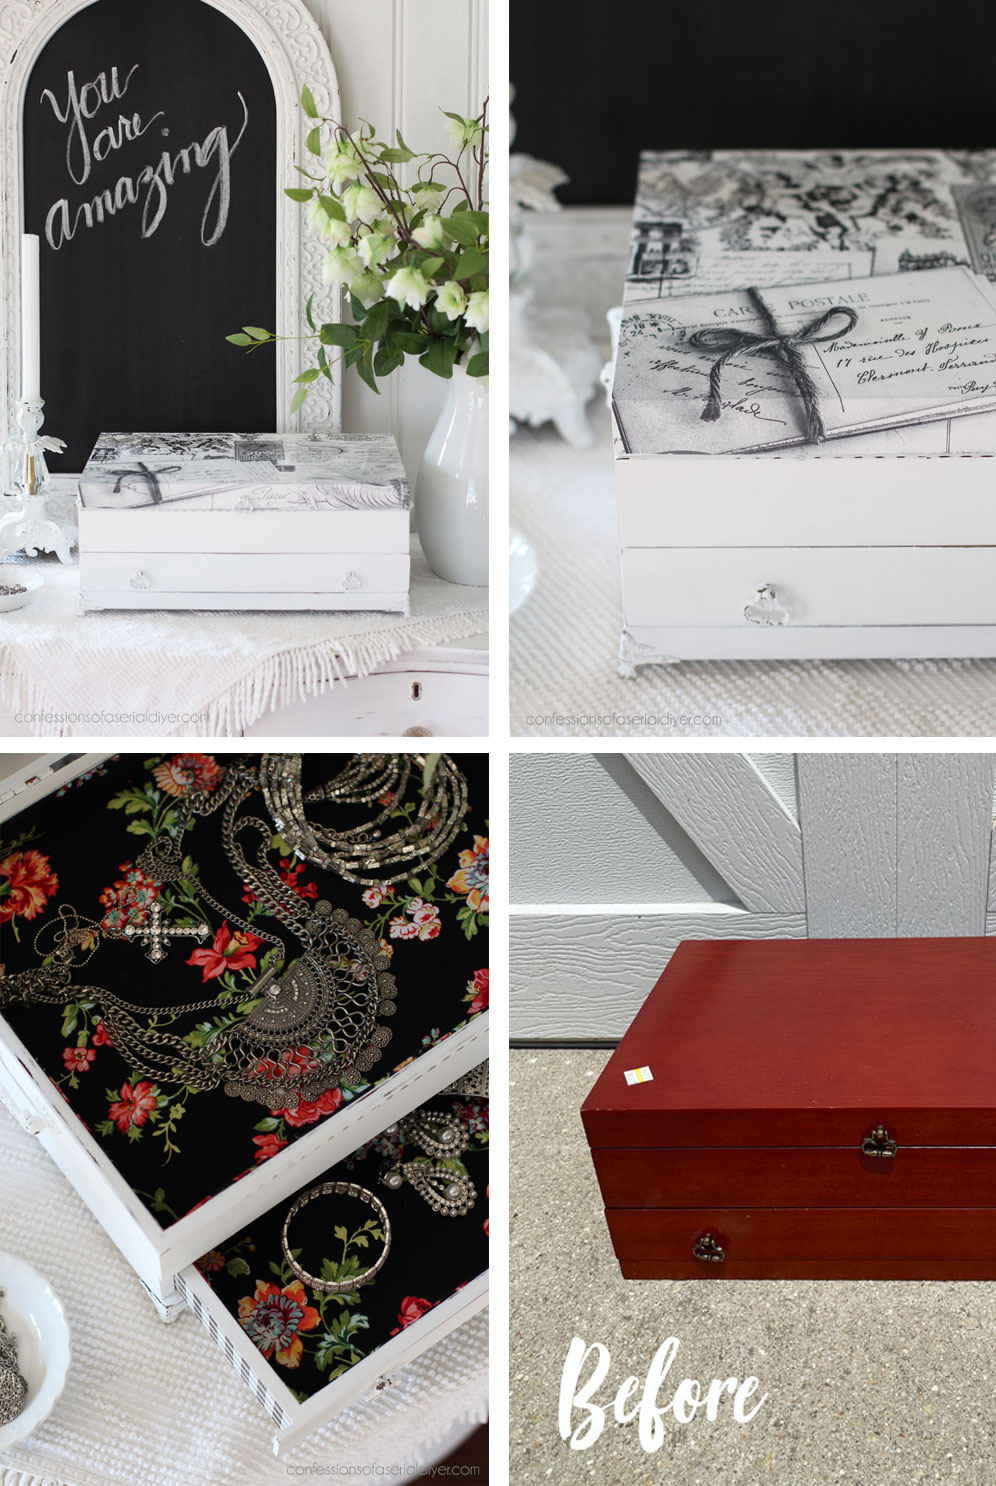
Hello, dear friends and welcome to the first Trash-to-Treasure Tuesday of the year! Today, I’ve got a flatware box upcycle that I used the Belles and Whistles Vintage Post transfer on to bring it to life!
I have two boxes remaining in this haul and this is one of them. I’m hoping to be done with this haul in the next couple of weeks, and then I’ll have a whole new haul of transformations to share!
Flatware Box Upcycle
This box started out like this:
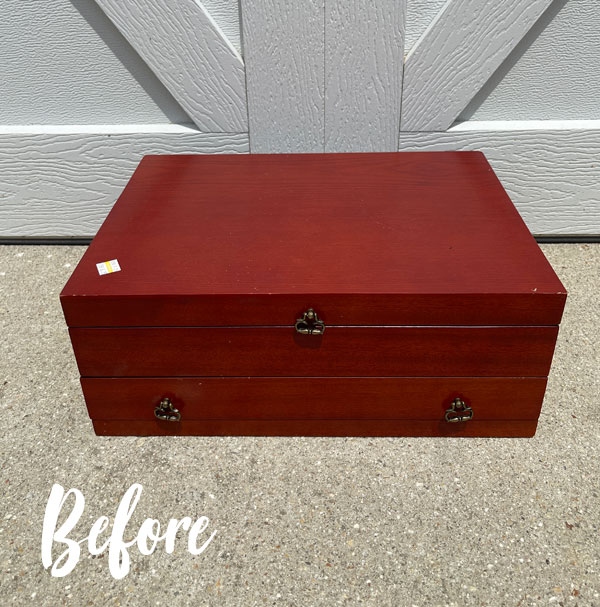
It was a thrift store find that I paid $6.75 for.
I love this one in particular because it has a drawer on the bottom as well.
Remove the inards
The worst part about these flatware boxes is removing the interior lining. Here is how this one started:
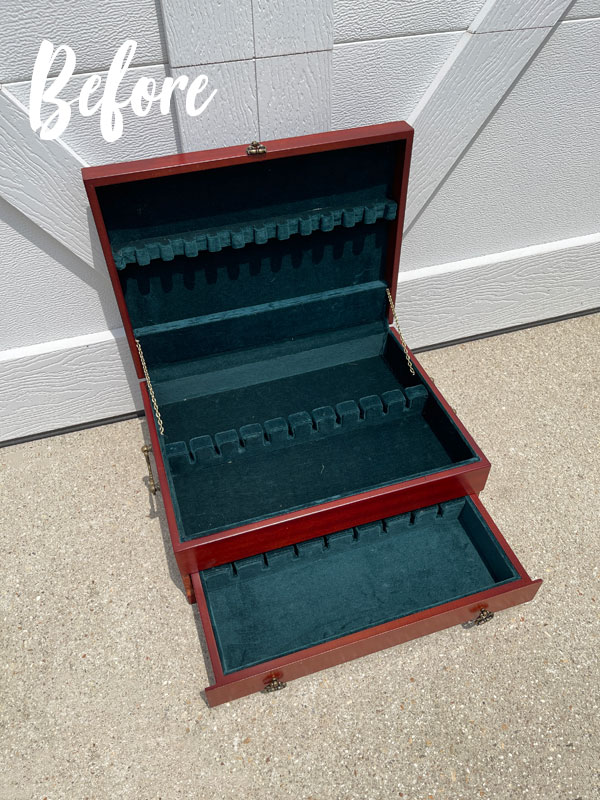
The green was actually quite pretty and nice quality, and had I been able to remove the parts that held the silverware without damaging the rest, I may have considered keeping it. Unfortunately, I tore it all to heck in the process lol.
A few tools and good old fashioned sweat equity will get it all out eventually. I start with those middle pieces by rocking them back and forth and I can usually get those out pretty easily.

It’s okay to leave it in this state since most of those parts will later be covered.
Clean
Cleaning is next! After sitting in our garage for several months, most pieces really need it!
I used my go-to prep cleaner, White Lightning. I just mix it in this old Mr.Clean sponge tub…usually 1 TBSP and a half gallon of warm water, but for this small piece, I mixed a half a TBSP and a quart of warm water:
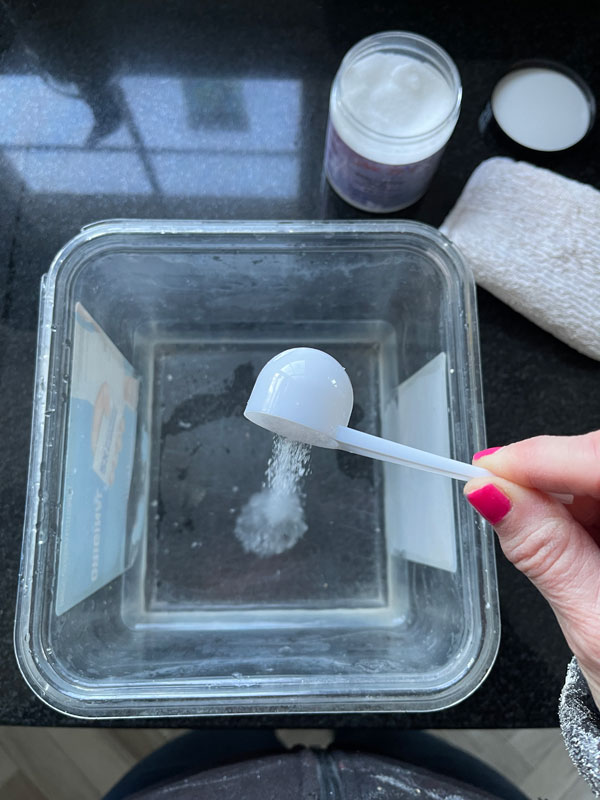
It is a degreaser and a deglosser and gloves are recommended. I like these terrycloth applicator pads for cleaning:
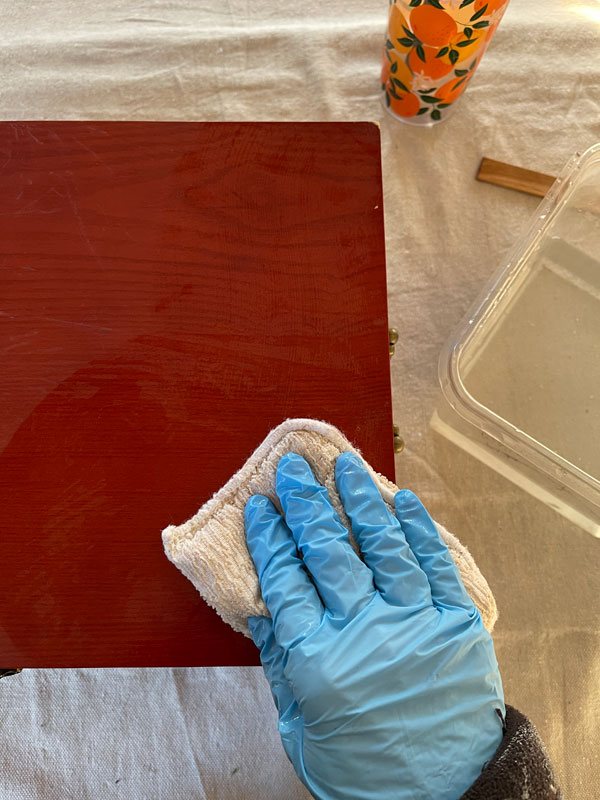
Once I had it all wiped down, I replaced my water for clean water and gave it another wipe down to rinse.
I’ve included a few affiliate links so you can find the products I love.
Cheating the first coat
I try to be very thorough with my makeovers, but I do like to save time where I can and sometimes I cheat with smaller pieces by giving them a quick first coat with Rustoleum spray primer:
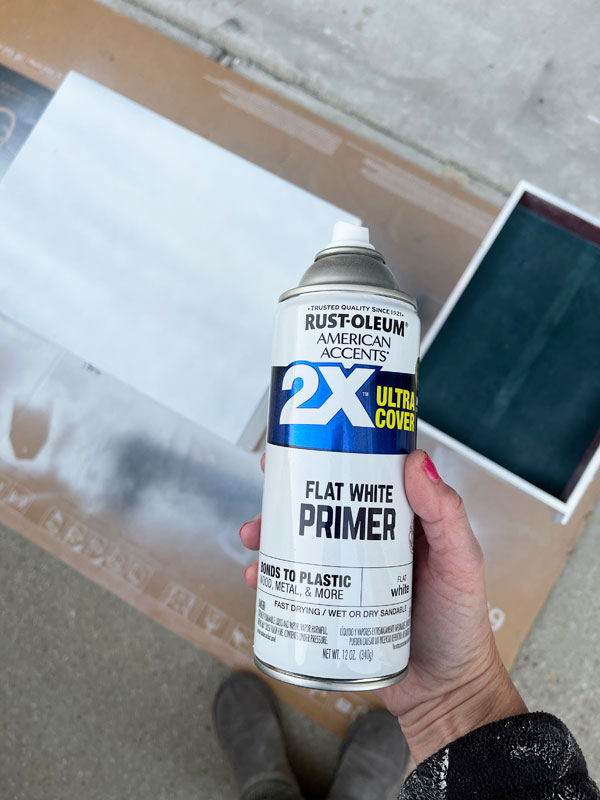
Priming is not necessary with chalk paint in most cases, this is just to save a little time.
Paint
I chose Cotton, Dixie Belle’s brightest white:

Sand
Once that was dry, I sanded all over with 220 grit sandpaper wrapped around an old sanding sponge to smooth everything out.
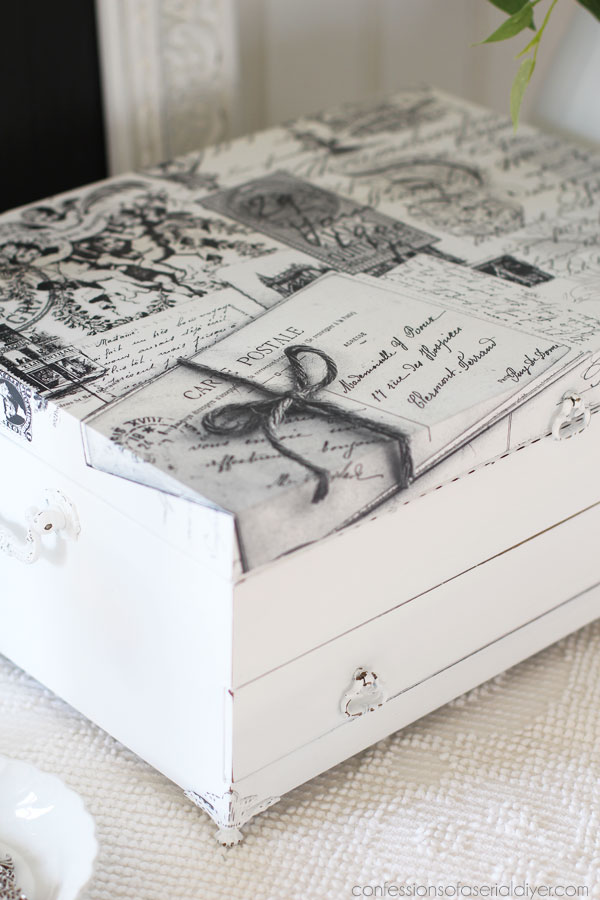
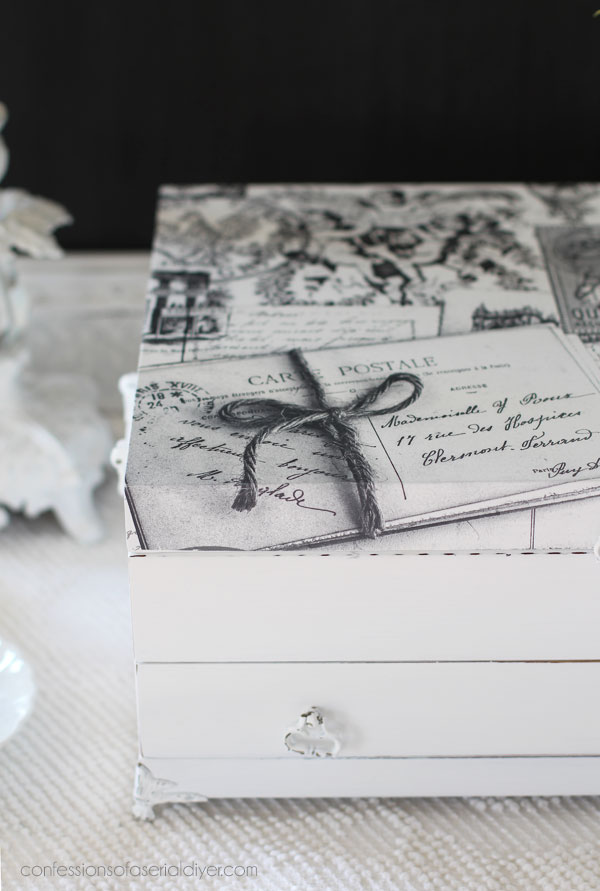
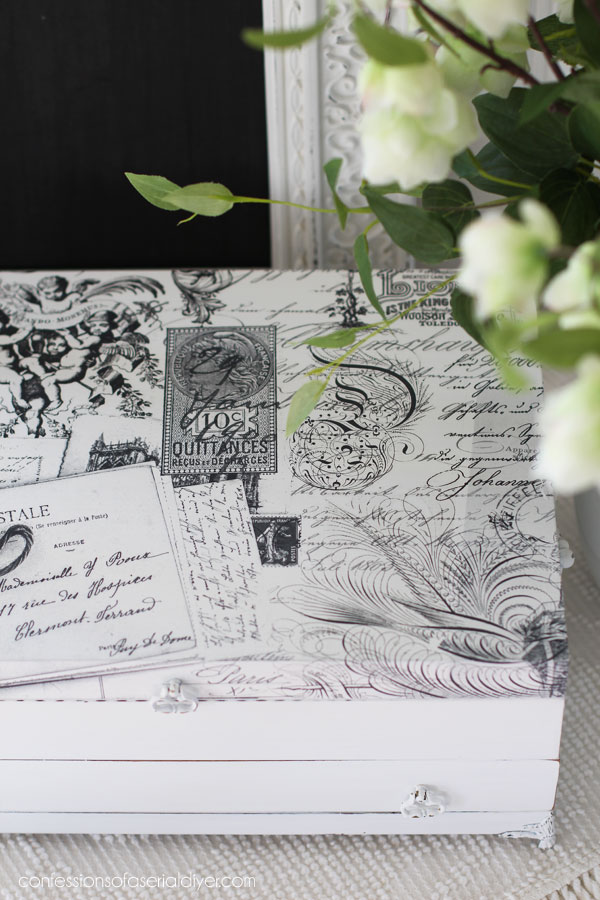
The Vintage Post Transfer
Next, I reached for one of the newer Belle and Whistles transfers, the Vintage Post transfer:
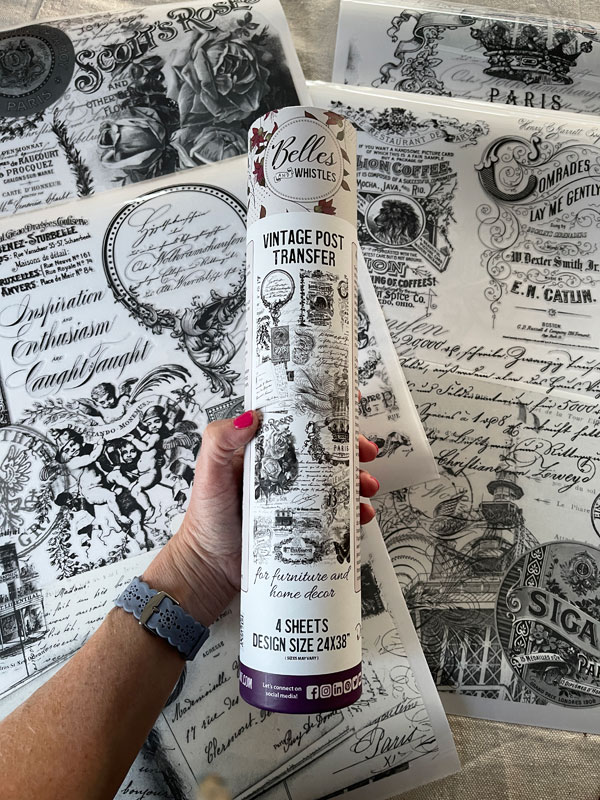
I have been wanting to use this on something since it came out and this was the perfect piece for it.
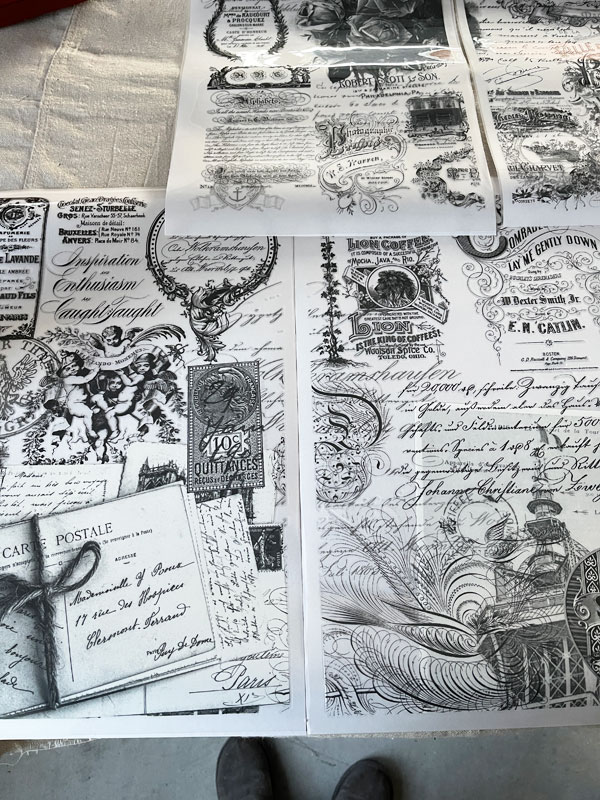
It comes with four sheets and all four match up to create one large image.
I chose to use the top two images:
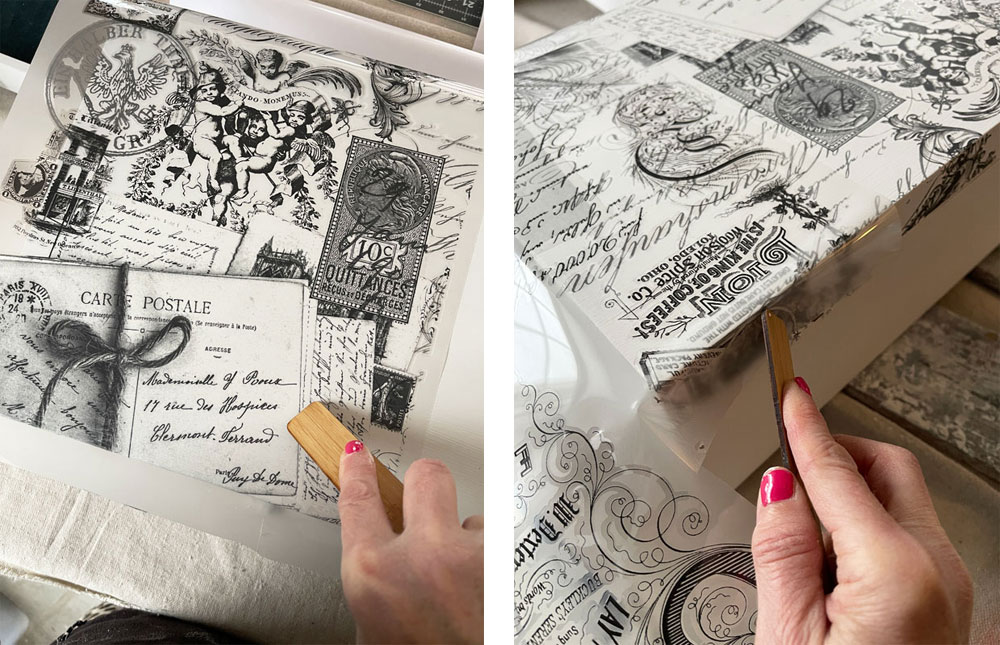
Using the included burnishing tool, I applied it to the top of the box, bringing it down the sides of the top all the way around as well:
Sealing with Wax
I sealed everything with Best Dang Wax in clear applying it with the Best Dang Brush:
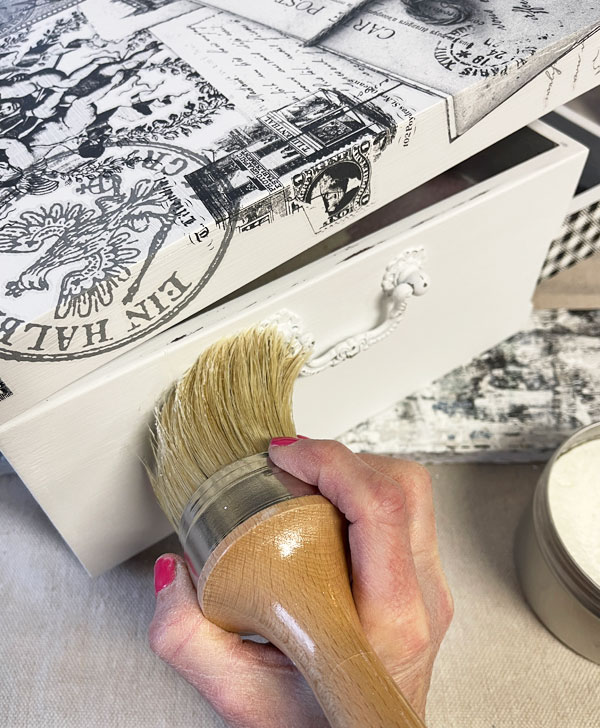
I buffed it in and removed any excess with a clean, soft cloth.
Satin Clear Coat is my go-to for most furniture pieces because wax can be a bit labor intensive to apply over larger surfaces. I also think the Clear Coat is easier to clean, but for smaller projects, I still like to use wax, so I keep both on hand.
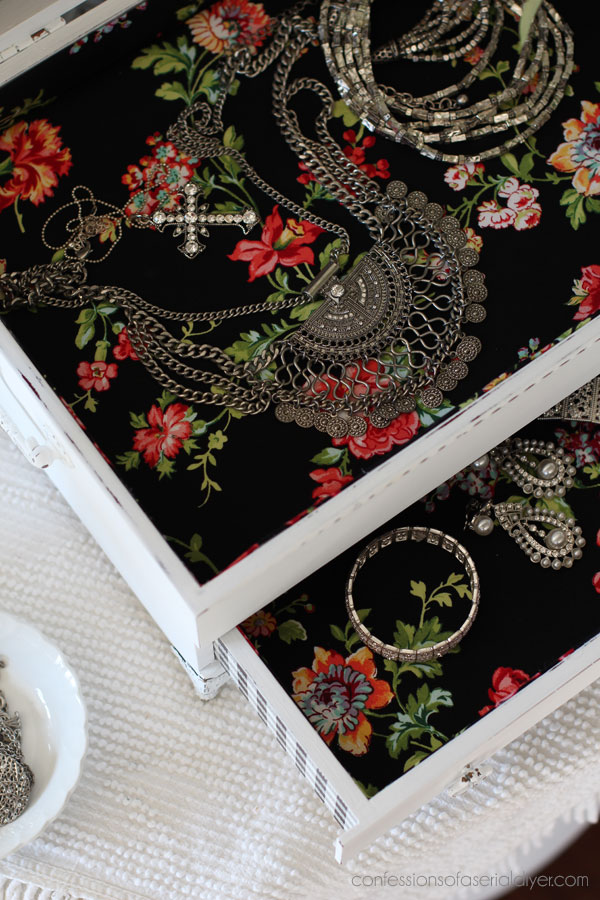
Lining the Inside
I lined the inside with this pretty floral fabric. I bought a few yards of it last time I bought it because I just love it with black and white projects!
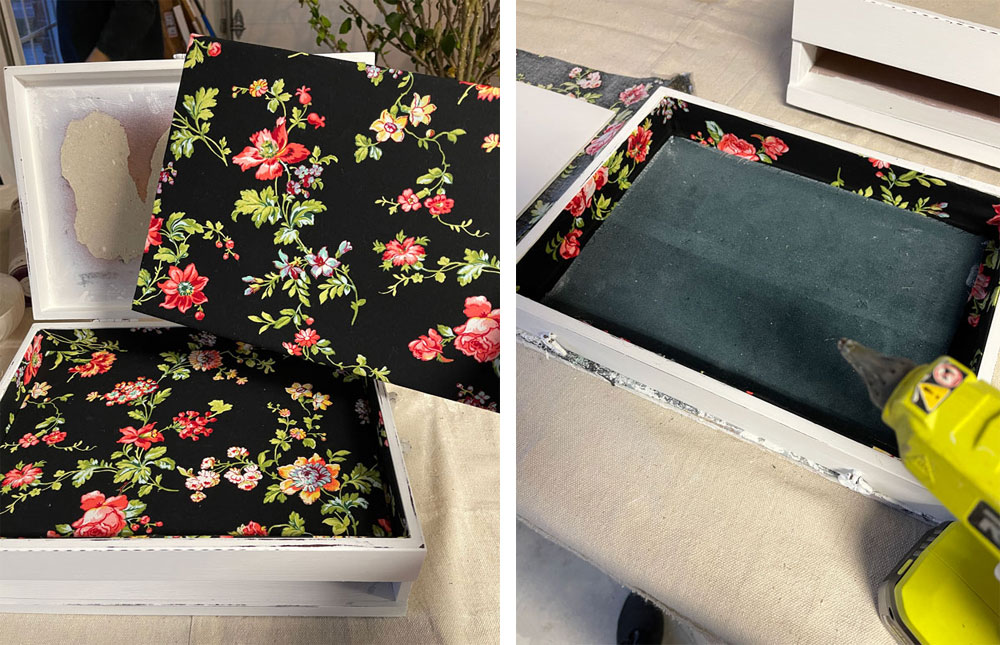
See more details on how I line boxes with fabric in this detailed tutorial HERE.
The After
Let’s see how this project turned out!
It’s hard to tell from there…let’s get in a bit closer…
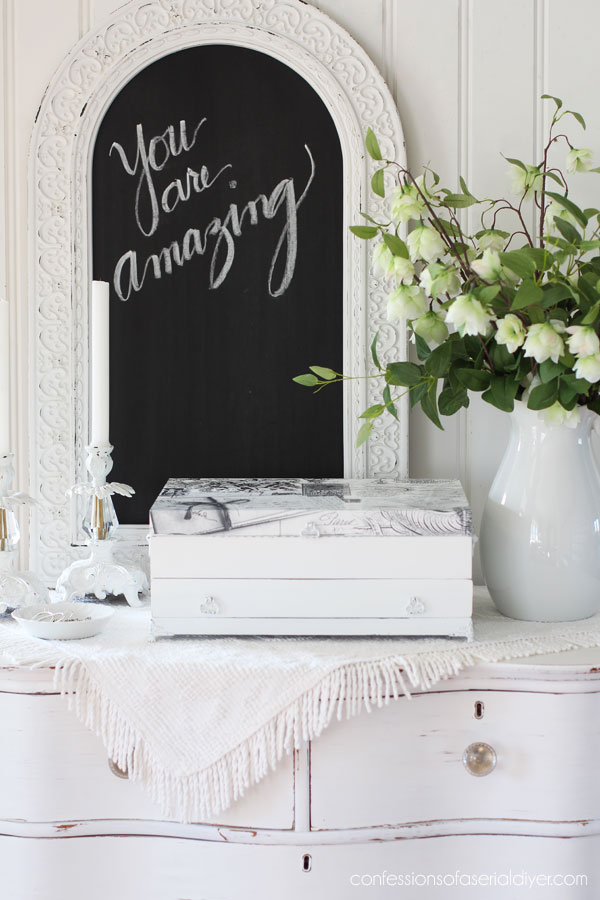
And even closer…
I love the layered look on the top…
I considered adding something to the drawer or a stencil to the sides, but in the end, I kept the rest simple.
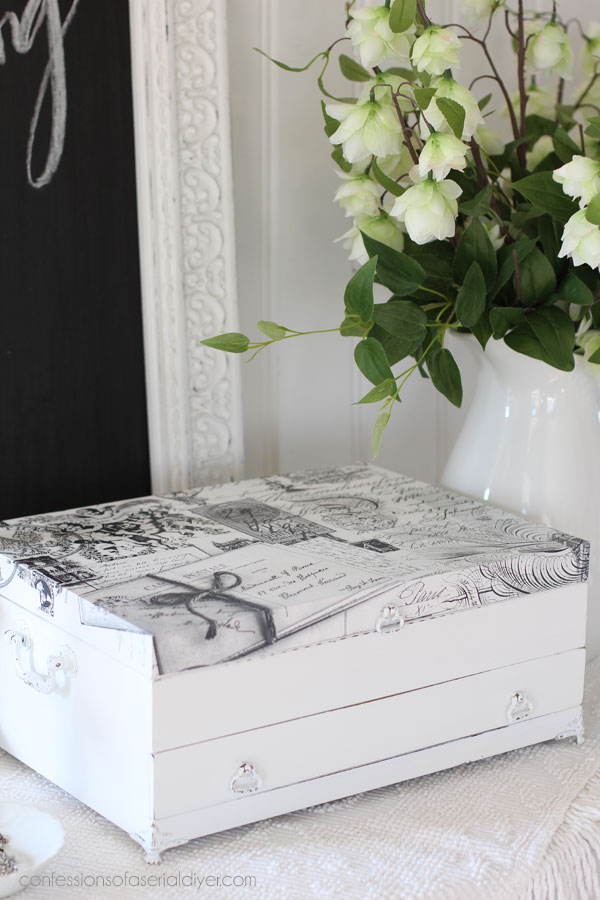
I do kind of wish I had added a stripe to the drawer front now that I see it. I was unable to remove the hardware, but luckily, it’s cute!
The inside
This pretty fabric inside adds a splash of color…

And I also had a few scraps of this Gingham transfer left that I used on the sides of the drawer…
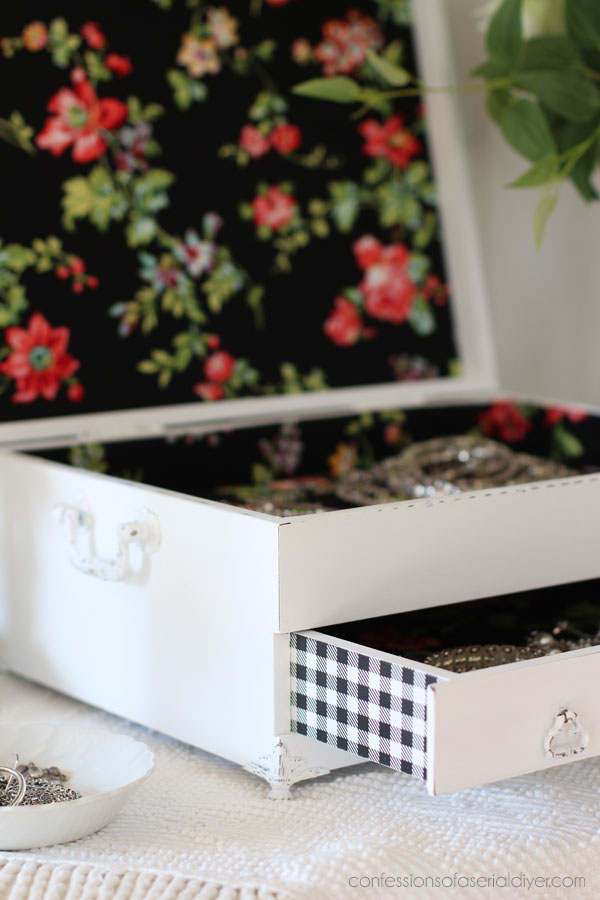
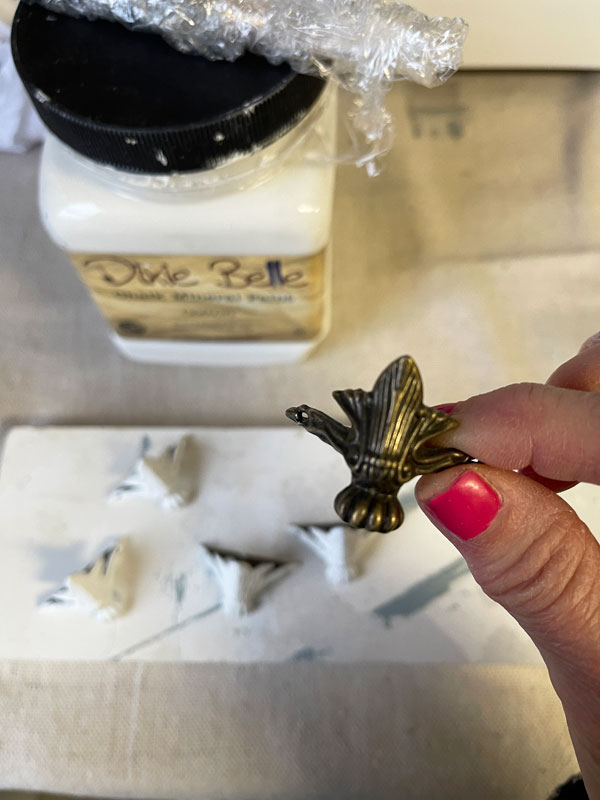
The final addition to this box were these dainty feet:
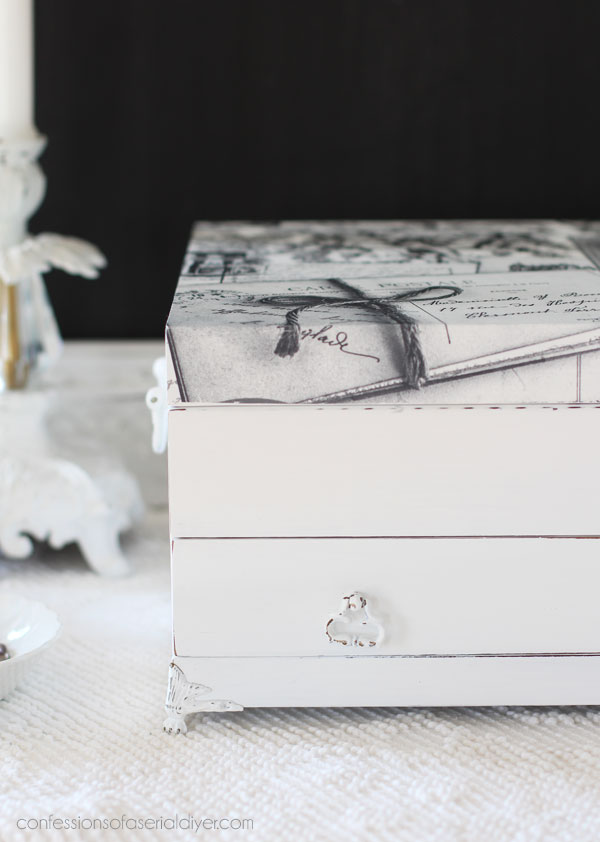
They started out this brassy color, but I painted them white:
And that is flatware box #253 complete! Just kidding…I have done a ton of these though. They are so fun to play with and can have so many uses.
My friends have three more makeovers for you today!

Jen will be back next month!
If you enjoyed this makeover, here are several more boxes I’ve redone:
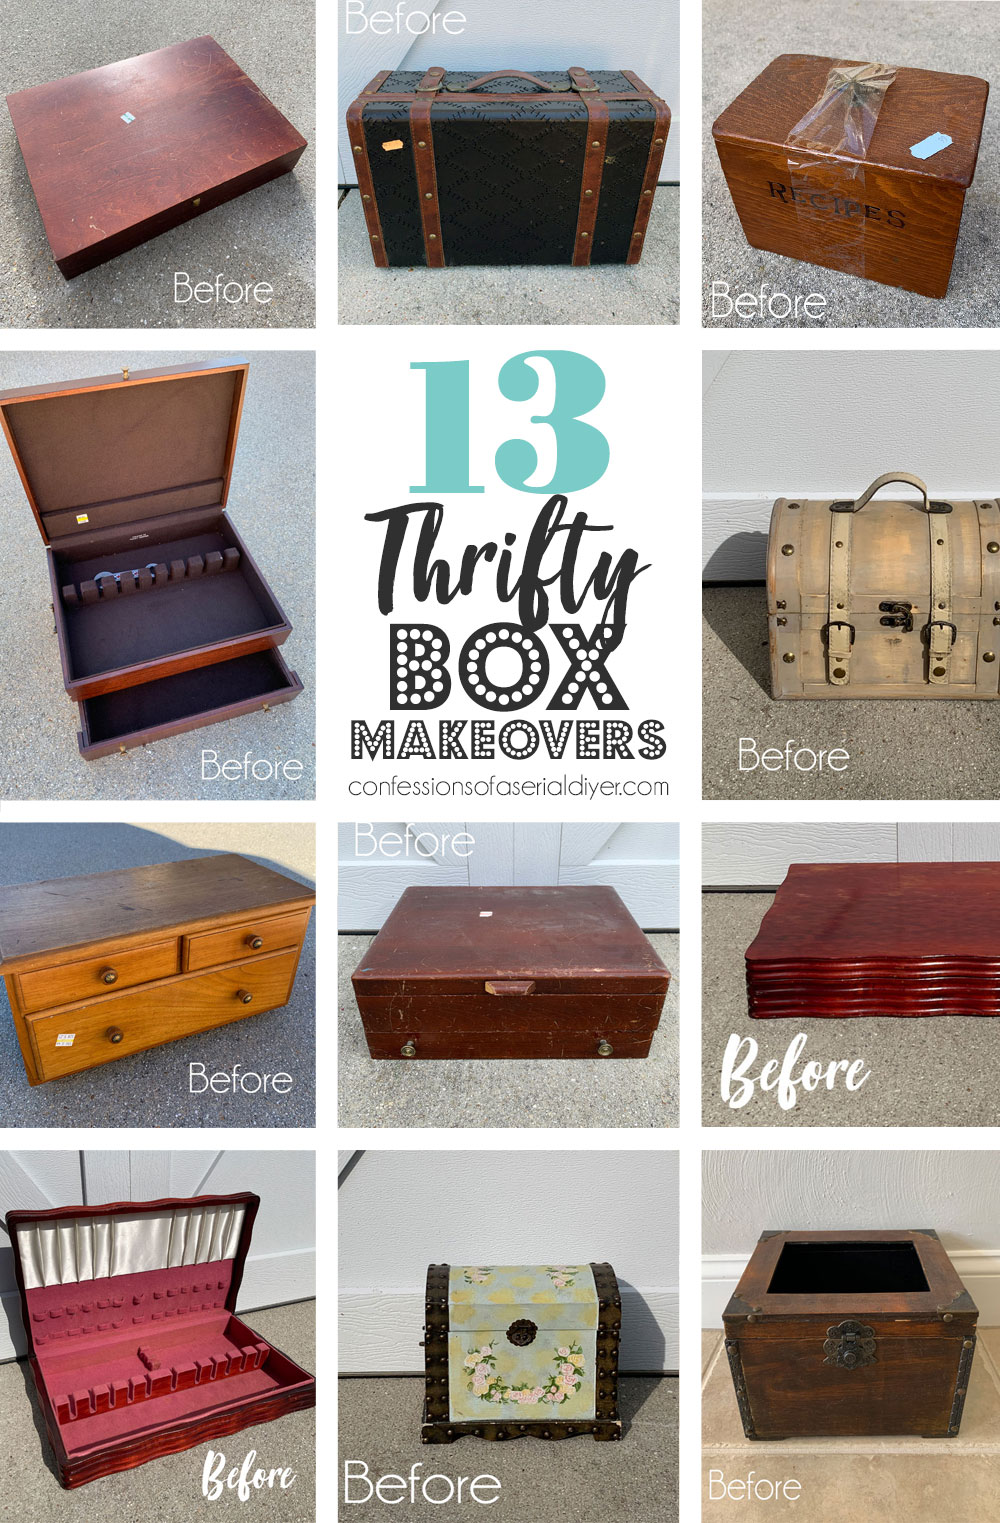
There are some good ones in there! See them all HERE!
That’s one more project closer to finishing this haul!!
See any of these you may have missed at the links below:
Updated Thrift Store Wall Art
Painting the Smalls #19
Picture Turned Chalkboard with Transfer
Serpentine Dresser Makeover
Mirror Makeover with Transfer
Flatware Box Upcycled for Christmas
Upcycled Picnic Basket with a No Sew Liner
Painted Empire Dresser
Neutral Rocker Makeover
Pink Painted Night Table
Mass-Produced Shelf Makeover
Repurposed Cabinet Door
Oak Drop-Leaf Table Makeover
Child’s Rocker Makeover
Vintage Banker’s Chair Makeover
Terra Clay Paint Case Makeover
Tea Kettle Makeover
Tray Update with Stencils
Painting the Smalls #18
How to Turn a Spindle Bed into a Bench
Dated Shelf Makeover
80’s Clock Repurposed
Stenciled Demilune Table
DIY Fabric Lamp Shades & $5 Thrift Store Lamps
Thrift Store Dresser Makeover
I have seven pieces left!! I’ll be back with the three remaining lamps on Thursday:
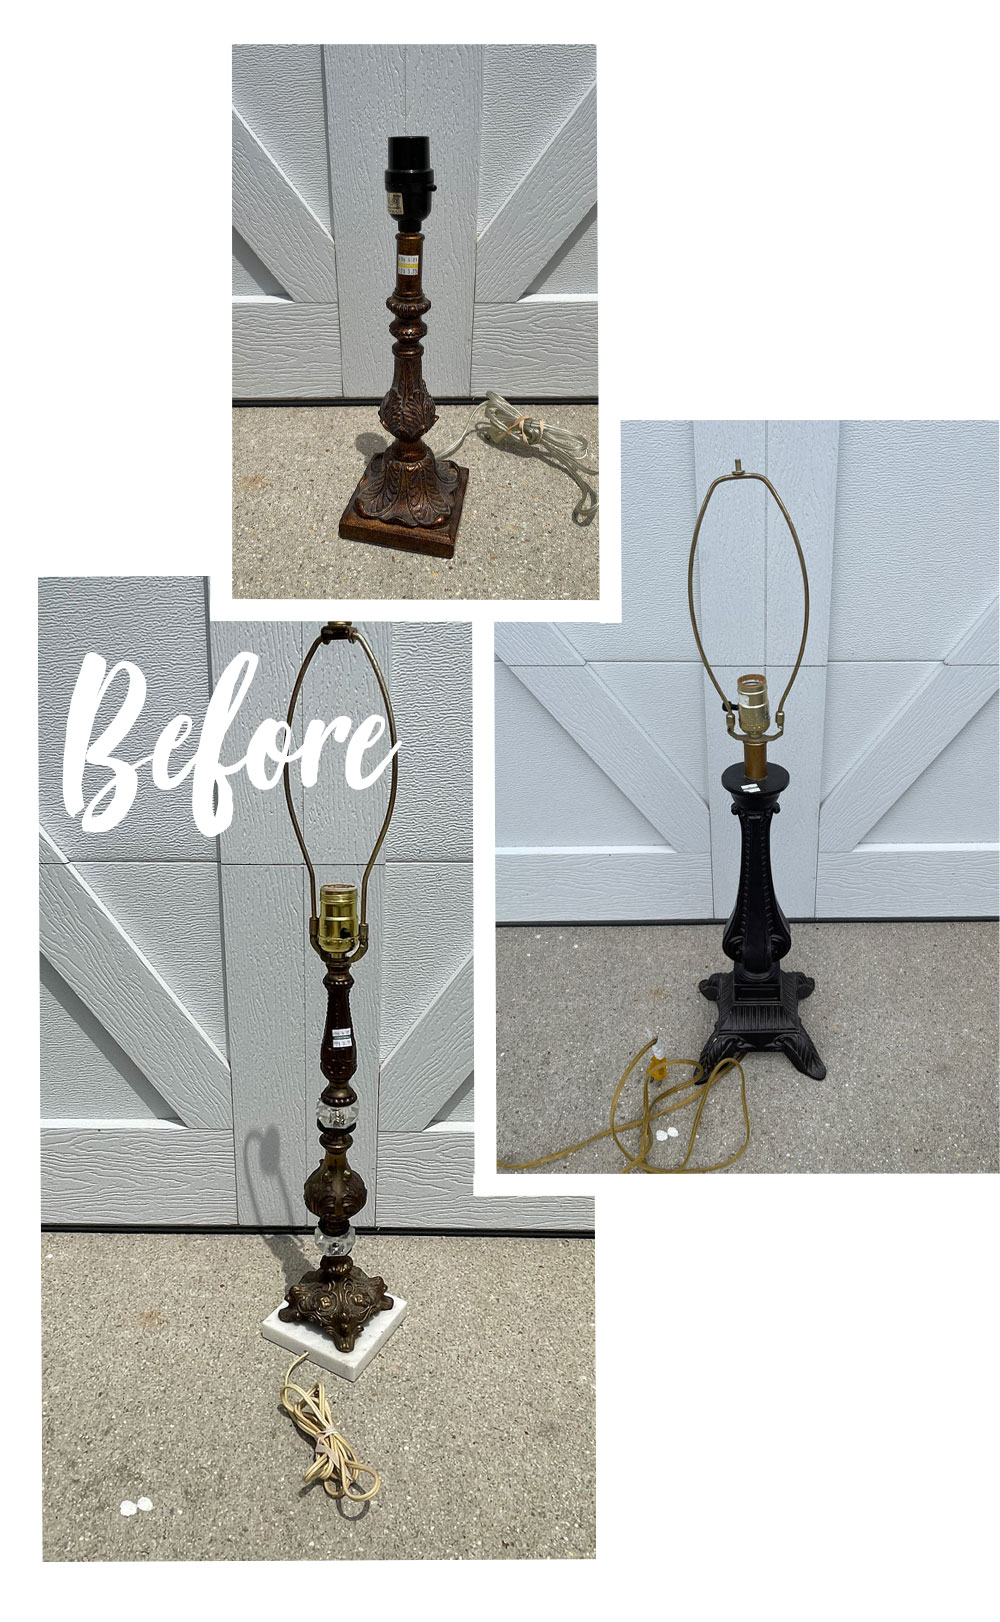
Update: See what I did with all three HERE now!
See y’all then!
XOXO,

Don’t Miss a Thing!
If you like what you see, there are several ways to follow along!
EMAIL * INSTAGRAM * FACEBOOK * PINTEREST


Get FREE SHIPPING on all orders over $50. No code needed at checkout! Orders under $50 always enjoy $8 flat rate shipping! Most orders ship same or next business day!


Mary Kaiser says
Oh I Love it! I have recently purchased one very similar to this one, it has the drawer also. I am on the look out for one more with the drawer so I can make over two of them for my 2 grand daughters. They are very young yet (1year old, and 2 months old) but never to early to start looking and making over. I can see little girls finding lot of things to keep in one of these. Once again, thanks for the inspirataion!!
Christy says
Thank you, Mary! Oh yes…a little girl could fill these with all sorts of things for sure! Have a great day! XOXO
Rose Lefebvre says
So cute and great for keep mementos. I love it!
Christy says
Thank you, Rose! Ooh yes! XOXO
Vicki says
That turned out cute as can be. May I ask where you found thise pretty little feet you put on it. Thanks Vicki.
Christy says
Thank you, Vicki! I found them on Amazon here: https://amzn.to/3XBXJwn 🙂 XOXO
Larissa ~ Prodigal Pieces says
Have I ever told you how much I despise removing silverware box lining? 😬 You did a beautiful job on this, Christy. I adore the interior! 🖤
Christy says
Right?? Removing the insides is the hardest part for sure! Thank you, my friend! XOXO
Janice Holt says
I love your flatware boxes and this one is no exception. The inside and side of the drawer makes it complete. I do have a question and have looked at the post several times. On the bottom left of the top is that part of the transfer or is that a real tied string. It looks so real. Hope this makes sense.
Christy says
Thank you so much, Janice! It is part of the transfer, but it really does look real, even in person. 3D ha ha! XOXO
Belinda Matthew says
Christy
What does a deglosser
do?
Belinda
Christy says
Hi Belinda! It dulls the sheen just a bit to give the surface the best prep possible for paint. XO
Gloria says
Happy New Year Christy! Nice to see you back with new projects. Love this one! I always wondered if you could save mixed unused white lightening for any amount of time?
Thank you.
Christy says
Happy New Year, Gloria! It feels so good to be back at it! Thank you! And absolutely, many even mix it into a spray bottle. I prefer the tub as many of my projects are so dirty (not this one) that I like to be able to submerge my sponge and get it really clean, but you could definitely save it if you didn’t use it all and it was still pretty clean. XOXO
Cecilia says
That’s a cool transfer and it looks wonderful on this piece. I just love how you repurpose and transform these outdated pieces! It’s so fun to see how you do it too. 😊 Love those little feet – they just finish it all off!
Cecilia
Christy says
Thank you, Cecilia! I’m so glad you enjoy what I share…it is really fun to see these pieces come back to life! XOXO
Cecilia from Georgia says
This is such a fun piece! I love the different designs and they all work so well together. Good job, Christy!
Christy says
Thank you, Cecilia! XOXO
Anna Kennel says
Gorgeous project. Do you have a source for the dainty feet you applied?
Christy says
Thank you, Anna! I just added that…you can find them on Amazon here: https://amzn.to/3XBXJwn 🙂 XOXO
roe squire says
I love every little detail you included on this project.
Christy says
Aww thank you, Roe! I enjoyed working on this one! XOXO
Niki says
I see a pretty writing desk in an uncluttered office with one of your lovely repurposed silver boxes filled with monogrammed paper- matching envelopes and pens that write as beautifully as it all looks……. Aaahhh a girl can dream!!
Christy says
Ooh yes! That would be lovely! I like that dream!! XOXO
Cheryl Atkinson says
Hi Christy! What a great way to start a new year!! I love it!! Can you cut this transfer up to use certain pieces or does it all kind of run together and there is no way to cut it up without messing it up. Does that make sense? I’m delirious from lack of sleep.
Christy says
Thank you so much, my friend! It does kind of run together, so you can’t really cut it apart. You could still use it on a few smaller pieces, but you would have to cover the whole top surface as I did here. XOXO
Robin says
Happy New Year, my (online) friend! Your flatware boxes are always terrific. Made 1 for the daughter (2 yrs ago) & have one that had moldy innards that I finally ripped out (yuk) but it is still sitting. Have a 3rd one to do at a later date. I also have many others but they’re filled with silver-plated flatware, LOLOLOL. Anyway, before I saw the sides of that drawer my suggestion would have been to add the transfer to the drawer front for more visual interest. Maybe the transfer on front would pair well with the drawer sides?
Christy says
Happy New Year, friend!! Thank you! I may go back and do something more with the drawer. Enjoy playing with yours! XOXO
Debra Hubbs says
So pretty! I love how the transfer wraps around the whole top.
Christy says
Thank you, Debra! It was a pretty transfer to play with! XOXO
Lizzy says
It’s so pretty and the crisp white paint you used is perfect. Do you think the wax brush you use is better than Annie Sloan’s wax brush? I’ve been thinking about replacing mine because the metal part is loose.
Christy says
Thank you, Lizzy! I have a smaller AS brush that I’ve had for years and I would say they are very similar. XOXO
Debbie in TX says
Wow, this one turned out great! Love that particular transfer and how much character it adds to the box. The feet also give it a whole new look and feel. Superb job! Happy New Year : )
Christy says
Thank you, Debbie! I was so happy to have a project to use this pretty transfer on. Happy New Year to you too! XOXO
Denise Zdziennicki says
This vintage postage transfer is adorable and I love how you put everything together. The feet, the side drawer detail and the lining is beautiful! XOXO
Christy says
Thank you so much, Denise! These boxes are so fun to play with! XOXO
Michele M. says
GREAT make-over, Christy! I love the gingham on the sides. Also – those little feet – did I miss where you find those? I have two old silverware boxes I no longer use – because I now house all my silver plate in vintage flannel wrap-bags in my china cabinet drawers. I entertain often and it got old keeping those boxes in the basement. So there those boxes sit – I need to redo them “Christy-style” this year! Love those feet – makes it look more “finished.”
Christy says
Thank you, Michele! I found those little feet on Amazon here: https://amzn.to/3Xj2Sco Very reasonably priced too. Yes, you need to give those boxes some love! 🙂 XOXO
Petra says
Happy new year Christy! That box is SO much better in white. Of course 🙂 I think the little feet really make it and give it that extra something special. Hope you’re not feeling the cold too much. I’ve put the air-con on today as we’ve started to heat up down under! Have a lovely day 😀
Christy says
Happy New Year, Petra! Thank you! We had a really mild spell for a couple of weeks…total shorts weather, so I’m not minding the cool down. We have a pretty decent warm season here, so I like winter to be winter lol. Enjoy those warm days! XOXO
Marcie Lovett says
Another lovely flatware box, Christy. I only wish you could selectively pull out the guts and leave the lining behind! Since I can’t see that happening anytime soon, pretty floral fabric is the solution. I knew there had to be a surprise somewhere – and there it was, on the drawer sides. Looking forward to seeing what else you do with the letters transfer.
Christy says
Thank you, Marcie! Had I been able to remove that bar across the center without messing up that green lining, I definitely would have kept it. This one was really nice quality! And that would be so much easier lol! Have a great week! XOXO
Nancy @ Artsy Chicks Rule says
That turned out so pretty, Christy! Love the dark interior! xoxo
Christy says
Thank you, my friend! XOXO
shan says
That fabric is just…so…I can’t even think of a word good enough for it. The whole box turned out great. Glad to see you back at it. Happy New Year to you.
Christy says
Aww thank you so much, Shan! I love this fabric so much too! And yay…it feels so good to be back at it! Happy New Year too! XOXO
Joanne H. says
The box makeover is so cute. I always look forward to seeing how you give new life to the pieces.
So what do you enjoy the most? The thrill of the hunt or bringing it back to life?
Christy says
Thank you, Joanne! I’m so glad you enjoy what I share! Hmmm…that is a tough one as I really do enjoy the hunt, but I get joy from redoing them and staging them too! XOXO
Debbie says
I am just starting & wanted to do one of the flatware boxes for my daughter. Do you think this would be a good one to start on or is it a more advance item .
Christy says
Hi Debbie! The hardest part of redoing a flatware box is removing the insides, but you can totally do it! XOXO