Awesome friends, I am SO excited to share how our front landscaping turned out!! I just love landscaping projects! You can see great results in a short amount of time. (Unlike a certain kitchen project ahem…can you tell I am so glad that one is done??)
Remember what it looked like when we moved in last August:

It hadn’t been loved in a very long time. I passed by this house before it was even for sale after leaving another house that we were interested in. The windows were all empty and it almost looked abandoned.
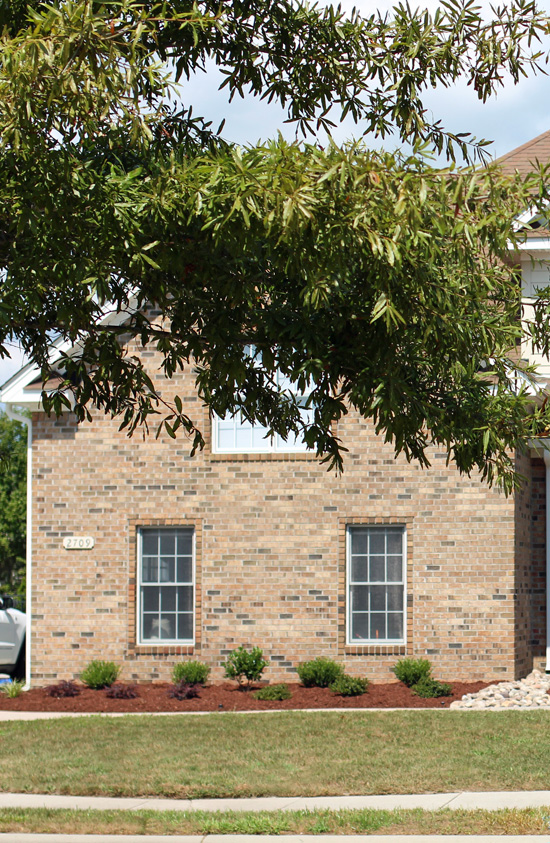
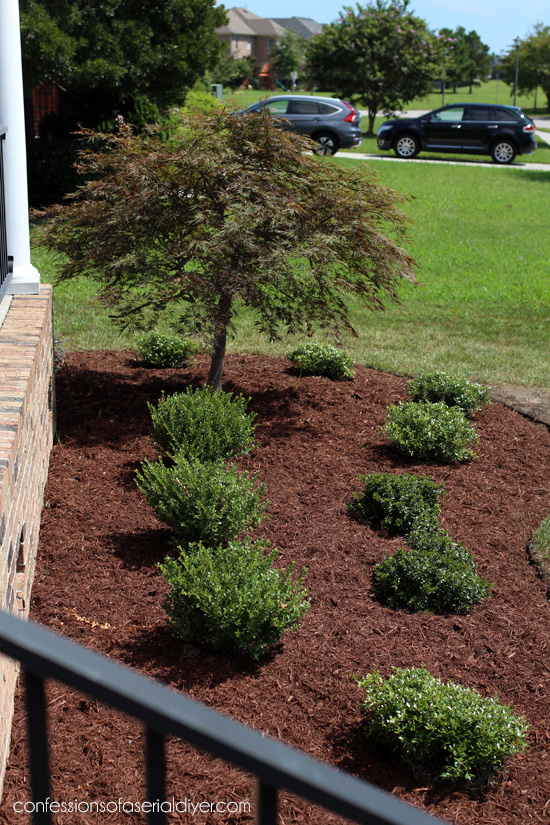
And here it is now:

Look at all those new plant babies! Pretty much everything that was there had to come out.
Everything was so overgrown and unkempt:

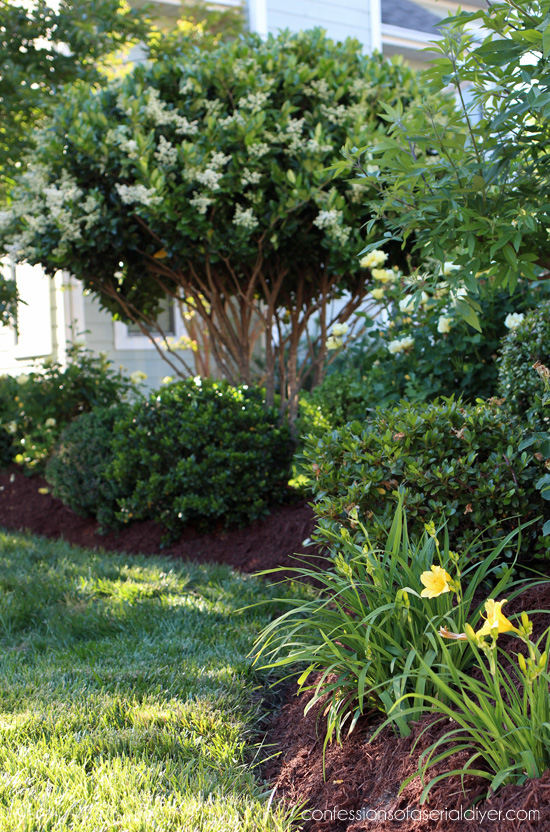
Now it is neat and clean, and it looks like people who actually love it live there:

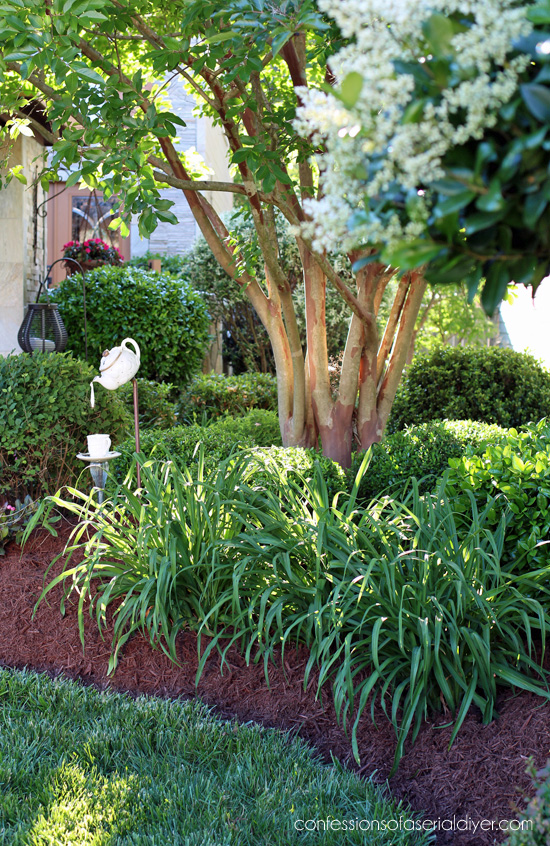
And luckily we were able to keep the Japanese Maple.
My hubby completely redid the grass last Fall, but it has taken quite a beating with this end of Summer heat. Time to aerate and reseed!
Creating a landscape you love doesn’t have to be daunting. I used graph paper to sketch out our blank landscape to-scale first. (One square = one square foot.) I penciled in what was staying which was just the maple.
Then I visited our local nursery to see what was available, took tons of photos of plants, shrubs, and their tags:

Then I came home and did a little research.
Next, I started filling in my sketch:

I was able to make a list of exactly what I needed to buy to take with me to the nursery. Last week I shared this photo from our big haul:
My sister and two of our boys helped me load everything up and haul it all home. I was able to lay everything out where it needed to go using my sketch…

Then my sister stuck around to help me plant the majority of it that same day!
Here we are full of sweat and dirt, but so proud of ourselves:

Pure determination right there! A HUGE thank you to her for helping me tackle this project!
I will share what I planted since some of you requested that I do so. I am in hardiness zone 7B. You can find your zone HERE. Each plant is labeled so this will help you decide what plants can tolerate the weather in your area.
Here was the entry area before:

Goodbye overgrown thorny knockout roses!

Our front door is so much more inviting now. Maybe even a little bare in comparison, but those plant babies will fill in in no time.
One of my neighbors at the bus stop the other day commented that in the five years she’s lived here, she’s never seen anyone decorate the front porch. So sad! I couldn’t wait to decorate it:
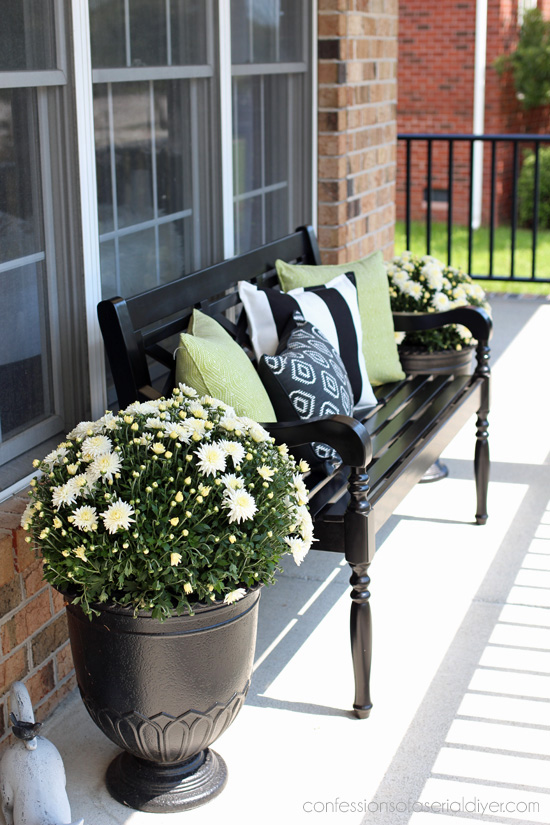
I found this bench on Hayneedle.com HERE, but they only have white and red left.
And just to the left of the front steps, under our dining room window:
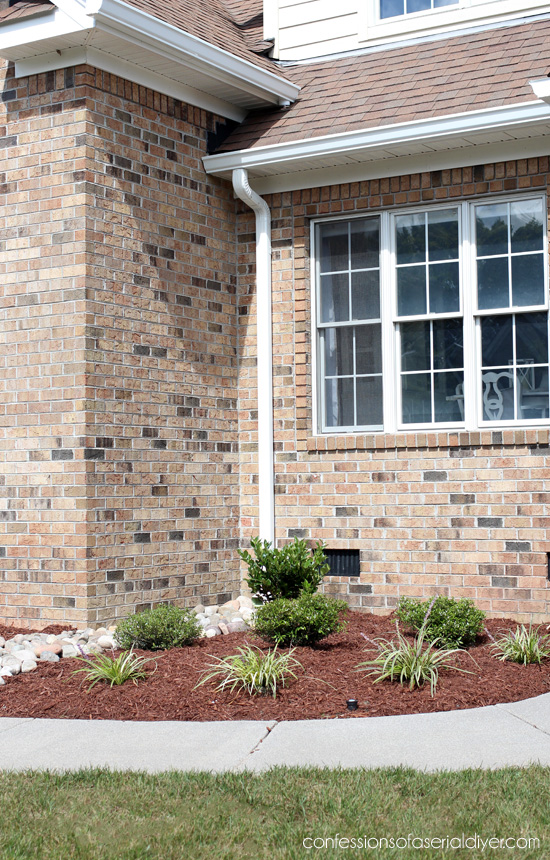
That little shrub in the corner is a Waxleaf Privet (Ligustrum) and can be shaped into a lovely, very manageable little tree.
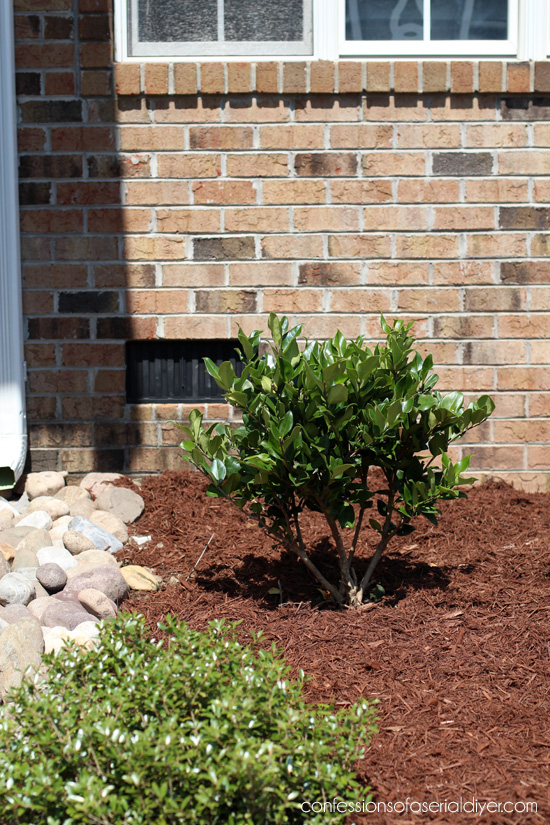
Here is one I planted at our old house:
I’ll keep this one a bit smaller. It will fill that corner nicely and be surrounded by three Dwarf Yaupon Holly bushes. They are low, slow growing and have a nice mounding growth habit.
I used the same ones around our Crape Myrtle tree at our last house (behind the daylilies):
Visit my last garden tour at our old house HERE.
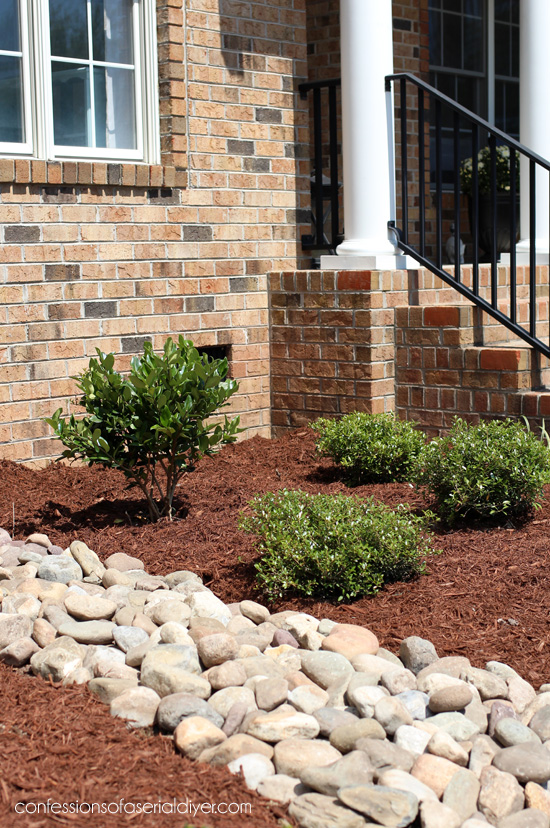
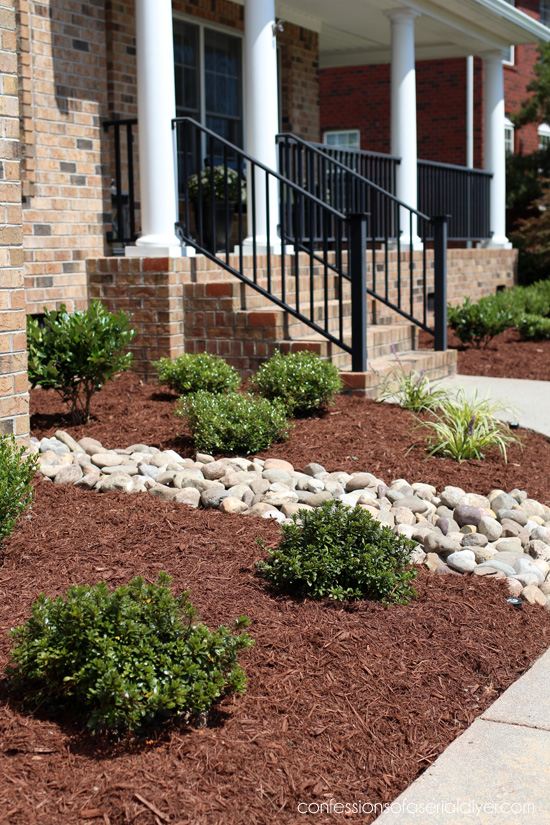
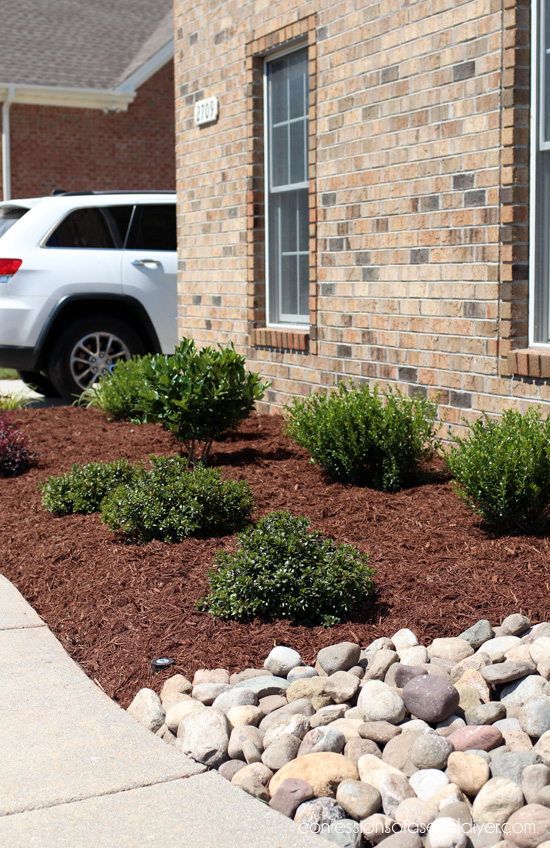
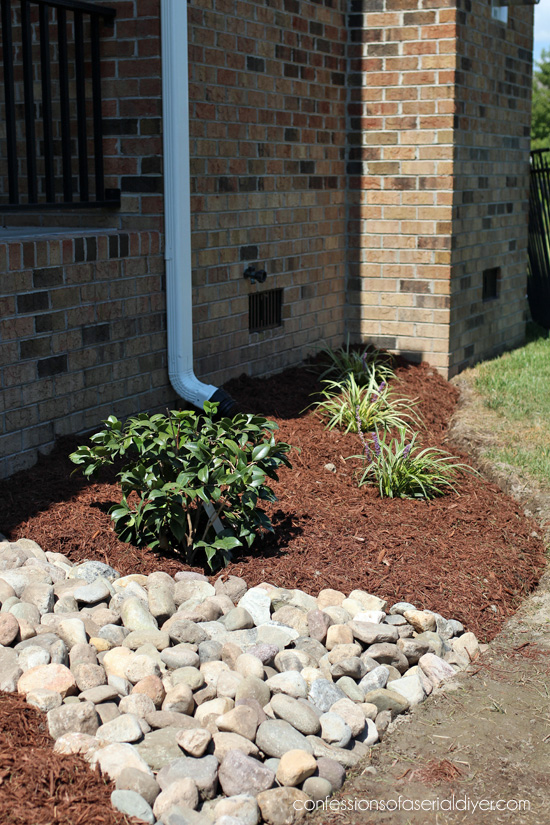
These rocks were here before we added the gutters, but I removed them all, added some topsoil to raise the height in that corner, and my sister and I moved them all back to stop the gutter from washing out the soil and much.

I like the way they flow now and add interest to the landscape.
Another sad before view:

Sometimes it’s nice to start with a clean slate. Now everything will grow and mature together.

I added another Waxleaf Privet that will become a small tree, in between the two windows of our garage, and then flanked it with two pairs of Japanese Holly (Compacta):
They make great foundation shrubs and should only get about four feet high. Then I added three Gumpo White Azaleas in front of the two holly bushes on the right:
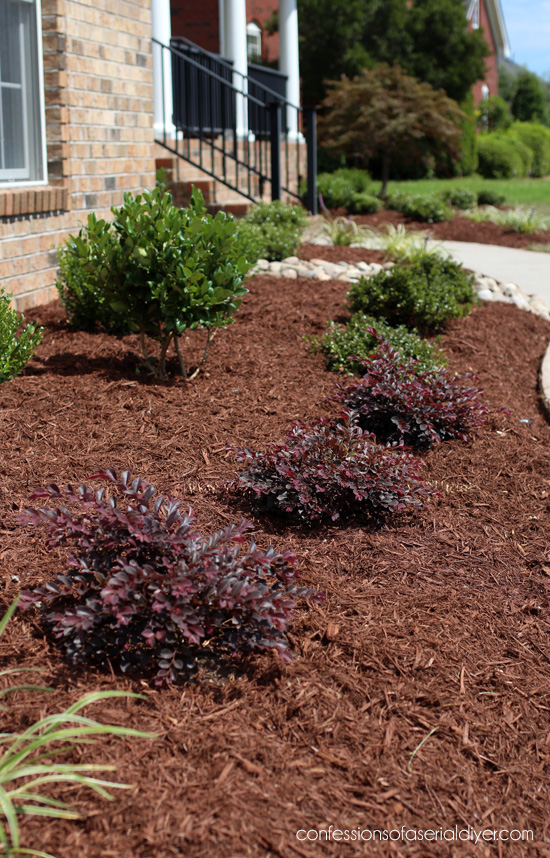
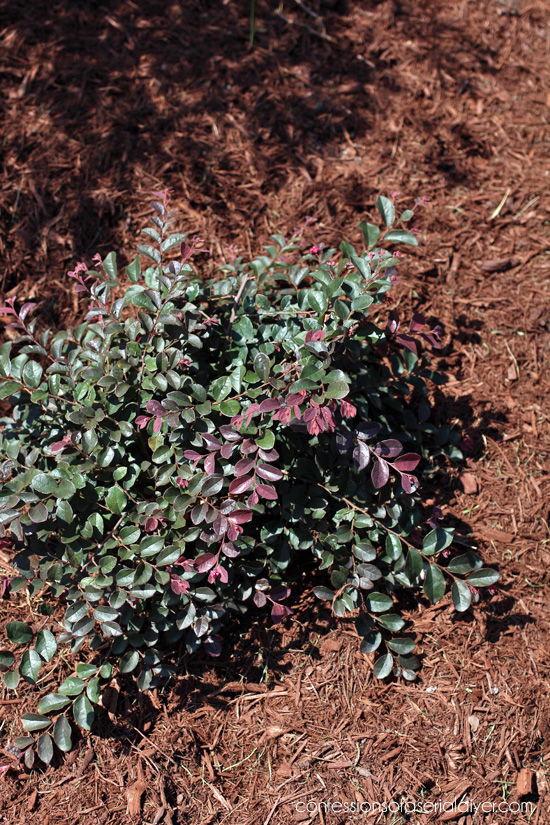
I also added three of these pretty Crimson Fire Fringe Flower shrubs in front of the holly on the left side. I really tried to be very mindful of how large things will get and spaced things accordingly. These are the only ones that I will have to keep tamed as they will probably more than fill this space, but I love the deep color to balance out the Maple on the other corner:
I added another Waxleaf Privet to the other side of the steps to balance it out and surrounded that one with a trio of the same dwarf Yaupon Holly that are on the other side of the steps…

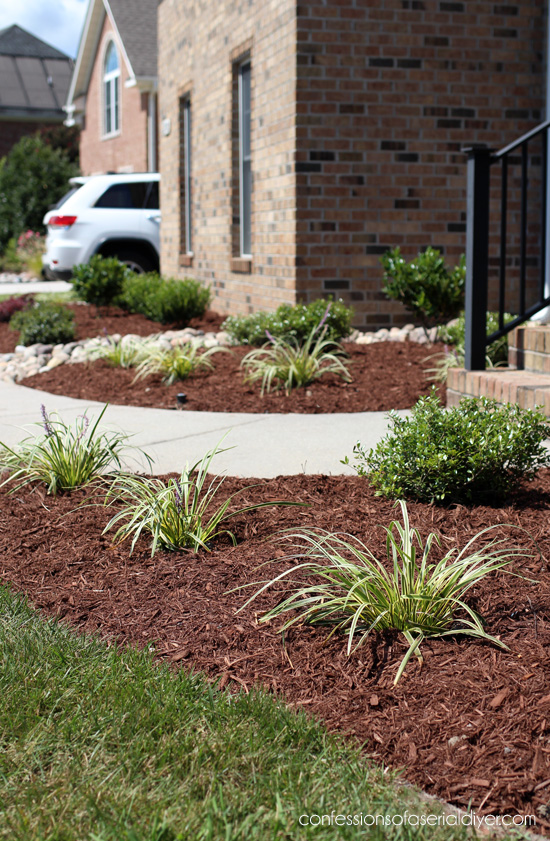
Variegated Liriope adds a nice contrast to the shrubs.
To the right of that, I added three more Japanese Holly bushes, perfect for basic foundation shrubs. In front of those I added a couple more Gumpo White Azaleas:
Along the side of our porch, on the other side of the Japanese Maple, I added three more Japanese Holly to stay consistent…
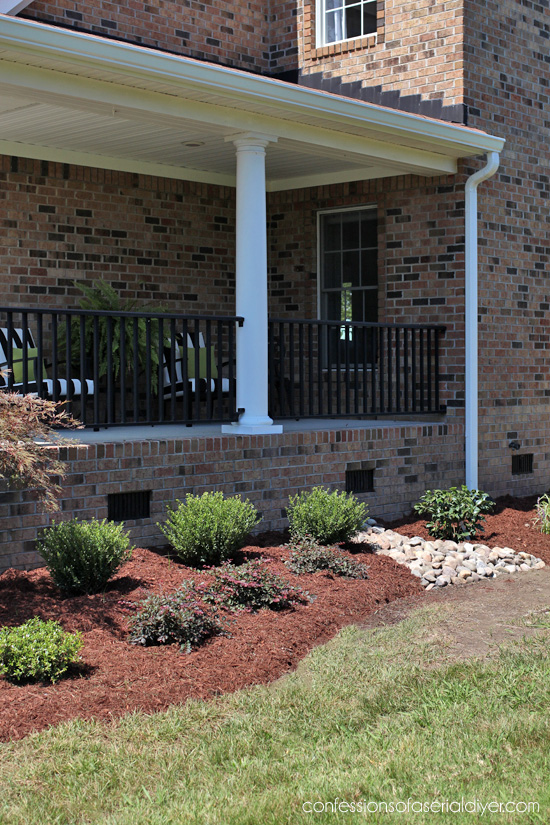
And just past the rocks I planted an April Snow Camellia. It will hide some of the gutter, and I can’t wait to see the showy blooms that come in the early Spring!
And I added these pretty Jazz Hands Dwarf Pink Chinese Fringe Flower shrubs in front of the holly bushes:
My Hubby added a drain from the gutter on that side to take the water underground, so he had to dig up a good amount of grass. Hopefully it will work. The water draining from that gutter is what has caused our grass to erode down the front of our yard as you can see below:

Around the Maple are four more Dwarf Yaupon Holly bushes.

I tried to stay consistent with what I chose and everything is evergreen so it will have form and color year-round.

I can’t wait to watch everything mature and fill in. I know my neighbors are grateful for the new view!

For a complete guide to creating a landscape from scratch, visit my “How to Create a Landscape from Scratch” post HERE!

I did nothing to amend the existing soil here. I bought bags of in-ground garden soil and added a good amount to the bottom of each hole that I dug. These are all pretty hardy varieties so that should be fine. We’ll see!
I hope you enjoyed seeing our front yard makeover today!
UPDATE!! It’s been two years and our front landscaping has had another update!! See it HERE!!
It is looking like we dodged a bullet with this hurricane as it has moved further south, but I will be keeping those in the path in my thoughts and prayers.
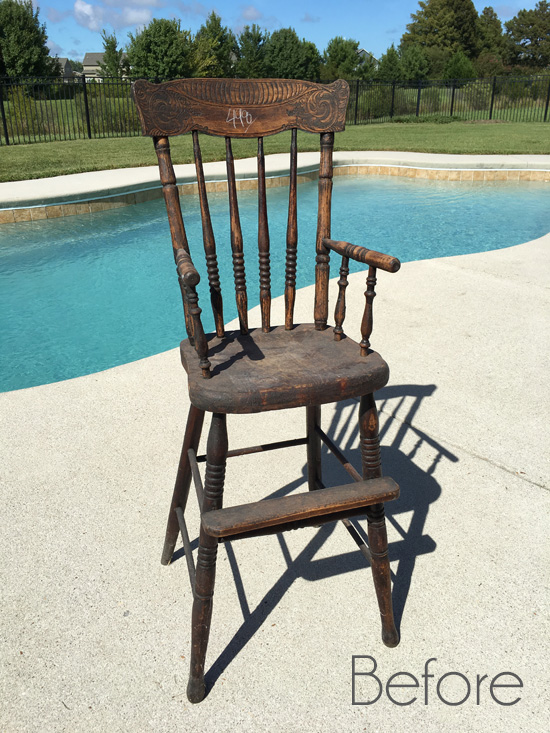
I’ll be back here on Tuesday sharing how I repurposed this antique highchair:
See ya then!
UPDATE: Bam! No need to wait…see what I did with this chair HERE now!!
XO,
![]()
Don’t Miss a Thing!
If you like what you see, there are several ways to follow along!
Email * Facebook * Pinterest * Twitter * Instagram


Mary Kaiser says
Oh it is so beautiful now. That was a lot of work, but it sure will payoff with how amazing it will be as it grows and matures. Great job Christy!
Christy says
Thank you, Mary! I can’t wait to see it fill in! XOXO
Christina in SW FL says
Christy you have some mad skillz!! Seriously! Your design is lovely and it really lets both the plants and the beauty of your home shine. Great going! Hugs to your sister for helping so much!!
Be safe with Florence and know I send tons of positive energy!!
Christy says
Ha ha thank you!! You can actually see our house now and not just the overgrown bushes! My sister is the best for sure! XOXO
Michele Branham says
WOW! The landscaping looks great. It makes such a difference in the appearance of your house. Everything looks clean and fresh. Congratulations!
Christy says
Thank you, Michele!! Yes you can actually see the house now lol. XOXO
Rebecca says
Your landscaping is so pretty!
Christy says
Thank you, Rebecca!! XO
Karen L Moore says
Looks great! I know that was a lot of hard work, especially in August. Give us updates as it matures.
Christy says
Thanks, Karen! Ah yes and boy was this a hot one! I will be sure to share updates as it grows for sure! XOXO
Gin says
You continue to amaze me Christy. You are so talented! Your home looks beautiful inside and your landscape design is perfect.
YOur sister could be your twin.
Another great job.
Gin
Christy says
Aww thank you, Gin! I love getting my hands in the dirt, so this was a fun project…glad it is done though! XOXO
sharon austin says
Very nice! I like the clean, manicured look. Make sure you share a pic next summer so we can see how/if it’s changed once the plants grow more!
Christy says
Thanks, Sharon! I definitely will! XO
Sandy says
Christy, I’ve never met a more talented woman in my life. — YOU are amazing….I loved the landscaping makeover at your former house.
Best wishes to you ❤️
Christy says
Aww thank you, Sandy!! You are so kind!! I’ll admit I miss our former gardens a bit, but I didn’t miss the upkeep part. At least I can drive by it any time I like lol! XOXO
Sheila Carrigan says
That is a world of difference!! I didn’t even NOTICE that beautiful porch in the before shots. Great job!!
Christy says
Thank you, Sheila!! XOXO
Pat says
Looks fabulous!
Christy says
Thank you, Pat! XO
Paula says
You are amazing! It looks so good!
Christy says
Aww thank you, Paula!! Our to-do list is dwindling and it feels so good!! XOXO
Mary says
Very nice professional job, well done. Wow, you and your sister could be twins!
When are you guys going to make a new thrift shopping video? Those are so cute…
Christy says
Thank you, Mary! Nancy and I filmed another thrifting trip not too long ago so we’ll have a new video soon! XOXO
marisa waid says
Wow, that looks great!! You are definitely a great landscaper and to have the help from your sister is awesome. What a wonderful sister you have and everything looks so good.
Christy says
Thank you, Marisa!! My sister is awesome for sure!! XO
Wanda Rose says
Just in time to start planning your Halloween decor 🙂
Christy says
Right?? I can’t wait to pull all my Halloween decor out!! ????
Becky says
Beautiful! I need to go and do likewise, haha! Too much maintenance and not enough winter fill in! Your house should look AMAZING in a year or two. Well done!!!
Christy says
Thanks, Becky! It’s always fun to spruce up our outdoor spaces! I can’t wait to see it filled in!! XOXO
Donna says
The landscape makeover is fabulous! You have a super sister to help with all that!
Christy says
Thank you, Donna!! I am very blessed to have my sister for sure! XOXO
Brenda Johnson says
It looks lovely! So tidy and clean looking! Good job!
Christy says
Thank you, Brenda! Much neater for sure! 🙂 XO
Julie Briones says
Just amazing! Like a man who looks better without a beard and decides to shave… ya know?! 😉 LOL!
Christy says
Oh ha ha yes…great analogy! Thanks, Julie! XOXO
Piper says
After reading your posts about your previous yard to get ideas and form a plan for my own yard, I found this newer post. I was just wondering what specifically was more work with your previous garden…the plants you used, weeding, spacing or quantity of plants, etc? Did the mounded beds with the newspaper hold up over time? I totally understood your desire for a garden, since that’s what I dream of too. Now I’m just wondering what I can learn from your experience over time. I don’t want my dream to become a nightmare of upkeep. Thanks!
Christy says
Hi Piper! First of all, the newspaper method worked like a dream! The newspaper killed any remaining growth and kept most weeds at bay. I would do that all over again if needed. I loved my garden at our old house. I couldn’t wait for each Spring to arrive so I could enjoy it all over again. The only issue was that there were a couple of specimens I chose that grew very quickly, so I was having to keep them trimmed back. (One was the Vitex Chaste Tree…it really needs a larger space if you don’t want to keep trimming it back, but it has beautiful purple blooms most of the Summer if it is in your zone.) I started my garden before blogging and I didn’t mind that at all then, but when my blog started demanding more of my time, I had less time to tend to my garden. Had I not had a blog, it would have been just fine. I really miss my garden actually and know already that my new landscaping won’t bring me nearly as much joy. Also our old garden was huge in comparison since it went around most of our front yard, all down the side of our house, and across the entire back. It would be much less work if it were smaller. I hope this helps! Good luck whatever you decide! I’d be happy to answer any other questions you have along the way if I can! XO
Mike S says
Hi we are adding foundation shrubs soon and this is really helpful. Can you tell me how far apart you spaced the Japanese hollies? Will they eventually spread so that the leaves are touching? Would love to see some after pics to see how everything has grown in (But I know we’ve only gotten through the winter). Thanks!
Christy says
Hi Mike! Is this the same Mike Silag I went to HS with? I spaced the Holly bushes about 3-4 feet apart. They are only supposed to reach 4X4X4 if I remember correctly, so hopefully they will grow until they are barely touching. Then I’ll try to keep them trimmed to that size. They have grown a bit since last Summer, but I anticipate a growth spurt with all the April showers that lie ahead. 🙂