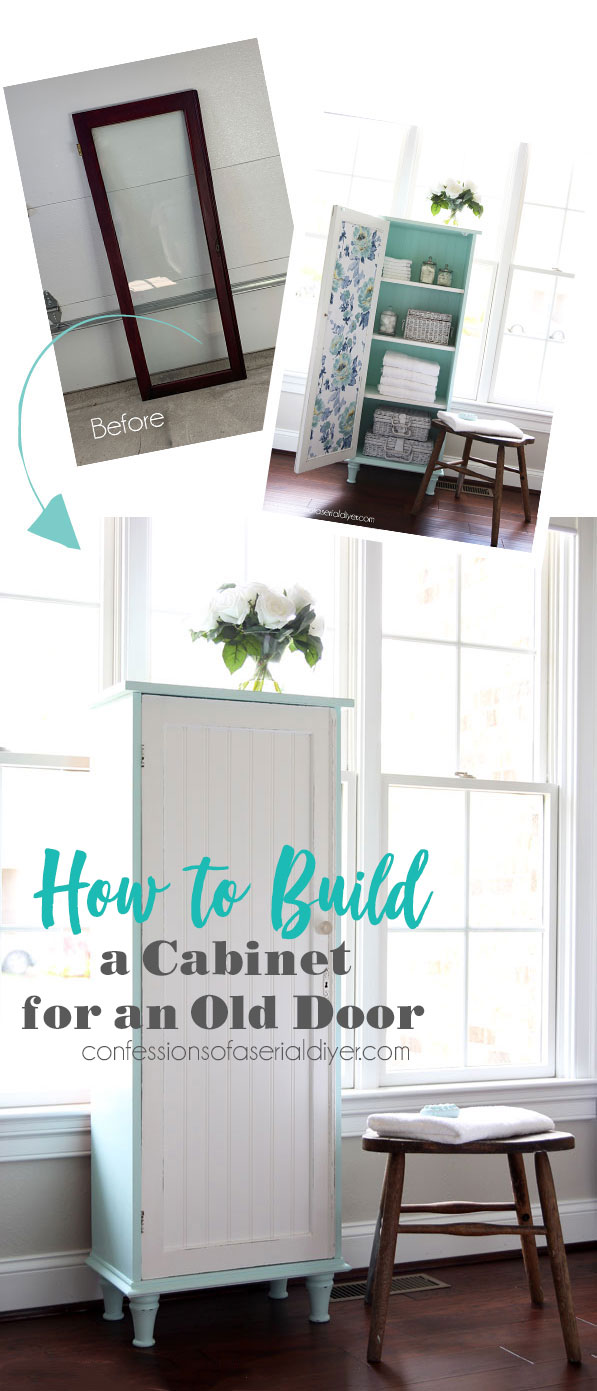
Beautiful friends, welcome back! Have you got a fantastic door that you don’t know what to do with? Today, I’m sharing how to build a cabinet for an old door!
I shared this DIY about two years ago right when the pandemic started going full force, and I thought it would be a fun one to revisit!
As I mentioned last week, nephew is getting married today! You know, 2-22-22 and all. So, we have family in town and I have been playing instead of working ha ha! I will be back with my Furniture Fixer Upper girls on Thursday with a new one for you though!
A couple before building the cabinet I’m sharing today, I shared this bookcase that started out as a cabinet with these glass doors:
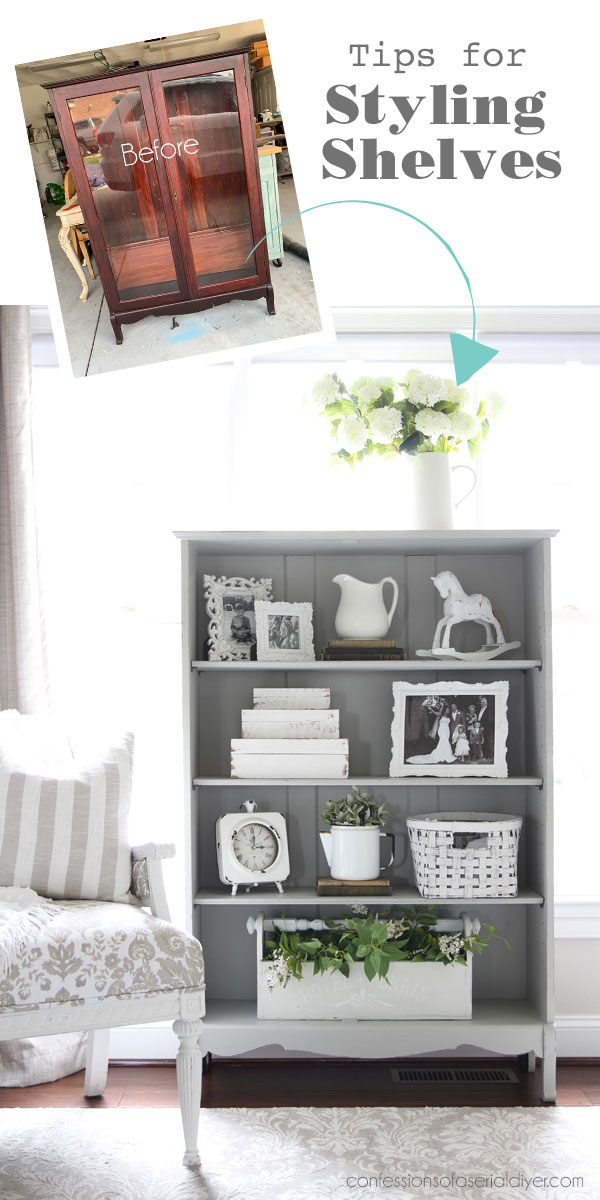
I had plans to use the shelving as a display case for my booth, so I did not want to keep the doors on.
And once I got it home and unloaded, I noticed that the glass was broken on one of the doors anyway:
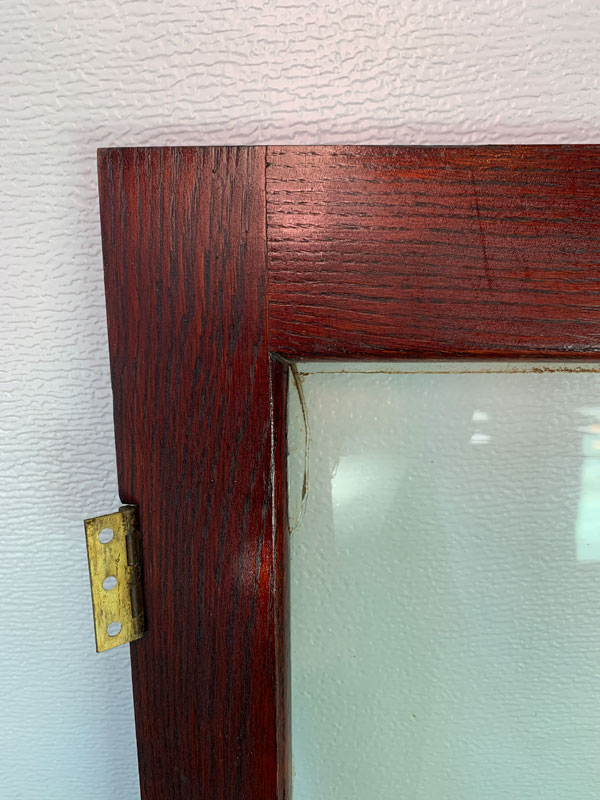
Bummer! Because I decided that this cabinet would work better as a display piece without the doors anyway, I removed them to hopefully be reused at a later date.
And this is the day! I’m sharing how I repurposed the door with the broken glass:

Except, is it really repurposed if I technically used it for the same purpose?
How to build a cabinet for an old door
I’ve included a few affiliate links so you can find the products I love.
I bought two 8ft pieces of common board at the Home Depot:
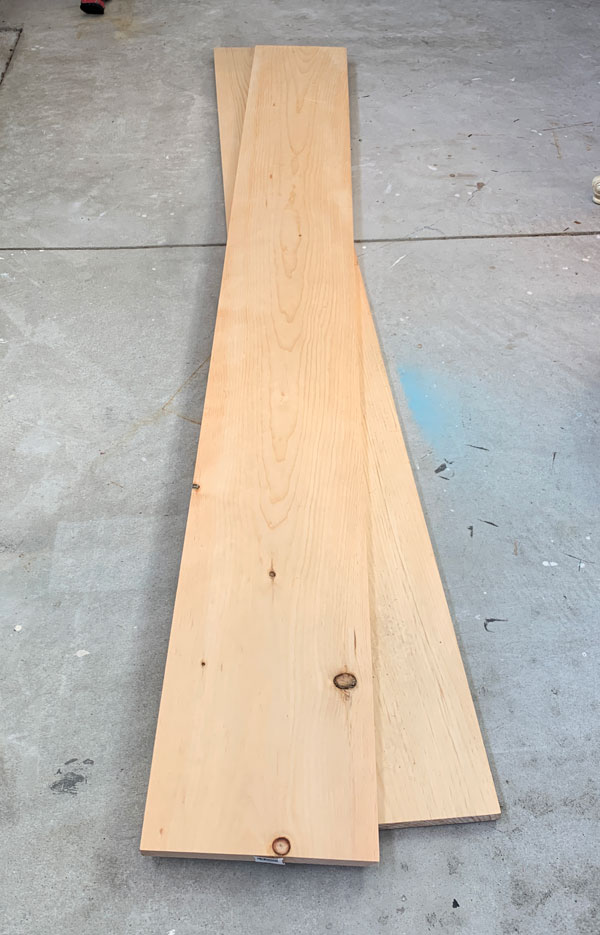
Plus I used a little of another piece of wood that I already had.
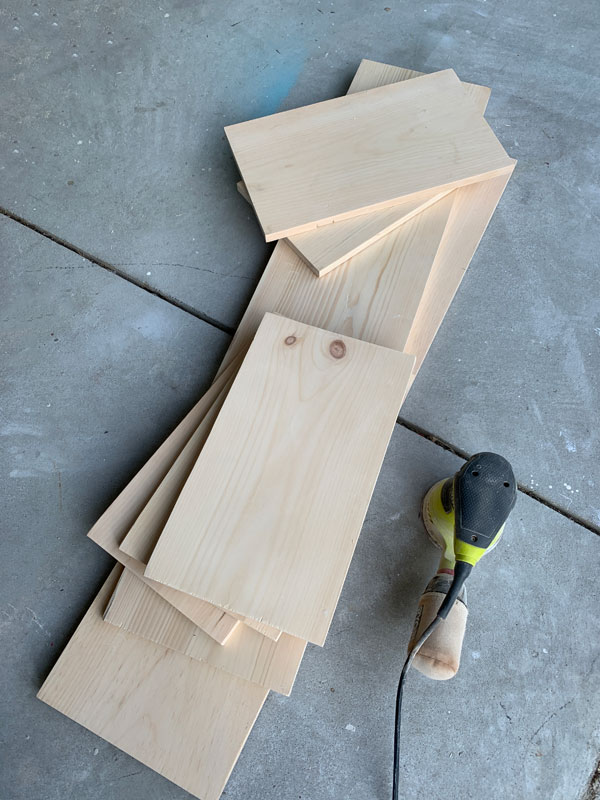
All my measurements were base on the size of my door. After deciding what I wanted to do and measuring my door, I measured and cut my pieces using my miter saw. Mine cuts pieces up to a foot.
Then I laid the pieces out and dry-fit everything:
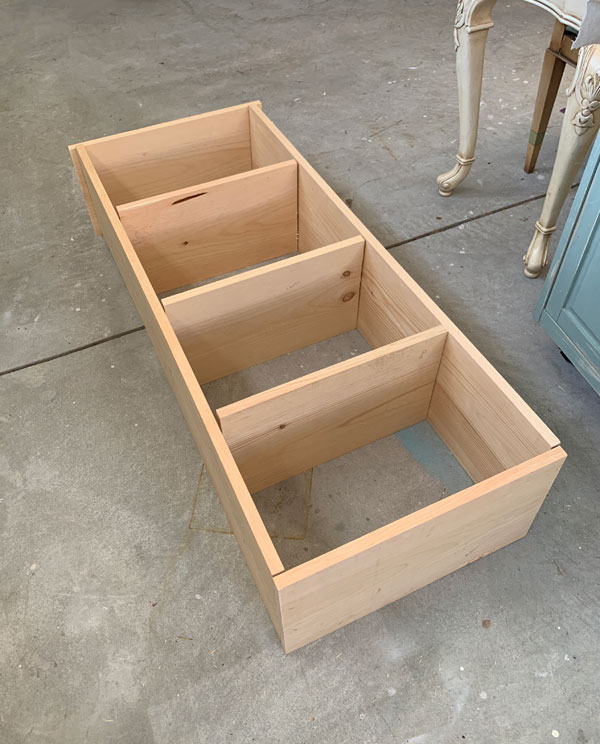
This was when I realized that if the door was going to sit flush with the sides of the cabinet, then I would need to cut the shelves so they sat back about an inch. So, I cut them down with my table saw and sanded everything using 220 grit sandpaper and my orbital sander…
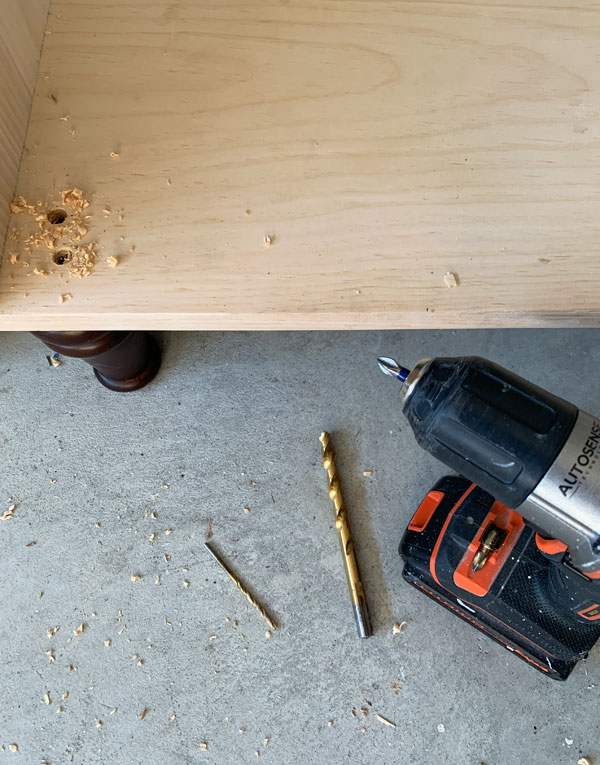
Then I started assembling my cabinet. To do that, I drilled a shallow hole with a drill bit just a bit larger than the head of the screws I was using. Then I drilled a pilot hole in the middle of the shallow hole with a drill bit slightly smaller than the screw, so that it would be easier to drive it in. Then I used my drill to add the screw to each hole:
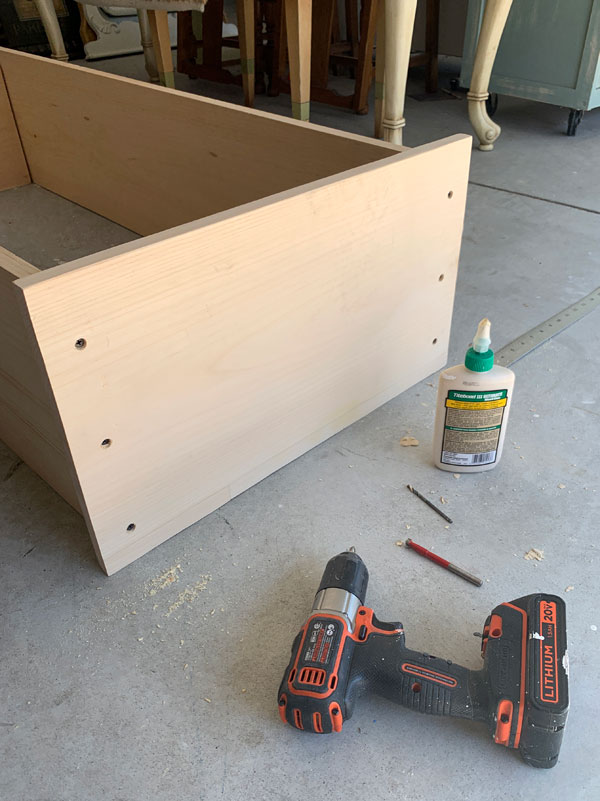
You can barely see in that above photo, but that top piece needed to come out about 3/4″ further in the front. To make that happen, I had to add a strip of wood to the back of it and join it with wood glue:
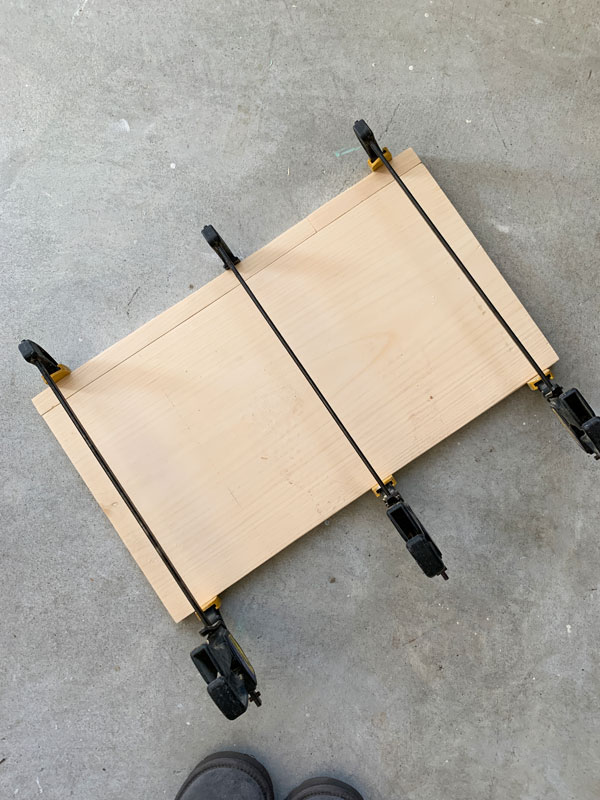
I used wood filler to fill in the seam and sanded it smooth.
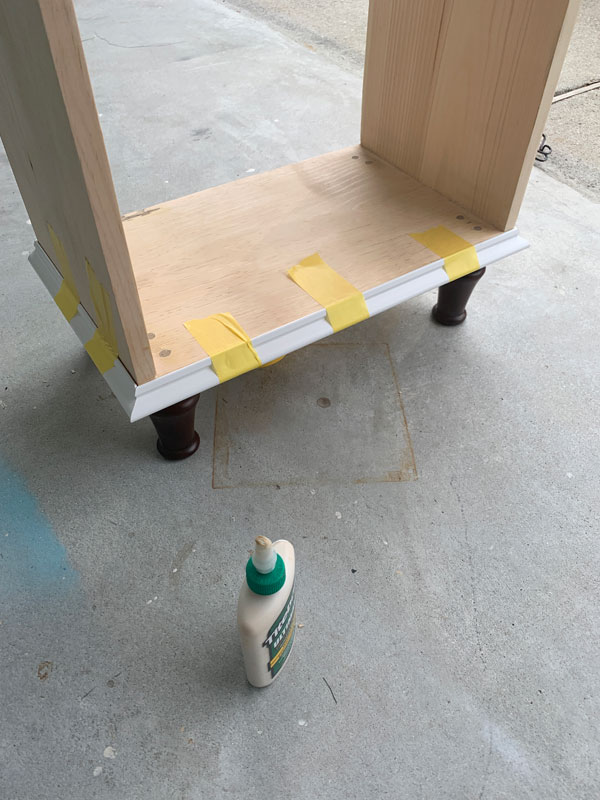
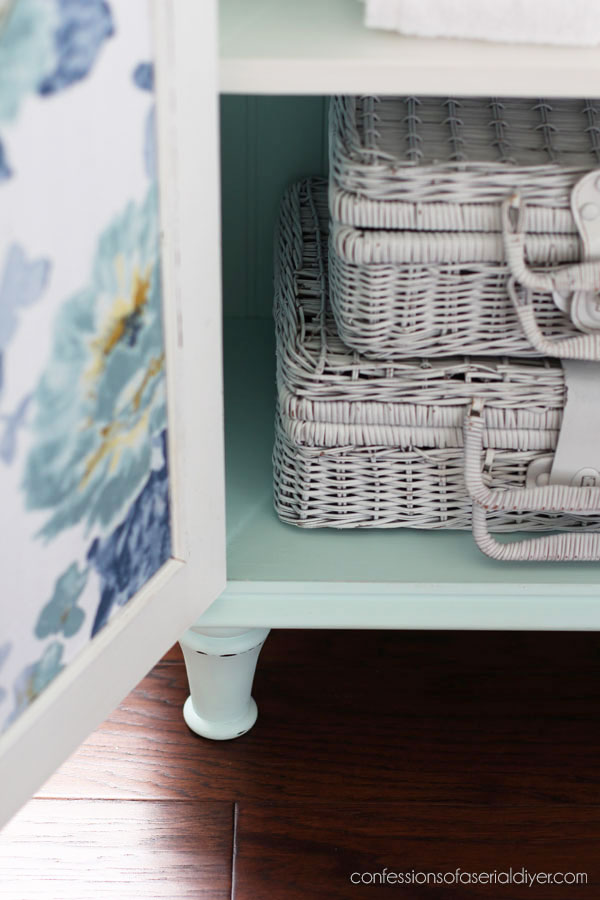
I added the bottom of the cabinet the same way. Then I was ready to add the feet. I bought a set of these feet HERE for another project a while back, but they didn’t work out. They were perfect for this project!
They had threaded bits on the ends that were way too long, so I cut them down using my rotary tool and a cutting wheel:
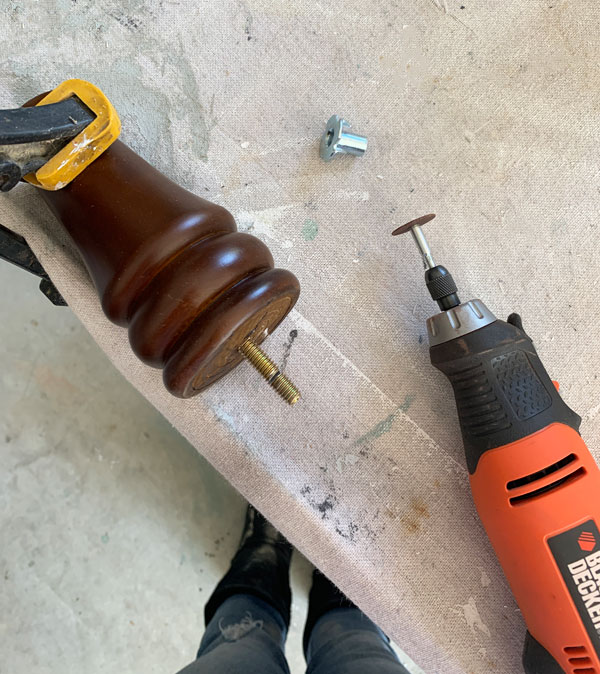
Use this tool with extreme caution. I always clamp what I’m cutting to my table and use both hands to hold it while cutting. (I use the same tool to cut down the threaded bit on knobs and pulls when they are too long.)
I drilled holes and screwed them in place from the bottom, but I wanted to be doubly sure they wouldn’t buckle under the weight of the cabinet if moved, so I drilled screws into the feet from the top also, using the same method I used to join the top and bottom of the cabinet to the sides.
Then I used Mud by Dixie Belle in brown to fill in all the holes…

I used my orbital sander to sand them smooth once they were dry.
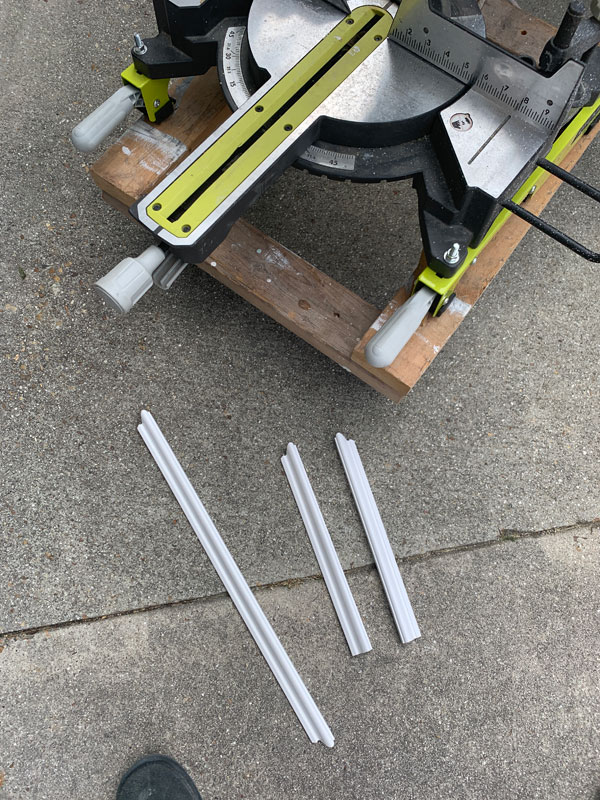
The bottom of the cabinet needed some detail, so I found some decorative molding in our garage to add to the bottom. I had a piece leftover from when we redid our stairs and used my miter saw to cut it:
I added it using wood glue:
Painting the Cabinet
Finally it was time to paint!
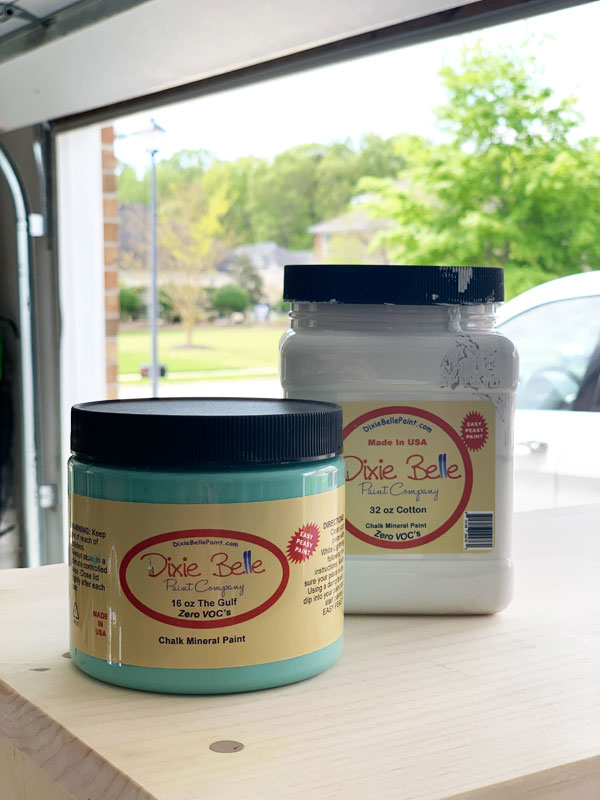
I created a custom Dixie Belle mix here using about a cup and a half of Cotton that was left in the container, and adding about a tablespoon of The Gulf.
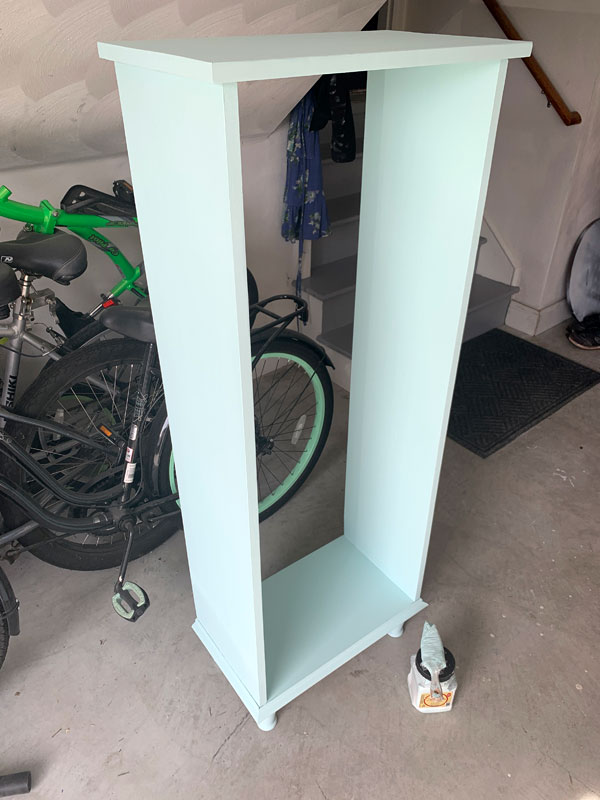
I went straight to painting the raw wood in my custom-mixed color and it only took two coats!
The Door
Next, I removed the broken glass from the door and to do that, I used a putty knife and pried up the thin molding up that was holding the glass in place:
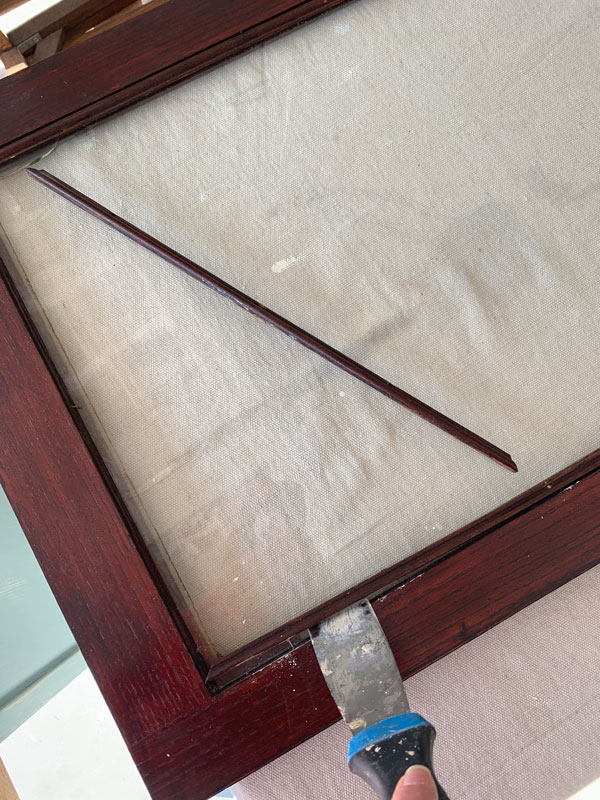
I pulled out any remaining nails with pliers.
Then, because I knew this red wood would be a bleeder, I gave the door a coat of BOSS in White and let it dry overnight.
I saw that there were still a couple of spots that were bleeding through the BOSS, so I gave it a second coat and let it sit most of the day. (Ample dry time is key!)
In that photo, you can see I used little tripod risers to hold up the door. That allows me to paint one side and when it is barely dry, I can flip my door over and paint the other side. Those orange ones I used are terrible, but I love these ones.
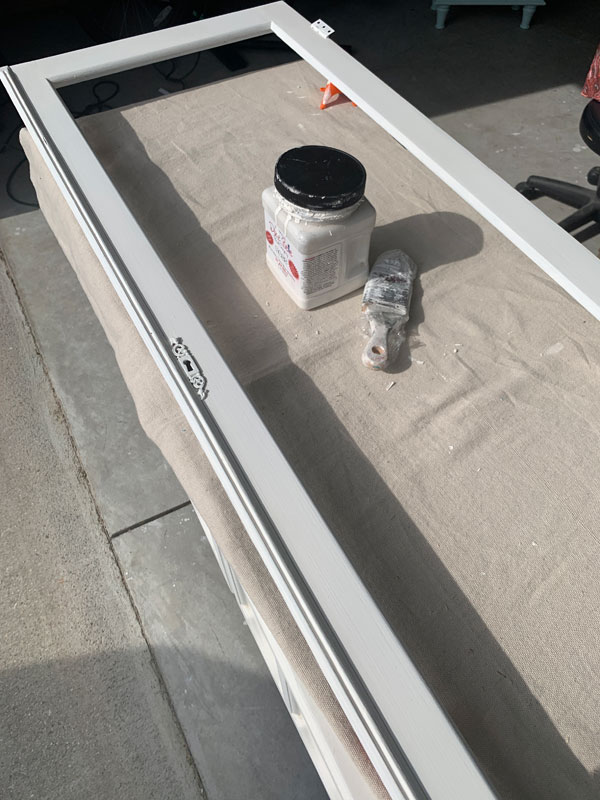
Then I painted the door in Cotton and no bleed-through!
I cut a piece of bead board out of a large panel I already had for the back of the cabinet and one for the panel in the door. The backing got a couple of coats to match the cabinet, and the door panel got two coats of Cotton, front and back. It was already white to start, but I wanted the whites to match. I painted the back because I planned to add a light fabric to it.
I sanded everything with 220 grit sandpaper and then decided to seal everything with two coats of Dixie Belle’s Clear Coat in Satin using the blue applicator sponge before assembling the rest of the pieces.
The backing got nailed in place with tiny nails.
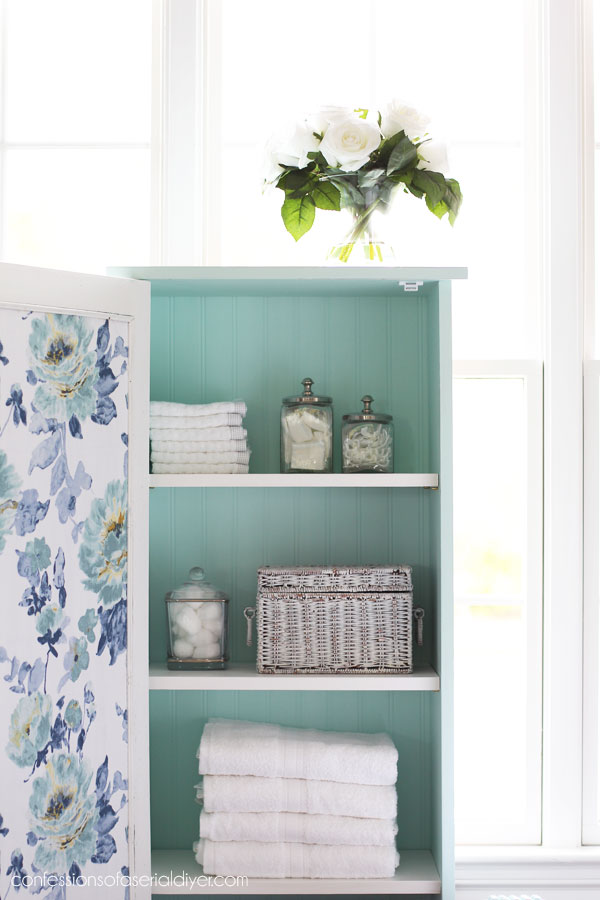
My New custom cabinet!
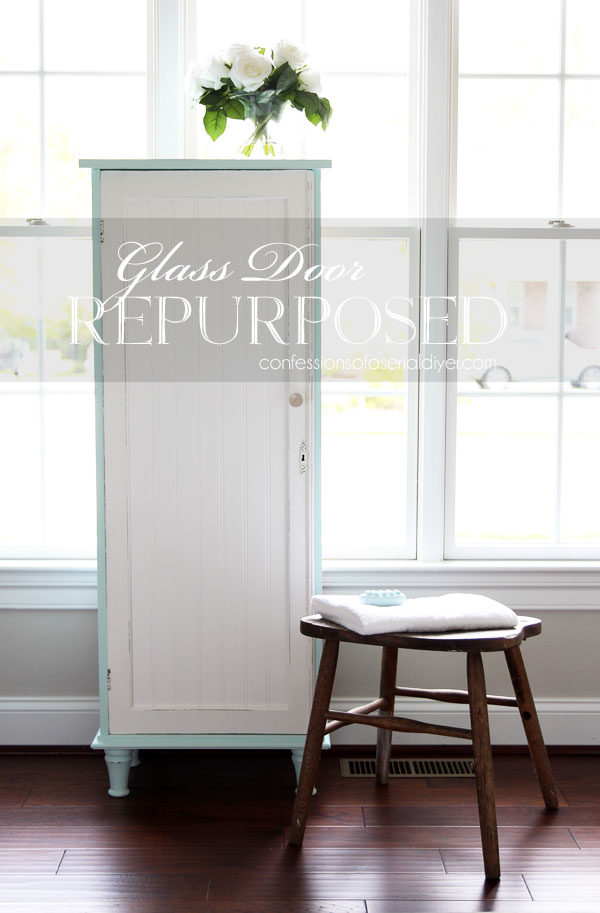
Cute, eh?
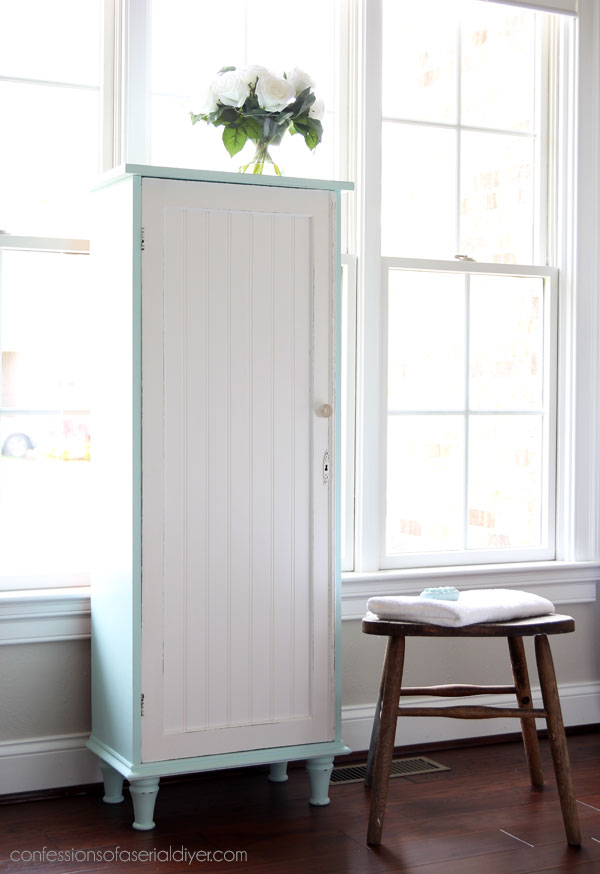
This would be perfect for extra storage in just about any small space!
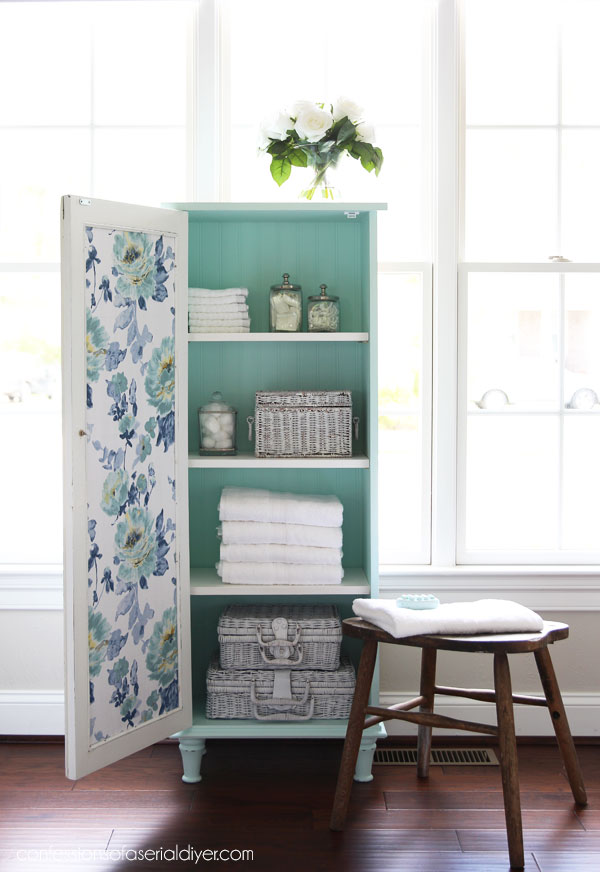
My favorite part
This is my favorite part of this project!
I covered the backing of the bead board door panel with this pretty fabric as a fun surprise, applied with matte Mod Podge:
I also used fabric to line the drawers of a set of these night tables:
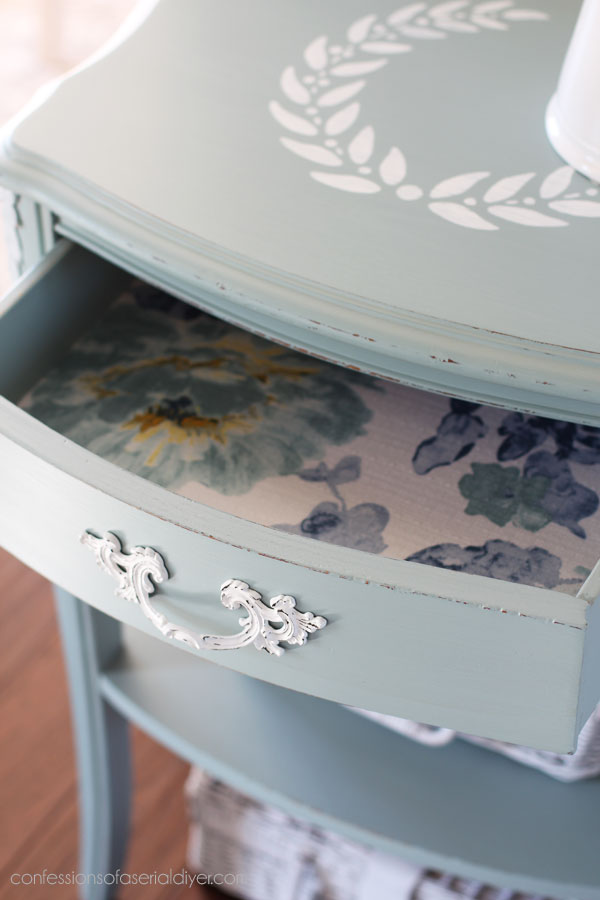
In that post I also shared a video demonstrating How I Paint Furniture with Chalk Paint!
The fabric started out as a pair of curtain panels I picked up at HomeGoods. (Y’all know that is my favorite resource for decor fabric!)
I used the same thin molding and original nails to secure the door panel in place:
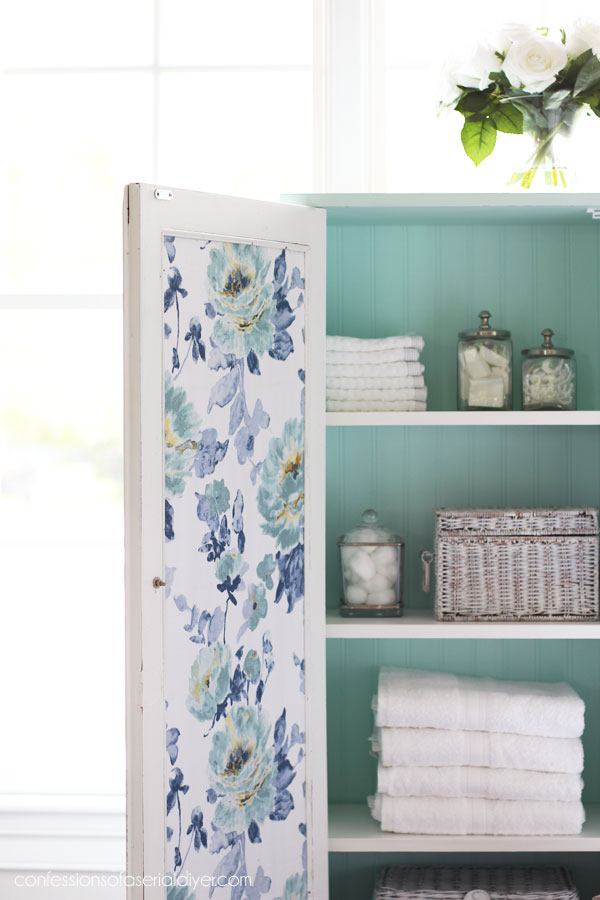
Here you can see the bead board backing that I added to the back…
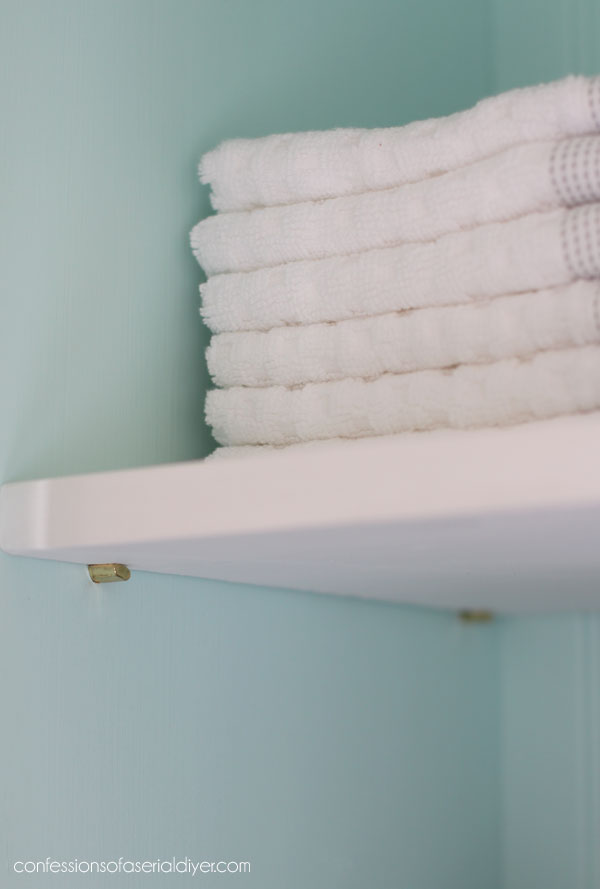
The shelves were all painted in two coats of Cotton also and sealed with Dixie Belle’s Clear Coat in Satin.
To install them, I used these thingys that you would use in a bookcase:
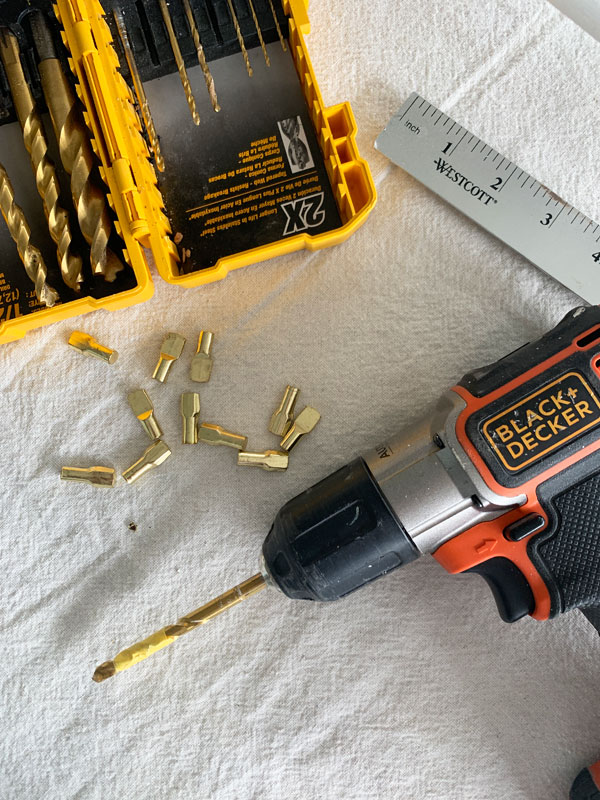
I measured and marked where my shelves would go. Then I drilled a hole the same size and depth as my shelf holder thingys. You can see above that I used a piece of tape to mark where I needed to stop drilling.
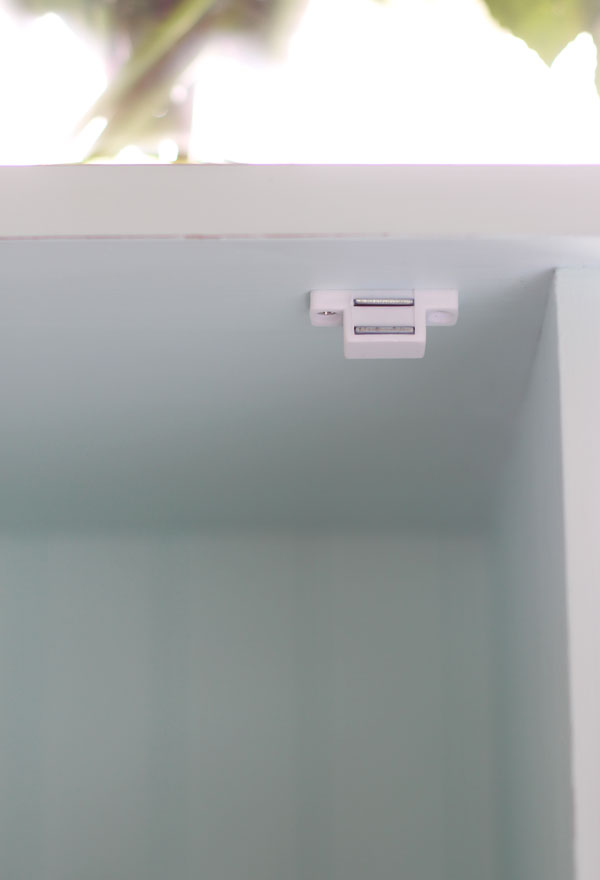
I also installed a simple magnet latch at the top to hold the door closed:
I also added a new glass pull to the door. The keyhole below was operational at one time. I love that antique detail.

And another peek at those perfect feet:
I love when I get to dust of my saws and build something!
I hope you enjoyed seeing this cabinet door become a cabinet door! 😀
I’m off to get ready for a celebration!
Meet me back here on Thursday with makeover #2 for this little gem:

Update! Makeover #2 is up and ready to see HERE!
XOXO,

Don’t Miss a Thing!
If you like what you see, there are several ways to follow along!
EMAIL * INSTAGRAM * FACEBOOK * PINTEREST


Denise Cox says
Somehow I missed this one… 🤔. I LOVE it!! The bead board and fabric lining are great!! I like the small footprint…can “squeeze” it in anywhere.
Christy says
Thank you, Denise! Yes…it is such a great size for any space! XOXO
Jackie C says
OMGoodness!! Love this! I may have missed it, but curious as to what width the pieces of wood were? I saw the 8’ part. I’m guessing 10 or 12” width?
Christy says
Thank you, Jackie! I believe they were 12″ width. XOXO
lazy Susan says
OH my gosh! I love this piece. You are brilliant and so creative. THis piece looks older and the dimensions of it are too fun! THanks for the tutorial! You rock! You always make things fun outside and inside!
Christy says
Thank you so much, Susan! This was a fun piece to work on!! XOXO
Christina says
Congratulations to your nephew! How wonderful!
Love this build! Such a great re-use of that door. That said, I wonder what the cost of the lumber would be today. lol
Have a great time at the wedding!!
Christy says
Thank you, Christina! And I know, right? Lumber is crazy these days!! XOXO
Janice Holt says
I don’t remember this cabinet and I watch most every video you have. It turned out so pretty and love the colors and the backside of the door. Would have to stage it open but it’s a good size for a small bathroom.
Christy says
Thank you, Janice! I’m hearing that a few missed this one. It was originally shared April of 2020 and we were all out of our routines (and minds lol) at that time! It would be perfect in a small bathroom! XOXO
Celia says
Love this Christy, especially the fabric in the door, such a pretty pop! Is there any particular way you apply the fabric? Do you use a roller over it to keep it smooth and flat? Thanks for all your hard work and sharing, all your projects look so professional.
Christy says
Aww thank you, Celia! I just applied the Mod Podge with a brush and then laid the fabric right over the top, smoothing it out with my hands. I believe I added it while the door was flat before I attached it to the cabinet. XOXO
Sue Mellette says
Clever you! I would never have thought about building a cabinet for a door! It turned out so cute! I love all the details and especially the fabric on the back of the door!. The color is perfect and the feet just add the finishing touch! Thanks for sharing your creative talents. Have a wonderful week.
Christy says
Aww thank you, Sue! Enjoy your week too, my friend! XOXO
Niki says
Such a cute little cabinet Christy. I like the surprises you come up with in or on drawers, the back of cabinets/shelves, and on doors. This one is pretty and also cheerful.
Congratulations to your nephew and his bride, I hope you enjoy all the festivities today!
Christy says
Thanks so much, Niki! We are heading out soon and will definitely enjoy it! XOXO
Verna Gorski says
I really like the cabinet re-do. I have several ideas in my head for bead board that I want to try. Thanks for the inspiration.
Christy says
Thank you, Verna! Bead board is a great addition to so many things! XOXO
Gloria Wyssbrod says
You are very talented. Looks great as usual. I have a question if you use the Silk paint. Do you have to use boss on a bleeder before you paint a piece with Silk paint. Thank you.
Christy says
Thank you, Gloria! The Silk has the equivalent of one coat of BOSS in it, so it is supposed to prevent you from having to use BOSS in addition. However, in my own experience when I have used Silk over a bleeder and waited the recommended amount of time after before applying my next coat, I have still gotten bleed a bit of bleed through, although less. Because I was on a time crunch, I went ahead and used BOSS and then the paint went over it perfectly. I have heard that it takes two coats of Silk to stop the bleed and it should cover on the third, but I didn’t have the time to take that chance to know for sure. I will definitely be trying it again when I have more time to experiment! XOXO
Marcie Lovett says
Your building skills amaze me, Christy. What a beautiful piece from scraps and leftovers!
Christy says
Aww thank you so much, Marcie!! XOXO
Nadine says
Kristy
Awesome on how you saw an entirely new cabinet using the old cabinet door with the broken glass….and then built it. Love it.
Christy says
Thank you so much, Nadine!! XOXO
dodie says
how clever and beautiful – as always! thanks for sharing the how-to! maybe one of these days, i will actually do this!
Christy says
Thank you, Dodie! It was a fun piece to work on! XOXO
Phyllis says
This may just be my favourite (every piece is but this is special). Wonderful job!
Christy says
Oh yay! I love that you love this one, Phyllis! Thank you! XOXO
Lyn Edington says
Your carpentry skills are amazing! I would have crooked shelves and uneven legs. That is so stinking cute!
Christy says
Aww thank you, Lyn! It isn’t easy to get it all level, that’s for sure…I really bow down to those that do this on a bigger scale lol! XOXO
Cathy Bizri says
Absolutely beautiful. Love the color and the way you put the pieces together to make a lovely cabinet.
Christy, I do have a question please. I have noticed that you use an orbital sander and wanted to know if you prefer the orbital sander to one that goes back and forth and why? Have one that goes back and forth and thinking about purchasing the orbital sander. Please advise when time allow…Thank you in advance. Actually, I can’t wait for your blog and remakes every week.
Thank you again and have a wonderful week
Christy says
Thank you so much, Cathy!! I prefer the orbital as I feel like it works faster than the other, but then I’ve pretty much always used the orbital one. I appreciate you following along with me each week!! XOXO
Emma says
That is an awesome idea!!!! U truly are my FAVORITE painter n builder blogger!!!
made my day!!❤️❤️
Christy says
Wow thank you, Emma!! I appreciate that SO much!! XOXOXO
Catharine says
I always marvel at your creativity and how you bring pieces to life using color, fabric, knobs, etc. You turn the ordinary into extraordinary!
Christy says
Aww thank you so much, Catherine!! I appreciate your kind words! XOXO
Michele M. says
Super super duper cute!!!! I think it’s so perfect for a bathroom – you styled it perfectly!
And blessings to your nephew – what a major day to get married. Yep, 2-22-22 and all! Glad you are having fun! We never get enough of that, do we?
Christy says
Thank you, Michele! Yep we are off to have some fun here soon woohoo! XOXO
Kathryn Sharp says
Hey Lovely Lady, You are always so inspirational and I love your work.
Thanks for the eye candy! I love to see what you have created and wonder if I could find the time I may try my hand at a few ideas you have be so kind to share. Blessings, Kathryn, South Australia.
Christy says
Thank you so much, Kathryn! I hope you get the chance to get creative! Enjoy the warmth down there for me! XOXO
Mary says
So very happy you reposted this Christy as I too missed it before and just rescued a similar size door with broken glass that I had no clue what to do about! Yay! This turned out super cute… Hope I have similar results 😍 thank you for inspiration once again ❤️ Hope the wedding was a blast!
Christy says
OH perfect timing then! I shared this about the time everything started going to you know what with COVID, so I think a few missed this one lol! Thank you, Mary! Have fun with yours, and yes…we had a blast at the wedding for sure! XOXO
Sharon L Austin says
Oh, that’s super cute! Love the inside fabric too, it just really sets the piece off. This post right here is why I asked for a saw for Christmas LOL
Christy says
Thank you, Sharon! And ha ha…I love that!! XOXO
Denise Dorn says
I am sitting here with my mouth wide open in total amazement of what you can do! That cabinet is gorgeous. You truly have some wonderful skills. Take good care and be safe!
Christy says
Aww you are the sweetest, Denise, thank you so much!! I used to wait for my hubby to cut things for me, but that got old real fast ha ha! XOXO
Petra says
This is super! You’ve essentially made a whole piece of furniture :). Well done.
Christy says
Thank you, Petra! For sure…my hat is off to those that build furniture on the regular!! XOXO
Cecilia from Georgia says
That is so cool, a wedding on 2-22-22! He won’t forget that anniversary! I had my best day of sales ever in my booth on that day! Did you do the flowers? I love this cabinet! Not just because of the aqua and white, but every detail is perfect! Spring is coming! We can paint outside until the pollen hits:). Have a good weekend!
Christy says
Right? He has no excuse for forgetting that date ha ha! Congratulations on a great sale day…is is said to have been a lucky date due to the numbers! I did not do the flowers this time, but they were lovely! And thank you! Yes, definitely ready to be able to work outside in the sunshine again! XOXO
susan says
Hmmm..l sure missed this somehow! Amazing! Another Larissa 😁. It’s beautiful!
Wish I had those skills!
Christy says
Thank you, Susan! Glad you got to see it!! XOXO