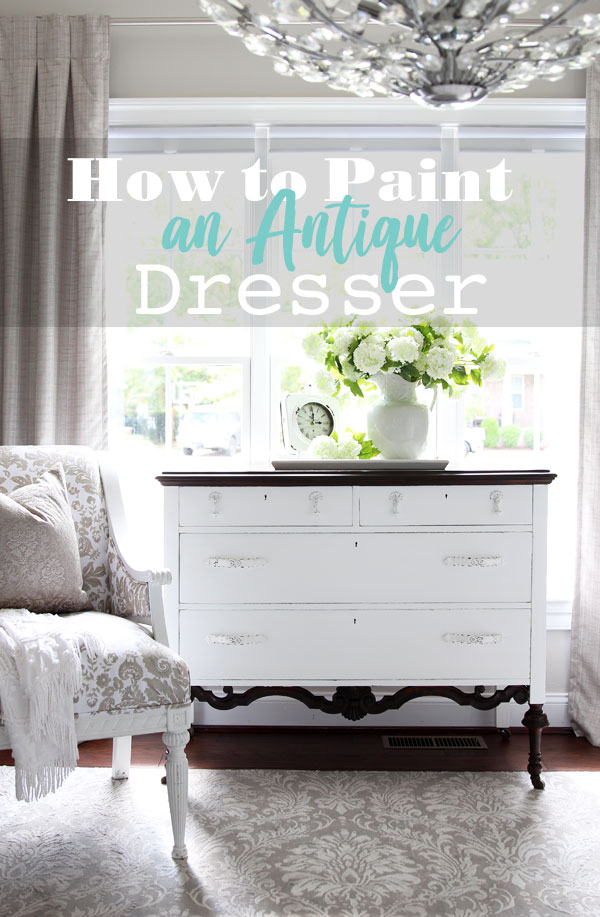
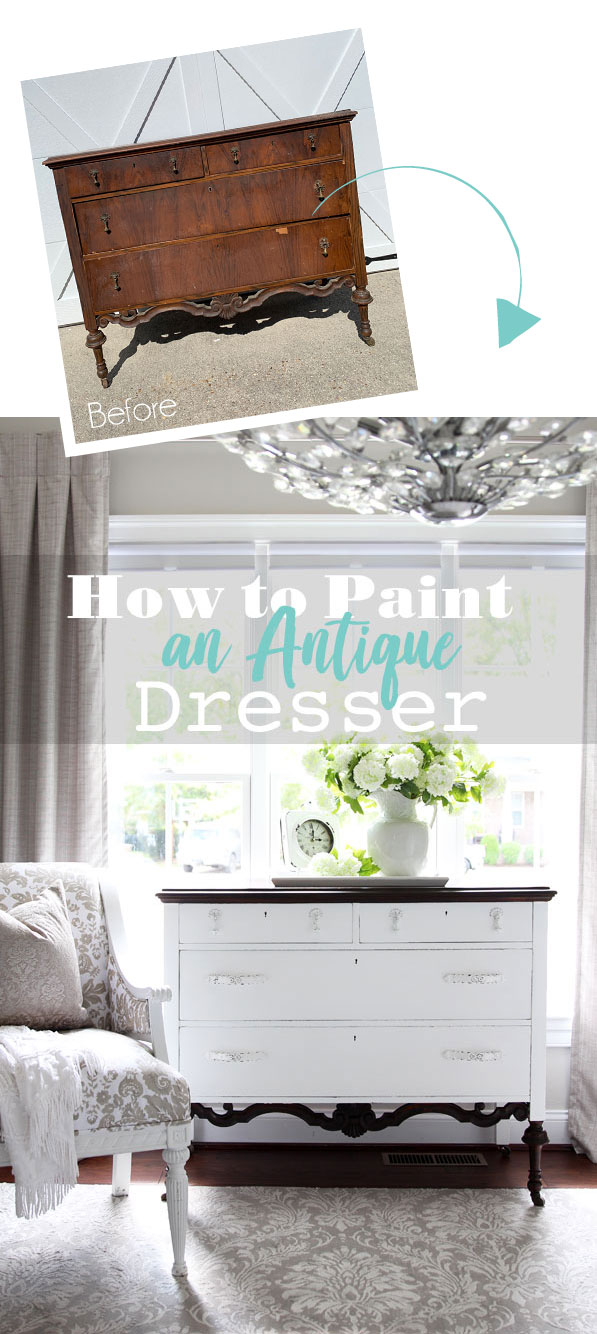
Hello amazing friends! Today I’m going to share how to paint an antique dresser, and we’ll address all the issues that come with painting an older piece as well! Bringing an antique dresser back to life can be intimidating, but just go through the steps one by one, and don’t feel like you have to tackle everything in one day!
If you’re dealing with an antique, there is a good chance that it will need a few things before getting the painting party started!
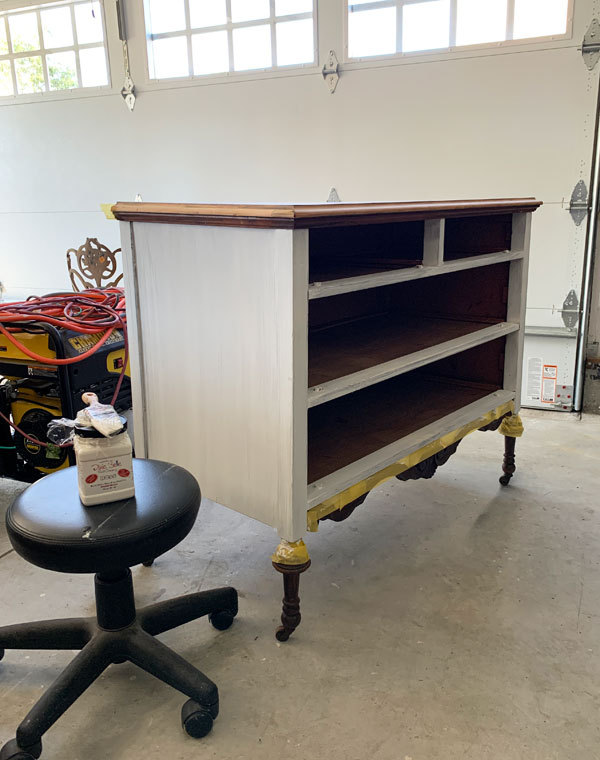
I’m going to show you exactly what to do using this once gorgeous dresser that was part of my Mother’s Day haul:
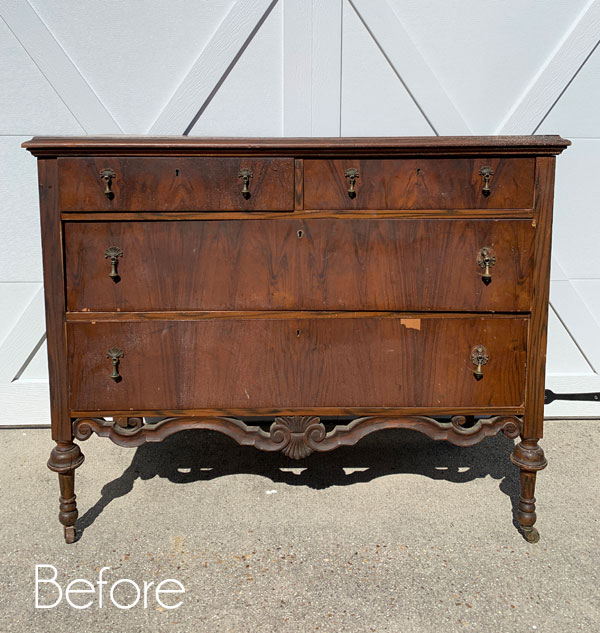
You may remember the taller mate to this dresser that I shared HERE.
I asked y’all if you thought I should paint this one to match or give it its own look, and the responses leaned more toward making it match.
Funny thing because when the delightful lady who blessed me with my Mother’s Day haul saw the first dresser made over here on the blog, she asked if she could buy them back!
She had held onto them as long as she could in their current state but was in the process of downsizing and just did not have the space to store them any longer. I knew she was heartbroken to have to let them go as she regaled me with stories from each piece on the day I picked them up.
This dresser had belonged to her father, and I believe her grandparents before then.
So, let’s see how I took it from its current state, to a painted beauty!
I’ve included a few affiliate links so you can find the products I love.
-
First, fill any gouges, holes, or deep scratches.
For this, I like Dixie Belle’s Mud in brown. You could use any color really if you plan to paint over it.
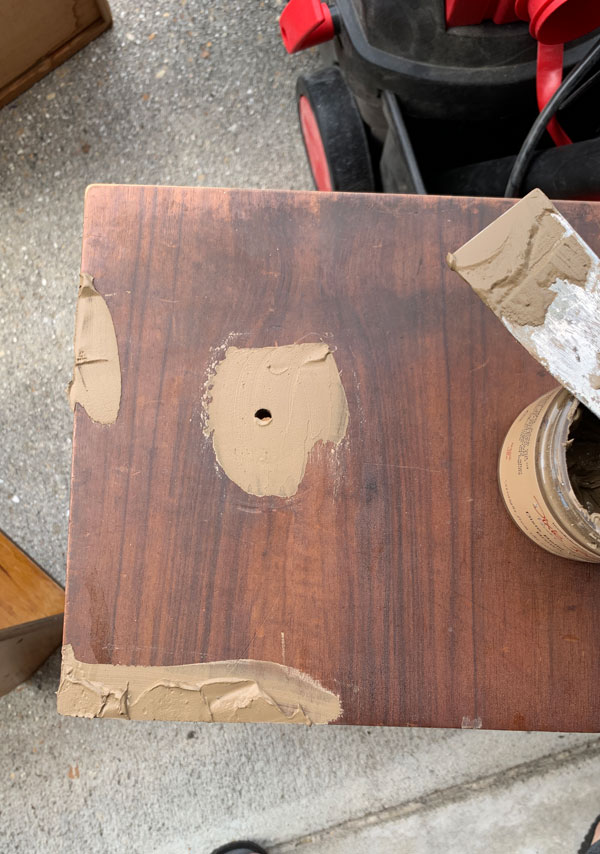
Allow plenty of dry time, as in several hours to be sure it is completely dry all the way through. I like to leave it out in the sun if possible as it dries super quickly. Then sand with 220 grit sandpaper. If I can run my fingers over the area with my eyes closed and still feel what I was trying to fill. I apply another coat and repeat.
-
Address Missing or Damaged veneer
If you have missing veneer, sometimes it can be filled in also as in this instance:

If the veneer is loose, it can sometimes be secured with wood glue and clamps. However, if it needs to be removed, there is a great solution for tackling that as well. You can see that HERE.
-
Sand any areas to be stained
I decided to stain the top of the original dresser I did like this one, so I did the same here using my rotary sander. I used 120 grit sandpaper first, followed by 220 grit.
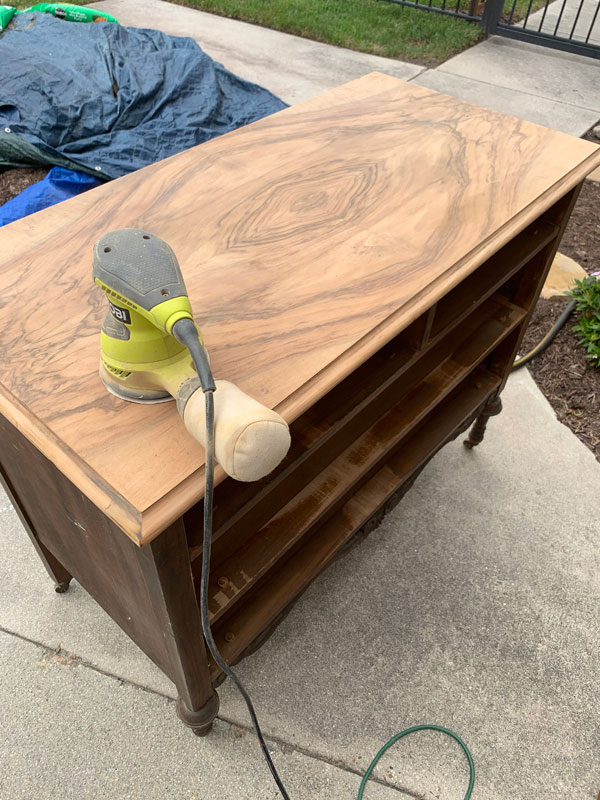
Avert your eyes from the tarp-covered mulch that has been sitting in our driveway since April. We ordered too much lol.
-
Vacuum and clean
Once you’re finished with all the sanding, vacuum using a shop vac and brush attachment. Then, give it a good cleaning! I usually use Lysol-type wipes, but I’m getting awfully low and there are none in sight anywhere. An alternative is White Lightning by Dixie Belle. It is a cleaner AND deglosser that comes in powder form that you can mix in small batches right into a spray bottle.
-
Get rid of musty odors
Yes! This is absolutely possible! The magic sauce for ridding furniture of musty smells is BOSS by Dixie Belle.
I used the clear formula to completely coat the inside of this dresser. I found it easiest to tackle while the dresser was lying flat on its back:
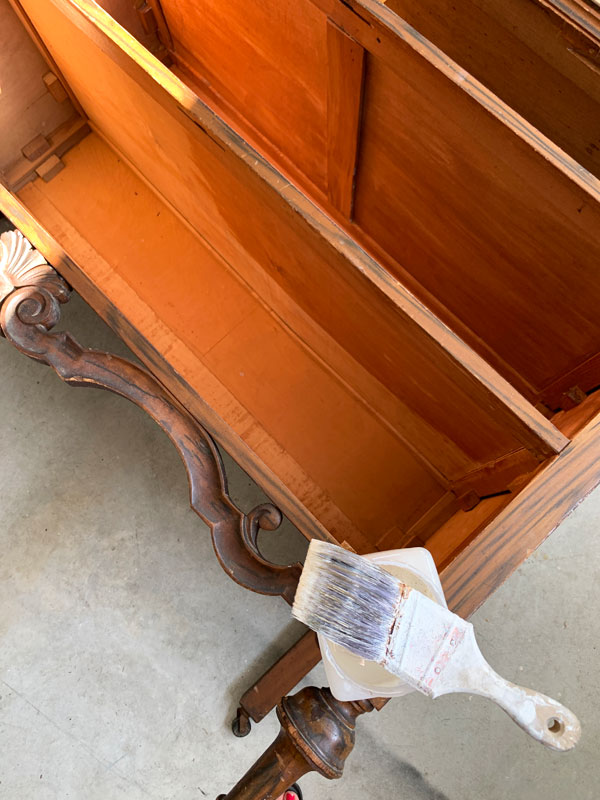
As you can see, I covered every surface inside. Most dressers don’t have the drawer areas divided like this one, so those should be easier to tackle.
I only used one coat and the musty smell that was quite strong before was eliminated completely.
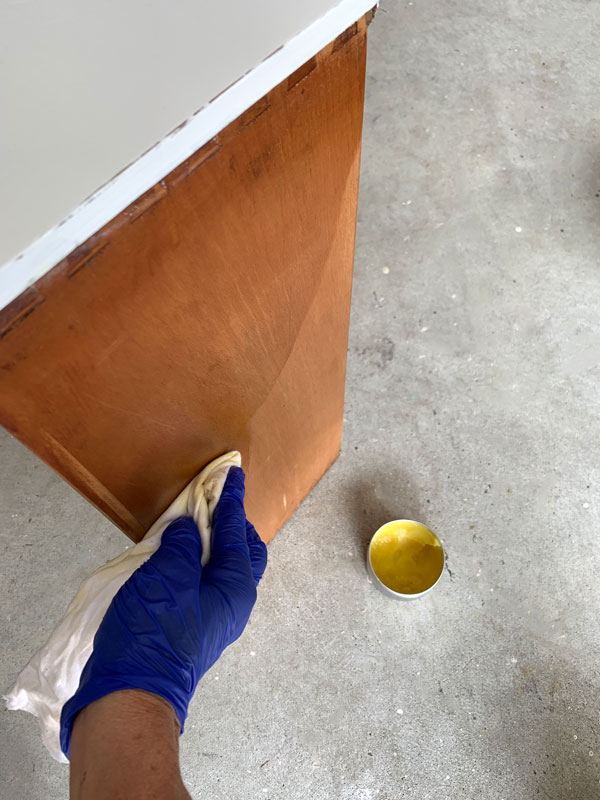
After cleaning the drawers, I applied Big Mama’s Butta in Orange Grove. It smells so lovely and hydrates the wood while adding a layer of protection:
-
Prime for possible bleed-through
Not all woods will bleed through paint, but anything considered antique gets a coat of BOSS from me if I plan to paint it a lighter color, especially white.
I chose the white formula since not only will it seal in any tannins that may possibly bleed-through, it will also save me a coat of paint!
I allow the BOSS plenty of dry time as well before painting, at least overnight. You can see areas that might still bleed through if you see any pink or brown splotches coming through the BOSS. If there are a lot, give it another coat. You should not need more than two coats. I only had two places that wanted to bleed through so I spot primed those with the Boss.
-
Painting time
Finally, it is time to paint! I ended up giving this dresser three coats of Cotton, Dixie Belle’s brightest white, but I probably could have gotten away with two since I BOSSed first.
You can see how I paint a piece of furniture in this video if you like:
If you have trouble viewing, find it on YouTube HERE.
-
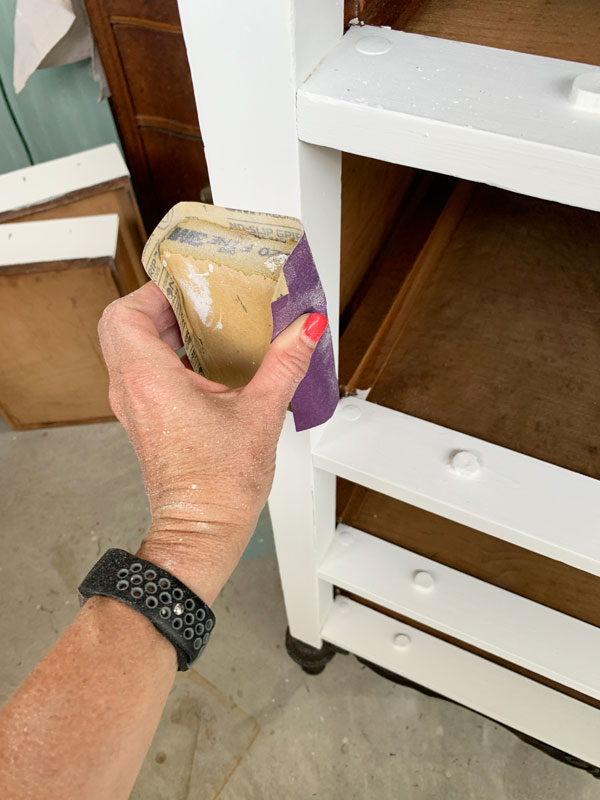
Sand to smooth
I like to smooth out the surface of my painted piece using 220 grit sandpaper wrapped around an old foam sanding sponge. I show that at the end of the painting video I included above. (I buy my sandpaper in sheets and cut them into four.)
If you like a bit of a distressed look, hit the edges a bit harder. If you like a really distressed look, break out the electric sander.
After sanding, clean up all the dust once again using a shop vac, followed by a good wipe down with a clean, soft cloth.
-
Stain the top
If you plan to stain the top, I like to do that last. I start by conditioning the top with wood conditioner. This allows the wood to absorb the stain more evenly:
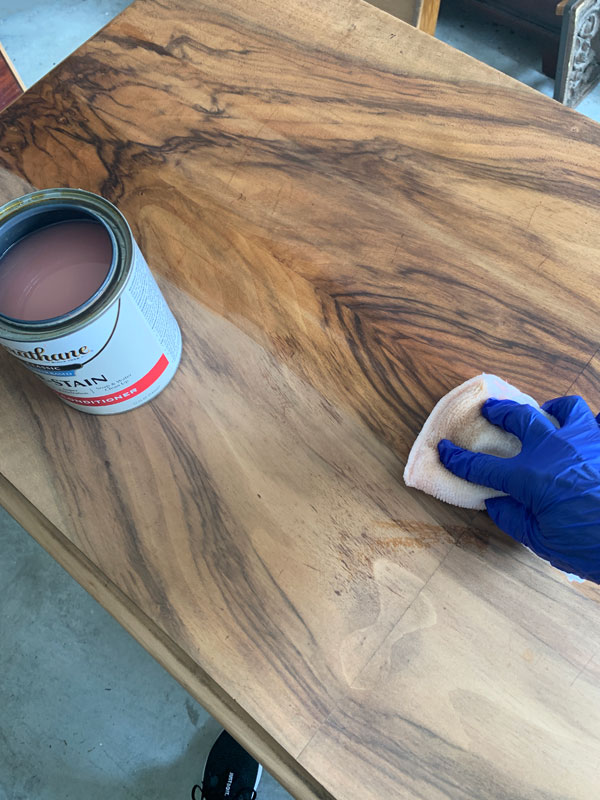
I applied it with a low lint, terrycloth applicator pad, or you can use a clean soft cloth.
I immediately followed up with No Pain Gel Stain in Espresso:
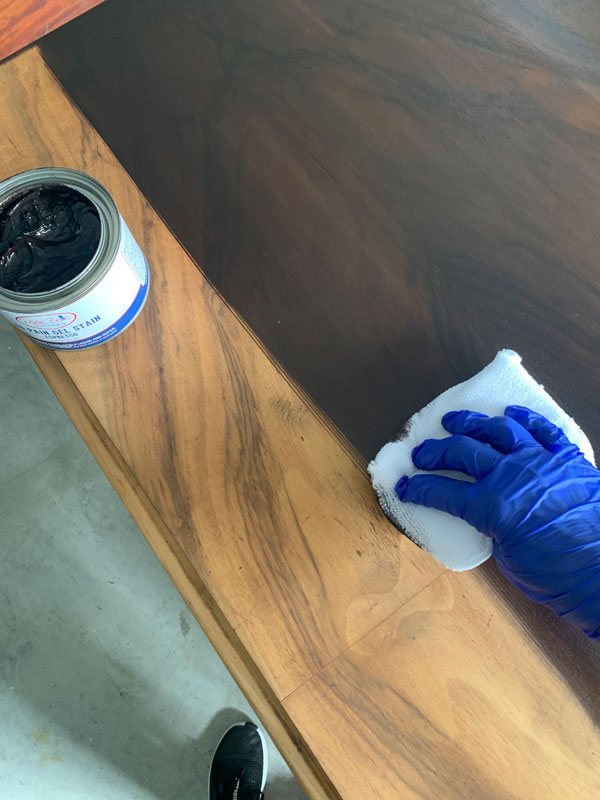
I love the gel stain as it is so easy to work with! The applicator pads are a one-time use if you use them with the oil-based stains, but can be used multiple times when using them with water based stains like the VooDoo gel stains. I kept wiping with the grain until I had pulled any excess stain from the surface.
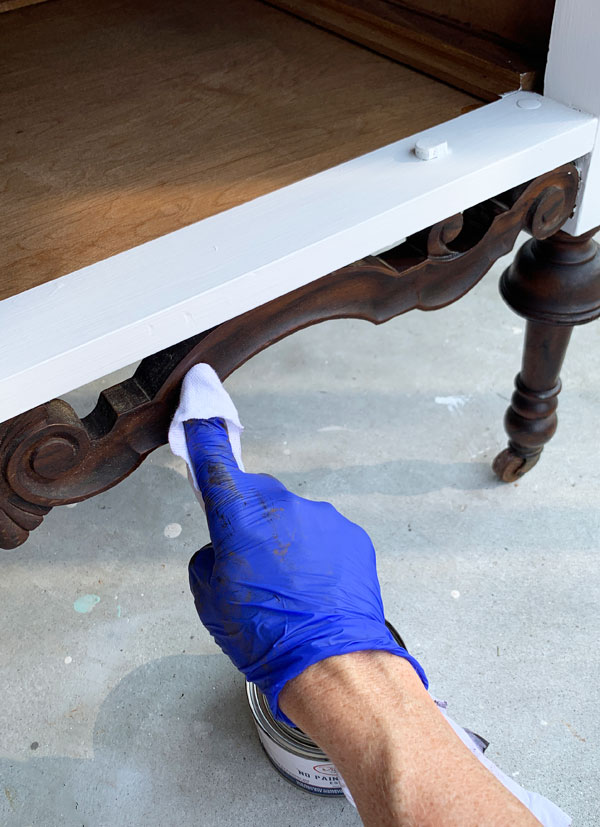
I also applied another coat of stain right over the existing stain on the gorgeous detail work at the bottom using a soft cloth:
-
Seal the surface
Finally, seal and protect your piece! When working with the oil-based No Pain Gel Stain, wait 48-72 hours to seal with a water-based stain. If you can leave your piece in the sun, it helps speed up the dry time.
I sealed the body using Dixie Belle’s Clear Coat in Satin, applying it with the blue applicator sponge. When I sealed the stained top, I used the same thing, but I felt this fancy of a dresser needed a little more sheen, so opted for the Gloss sheen this time instead.
-
Add the jewelry
Time to add the pulls! I like to think of it as jewelry. Luckily we had four good original pulls that I could use. They got a good cleaning and two coats of Cotton. The other four came from Hobby Lobby.
-
Having trouble with the drawers sticking?
If you have trouble with the drawers sticking, which is quite common in antique dressers, rub a candle along the bottoms of the drawers on the edges on either side and on the insides of the opening, or anywhere the drawer is sticking.
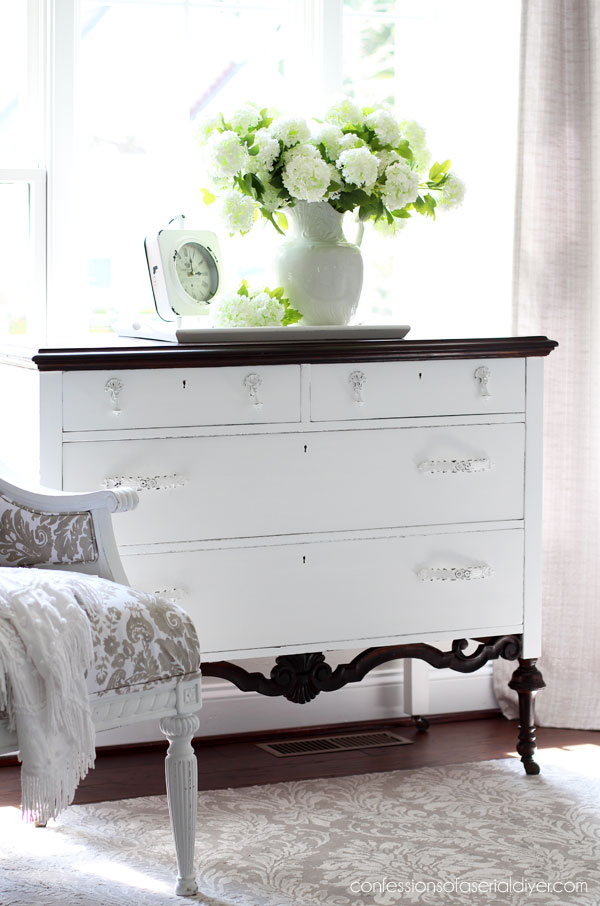
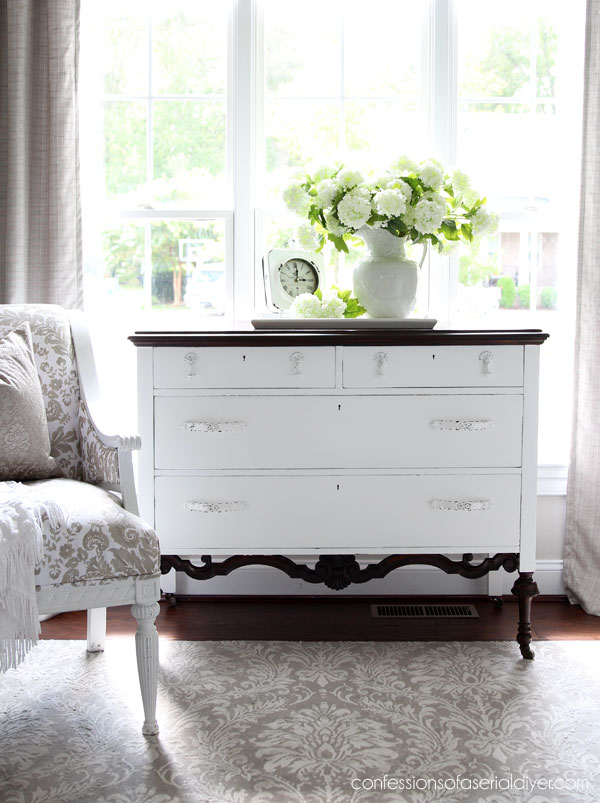
Ready to see the final product??
It’s like deja vu ha ha:
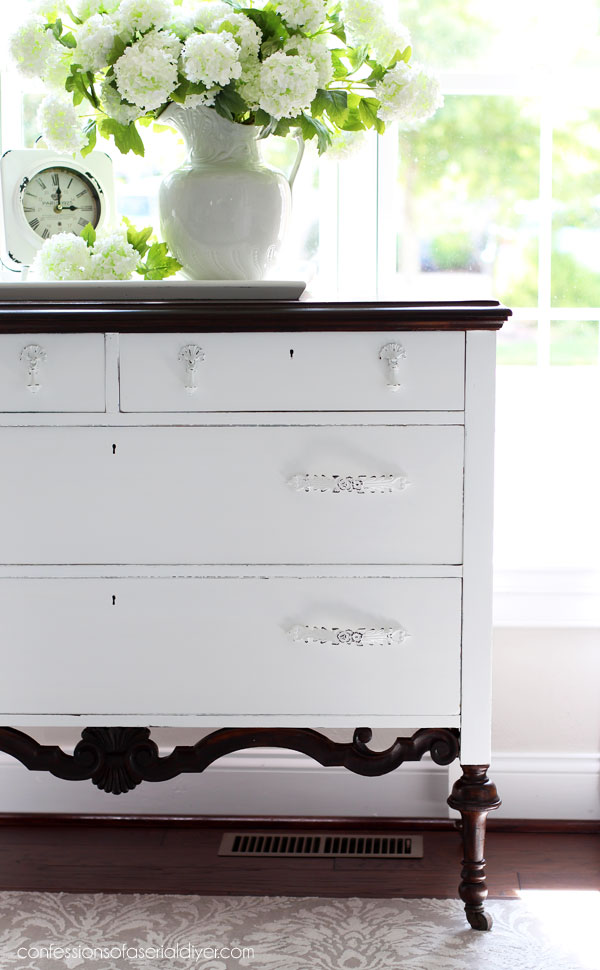
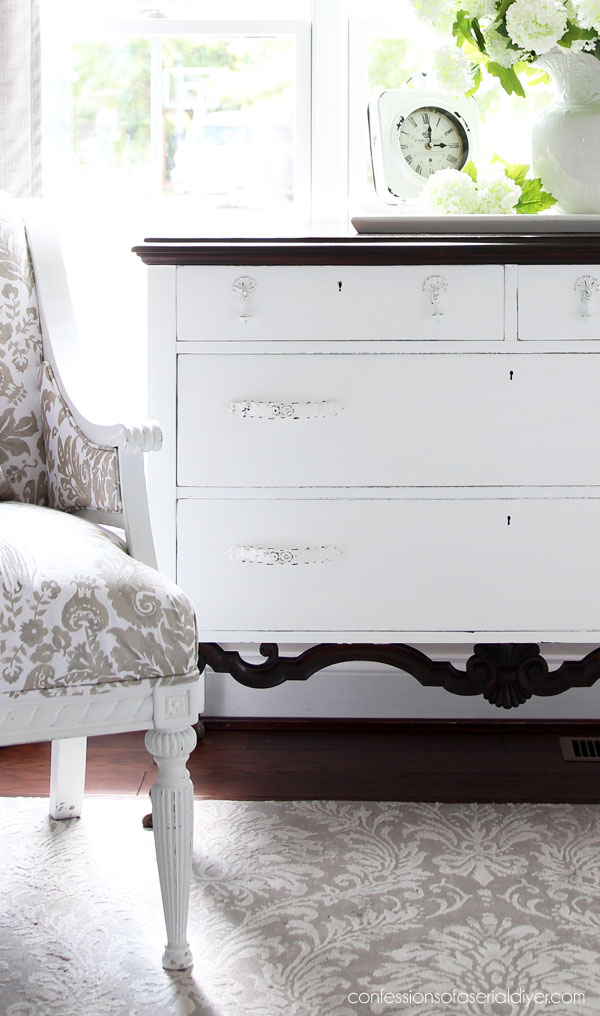
Leaving those amazing details on the bottom stained really makes them stand out:
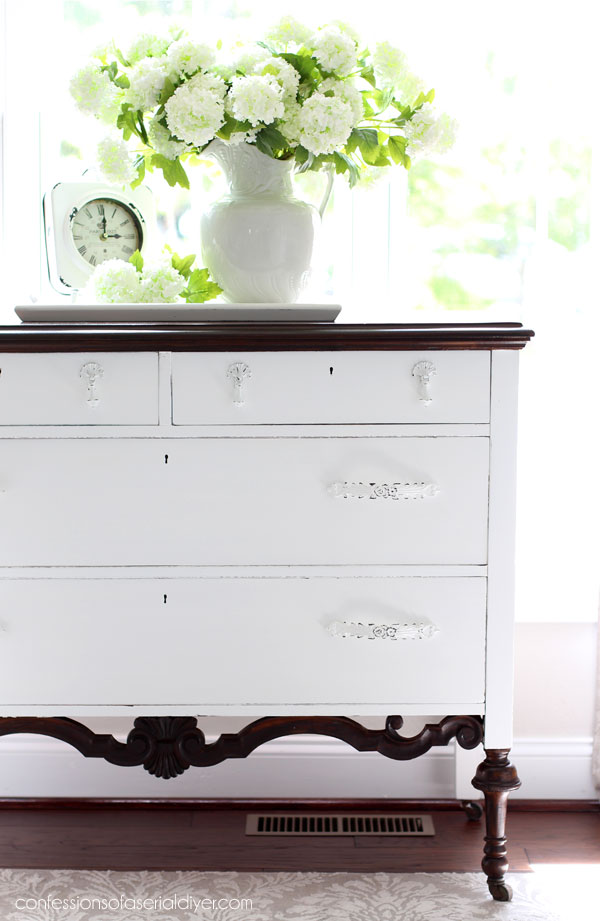
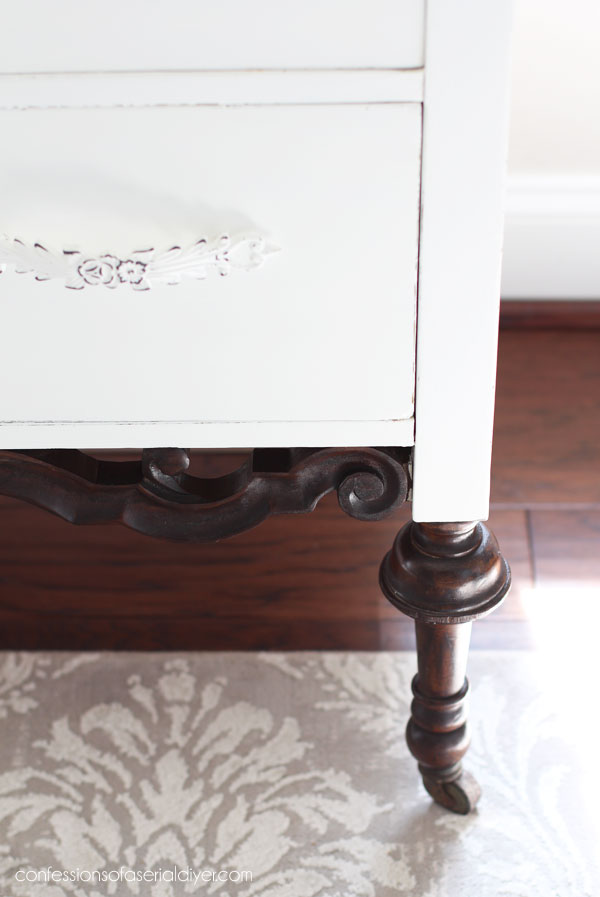
I think the combination of Espresso and white adds sophistication to these already beautiful lines.

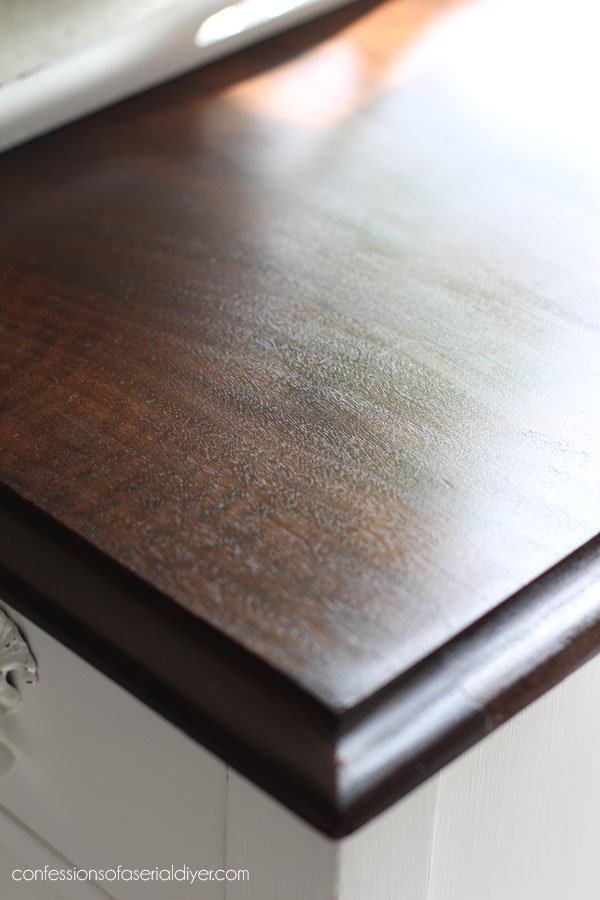
It was difficult to get a goo photo of the stained top, but here you can see how rich the color is…

I used the same combination of pulls from the first dresser.
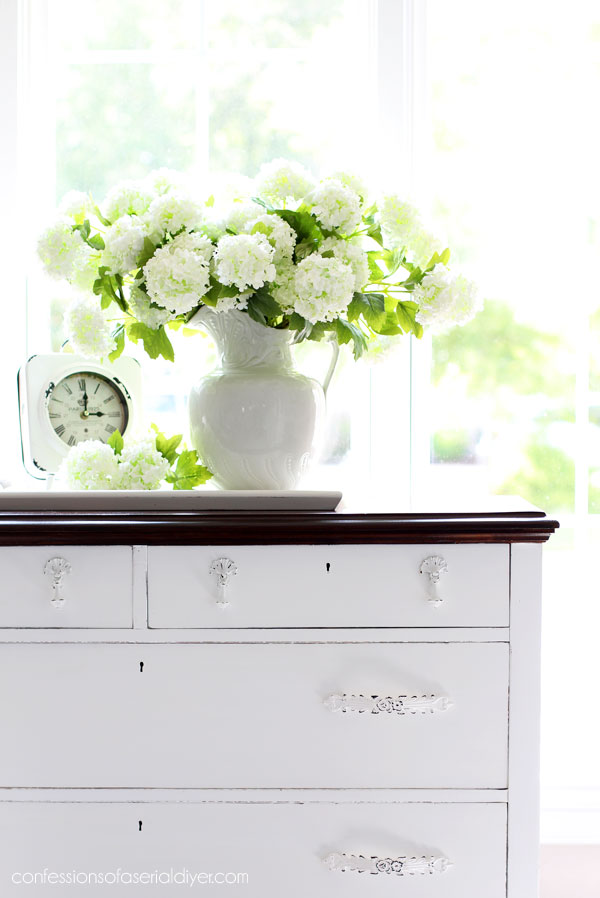
The top ones are original and the others are from Hobby Lobby:

And I had enough of this paper left to add some pretty to the insides too:
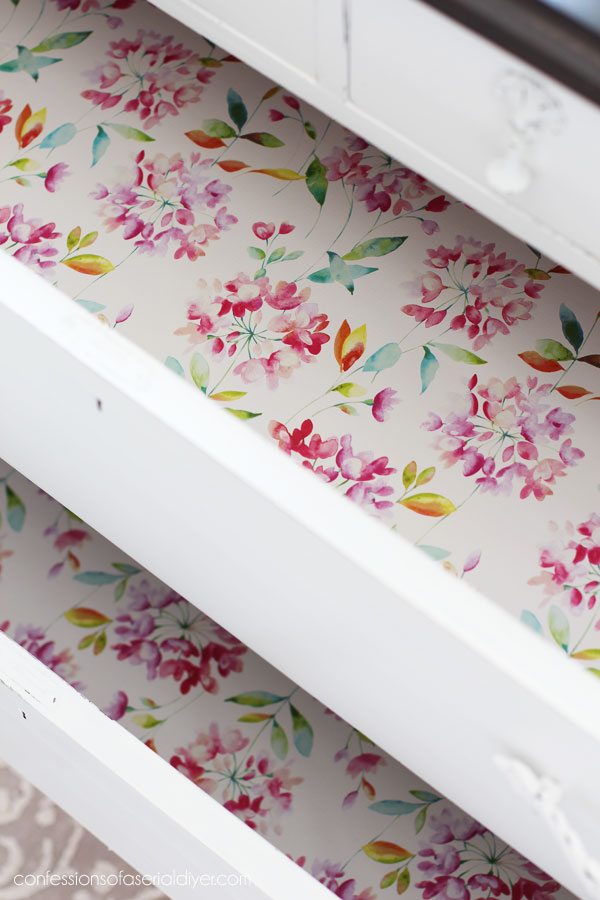
This was a roll of thicker wrapping paper I found at HomeGoods. I cut it using my rotary cutting set and adhered it the bottom with a glue slick.
Don’t forget my pals have makeovers to share today too!!

And now I only have ONE piece left from my Mother’s Day haul!!

Visit any of these makeovers you may have missed at the links below:
Antique Serpentine Dresser Makeover with Transfer
A huge thank you again to Mary for giving me the opportunity to bring these pieces back to life! It makes my heart so happy to see her getting them back to enjoy!
If you missed the dressing table I painted for her:
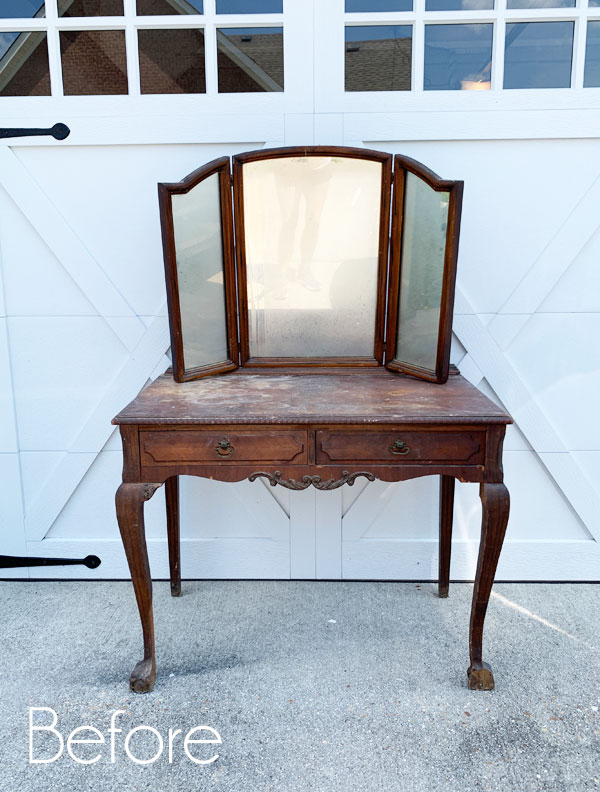
You can see that HERE!
Brennan starts 5th grade virtually here in Virginia Beach today. I expect some challenges as we navigate a full school day via Zoom. So, I am not planning to share another brand new makeover this week, but I will be back with this $15 yard sale bookcase I shared a couple of years ago:

UPDATE: See how sweet this turned out HERE now!
Have an amazing day and kudos to all the teachers out there, both professional and at home navigating this virtual experience!
XOXO,
![]()
Don’t Miss a Thing!
If you like what you see, there are several ways to follow along!
EMAIL * INSTAGRAM * FACEBOOK * PINTEREST * TWITTER


Mary Kaiser says
How beautiful it is!! Wow I am so happy you made it match the other one. You have totally saved its life! I LOVE how they turned out, and thank you for always sharing how to fix all the problems that come with antique pieces of furniture! Beautiful!
Christy says
Thank you so much, Mary! I am so glad it matches the other too! It was such a gorgeous set to start…they sure don’t make furniture like that these days! And you’re welcome, happy to share! XOXO
Maryellen Webber says
This dresser turned out beautifully! Hope your son’s digital learning with Zoom goes well. My teenage son went back to school last week and so far so good. Take care Christy!
Christy says
Thank you, Maryellen! I am happy to say we survived lol! Crazy times! Lots of luck to your son as well! XOXO
Larissa ~ Prodigal Pieces says
Your work really saved this forlorn piece. Great job , Christy.
Christy says
Thank you, my friend! It always feels good to bring life back into these older gems, as you well know! XOXO
Patricia says
As soon as you started to paint this dresser the same as the first one, I knew you were going to give them back to Mary. A kind gesture!
Christy says
I am so thrilled that she will be able to enjoy this set for many years to come! XOXO
Janice Holt says
Just beautiful. I know the lady is so glad to get them back. She’s actually getting new pieces of furniture that already has meaning to her. Good luck with the virtual schooling. My granddaughter started in the 5th grade and they go 2 days and virtual the other 3 for the 1st 4 weeks.
Christy says
Thank you, Janice! Yes, for sure! It makes me happy too! We survived our first day and it didn’t kill us lol, so I think we’ll be okay! I love the idea of splitting time like your granddaughter. That was originally an option and they they took it off the table for some reason. Hopefully they’ll all be back full time before we know it! XOXO
Christina says
Christy, this was such an intense makeover! Just like its mate, it turned out beautiful!! Did the seller buy them back? I can see why she would want them!!
Happy Zoom school.. wow, that has to be intense for everyone.
Be well!!
Christy says
Yes, Ma’am! It sure was, and thank you!! I am so delighted to see it completed and yes, Ms Mary did buy them back. I just charged for labor and supplies. I’m really thrilled that she gets to enjoy them for years to come! We made it through our first day of Zoom school and it wasn’t too awful lol! Have a great week! XOXO
Christina says
How completely wonderful for Mary to have your marvelously restored/renovated/rejuvenated pieces back in her home!
Glad to hear Zoom school wasn’t too bad.
Be well!!!
Christy says
Yes! That makes me SO happy!! And zoom wasn’t as bad at all! XOXO
Mary King says
Christy, What a beautiful site to wake up to! It looks absolutely lovely. This dresser, along with the tall one, did indeed belong to my Grandparents and then was passed on to my dad their only child. Growing up I remember them being used by my parents and have very fond memories. So glad my current dresser’s size didn’t work after moving and down sizing. Even more glad that I found your blog six years ago and then was delighted to see you lived nearby!I look forward to many more years of memories with my beautiful pieces!! Thank you again for your beautiful and talented work that has made my dream come true!!! I will be in touch soon 🙂
Christy says
I am so thrilled that you are happy and that you are getting these pieces back to enjoy for many more years! It was a pleasure to bring them back to life! I am so glad you reached out to me! I’ll see you soon! XOXO
Susan Cox says
Another beauty–you have terrific vision. (BTW, the link to Prodigal Pieces isn’t working here or on the other other blogs.)
Christy says
Thank you so much, Susan! And thank you for the head’s up on Larissa’s link! XOXO
Sheryl Danner says
This piece is absolutely gorgeous, and thank you for the candle tip on sticking drawers. That’s a great trick I’m going to try!
Christy says
Thank you , Sheryl! Yes, a candle works wonders on those sticking drawers! XOXO
Lorri says
As always, this piece is lovely. I really think that by staining the top and piece on bottom makes it stand out. Good luck with Brennan and schooling. Hope Jack is staying safe as well…you hear all about the large frat parties and no masks. Yikes!!
Christy says
Thank you, Lorri! Isn’t that scrollwork on the bottom so lovely? I had to highlight that for sure! Thank you for the well wishes for school today…he made it through it ha ha! Jack is doing great! He isn’t much of a party boy, but who knows what he is really up to when mama is seven hours away, right?? XOXO
Toni DeBenedictis says
Love how this turned out!!! Nicely done!!
Christy says
Thanks so much, Toni! XOXO
Mary Smart says
Hi! Christy, Another great transformation. I have a question for you, if you would have time to answer it. I just purchased an Antique Radio that I want to turn into a bar. The veneer is broken and missing in a couple of places and I would like to re-stain the radio but I don’t know how to repair the veneer, so I can re-stain it. Do you have any clever ideas on how I might do the repair? Thank you for any time you could give me.
Christy says
Thank you so much, Mary!! If the veneer is just loose, you can add some wood glue and sit something heavy on top or use clamps to hold it in place. If just small areas are missing, you can do what I did with this one and fill it with wood filler, and if the veneer needs to come off, I linked to a post where I shared a great solution for removing veneer in this post. It is usually decent wood underneath that can be painted, but I have not tried to stain the wood beneath veneer before. Good luck with it! XOXO
gwen says
Oh Chrissy – the matching dresser is so pretty and it really warms my heart that Mary found space for her beloved pieces to return to her downsized home!
Christy says
Thank you, Gwen!! Oh it makes my heart so happy to see her reunited with these gorgeous family pieces! XOXO
Denise - salvagedinspirations.com says
I love the light and dark wood contrast… gorgeous! Pinned! XOXO
Christy says
Thanks so much, my friend! XOXO
Bunny says
Hi Christy! You are forever inspirational! Seeing this dresser project makes me inspired to do my antique dresser! Yours turned out beautifully!! It really shows the beautiful lines of the piece. Thank you for keeping us inspired!
Christy says
Aww thank you so much, Bunny! These older pieces can be intimidating, but just taking them one step at a time makes them easier to handle! Good luck with yours! XOXO
Sue H Mellette says
Once again, you found the beauty in an old, but lovely antique dresser. So pretty! I love the stained top and the white for contrast and leaving the bottom of the dresser stained just brings the look together! Of course, your signature dresser drawer details provide a distinctive touch as well. Great job!
Christy says
Thank you so much, Sue! I loved working on this one! XOXO
Wendy Fuller says
oh my goodness, that turned out beautiful. I love that you left the legs and detail stained. It is gorgeous.
Christy says
Thank you, Wendy! Those legs are my favorite part! You just don’t see those beautiful details in furniture anymore! XOXO
Jackie C says
Mary is one fortunate lady!! WOW! I know she is ecstatic over these gorgeous pieces! I discovered something while looking around today and wanted to take a moment to express my gratitude. Thank you for a great website. I do everything on mobile, due to my geographic location, it’s my only option. I appreciate not having to fight a ton of annoying pop ups, videos and ads. I realize there needs to be some, but when there are so many I just close out and don’t visit the site anymore. I appreciate that your pinterest, FB & twitter share buttons remain in the page rather than hanging out on the side of my screen blocking my view. You have taken everything into consideration when you present a project, from the site itself to links to products/materials used, and your detailed how-to’s are hands down, the best. I have followed you for a very long time, while I visit other sites through links provided etc, you’re still the only one I subscribe to. Sorry for writing such a long post. I want you to know you’re appreciated and have been a huge influence/help to me.
❤️❤️ xoxoxo
Christy says
Aww thank you so much, my friend! I really appreciate that!! I do try to keep my site as user-friendly as possible and I am grateful for your feedback! Thank you for following along with me and for always cheering me on! And yes, Mary loves her dressers now for sure! I hope you have an amazing week!! XOXOXO
Sue Duffy says
So glad you stained the top to highlight that beautiful grain pattern. Love it!
Christy says
Thank you, Sue! Yes, I’m so glad I let some of that beautiful wood shine! XOXO
LYN says
So…I am dying to know, are the dressers going back to their original owner? They’re beautiful!
Christy says
Thank you, Lyn! Yes! I am so happy about it too. She already has the first one and will be getting this one this weekend! XOXO
L says
Where is a photo of the finished dresser top? It was stunning in the sanded photo. I really wanted to see how that turned out.
Christy says
Hi L! None of the photos I took of the top came out great because of the light from the window, but I just added one that shows the rich color if you want to take a peek! 🙂
L says
Thank you! 🙂 You always do such beautiful work, I love the grain on this piece 🙂
Christy says
Thank you so much! The top on this one was lovely for sure! XO
Mary Loveland says
The dresser looks wonderful, I just love those teardrop pulls. Keep up the good work! Hope all goes well with the home schooling, has to be hard on him not seeing his friends. adios
Christy says
Thank you, Mary! Those pulls were lovely! All the drawers on both dressers had those, but I had just enough that were in good condition to use on the tops of both dressers. And thank you for the well wishes for school. He made it through day one so far! And he had a few friends from previous years in his class this year that he was able to see on Zoom! XOXO
Donna says
That turned out amazing!!! So do love that look!!
Christy says
Thanks so much Donna! XOXO
Karen J Thompson says
These 2 matching pieces are absolutely devine! If I were closer I would buy these in a heartbeat for my guestroom! So pretty! And thanks for tips again on how to hide musty smell. I also didn’t know you can apply the BOSS topcoat on top of an oil-based stain. That is great to know! Thank you and congratulations on saving another beautiful piece of furniture. Your work is fantastic!
Christy says
Thank you so much, Karen! And yes, you can use a water-based sealer over oil-based as long as the oil-based is completely dry! XOXO
Carol Karl says
What a great makeover. I didn’t know that you could stop the odours. I renovated a scotch chest and it took a long time for the musty smells to go. Thanks for the tip. You’ve given me inspiration to do something like this to my own dresser.
Christy says
Thank you, Carol! Yes…the clear BOSS works wonders on odors with only one coat! This dresser had been stored in a drafty garage for many years and was quite musty. Good luck with yours! XOXO
Mary says
Magnificent Christy! And what an affirmation of your craftsmanship in that the original owner wanted the pieces back after you transformed them! No higher compliment to your skills and vision ❤️ Thank you for inspiring us and sharing your process 🙂
Christy says
Thank you so much, Mary! I was so thrilled that she wanted them back! XOXO
Nancy @ Artsy Chicks Rule says
Stunning!! And I love the pretty paper inside. So sweet. 🙂 xo
Christy says
Thank you, Nancy!! XOXO
Linda Charlton says
OMG!!!! It’s gorgeous! If I lived closer I would purchase it. I paint furniture myself but not as talented as you are.
Christy says
Thank you so much, Linda! I’ve had lots of practice lol! XOXO
Becky says
Beautiful! So cool that they get to go “back home” again! 😊
Christy says
Thank you, Becky! Yes!! XOXO
ROSE LEFEBVRE says
So lovely! Such a pro at renewing!
Christy says
Aww thank you so much, Rose! XOXO
Rosie says
This piece is absolutely stunning!!
It turned out so beautifully. The detail on the bottom just pops with it being stained. Matching it to the other piece just makes sense. Loved seeing the transformation. Thank you Christy😁
Christy says
Thanks so much, Rosie! I was so glad to be able to bring attention to those beautiful carved details at the bottom! XOXO
Jen @ Girl in the Garage says
Such a beautiful piece with the two-tone look, Christy! And the woodgrain on the top literally took my breath away – so gorgeous! They don’t make them like this anymore…. xo
Christy says
Thank you, Jen! That top was so pretty and yes, you really can’t find anything as lovely as this these days! XOXO
Barbara Moran says
This set is absolutely GORGEOUS!! You have such wonderful ideas for your refurbished pieces. Love them all. I was given a set of pine bunk beds from a friend that were stored in her basement and are musty smelling. I’ve already rubbed on with a cloth beachy blue paint color and then wiped it off to just give it a light stain. Can I still use the Boss by Dixie Belle and just apply over the paint stain to remove the smell? There was never any sealer applied.
Thanks for any assistance you can offer.
Christy says
Thank you so much, Barbara! Yes, you can apply the clear BOSS right over your paint! XOXO
Cecilia from Georgia says
I’m trying to catch up on my bloggers and of course you are the first I go to and this was such a great article! I couldn’t wait to see the final finish so I by-passed the steps and was just awed at how lovely this turned out. I have several 1930’s pieces that need TLC and you have once again given me the inspiration to pull one out and get’er done. I hope mine turns out half as lovely as yours.
Christy says
Aww thank you, Cecilia! The original owner that gifted me these pieces ended up buying back this one and the taller one just like it that I redid. They have been in her family for generations. Now, she gets to enjoy them again! XOXO
Marie says
Beautiful makeover, Christy, and how sweet that the original owner bought the two pieces back from you.
Christy says
Thank you, Marie! I was so thrilled that she would get to have these treasured family pieces back! XOXO
Carolyn B Graves says
Christy
I have commented on a couple of your different posts. I just devour all your projects. I do have an odd question. I just repainted my living room, dining room and kitchen in a gray very close to yours. It has been 10 years since it was painted before!!! I do love the lights that you have hanging over your kitchen island and have been wanting to replace mine. Unfortunately I do not have a lot of natural light in my kitchen so good lighting is important and I currently have downward facing light fixtures over my dining room table and kitchen island. Do you feel that your candelabra style light fixtures provide good light on your island?
Thanks,
Carolyn
Christy says
Thank you, Carolyn! I love the lights that I have as I think they are lovely to look at and they do produce a lot of light, but it is rather bright as there is no cover or shade over the bulbs and they hang quite low. It can be too bright at times, so I usually use the can lights in the ceiling to light our kitchen since it is a bit softer. I hope this helps to answer your question! XOXO