Hello beautiful friends! Today I’m finally sharing the two chairs left in my Fall Haul that I’ve been teasing for about two weeks now! I’m also going to use them to show how easy it is to replace a seat cushion. And for those of you that missed me popping in on Saturday, welcome to my new and improved site! Both the blog and I survived the update marvelously. I hope you’ll take a peek at the homepage before you go. That’s where all the pretty is!
I missed touring with my Furniture Fixer Upper girls on Thursday because of my blog being under construction for a couple of days, but just in case you missed their makeovers, I’ll include them at the bottom, so be sure to check them out if you missed them!
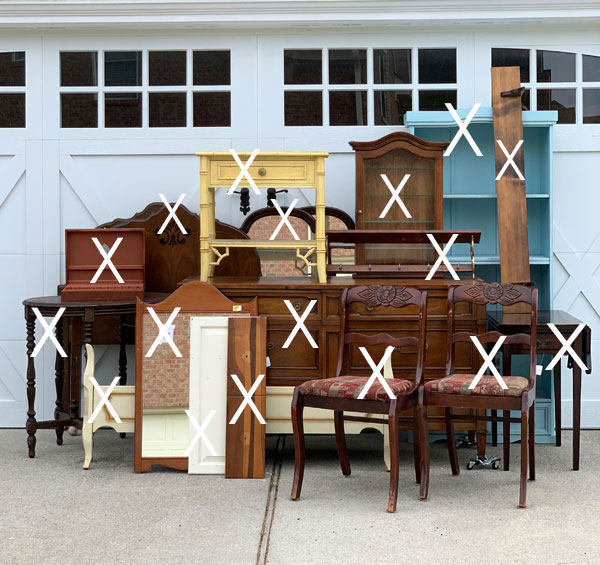
Here’s another peek at the last two items in my Fall haul:
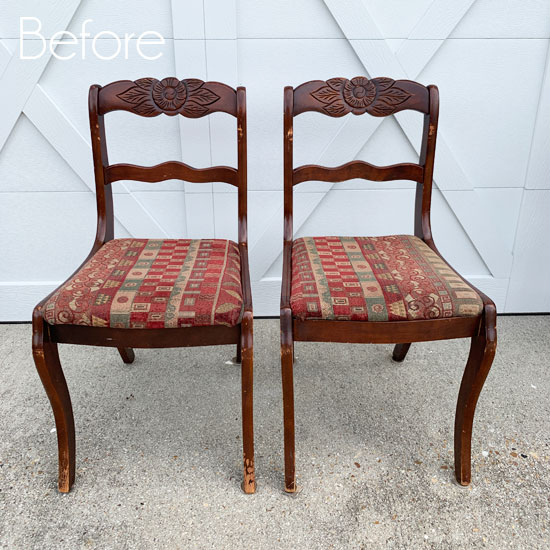
I see these chairs quite often but I just could not pass them up this time for the bargain price of $5.25 each!
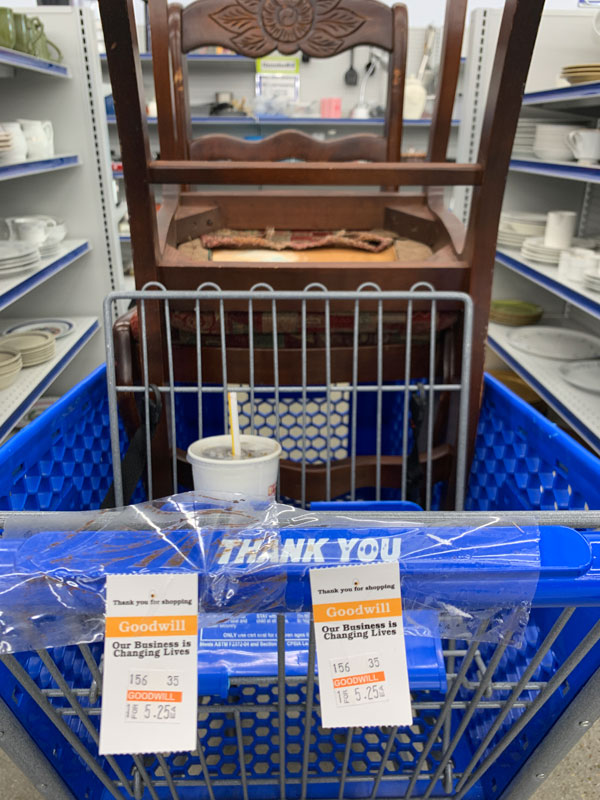
This is the Goodwill closest to my house and I always find something there, but not usually furniture. I’ve included a few affiliate links so you can find the products I love.
To start this makeover, I removed the seats by unscrewing four screws from the bottom of each chair. Then I gave both chairs a good wipe down with knock-off Lysol wipes (NO sanding required!) and a coat of BOSS in white. I thought for sure these might bleed through. I let them dry overnight and then gave them two coats each of Dixie Belle’s Fluff:
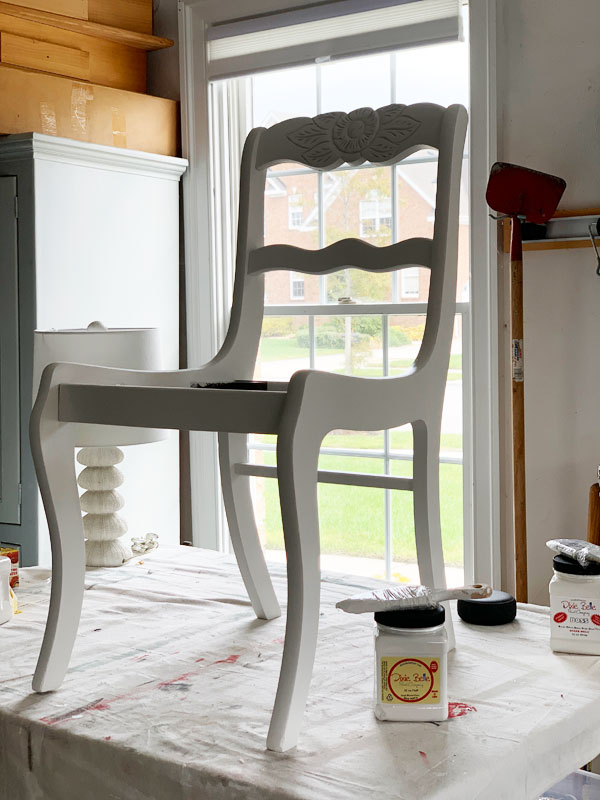
No bleeding yay! I sanded them with 220 grit sandpaper and cleaned all the dust up with my shop vac. Then I wiped them down with a clean soft cloth and sealed with Dixie Belle’s Clear Coat in Satin using their blue sponge applicator.
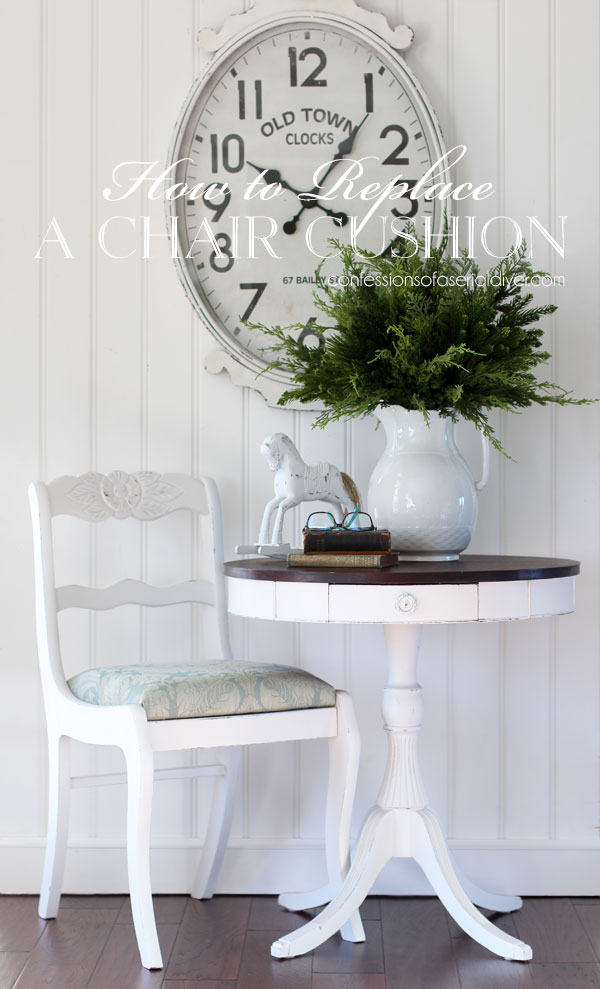
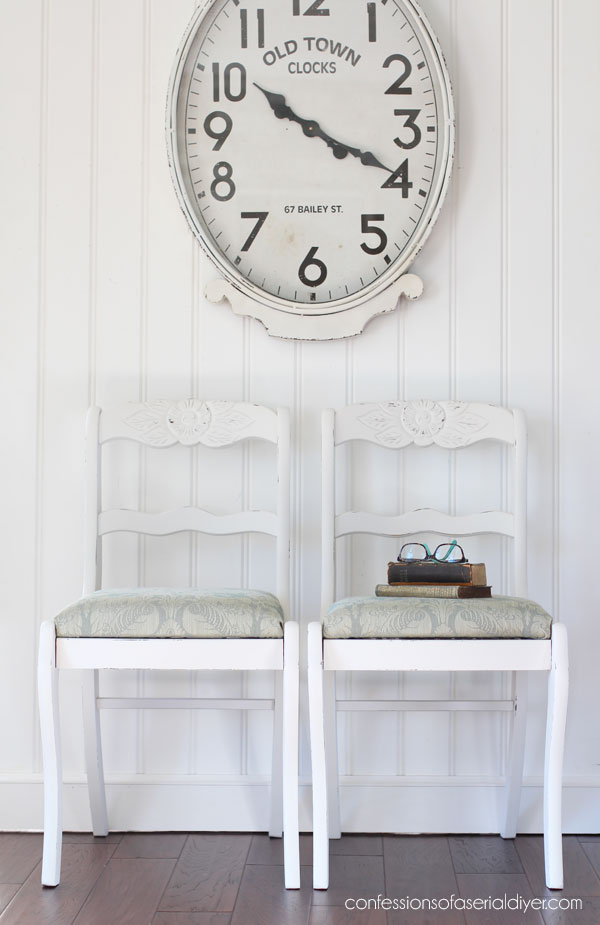
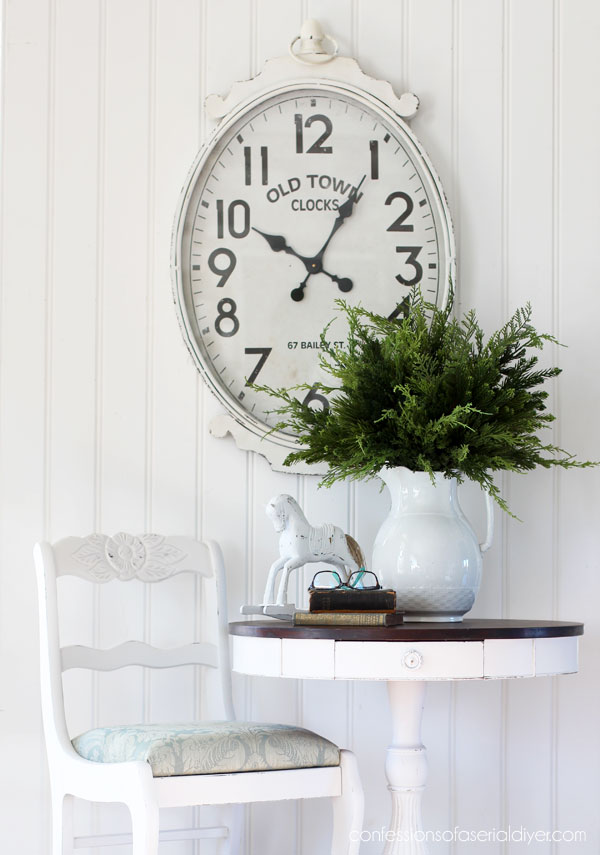
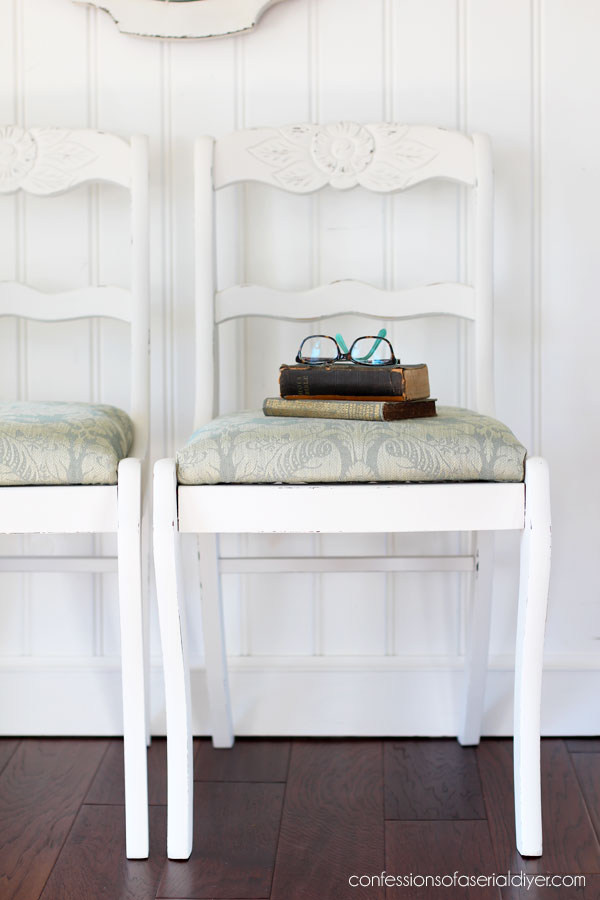
And here is how they turned out…
The original seat cushions were flattened and really needed replacing.
First, I gathered my supplies!
Materials
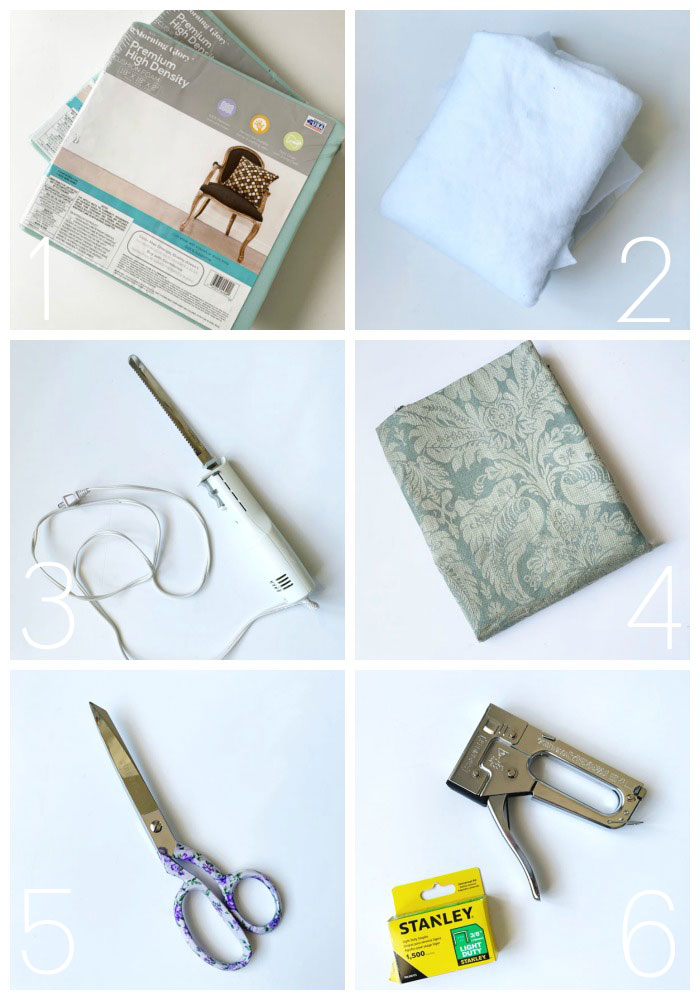
1. 18 X 18 X 2″ sized seat cushion (I found mine at Walmart for around $7)
3. Electric carving knife or regular knife (I found mine at the thrift store.)
4. Fabric
6. Staple Gun and staples
Not pictured: sharpie, upholstery staple remover
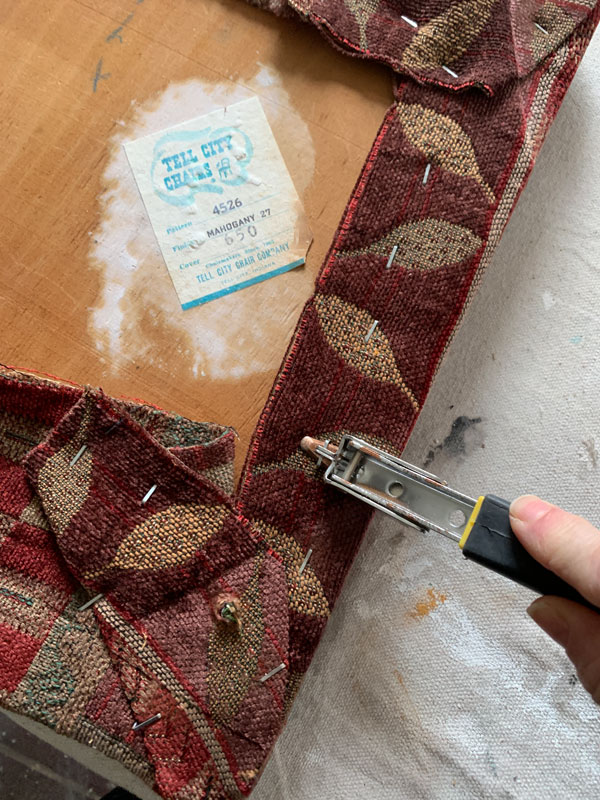
If your cushions are in good condition, you might be able to cover right over the existing fabric. However, that wasn’t the case here, so the first step was removing the old fabric. I used my upholstery staple remover to easily remove all the staples:
After removing the first layer, I uncovered two more!
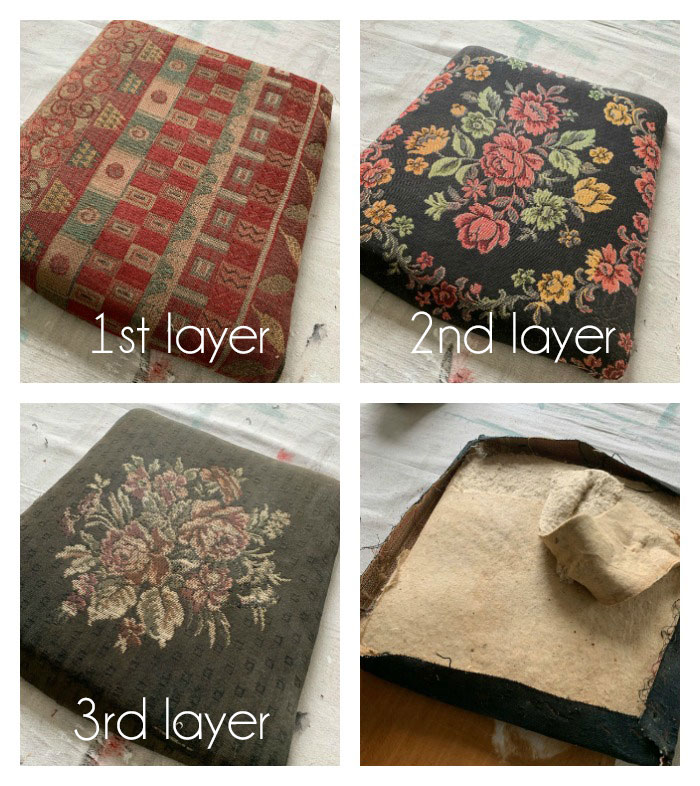
It’s always fun to see what is under those layers. My favorite is layer number two!
You can also see there what was inside the cushion. Definitely time for a replacement.
I took the seat all the way down to the wood:
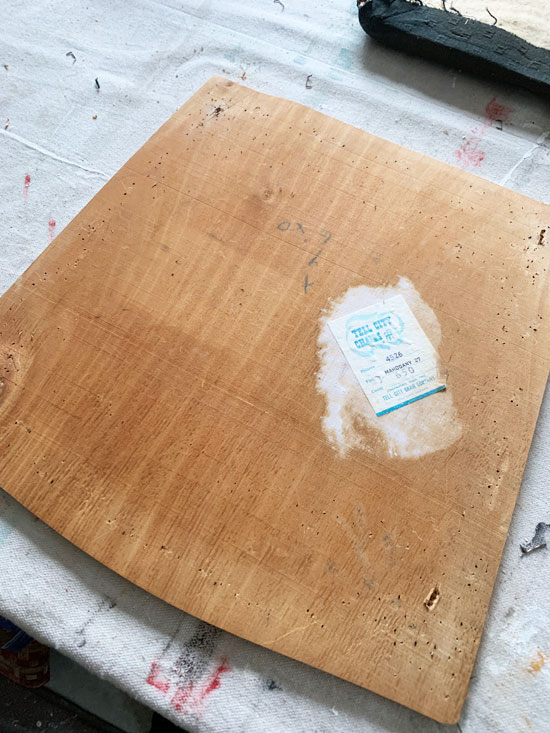
Now I was ready to build the seat back.
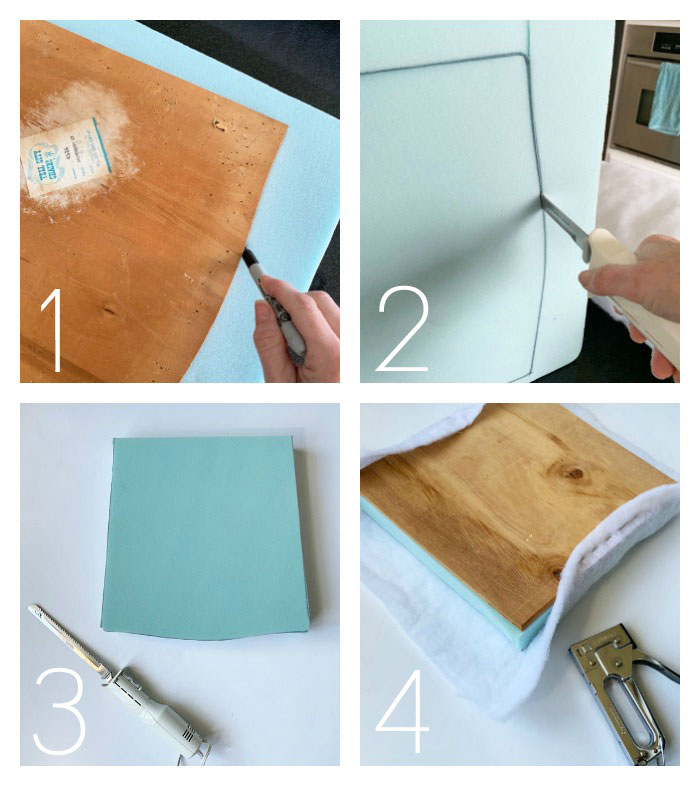
- I started by using the wood as a pattern and traced it onto the new foam cushion using a sharpie.
- Next, I used my electric knife to cut the foam. I found mine at the thrift store years ago. It went MIA for a while until I realized my Mom had it. It cuts through foam like butter!
- All done! If you don’t have an electric knife, a regular knife will do.
- Then I cut a piece of batting to fit and started wrapping the new seat cushion by pulling it taut and adding several staples on either side. I love my el cheapo staple gun!

- I added several staples on the opposites sides and then continued on the corners, pulling the batting taut as I went. I used my fabric scissors to trim any excess batting.
- Next, I cut my fabric, making sure to center the pattern how I wanted.
- Then I did the same as I did with the batting and started stapling several staples on opposite sides, making sure to pull the fabric taut as I stapled. You don’t want a saggy seat!
- I then added several more staples to the other two sides, pulling the fabric taut as I went as well.
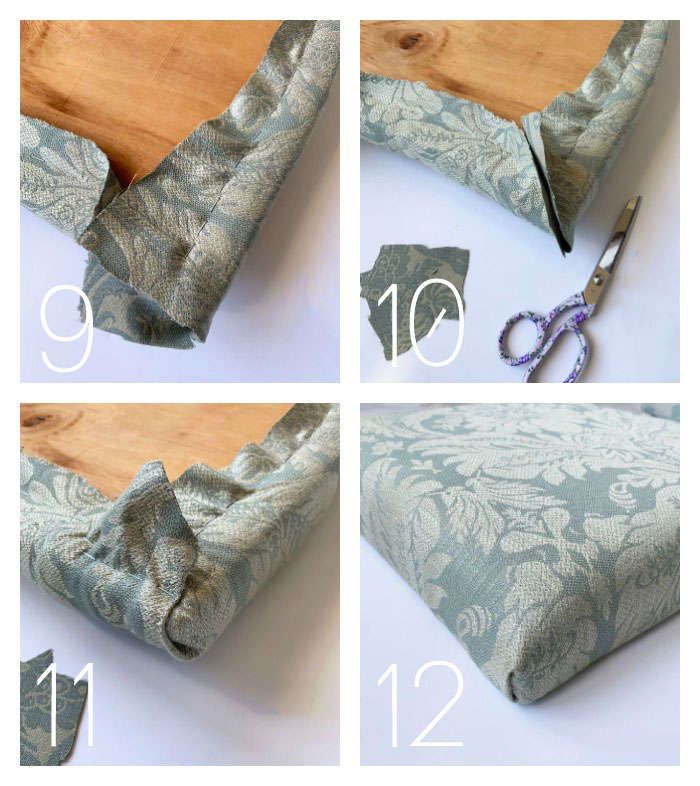
- To finish the corners, I took the staples all the way to the edges on the front.
- Then I trimmed the excess fabric off as shown.
- Next, I created a corner fold by tucking the fabric on the front over the side and then secured the side fabric with several more staples. I continued the same way with the other three corners.
- The end result is a small fold in the corner. If your cushion is flatter, you can avoid having any kind of fold simply by pulling the fabric in the corner super tight and stapling it in place. It is more difficult if you have a thicker cushion.
Here’s another option for those corners:
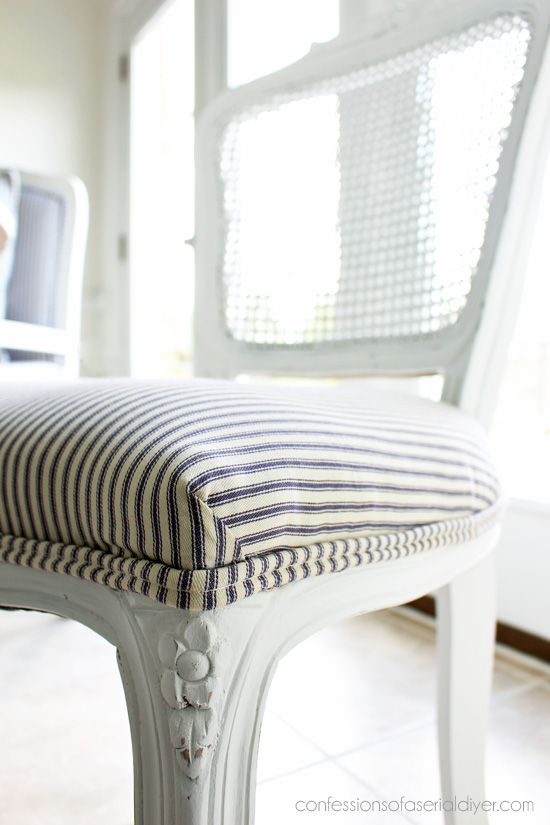
You can find this redo HERE.
Check out my double welt tutorial (as seen above) if that’s something you need HERE.
And here is a more flat cushion where I added piping:
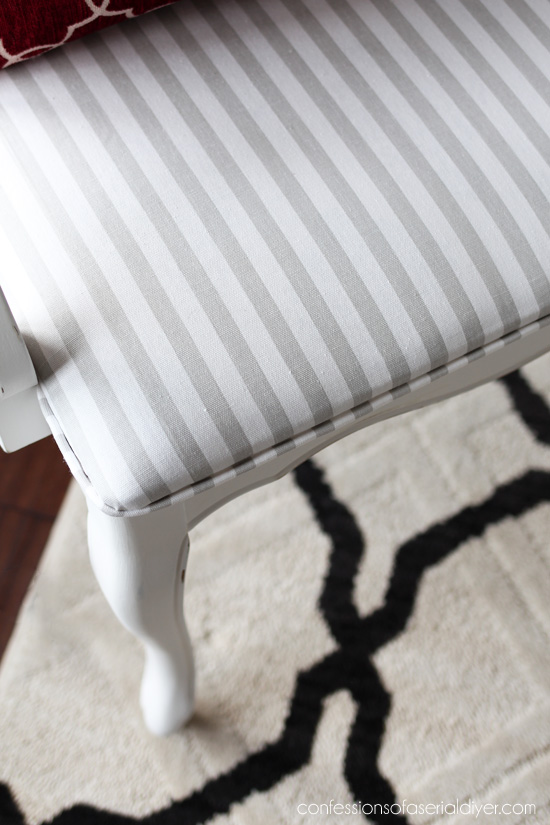
You can find my tutorial for adding piping to dining room chairs HERE.
I almost always add piping, but because you can’t see the sides of the cushion here, I chose not to.

This fabric has been in my stash for as long as I can remember. It was a remnant that I picked up at a fabric store that has since gone out of business. It is beautiful quality and I just love the subtle hue.
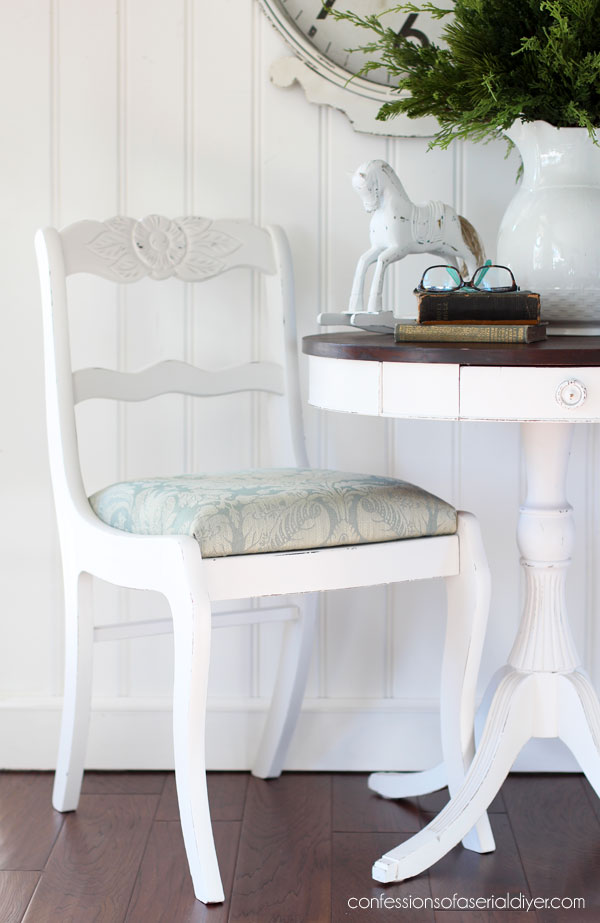
Time to bring out my Winter greens. I just love juniper for Winter…
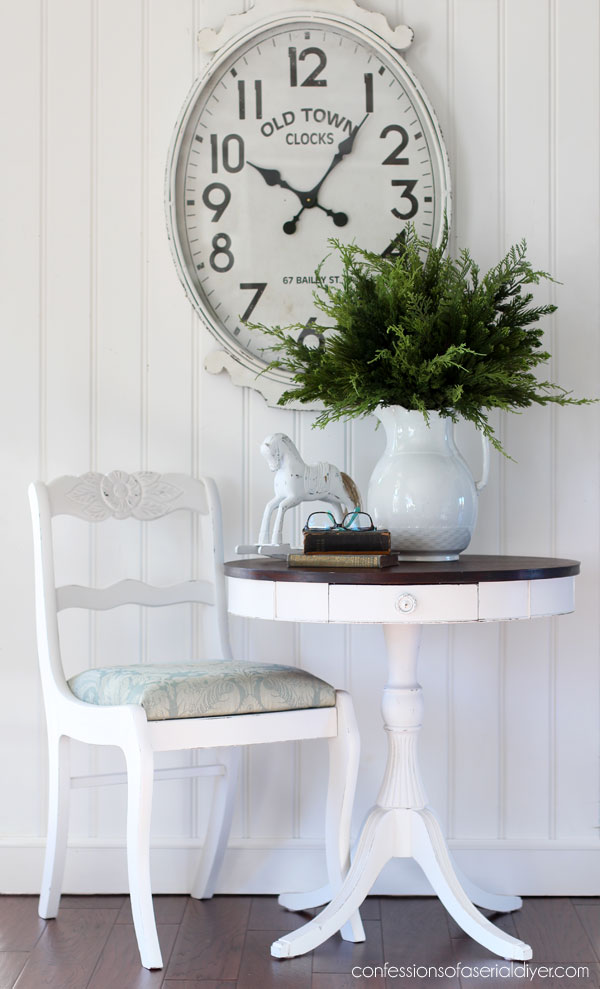
I found that on deep discount at Pier One after the holidays several years ago. The clock came from HomeGoods.
And I did do both chairs:

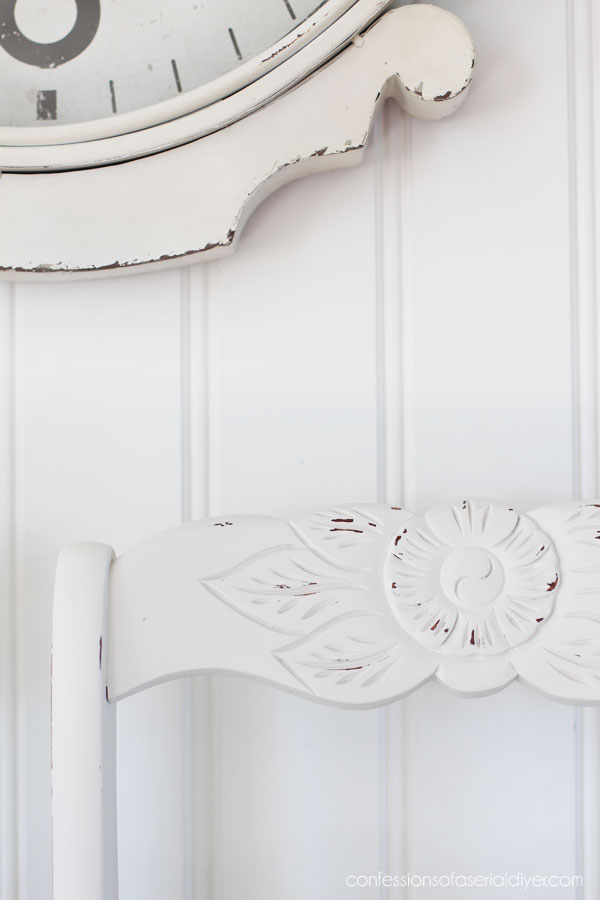
I love this pretty detail on the back…
If you missed this table makeover, I used Fluff on it as well:
See the super sad state it was in when I found it HERE.

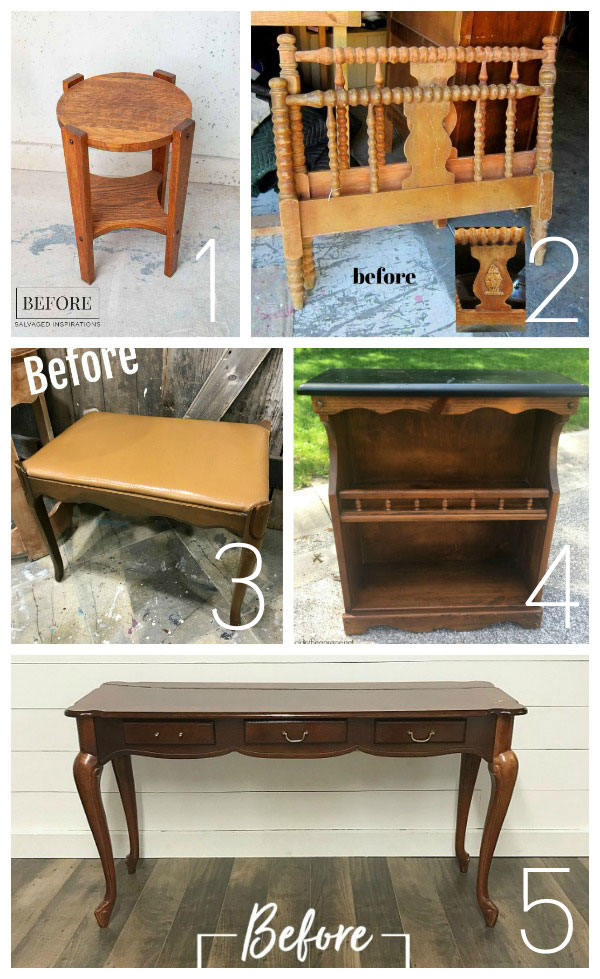
Be sure to check out my friends’ furniture redos as well if you haven’t already:
And that completes my Fall Haul!!
Visit anything you might have missed at the links below!!
Grandma’s Footboard Repurposed
Cottage-Inspired Drop Leaf Side Table
$2 Flatware Box to Halloween Prop
The blue bookcase got a quick redo for my booth here
$2 Thrift Store Shelf Makeover
DIY Faux Etched Christmas Mirror
Ornate $25 Thrift Store Table Makeover
$6 Thrift Store Night Table Makeover
$4 Mirror Makeovers and How to the Perfect Distressed Finish
So I shared this photo on my FB page on Sunday:
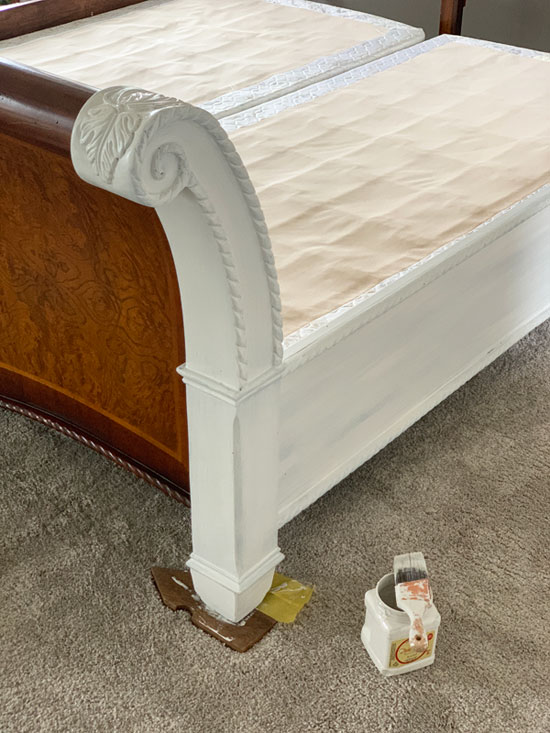
I did it, y’all. I started something and now there is no turning back. Of course, this has started a chain reaction, so it looks like I am going to be spending a few days tackling our master bedroom. It has been a long time coming!!
I’ll stop by on Thursday to wish you all a blessed Thanksgiving and to share what other projects in this room need help! We still have to tackle my sister’s kitchen island and her table and chairs as well so I can reveal her kitchen. PLUS, I have a whole new haul to start on, so there are lots of fun things coming to the blog!
XOXO,
![]()
Don’t Miss a Thing!
If you like what you see, there are several ways to follow along!
Email * Instagram * Facebook * Pinterest * Twitter


Mary Kaiser says
I LOVE how they turned out and how cute they are with the table you already did a beautiful re-do on!! So are you keeping them as a set for yourself or selling in your booth? I LOVE your new updated fresh site, it is beautiful!! I can not wait to see the bed all painted, looks good so far you tease!! You are so talented and amazing!! Thanks for always sharing such amazing ideas and beautiful projects!!
Christy says
Thank you, Mary! These will be heading to the booth as I don’t have a spot for them, but they do fit right in here! I’m so glad you like my new site. And our bedroom is looking so much lighter and brighter now! I can’t wait to see it all done! As always, I appreciate your encouragement, my friend! XOXO
Janice Holt says
Love the chairs. Now are you telling me you started painting your husband’s bedroom suit? Well, the one he had before you two married with the grapes? If so, you are tackling a huge job. Happy Thanksgiving.
Christy says
Thanks, Janice, and yes! I am here to confirm that it is a huge job indeed lol, but our bedroom is looking so much lighter and brighter! I figured a hundred bucks for paint was much cheaper than the new $5000 set I had my eye on! XOXO
Christina in SW FL says
Cute chairs Christy! Love the color and the new seal covers!
Whaaaat? You are tackling the bedroom set? Wowzers!!
Christy says
Thanks, Christina! yes, girl…I must be crazy ha ha! XOXO
MrsSW says
Hi Christy – that turned out well.
I’ve had that same chair sitting in my garage for over a year (picked it up at a yard sale for $1.00.) I’m printing out a copy of your finished project and hanging it in the kitchen as inspiration and a reminder to myself to get busy.
Thanks,
Sheila
Christy says
Thank you, Sheila! Yes, you could have it done in a day! XOXO
MrsSW says
LOL – YOU could have it done in a day. By the time I go through my stash of fabric, gather my painting supplies, get everything set up on the back porch (on a day that’s warm, cool, dry enough to paint) and wrestle the chair from the back of the garage I’ll be exhausted and have to wait until the NEXT day that’s warm, cool, dry enough to paint. 😉
However, while I’m waiting I’ll get the seat cushion done. 🙂
Sheila
Christy says
Oh haha! Starting with the cushion sounds like a great plan! 😀
Denise - Salvaged Inspirations says
You finished your haul…woohoo! The chairs are stunning. I have to admit I get super excited whenever you do ANYTHING with fabric! XOXO
And thanks for linking my friend… we missed you but your new site looks AMAZING! XOXO
Christy says
Thank you, Denise! And yes, that is another haul done, and I got to use up some fabric that has been sitting here forever woohoo! You are so welcome…couldn’t let my girls down like that! And I’m so glad you like the new site… it was long overdue!! XOXO
Marcie Lovett says
So sad before, so lovely now! Don’t you love doing archeology on chair seats, Christy? The new fabric is a huge improvement, although who knows what they’ll think when it’s discovered some day 50 or 60 years from now.
You’re painting the bedroom furniture! Can’t wait to see how that turns out. Wishing you and the family a wonderful Thanksgiving.
Christy says
Thank you, Marcie!! I do love to uncover those layers! And yep…I couldn’t help myself, and now I must keep going! Paint was much cheaper than a new set! Hope you have a wonderful Thanksgiving as well! XOXO
gwen says
I love the new look! My question is: “What will you do with under fabric #2?” That was my favorite as well! You’ve gotta do something with it! Happy Thanksgiving Christy!
Christy says
Thanks so much, Gwen! I love that fabric! I almost reused it. I did save it, so you may see it again! XOXO
Phyllis says
As always, beautiful! I am always amazed how much you can accomplish.
Christy says
Aww thank you, Phyllis! I don’t think I could sit still if I tried! XOXO
Mari says
Love the chairs! I used to have dining chairs Like this and I would change the fabric every Or so. Now I have all wood fiddle back chairs that are hard and uncomfortable. Making cushions is tedious and they never stay on the chairs, I wish I could figure out a way to make a comfortable easy to recover cushion.
Christy says
Thank you, Mari! It stinks that your chairs are uncomfortable! I hope you find a solution! XOXO
sharon austin says
Super cute chairs; my color too!! Amazing what some paint and fabric will do for old chairs. Happy Thanksgiving!
Christy says
Thank you, Sharon! Yes!! Happy Thanksgiving to you too!! XOXO
Marie says
Whoa, you’re painting your bedroom suite I see! I can’t wait to see it. The new look of your blog is gorgeous, Christy! As for the chairs, so fun to see all the former upholstery. Night and day transformation – so pretty! A BIG thank you for sharing our Furniture Fixer Upper makeovers, Christy! Sending hugs your way and will do the same on my post. xo
Christy says
Yes I am!! I am so excited to banish the brown from our bedroom! I’m so glad you like the new look of my site…thank you!! It was long overdue! And of course…I couldn’t completely ditch my girls this month!! I will share everyone over the weekend! XOXO
Lizzy says
I love it! So pretty. Going on Pinterest!
Christy says
Thank you, Lizzy, and thanks for pinning!! XOXO
Lea says
I love your blog and look forward to receiving it in my emails each week! I just wanted to point out that a person pulls fabric “taut”, not “taught”. They sound the same but are spelled differently and have very different meanings. ☺️ Have a wonderful Thanksgiving!
Christy says
I just fixed that, Lea, thank you! I always appreciate when ya’ll keep me in line. That was my fuzzy brain writing that after a full day of painting! 😜 XOXO
Joey says
Oh Christy, I love your new and beautiful website. It is so pleasing to the eye as I noticed the minute I clicked on it. You are so amazing at what you do and you do everything so beautifully. If I could I would hire you to hunt and redo furniture for my whole house and pay you a fortune…lol…but unfortunately I have to do it…lol…but I love it too. Thank you for all the lovely things you do and I always will look forward to your next email because I know I am going to be thrilled as I always am at what I see you have done. Happy Thanksgiving to you and your family. Please never stop doing what you do!! Hugs and smiles, Joey
Christy says
Aww you are so sweet, Joey! Thank you so much!! I’m so glad you like the new look of my site. And I hope to be doing this for a long time to come! Happy Thanksgiving to you as well!! XOXO
ROSE LEFEBVRE says
I have 2 chairs just like yours! One is painted a gray and the other still original. Yours loos good.
Christy says
Thank you, Rose! The style is so cute! XOXO
Cecilia from Georgia says
I never met a chair I didn’t love! You have such amusing makeovers for everything. Can’t wait to see the sleigh bed! Have a wonderful Thanksgiving!🦃
Christy says
Thank you, Cecilia! I can’t wait to share our bed! Have a lovely Thanksgiving as well! XOXO
Petra says
Gosh I loved seeing it painted white – what a relief 😀 And I really like the little “flower” detail on the chairs. Fabric is so pretty too 😀 Looking forward to seeing your bed done!
Christy says
Thanks, Petra! White paint fixes everything lol! And our bedroom is coming along nicely…looking forward to the end result myself! XOXO
Becky says
So pretty! Your corners are always so beautiful! Ugly upholstery corners are a pet peeve of mine, haha!
WOW, you took on the BIG project! 😊 I can’t wait to see how it all turns out!
Have a lovely Thanksgiving!
Christy says
Thanks, Becky! I don’t like those corners, but they are unavoidable sometimes! And yes!! Girl…this is a big project for sure, but I am really enjoying working on something for me lol! Hope you have a wonderful Thanksgiving as well! XOXO
Lori says
Love your projects! Congrats on finishing the new website. Is there a way to reactivate the Reader View option, please? On a phone it’s more difficult to view with the ads.
Christy says
Hi Lori! Thank you! If you are on an iPhone, in the URL bar at the very top, to the left of my web address, there should be two letter A’s side-by-side. Tap on those and a drop-down menu should come and you can select Show Reader View. Hope this helps! XO
Denise says
Hi! I inherited my Grandma’s Duncan Phyfe set years ago – 6 chairs, drop leaf table & sideboard. I love the set & it’s holding up well, considering it’s from the 1930’s. I enjoy seeing how others makeover this style of furniture, but I can’t quite bring myself to paint the beautiful mahogany wood. Lol
Thanks for your inspiration! I enjoy seeing your projects!
Christy says
Thank you, Denise! I have no problem painting pieces that have no personal history attached to them, but I might think twice before taking a brush to a treasured family piece as well! XOXO