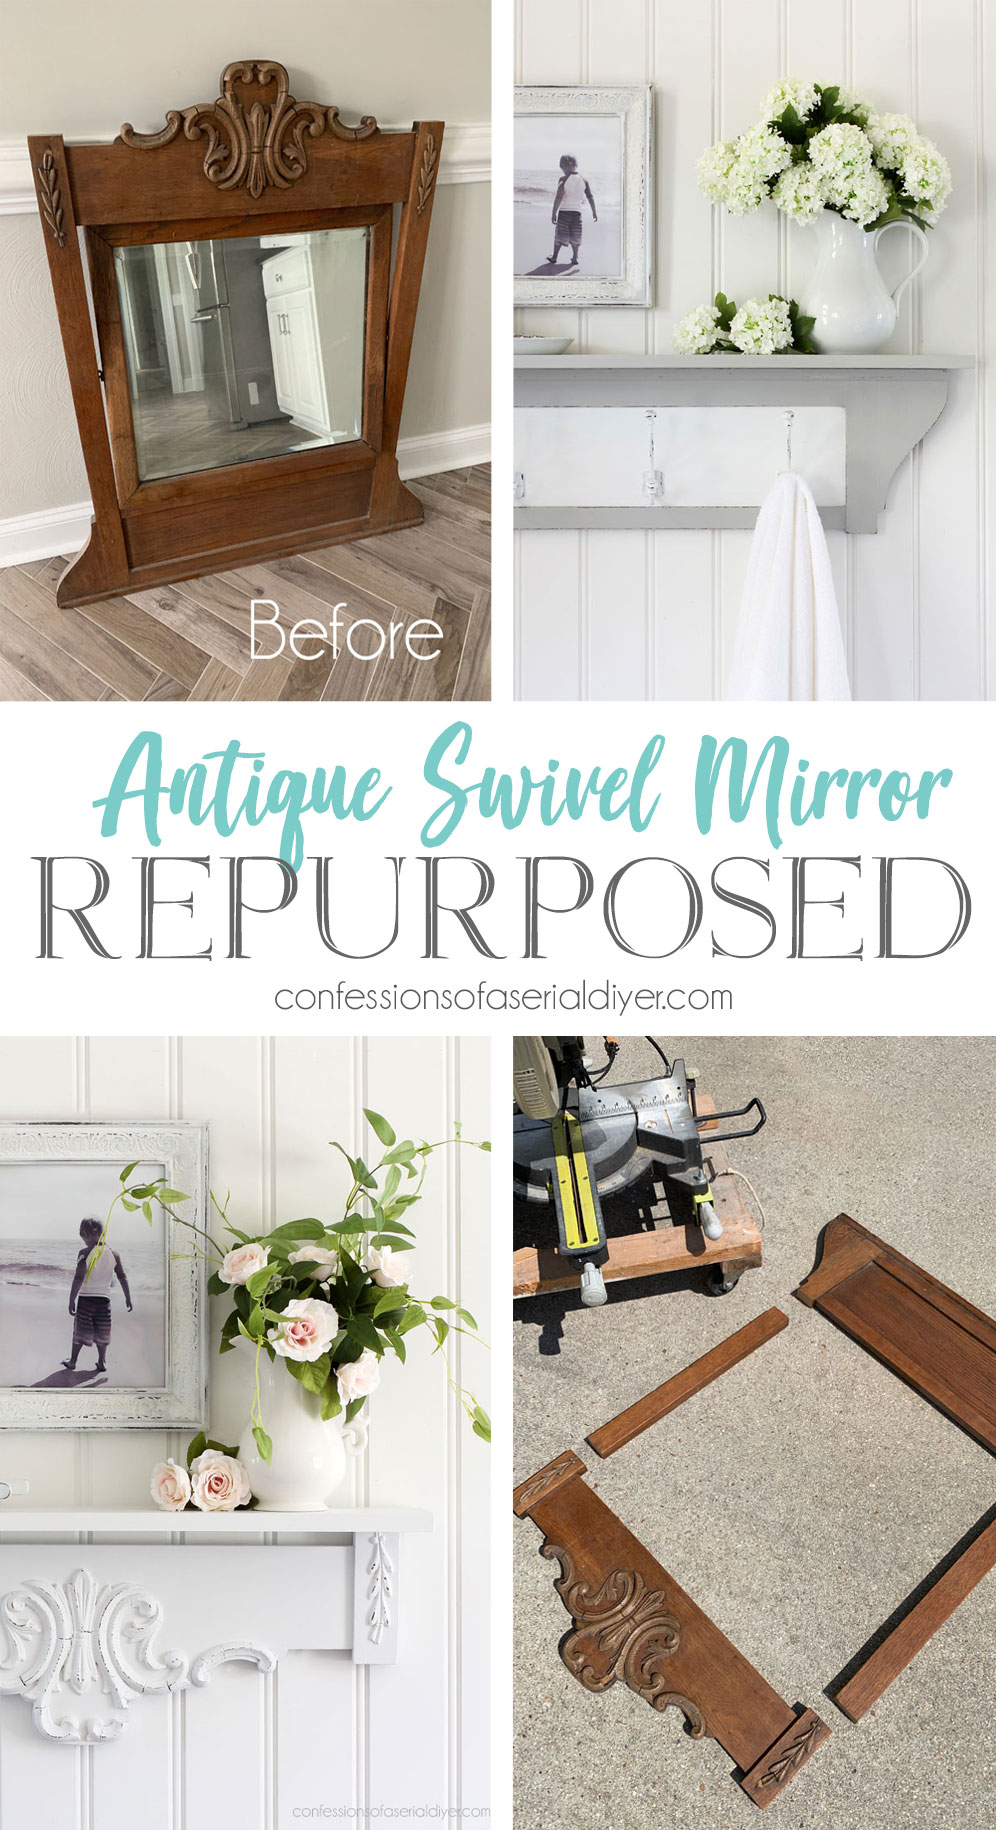
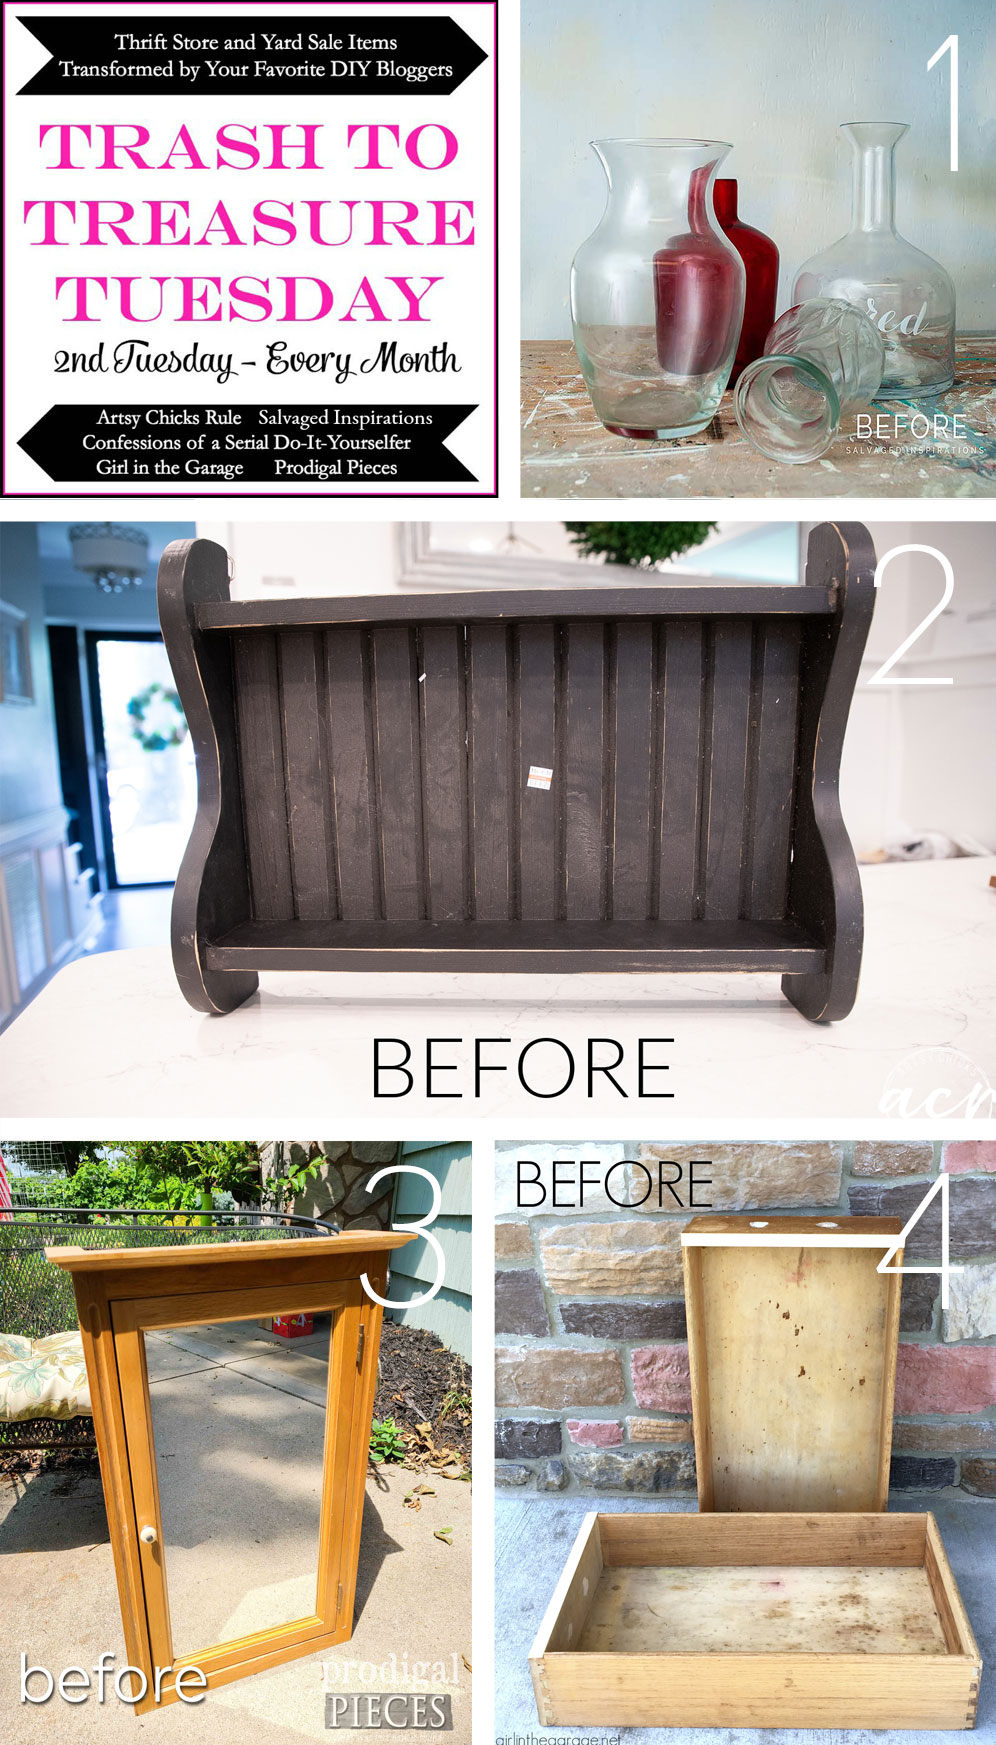
Beautiful friends, have I got a fun makeover for y’all today! It’s Trash-to-Treasure Tuesday, and I have the perfect project piece! I’m going to share how to repurpose an old swivel mirror!
What swivel mirror?
The one that came with this dresser! It just felt to too top heavy for the dresser in my opinion:
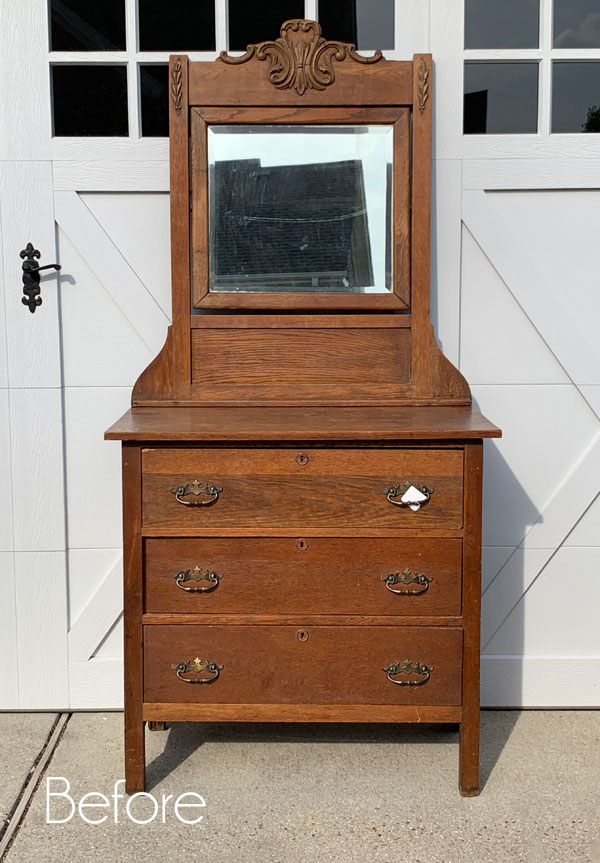
So, I decided to redo the dresser without the mirror.
You can see what I did with the dresser HERE.
That left me with just the mirror:
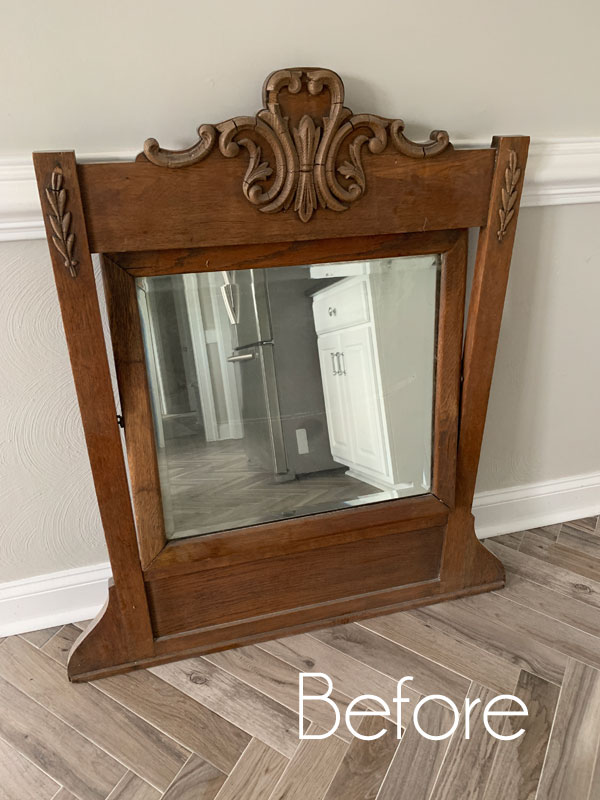
After staring at it for a day or so, I hatched a plan to repurpose it. I’ve included a few affiliate links so you can find the products I love.
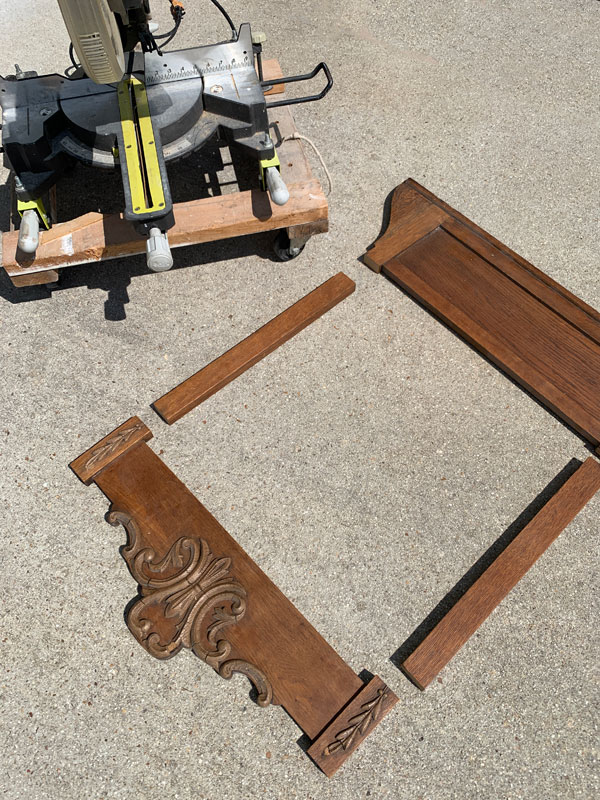
I first removed the mirror and then used my miter saw to cut off the top and bottom parts:
Then, I stole some wood that my husband had just purchased for another project, to make a shelf for each:
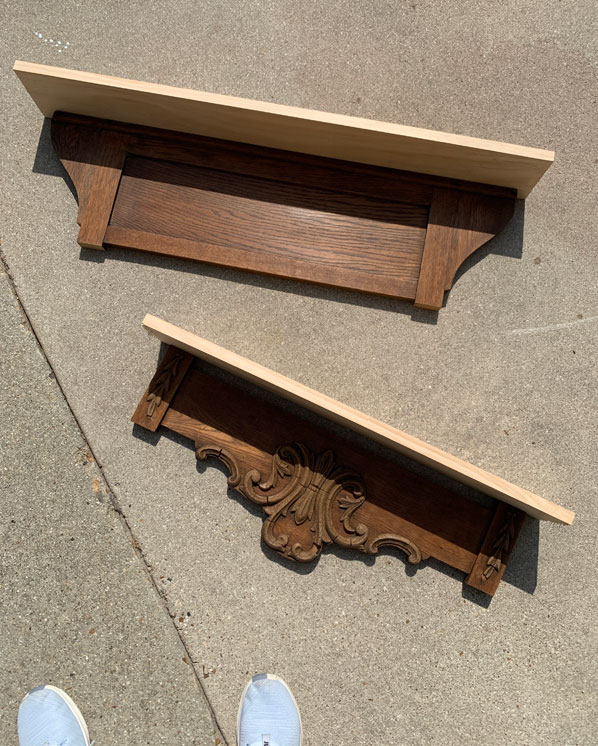
I was later informed that this was prime lumber he spent a fortune on that was intended to be stained. Oopsie and thank you, Hubby, for donating to my cause!
I did stain these pieces though using Tobacco Road Voodoo Gel Stain:

I did that so when I painted and then sanded, the wood would show through. I’ve been using the cheat method of distressing more lately, but I thought I’d go this route this time. Not much showed through though in the end as I didn’t sand the shelf part very heavily at all.
The Prep
The mirror pieces that I cut off got a good cleaning with White Lightning:
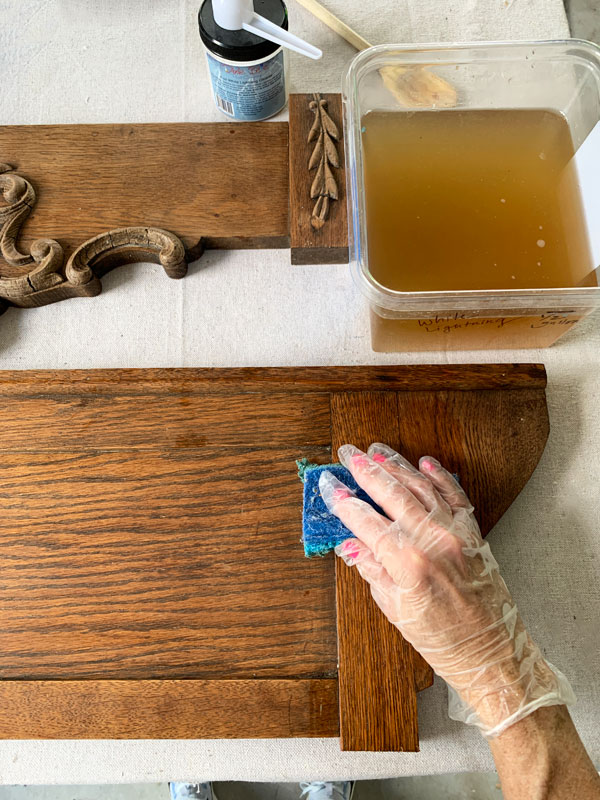
I swapped out my water for clean water and gave them another wipe down to rinse, and I was ready for paint!
Shelf #1
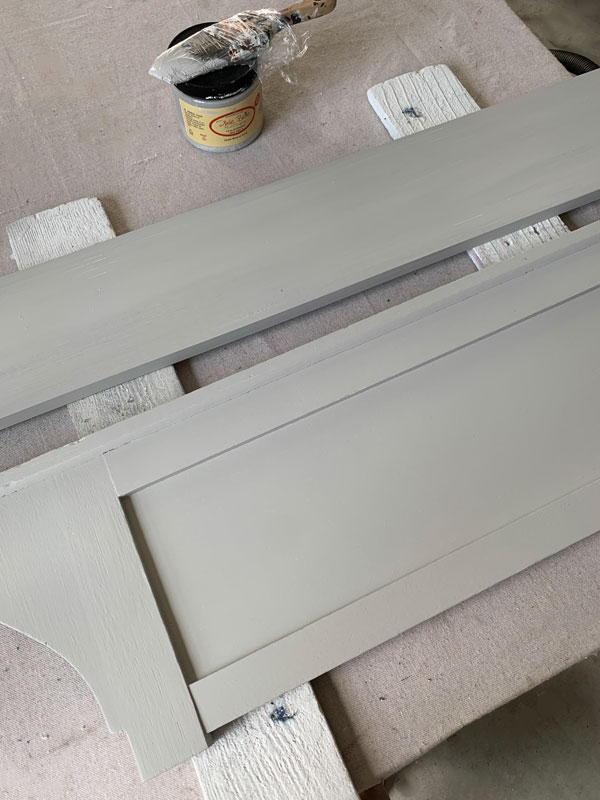
I started with a coat of White BOSS on each since I got bleed through when I was working on the shelf with the beautiful details. I let them sit overnight to allow plenty of dry time.
The more simple shelf then got painted in a custom mix of half Driftwood and half Cotton.
I love Driftwood, but I love it even more lightened up!
Attaching the shelf
I decided it would be easier to paint all the parts separately, but then I realized I would have holes to fill after attaching the shelf. It still worked out fine though.
To attach the shelf to the base:
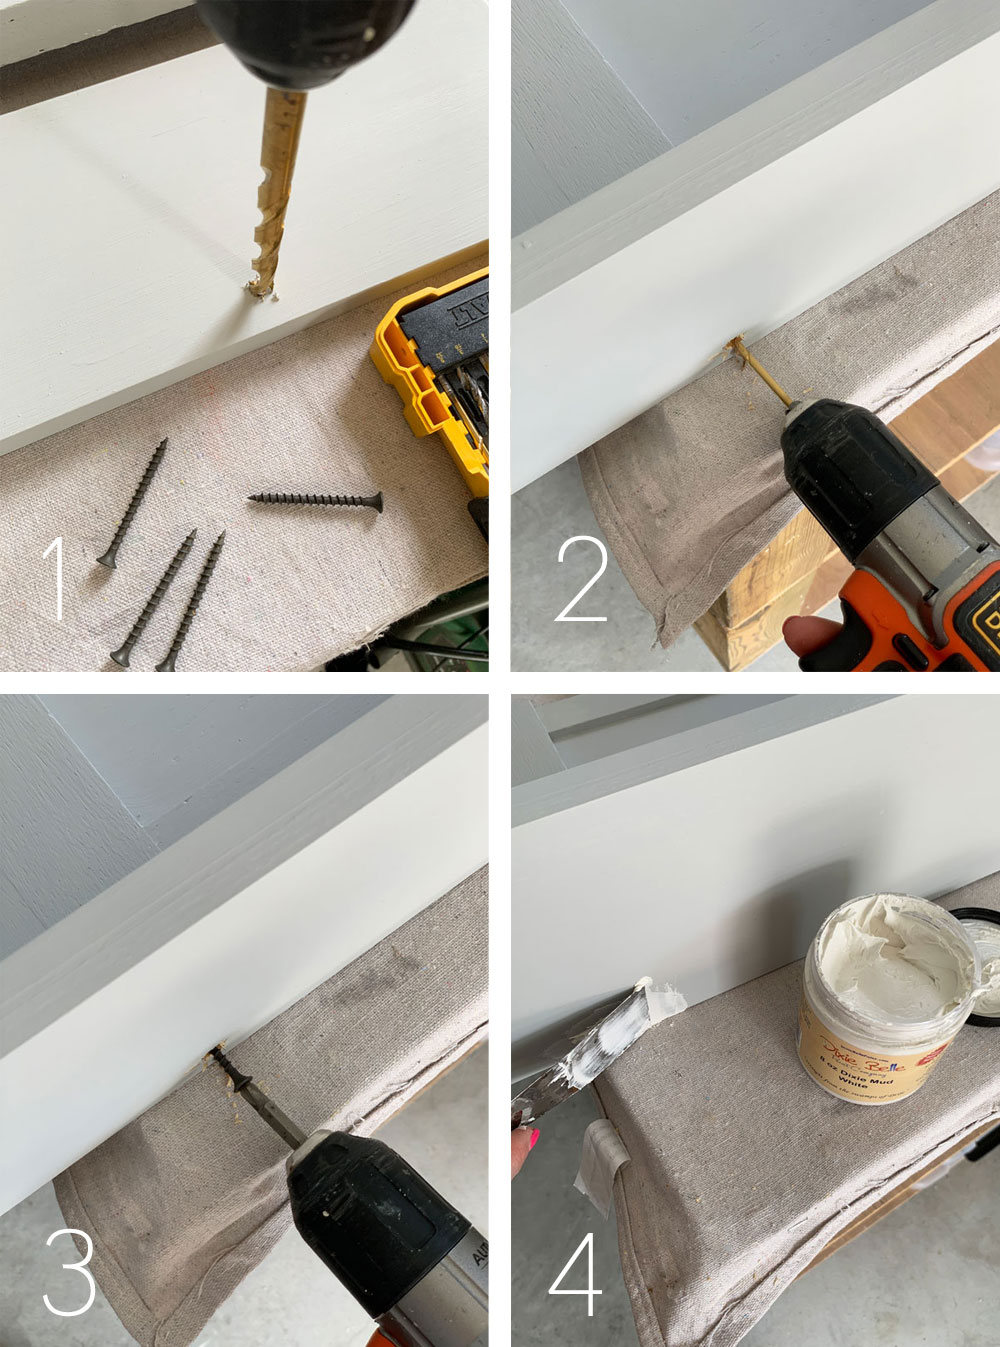
- I drilled a shallow hole just a hair bigger than the head on my screw.
- Then I drilled a pilot hole with a drill bit just a hair smaller than the screw itself to make it easier to drive the screw in.
- I added a small amount of wood glue to the edge of the shelf where it would meet the base, and then I screwed the screw in place to attach the shelf to the base.
- The last step was filling the holes with Mud. I used white Mud this time and allowed it to sit overnight. When it was completely dry, I sanded the area smooth with 220 grit sandpaper and touched up the area with paint.
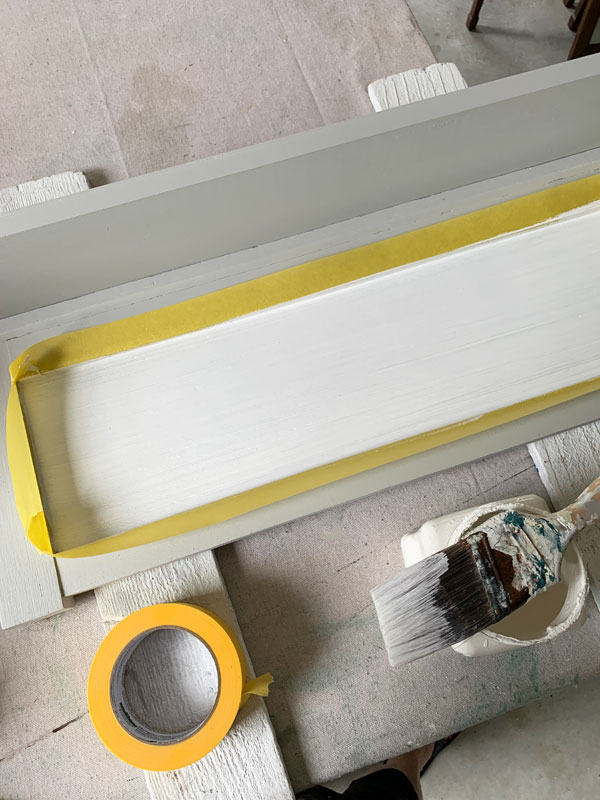
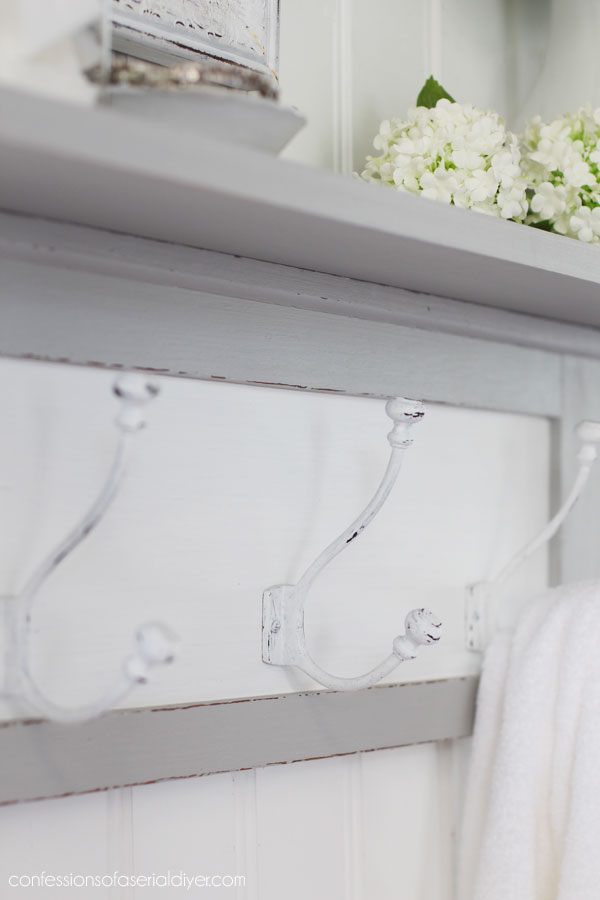
Once I had the shelf attached, I decided to paint just the center panel in Cotton, taping it off with FrogTape for delicate surfaces:
I went through my stash in search of some simple hooks to add to the center and I came up empty. I usually buy hooks from Hobby Lobby when they are half off every other week. Last week, however, they were not on sale, so I decided to head to another favorite resource when I need hooks in a pinch: HomeGoods!
They always have an assortment of these hanger thingys with lots of hook options!
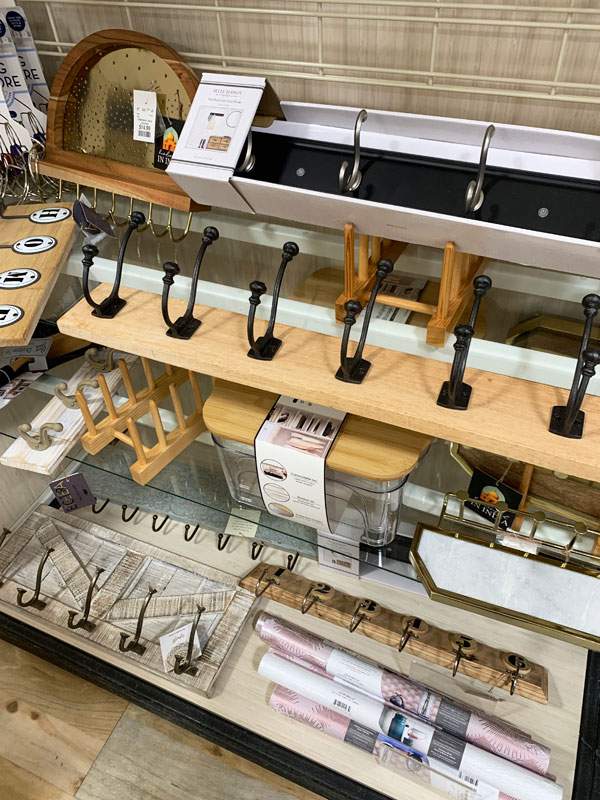
I sometimes get lucky finding one on clearance when a hook has busted off, but no such luck this time. I bought the one you see in the center with the seven hooks for $24.99.
I look for hooks that can be attached with screws from the front like these:
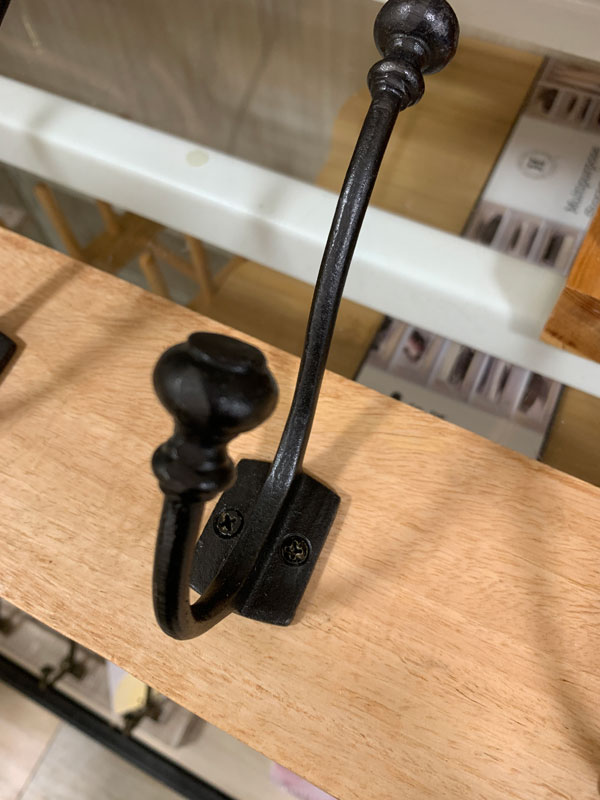
Each hook ended up costing around $3.50 which is reasonable, and I only needed three for this project, so I have four more for another project down the road. I can also reuse the wood they are attached to as well!
Attaching the hooks to a scrap board makes them easier to paint. I painted them in two coats of Cotton:

When they were dry, I just used my nail to remove some of the paint here and there to give them a distressed look and then attached them to the shelf.
Everything was sealed with Clear Best Dang Wax; D ring hardware was attached to the back for hanging; and shelf #1 was complete!
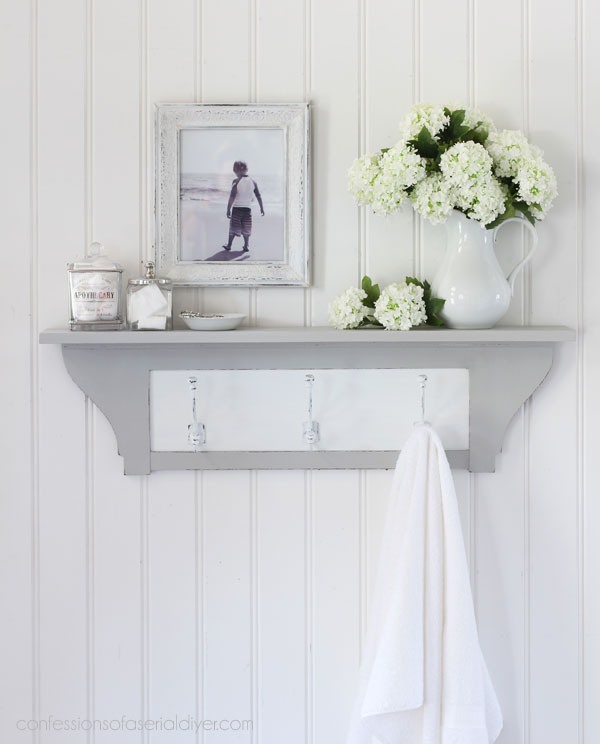
The Result:
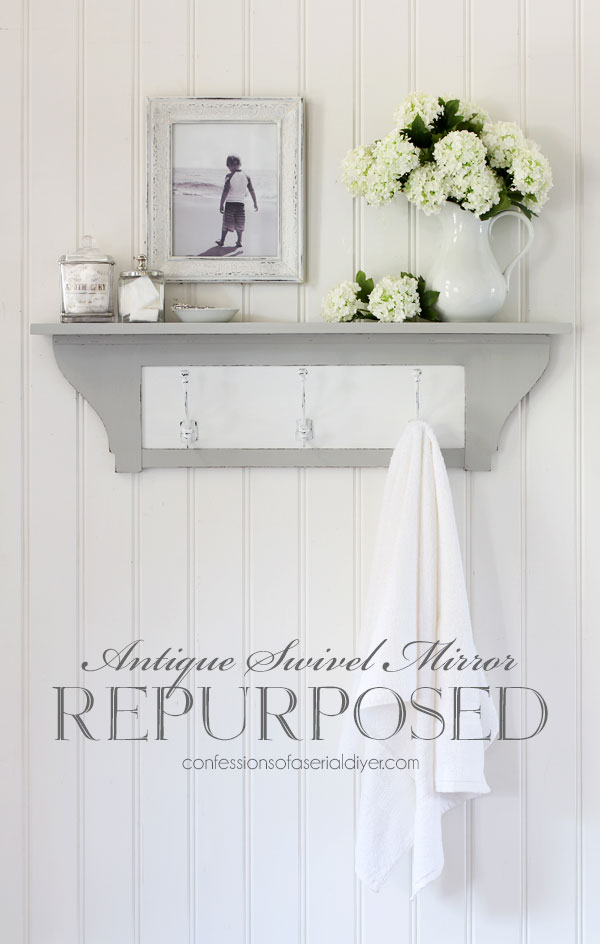
I kept it pretty simple and neutral so it could match just about any space!
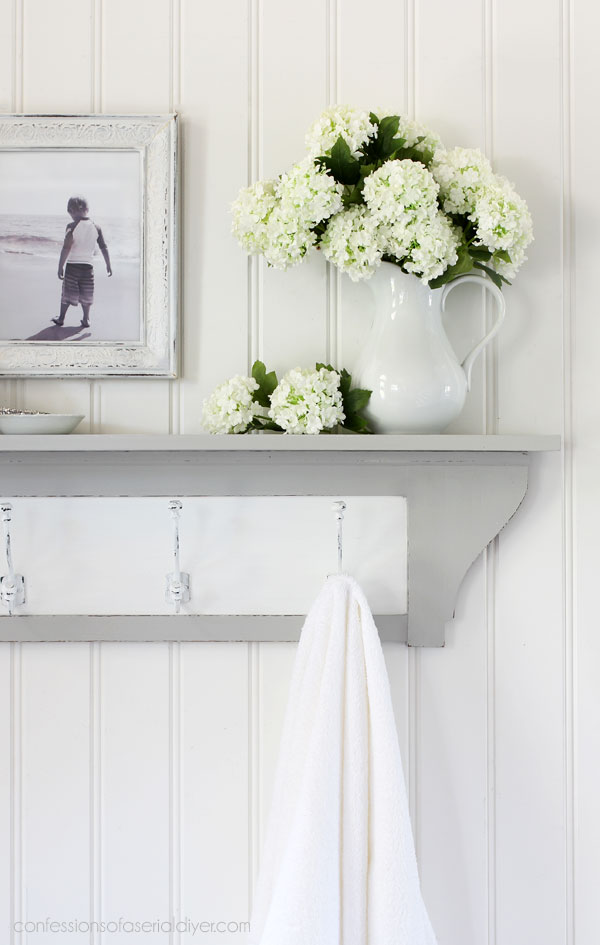
You would never know it started out as part of an old swivel mirror!

These hooks ended up being perfect…
Shelf #2
Ready for shelf #2?
This one definitely needed a coat of white BOSS:
And just look at the condition of my poor BOSS! Ya’ll, I am a messy creative! That can make it especially difficult to get the lids off when I’m ready to use my products again, but I have a hot tip for ya!
HOT TIP!
Use a piece of sandpaper as jar opener…the grip on the sandpaper works amazingly well at loosening stuck jar lids with ease!
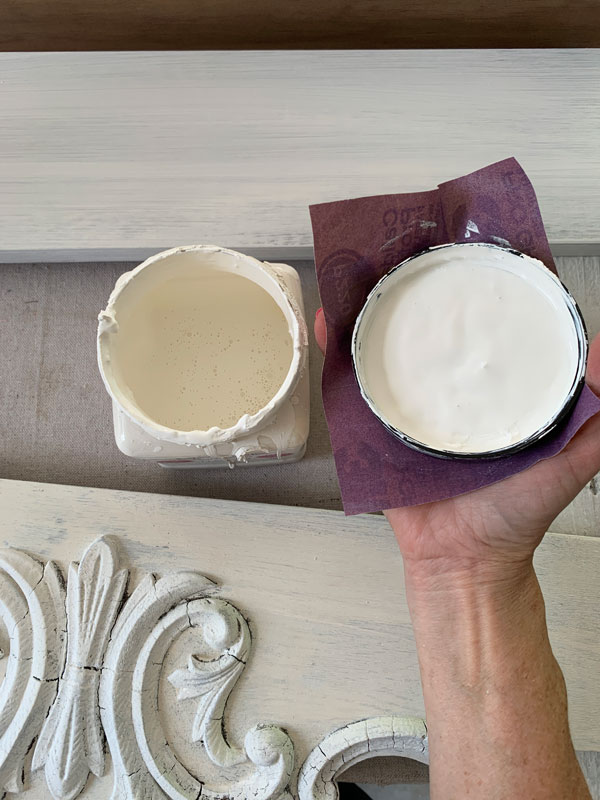
I haven’t tried it on a jar of pickles yet, but I bet it works!
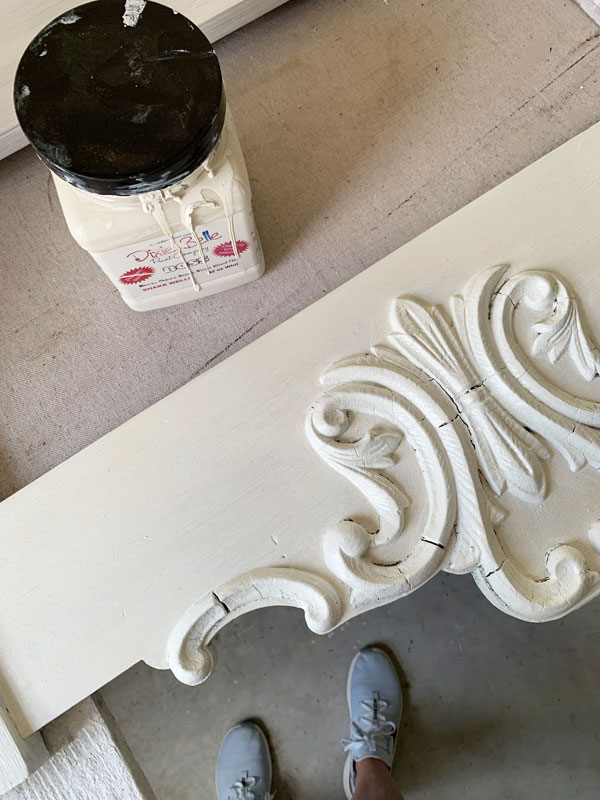
Once my BOSS had plenty of time to cure, I gave it two coats of Cotton.
I attached the shelf the same way as I attached shelf #1, and then I was ready to sand.
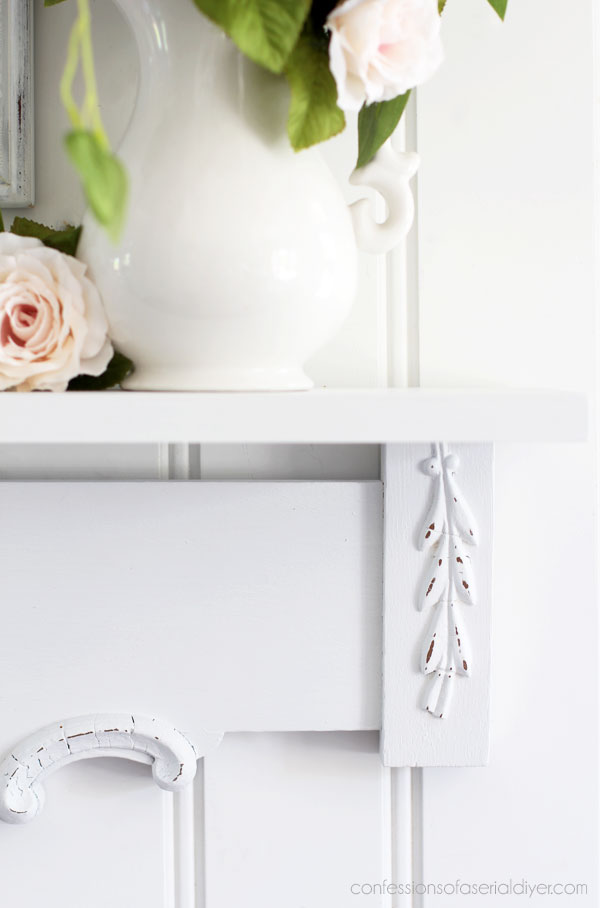
I used 220 grit sandpaper wrapped around an old sanding block to highlight all those gorgeous carved details!
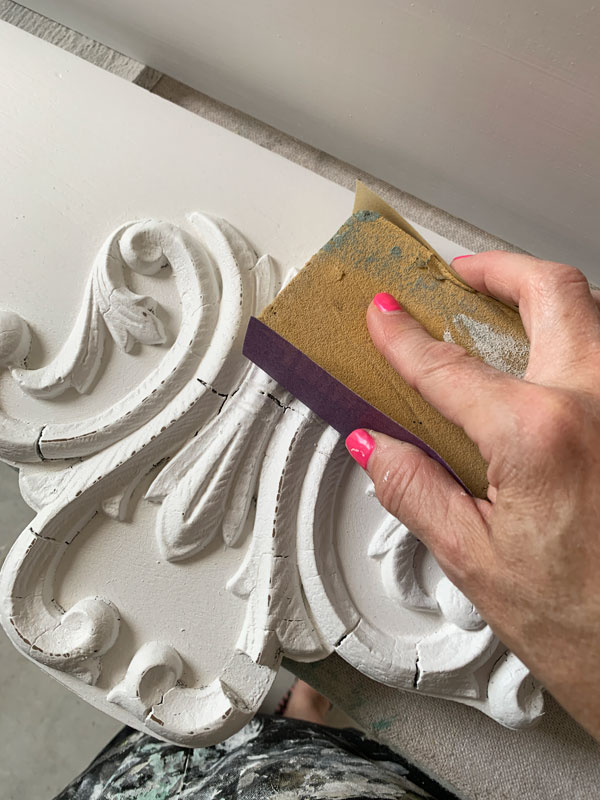
I sealed this one with Best Dang Wax in Clear also. You could definitely use Clear Coat as well…you would just have to be sure the liquid didn’t pool in any of those curvy parts. I already had my wax out for the project I’m working on for Thursday.
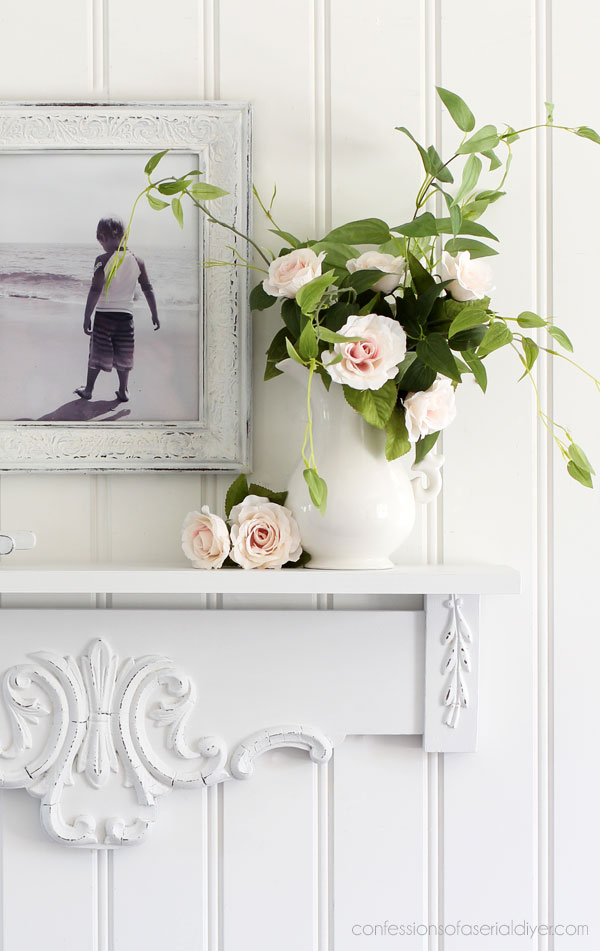
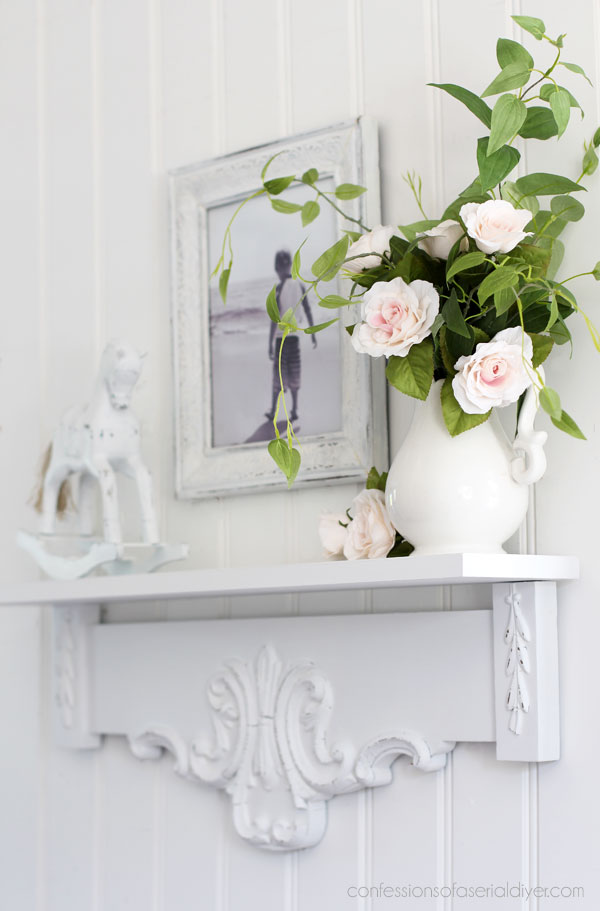
The Result
And here is how shelf #2 turned out:
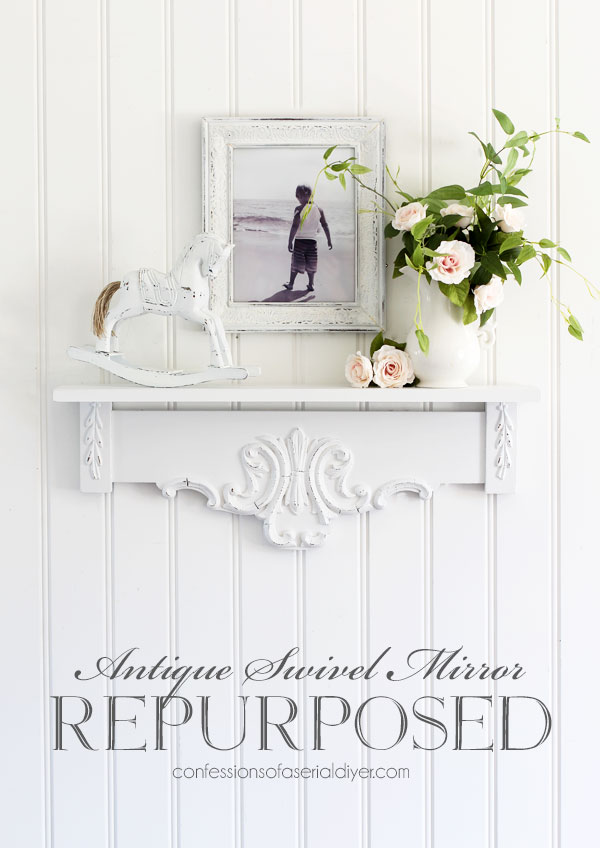
I’ve already been looking for a place to hang this one!
These gorgeous details get me every time.
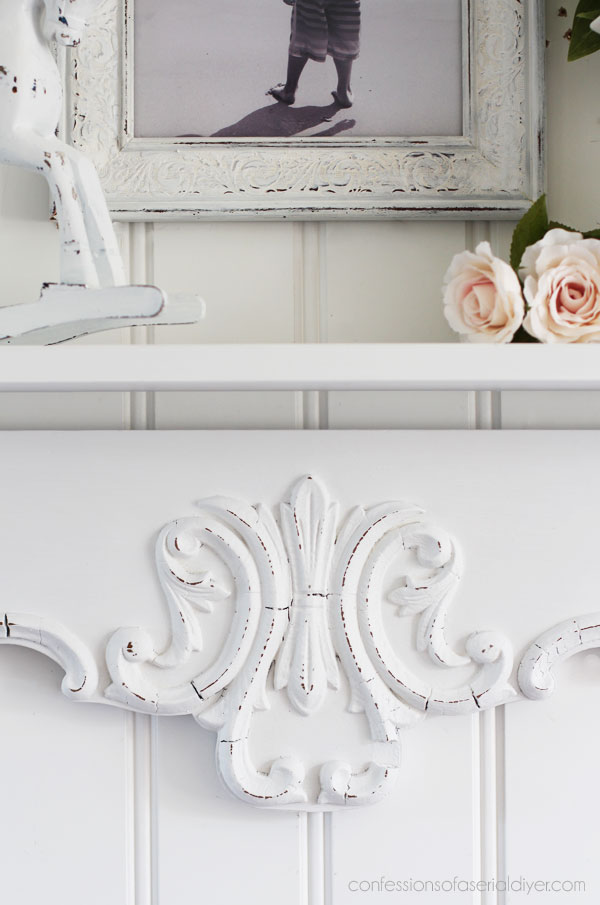
Can you see that the details are cracked in several areas and a piece is even missing altogether? I love that they tell the story of this piece!

And that is how you can repurpose an old swivel mirror! Well, I didn’t actually do anything with the mirror part yet, but I will! 🙂
Don’t go anywhere just yet though! My friends have four more fantastic Trash-to-Treasure makeovers for you today!
I’ll be back next time sharing how I repurposed these frames plus two more!
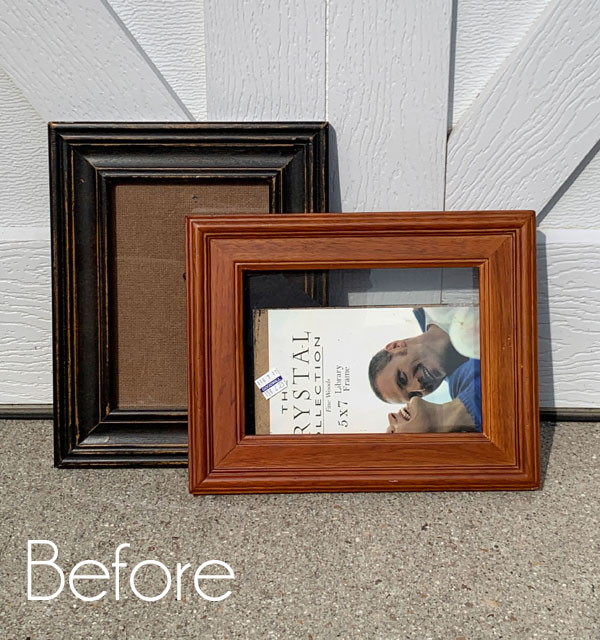
Update! You won’t want to miss what I’ve done with these! See them HERE now!
XOXO,
![]()
Don’t Miss a Thing!
If you like what you see, there are several ways to follow along!
Email * Instagram * Facebook * Pinterest * Twitter


")


Cara says
I love seeing your visions come to life. You are very talented in breathing new life into old pieces. Thank you for your inspiration.
Christy says
Thank you so much, Cara! I am so thrilled to hear you enjoy what I share! XOXO
Larissa ~ Prodigal Pieces says
What a beautiful save, Christy! Both make such a delightful statement. Bravo!
Christy says
Thank you so much, my friend! XOXO
Denise - salvagedinspirations.com says
omgosh, I need to try your sandpaper trick. I use a dish glove which works fab… except on Slick Stick! I have to pry that sucker open…lol. Brilliant upcycle my friend. Both are gorgeous! XOXO
Christy says
Yes!! It works incredibly well! I keep a round sandpaper disc in my painting apron at all times lol! Thank you so much, my sweet friend! XOXO
Christina says
Love these little shelves! Beautiful transformation and so creative! Love the colors you used also! I’m sure your husband has forgiven you about using the wood.
Christy says
Thank you, Christina! And yes, my hubby is especially gracious when I steal his supplies lol! XOXO
Teresa says
I tend to agree with your husband. The grain of wood is special. Do you paint everything?
Christy says
It was really nice wood, but he actually bought it for our pantry project, so it would have been painted also. He chose the pricier wood because it had no knots. I do tend to paint anything that sits still long enough ha ha, but occasionally, I do come across a beautiful grain that I just cannot paint! Here’s one you might enjoy: https://www.confessionsofaserialdiyer.com/30-thrift-store-dressing-table-makeover/ XOXO
Mary Kaiser says
Wow both of them turned out very well. I especially like the 2nd one with all that old charm, I would find a place for it in my home. So what are you going to do with the actual mirror? I am sure you’ll do something with it. Maybe you should offer it up to your husband to make up for using his wood, LOL! Your husband really should know better to leave wood laying around for you to use, silly! Both shelves turned out amazing, let your husband know he can buy back the wood at your booth. LOL
Christy says
Thank you so much, Mary! I am going to try hard to keep that second one! And my hubby really is the best…he was just trying to make me feel bad, but he is very forgiving when I steal his supplies ha ha! XOXO
Denise Cox says
The second one is my favorite!!
Christy says
Mine too! I’m trying really hard to find a home for here!! XOXO
Corinne Powley says
Amazing, ALL of your projects !!! Do you have a book out?
Christy says
I appreciate that so much, Corrine! Thank you! I do not have a book, but I should really do that! XOXO
Cecilia from Georgia says
You are so imaginative! Love both shelves; sorry about the wood(snooze you lose!) Have a great week, my friend!
Christy says
Aww thank you, Cecilia! And yep ha ha…he was a good sport about it! Enjoy your week too! XOXO
Mandy says
I love this! Do you know how many big antique mirrors I have?! LoL
Your makeovers always inspire me.
Christy says
Oh yay! Thank you, Mandy! I too have a couple more that I have my eyes on now ha ha! XOXO
Janice Holt says
Well only you could see the vision of 2 shelves out of this mirror. Great job as usual.
Christy says
Aww thank you so much, Janice! XOXO
Marcie Lovett says
Never would have guessed! They’re lovely and useful, my favorite combination. Here’s another tip for stuck paint lids: Cover the top of the jar with plastic wrap before screwing on the lid. It creates a boundary between any spilled paint and the threads on the lid. You also can coat the outside of the jar threads with petroleum jelly, but I’ve never tried it because I’m sure I would end up getting it in the paint somehow.
Christy says
Thank you, Marcie!! Those are great tips too! XOXO
Constance Colvin says
You’re the maestro! 😀
Christy says
You are the sweetest, Connie! Thank you!! XOXO
Lizzy says
Really pretty AND useful!
Christy says
Thank you, Lizzy!! Gotta love pretty pieces that are also functional! XOXO
Ellen Shook says
I enjoyed this as always. The only complaint I ever have about this paint is trying to get the lids off once the paint is opened. I have a jar opener that is under-mounted to a kitchen cabinet which grips the top with metal teeth, and that will usually work. But I have figured out a method to keep it from being so gloppy. I bought a bottle of mineral oil and the first thing I do when I open a jar is to pour a bit into the lid, wipe most of it out with a paper towel, then run that same oily towel around the rim of the jar. When I am done with the paint, I clean it off the same way, and put it away. That oil which stays only on the jar has worked like a charm!
Christy says
Thank you, Ellen! And thank you for sharing a great tip! If you forget to do to that…sandpaper lol! XOXO
Petra says
Love shelves – yours are adorable and a great way to get two new pieces out of one piece (the mirror) 🙂 I wonder what you’ll do with that mirror down the track!!!
Christy says
Thank you, Petra! I was so excited to get two great pieces out of this. I will eventually do something with the mirror, and I also kept the two side pieces that I cut off, although I’m not sure what I’ll do with those ha ha! XOXO
Michele M. says
WOW!!!!! They look awesome!!!! You did a fabulous job with these two, Christy. Really looks fantastic!!!
PS: Sorry about using your husband’s stash of good wood. Yikes.
Christy says
Thank you so much, Michele! And no worries! He was very cool about it! XOXO
Nancy @ Artsy Chicks Rule says
Wow, those are both stunning!! Such a beautiful use of that old mirror! Love them both! xo
Christy says
Thank you so much, my friend! I just loved the details on this mirror and was super bummed when it was too heavy for the dresser it came with. I’m so glad I was able to use it after all! XOXO
Jen @ Girl in the Garage says
Awesome job, Christy! I really love the curvy details on the second one! xo
Christy says
Thank you, my sweet friend! I’m trying really hard to find a spot for that one LOL! XOXO
Rose Lefebvre says
Great idea! They both look good! Love this repurpose!
Christy says
Thanks so much, Rose! They were fun to make! XOXO
Becky says
Beautiful! You’re so creative! I like shelf 1, but I love shelf 2!
P.S. Husbands need to learn to hide their private lumber stashes. How are we supposed to know these things? 😁 Any piece I’m particularly fond of, I HIDE. Come on guys, be responsible lumber-owners. 😆 😎
Christy says
Ha ha ha ha!! Yes! Good advice!! Thank you, Becky!! XOXO