I love to create signs and add graphics to my furniture pieces. Today I’m sharing with you how I do it.
There are a lot of ways to add words/graphics to a project with all the awesome cutting machines and fancy stencils circulating out there. When I want to add a little something extra to my pieces, I have to use what I have on hand which sadly, does not include awesome cutting machines or fancy stencils. So, I transfer them old school style.
Transferring to Lighter Surfaces:
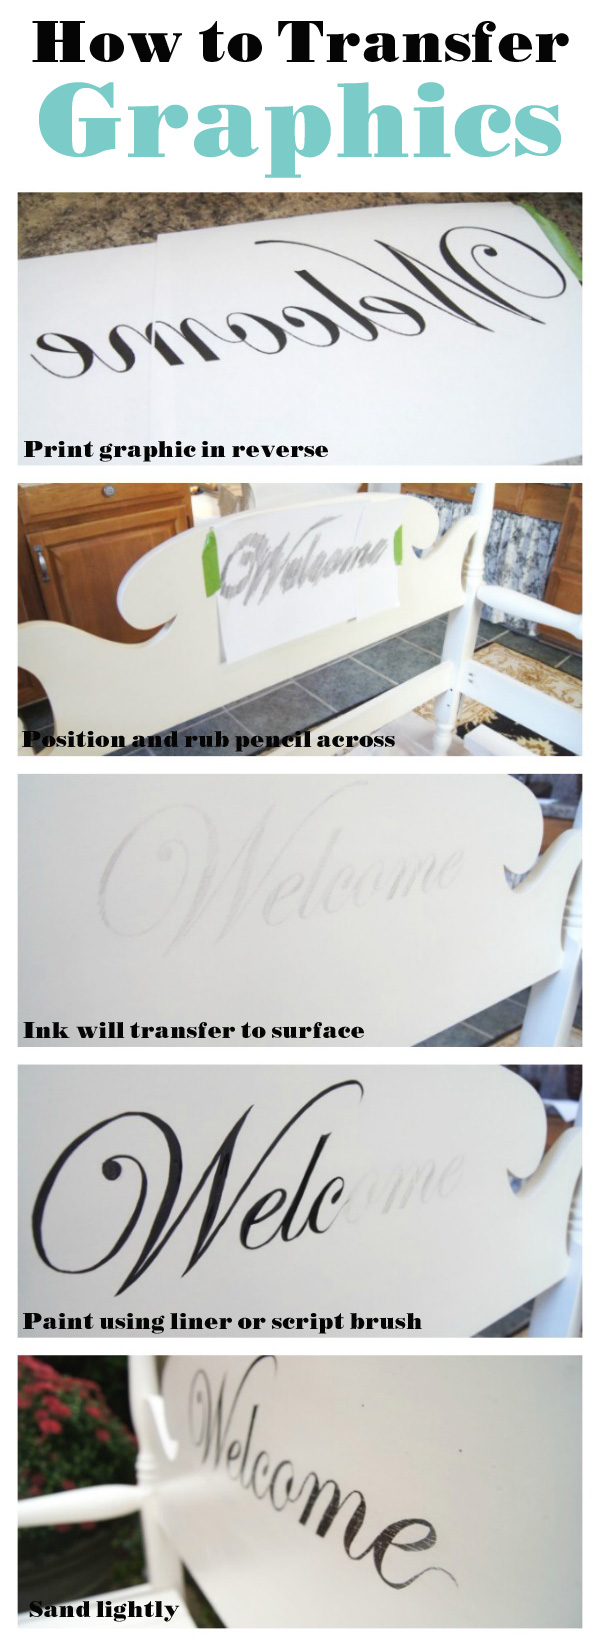
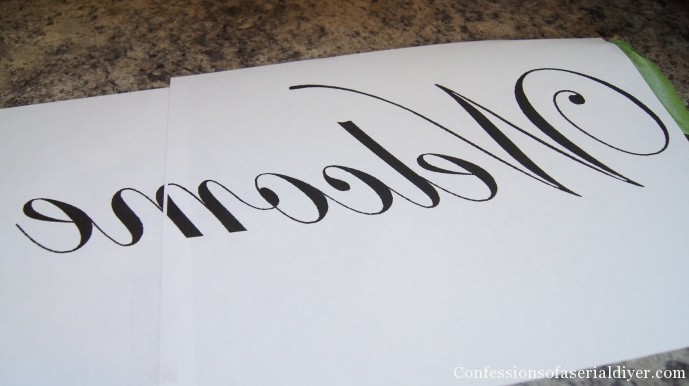
Step 1: Print your graphic in reverse. (If you don’t know how, I show you in this tutorial or scroll down for how to transfer without printing in reverse.) I created this example through “Paint.NET” (a free down-loadable photo editor you can download by visiting www.getpaint.net ) using the font Edwardian Script.
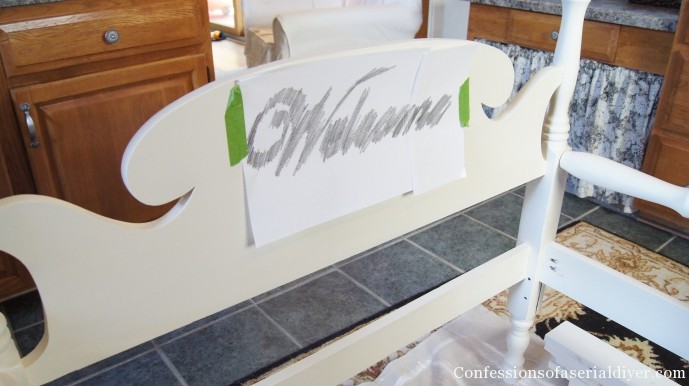
Step 2: Transfer your graphic. Position your graphic face down and use a pencil to shade across the back of your image:
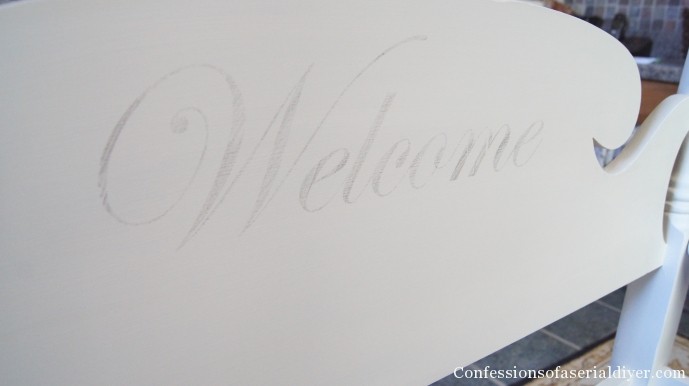
This will transfer the image to your surface:
Step 3: Paint in the graphic. I like to use acrylic paint and a script liner brush
for this step.
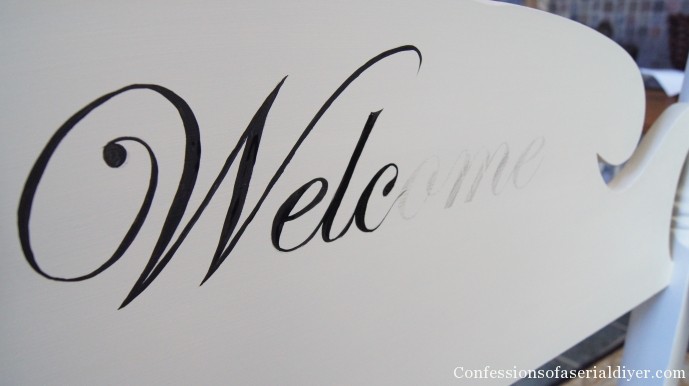
Lightly sanding after will do wonders! It will smooth out all any raised areas. After applying something to seal, it’s all set! I use wax for chalk painted pieces and acrylic spray sealer for signs I’ve painted using latex.
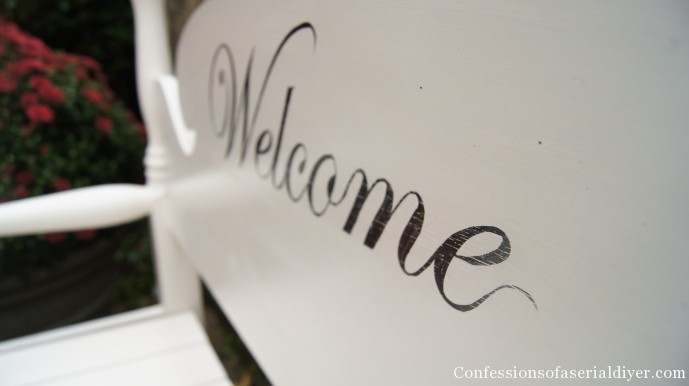
You can see more of how I built this headboard bench here.
To transfer without printing in reverse is a bit more work, but if it’s something small this will work just fine.
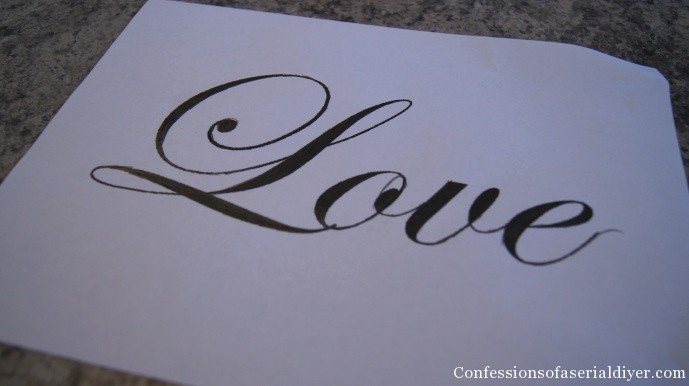
Step 1: Print out your word/s in the font/size you want. Again, I created this example through “paint.NET” (a free down-loadable photo editor) using the font Edwardian Script.
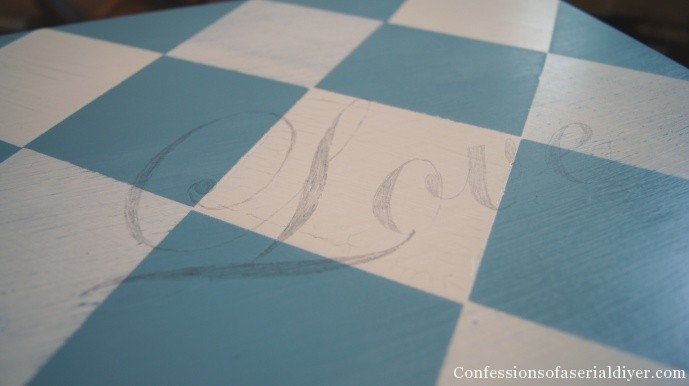
Step 2: Turn your paper over and color in the lines with pencil.
Be sure to stay in the lines so it transfers nicely.

Step 2: Position your graphic on your surface.
Flip your paper over and center your word/s on your surface. Color over the words on the front in pencil. For this part, you don’t have to be neat about it.

Voila! Your beautiful letters have been transferred!
Step 4: Paint.
Easier said than done when you’re working with a font like this, but just take your time using a small thin paintbrush. I use a script liner. Try to paint in long smooth strokes.
I use acrylic paint for the letters.

I added a coat of clear wax to finish it off.

You can see more of this little $5 Yard sale table makeover here.
Transferring graphics to a dark surface:
- Print graphic right side up.
- Rub chalk across the back of your graphic.
- Position in place and trace the outline of your graphics with a pencil on the front side. (As seen here and here.)
- Paint in the lines.
Happy Transferring!
XO,
![]()
Don’t Miss a Thing!
If you like what you see, there are several ways to follow along!
Email * Facebook * Pinterest * Hometalk * Twitter * Instagram


cara molluranda says
You keep me going woman…loving your unique, one of a kind touches to your Home. Miss & live you 🙂
Christy K. James says
Awe, love you too Sunshine:)
Cristina@remodelandolacasa says
Hey Christy, I love it! That’s the usual way I transfer letters, don’t have those fancy machines either, to make matters worse my printer stopped working, uhggg! The bath sign is cute too! You made me laugh with your “look-natural” pic 🙂 I do that a lot when I’m with my sisters! Yours is a beautiful pic and yes it looks natural!
Jana says
Christy,
Really like both signs but especially love the Bath one. I don’t have one of those machines either so I have to improvise quite often with letters when I’m painting.
Christy K. James says
I think if I broke down and bought one, I would think it more bother than its worth!
Anja says
Old school is the best! You don’t need fancy vinyl stuff to make the most stunning pieces. Even though I did enjoy using a projector for the lettering of my basement bar =)
I am your newest follower, by the way!
Anja @ cocalores.blogspot.com
Christy K. James says
I agree:) Thanks for following! That always makes my day!!
Suzie Hobgood says
Just found your blog and really enjoying it. Wonderful ideas!
Christy K. James says
Thanks, Suzie! I’m so glad you’re here!!! 🙂
JaneEllen says
I love your blog and the projects you do, will be back many times. You sure inspire me. I had to print out how to transfer images as it seems to be rather difficult hurdle for me, duh, go figure. At least now I have a much better idea how to do it. Your tutorial made it much clearer for me. I have learned so much from so many excellent bloggers like yourself, thank you. I’m a little slower than some of you, maybe cause I’m just learning about so many techniques, there’s so much to learn. My head is full constantly of all the incredible projects I see on here. Who wants to clean house, do laundry when there are so many things we can make. Happy weekend
Christy K. James says
I agree, JaneEllen! My garage is filled with projects waiting to be completed…I’d be out there all day if I had no concern for personal hygiene ha ha! I’m so glad to have you here! 🙂
Rosalba Qumsieh says
Hi my name is Rosalba I like to decorate my home I just found your blog couple of days ago I really enjoy it you are great very talented and funny; there is nothing that I don’t like from your blog. Thank you for taking the time to explain everything about every single of your proyects they are super
RQ
Christy K. James says
Thanks so much for your very sweet comment, Rosalba! You made my night!! 🙂
karen says
I love this tutorial, so perfect every time. I downloaded Paint.net. Now I have to figure out how to use it!
Christy K. James says
This makes adding letters to something so much easier! It took me a while to get the hang of paint.net, but now I use it for collages and everything. I just discovered block posters.com. You’ll love that too. You can make your image as big as you want. It’s so easy and free…our favorite 🙂
Debbie says
Love your transfers. I was wondering if you could use the paint pens for this instead of painting it by hand. I would make a big mess of it if I had to try to paint in the letters with a brush. I think if I used a paint pen it would be more like coloring. Is there any reason you do not use the paint pen? Would it make a difference that I am not thinking of? Please let me know what you think about this.
Thank you
Debbie
Christy K. James says
I’ve seen beautiful pieces done with pens, but oddly, I am very slopping with them. I do think the paint gives better coverage and I like the way the tip of a script liner brush can create fine details. I’ve also found that as the paint builds up just a bit on my brush as I’m working on a project, it stiffens a bit and I have more control over it. I would suggest trying both ways on a test piece first to see what works best for you. Good luck 🙂
Jackie Brown says
Thank you for the tutorial! I love your Bath sign btw. I saw it on Gina’s site too and loved it! I had to make my own as well,lol. Here the link if you wanna check it out!!! http://diyneophyte.wordpress.com/2014/05/21/hallway-sign/
Christy K. James says
Thanks, Jackie! She was my inspiration too! 🙂
Jackie Brown says
Oops, I’m sorry not Gina, it’s Missy’s site, My Cottage Charm.
Lorna Howe says
I Love your site!
You’re SO CREATIVE, you inspire me 🙂
I’m wondering if you use a special type of paper to print your words on for transferring onto furniture etc?
Christy K. James says
Thanks so much, Lorna! That sweet comment made my day! I use plain old computer paper 🙂
Joyce @ Quilted Nest says
I cannot find paint.net try as I might. (or paint.NET). Can you help? Thanks!
Christy K. James says
Sure…this will take you there: http://download.cnet.com/Paint-NET/3000-2192_4-10338146.html
Linda J says
I have been following you for a while and truly benefit and enjoy your blog. I just wanted to say thanks for this post. I don’t have the luxury of the costly machines and no chance of winning the lottery! I’m on my way to transfer something! Merry Christmas and/or Happy Holidays!
Christy K. James says
I hope this worked well for you! I don’t own an expensive machine either so this is perfect. Thanks so much for your sweet comment…it is so appreciated! Thanks for following along. XOXO
Rita Spittler says
I know I’m really late in responding here. Loving your site. You inspire me on so many levels! Quick question. With the pencil transfer method can carbon paper be used instead of the pencil lead on the back? Maybe it’s messy. Or maybe they don’t even make it anymore LOL. Just curious.
Christy K. James says
Thanks, Rita! Carbon paper would work great if you don’t mind tracing the letters. However, if your graphic has a lot of detail, that may be a lot of work. You would need to trace as perfectly as possible to get a pretty transfer.
Jodie M says
Love Love your creative ideas. Just wondering what type of printer you use for this transfer method. I seem to remember that it does make a difference whether you use a laser or an inkjet. Looking forward to more of your exciting ‘cheap’ ideas, as I am cheap too.
Christy K. James says
Thanks, Jodie! I have an inkjet printer and it works fine. Sometimes when burnishing the backside with a pencil, I have to go over it twice in two different directions to get a good visible transfer. And I am definitely into cheap! 🙂
Deena says
Loving this technique. I tried it on my chalkboard and it looks so much better than freehand. I used Word to make my letters in an arch pattern. Thanks for sharing. I’ll be trying it on a sign next.
Christy K. James says
That’s great! I bet it looks terrific on your chalkboard! I got a silhouette machine for Christmas thinking that I can just use cut vinyl as a stencil for my graphics from now on, but the vinyl is so flimsy that it really is difficult to work with. I think I’ll be sticking with this method that has served me very well for a long time! XO
Little Miss Maggie says
Christy, what type of printer do you use, an inkjet or a laser? I love your signs.
Christy K. James says
Thank you! I have an inkjet printer. 🙂
Elsy Kay says
Hi Christy….
Love the wood placque flag you’ve done – it is absolutely beautiful. I want to do that as well, though need one point of clarification. Are you saying that when you burnish onto the wood, that the ink is transferring to the piece? That is, no special paper, no special ink, no carbon paper, you basically are just pressing the ink from the paper to the project, yes?
Christy K. James says
Thanks, Elsy! Yes, the ink should transfer right to the wood from the paper. Then you can paint it in.
Sherry Eason says
When I transfer and paint my letters on it always seem to smear the letters with the wax. What is the recommended time to wait before waxing? It really seems dry after a couple of hours but I must be doing something wrong. Please help. I would appreciate it so much..Thanks
Christy says
DO you sand a little before waxing? That knocks the paint down just a bit and makes the surface smooth. I usually wait several hours before attempting to sand with 220-320 grit paper. I have had issues with the paint smearing when sanding, but not when applying wax. Waiting a bit longer usually helps that. I’m not sure what would cause smearing with the wax.
Christy K. James says
Thanks for the shout out, Karen! That turned out SO pretty!! I love how you mixed up the knobs! I’ve had some projects that I’ve finished and thought, “Wow, I love it!” and then after several days, it wears on me and I’m over it lol! This little french beauty turned out great 🙂