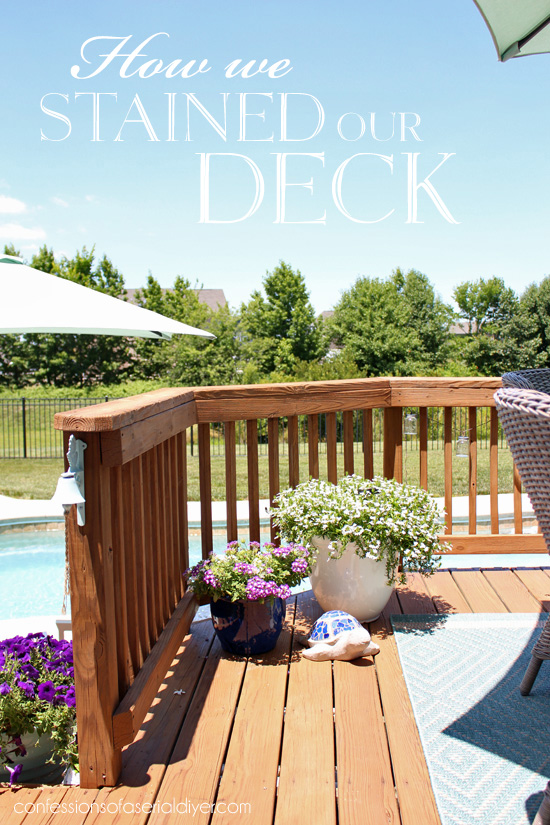
Hello fellow DIYers! After sharing our new and improved deck space last week, several of you mentioned you would be interested in seeing how we stained our deck. Well, lucky friends, here is the super exciting deck staining post!
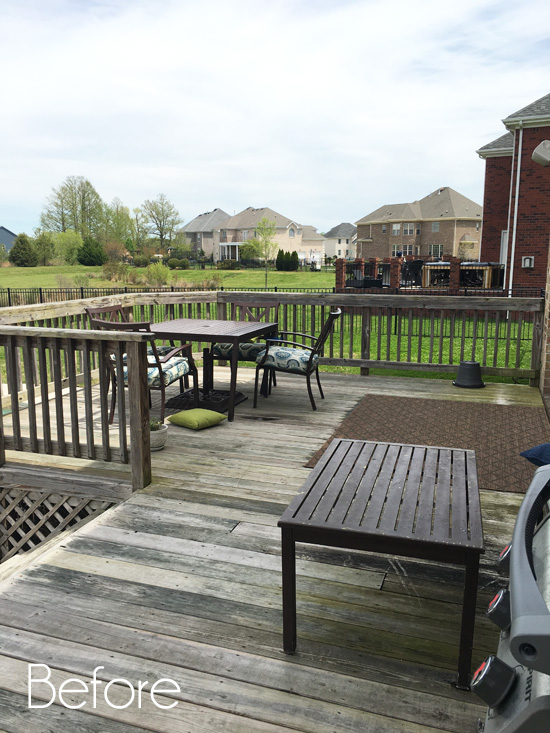
First let’s look take another quick look back and see how this deck looked just a couple of months ago:
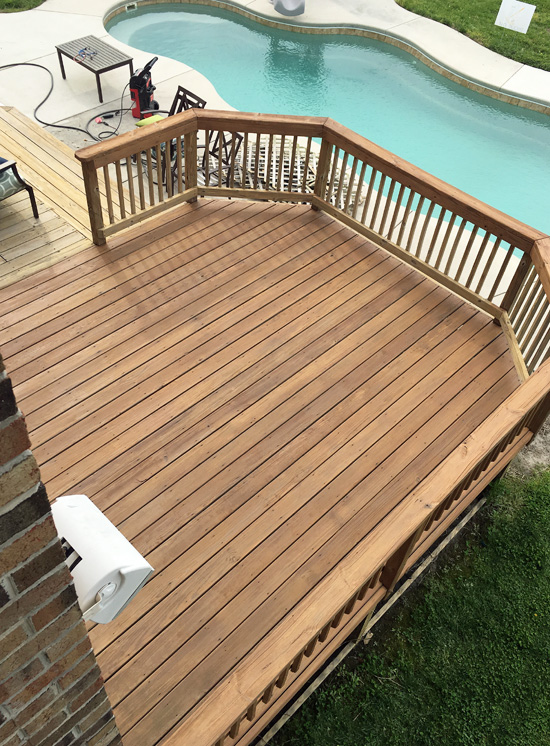
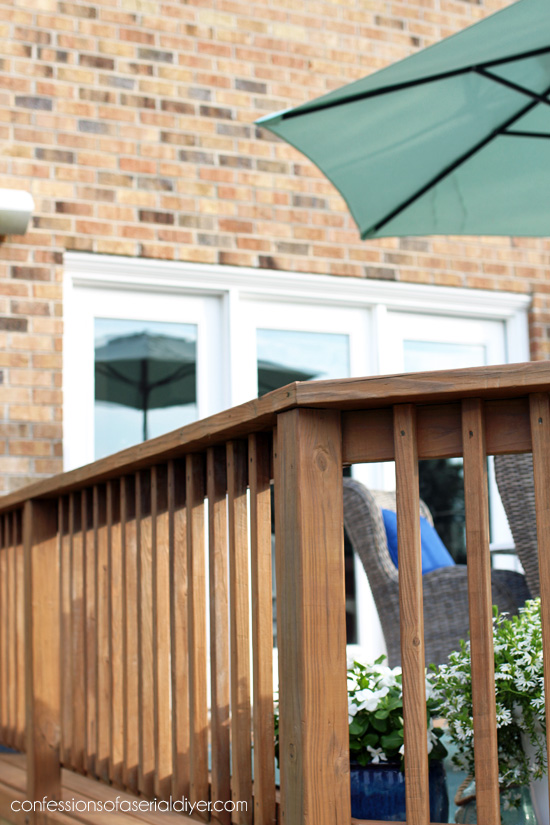
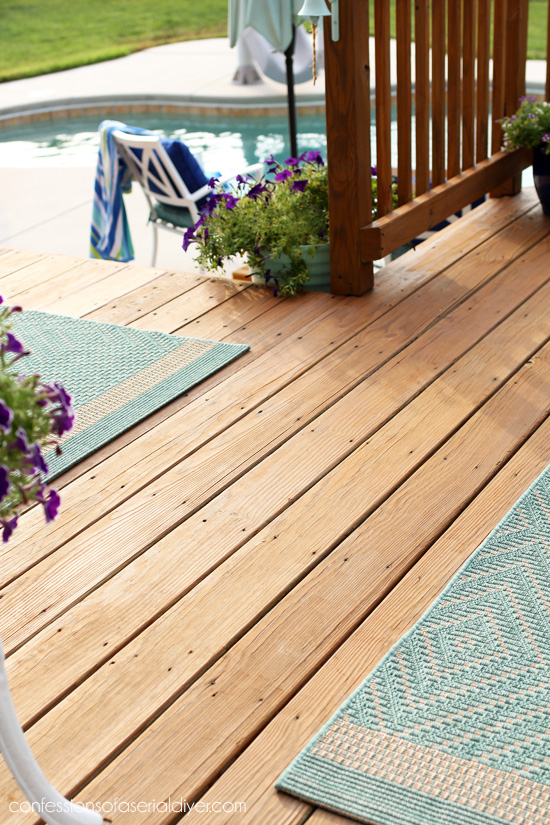
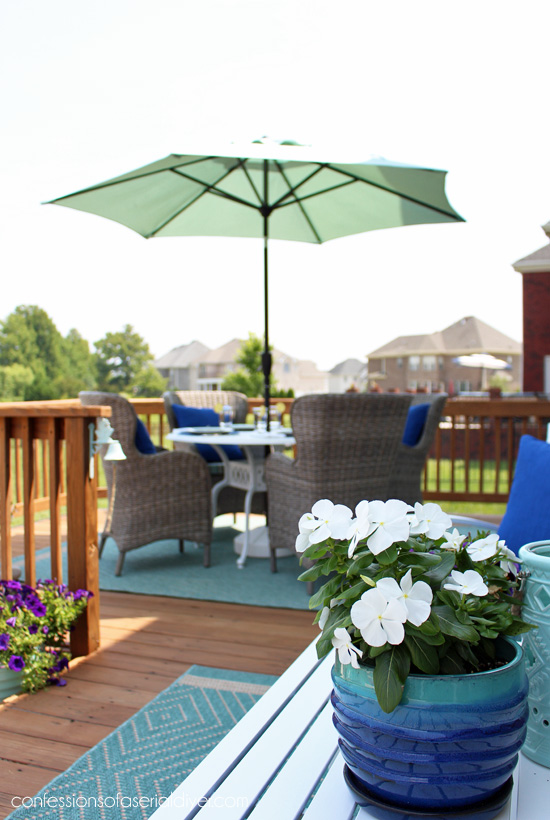
And here is how it looks today:
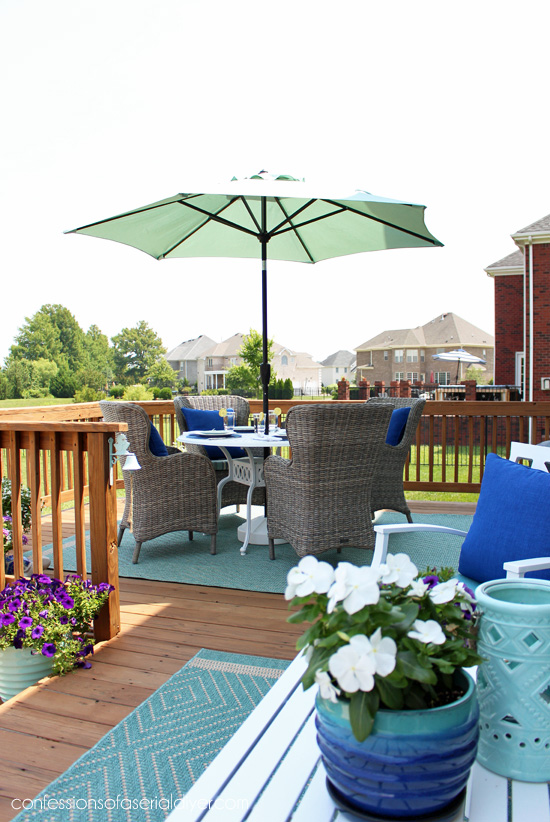
Huge improvement! Of course the new and updated patio furniture and decor does wonders ( I shared those HERE and HERE if you missed those posts.), but none of it would look as nice if we hadn’t addressed that nasty old deck first!
When we bought our house last Summer, the deck looked like it hadn’t been touched in years, and we knew that would be a project for this year. I’ve included a few affiliate links so you can find the products I used.
So here is what we used to get our deck back in shape:
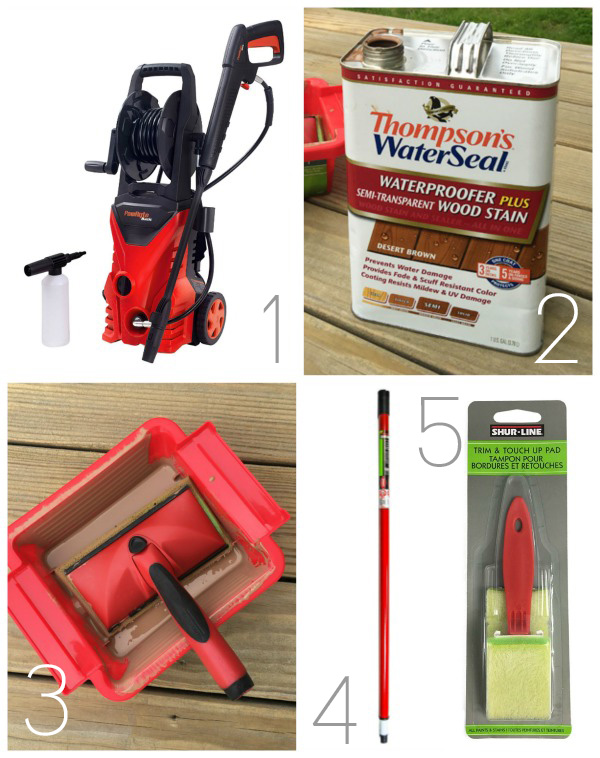
1. Pressure washer. We purchased ours several years ago for $99 but it is no longer available for sale. This one I linked to is comparable at the same price and gets great reviews.
2. Thompson’s WaterSeal Waterproofer plus Semi-Transparent Wood Stain in Desert Brown…I found this color at Walmart. (Warning: this product did not get great reviews!)
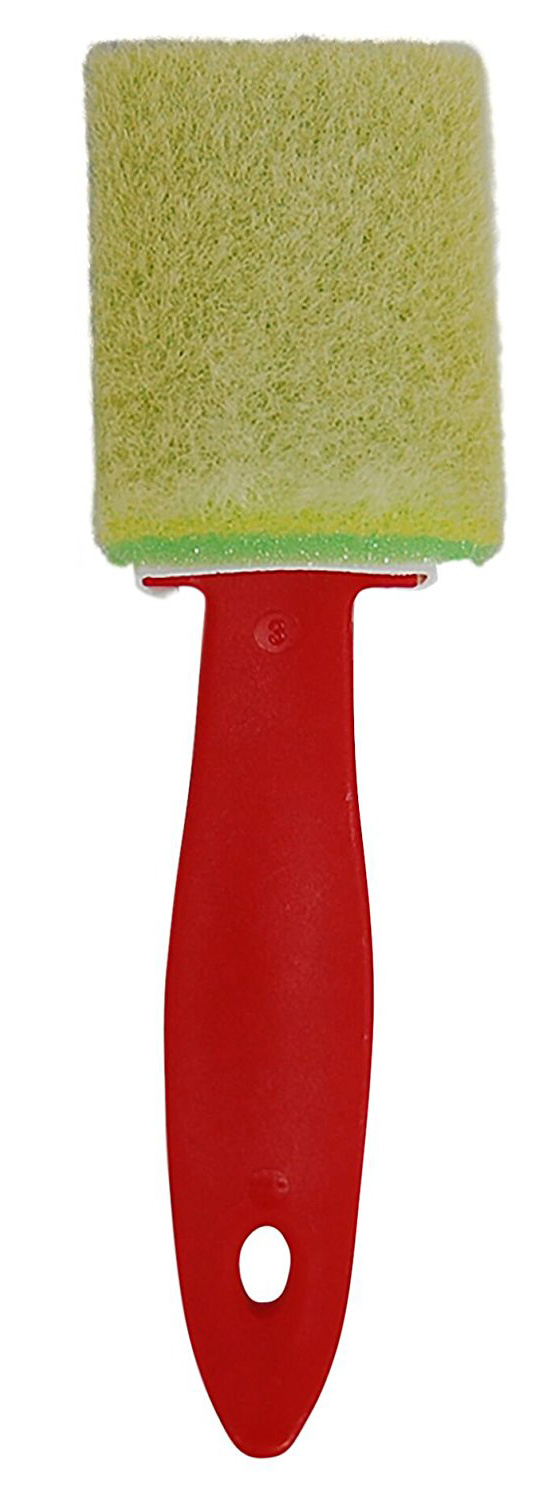
3. Shur-line paint pad and tray, plus one refill pad.
4. Extension Pole I used my old paint roller extension pole…they should be universal if you already have one.
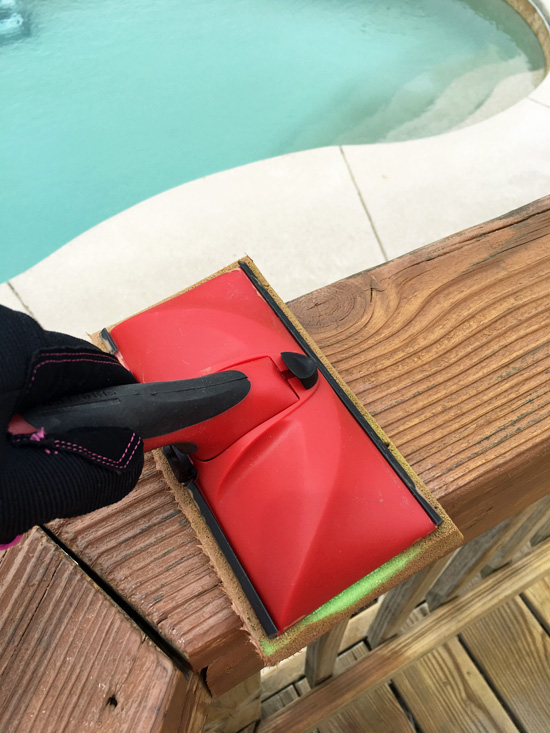
5. Shur-line Trim and Touch up Pad (2) (These worked fantastic on all those spindles.)
We started by giving the deck a good cleaning with our pressure washer. There is a compartment for adding a cleaning solution, but we just used plain water.
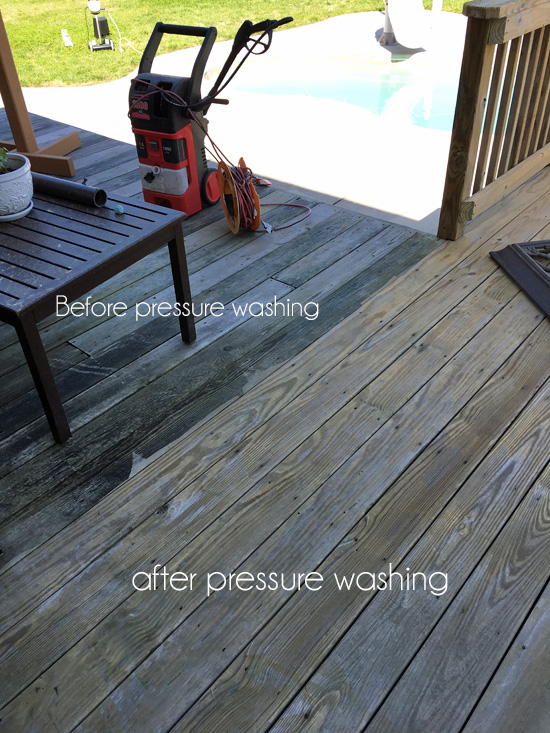
Big difference! Pressure washing basically took it back to the original finish. Here is what our deck looked like after it had dried:
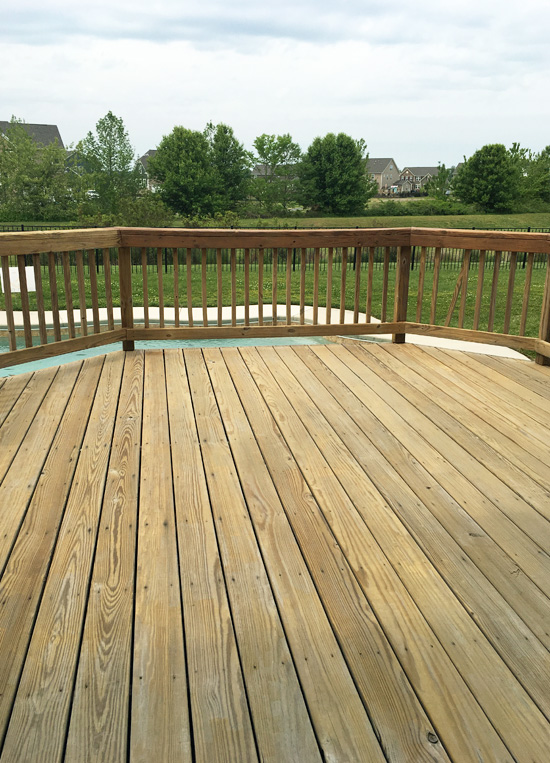
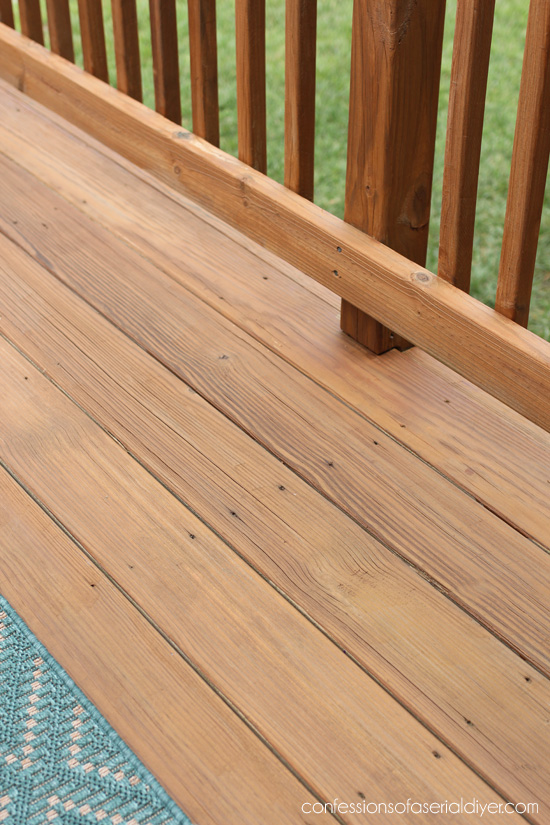
And up close:
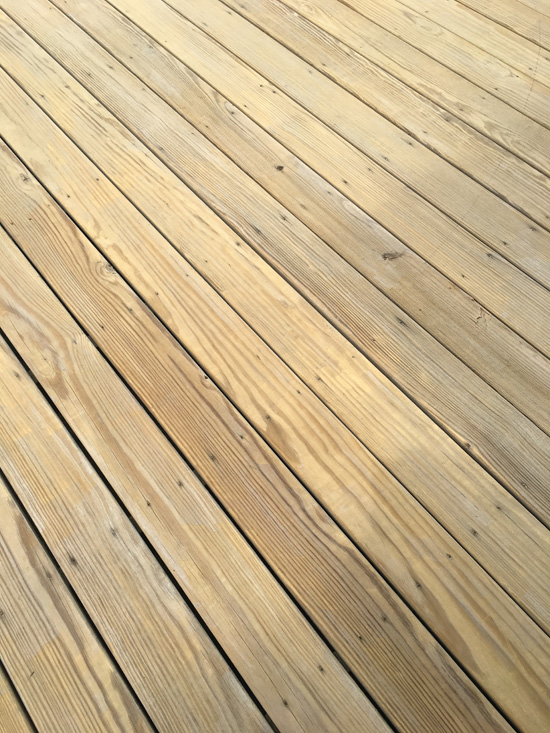
Almost like new, right?
Time for stain! Your deck surface should be completely dry for at least 48 hours before staining. (If you are staining a brand new deck, you will want to wait around six weeks for the new wood to thoroughly dry so it takes the stain properly.)
When we finally got a clear enough weekend to start the staining process, I gave the deck a good sweeping first to remove any debris.
The stain I chose to use is Thompson’s Waterseal Waterproofer plus Semi-Transparent Wood Stain in Desert Brown:
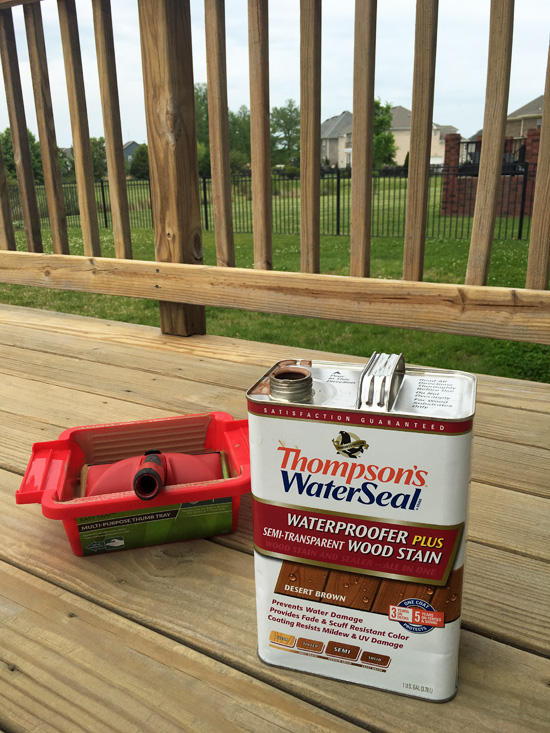
They have four different coverages: clear, tinted, semi-transparent, and solid. We decided to go with the semi-transparent coverage. (No affiliation.)
HUGE FYI: In full disclosure, this stain did not get great reviews, and of course it was too late when I discovered that. I figured they have been in business for years so it has to be good stuff, right? I guess I will get to see for myself how this product will hold up. For now it looks fantastic. I will say that our last deck also needed to be touched up every year and we used a different product. I will definitely come back and report how it has held up for us!
What I hope will be super helpful from this post are the products I used to apply our stain, like this this pad applicator from Shur-line:

Shur-line sent me several products a couple of years ago and I still had a couple of these that I had never used. I am under NO obligation to rave about their products at all, but they worked fantastically! These are actually intended for paint, but these worked perfectly with the stain as well. They do actually make a version specifically for using on your deck HERE that are a little larger, but I liked the size of the ones I used.
I used this deck pad and one refill to stain all of our deck surfaces except the spindles.
They have a sponge-like surface so they hold quite a bit of stain, helping to give quick coverage to a large area at a time.
I used this smaller version for the spindles:
Each package of these smaller ones comes with a refill pad. I used two packages of them to stain all the spindles on our deck. They worked better than anything else I could think of for tackling that tedious chore.
Then I attached an extension pole to the end of the larger paint pad, and that made quick work of the deck floor:
Thompson’s recomends only using one coat, unless you want a darker look, then you can add a second coat after two hours, but within four hours of applying the first coat. The stain dried really quickly and the next morning, water was beading up all over the surface!
When deciding on a stain color, I wanted something that would tie in nicely with the brick color, and I think this was a great match:
This color went on with almost a purplish hue and had me worried for a minute, but the can warns that it will look different when it dries, and sure enough it did, Whew.
We couldn’t be more pleased with the results!


I can’t speak for how well this stain will hold up, but I guess time will tell. So far, so good!
I hope this was helpful!
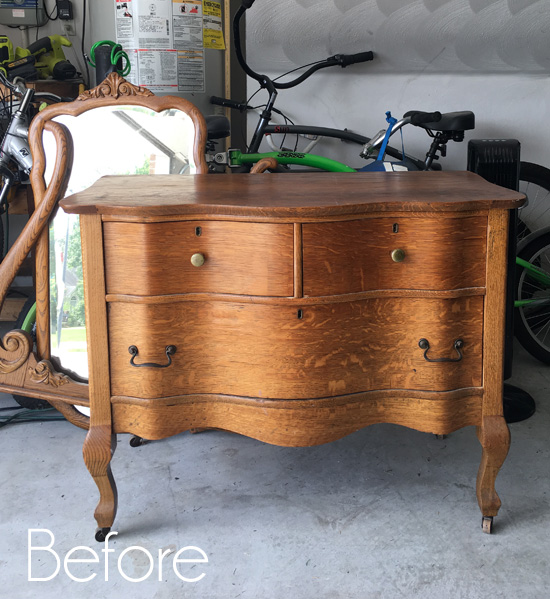
I’ll be back on Thursday with my Furniture Fixer Upper girls sharing this pretty curvy serpentine dresser:
Till then, my friends! 🙂
UPDATE: No need to come back…see how this pretty lady looks now HERE!
XOXO,
![]()
Don’t Miss a Thing!
If you like what you see, there are several ways to follow along!
Email * Facebook * Pinterest * Twitter * Instagram


Cornelia Short says
We are about to stain our deck but we are using a different product, so I will be curious too see how your deck makes it through the summer.
Also, I read that you have too wat at least 4-6 months before you stain any type of new wood whether it be a deck or fence.
I really like your color choice and all your decorations really made your deck look so amazing!
Christy says
Thank you so much, Cornelia! I am curious too about this stain…hoping it holds up well! You really only have to wait until the wood dries out enough to accept the stain which is around 4-8 weeks. If you wait too long, you may have a hard time with your wood accepting the stain. I would hang on to a scrap piece of deckboard and test it on that starting at around four weeks and see how it takes the stain. Good luck with yours! XO
Christina in SW FL says
Wow, Christy, I cannot imagine how much work this was. I hope it was both you and your husband working on it. Staining spindles? EEeek. That’s a LOT of work!! The results speak for themselves though I admit I rather like the weathered grey. 🙂
Enjoy!!
Christy says
I said “we” because my hubby helped just enough to be included ha ha. It was a lot of work, but well worth it. And I too like the weathered grey look, but not the green and black mildew look lol, and once we started pressure washing to clean it, we kind of had to go all the way. XOXO
Becky says
Beautiful! I like your choice! Our house came with huge almost-wrap-around decks (on multiple levels- stairs seem to be the theme of our house!),and all the lattice underneath covering open spaces, all done in an solid “stain” in a crazy red-brown. We repainted in a less-red-but-still-blending shade when it needed repair, but oh the unending surfaces! We left the lattice alone, and the kids and I still put in a VERY long day with rollers and brushes! We’d SO much prefer a semi transparent stain, but no WAY is that job appealing! We’ll live with “campground brown”, thank you! : ) Yours looks wonderful! Good job!
Christy says
Thanks, Becky! I can’t imagine what a job that must have been for you guys! We used a solid stain at our last house, and it did great at covering up all the ugly that was already there. I am liking the more transparent look this time though as well. Glad it is done done done! XOXO
Kimberly says
Christy, how your deck looked after pressure washing only is amazing (considering the before) but the stained finish is wonderful. It has given me hope for some surfaces around my yard, too. Thank you so much for the walk through!
Christy says
Thank you, Kimberly!! XOXO
Robyn Wright says
WOW! Just the pressure washing made it gorgeous! I’m going to try that on my wood privacy fence!
Christy says
I know, right? We almost thought about leaving it that way..it looked brand new!
Rich says
I have owned Deck Renewal systems for 25 years and have cleaned sealed/stained over 15,000 Decks.Thompsons is one of the worst products you can apply it is basically just paraffin (wax) and mineral spirts.last about a year.
Christy says
Thank you for that information, Rich, although it is too late for me…I did update the post to mention that.
MaryJean says
Your backyard and deck are beautiful!
Christy says
Thank you, MaryJean! XOXO
linda Kulchinsky says
Your deck is Beautiful! !!! Where did you get your rugs? I’ve been looking for some and I really like yours!!!!
Christy says
Thank you, Linda! I found them at Target this year! 🙂