Hello amazing friends! I am so thrilled you stopped by today!
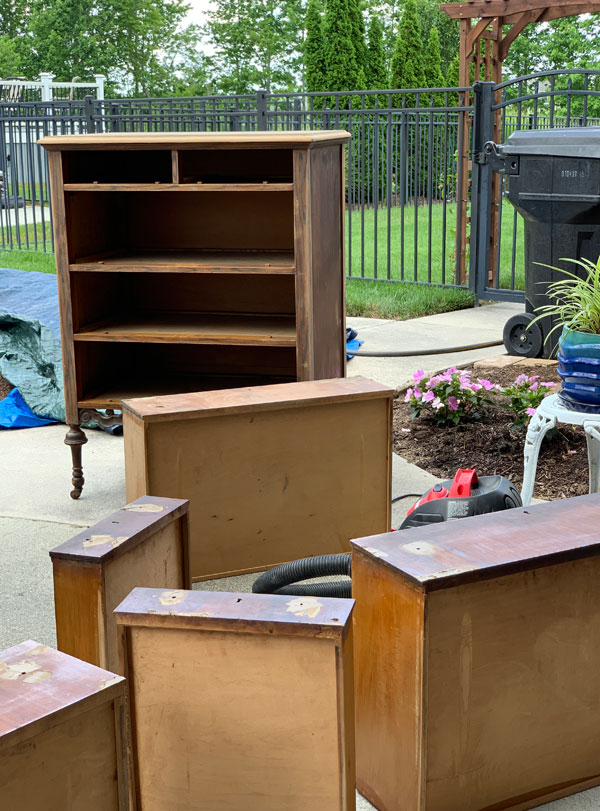
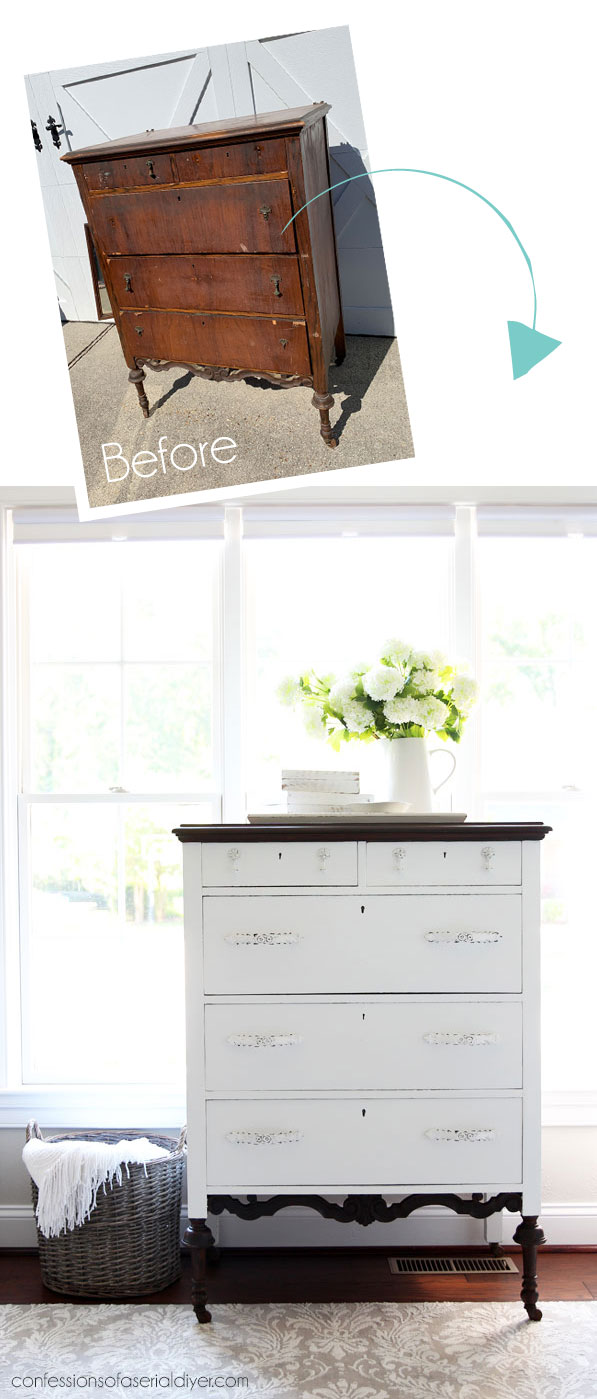
I am diving headfirst into my first piece from my Mother’s Day Haul, this tall antique dresser:
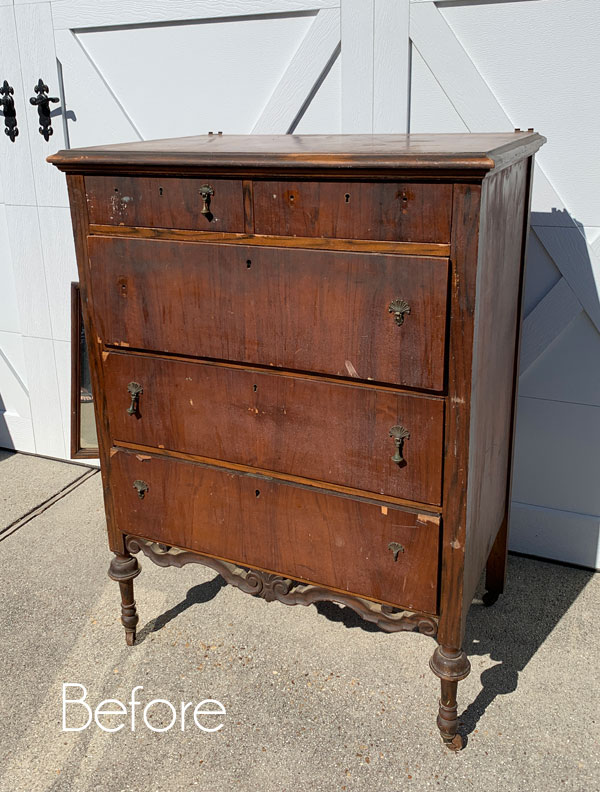
This poor thing was in serious need of TLC and I spent way more time on this than I normally do on my furniture pieces. I’ve included a few affiliate links so you can find the products I love.
Fixing Damaged Veneer
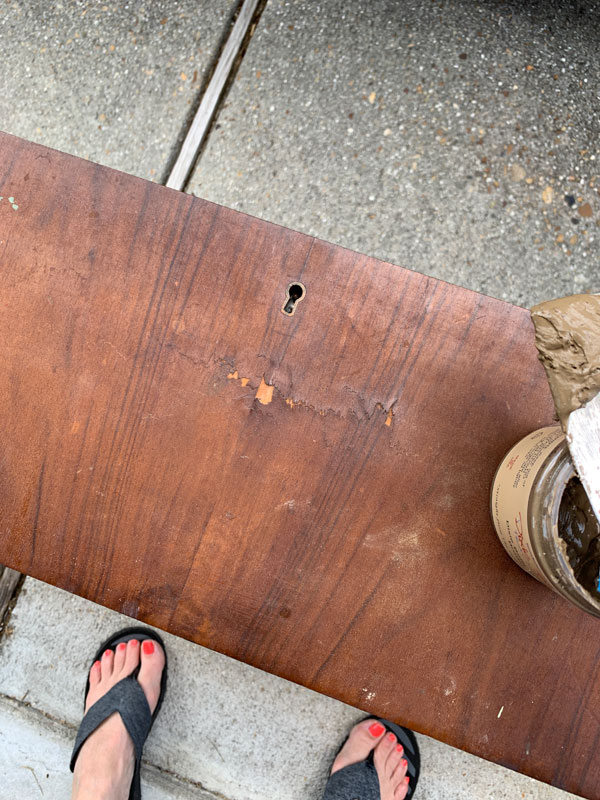
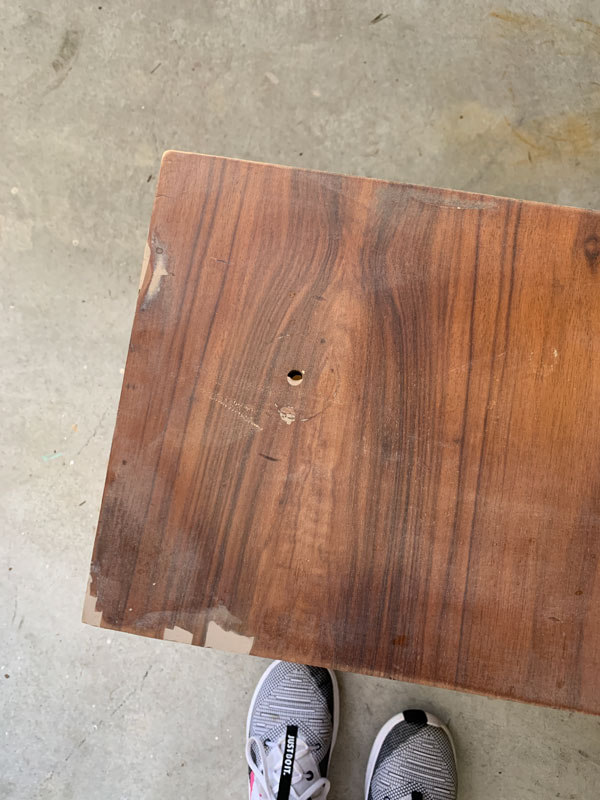
I started with removing the drawers. They were missing veneer in several spots:
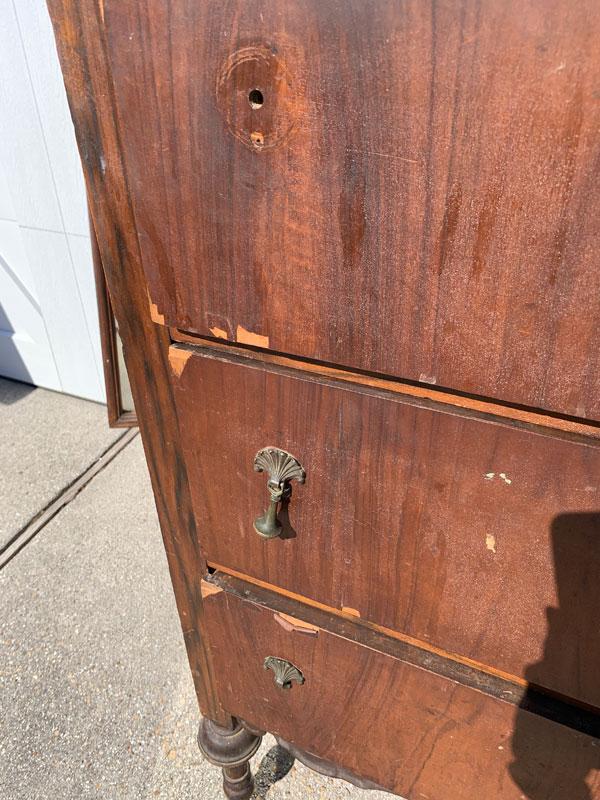
I had two choices here. One, I could soak the veneer off like I did in this post, or two, I could fill those spots with filler. I chose the second option. The veneer was still attached very well, so I applied Dixie Belle Mud in brown with a putty knife to patch those areas.
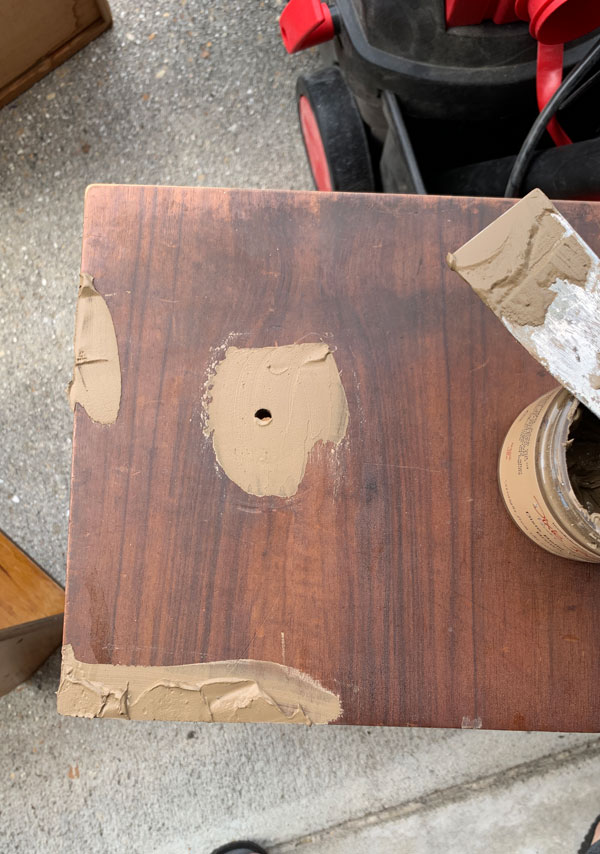
I even had this very questionable area on one of them:
I applied the Mud to that too.
While the Mud was drying, I sanded the top of the dresser with 120 grit sandpaper first, followed by 220 grit sandpaper using my orbital sander:

I rigged it to my shop vac to cut down on the dust. My friend, Kandice, shared that trick ages ago and it really works!
I shared this picture at the end of my last post…my favorite way to spend the weekend!
After the Mud was completely dry, I used my orbital sander to smooth those areas out also, using 220 grit sandpaper. As a test when filling holes, I close my eyes and run my finger across the area to feel if it is smooth. If I can still feel an indent, I reapply the filler/Mud and allow it to dry again. I’ve never had to do it more than twice. After giving a couple of areas a second coat, I was good to go.
Combatting Musty Odor
When I removed the drawers, I got a big whiff of must. It has likely been several years since this dresser has been in use, and that smell would not be unusual for a piece being stored in the garage for many years.
I went straight for the BOSS. It blocks odors, so I used the clear formula this time and brushed it on the entire interior of the dresser:
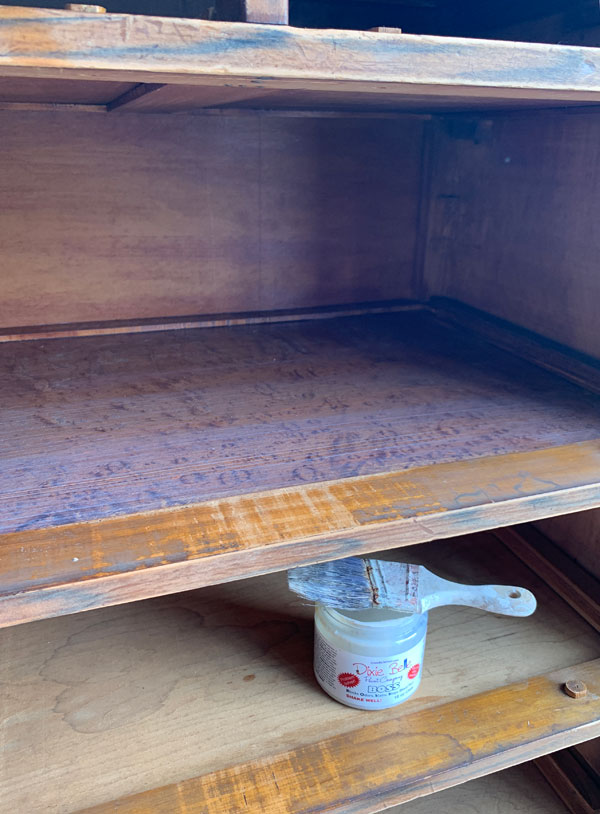
I let that dry overnight and then gave it the sniff test…no more musty smell woohoo! And don’t worry, it dries perfectly clear with a matte finish.
I gave everything on the outside a good cleaning and then moved onto the drawers. They were in need of a good cleaning as well. As I was wiping out the insides, it seemed the musty smell on them was only coming from the thinner pieces of wood that were on the bottoms, so I BOSSed the bottoms of the drawers. Then I used a product called Big Mama’s Butta in the Orange Grove scent (It smells amazing!!) and buffed it into the rest of the drawers, inside and out.
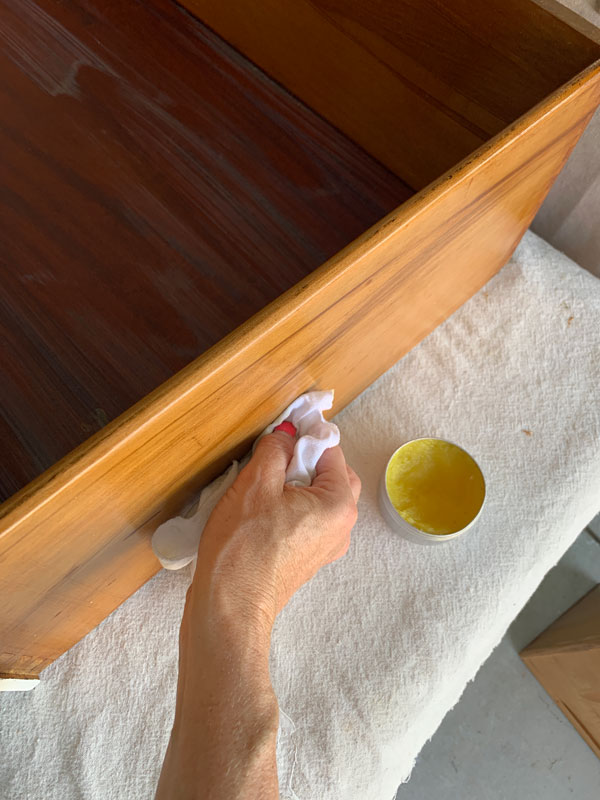
It is like a salve and it rejuvenates and protects the wood. It also leaves a lovely sheen and even better fresh citrus scent! It also comes in a rose scent called Suzanne’s Garden and an unscented formula as well.
Priming for bleed-through
Next, I primed the body of the dresser and the drawer fronts with two coats of BOSS in white, allowing it to dry for several hours in between coats. This is an antique piece, and I don’t like to take chances with bleed-through on older pieces. Plus, because it is white, that’s less coats of paint I will need to use.
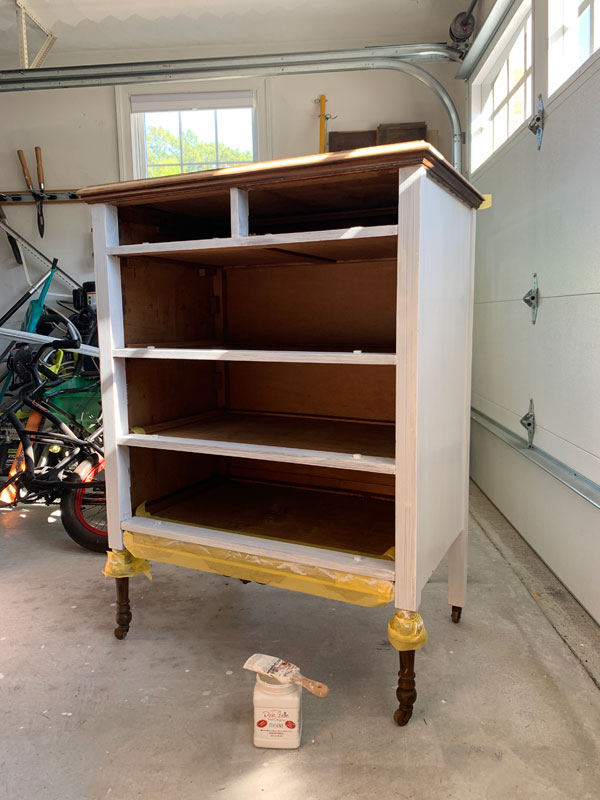
I taped off the legs with FrogTape since I didn’t plan to paint them.
Painting & Sanding
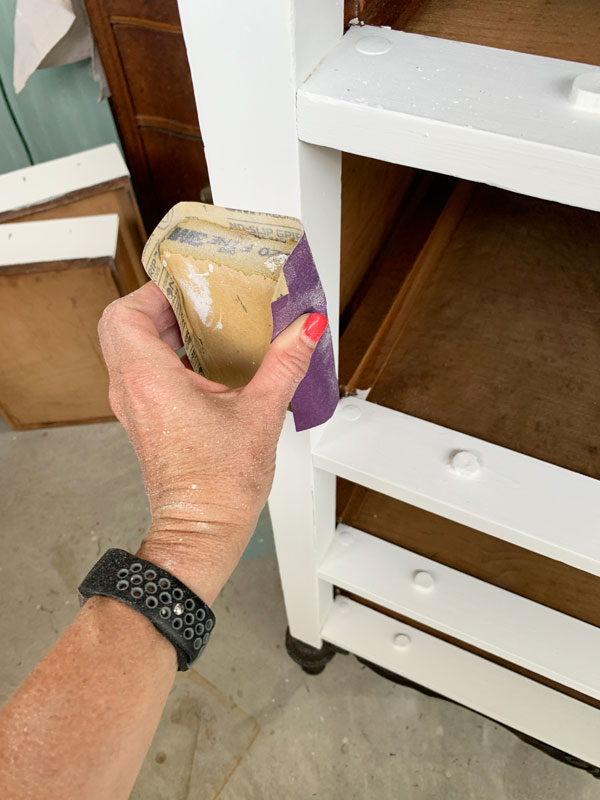
I followed up with two coats of Dixie Belle’s Cotton and then sanded with 220 grit sandpaper that I wrapped around an old foam sanding sponge to make it easier to handle:
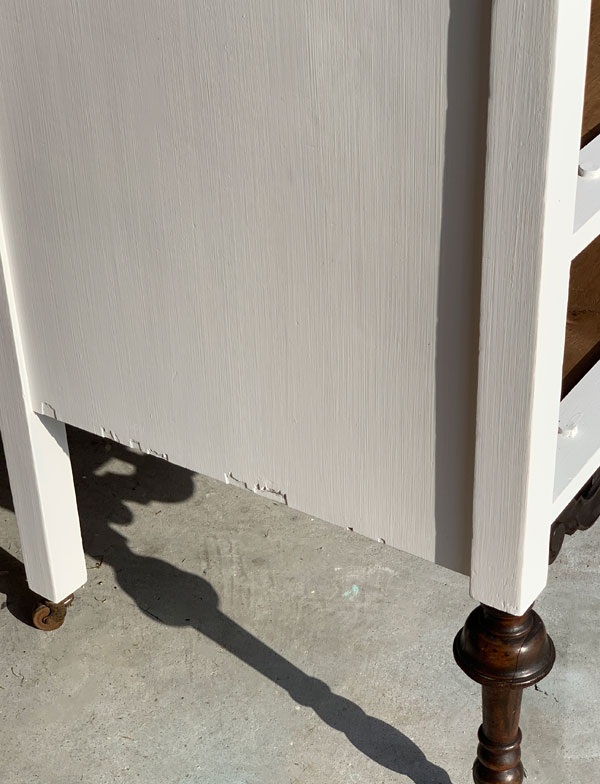
The bottom of the sides had chipped veneer also, but I have another remedy for that:
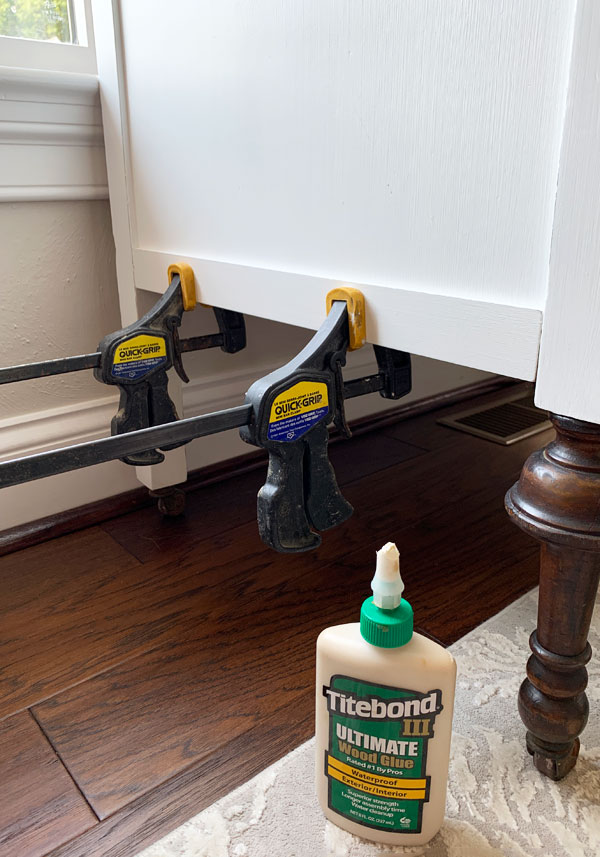
I cut a piece of poplar to fit, painted it, and attached it with wood glue:
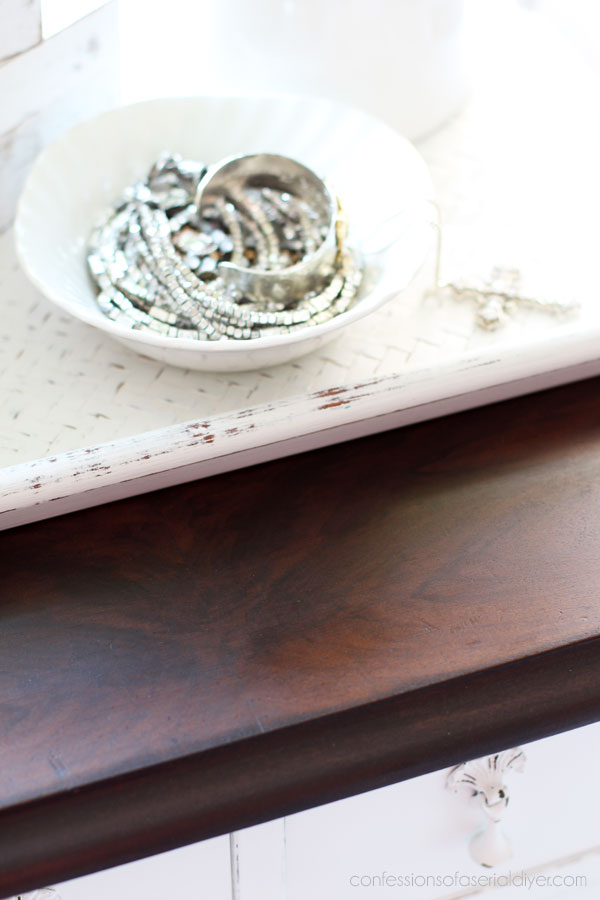
Staining the top & bottom
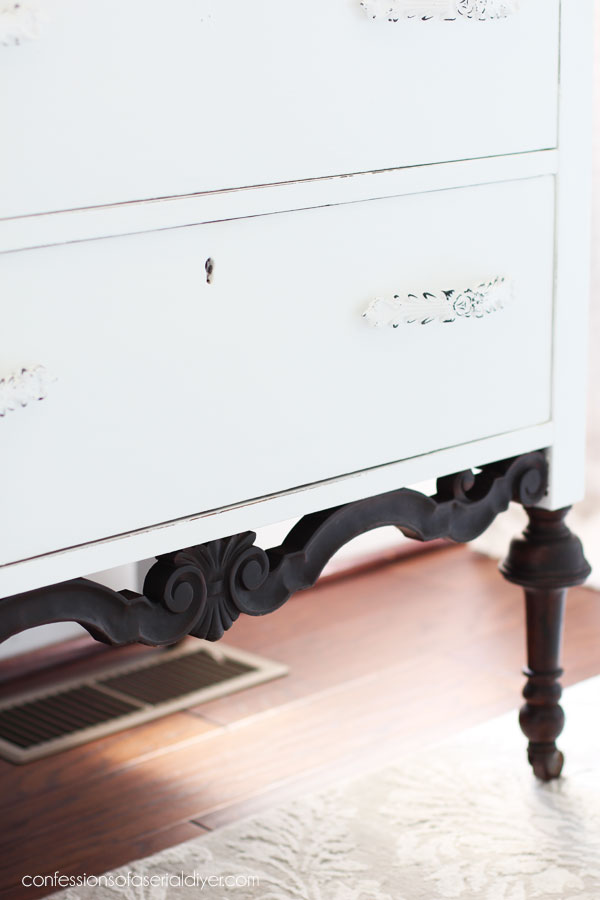
For the top, the details at the base, and the legs, I used Dixie Belle’s No Pain Gel Stain in Espresso:
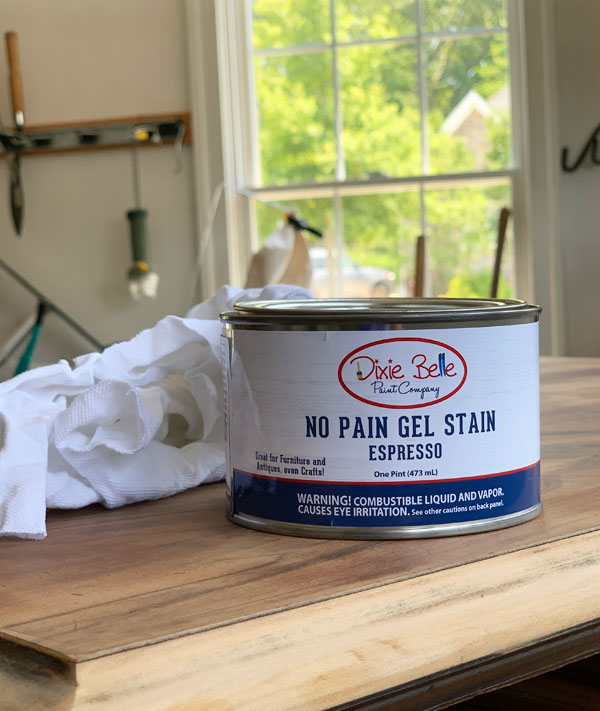
It has a thicker consistency so it is less likely to splatter and it’s easier to apply:

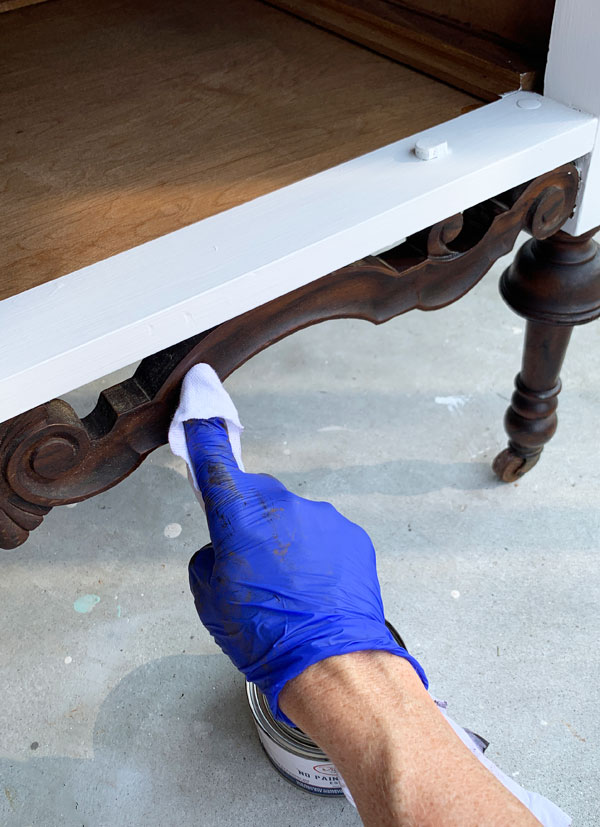
I conditioned the top first with Minwax Pre Stain Wood Conditioner and then applied the stain with a soft cloth right away. Wear gloves for this as the stain will stain your hands. For the details on the bottom, I applied the stain right over the existing stain.
I used a clean soft cloth for that also:
I let the stain dry for a couple of days and then sealed the entire dresser, top included, with Clear Coat in Satin using the blue sponge.
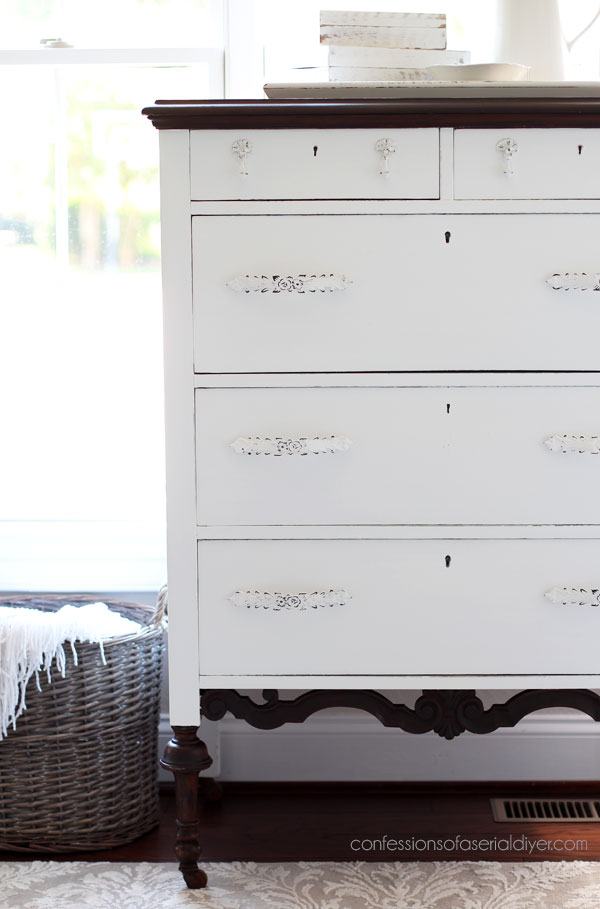
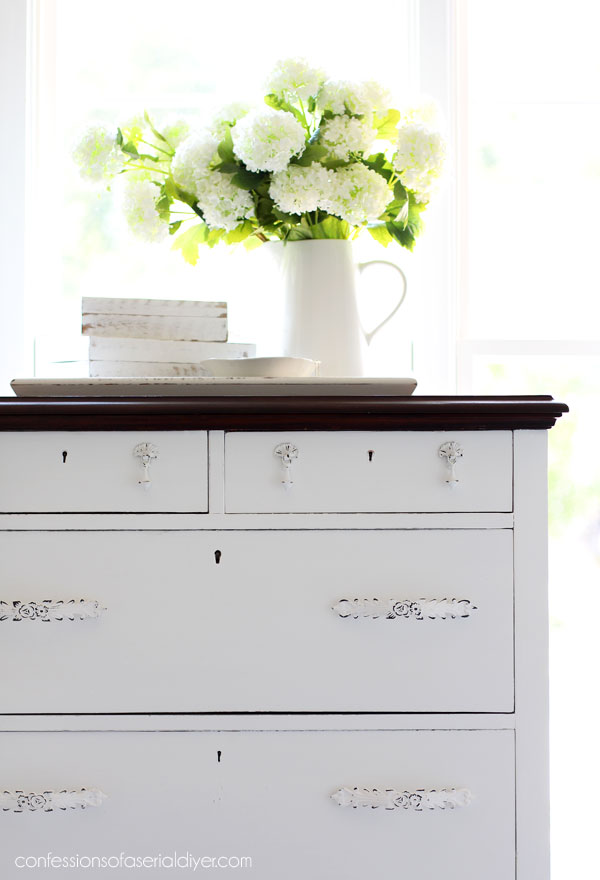
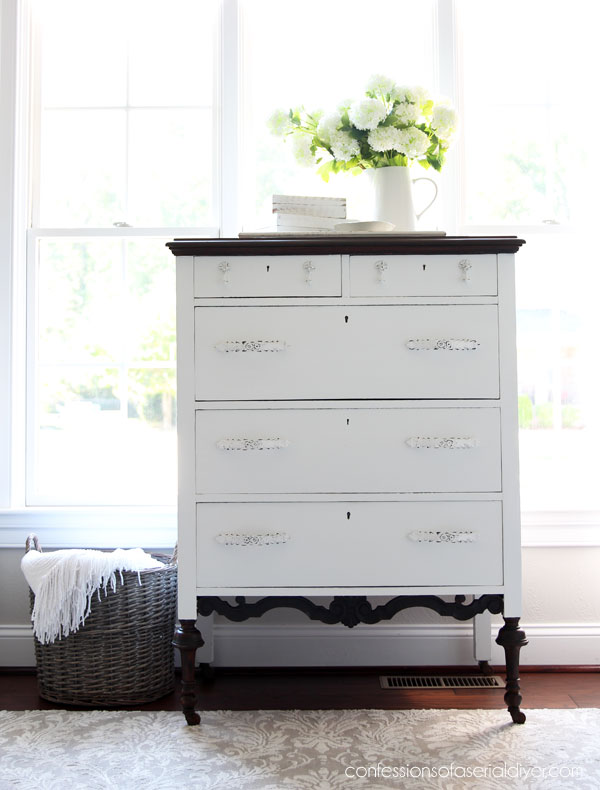
The Final reveal!
Tada!
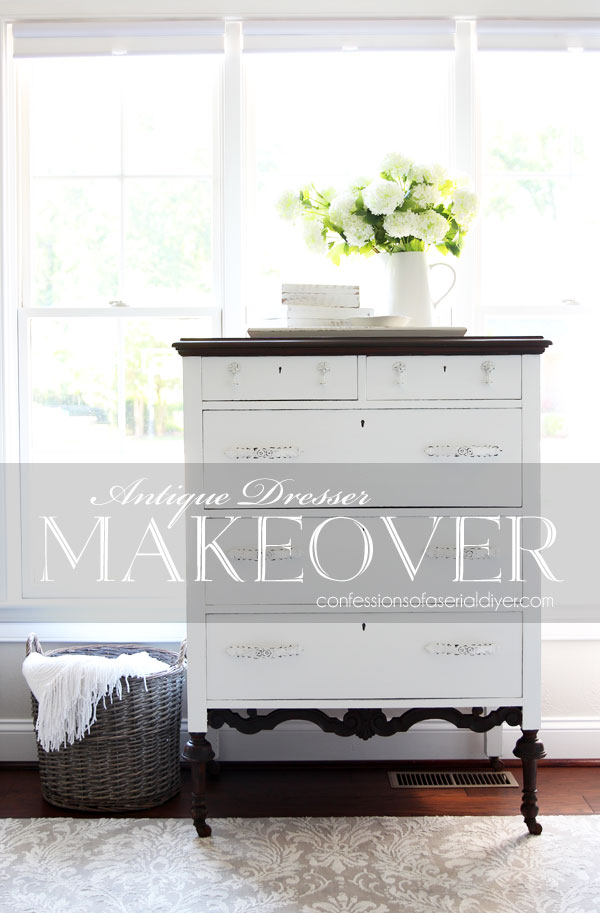
It’s amazing what a little (okay, a lot) of TLC did for this dresser!
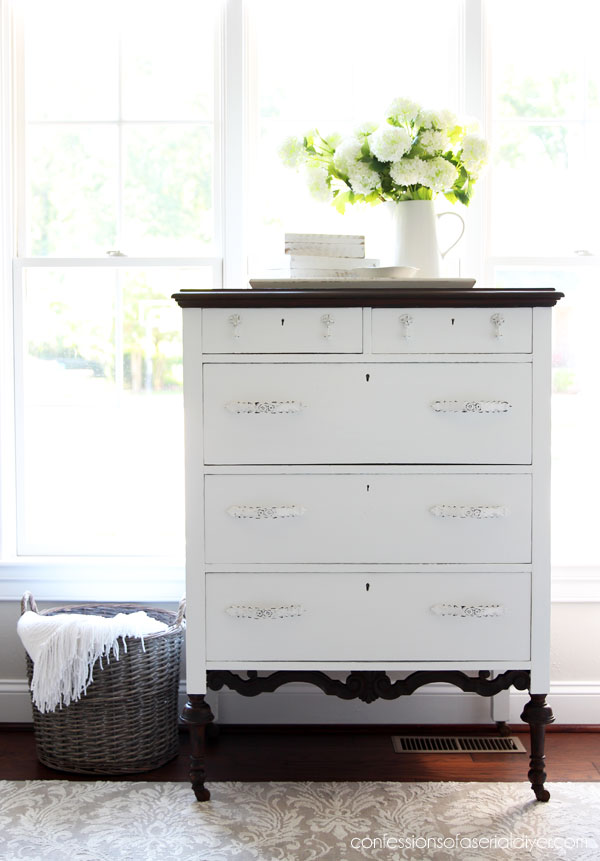
I loved the carved detail along the bottom and wanted to keep that as is:
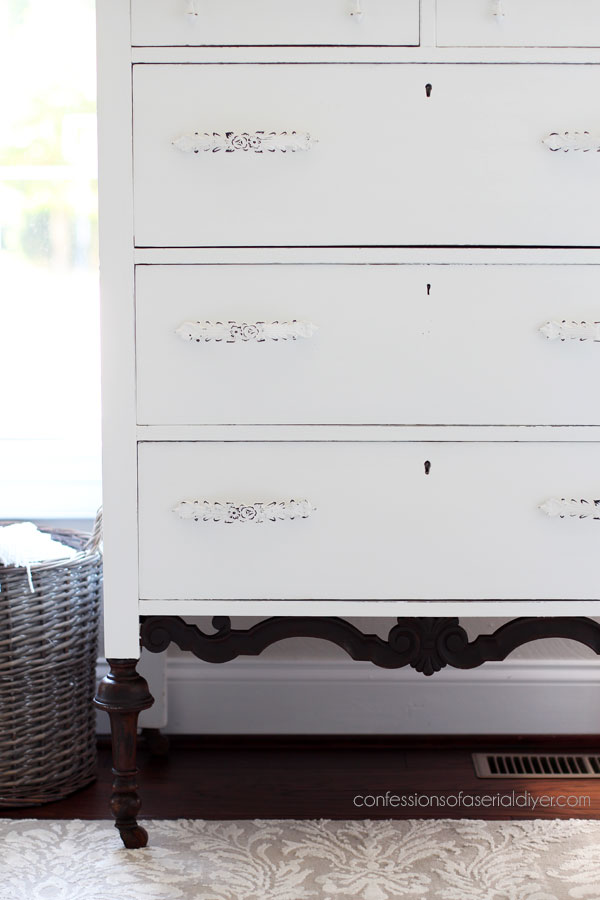
And here’s the side where I covered the chipped veneer:
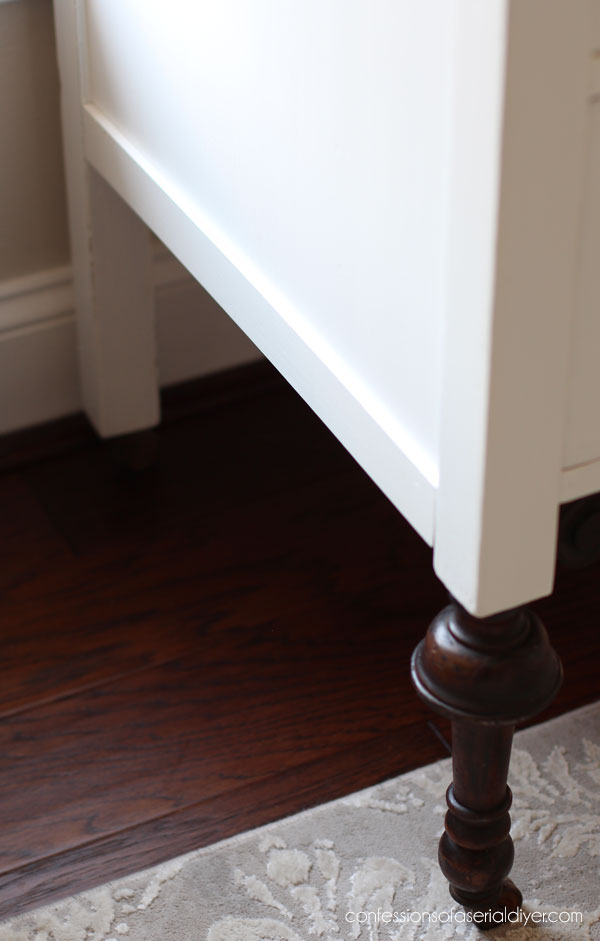
It looks like that piece was always there!
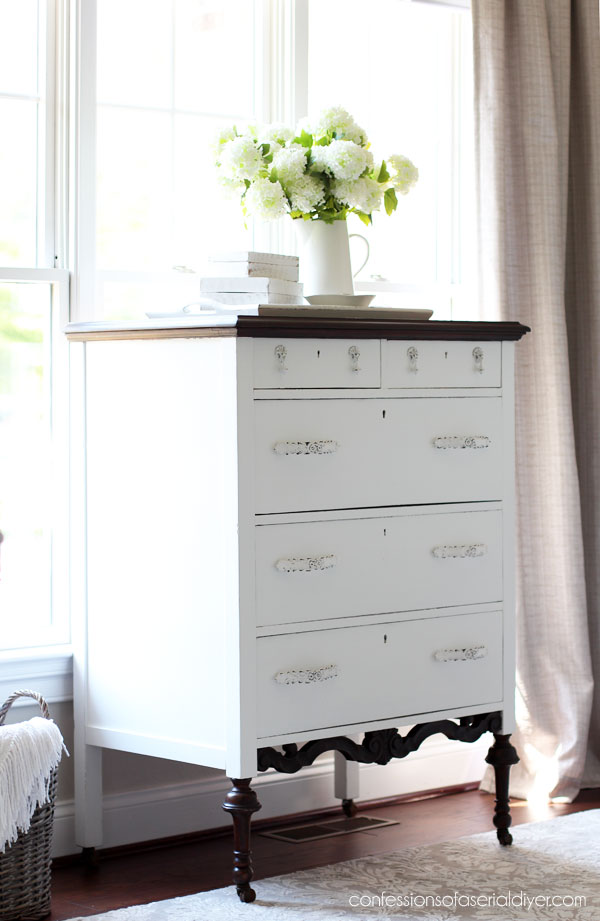
I wanted to keep it simple and timeless and I think this combination achieves that.
The Satin Clear Coat over the stain appears more matte than I’d like. I may go over it with the Gator Hide to give it a bit more sheen.
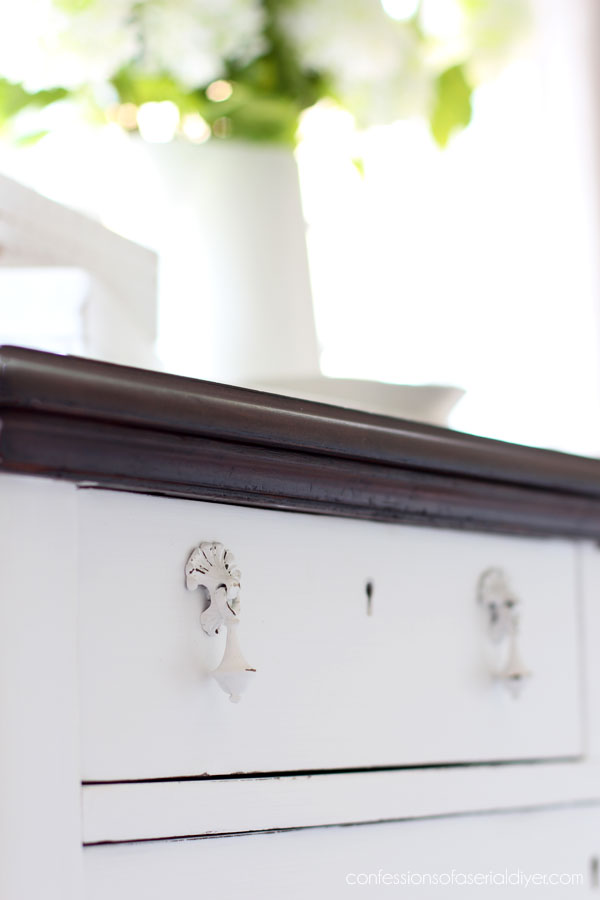
Many of the original pulls were either broken or missing, but I managed to pull together four from this dresser and the wider dresser that I have just like it.
They got a good cleaning and three coats of Cotton. I used my nail to scrape away paint here and there to age them:
The other drawers got one of my favorite pulls from Hobby Lobby:
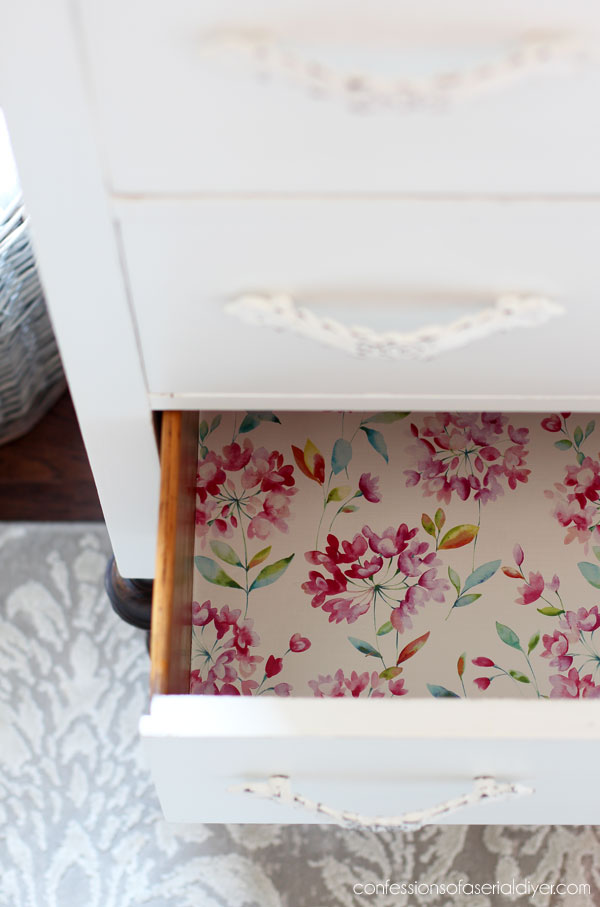
For the inside of the drawers, I used this pretty paper I found at TJ Maxx last year:

My fabric stash is very thin these days, so this paper worked just fine. I used my rotary cutter and cutting mat set to cut it to fit and attached it by by running a glue stick around the perimeter.
This dresser may have taken twice as long for me to complete, but it was so rewarding to see this once loved piece come back to life with each step!
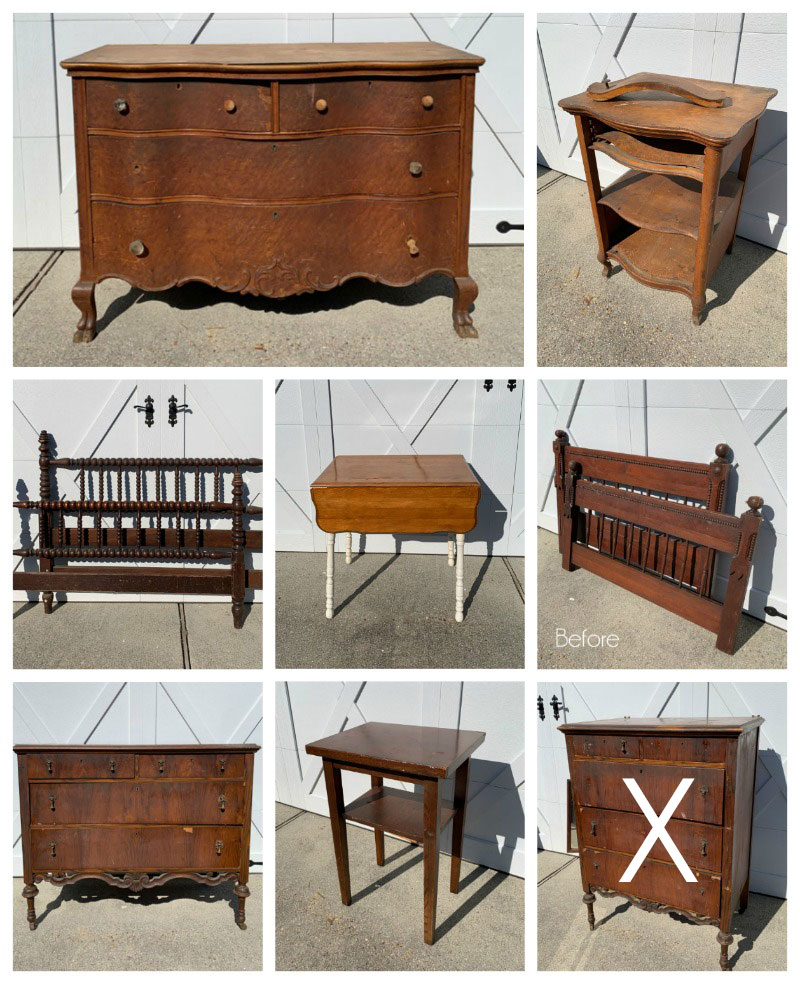
I still have the larger wide dresser like this to do. Should I do it to match? Or should I give it a look of its own?
I’ll be back next time with a much more simple redo from my Post Shut-down Thrift Store Haul:
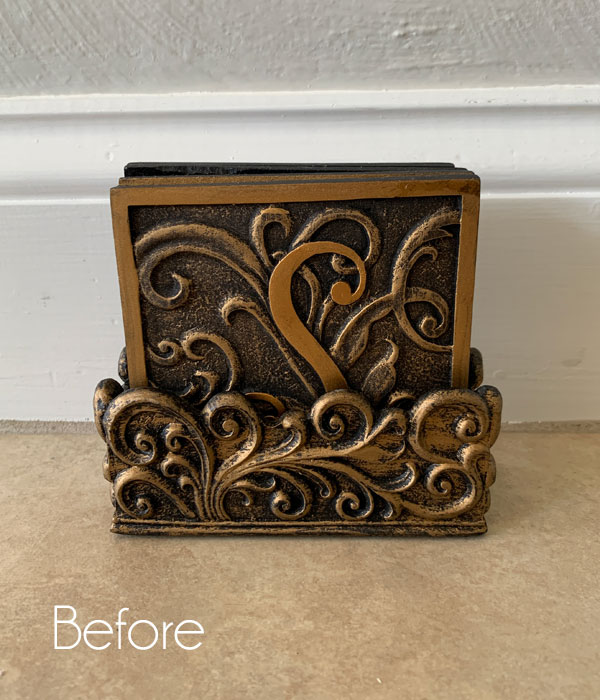
I bought this coaster set with a specific idea in mind…any guesses?
UPDATE: You can see what I did with it HERE now! 🙂
Have a great day!!
XOXO,
![]()
Don’t Miss a Thing!
If you like what you see, there are several ways to follow along!
Email * Instagram * Facebook * Pinterest * Twitter


Leticia L Beam says
Beautiful and unusual!
Christy says
Thank you so much, Leticia! XOXO
MJ says
I still have the larger wide dresser like this to do. Should I do it to match? Or should I give it a look of its own? I’d love to hear your thoughts!
My answer would be the ‘same’ because it is so ‘unique’ and doesn’t the buddy system always work? smile.
Christy says
I think you might be right and I might sell them together that way! Thanks for the input, MJ! XOXO
Marilyn says
Make it it’s “own” star piece!!!
Love, love your CREATIVITY!!!💕💕💕💕🦋
Christy says
Thank you, Marilyn!! XOXO
Ann Afflerbaugh Kehl says
WOW – it looks sensational!!
Christy says
Thank you so much, Ann! XOXO
Leanne Smook says
Utterly beautiful Christy, thanks for sharing. I always find your projects so inspiring!
Christy says
Aww I appreciate that so much, Leanne! Thank you!! XOXO
Janice Holt says
What a beautiful piece of furniture and the hardware is perfect. I would do the other the same because it’s so pretty even if they don’t end up in the same room. Love the paper inside also. Great job as always. Happy Birthday Brennan.
Christy says
Thank you so much, Janice! I had a bit of a time deciding on hardware, but I love how these worked out too. Thanks for your input on the other dresser, I think you are right! And thank you for the birthday wishes, it’s off to a great start! XOXO
Denise Cox says
Ohhhh, it’s just lovely, and yet still holds it’s antique character!! What a lot of work, but well worth the effort. And, as I ADORE flowers, I love the paper you placed inside the drawers! Well done, girlie… 👍👏🤗. Re., the second piece, I’m torn. You may have a better chance of selling the pieces if each is done on it’s own. But, what a lovely ‘set’, if done the same, to go into a young couple’s bedroom if they are setting up a new home.
Christy says
Thank you, Denise!! Yes…that is exactly what I was going for! I did not want to lose any of that antique character, and it was totally worth the work to see it come to life! Glad you liked the paper…I figured it needed a little pop of color inside. Still deciding, but I think I might do the second to match because it would make such a lovely set! XOXO
June says
Wow, you turned something that looked old and ugly into a thing of beauty.
Christy says
Thanks so much, June! I do love a challenge lol! XOXO
Anna Edwards says
Gorgeous! Your finishes are always so professionaly done! I look forward to your posts each week. I vote to refinish the other to match. They would be so lovely together in a bedroom.
Christy says
Thanks so much, Anna! I think I may do just that…they would make a lovely set! XOXO
Christina says
Oh Christy, there is SO much to love with this piece! So many great tips and inspirational ideas! Love how you dealt with the peeling veneer on the drawer and the sides. Brilliant. Love that you balanced the top and the bottom with the white middle. Great idea to get rid of the musty smell.
I would love to see the coordinating piece match. Though It probably has many of the same issues, I know you will make it beautiful no matter what you choose to do with it.
Be safe and be well… Happiest Birthday to Brennan!!!
Christy says
Thank you, Christina!! And thanks for your feedback on the other dresser. I think I may just do it to match! And thank you for the birthday wishes!! XOXO
Kelly Howard says
Good morning, my favorite DIYer! And happy birthday, young man!💕 This piece turned out SO lovely and I was wondering if the other piece had drawer fronts in good enough condition to do a sort of reverse of today’s project. Maybe with the knobs still white and chippy also. I think that would complement the other piece so well and play up that lovely dark antique wood. I am about to redo a sewing table and am going to go through your posts for inspiration on how to better utilize the empty opening where a sewing machine once sat. I am looking to go a bit more colorful on it also. You two sweeties go and have a lovely day today!💕
Christy says
Aww good morning, Kelly!! Thank you! I love your idea…I think the other one has issues with the drawers too though. Will have to see! I have redone several sewing machine tables, but I have not done anything clever with the insides. There are so many possibilities though! Good luck with yours! And thanks, we just stuffed our faces with pizza lol! XOXO
Jerri says
Beautiful! Thank you for all the info on repairs. I love the carving too.
Christy says
Thank you, Jerri! And you’re welcome! XOXO
Tracey Baxter says
Hi Christy, a beautiful transformation, I really like the way you make repairs.
Congratulations, you are so clever.
Christy says
Thank you so much, Tracey! XOXO
Nancy says
It does sound like a lot of work but it turned out great like all your other pieces. I always love your before pics and then I’m amazed at the after.
Christy says
Thank you so much, Nancy! It was worth the work to see it come back to life! XOXO
Betty Jane says
Very interesting….. and I like it!
I have an old chest of drawers my Daddy made in the fifties. Mice lived in it before I became the owner. How do
I deal with the cleaning and odor?
Thank you.
Christy says
Thank you, Betty Jane! If you read this post, I share exactly how I tackled the musty odor. To clean, I vacuumed really well and then wiped all the surfaces with Clorox-like wipes. XOXO
Cheryl Atkinson says
Hi Christy! It turned out so pretty. I love those details on the bottom and I’m so glad you didn’t paint it and the top. I love that look. Great job again.
Christy says
Thanks so much, Cheryl! I’m glad I left those details unpainted too! XOXO
Carol Shelleman says
This turned out great, Christy! I love the contrast of the white and espresso. I’d vote for doing the companion piece similar, but with just a bit of difference. It seems to cry out for a touch of toile. Maybe a transfer or stencil on the side of the drawers? I know that means more painting … Whatever you do, I am confident it will be amazing – as always!
Christy says
Thank you, Carol!! Would you believe that I actually stopped by the fabric department at Hobby Lobby when I was there looking for hardware, to see if I could find toile fabric to line the drawers?! No kidding! Ha ha great minds! XOXO
Robin Stephens says
That piece looked like a total lost cause. A piece destined for Old Furniture Heaven in the Sky. Your vision to restore and renew always impresses and amazes me. Always. Now that piece has decades longer to live a good life! Go you! ❤️
Christy says
Thanks so much, Robin!! Ha ha it really was sad before! If I had to pay for it, I may have even passed on it, but I am so glad I got the chance to bring it back to life! XOXO
Cindy says
I’m so glad you kept the top natural. When I saw the beautiful grain after you sanded it, I thought it would be a shame to paint over it. And putting that poplar strip across the damaged bottom edge actually finishes it off nicely. It’s such a lovey piece now. The buyer will be lucky to have it in their home.
Christy says
Thank you, Cindy! I’m so glad I kept parts of it stained as well. I wasn’t sure how it was going to look. Glad it worked out! XOXO
Rosie says
GORGEOUS!! I love everything that you did. I thought perhaps you would paint the bottom scroll and lightly distress it but staining it really stands out and high lights the beautiful detail of it. Absolutely beautiful!! I would do the other piece to match unless you have another look for it in mind.
Christy says
Thank you so much, Rosie!! I think painting and distressing that detail would have been pretty too! I am going to to do the other to match…thanks for your input! XOXO
Carolyn says
Hi Christy,
The dresser turned out lovely, as always! It’s so interesting that each drawer has a key hole. I’ve never seen one like that! I think it would be nice to have a matched set.
Christy says
Thank you, Carolyn! Yes…imagine if you had the need to lock all of your drawers nowadays! I agree that they should be a set! XOXO
Virginia Thompson says
Wow! You did a beautiful job! So many good tips from reading this.
Christy says
Thanks so much, Virginia! I’m glad you found this post helpful! XOXO
Cecilia from Georgia says
What a HUGE accomplishment!! It is fabulous!! I love the natural wood with the Cotton. The little pulls are so sweet and it’s great that you were able to take some from the matching piece. Big HAPPY BIRTHDAY to Brennan!! 10 is such a fun age for parents—before the teens turn them into another person!! This was a great tutorial and inspirational post! Thanks for sharing your process so thoroughly!!
Christy says
Thank you so much, Cecilia!! I too love the stain/cotton combination on this piece! The contrast is very striking. And thank you for the birthday wishes! I know exactly what you mean…about 12, they turn into someone else lol! Have a great day! XOXO
Mary Kaiser says
It is so beautiful now. I think the set should match. You could sell them both to the same person looking for matching set. If I lived closer it would be mine.
Christy says
Thank you, my friend! I think they should match too! XOXO
Stacey says
Great job!! Just beautiful!!! So happy to see it standing so fresh and lovely!!
Christy says
Thanks so much, Stacey! It was a treat bringing this one back to life! XOXO
Kellie says
I love how this turned out! I think you should do the other to match. I wish I could find a matching set like that for my room. So beautiful!
Christy says
Thank you, Kellie! I am leaning that way for sure! It isn’t often I find a matching set when I am thrifting either! XOXO
Sandra Stone says
While I think the smaller chest is nice, I would like to see the large dresser different. I personally love when you use transfers to transform the fronts. Whatever you choose I’m sure it will be lovely.
Christy says
Thank you, Sandra! A transfer would be stunning on the other one! XOXO
Maryellen Webber says
That dresser was a lot of work! I think the next dresser should have it’s own look. Can’t wait to see what you do with the coasters. I haven’t a guess of what you plan for them.
Christy says
Thank you, Maryellen! Thanks for weighing in! See ya tomorrow! XOXO
gwen says
i love the combination of wood and paint that you chose! the top looked gorgeous with the quick glimpse you gave us while sanding it! i so wish we had a local Hobby Lobby for handles and pulls and such…..
in answer to your question whether to do the matching piece the same, that’s a tough one! do sets sell well in your booth? it would certainly be fun to be able to buy a set and the pieces have such beautiful curves that if a person ‘needed’ one or the other for its dimensions then it’d be right there. good luck choosing! and happy birthday to your ‘little man!’
Christy says
Thank you, Gwen! Hobby Lobby is such a fantastic resource for pulls. We used to drive two hours to a location in Richmond, VA before we had one here, just to stock up! You can purchase them online also…they are 50% off every other week, even online, but I know it is hard to see them well online. Thanks for the birthday wishes; he had a wonderful birthday! XOXO
Mary King says
Beautiful! You are so talented.
Christy says
Thank you so much, Mary!! XOXO
Mary in VA says
Amazing what you’ve done to this chest! You work magic on furniture. I have two pieces that were my mother’s from the art deco era. They need work exactly like you did here. Thanks for the tutorial. About the other piece, if they were going to be used in the same room I’d make them both white. Otherwise, use your imagination!
Christy says
Thank you so much, Mary! You are so sweet! Thinking they will be a matching set! I hope this was helpful to give you ideas on how to tackle yours! XOXO
Sue H Mellette says
WOW Christy, you must have a ton of patience! This makeover is amazing. I can tell by your pics and your comments that this took a great deal of time. But.. you pulled off another fabulous makeover!l Love the details of the chest and the contrast between the white and stain on the legs and top. You even take time to finish off the drawers even after getting that musty smell out. My suggestion would be if you are thinking about selling this and the dresser as a pair, then I would do it the same as the chest. However, if you are considering selling each piece separately, I would definitely paint it a different color! I am thinking a shade of blue in a metallic finish would be pretty. Just my thoughts! Enjoy your son’s birthday. Can’t wait till Thursday!!
Christy says
Ha ha thank you, Sue! I really enjoyed taking my time with this one. The end result was well worth the work. I;m leaning towards a matching set. It would be a shame to break them up, I think! Thank you for the bday wishes…we had a wonderful day! XOXO
LeAnn says
Holy cow girl! I love this piece – you spent so much time and effort on it – and it paid off. I love the combination of keeping the dark stain on the bottom decorative piece and front legs with the white on the rest – keeping some of the original and making some of it new. I’d vote for not making the big piece match, selfishly, because I just love to see what you pull out of your hat and I bet you’d have another wonderful work of art on the big piece. Maybe coordinate the two pieces but not having them match? Kudos to you!
Christy says
Thanks so much, LeAnn! I really enjoyed seeing this one come back to life while keeping the classic antique look and feel of the piece. Will see about the other…it sure would be easy to just copy this one lol! XOXO
Liz says
Hi Christy, this antique piece looks beautiful. And thanks as always for your info and photos. I think the large set matching piece should be done the same as this piece, as you’ll probably sell them together.
Christy says
Thank you, Liz!! I’m leaning towards making them a set. Thanks for your thoughts, my friend! XOXO
Lorrie says
Keep the dresser set the same paint finish…pretty
Christy says
Thanks for your input, Lorrie! I’m leaning that direction! XOXO
Kimmylouwho says
What a lovely dresser and highlighting its unique features with stain was perfect. The wood top has such a pretty grain that it would have been awful to cover with paint! And you don’t cut corners when doing all the work. The new owner will have a beauty! Hooray!
Christy says
Thank you, Kimmylou! I really did hate to cover that beautiful wood with paint. Have a great weekend! XOXO
Julie Ritter says
Wow so many great tips and tricks. This helps me so much, as I have several pieces with veneer missing. I love the wood piece on the bottom to cover the missing side, so clever !
It turned out really pretty. Thanks !
Christy says
I am so glad you found this post helpful, Julie! It has all the issues ha ha! Thank you! XOXO
Judy Esposito says
You do beautiful work. Covering the chipping veneer is genius. I always try to fill it but it’s never perfect. Thanks for all the detail you supply. Low bureau would look awesome to match but that’s a lot of work. A true labor of love.
I’d like to see how the 2nd one looks with painted legs so just the bottom detail pops. Just a thought.
Got my box of Dixie Belle supplies yesterday. Thanks.
Christy says
Thank you so much, Judy! A tip for filling veneer or using wood filler in general is to not be in a hurry…it may take two applications to get it right, but covering it up is definitely the best solution lol! I think the legs would be gorgeous painted and distressed… might do that on the other! I’m glad you got your goodies! Happy painting! XOXO
Kim says
How beautiful!!! Definitely do the other piece to match!
Christy says
Thanks so much, Kim! XOXO
Jan says
Christie, I love your ideas. They are stunning. You inspire so many. I wish I lived closer, so that I could buy your stuff. However, I am afraid I would have to buy a gigantic house. Lol. Thank you for continuing your style. Happy birthday to Brennan.
Christy says
Aww thank you, Jan! I really appreciate that! And ha ha! Thank you for the bday wishes…we had a wonderful day! XOXO
Addie says
Yay!!! Good save!!! A lot of people would have just junked that piece.
Lots of great ideas in this post…thank you for sharing!!!
When you hook the sander to the vac do you turn the vac on while sanding???
My guess for the coasters…..is some kind of decorative trim, lining them up as a back drop for a shelf or rack????
Add…XXOO
Christy says
Thank you, Addie!! I’m SO glad I got to save this one!! Yes, when I attach the vacuum (I used duct tape lol), I turn on the vacuum and then the sander and it sucks up all the dust. Good guess on the coasters! See ya Thursday!! XOXO
Ellen Shook says
Happy Birthday to Brennan! I like seeing how you used some of those products because I bought some of them. I am getting ready to paint a junker myself although you probably will faint when you see what color I am going to use. I had to mention that I used that Boss in white in desperation on something I was painting on canvas. I had drawn some lines with paint markers becuase it is a geometric design and I goofed in a couple of places, gesso and more heavy white paint did not cover it. I thought about Boss and figured it couldn’t hurt. So I dabbed it on those areas where the red and bue markers had bled through. Then I went back over that with gesso and more heavy-body white paint. Presto! It worked!
Christy says
Thank you for the birthday wishes, Ellen!! Oh I hope you are using color!! I love to see colorful pieces that others do…I’m just too chicken ha ha! You bought lots of goodies if I remember correctly and I’m so glad the BOSS worked for you…it is awesome!! XOXO
Mary says
What a gift you have for turning the ugh into beauty! This turned out so beautiful Christy. You are excellent in your craft! I think I would do the other piece to match too; as you and others mentioned, it would make a beautiful set. Soo grateful you are giving these old magnificent pieces of furniture new life! ❤️ (And Happy Birthday to your son too!)
Christy says
Aww thank you, Mary! I appreciate that so much! I am leaning towards matching them. I really do hate to break up the set. And thank you for the birthday wishes!! XOXO
Donna says
Once again another awesome and pretty makeover!! Love, love. I would do the other dresser to match it.
Christy says
Thank you so much, Donna!! I am leaning that direction, thanks! XOXO
Debbie in TX says
What a labor of love. This piece has such beautiful details, and you made them stand out so nicely. I love the contrasting colors. I think you should finish the larger dresser differently, just to have another original piece.
I can’t imagine what you are going to do with that gorgeous coaster set. Maybe glue the coasters together and paint it to make a decorative holder? Dunno, but my mind is definitely not as creative as yours : )
Hope your little man has a wonderful 10th bday!
Christy says
Thank you, Debbie! I really did truly enjoy working on this special piece! I hate to break up the set, so we’ll see about the other! Thank you for the Bday wishes…he had a fantastic birthday! Great guess on the coasters…see ya tomorrow!! XOXO
Connie says
So beautiful
Christy says
Thank you, Connie! XOXO
Phyllis says
As usual, awesome. Love this! My vote is to do the matching piece in the same manner. I can’t even imagine what you will do with the coaster set but I will be back on Thursday (with bells on) to find out. You always inspire.
Christy says
Aww thank you, Phyllis! I think that is the way to go also! XOXO
Heidy says
Absolutely beautiful! I would never have come up with that idea yet it’s perfect. It’s perfect to show the gorgeous detail of the piece! I’d do the same for the matching piece, just so beautiful!
Christy says
Thank you so much, Heidy! And I appreciate your input on the other! XOXO
Marie-Interior Frugalista says
Another stunning makeover, Christy. Love the white and dark stain combination on this piece. Thanks for the awesome tip about closing your eyes when filling holes – brilliant!
Christy says
Aww thank you, my dear friend! Yes… it is hard to get those filled areas super smooth and I have found that trick to work very well! Have a great weekend! XOXO
Marian says
Christy,
It turned out just beautiful. Thank you for going through the different steps to take the “antique” smell out of the dresser. I tried to use some of my Mom’s antique dressers, but nothing I tried took out that “old” odor. I finally gave up. I vote keeping the look of the dressers the same. They would look so pretty in someone’s home. Thank you for all of your hard work!!!!!
Christy says
Thank you so much, Marian! The BOSS worked amazingly well on the musty odor…it is completely gone! Thanks for weighing in on the other dresser. I think it would be a shame to break them up too! Enjoy your weekend!! XOXO
Petra says
So pretty! I have a similar one I’m about to tackle and I was thinking of leaving the top stained timber so seeing that yours looks great, I’ll do it too! Congrats on 8 years of your blog! xo
Christy says
Thank you, Petra!! Glad I could give you an idea of how yours will look! Have a great weekend!! XOXO
Jani says
Hi Christy! Beautiful work on that cutie pie dresser! If I find a piece that has a good top I always like to do a stain. Loved that you stained the bottom detail! Great tip on attaching the molding to the side, I’m stealing!!! 😂
If the second one has a good top, do the same look, love it! Thanks for all your inspiration and joy! I Look forward to your posts… and I feel ya DIY sista’! ☺️☺️☺️☺️
Christy says
Thank you, Jani! I do like the durability of a stained top as well! And steal away ha ha! I appreciate your sweet comment so much!! Enjoy your weekend!! XOXO
Cheryl says
I think it turned out so much better than what it was originally! Love it!!
Christy says
Thanks so much, Cheryl! XOXO
Bev says
Love your work. Look forward to your post
This piece is beautiful. But myself I would have stained the legs in the back
Christy says
Thank you, Bev!! The back legs are one solid piece from top to bottom, but had they been separate pieces, I definitely would have stained them. Have a great weekend! XOXO
jennifer says
I just wanted to say that I especially love this makeover! It was clearly a beautiful piece of furniture in need of some love and you gave it some. I love the stained parts at the bottom and the top. It makes for a very striking piece. I love seeing you work-I always come away inspired to try something new on my furniture. Thank you!
Christy says
Aww thank you so much, Jennifer! I’m so glad you enjoyed this one. I always enjoy working on my pieces, but this one especially! XOXO
ROSE LEFEBVRE says
I am amazed at how wonderful you made this look. The damage alone would have scared most people!
Christy says
Aw thank you, Rose! I’m so glad you like it! I think I might have passed on it if I had to pay for it, but being free, I couldn’t pass it up. And I’m so happy I got the chance to bring it back to life! XOXO
Michelle says
Beautiful…you never disappoint!
Pieces with missing or lifting veneer have stifled me in the past…I’ve tried to heat remove it …big fail! That glue really holds up! So I like the mudd idea!
As for second piece to match…I’m going to go against the grain and say make it different! Here’s why! They are different styles of dresser! Where the bottom of your finished piece has a distinct trim and top…the next dresser does not have that and the front is curvy …softer edges! Plus the second piece has claw feet verses the roller wheels on the piece you just finished! Honestly I think an ombré look would be beautiful…subtle colors light to dark! I’m a sucker for ombré!
Can’t wait to see which direction you go with the next dresser!
Christy says
Thanks so much, Michelle! Yes, the Mud certainly makes it easier to get on with business LOL. The second dresser I was referring to is actually in the bottom left corner of the collage I shared, and it is just like this dresser only shorter and wider. The other dresser you are referring to in the photo will definitely get a look of its own, and I already have an idea! Stay tuned! XOXO
Mary Loveland says
Hi Christy, wonderful makeover, you have done the dresser proud. My only concern is that for the larger drawers there are no drawer guides which has always been a concern with older pieces….they can be hard to open/close unless the sides are waxed or you add the guides. The two dressers are not a set. The large dresser is a serpentine and without the fancy fretwork. If they were the same color I think that would be way too much white in a room. The larger dresser could probably pass for a buffet. Have to say the top on your finished piece looked gorgeous and I have heart pitter patters for teardrop pulls! Well done Christy.
Christy says
Thanks so much, Mary! The drawers in this luckily work pretty well, but I know what you mean. The matching dresser to this is in the bottom left-hand corner of the picture collage I shared. I have a much different plan for The serpentine one, and will share that for my furniture fixer-upper post! I too love those teardrop pulls! Have a wonderful weekend! XOXO
KATHY BINKLEY says
Christie, you seem to always amuse me. When I saw that vaneer at the bottom, I said ok Christy what are going to do. I just learned another trick from you . I would had not thought to put that extra piece of wood there. What a great idea , and I loved it. The piece is beautiful!
Christy says
Aww thank you, Kathy! I’m glad I can still provide the hot tips lol! XOXO
Val says
wow, amazing the way you took this dresser back to life. It was a pleasure to read the post and learn so many tricks. Thankyou for sharing and congratulations on a such wonderful work!
Christy says
Thank you, Val! I’m so glad you enjoyed it! XOXO
Lucy says
Wow, beautiful job! I love pieces with a light and dark contrast, and those handles are so pretty.
I have a question I hope is not too silly…I know you have said you can get bleedthrough with cherry or mahogony type wood….but would you get bleedthrough on a fake dark wood….eg an Ikea black/brown piece that has no real wood in?
Christy says
Thanks so much, Lucy! Not a silly question at all, but no. Those pieces paint up like a dream! It’s the tannins in the wood that tend to bleed through. XOXO