Happy Thursday amazing friends! Today I am sharing a dresser that I purchased last November. My booth inventory was very low at that time and I was kind of desperate to find a few pieces for it, and was having a hard time finding anything.
Enter this pretty little number:
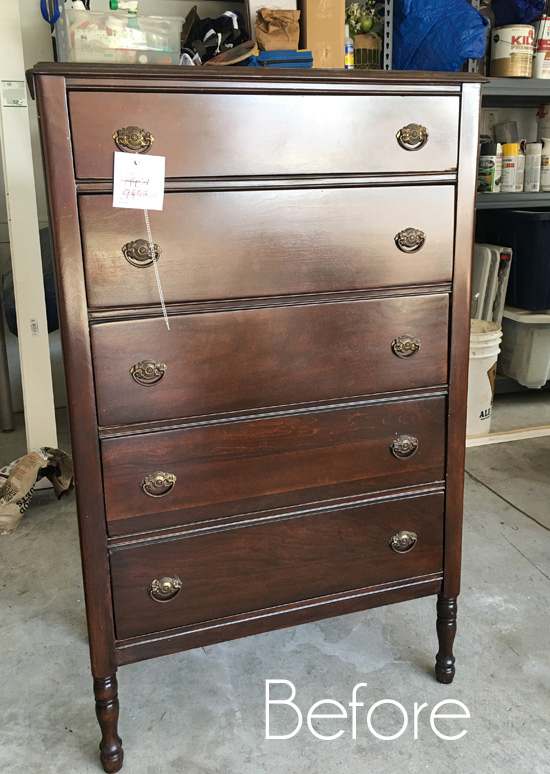
It was $99 which I would normally NEVER pay for a small dresser like this, but it was already in beautiful condition. Clearly someone had lovingly restored it, so I decided it was worth the hundred bucks.
Except because it was already so nice, I struggled with taking a brush to it, and so there it has sat in that very same spot in our garage…blocking all my hubby’s grilling/smoker supplies for nearly a year. He would ask me weekly when I was going to paint it. I half considered just taking it to my booth as is, but as lovely as it was, there was absolutely nothing unique about it. That is what adding paint and your own spin on a piece of furniture does for it. It makes it one of a kind!
So I finally did something with it:
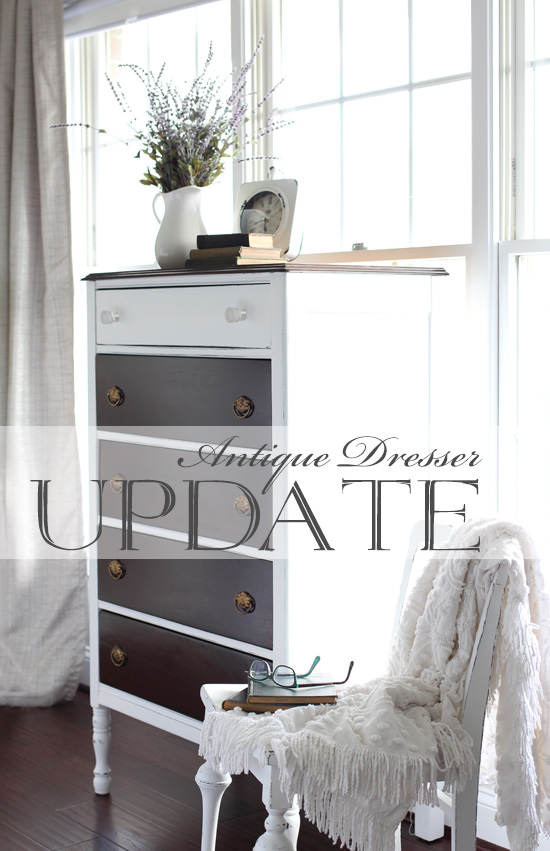
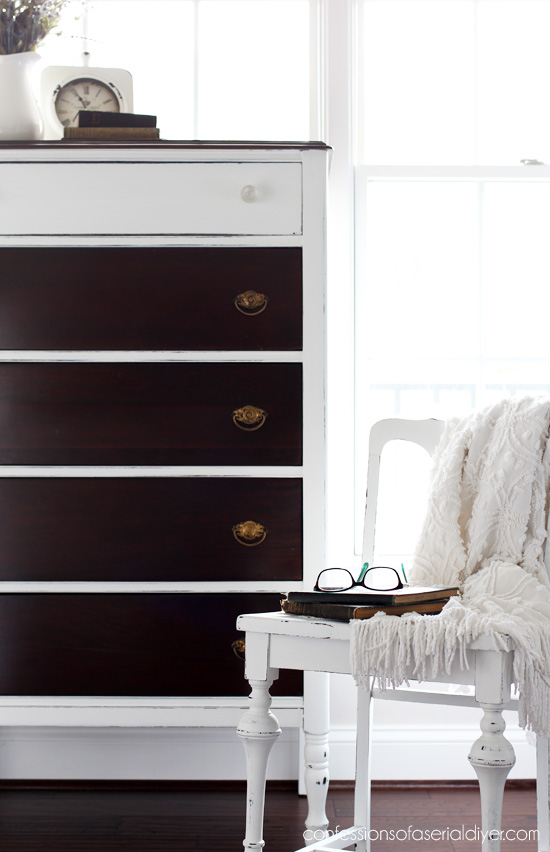
Now it is more unique, yes?
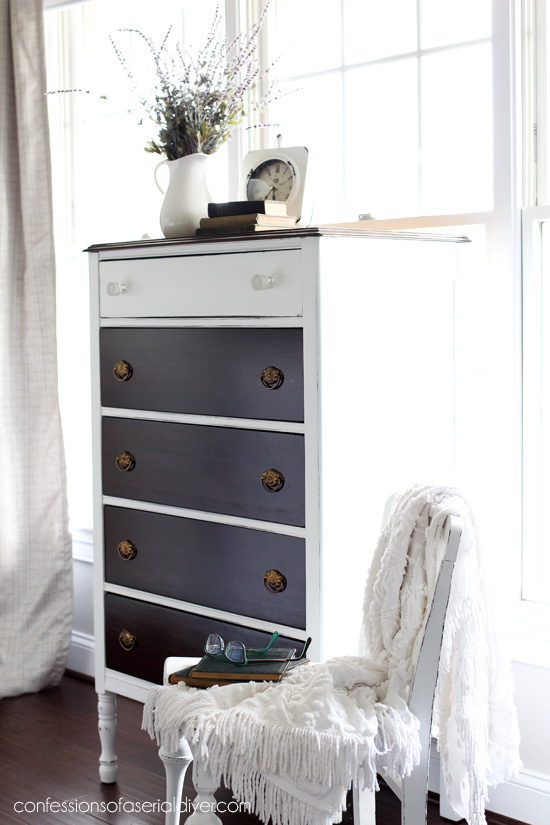
I just couldn’t bare to cover up all that pretty wood though, so I decided to leave the top and most of the drawers as is…
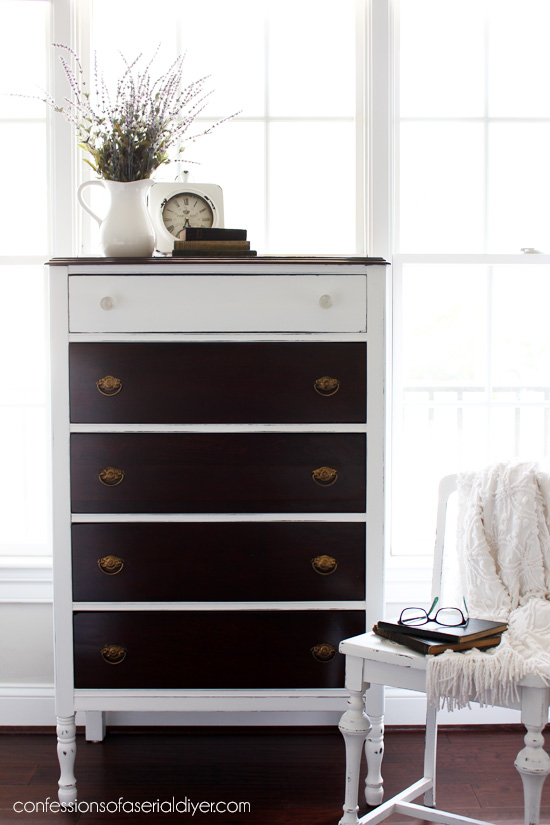
For being so chicken to take a brush to it, I am really pleased with the final outcome. I’ve included a few affiliate links so you can find the products I use.
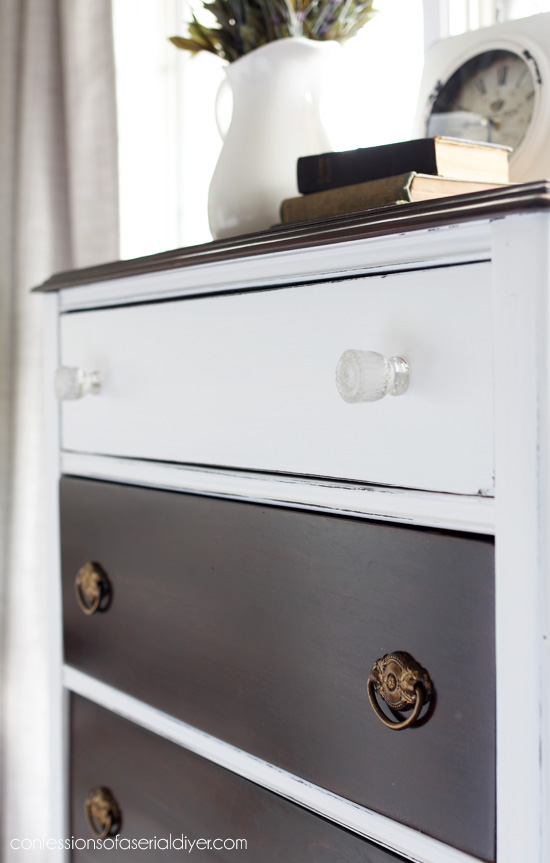
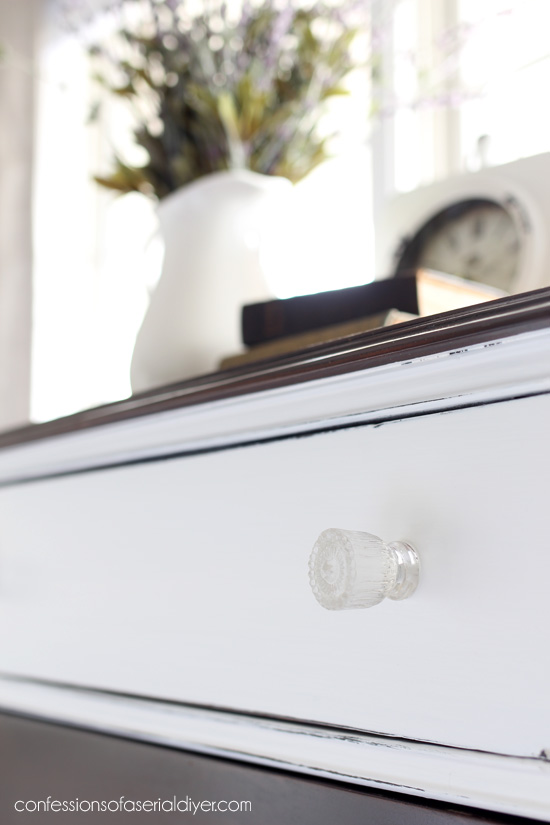
The top drawer was a bit smaller so I decided to paint just that one drawer and switch up the hardware…
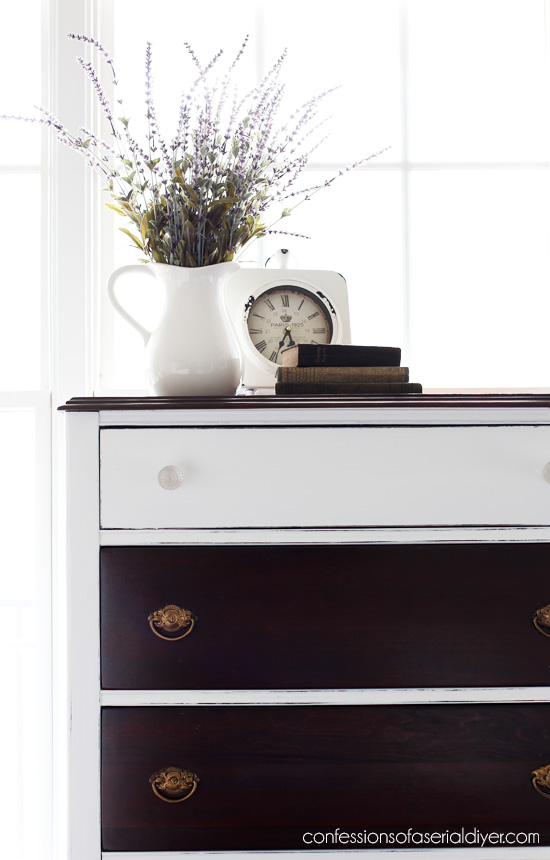
I used my trusty Bit of Sugar by Behr, made into chalk paint (recipe HERE). Then I sealed with Dixie Belle paint’s satin clear coat sealer again to test for yellowing over white and it did great. However, because this dresser already had a nice coat of sealer on it from being redone before I painted it, it didn’t bleed either, so I think I need to try a bleeder as a real test next time. I’ll be sure to report back when I do. I really do like the ease of brushing on a sealer though, and this has no odor which I really love. I used my favorite Wooster brush for applying the sealer.
These pretty glass knobs are from Hobby Lobby:
The original pulls are so pretty but were really showing their age. I used a little gold leaf Rub’n buff to bring them back to life:
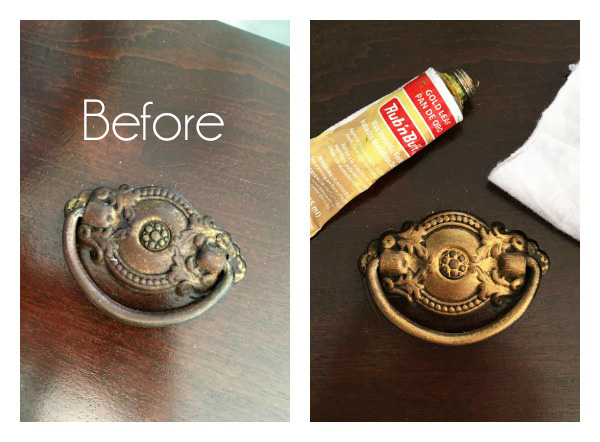
You simply rub it on and buff, just like it says on the tube.
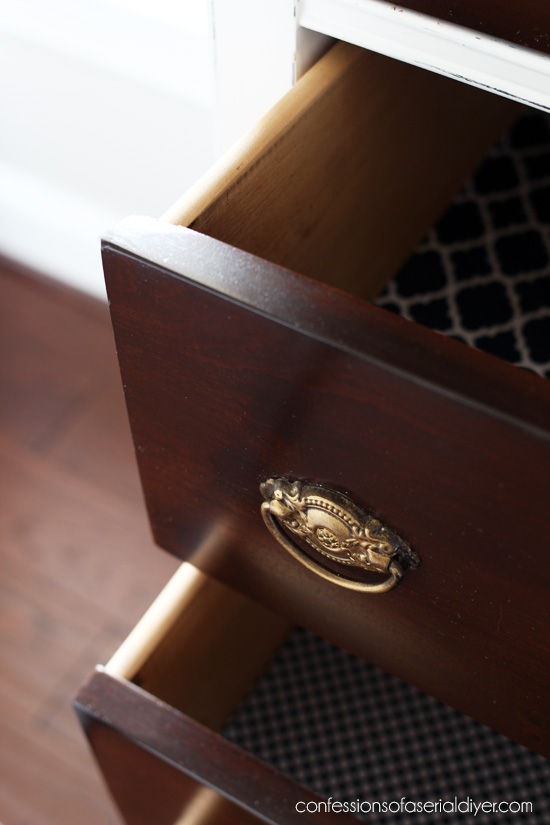
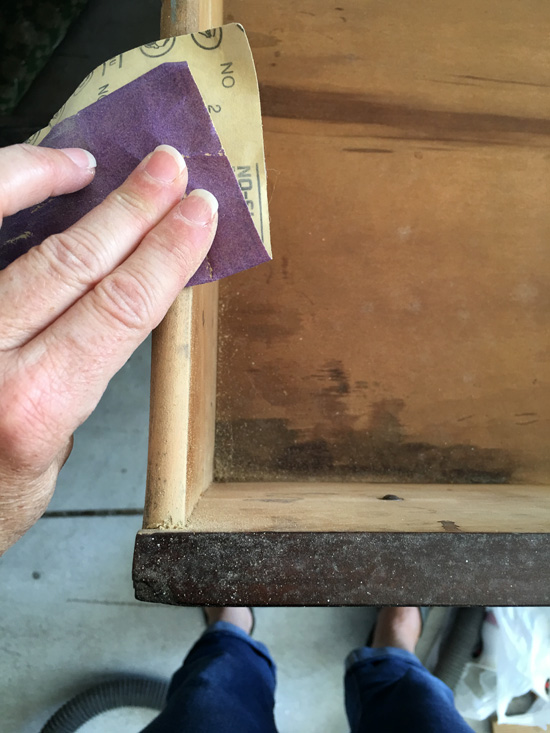
As for the drawers, although the outside was gorgeous, I couldn’t say the same for the insides…

A quick sanding all over to remove all that dirt and grime made them look clean and new again…
Then the bottoms got the fabric treatment…
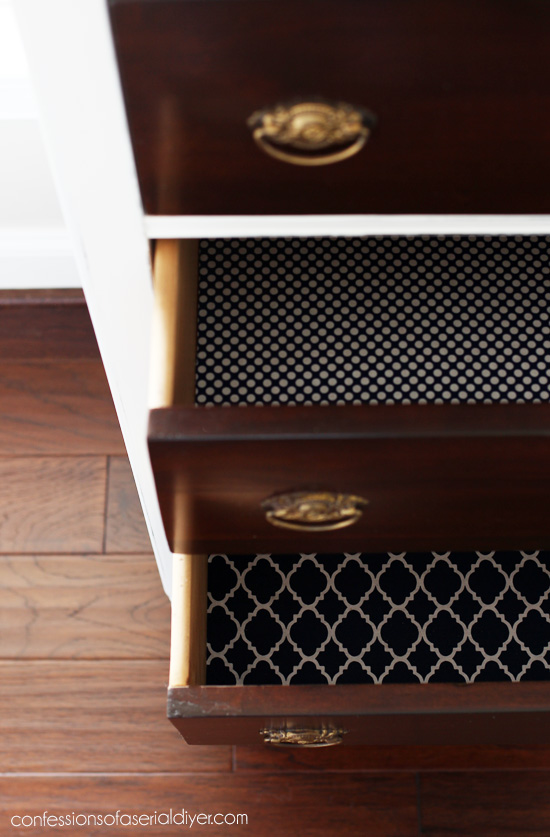
I alternated two patterns this time in navy blue since I love the mix of brass and navy. I used my rotary cutter and cutting mat set to cut the fabric super straight, and matte mod podge and a chip brush to adhere the fabric to the drawers. This fabric came from Hobby Lobby also.
This dresser would be beautiful paired with either a stained bed and night table or white painted pieces.
I hope you enjoyed this makeover as much as my hubby enjoyed getting it out of the garage! 😀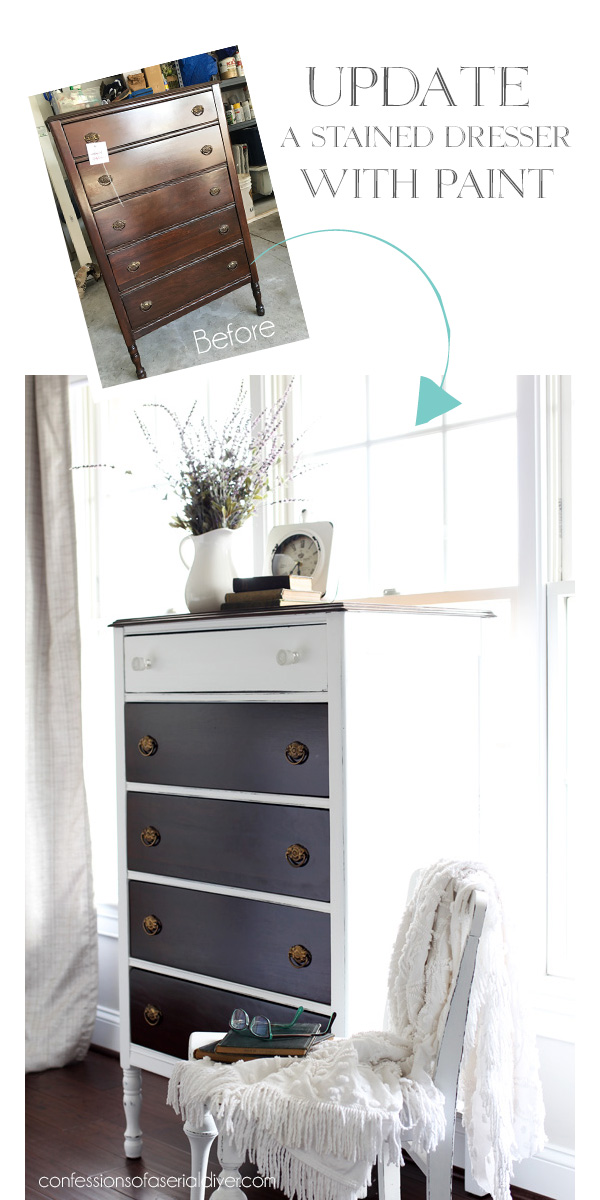
If you liked this post, you might enjoy this oldie but goodie too:

See how I updated this brown beast HERE!
I’ll be back on Tuesday with my Trash-to-treasure girls sharing what I did with these vintage lamps:
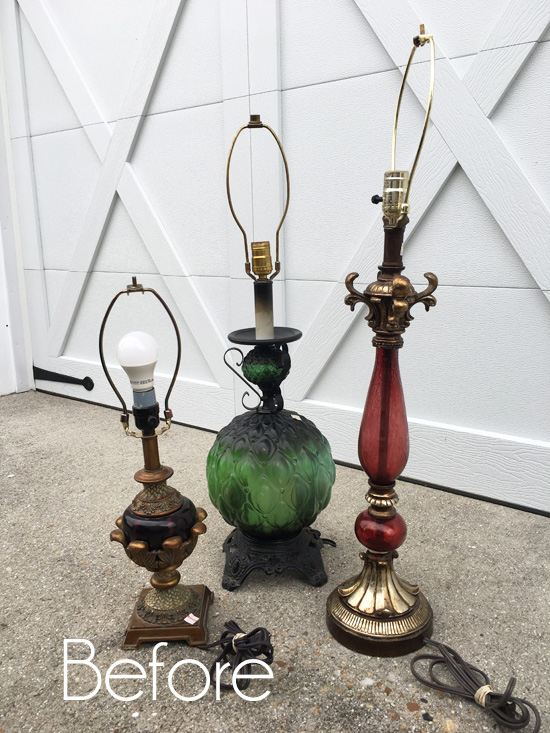
UPDATE: Check out how I repurposed these lamps HERE now!
Have a fantastic weekend!
XO,
![]()
Don’t Miss a Thing!
If you like what you see, there are several ways to follow along!
Email * Facebook * Pinterest * Twitter * Instagram


Mary Kaiser says
Oh it is so beautiful. I love how it turned out, the fabric in the drawers, how pretty! I can’t wait to see what you do with the door next week!
Christy says
Thank you, Mary!! XOXO
Christina in SW FL says
Oh Christy, this turned out so pretty! I love natural wood but this one was SO dark, it needed some brightening. You did it! 🙂 You have a knack for styling furniture beautifully. The drawers look beautiful inside as well. I’ll look forward to hearing more about the Dixie Belle sealer.
Enjoy the rest of your week and your cooler weather.
Christy says
Thank you, Christina! It was really dark before! Looking forward to a cool down here! XOXO
Marcie Lovett says
I love those old dressers! Not everyone is a fan of dark wood, so you definitely saved it from spending a sad lifetime in someone’s basement, Christy. I was sure you’d paint the drawers, but the fabric is lovely.
Christy says
Thank you, Marcie! XOXO
Debra A Wise says
She’s a beauty Christy! Another great makeover!
Christy says
Thank you so much, Debra! XOXO
Vicki Wright says
One word…….LOVE! I never would have thought of just painting one drawer and leaving the rest as is but it looks amazing!!
Christy says
Thanks so much, Vicki! I wasn’t sure how it would look either, but so glad it worked it out! XOXO
Mary says
That is an unexpected twist but it really looks great. Like it’s all dressed up with a white jacket!
Christy says
Ha ha exactly! Thanks, Mary! XOXO
Petra says
Lovely, and I do like how you painted the top drawer and put different knobs on ????. Little touches like that are what makes these pieces stand out ????
Christy says
Thanks, Petra! It is much more unique now for sure! XOXO
Linda Petersen says
I love what you’ve done with this piece! It’s very stylish. I think I would “build” a guest room around it????. XOXO, Linda
Christy says
Thank you, Linda!! I think I would too lol! XOXO
Cecilia from Georgia says
Oh Christy, the dresser is beautiful! I asked you about bleedthrough earlier this month and your tutorials were wonderful! I finished the 1930’s china cabinet in pale aqua and white and put it in my booth to use as a display and just stuck a price on it because the shop owner wanted it priced. Well, jumpin’ Jehoshaphat!! the darn thing sold in 3 days!! I am so pumped now that I want to paint everything I see. It is so good to have your blog to refer to for help or new ideas. Thank so much for the inspiration!!
Christy says
Thank you, Cecilia!! Yay!! I am SO excited that you are excited about painting!! I bet your China cabinet turned out gorgeous with those colors. Have fun hunting for your next piece to transform! XOXO