My latest haul is dwindling fast and today, my beautiful friends, I am excited to cross another one off the list!
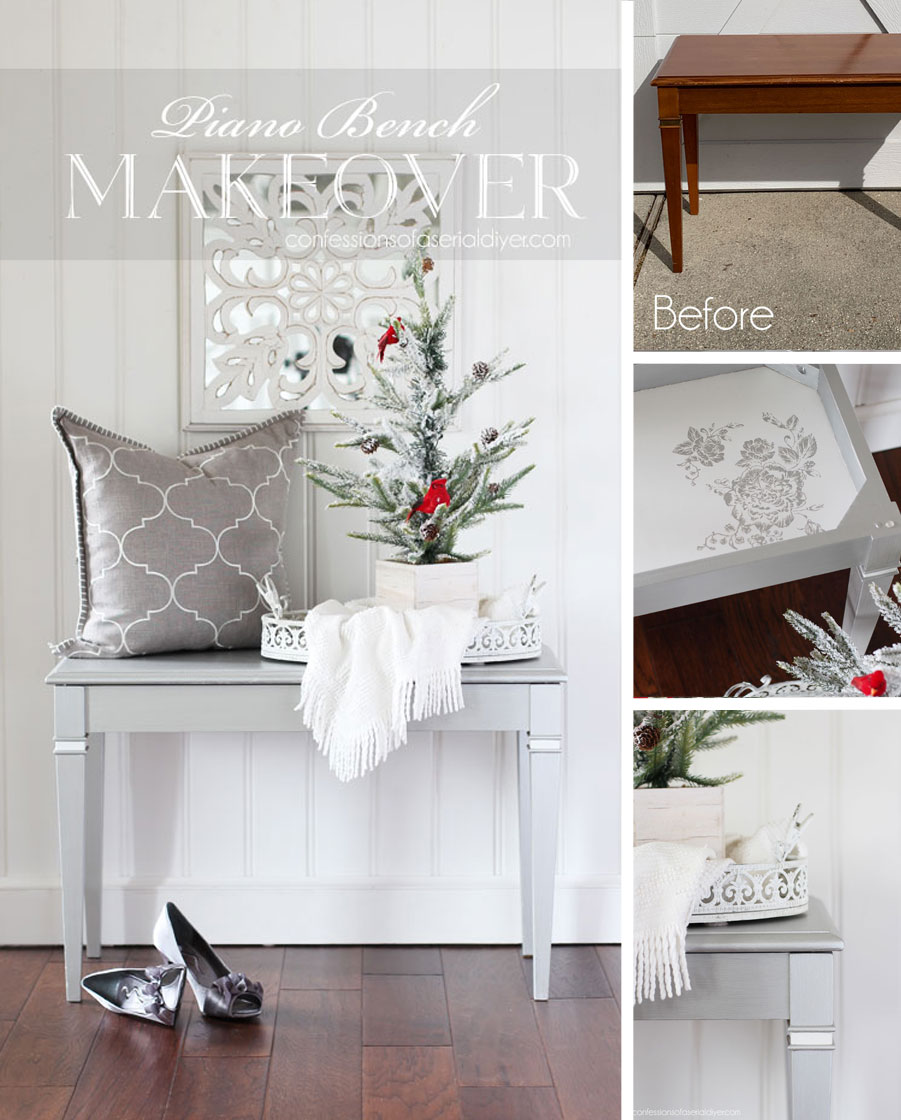
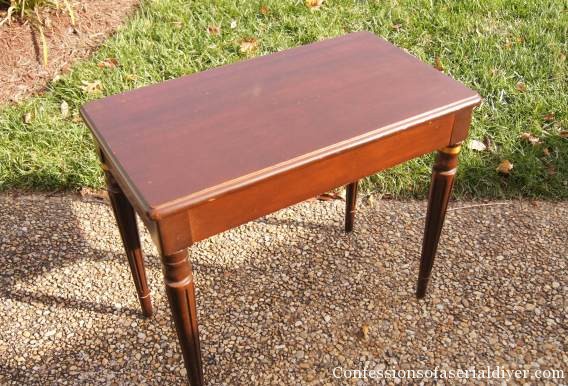
I’m sharing the redo of this piano bench I found for around $10:
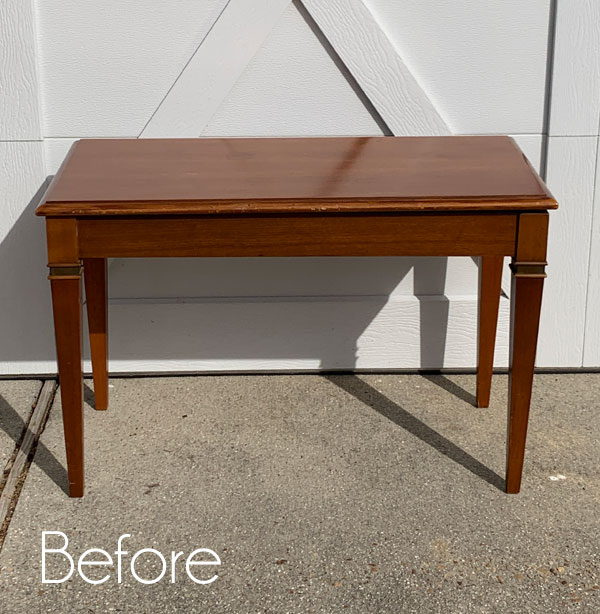
This bench was originally $12, but I had a full punchcard that earned me an additional 20% off. I love a deal, even at the thrift store!
For this makeover, I knew I wanted to use a pretty metallic, Silver Bullet, and I wanted to dress it up a bit with silkscreen stencils. I’ve included a few affiliate links so you can find the products I love.
The Best way to Paint with Moonshine Metallics
The Moonshine Metallics go on a bit sheer, so they work best with a similar shade of regular chalk paint as a base coat. I would have chosen Manatee had I not already had this custom mix on hand:

This is one part Hurricane Gray and two parts Cotton that I mixed up for this flatware box makeover. I don’t normally paint inside the house, but with temps in the upper twenties when I was painting this, I decided to bring this one inside.
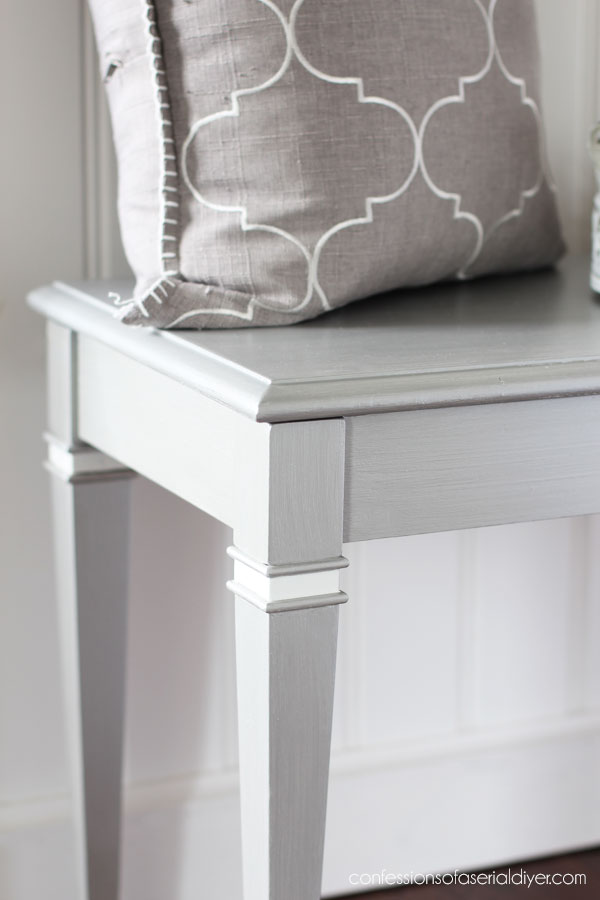
I followed up with two coats of Silver Bullet:

I love the Moonshine Metallics!
To get a smooth finish, it’s important to use a quality brush and paint in long even strokes, going from edge to edge and with the grain. Dixie Belle brushes are a hot commodity these days, but I love Purdy brand brushes equally as well.
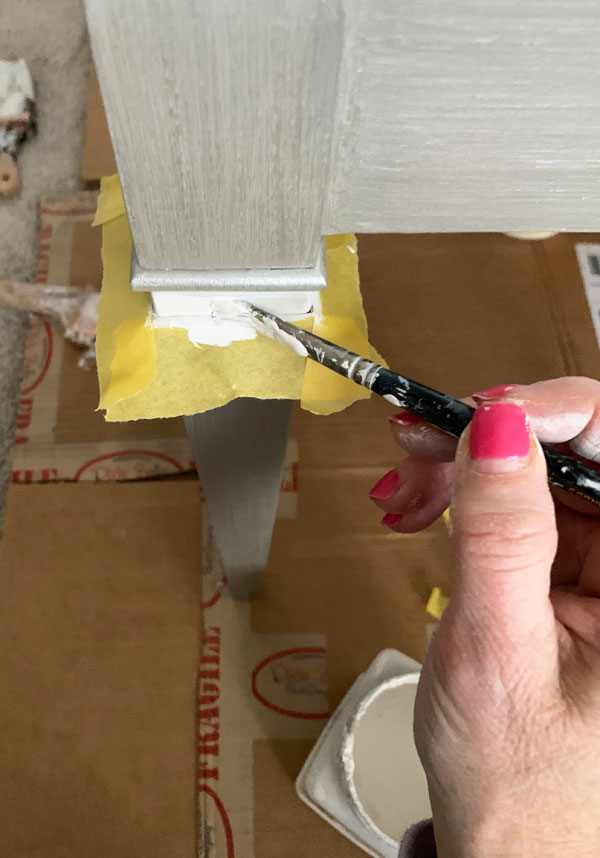
When the paint was dry, I went back and taped off the detail on the leg with my favorite painter’s tape, FrogTape, and painted it with two coats of Cotton.
Someone please give that girl a fresh manicure.
There is no need to sand or seal the Moonshine Metallics as they are self-sealing!
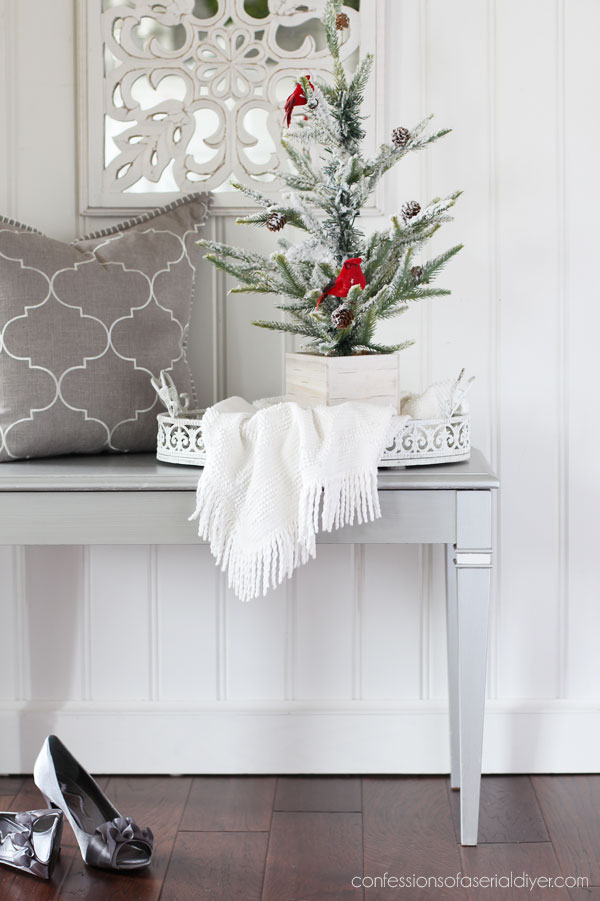
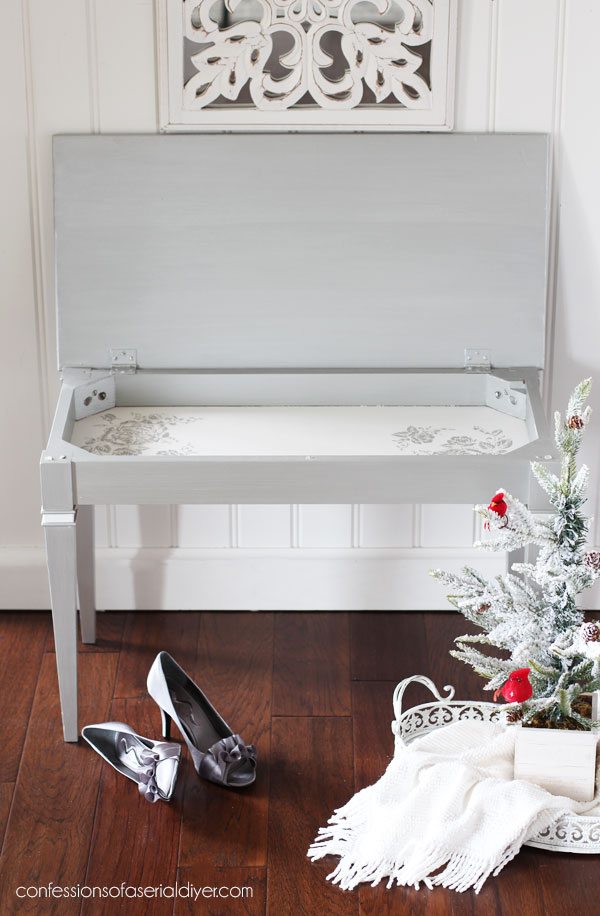
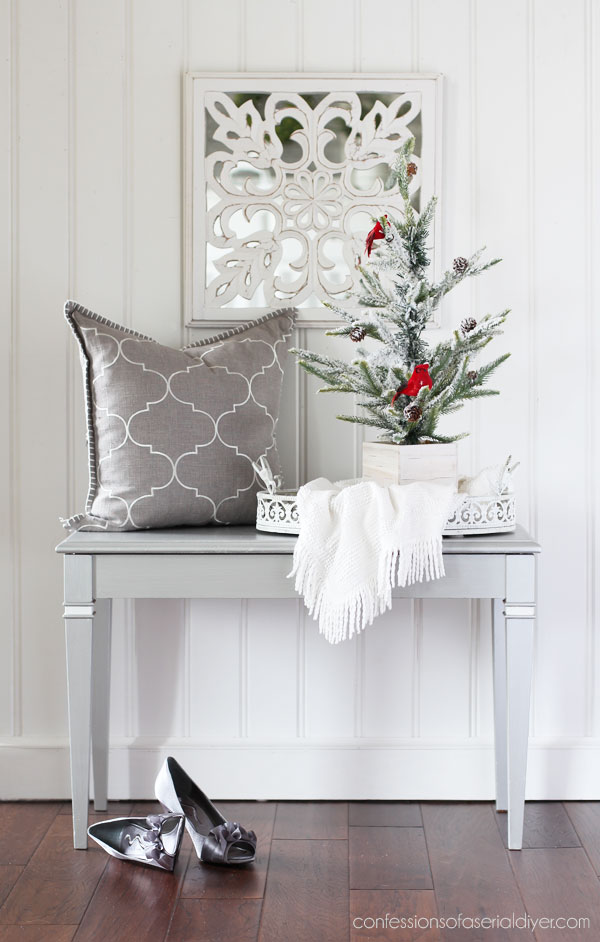
Ready to see the after??

Perty, no?
This pretty metallic took a dated piano bench and gave it an air of sophistication!
How sweet is this flocked tree?
I had it on this tray on my dresser for the holidays and never packed it away…
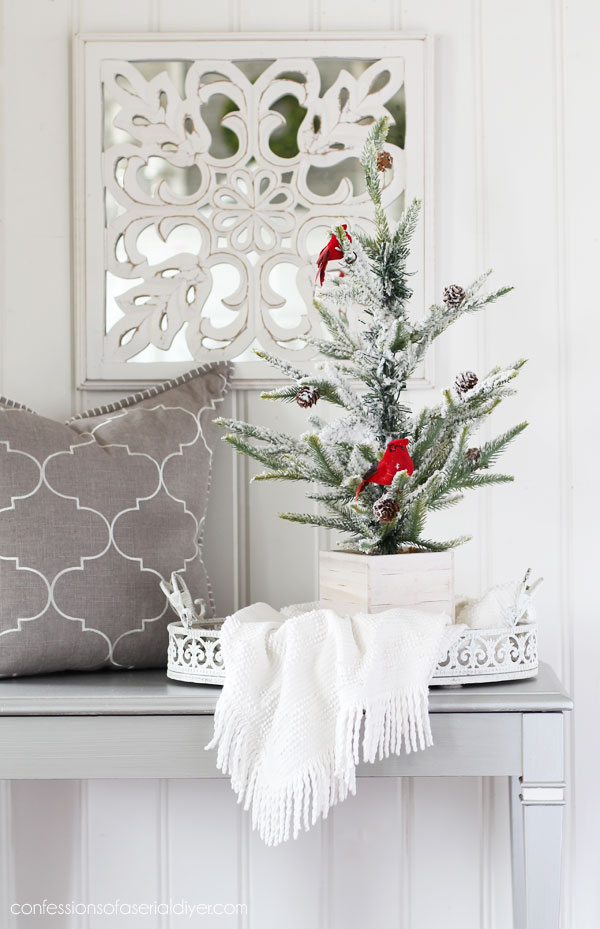
I just love the cardinals in it. They are our state bird, and I just saw one in the trees behind our back fence yesterday when I got up.
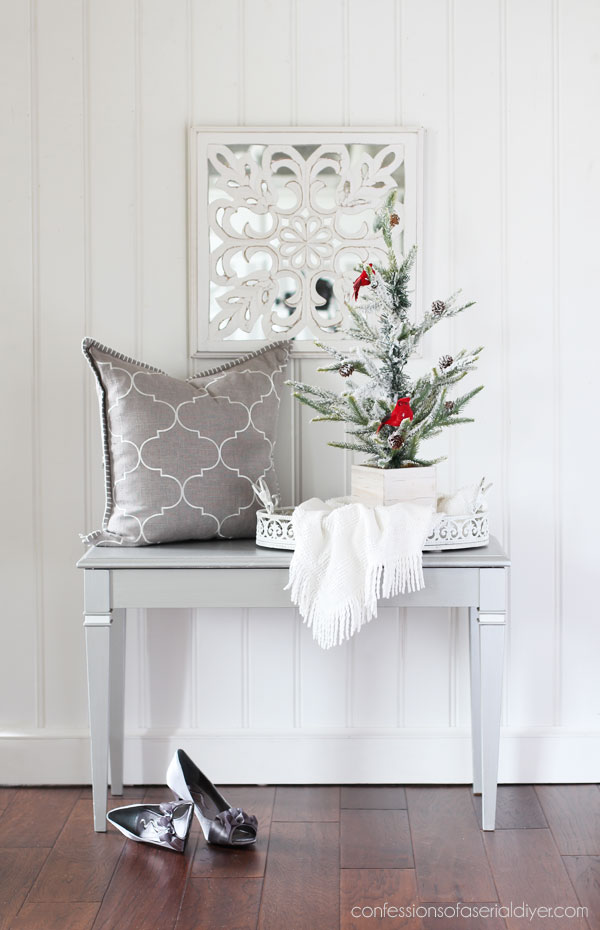
Adding a bit of white on the leg detail makes it a prettier detail…
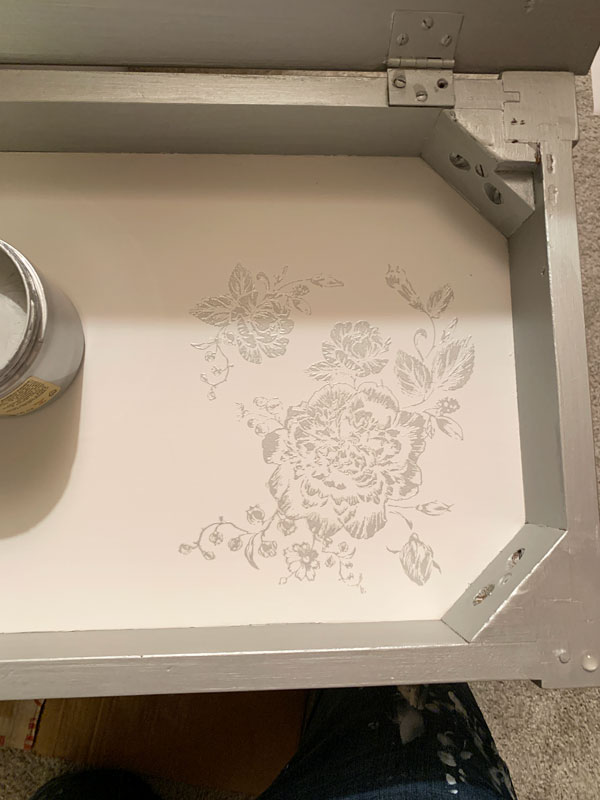
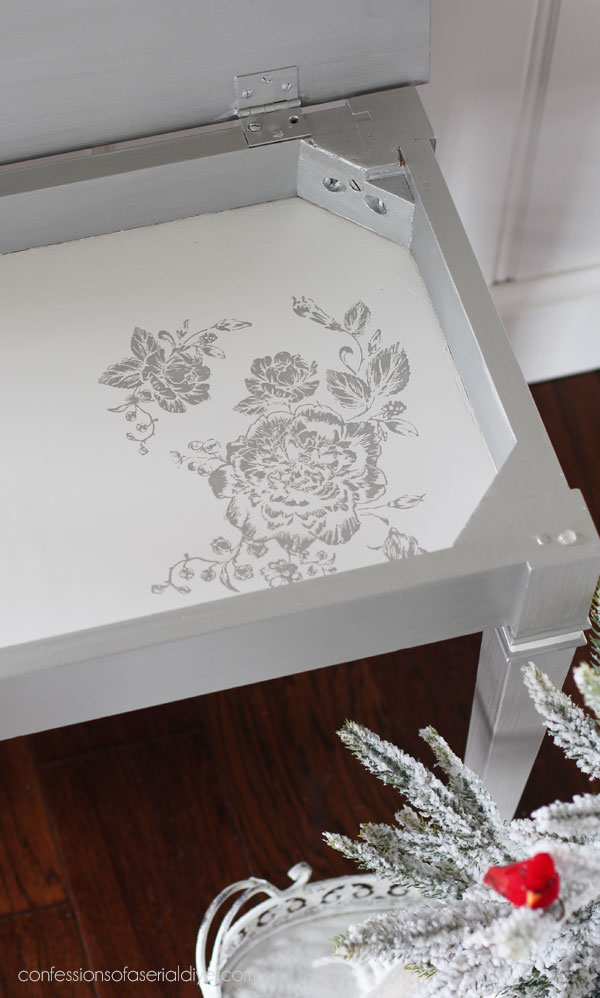
How about the inside?
To prep the inside, I started by taping off the perimeter with FrogTape and painting two coats of Cotton:
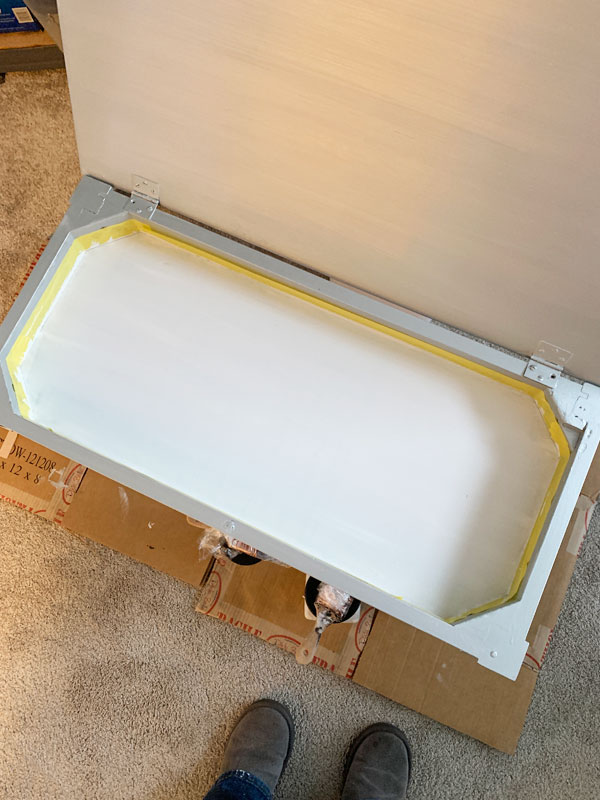
I removed the tape as soon as I applied the second coat.
How to Use Silkscreen Stencils
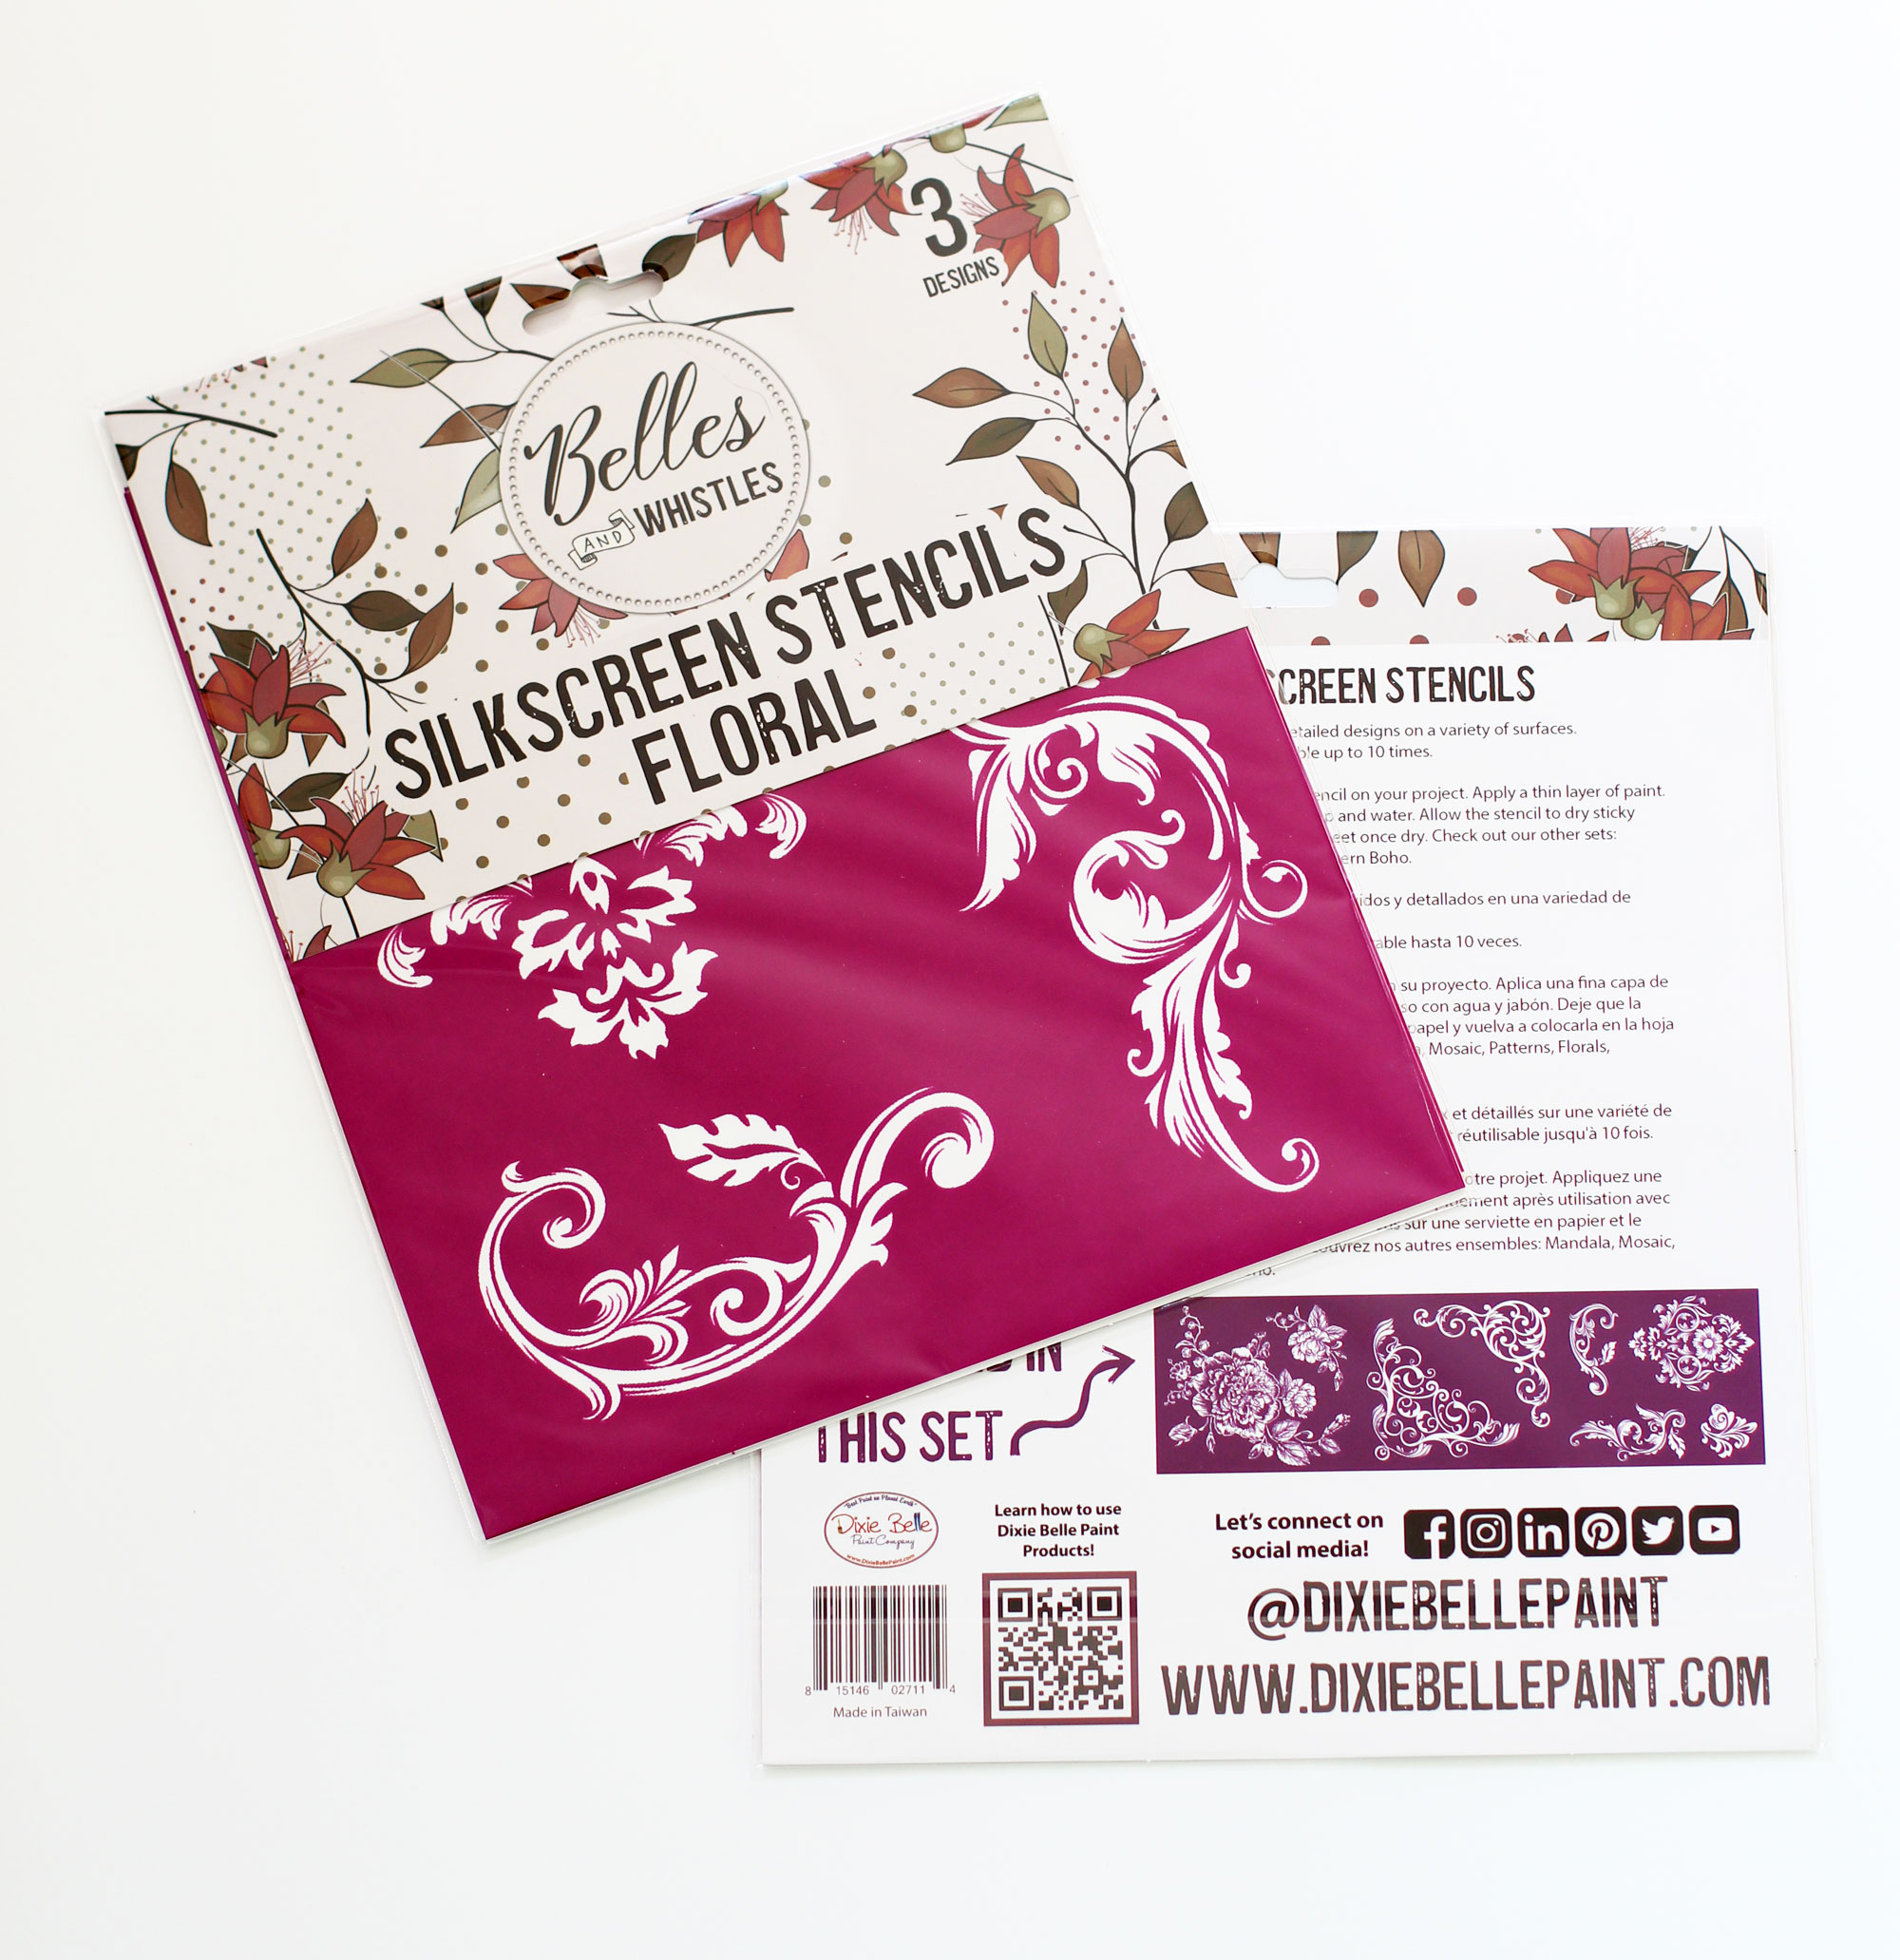
Then I reached for one of Dixie Belle’s new Belles and Whistles silkscreen stencils:
Silkscreen stencils have an adhesive backing, so there is no need to use spray adhesive as I normally do with stencils. I love that!
- Place the stencil where you want it to go and rub gently across the surface to be sure it is firmly in place, so no paint will seep under anywhere.
- Then, using the included spatula, load up a small amount of paint:
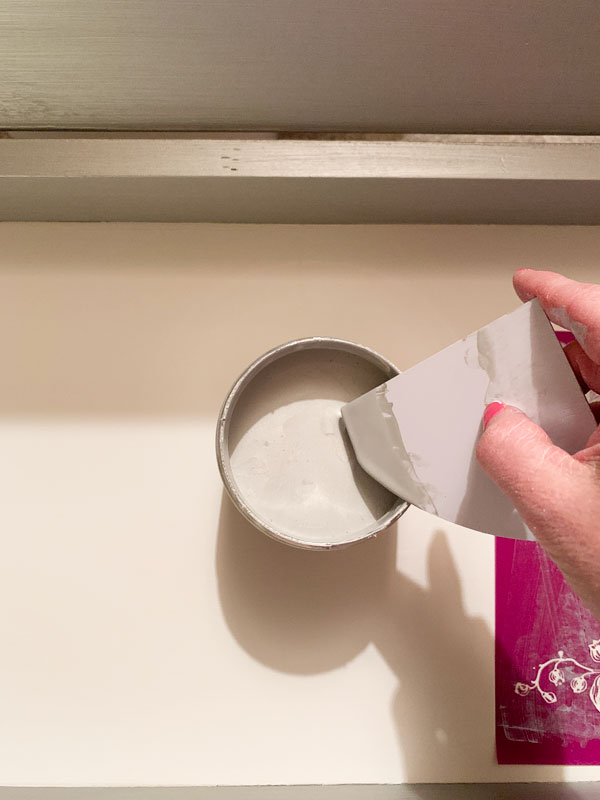
I used the Silver Bullet here.
- Next, spread the paint across the surface of the stencil. There is a super small screen in the open areas of the stencil and this will aid in pushing the paint through the screen:
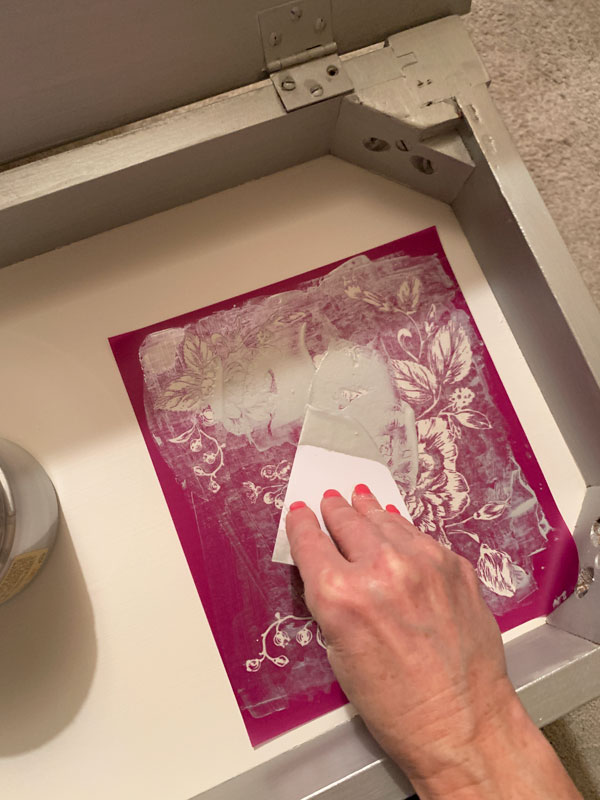
- Once you have it covered, go back over and remove any excess paint:
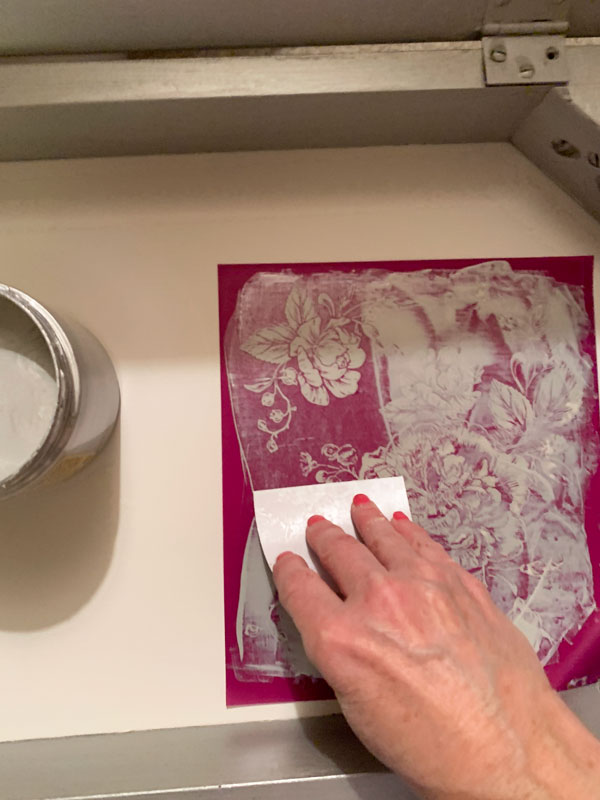
- Remove stencil while it’s still wet:
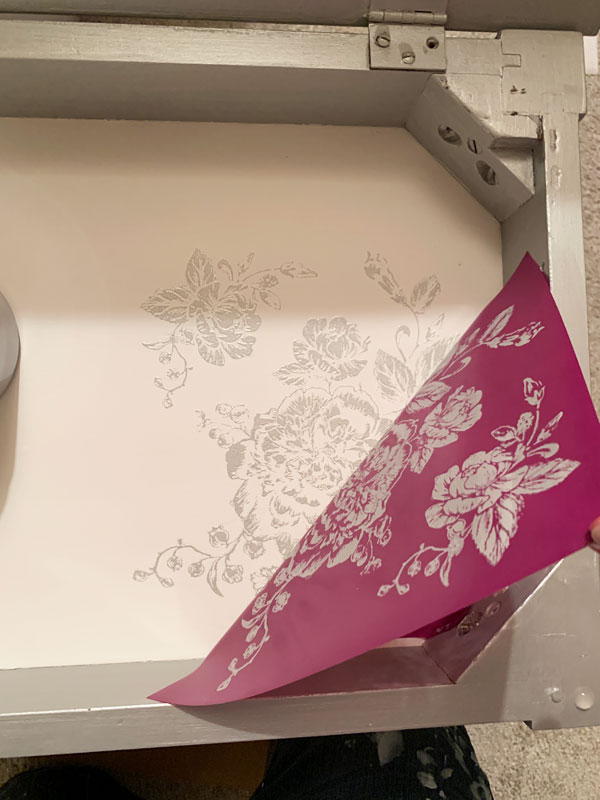
- Voila!
- Place the stencil in a tray of water to clean immediately after use:

I did use mine two times; I added the same floral to the left side first and then immediately used it again on the right side, before washing.
If you want to use your stencil more than once on a project, you will want to rinse it often so paint does not dry and clog the screen.
- Allow it to dry tacky side up and then reattach it to the original backing:

You should be able to get about 10 uses out of one stencil.
This Floral one is my favorite. It came with two other sheets of designs as well and the spatula is included also:
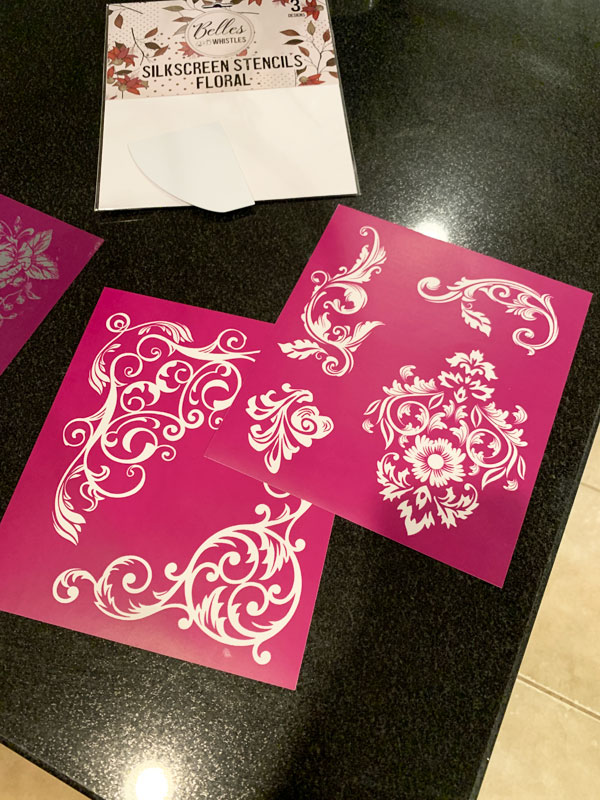
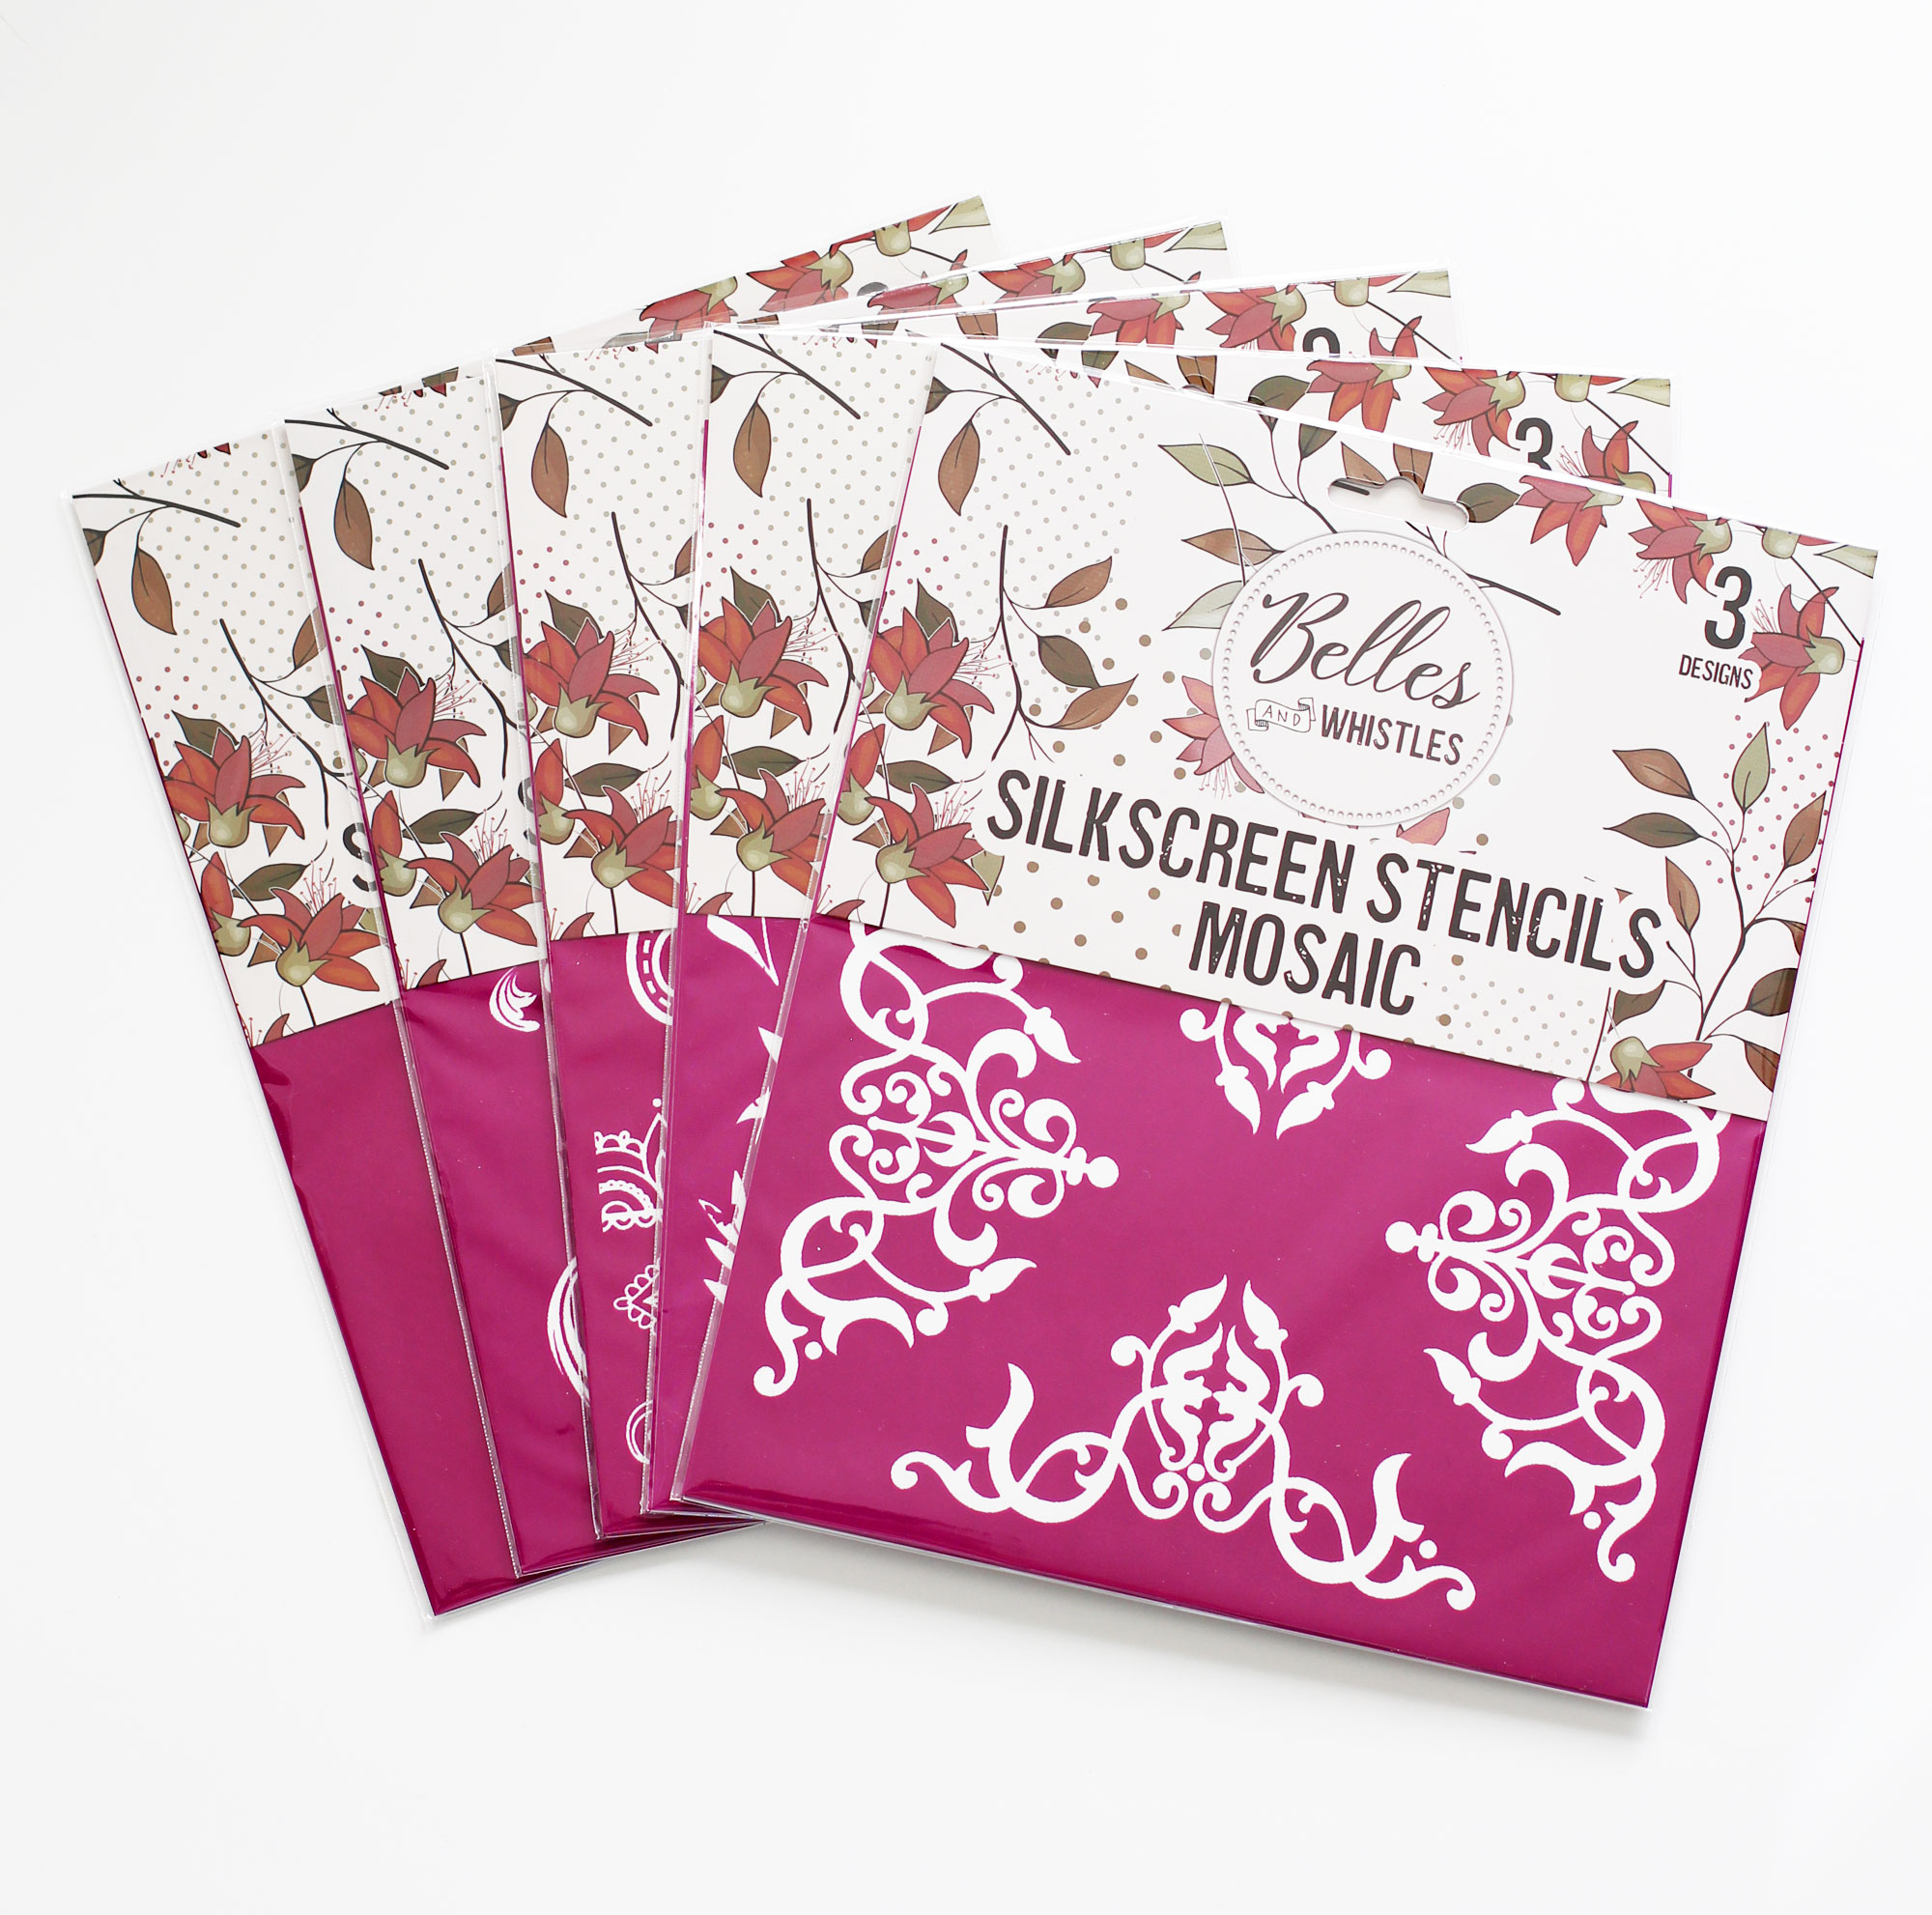
I have nine silkscreen stencil designs in my shop to choose from and each one comes with three sheets of designs:
The fine detail you get with these stencils is really detailed and beautiful!
This little bench would be perfect at the foot of a bed!
I hope you enjoyed this simple makeover today!
I’m excited to be one project closer to finishing off this haul!
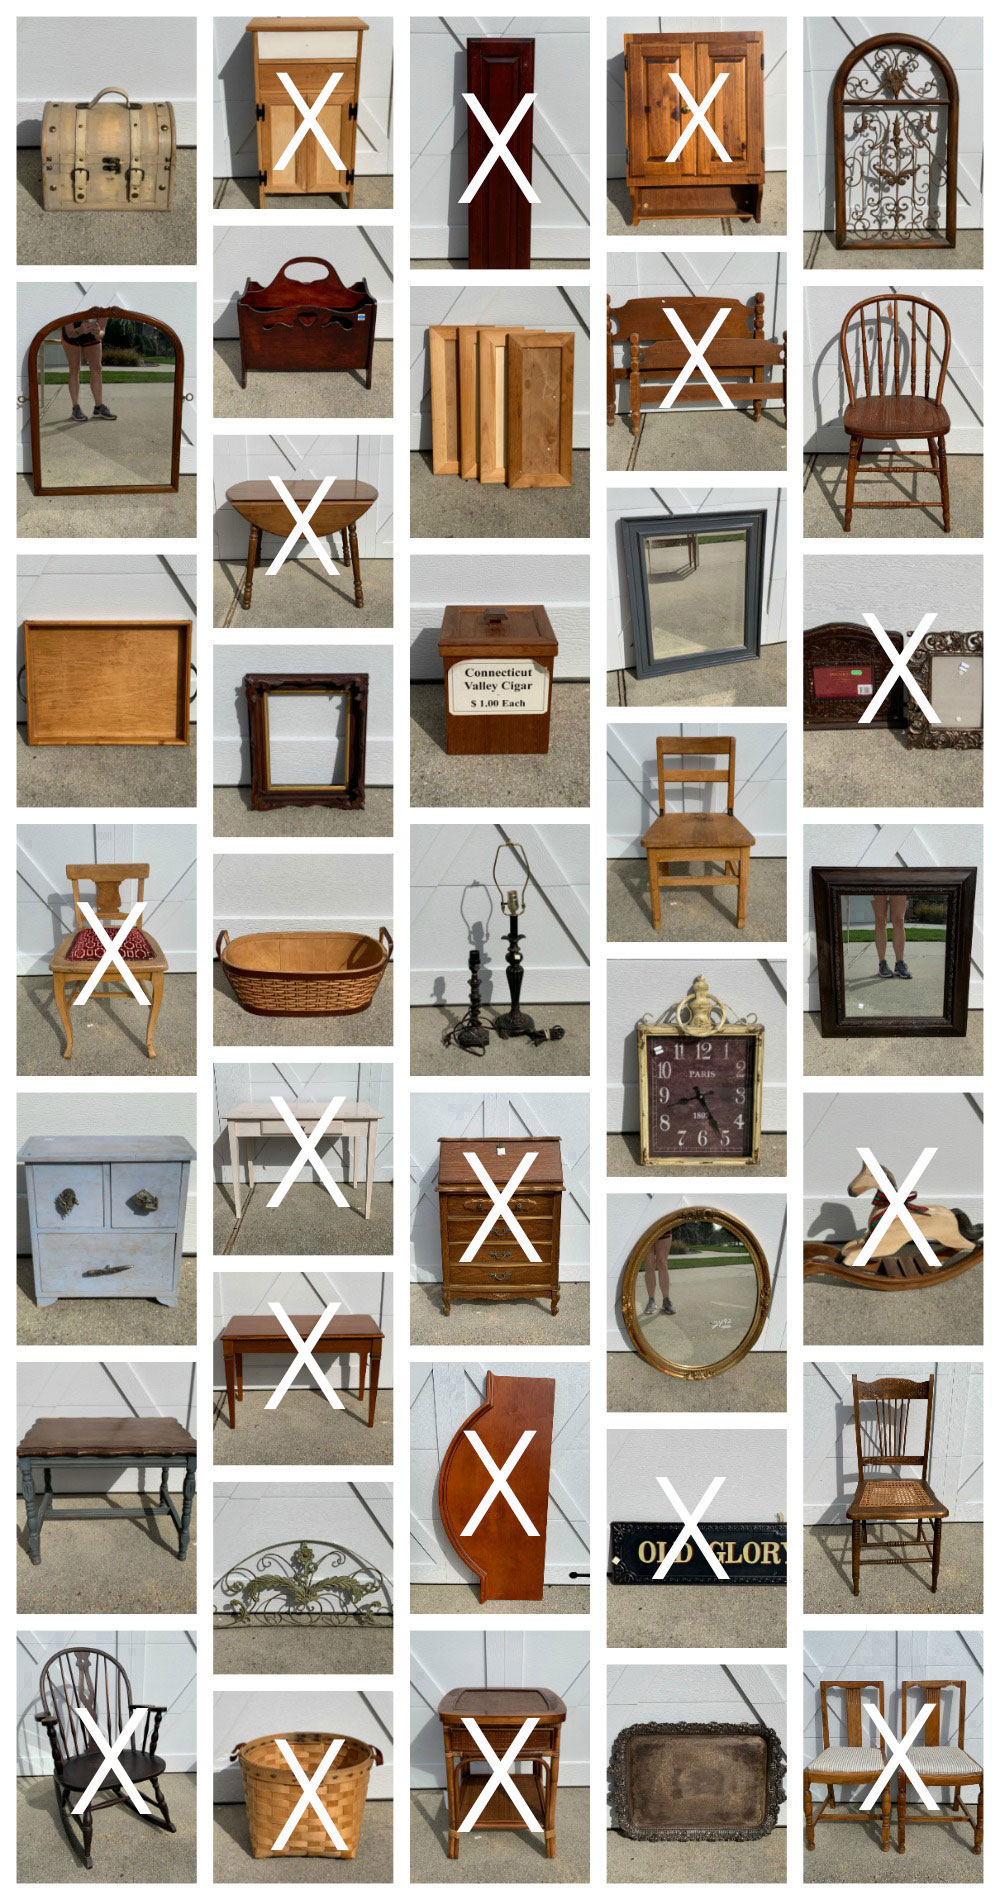
Catch up on any you may have missed so far here:
$20 Thrift Store Desk Makeover
$5 Thrift Store Chair Makeover & How to Use Silk All-in-One Mineral Paint
Unfinished Wood Cabinet Makeover
Cabinet Door turned Shelf
Painting the Smalls, Holiday Edition (Five of these pieces are in this post!)
Kudzu Painted Side Table
REPURPOSED HEADBOARD AND FOOTBOARD
VINTAGE SECRETARY DESK MAKEOVER
$3 THRIFT STORE HEADBOARD REPURPOSED
WALL CABINET REPURPOSED
WINDSOR ROCKER MAKEOVER
DROPLEAF TABLE AND CHAIRS MAKEOVER
Still many to go!
I did another piano bench seven years ago:
It’s a super oldie! See how it turned out HERE!
I’ll be back on Thursday with this cute piece:
Right now it doesn’t look happy, literally ha ha!
UPDATE: No need to come back! This little box is prettier than ever now…see it HERE!
XOXO,
![]()
Don’t Miss a Thing!
If you like what you see, there are several ways to follow along!
EMAIL * INSTAGRAM * FACEBOOK * PINTEREST * TWITTER


Petra says
STUNNING in silver.
Christy says
Thank you, Petra! XOXO
Mary Kaiser says
Oh it is so beautiful now. I love the inside cuteness when you open the lid. I just saw a piano bench at my thrift store, I will have to go back and see if it is still there. I love the idea of using it at the foot of a bed. You are so amazingly talented. Every thing you touch turns beautiful!
Christy says
Aww thank you so much, Mary! Ooh I hope it still there if you go back! XOXO
Carol Karl says
This is lovely. I like that you’ve added the stencil on the inside.
Christy says
Thank you, Carol! XOXO
Maryellen Webber says
What a pretty bench! Love the rich color with white detail and the beautiful stencil inside! Great job Christy!!
Christy says
Thank you, Maryellen! Paint did wonders for this one! XOXO
Sheila says
LOVE the way this not-quite-ugly duckling was turned into an elegant swan!! And the stencils look amazing as a sweet little inside surprise. Nicely done!
Christy says
Thank you so much, Sheila! XOXO
Christina says
Christy, this is an amazing makeover! Love the metallic and the white accent is perfect! The silkscreen stencil produces extraordinary details!
Another one you knocked out of the park. Way to go!!
Stay warm!!
Christy says
Thank you, Christina! The stencil does work amazingly well! Have a great week! XOXO
Janice Holt says
Just lovely and the stencil and white on the legs just finish it off so well. Can’t wait to see what you do with the little box; boxes are so handy and pretty to sit around.
Christy says
Thank you, Janice! The box is nearly done and it looks so sweet! XOXO
Denise Cox says
I love the stencil, but I can’t detect any ‘metallic sheen’…?
Christy says
Thank you, Denise! I think it is just the lack of light hitting it; it is definitely metallic when you look at it from the right angle. XOXO
Cherilyn Barber says
I don’t think that was a Piano Bench,I think it was Table ,Piano benches have a padded Seat ,but you made it look very beautiful anyway.
Christy says
Thank you so much, Cherilyn! It is a piano bench and the inside opens to hold sheet music. I see them with pianos in thrift stores often, and I have even tried to purchase the benches separately, but they never let me lol! 🙂 XOXO
Phyllis says
You always take things over the top. Wonderful transformation. You are so brave, as well. I would have paint all over my flooring.
Christy says
Thank you so much, Phyllis! Ha ha…I’ve gotten much better about containing my mess through the years! XOXO
Deborah Mealus says
Another gorgeous makeover! Your vision for what a piece could be is truly remarkable. I love the detail on the legs! I can’t wait to see what you do on Thursday with the “sad” little piece!
Christy says
Thanks so much, Deborah! That box really does look sad lol! XOXO
Dawn Shelley says
Christy did you flock the lil tree yourself?
I have 2 large (beautiful older Christmas trees at my church.) They are the kind of tree you have to add each branch onto the stem!!! Grrrrr
The trees have beautiful foilage though. I discovered by taking 2 branches back to back n zip tying them together they make beautiful mini trees of varying sizes. I just want a recipe n simple way to flock them inexpensively! I have a lil vision for next Christmas slready on how to use em!
Thx for any input you might have!
Dawn
Christy says
Hi Dawn! I did not flock the tree myself…I found it as is on an after Christmas clearance last year. I haven’t flocked anything myself, but my friend, Nancy from Artsy Chicks Rule, has and you can see that here: https://www.artsychicksrule.com/diy-flocked-tree-wreaths-and-a-little-bit-of-everything/. I love the idea of using the larger tree branches to make smaller trees! XOXO
Kathy Blumenberg says
I love your blog and the way you go about explaining what you did. You are so informative but not boring. Throwing in a little wit makes for some entertaining reading. Now, let me go in search of a piano bench. Lol.
Christy says
Aww I appreciate that so much, Kathy!! Thank you! Good luck in your search! XOXO
Cecilia from Georgia says
Oh man! Those stencils look so easy; maybe I can make them work since I have difficulty with regular stencils. The bench is lovely and the Moonshine Metalics look so classy; it will not last long in your booth. When you price a piece you have made over, how do you figure in your time? Someone told me to calculate at least $25 an hour but I don’t know about that since I am slow and have to go back over spots to make them perfect. Have a great week!
Christy says
Thank you, Cecilia! These stencils make stenciling so much easier! I do not follow the $25 hour for my time rule. This bench would end up costing way more than anyone would be willing to pay, and I am usually working on a few things at once, going back and forth as things dry. I usually take into account the cost involved and what someone might be willing to pay. I’m considering keeping this one for our bedroom, but if I were going to sell it, I would probably charge $55-$65 for it. XOXO
Sandra says
My goodness! THAT is sophistication! Thank you for sharing that. Question: how do you keep your fur baby from getting onto your just-painted works?
Christy says
Thank you, Sandra!! I almost never paint in the house. I usually paint in the garage and she is not allowed out there. It was so cold last weekend that I decided to move this one indoors, but luckily, she didn’t mess with it at all! XOXO
Meg says
Love this. Thanks for using the metallic paint and your stencils. This turned out beautifully elegant.
Meg
Christy says
Thank you so much, Meg!! XOXO
Sharon L Austin says
Sophistication is the perfect word for this. It’s very classy; reminds me of old Hollywood. *swoon. You’re going to start a whole new trend now with the metallics! And that interior stencil is a nice touch, and so pretty in itself.
Christy says
Thank you so much, Sharon!! The metallics really make pieces shine…ha ha no pun intended there! XOXO
Karen H says
Christy, I love that! I’m not usually a big fan of using stencils, but I’m going to have to check out the DB stencils! You did a great job on that cute bench, and also gave us so many great tips! Thank you!
Christy says
Thank you, Karen! These stencils are so detailed that had I covered the whole area, it would have looked like beautiful patterned paper! I just did the corners, but really wanted to keep going lol! XOXO
Susan Cox says
You always approach these makeovers with an artist’s eye. The touches of white banding make all the difference to this little bench–anther beautiful project.
Christy says
Aww thank you so much, Susan!! XOXO
Terry P says
Love how this bench turned out..the stencil ‘surprise’ inside is a great addition!!
Christy says
Thank you, Terry! XOXO
Patty says
Christy, you are truly an artist in every sense of the word!! I love the metallic paint – just beautiful! And that sweet baby watching so intently – like she might try painting herself – makes me feel good just to see her.
We lost our sweet, beautiful, black kitty to cancer a week ago and we are just heart broken! Please give Layla some extra lovin’ from me. 🙂
Christy says
Aww thank you so much, Patty! I am so sorry to hear about your sweet kitty. I’ll give my girl some extra love for you for sure! XOXO
Sue Mellette says
I love this makeover! The silver and the transfer really makes the bench pop. I also like the contrast of the white on the legs. Thanks for sharing your steps and techniques as well as some of the new Dixie Belle paint and transfers. Lots of inspiration from your posts! Thanks as always for sharing. I look forward to Thursday’s post. Have a great week!
Christy says
Thank you, Sue! I am so thrilled that you enjoy what I share around here! See ya Thursday, my friend! XOXO
Sandi Allen says
Beautiful! Love the color. And that stencil in the inside was the perfect touch!
Christy says
Thanks so much, Sandi! XOXO
carolyn lawrence says
Really love the stencil detail!! Turned out so pretty. You always inspire me!!
Christy says
Thank you so much, Carolyn! XOXO
Denise says
Absolutely gorgeous — you have such vision!
Of course, I notice you have an excellent furry helper!!
Christy says
Thank you, Denise! And yes…she is more like my supervisor ha ha! XOXO
Lizzy says
Beautiful. I love the finish.
Christy says
Thank you, Lizzy! XOXO
Rosie says
Oh so pretty!!!
Liking the colour combo a lot and the stencil is a nice surprise when you open up the lid
Christy says
Thank you, Rosie! It was fun to do a metallic for a change! XOXO
Michele M. says
WOW, Christy!!!! That is stunning. I’d never have EVER thought of doing something like that. I am kicking myself for selling my piano bench when I upgraded to a height-lifting leather one. I think it went for about that when I did. Ugh.
I can sooooo see that as a perfect foyer bench and keeping mittens and scarves in it – and have a boot tray underneath. How nice to be able to sit comfortably putting one’s shoes or boots on.
Well done – that metallic really raises the bar on a simple piece!
Christy says
Thank you, Michele!! Oh darn…and yes, it would make an excellent foyer bench…just perfect for mittens and such! I love that idea!! XOXO
Kay says
Our piano bench has never had a padded top, but I added a cushion which kept falling off. I would not have thought to put the stencil on the bottom of the bench. I might have put it on the inside of the top where it could be seen every time it was opened. It is beautiful!
Christy says
Thank you, Kay! I should have added something to the inside of the lid…that never even occurred to me! XOXO
Marcie Lovett says
I thought it was so pretty in silver. Then you added the white. Then you added the stencil. I should have known you would do more! That stencil is just astounding and I think I must have it. I love learning things from you, Christy. Beautiful job on this one!
Christy says
Thank you so much, Marcie! These stencils are awesome and easy to use!! Love that! XOXO
kathy says
I almost love the inside more than the outside – lol
Christy says
Oh ha ha! Maybe I should have reversed them! XOXO
Rose Lefebvre says
Ieresting to use a metallic paint. Would not have thought to decorate the inside of the bench! Unique!
Christy says
Thanks, Rose! XOXO