Hey there amazing friends, and welcome back!
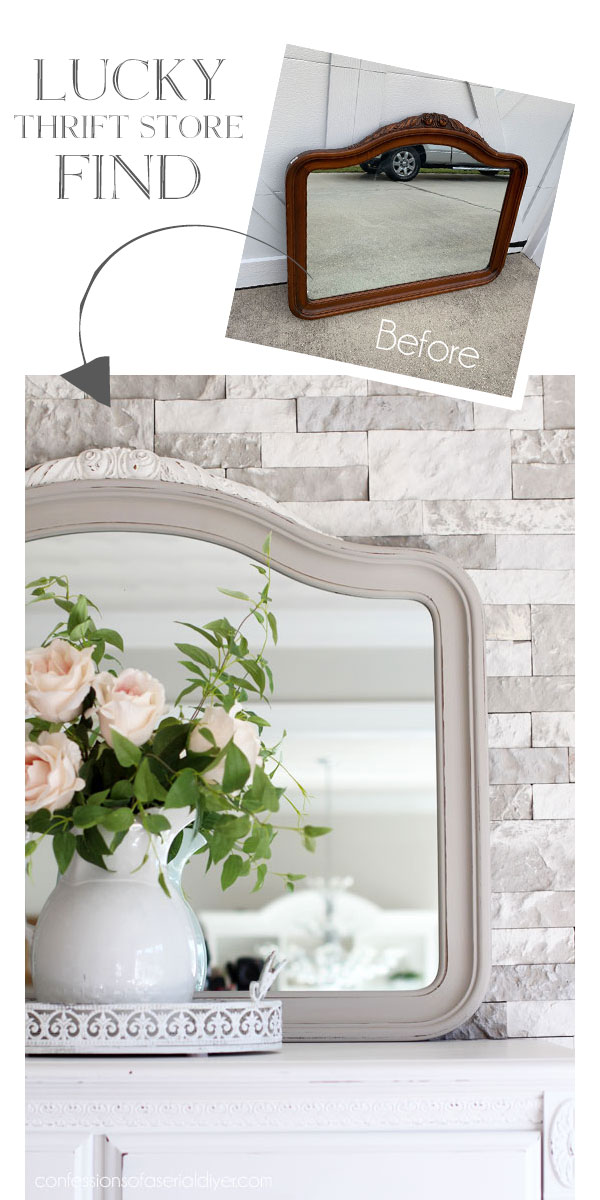
I’m here today sharing another piece from my latest thrifting day, this beautiful mirror:

Now this was not on deep discount like the previous two pieces I shared from this haul, but at $25, it was still worth it. It was in perfect condition and didn’t need to be made over at all. But you know me…I just can’t help myself.
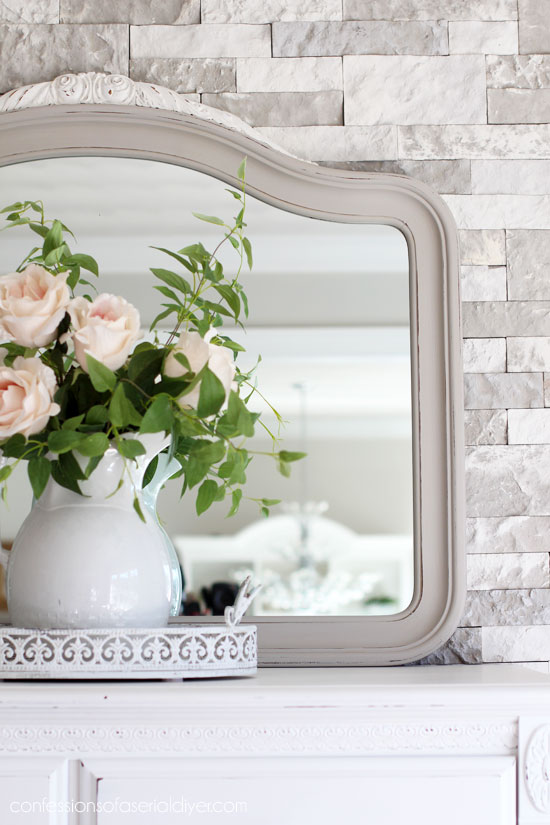
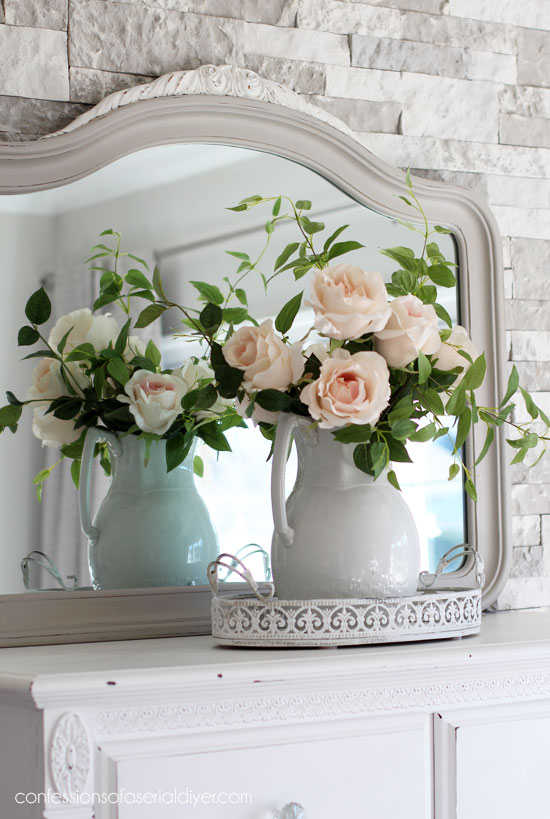
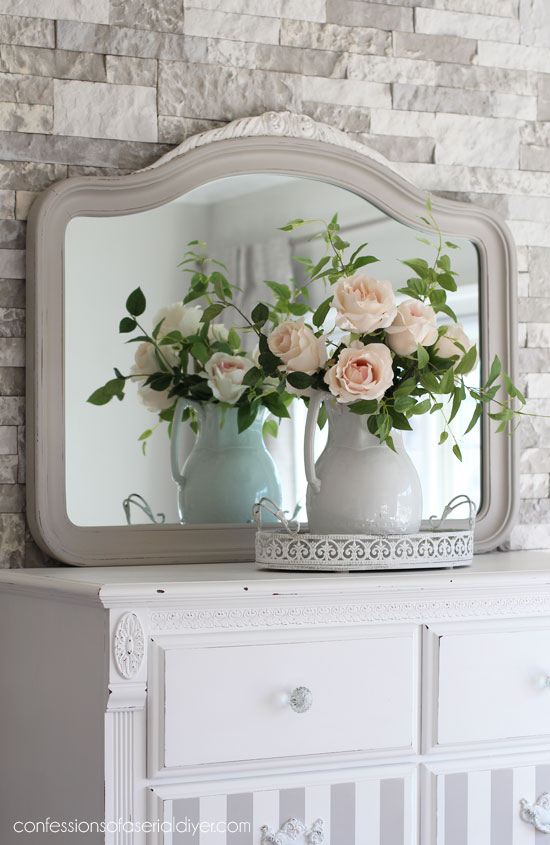
Plus I knew it would sell more easily with a fresh new paint job:
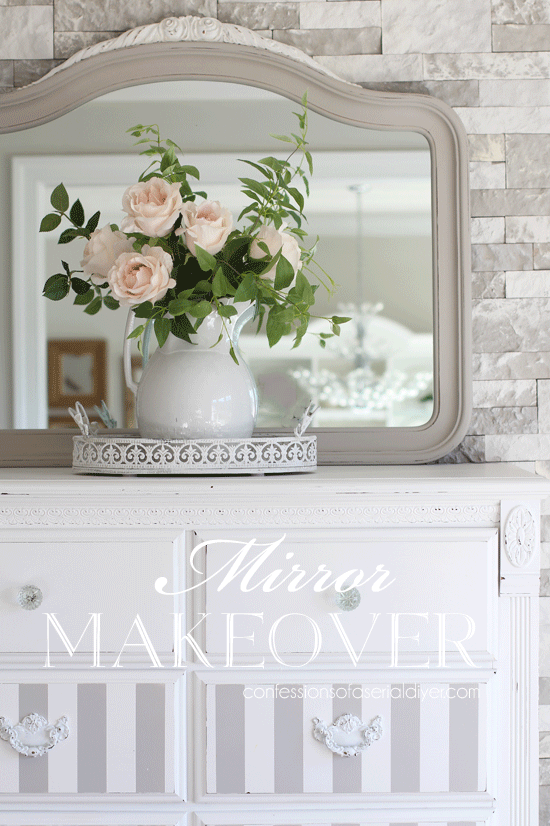
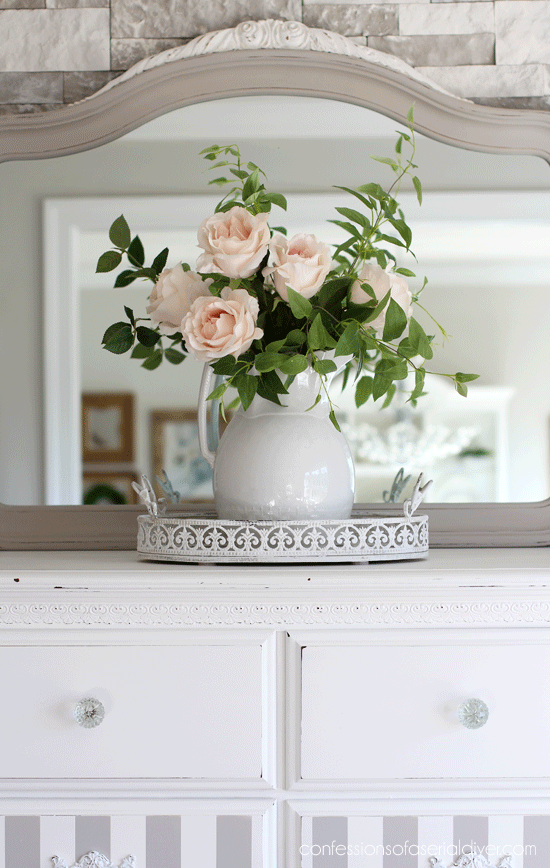
It matches beautifully with my storage piece I painted for my office last year.
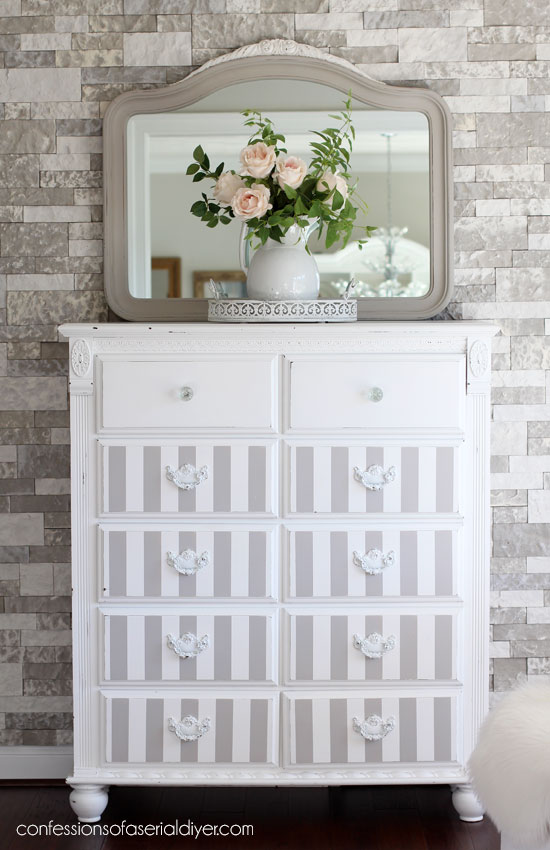
It’s a tad big for this piece, but this was the best way I could find to style it for the photos. This mamma jamma is heavy! I’ve included a few affiliate links so you can find the products I use. Read my full disclosure here.
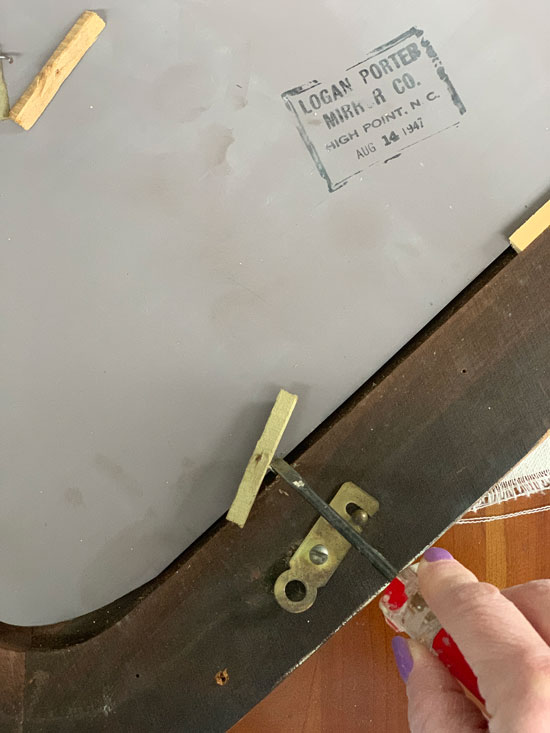
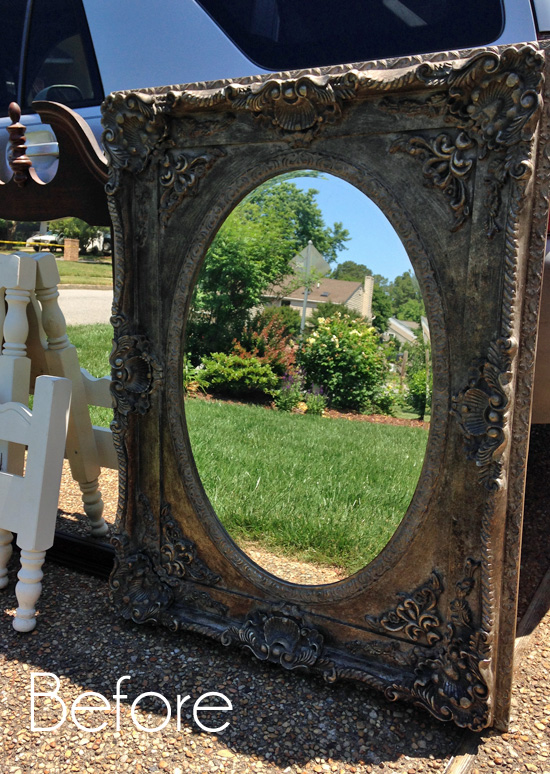
When painting mirrors, I always try to remove the back and take out the mirror if possible. It is worth the trouble in my opinion to get a perfect paint job.
This mirror backing was held in place with these nails:

I was able to pry them up pretty easily with a strong putty knife…
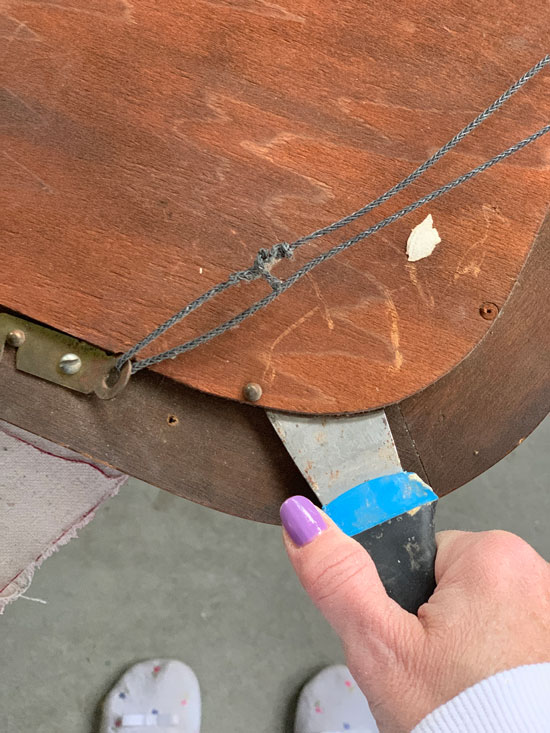
(Working in my slippers. 🙂 )
Then there were these small wooden pieces wedged in all around the mirror to hold it firmly in place. I was able to pry them up with a screwdriver. And looky there…this mirror was born the same year as my sweet Mama!
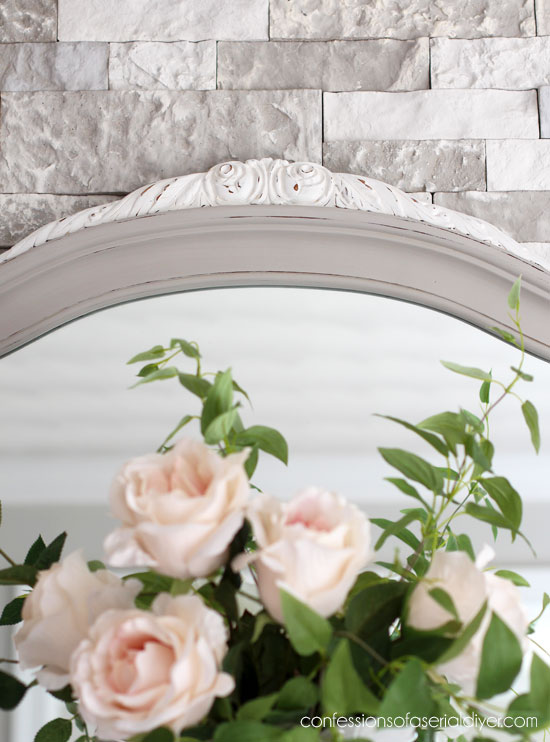
Once I got the backing off and the mirror safely removed, I painted the frame in Annie Sloan’s French Linen that I had added white to a while back:
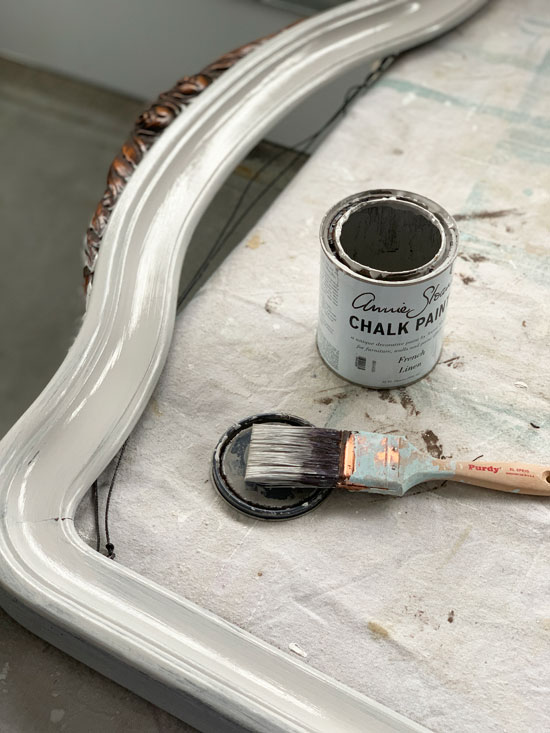
This is about two parts ASCP in French Linen and one part Bit of Sugar by Behr. I painted all but the carved piece at the top. That was painted in Behr’s Bit of Sugar made into DIY chalk paint. (Recipe HERE.)
I was at the absolute bottom of the can here…

This is one of those colors that I continue to buy the Annie Sloan version of since I love it so much.
Don’t forget to paint the groove on the back that will reflect in the mirror!
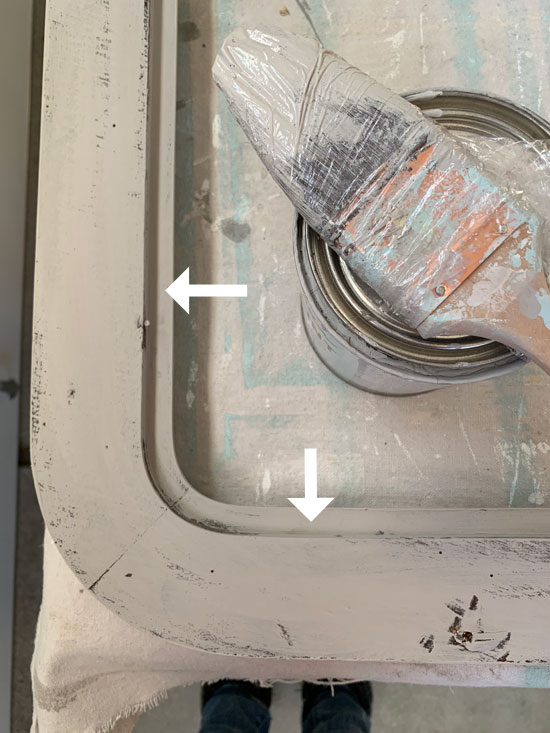
That is the main reason that removing the mirror is so worth the effort.
I sanded lightly all over and sealed with Dixie Belle Satin Clear Coat. I made the mistake of sealing the white carved piece on the top when it was lying flat, and I was a bit too liberal with it. The sealer settled in the grooves and turned yellow! I ended up having to repaint that piece and then sealed it again while the mirror was standing upright, being much more careful to not overdo it the second time.
I added the same pieces to secure it right back and then put the old backing on, and I used the same vintage nails to secure the back. I reuse as much of that stuff as possible when I can!

This storage piece has been such a great way to store my fabrics, notions, and photo props. It started out like this if you missed it:

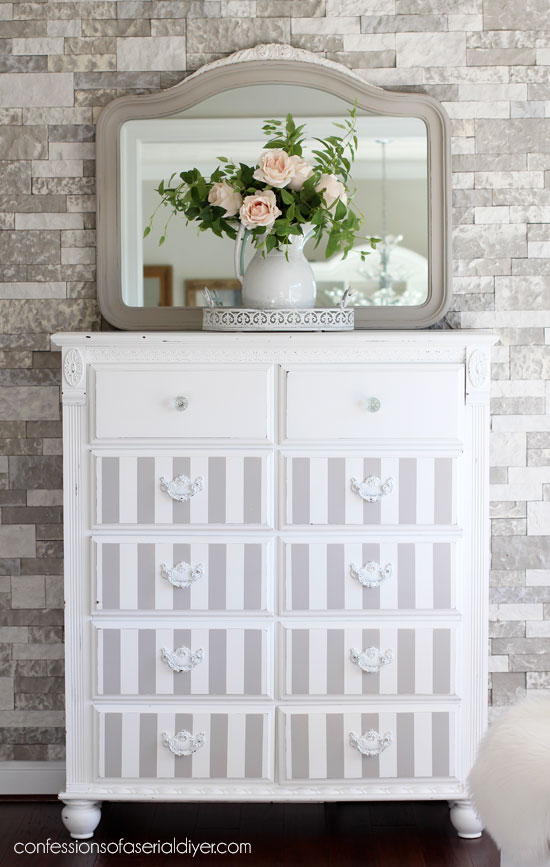
You can revisit this makeover HERE.
I also made this simple cover for this small sofa in my office that you see poking into a couple of the photos:

My Mother-in-Law passed this on to my Hubby before we were married, but it was yellow. It is the most comfortable sofa ever and I loved the shape of it, so I was determined to make it work and claimed it for myself to use in my office. You can visit this slipcover tutorial and see the before HERE.
I hope no one is too upset that I painted this lovely mirror, but that is what I do, y’all!
This is the biggest mirror I have ever painted:
It was an amazing yard sale deal! See how it turned out HERE!
That’s another project crossed off!
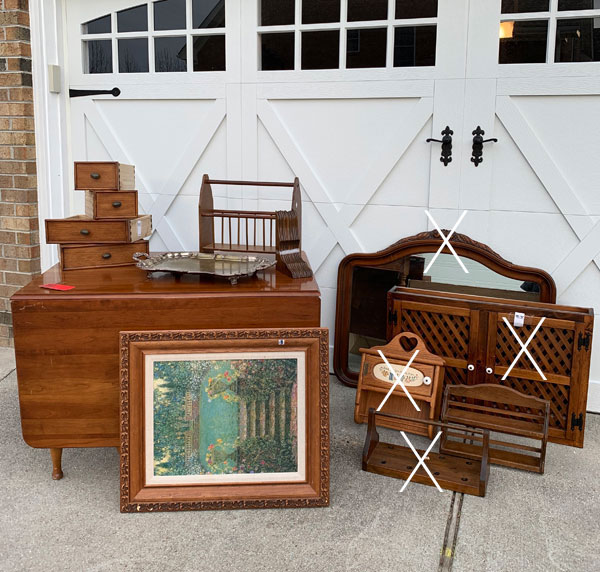
See the other three HERE, HERE, and HERE if you missed them!
I’ll see y’all back here on Tuesday with one of these drawers I started on:
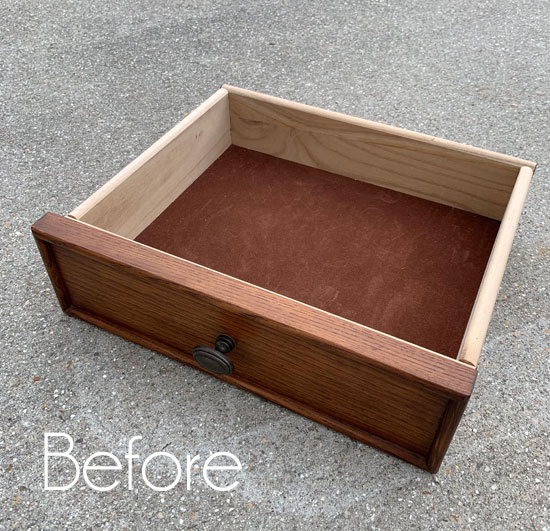
UPDATE: See what this drawer is up to now HERE!
Have a great weekend!
XO,
![]()
Don’t Miss a Thing!
If you like what you see, there are several ways to follow along!
Email * Facebook * Pinterest * Twitter *Instagram


Mary Kaiser says
That is beautiful now. Love the colors you used. I think the finish was pretty before, but think it is beautiful now!! Good job!! I am looking forward to see what you do with the drawers as I have a couple in my stash to use.
Christy says
Thanks, Mary!! This is one of my favorite color combinations…gives pieces a soft, romantic look. I’m so glad you like it! See ya Tuesday…have a great weekend! XOXO
Christina in SW FL says
Christy, this mirror turned out so lovely! Thanks for the reminder to paint that one lip that reflects in the mirror. The colors are so you! 🙂
I adore your slipcover tutorials though I admit I freak out at the thought of actually making one! 🙂 I have a couple of chairs I would re-done but …. shaking my head … can’t bring myself to do them… yet. 🙂
Have a wonderful weekend!!!
Christy says
Thank you, Christina! I do love these colors! Slipcovers can seem daunting, but if you see it broken into smaller steps, it seems much more do-able. And you can easily undo a seam if it sews up wonky in the process! Enjoy your weekend too! XOXO
Janice Holt says
Love the mirror. Don’t upset me at all that you painted it because I love painted pieces. Loved the tote on Tuesday but didn’t comment. Glad to see holidays are over and you’ve gotten back to what you do best.
Christy says
Thank you, Janice! Glad to hear you enjoyed the tote as well, and yes I am so happy to be back at it as well! XOXO
Marcie Lovett says
Lovely, Christy! And fun to see the back with the old hardware and marks.
Christy says
Thank you, Marcie! I love uncovering the history in pieces! Have a great weekend! XOXO
sharon austin says
Very pretty; I seriously wish I had your imagination for detail!
Christy says
Thank you, Sharon! You are so sweet! XOXO
Kellie says
Your mirror turned out beautiful. I love all the projects that you do. You are my favorite blog that I follow and always look forward to Tuesdays and Thursdays!
Christy says
Thank you so much, Kellie! You totally made my day!! XOXO
Debra A Wise says
Gorgeous! Love the colors. Another great makeover, Christy! Can’t wait to see what you do with the drawers.
Christy says
Thanks, Debra!! Have a great weekend! XOXO
Becky says
Lovely. Anytime you want to paint a ho-hum wood surface, it’s OK with me, haha! I love a really nice antique left alone, but other things really should be updated and made happy again… like this mirror!
Christy says
I appreciate that, Becky! That was my really nice way of saying please don’t anyone comment that I ruined it by painting it LOL. Much better! Enjoy your weekend! XOZo
Donna says
You are a genius ! I so enjoy your posts. Wish I could shop at your booth.
Christy says
Aww thank you so much, Donna! I wish you could too! XOXO
Addie says
Beautiful mirror….my thrift shops aren’t always so giving!!! But some times I do score BIG!!!!
WOW!!! to that little curved sofa!!!! How did I miss that??? It’s like a giant toaster cover!!!!…that I also love!!! Why didn’t you completely have me calling the paramedics…..by adding blue hydrangeas to the picture!!!!! That is a REAL beauty!!!! GREAT job!!!!! Also, really liked the second ornate mirror…
GORGEOUS!!!!
Addie love your way!!! Happy New Year 2019!!!
Christy says
Hello awesome Addie and thank you!! I always enjoy your comments so much! Yes that slip cover really is like a giant toaster cover lol. Did I mention that I dug up one of my hydrangea bushes and brought it to the new house when we moved? Hoping for blooms this year!! Have a fabulous weekend!! XOXO
Addie says
You did not mention that and you didn’t have to feel the need to throw that in!!!
XXOO
Christy says
Ha ha sorry…that bush started as a clipping my MIL gave me from her bush which was from her great grandmother’s bush! I had to dig it up and bring it here. It doesn’t give off as many blooms as the ones I had on the side though, but I should see some. XOXO
Paula says
You made beautiful even better! Thanks for the tips! I have two mirrors that need painting!
Christy says
Thank you so much, Paula! And you’re welcome! XOXO
Julie Briones says
Such a pretty mirror, Christy. And now I’m trying to figure out how to add another dresser to MWA for storage! Ugh!
Christy says
Thanks, Julie! Ha ha they are awesome for storage in other places besides a bedroom! 🙂 XOXO
Debbie in TX says
This turned out very pretty, with the two colors and the accent piece on top. Looks fantastic on your storage chest — are you going to leave it there? Two thumbs up for working in your slippers!!! Way to go, girl!
Christy says
Thanks, Debbie! I was tempted to keep it, but I did end up taking it to my booth this week. And yes…I’m am rarely without my slippers lol! XOXO
Lisa says
Hi Christy! Just wanted to let you know how much I admire all of your work. A few months ago I posted a comment that I was moving and redoing a lot of furniture for my new place as well. It’s been somewhat successful. I learned some things already like the top coat I was using turns yellow if I apply too much. Also, white chairs pick up black marks on the legs very quickly. I made some pieces I really love though. One cabinet though is so disappointing. It smelled horrible and even though I used shellac and a top coat, it still smells. It turned out so cute with the gray stripes. Does that just happen sometimes? I live in an apartment now and don’t have an outdoor space so I miss this already. Maybe I will start doing some smaller pieces on my balcony. I do live very close to goodwill and pass restore on my way to work hehe! Lisa
Christy says
Thank you so much, Lisa! Sounds like you’ve been busy! Dressers are the worst for smells because the entire inside cavity can still smell even after shellacking and painting the outside and all the drawers. I read somewhere that you can use cheap vodka in a spray bottle to eliminate musty odors, but I have not tried that. (Google it.) Now I just try to avoid really musty pieces all together. Best of luck in your new place and I do hope you can find space to continue being creative! XO
Nan Kanipe says
I admire what you do–many projects make something old and decrepit look great and useful again. However, I am a little tired of the “paint it shades of white” theme. There are other colors out there! Plus, sometimes the old wood just needs to be cleaned and polished or refinished–natural wood is beautiful too!
Christy says
Thanks, Nan! I love neutrals and shades of white. That is why I use them so often. I do use blue a lot, but if you are looking for a rainbow of colors, I’m afraid I will disappoint you, my friend. XO
Missy says
Christy, I am trying to finish my husband’s, “man cave”, and came across the mirror that I needed to work on before I could hang it. It just happens to be just like your mirror, and boy did you save me a lot of headaches and mistakes. I do have a question for you though, the wood on the back of the mirror is quite warped. Do you think I should replace it or is there a way to flatten it again? I wish we lived closer, I have so many great things that I would love to give you to work on, especially frames, but tables and magazine racks and………so much more.
Christy says
If you might have to replace the backing anyway and aren’t worried about ruining it, you can try laying it on a flat surface outside and soaking it with the hose. Then lay something flat and heavy on top while it dries. Good luck! XO