Amazing friends, I am so excited to be back creating! I’ve got a fantastic way to repurpose an old headboard and footboard for you today!
But first, thank you so much for hanging out with me every day last week! I decided to pull out some Christmas oldies in my Posts of Christmas Past series. That gave me a chance to get the halls decked and we finished with setting up our Christmas village this weekend!
Today, I’m joining my favorite treasure maker friends for our December edition of Trash-to-Treasure. Be on the lookout for their awesome makeovers at the bottom!
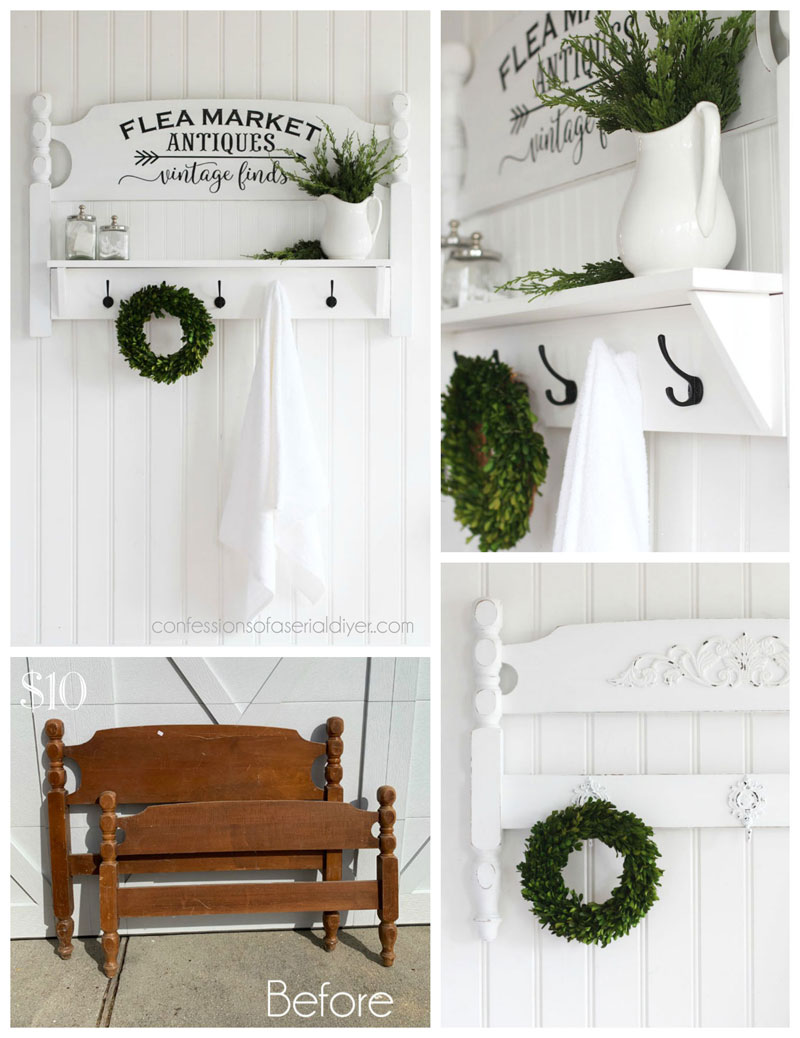
Repurposing a Headboard
I found this headboard and footboard set two or three Summers ago while yard saling for only $10:
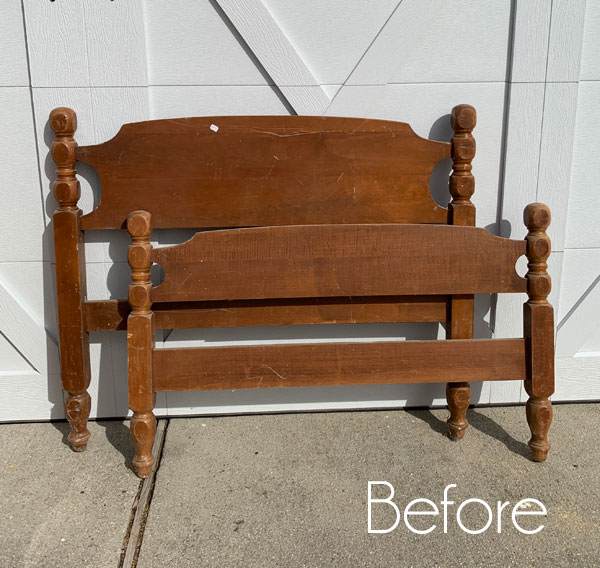
I bet many of you guessed that I would be creating a headboard bench from this set.
That’s probably because I’ve made a headboard bench or two, or ten lol.
But not today!
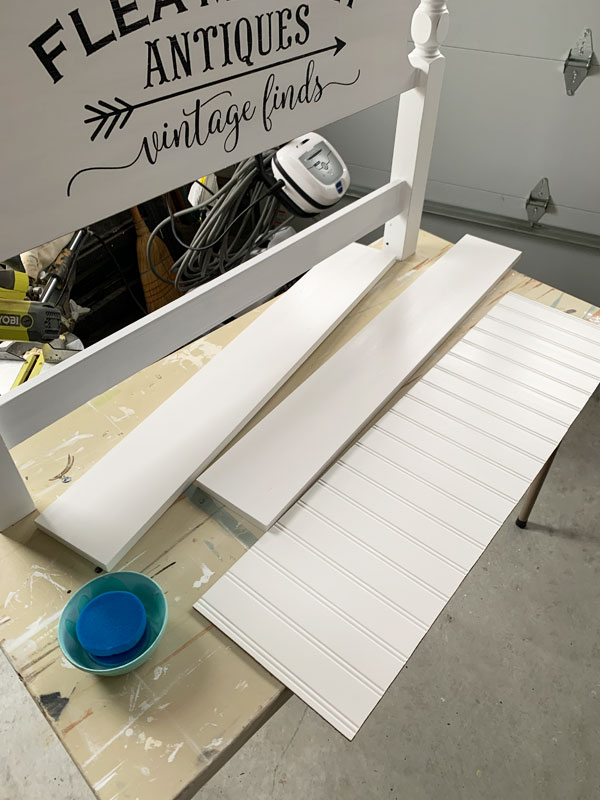
For this project, I started by giving both pieces a good cleaning with White Lightning. I followed with a quick rinse with clean water and then stood there staring at both pieces while I waited for inspiration to strike. I finally decided on a plan which required a quick trip to Home Depot for these:
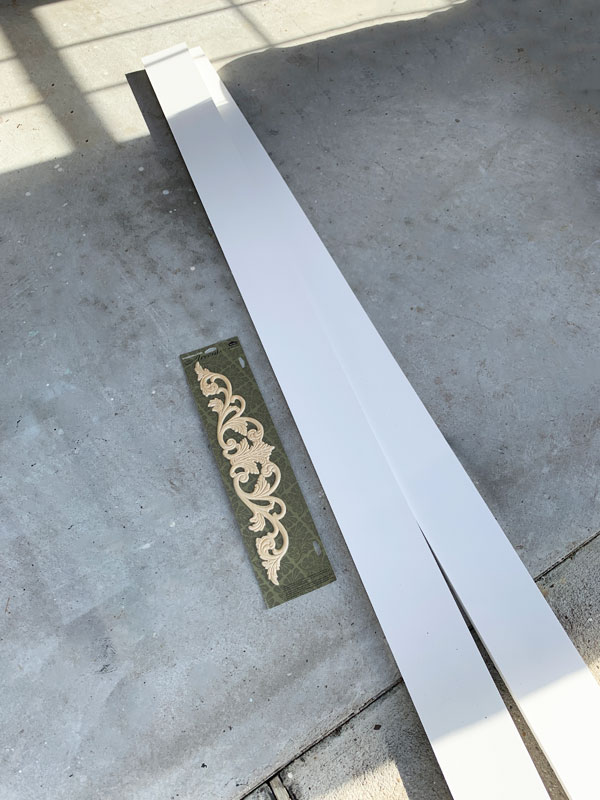
I only ended up using one of the primed 1x4s.
I had a piece of scrap bead board that I cut to fit the opening of the headboard:
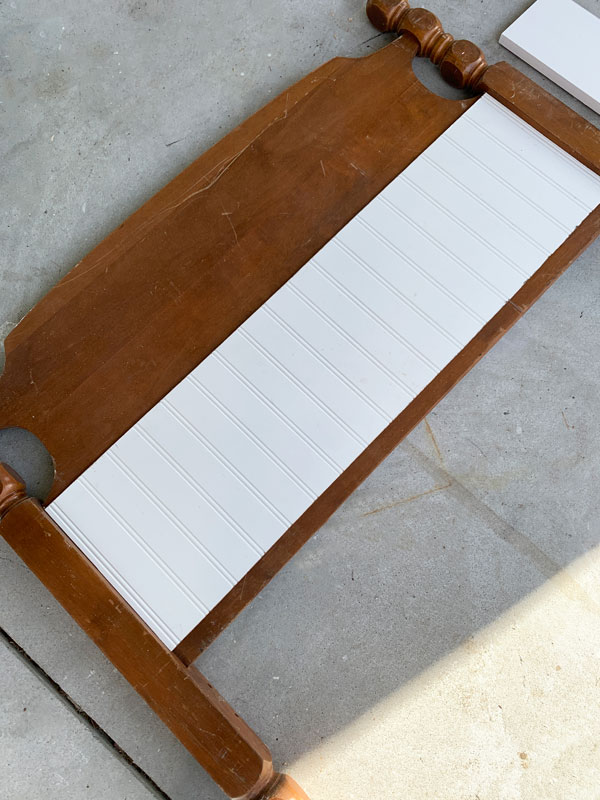
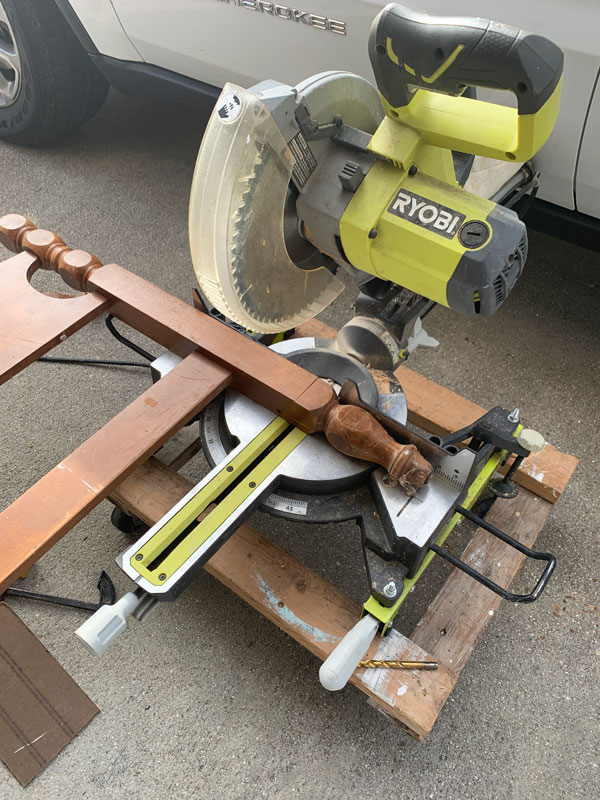
Then I cut the 1×4 to bulk up the cross piece on the bottom and for a shelf and two support brackets using my Miter Saw. I cut them to fit inside the bed posts:
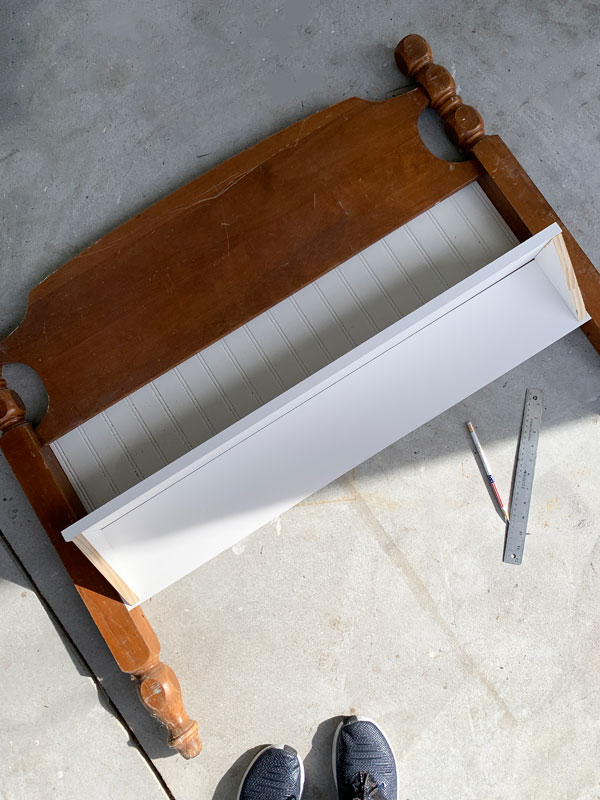
Here I was just dry fitting everything into place. I’ve included a few affiliate links so you can find the products I love.
I ended up cutting the legs off also using my miter saw:
I’m not sure what this headboard was made of, but the sealer had worn off in several places and that is usually an indication that it may bleed-though in those areas, so I gave it a coat of BOSS in white to be safe and let it sit overnight. It works wonders on bleed-through!
It’s not any extra work since being white, it saves a coat of paint.
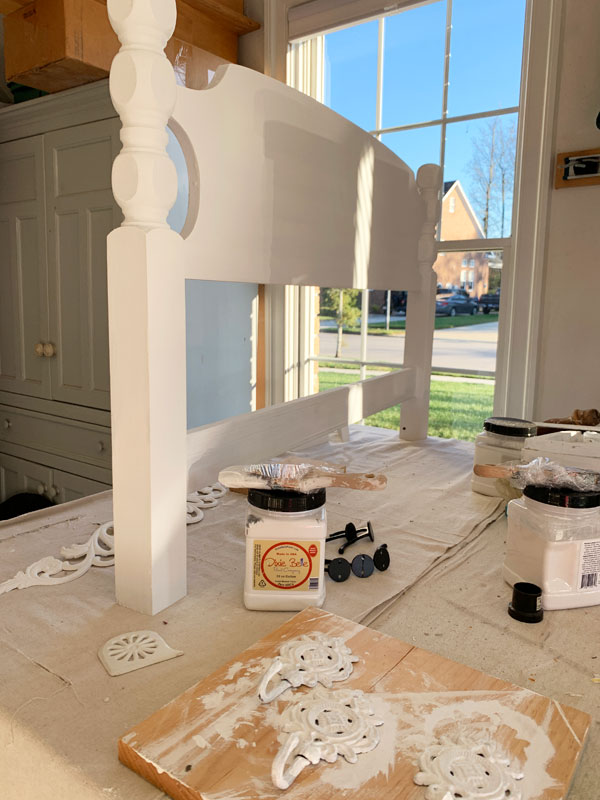
Then the next morning, I gave everything two coats of Dixie Belle’s Cotton:
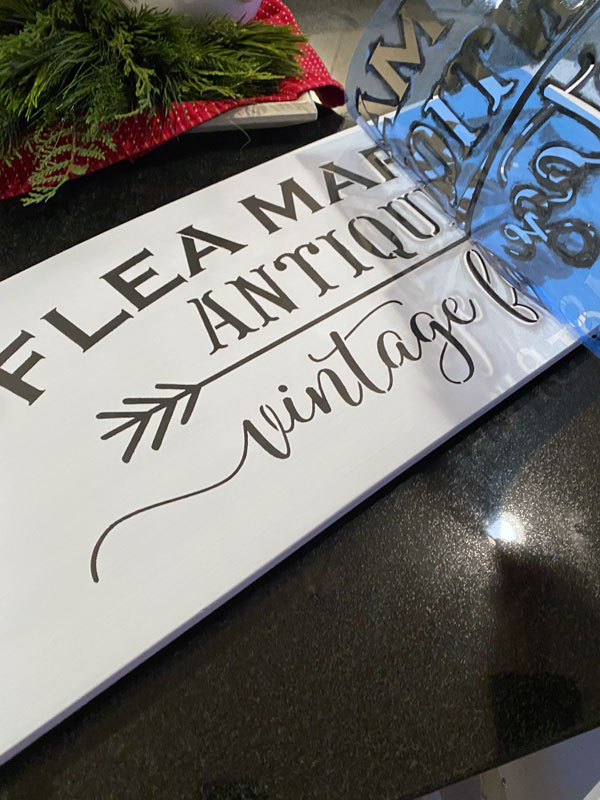
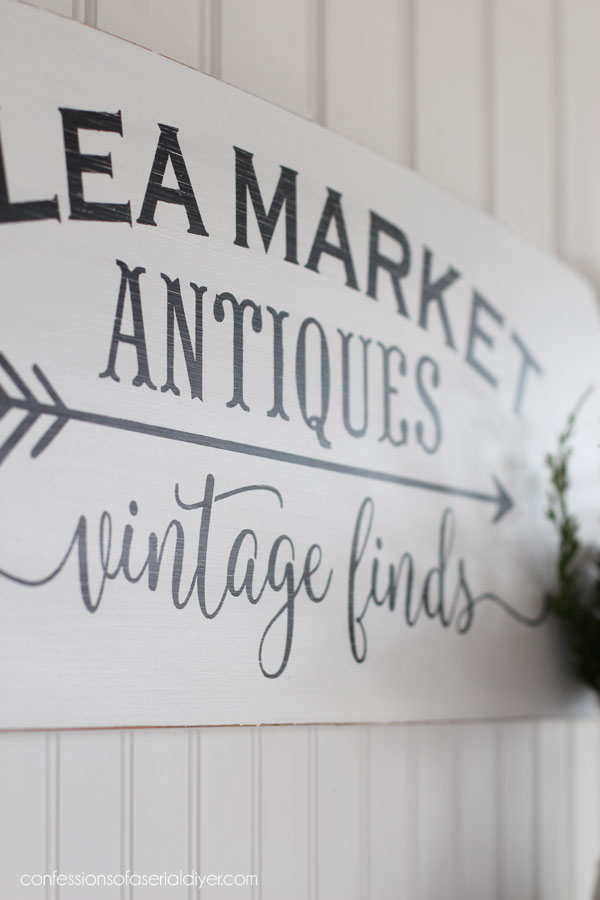
When that was completely dry, I pulled out this stencil and added it to the headboard using acrylic craft paint:

I gave it two coats and removed the stencil immediately after. (I apply spray adhesive to the back of my stencil to hold it in place.)
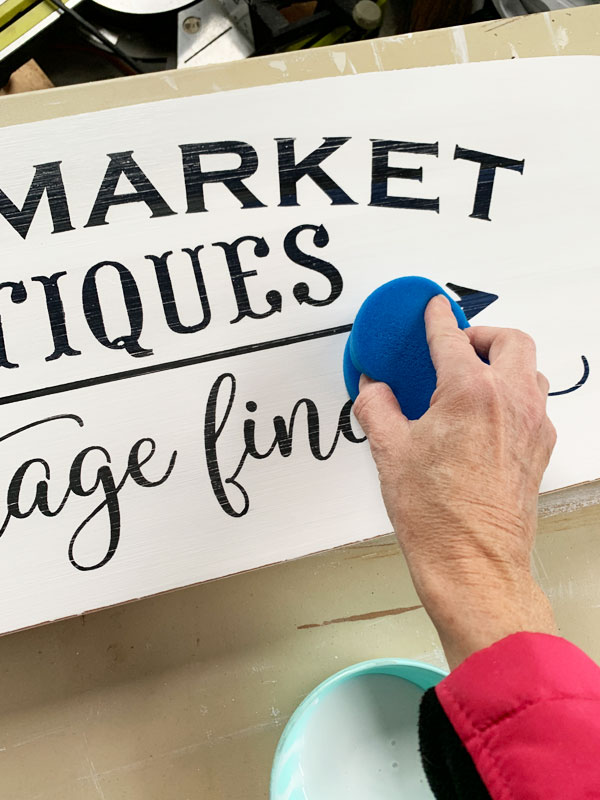
Then I went back with a liner brush and filled in the breaks in the stencil:

After allowing plenty of dry time, I sanded the entire headboard and across the stenciled surface with 220 grit sandpaper wrapped around an old sanding sponge to smooth everything out.
I sealed with Dixie Belle’s Clear Coat in satin using their blue sponge applicator:
As you can see, I left everything unassembled to make painting and sealing easier.
Assembling the Headboard Shelf
Then I put it together. If you don’t need this much detail, you can skip to the pretty afters below!
To assemble the shelf, I started by attaching the bead board to the back of the opening with small screws. I also attached the 1×4 I cut to beef up the piece across the bottom of the Headboard. (You’ll see why soon.) I pre-drilled those holes since those screws were a bit larger and then screwed it in place from the back:
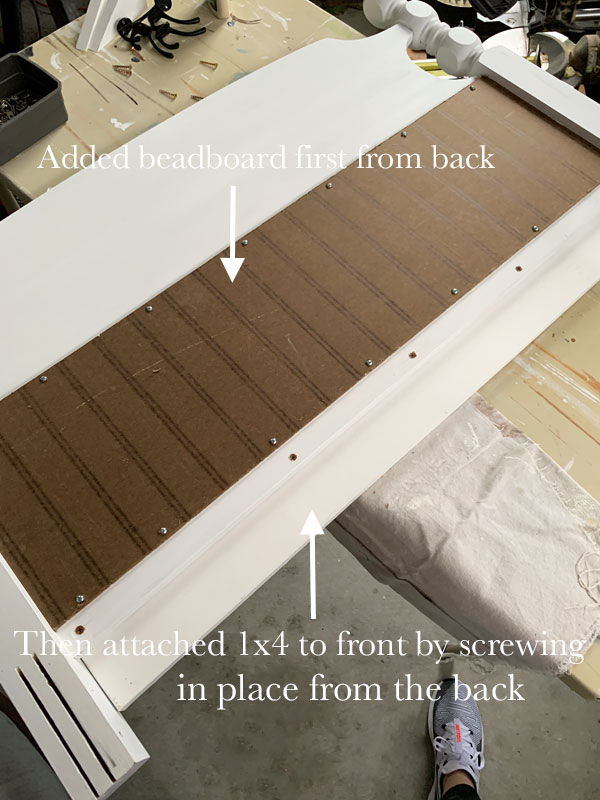
Then I flipped it over and added the shelf to the front by drilling wood screws (pre-drilling first to prevent splitting the wood) down from the top:

You could counter-sink these and fill the holes, but honestly, I didn’t bother. I just painted them!
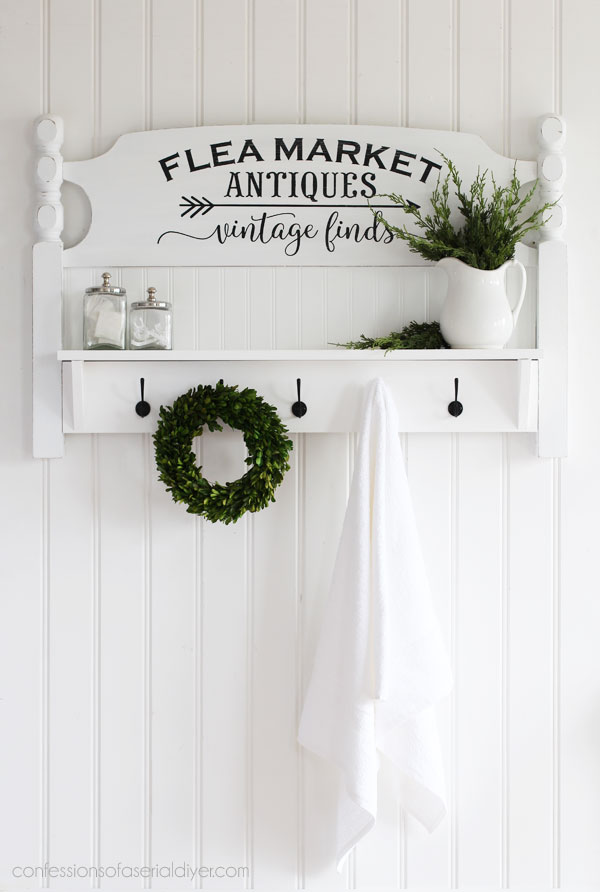
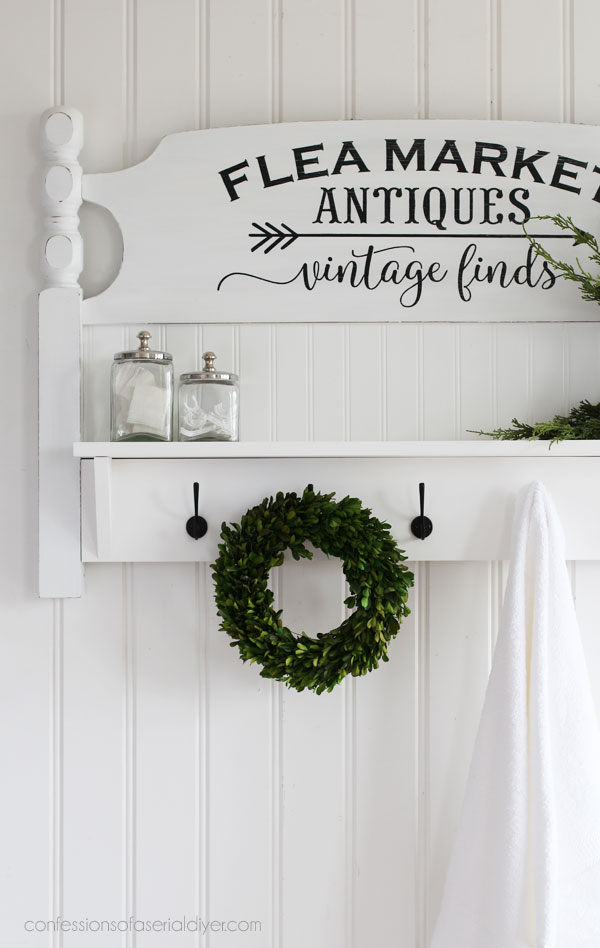
Are you ready to see the final shelf??
Here ya go!
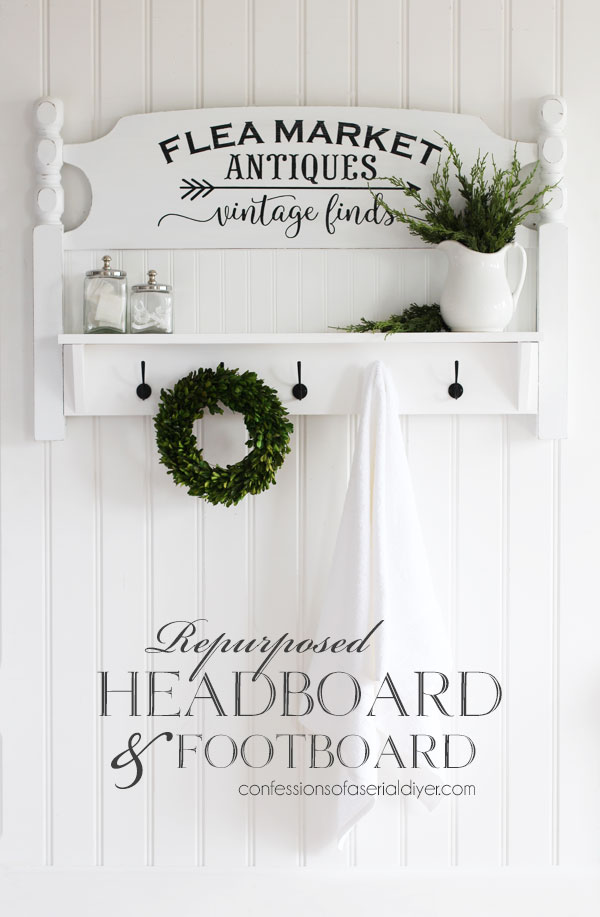
I am so excited with how this one turned out!
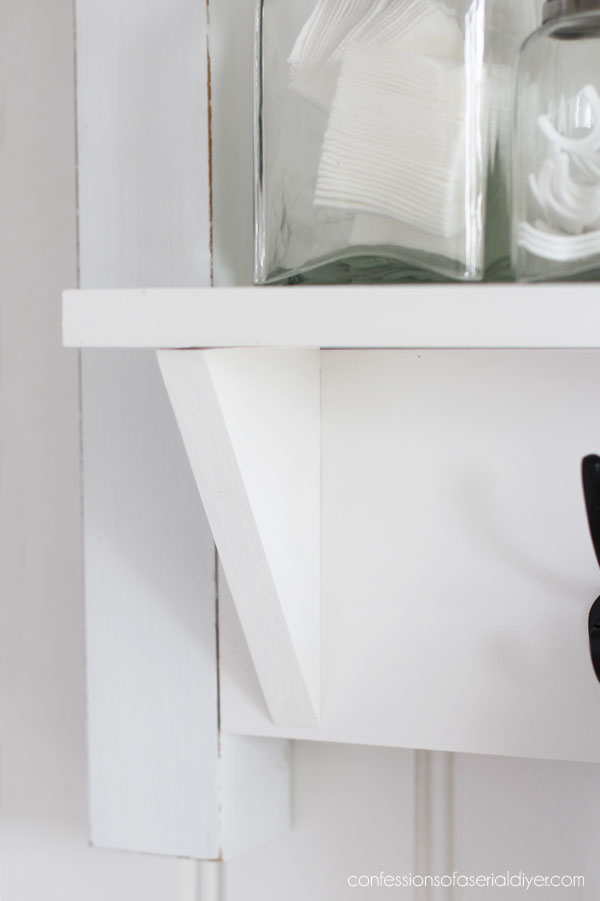
As you can see, I added these small black hooks from Hobby Lobby across the bottom:
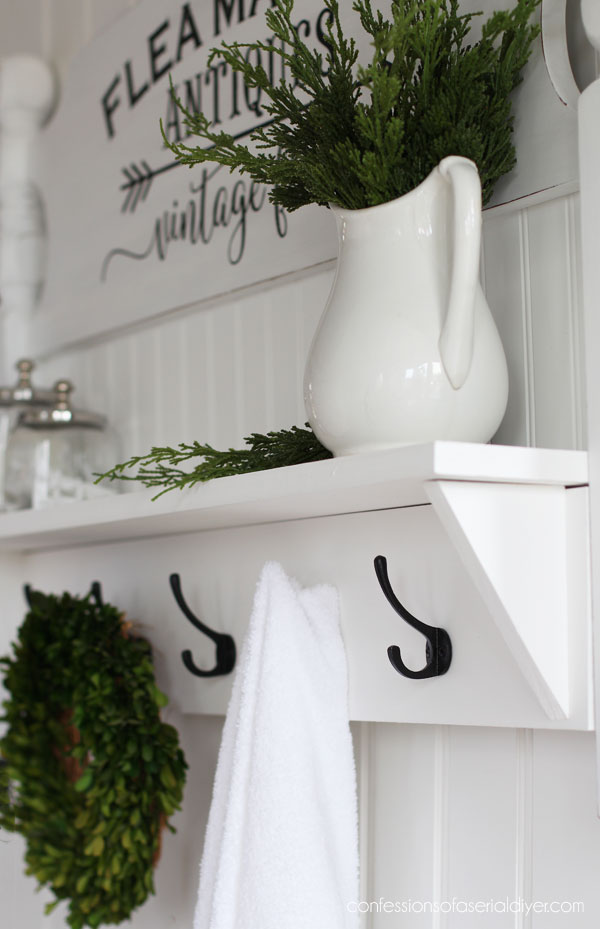
And those support brackets were added just for looks with wood glue:
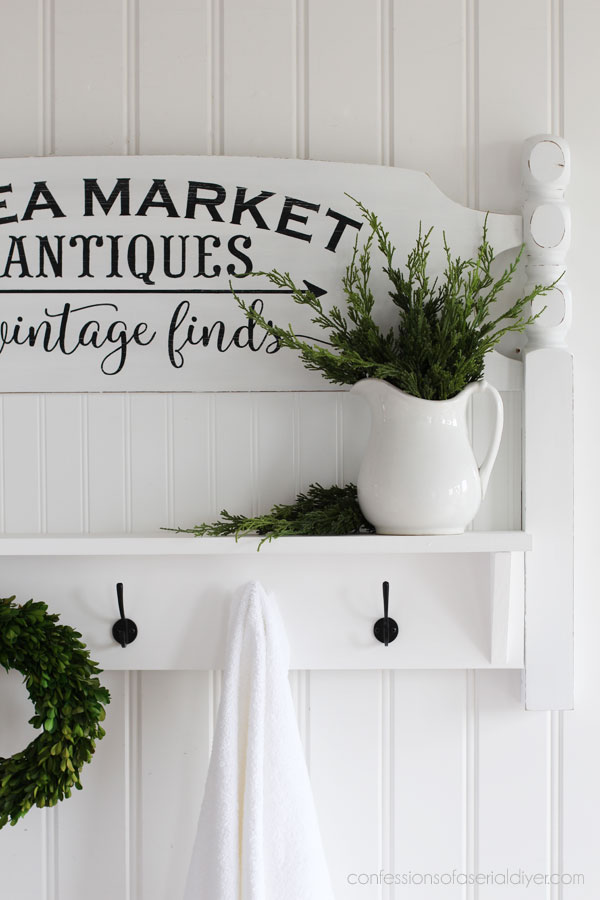
I love the look of black graphics against a white background!
You can see now why I had to beef up the piece beneath the shelf…so that the hooks would fit:
I really enjoyed seeing this one come to life!
And what about the footboard?
I turned that into a more simple piece:
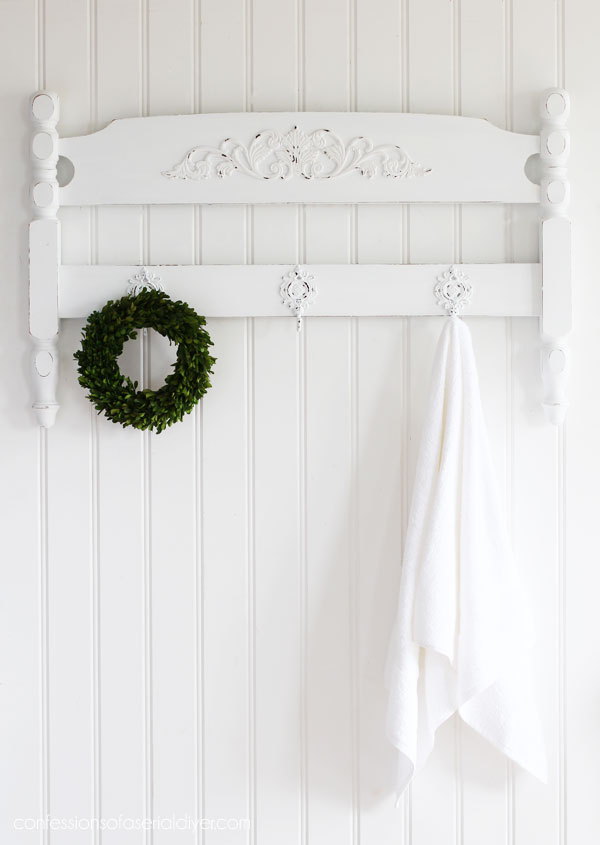
The wood applique I found at Home Depot was for this one!
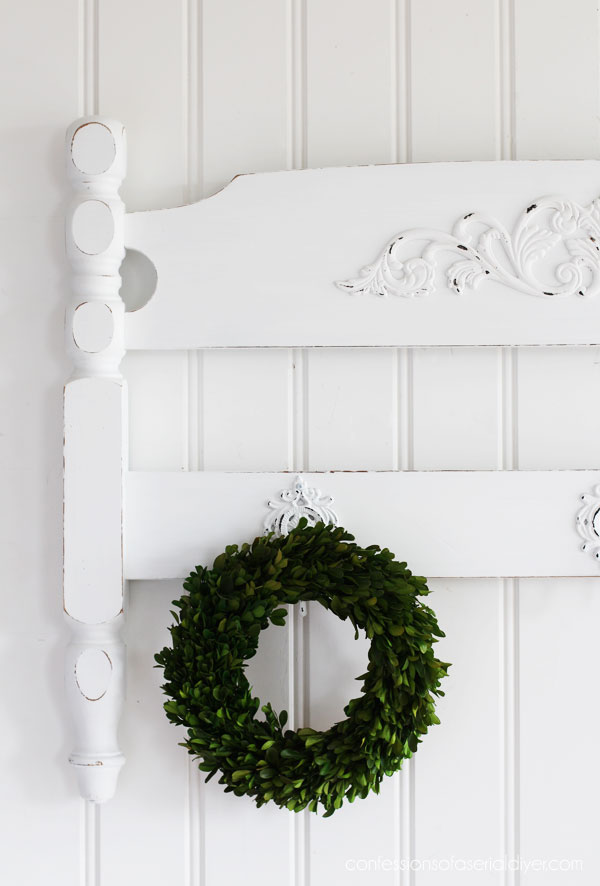
Because it was new wood under the paint, I brought out my distressing block to faux distress it using a bit of Coffee Bean:

You can see more on how I do that in this quick video:
If you have any trouble viewing, you can see it on YouTube HERE.
I attached it with wood glue.
I used the block on these hooks that I painted from from Hobby Lobby also…
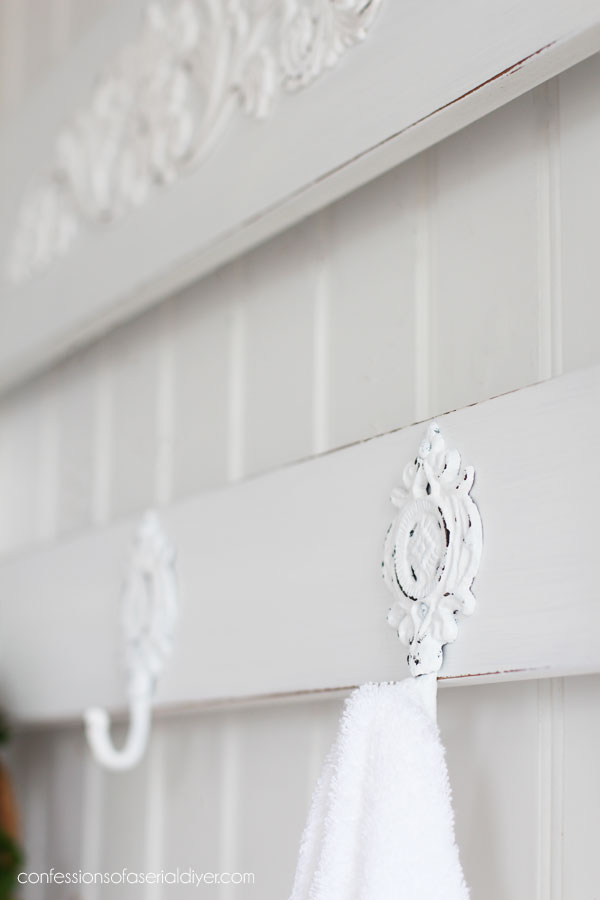
This one only required a drill! I added D-ring hanging hardware to the backs of both pieces for hanging.
I hope you enjoyed these makeovers!
Don’t forget my friends have makeovers of their own to share with you today!
And that is another piece done from my Biggest Thrifty Haul of them all!

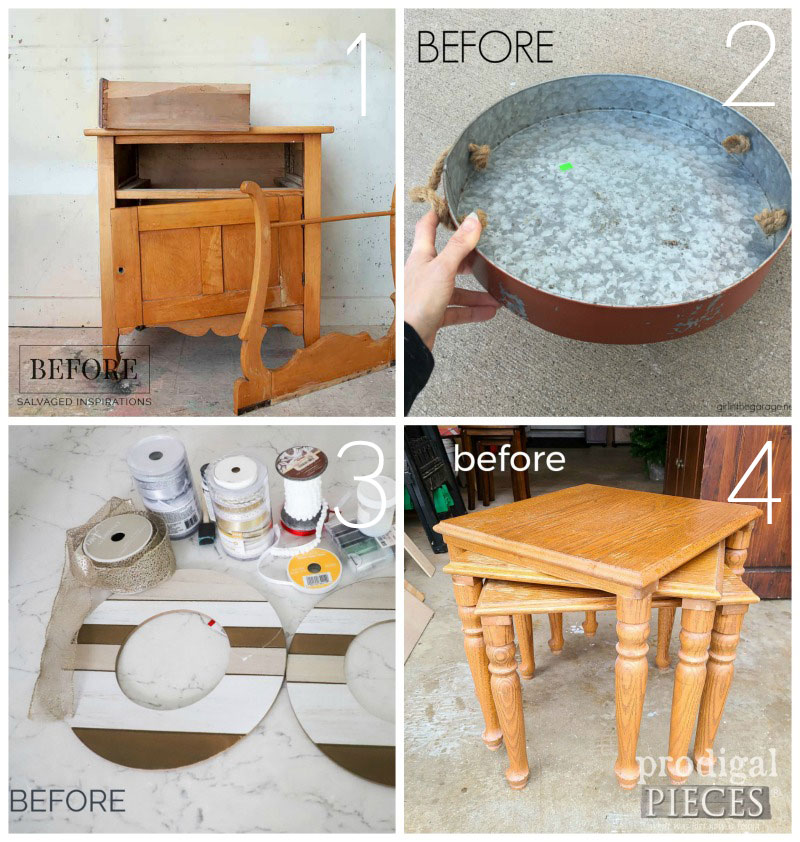
If you missed any of these makeovers so far, you can find them all here:
Vintage Secretary Desk Makeover
$3 Thrift Store Headboard Repurposed
Wall Cabinet Repurposed
Windsor Rocker Makeover
DropLeaf Table and Chairs Makeover
And if you enjoyed today’s makeovers, you might also enjoy what I did with this very similar headboard:
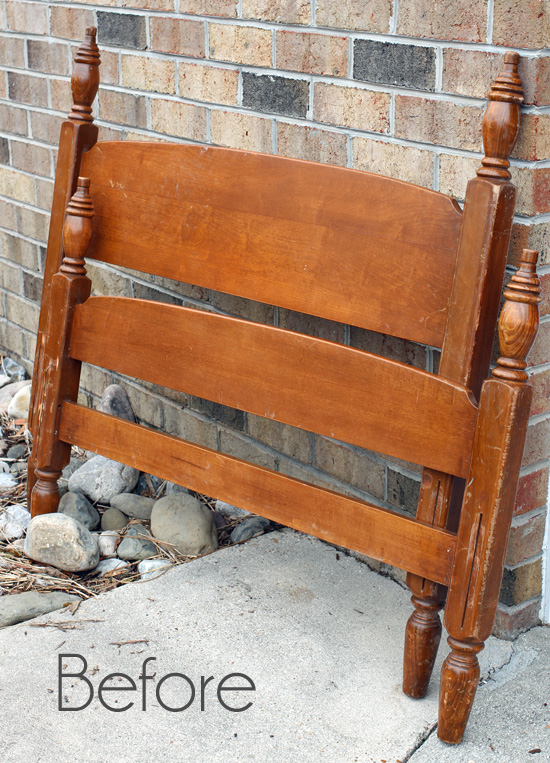
See it HERE!
I’ll be back on Thursday with this little bamboo inspired table:

Hope to see y’all then!
UPDATE: No need to come back…see what new color I tried on it HERE now!
XOXO,
![]()
Don’t Miss a Thing!
If you like what you see, there are several ways to follow along!
EMAIL * INSTAGRAM * FACEBOOK * PINTEREST * TWITTER


Larissa ~ Prodigal Pieces says
Bravo! Beautiful upcycle, Christy.
Christy says
Thank you, my friend! XOXO
Mary Kaiser says
Wow I am loving what you did with them!! I especially love the head board. It is so adorable with the black with the white. The bead board gives it sort of a cottage vibe, which is right up my alley! You have totally out did your self on this one, knocked it out of the park!! You my friend are amazing!
Christy says
Thank you so much, Mary! The headboard is my favorite too and yes, it’s all about that bead board lol. I wasn’t super excited about woking on this one to start, but things turned around! XOXO
Pam Walsh says
Gorgeous shelves !!! Love the black lettering against the white like you mentioned!
Christy says
Thanks so much, Pam! Yes, I love that contrast! XOXO
Leticia L Beam says
This is so very beautiful! I really love this project! Happy Tuesday to you..
Christy says
Thank you so much, Leticia! Happy Tuesday! XOXO
Janey Rice says
I enjoy your post very much and look forward to it each day.
Many thanks.
Christy says
I am so glad you enjoy what I share, Janey! Thank you! XOXO
Cheryl Atkinson says
Christy, you really out did yourself on these. They are so pretty. I didnt know Home Depot had wood appliques. Good to know. These are just wonderful.
Christy says
Aww thank you, Cheryl! Yes, they have a few to choose from. I believe this one was $10. XOXO
Denise cox says
I’m trying to follow.. guess I’m stupid! You said you placed the stencil on the back of the headboard? I know it must have to do with the placement of the support board, etc? I’m having trouble visualizing?
Thanks. Love both of these… But it’s NO SURPRISE there, 😘🤗😁😛!!!!
Christy says
Thank you, Denise and sorry about that ha ha! I just fixed it. I placed the stencil on the headboard. XOXO
Christina says
Woo hoo!!! Love the beautiful utility of both of these! You are right, I was kind of expecting a bench. lol I do love the stencil you used. 🙂 I adore that you take the time to show the details of your creative process. 🙂 These both turned out beautifully. Assuming they go into your booth, we both know they won’t last long. 🙂
I also loved the link to the bench you made. Sweet!
Christy says
Thank you, Christina! I assumed this would become a bench also, but man, they are a lot of work lol. Glad I was able to come up with another idea! That stencil fit so nicely. Have a wonderful Tuesday, my friend! XOXO
Toby Peplow says
I love this! Most headboards and footboards people turn into benches and its my favorite use of these old gems. THIS however is beautiful and BRILLIANT!!
Christy says
Thank you so much, Toby! That is what I usually do with these old beds, but I wasn’t looking forward to all that work lol! This was a fun alternative! XOXO
Jane Sauder says
These are amazing! I love them both but the headboard might just be my favorite 😊
Christy says
Thank you, Jane! The headboard is my favorite too! XOXO
Janice Holt says
I really can’t choose which one I like the most so I’m just gonna say both. Great job as usual. See you Thursday
Christy says
Thank you, Janice!! See you Thursday! XOXO
Marcie Lovett says
Well, that was a surprise! I always enjoy seeing your bench conversions but it was nice to see what else your creative mind conjures, Christy 😉
Christy says
Oh yay! Thanks, Marcie! I’m glad I can still surprise you ha ha! XOXO
Denise - Salvaged Inspirations says
Brilliant and super adorable! And yes, I was expecting a bench…lol… you do them SO WELL! Have a super day my friend. Pinned! XOXO
Christy says
Aww thank you, my friend! Hope you are taking time to enjoy some of the holiday!! XOXO
Sue H Mellette says
Love these makeovers! I especially like the transfer you used on the “headboard.” The black really pops on the white finish. What a clever way of repurposing a wooden headboard and footboard. You always find a way to add such pretty details and well as make each piece so useful! Thanks for sharing.
Christy says
Thank you, Sue!! I’m os glad you enjoyed these makeovers! XOXO
Vicki Bray says
Amazing!!!! I am in love with that headboard – love love love!!!
Christy says
Thank you so much, Vicki! XOXO
Jane says
Oh how I wish I could buy both! I would love to decorate both for Christmas!
Christy says
Ooh yes…they would be fun to decorate for Christmas!! XOXO
Carroll Xavier says
Both are gorgeous! Thank you for the inspiration 😀 I’m making Christmas gifts this year for family and friends, and this gives me ideas for 2 of them. Love seeing what direction your projects take you and the results are often surprising. Really look forward to your posts every week. Thanks!
Christy says
Thanks so much, Carroll! Handmade gifts are the best, and I’m sure your recipients appreciate them! Have fun! XOXO
Cathy Vollmer says
I love that you held the “after” picture until much later! Kept me in a happy suspense of “what is she making?!” They both turned out amazing! Your vision/creativity never ceases to amaze and inspire me! (And you were right… was expecting a bench!)
Christy says
Thank you so much, Cathy!! I was planning on a bench for this set, but they are a lot of work, so I decided to play around with other ideas…so glad I did! XOXO
Dee Kelly says
Christy,
You really out did yourself on this particular project!!! What you did was spectacular. It came out so gorgeous, I was thrilled for you. You are one talented lady. I love reading your blog every week! Happy Holiday to you and your family.
Dee Kelly
Christy says
Aww thank you so much, Dee! I was quite tickled myself ha ha, but mostly because I wasn’t too excited about working on this one to start! I appreciate you following along with me! Happy holidays to you and yours as well! XOXO
Mary says
This is AhhhMazing!!! Lots of talent in your hands and your brain❤️❤️❤️
Christy says
Thank you so much, Mary!! I really enjoyed working on this one!! XOXO
Cecilia from Georgia says
Both of these are wonderful! I would hate to have to choose which one I like the best. I’m amazed at your talent and ability every time you transform something. Stay healthy!
Christy says
Aww thank you so much, my friend! I really enjoyed working on these! XOXO
Arlene Fox says
Absolutely stunning! Your creativity is such an inspiration. Thank you for sharing.
Christy says
Thank you so much, Arlene! I appreciate that! XOXO
ROSE LEFEBVRE says
You are such a whiz at repurposing! I love most of what you create! This is another wonderful idea.
Christy says
Most?? Ha ha! Thank you SO much, my friend…I really appreciate that! 😀 XOXO
Nancy @ Artsy Chicks Rule says
I love what you did with these!! The black and white is perfect and looks so good with your greenery too! xoxo
Christy says
Thanks so much, Nancy!! I have been giving this bed the side-eye for so long lol, so I am so happy to finally have done something with it! XOXO
Jen @ Girl in the Garage says
Another super cute and functional upcycle! Bravo Christy! xo
Christy says
Thank you so much, Jen!! XOXO
Evelyn Perry says
Hi Christy- I LOVE YOUR BLOG and your STYLE!
I wanted to ask where you got the stencil for the headboard redo?
Christy says
Thank you so much, Evelyn! You can find that stencil here: https://www.thestencilsmith.com/collections/antiques-collecting/products/3369-flea-market-antiques XOXO
Amber Arnold says
Love these! You always have the cutest stencils! I’m working on a headboard sign as well, and I’m wondering–how did you attach it to the wall?
PS: You inspired me to start flipping furniture and now I have a garage full and a basement storage room full (My eyes are bigger than my free time haha). It’s so fun, though!
Christy says
Thank you, Amber! I attached D-ring hardware to each side post to hang it. And wow! I love that you were inspired to start flipping furniture! I really love the hunt so much, so I totally understand how easy it is to accumulate project pieces ha ha! I have found making a list like I do with these hauls has been a fantastic way to get things done, and it stops me from wanting to stop by every thrift store I pass knowing that I have a bunch of things already lined up. I wish you much success in the year ahead! XOXO
Sharon L Austin says
I love it, I think this is one of my favorites!
Christy says
Thank you, Sharon!! It is one of my favorites too! XOXO
Jenni Floyd says
I love the hooks you used on the foot board! Do you have a link to those?
Christy says
Thank you, Jenni! I found those at Hobby Lobby and painted them white. It looks like they are out of stock online, but you can see them here: https://www.hobbylobby.com/search/?q=wall+hooks%3Arelevance&page=1&quickview=39456 XOXO
Janet Schen says
Oh my goodness! This is such a clever way to redo a bed! I love it!
Christy says
Thank you so much, Janet!! This was a really fun one to play with! XOXO