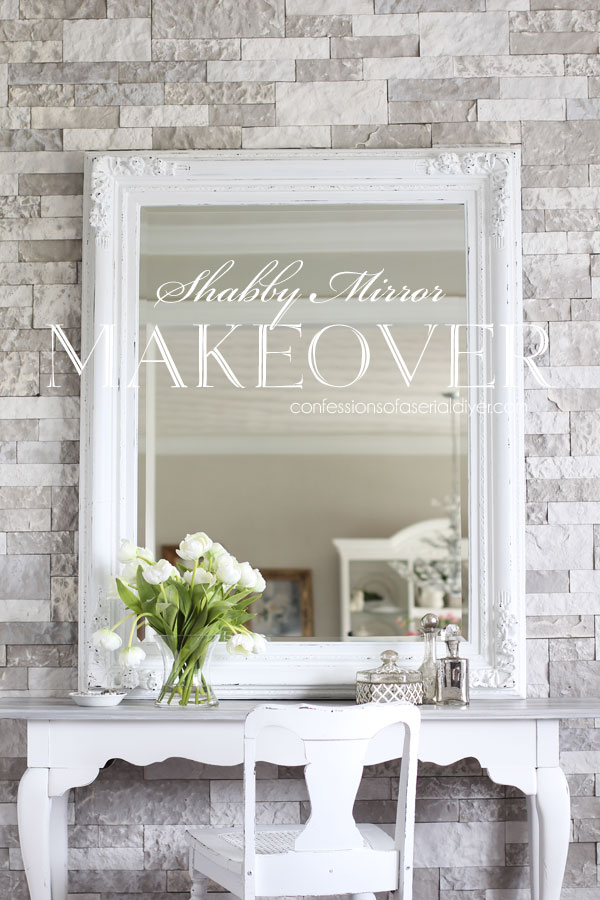
Hello amazing friends! Today I’m sharing how to cheat a distressed look, and I’m using this huge mirror I found at the thrift store to share how to do that:
This is a super easy way to cheat a distressed look!
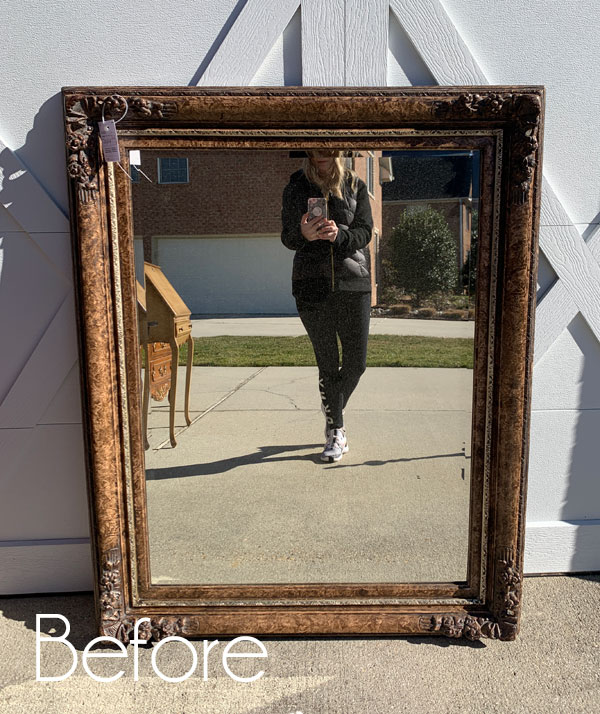
I picked up this mirror while thrifting with my sister. It was $34.95 originally, but she got a military discount so we got it for $28. The finish is not my taste at all, but I loved all those details!
And then on the day I was photographing my Winter Haul, it was super windy and this mirror was blown over. Luckily, the mirror did not break, but the frame cracked:

Bummer! I wasn’t looking forward to fixing it, but it didn’t end up being too bad at all. I’ve included a few affiliate links so you can find the products I love.
I removed the mirror and used E6000 glue to fix the frame. I also screwed a metal strip the back of the frame for extra strength.
Then I used Dixie Belle’s Mud in brown to fill in the crack:

When it was dry, I gave it a light sanding. Then I painted the frame in two coats of Dixie Belle’s Cotton:
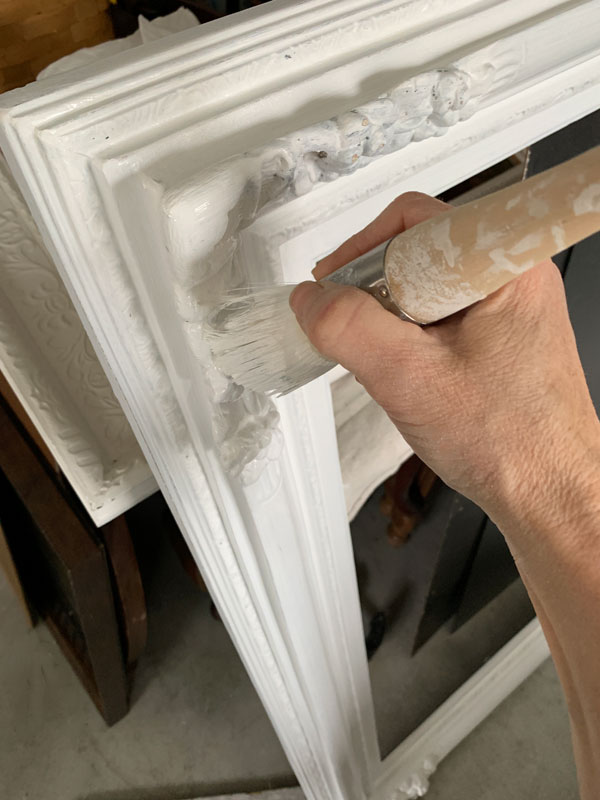
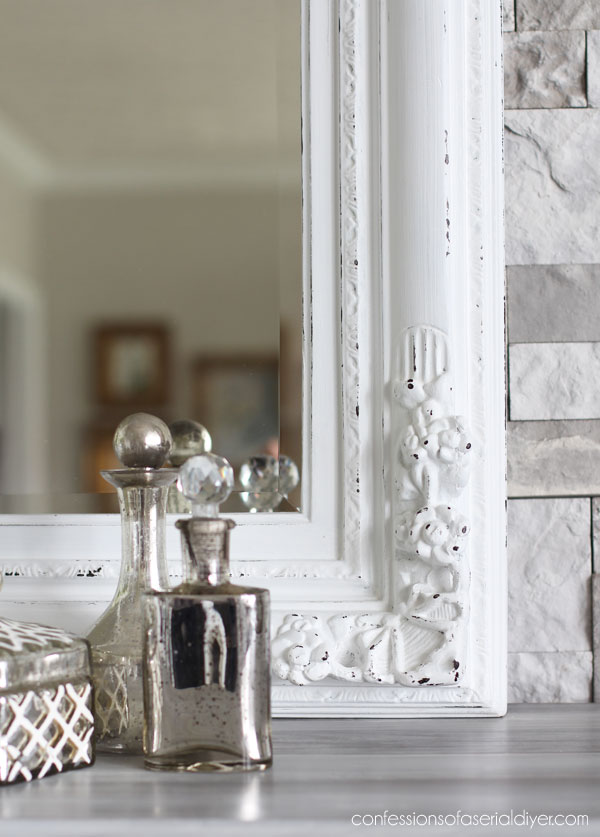
As you can see, I used a round brush to paint in those details. This one was kind of small, but did the job easier than a flat brush would have. (UPDATE: A larger one like our new Best Dang Brush would be ideal for this!!) It just makes painting those details much easier. I used it on the straight areas of this frame as well.
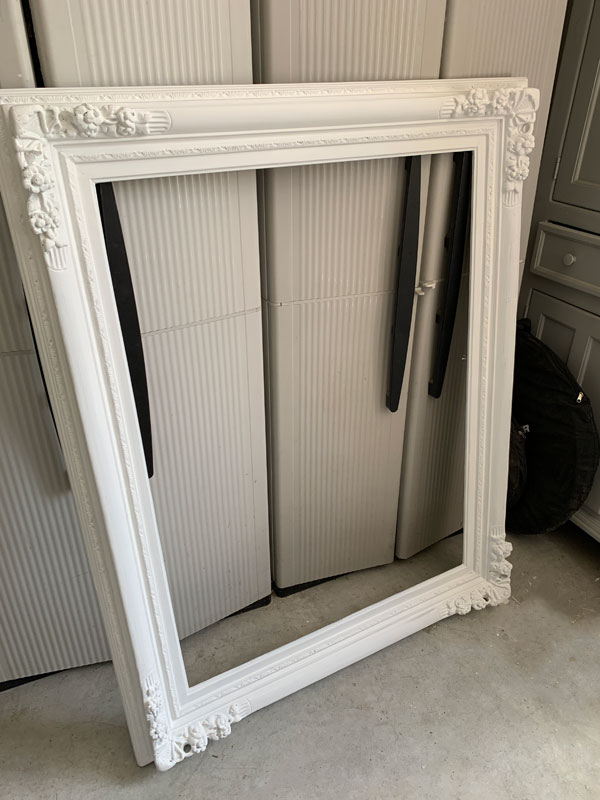
I also turned it over and painted the back all around the inside edge of the frame so the mirror would reflect white instead of the original brown.
Looking better already!
How to Cheat a distressed look
It involves this block and Coffee Bean by Dixie Belle:
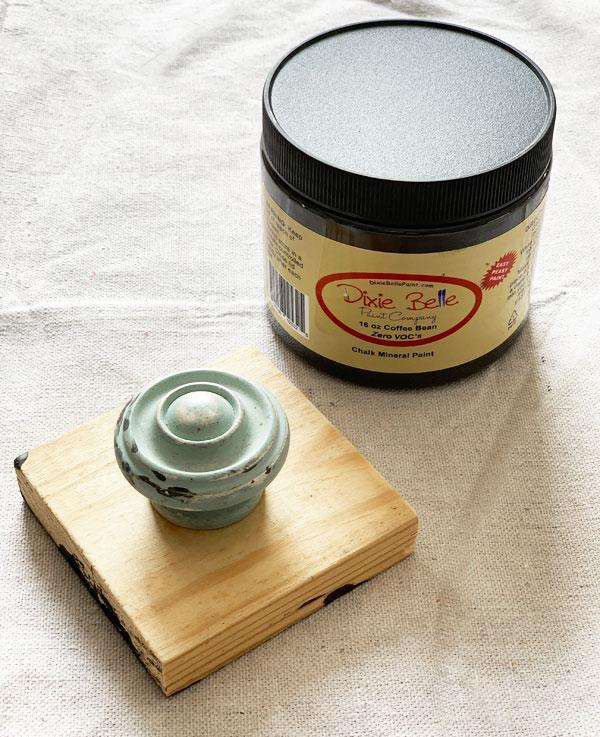
You can find a block (called a layering block on Amazon) made by Folkart HERE, but I just made my own with a wooden knob and a block of wood.
When I tested a small area with sandpaper to see how this mirror would distress, I was getting a light tan/white color when I sanded. I was hoping the original dark brown would show through. That is usually the case for wood pieces, but not with pieces like this mirror.
So, instead of sanding, I pulled out my distressing block. I just poured a little paint onto my block and then wiped most of it back off on the lip of the jar:
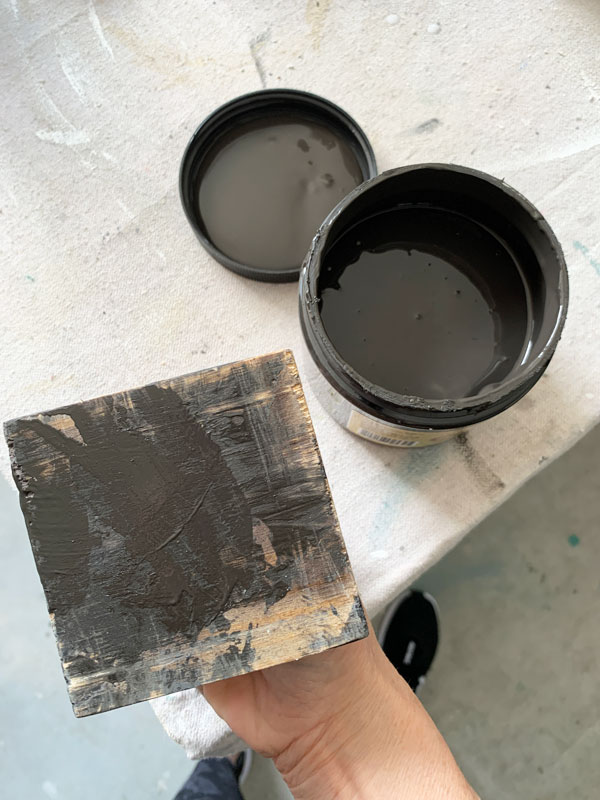
It is important to not have too much paint on your block!
Then I hit the raised areas on my mirror:
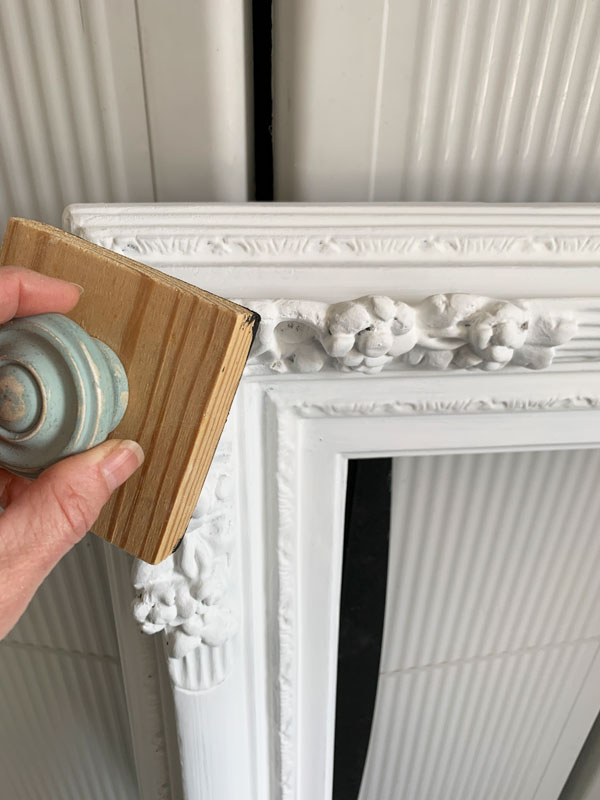
I ran it along all the edges and anywhere I might see distressing if I were to sand, reapplying paint to my block as needed. You can also gently tap the block anywhere you want it to appear distressed.
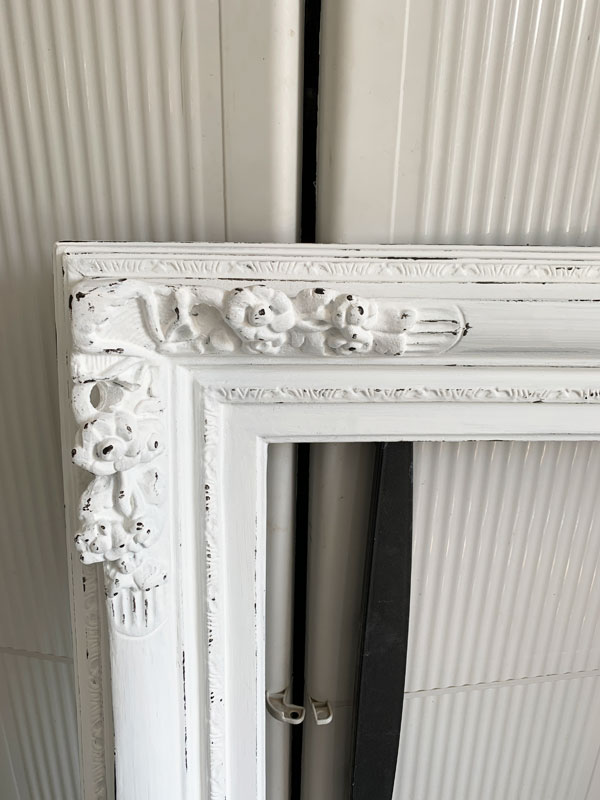
This effect is so easy to do!
You can see more on how I cheat distress in this quick video:
If you have any trouble viewing, you can see it on YouTube HERE.
When I got the look I wanted, I waited for the paint to dry and then gave it a coat of Rustoleum clear spray to seal.
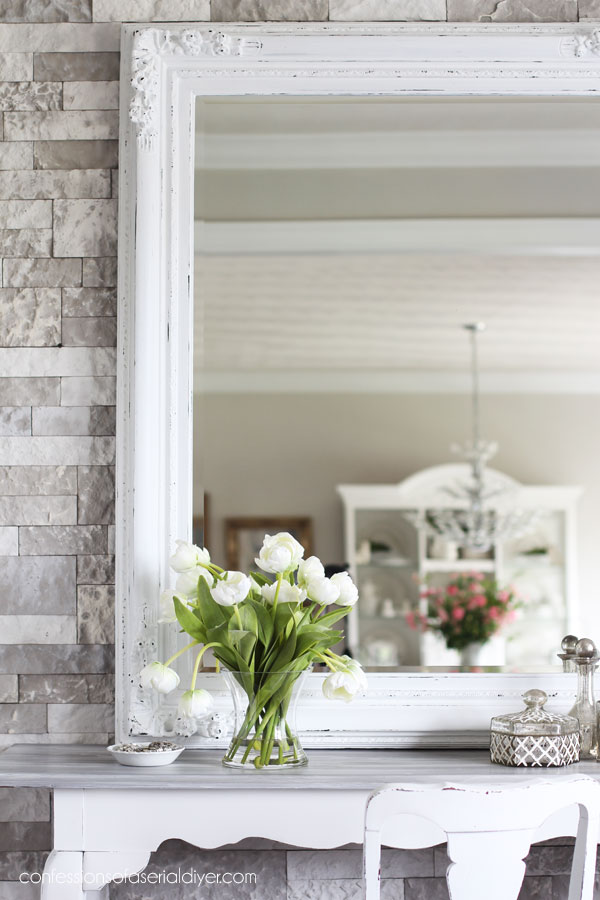
I love the Shabby Chic finished look of this mirror!

If you get an area that is too thick or that you just don’t like while using the block, you can just take a damp wash rag and quickly wipe it off. Then you can try again.
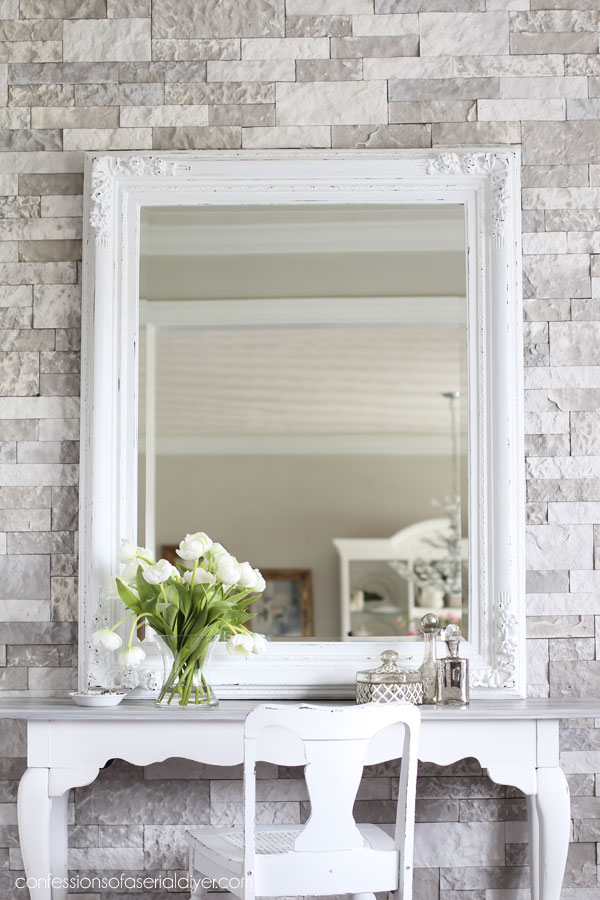

My sister thought this mirror was too much, but I knew it had potential. $28 is a steal for this beautiful mirror now!

When I stopped by my booth a few weeks ago, I had a customer ask me if I paint anything just white. I immediately thought of course I do! But actually, I haven’t in a while. When I do, it always sells quickly though so I guess I need to do a few more plain white pieces. They are usually my favorite!
I only have TWO more pieces left in my Winter haul! I didn’t quite make the Spring deadline, but I’m close!
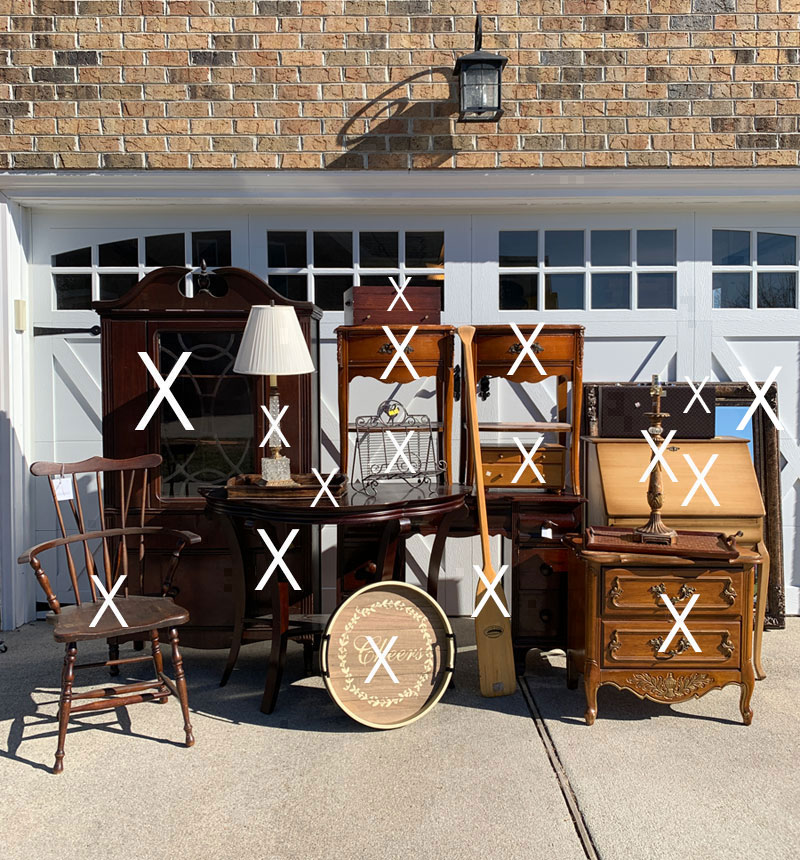
If you missed any of these makeovers so far, you can see them below!
How to Paint Furniture with Chalk Paint (& $10 Night Tables)
$4 Thrift Store Case Repurposed
$25 Thrift Store China Cabinet Makeover
$3 Lamp Makeover (& How to Rewire a Lamp)
Windsor Chair Makeover (& Drop Leaf Table Take Two)
How to Wet Distress (& a $5 Lamp Makeover)
$5 Thrift Store Chest Makeover
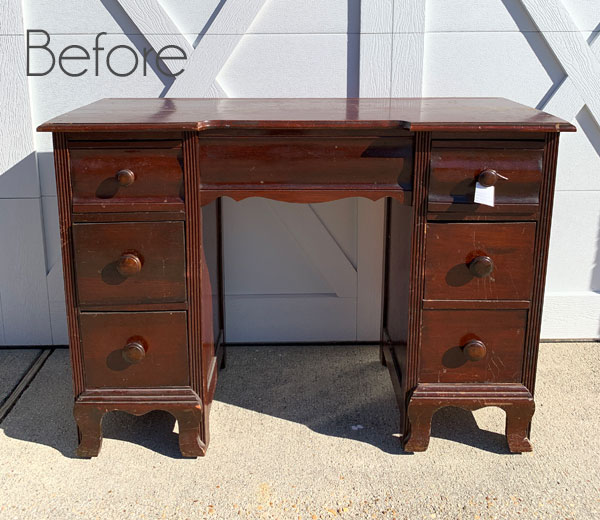
All that’s left is a tray and a desk! I’ll be back with my Furniture Fixer upper friends and this desk on Thursday!!
I appreciate every one of you, sweet friends!! Wishing you all good health!
UPDATE: No need to come back! This desk is done and you can see it HERE now!
XOXO,
![]()
Don’t Miss a Thing!
If you like what you see, there are several ways to follow along!
Email * Instagram * Facebook * Pinterest * Twitter


Leticia L Beam says
Well, it certainly came out wonderful! Thank you for the distressing tip! Have a great Tuesday!
Christy says
Thank you, Leticia! And you’re welcome! Enjoy your day as well! XOXO
Marina arina says
I just want to say thank you I so enjoy reading your postings. Every makeover is beautiful and inspiring.
Christy says
Thank you so much, Marina! I appreciate that! XOXO
Mary Kaiser says
Wow it is beautiful now. It was ugly before, but not now. Beautiful! It will sell fast with the white. So glad you didn’t have the mirror break when it blew over, that would be 7 years of bad luck!
Christy says
Thank you, Mary! It really was ugly before…you should have seen my sister’s face when I showed it to her at the store lol. And yes! I’m glad the mirror didn’t break as well! XOXO
Pam Walsh says
Love the mirror !!! White is such a classic… hope you and your family stay well ! Take care and thank you !
Christy says
Thank you, Pam! White always works, right? You stay well too, my friend! XOXO
Janice Holt says
I had already been thinking about seniors that would not be able to go to prom, graduation, etc. Sure hate this for all seniors. I don’t look for our schools to go back this year either (NW Ala). Thanks for continuing to send us your DIY projects. The mirror is so pretty and I have one similar that I’ve been meaning to paint and with it being gold, I now know how to make it look distressed without sanding and the gold showing through which is not what I want. Hope you and your family stay healthy.
Christy says
I know…my son seems okay with it now. I imagine it’s the girls who have already picked out prom dresses, or the guys who didn’t get a chance to finish their high school sports that will feel it most. I am so blessed that I can still do what I do amid this chaos, so I am just going to keep showing up! Luckily, I have a ton of things still in my inventory so I won’t run out for a while lol. I just did a gold mirror also using this technique and I too did not want the gold to show through and it worked great! Stay well! XOXO
Christina says
Christy, this mirror turned out beautifully! Thank you for the inspiration. I painted a mirror frame white a while ago and have one of those blocks so I’ll work on “distressing” it … I had wondered how I was going to distress it, thank you ! 🙂
I also hope the school has a graduation ceremony for your son later.
Be well!! xo
Christy says
Thank you, my friend! These blocks work great…I don’t why I da forgotten all about it! I too am hoping they will hold a ceremony, even if it is a little later in the Summer! You stay well too! XOXO
Michelle says
Thx, Christy, for the inspiration! The mirror turned out beautiful. I have never seen a distressing block so thank you for the info. Have a great day!
Christy says
You are so welcome, Michelle! The block works great when you don’t want what is under your paint to show through! XOXO
susan says
Thanks for the great tip! Hope you and your family are well and staying sane!
Christy says
You’re welcome, Susan! Thank you…same to you lol! XOXO
Frances Blunt says
Christy,
I have a similar mirror in the wings. Also have a table like the one pictured. I sold my first piece on Craigslist in February. I want to get a booth in a store in my area but it has been tough. Things came up health wise. I have been at it 2 years following your advice and keep getting better every day. I’m 72 years old and this keeps me challenged ,which I love.
With the crisis going on it’s a lifesaver.
Thank you for all your inspiration.
Virtual hugs and love, Fran
Christy says
I love that you are enjoying the creative process so much and congratulations on your sale! That is exciting!! I too am so thankful for this creative outlet in these crazy times! Virtual hug right back, my friend! XOXO
Elizabeth says
Your mirror turned out fantastic, I love the classic white. Your tip for distressing with the block is brillant! I can’t tell you how many projects I sanded to get the look that you achieved. Thank you for sharing this tip!! Stay Well!
Christy says
Thank you, Elizabeth! Sanding is always my go to as well, but this works great for these pieces that don’t distress so nicely, and you could use this on just about any piece really! You stay well also! XOXO
gwen says
Thanks Christy! I always love the tips you give! I do feel for your son and all the HS seniors, but it too will pass!
I’ve been doing little projects, mostly sewing cushions and pillows, but hope to get my hands dirty soon with some paint!
Christy says
Thanks, Gwen! Yes, Jack is okay with it…at least it will be a story to tell for the future! I’m glad to hear you are staying creative…so good for the soul! XOXO
Anita says
Christy, love the things you do. Now I am painting shinny bunnies with chalk paint to make them look chalky for Easter. Will be decorating even though grandchildren may not be coming. Getting out Spring decorations will make me happy. Keep up the good work!
Christy says
Thank you, Anita! Hmmm…I have my own set of shiny bunnies that I never even thought to paint. Great idea! Yes…adding a few Spring touches will surely put a smile on your face! XOXO
Micah says
Very nice! I love the frame on this one. Also thank you so much for sharing your distressing cheat! It’s just what I need! I had a makeover I did and when I got to the distressing stage the sandpaper went right through my black undercoat to the resin underneath. =( This should fix that problem!
Christy says
Thank you, Micah! And you are so welcome! I can’t believe I forgot all about it until I found my block lol…it will surely solve your problem! XOXO
Laura says
Good save on the mirror and I love your distressing block!
Christy says
Thank you so much, Laura! XOXO
Cheryl Atkinson says
Hi Christy! What a great tip that is. I have never seen a distressing block. I guess i will have to purchase one since i don’t have anything to make one. I love your mercury glass. I read a tutorial on how to make mercury glass and i went and bought all of the things so i guess i will try. I’m working from home now so i’m able to play a little on the side with DIY’s. Like you, i have plenty to work on. Stay safe and keep sending these wonderful blogs.
Christy says
Thank you, Cheryl! Yes, the block is so easy to use…I totally forgot I had it! I’ve never made mercury glass…I’d be interested to know how yours turns out. Good thing we have a creative outlet in these crazy times! Take care, my friend! XOXO
Cecilia from Georgia says
I have been meaning to tell you how convenient the arrow is in the corner to get back up to the top! I have a Godzilla size mirror and had no vision for it but once again, you have helped me spark an idea. I have a block that I use for scraping off paint for a chippy look but I like your method of using it for distressing. You have invented a new technique! We can call it the Christy distress-block method! XOXO
Christy says
Oh good…yes the arrow is easier than having to scroll all the way back to the top for sure! I’m glad it is helpful. Oh ha ha maybe that is what the block is intended for…I never thought of that lol! Well. I suppose it can have many uses! XOXO
Maryellen Webber says
This mirror turned out beautiful Christy! I learned the wooden block distressing technique recently. My project turned out great for a newbie!!😊 I hope your son will have a late graduation ceremony. I feel like it’s important to have that “send off” before your student begins the next phase of his life as a young adult! My son is missing his friends which I am dealing with too!
Christy says
Thank you, Maryellen! It is a great technique! I do hope my son will have a ceremony as well. I’m sure they’ll have something when they can. Yes, my son has been missing his friends as well and his girlfriend, but it seems like he has been on the phone day and night…not quite the same as seeing them in person though! Y’all hang in there…we’ll get through this! XOXO
Janina says
Fabulous transformation. The distressing block is a great idea!
Glad to hear that Virginia has made the decision to close down schools. I imagine that most of the world will be making that decision eventually. We are in forvthe long haul on this one. People are being foolish and careless, and that all prolongs this crisis. Glad you are safe and well! May you stay that way!💝💝💝
Christy says
Thank you, Janina! They finally shut down all non-essential businesses yesterday as well. I agree…people need to just stay home unless they have to be out. Praying our nation recovers from this quickly! Stay well, my friend! XOXO
Lizzy says
So pretty! I love those big ornate frames when they are painted beautifully like this. I have one from my grandparents and I am hesitant to paint it because some of those old frames are worth hundreds. It’s a dilemma!
Christy says
Thank you, Lizzy! I would be hesitant to paint a beautiful family piece as well, but then again, if you don’t love it as is? A big dilemma for sure! XOXO
Ashley says
Beautiful looking mirror! Thanks for the tip re distressing, Christy! xo🌷
Christy says
Thank you, Ashley! And you’re welcome! It works great! XOXO
cristina kadonsky says
Love, Love Love it!! Can’t wait to try!
Christy says
Thank you, Cristina! Have fun with it! XOXO
Cindy says
Wow! Total transformation, it is now an awesome mirror. Love seeing the end results of your creativity & hard work. Hoping to transform some old furniture if I ever get the nerve =)
Christy says
Thank you, Cindy! Practice on a small piece and then go for it!! XOXO
Cate says
Excellent job! Really like the idea of the distress block, too. You added that certain “just enough” look to this mirror and now it looks “smashing” (oops, forgot about the crash it took). I usually have fits when people distress things because in my opinion, it’s just toooo much. Less is more in my sense, especially when you focus on the areas of your project that really would have gotten a lot of wear, and that’s not always everywhere.
Christy says
Thank you, Cate! I agree…I like a piece to look a bit worn, but like it was cared for. Sometimes it’s easy to get carried away with the distressing! XOXO
Esther says
Great idea. I never distress because im afraid I’ll over do it. I am just about to paint a mirror for my daughter that was my parents’ 60 years ago. Now I have great ideas. Thanx.
Christy says
Just do a little bit at a time and if you want more, go back and do more. If you don’t like an area, you can wipe it off with a little water on a rag as long as you do it right away! Good luck with your mirror! XOXO
Petra says
That block idea is very cool – might have to give that a go and make my own block 🙂 Gorgeous mirror 🙂 xo
Christy says
Thanks, Petra! Yes, make one too! They work really well! XOXO
Rosie says
Always look forward to your projects and this mirror was beautifully done. Great tip for distressing! Looking out for your posts and projects makes me feel something that remains normal in my life right now. I did miss replying to the oar project so I want to add that too turned out beautifully!!
Christy says
Aww I’m so happy to hear that you look forward to what I share, Rosie! Thank you for that! I really need this right now too, so I’m just going to keep on showing up. Even with the thrift stores closed, I have enough stuff to keep me busy for a while yet! Glad you liked the oar too! Stay well! XOXO
Robyn D Wright says
I, too, have a layering block and I love the look it gives when you can’t distress easily.
Christy says
Yes! I can’t believe I forgot all about this handy tool! XOXO
Becky says
Fantastic! Not only is the mirror lovely, but that tip is pure gold!
(I’m behind on all this wonderfulness because somehow, in an email “upgrade”, I ended up unsubscribed to all kinds of good stuff?!! Yikes! I wondered why everyone stopped posting, haha! Glad you’re still here!)
Christy says
Thanks, Becky!! I can’t believe I put that block away and forgot all about it for so long!! And oh no! I’m so glad you’re back!! XOXO
Claire says
Another fantastic upcycle. I love the distressing block technique and want to make my own block. How did you attach the knob to the block? Just glue?
Christy says
Thank you, Claire! Yes…I just attached a wooden knob to a square of wood with wood glue. Works great! XOXO