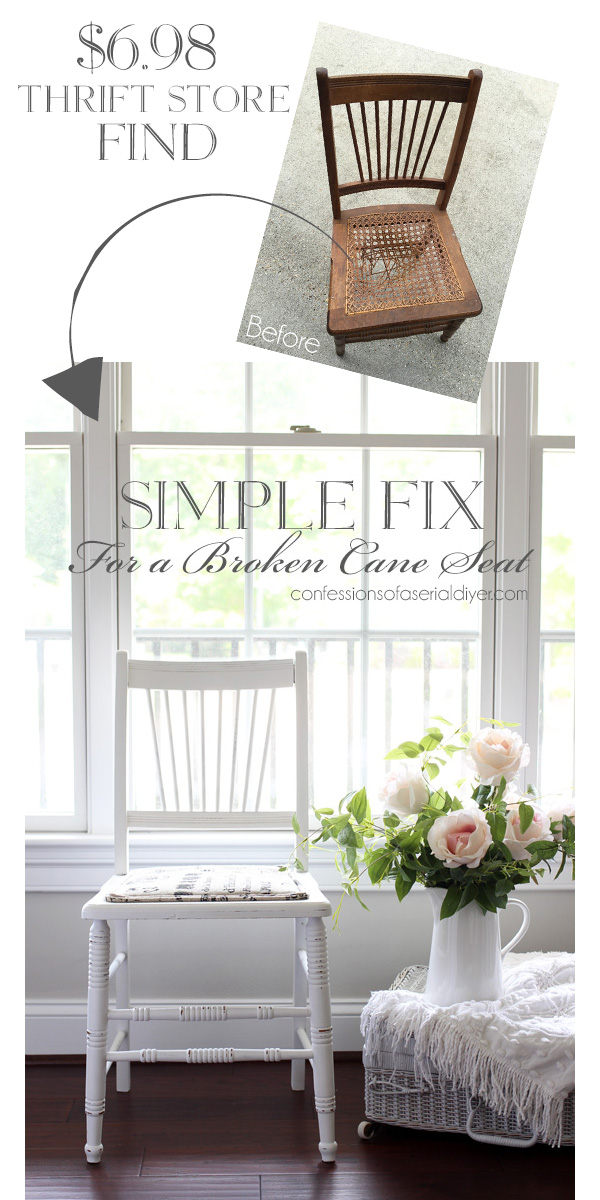
Hello beautiful friends! Have you ever passed on a chair because it had a damaged seat? Well, today I am getting together with my Furniture Fixer Upper girls to share furniture flips, and I have one such chair to share!
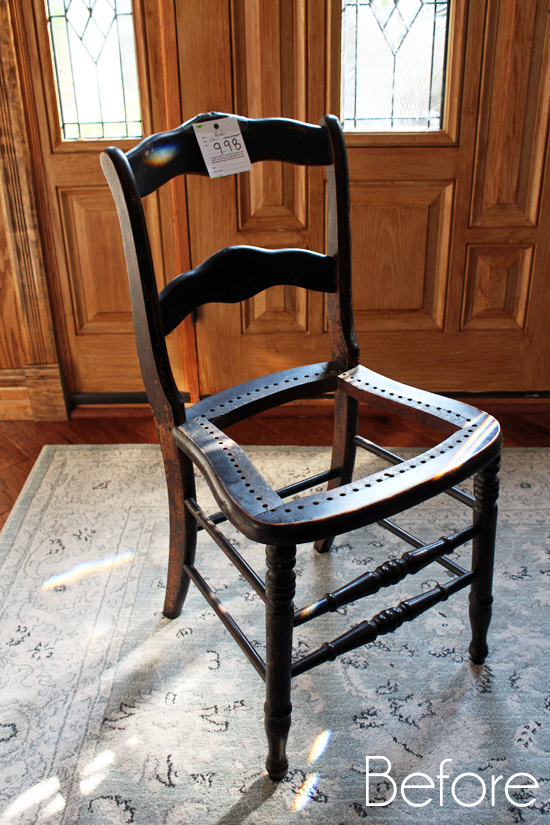
I picked this up at the thrift store last week at the bargain discount price of $6.98:
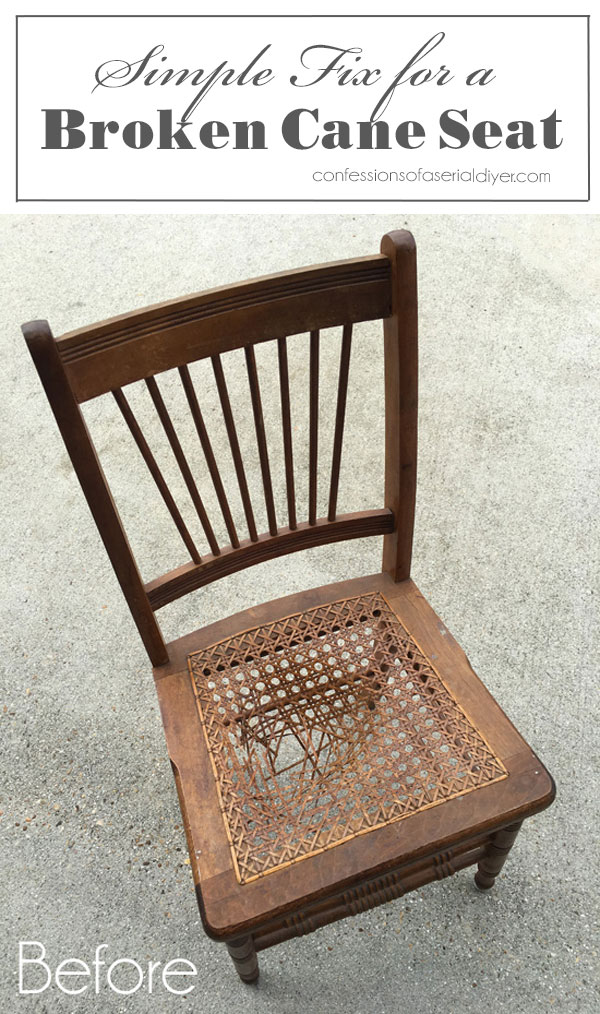
A busted cane seat might be a deal-breaker for most, but I have been down this road before and knew I could make it functional again.
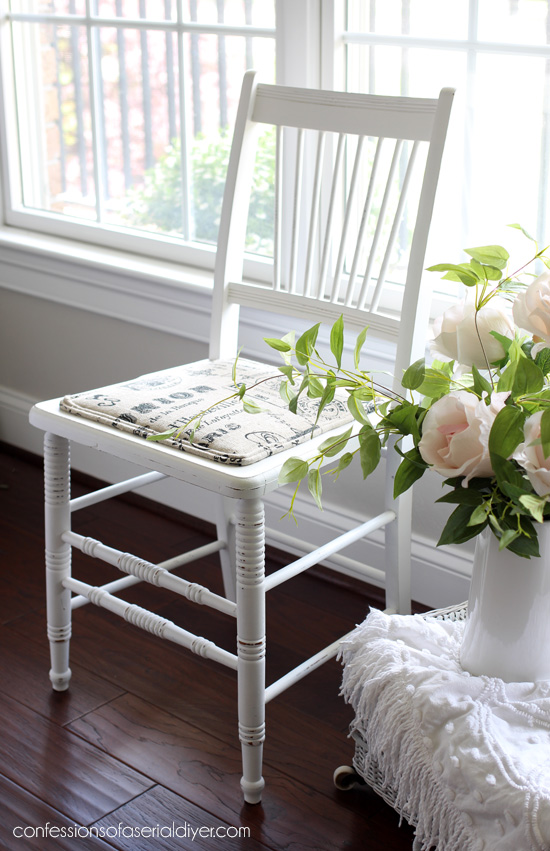
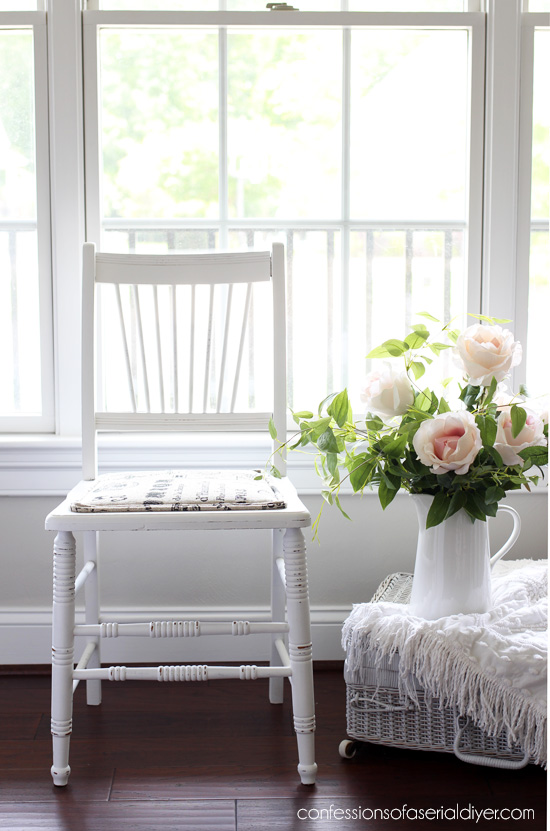
Here is how this chair looks now:
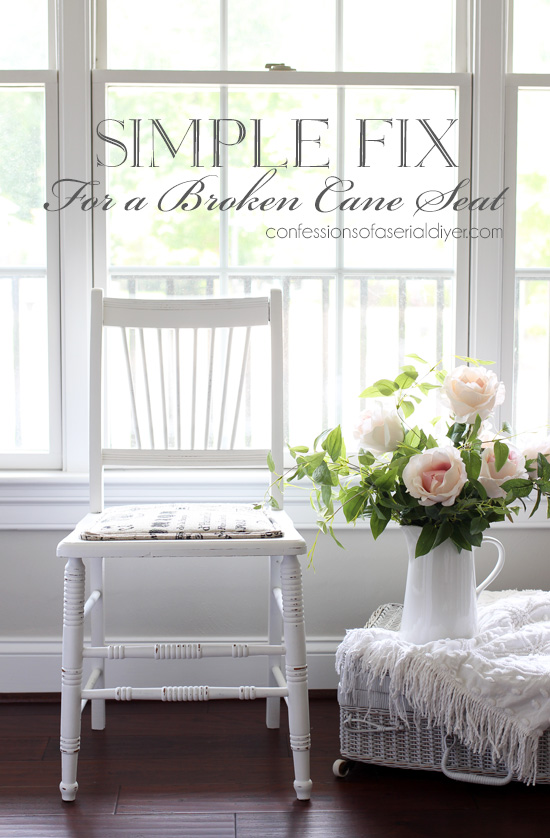
What broken seat?
I’ve included a few affiliate links so you can find the products I love.
I started by removing all of the caning:
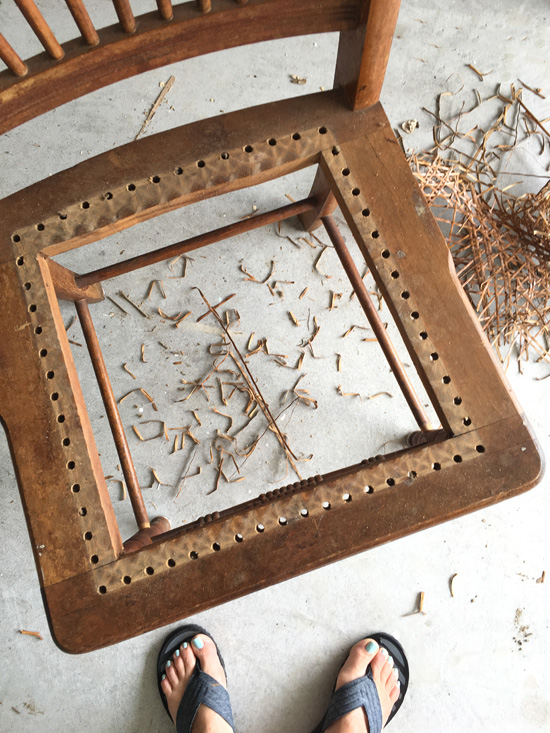
I have never replaced the caning in a piece of furniture before, but it doesn’t sound like a fun way to spend an afternoon to me.
Here is what I did instead…
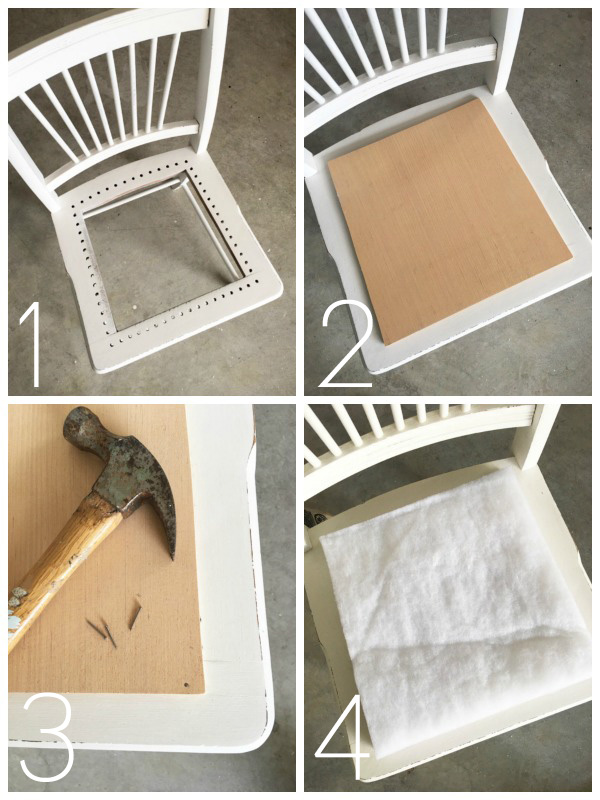
1. After removing the caning, I painted the chair with Behr’s Bit of Sugar made into DIY chalk paint. (Recipe HERE.) Then I followed up with a good sanding and a coat of Annie Sloan’s Clear Soft Wax.
2. Then I used my Ryobi jigsaw to cut a piece of scrap wood I had to fit the top.
3. I used small nails in each corner to hold it in place.
4. I cut four layers of batting to the same dimensions as the seat panel I cut. (A thin piece of foam with a layer of batting on top would have been ideal, but this is what I had on hand.)
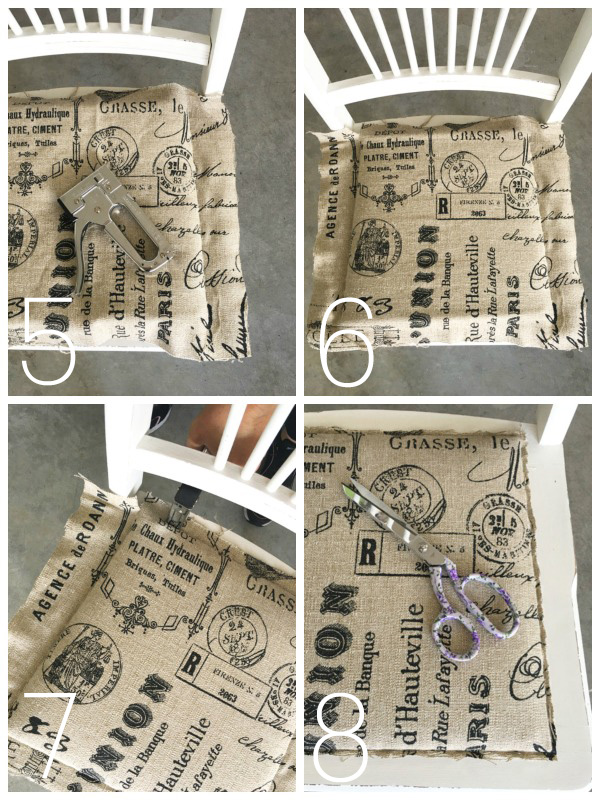
5. I cut my fabric just a bit bigger than my chair and started stapling it in place along the right edge with my el cheapo staple gun. I butted my staples right up against the edge of the wooden piece I cut.
6. Then I pulled my fabric taut and stapled up the other side.
7. Next I continued stapling across the front, then across the back, pulling it taut as I went also.
8. I used my fabric scissors to cut the fabric as close the edge of the staples as possible.
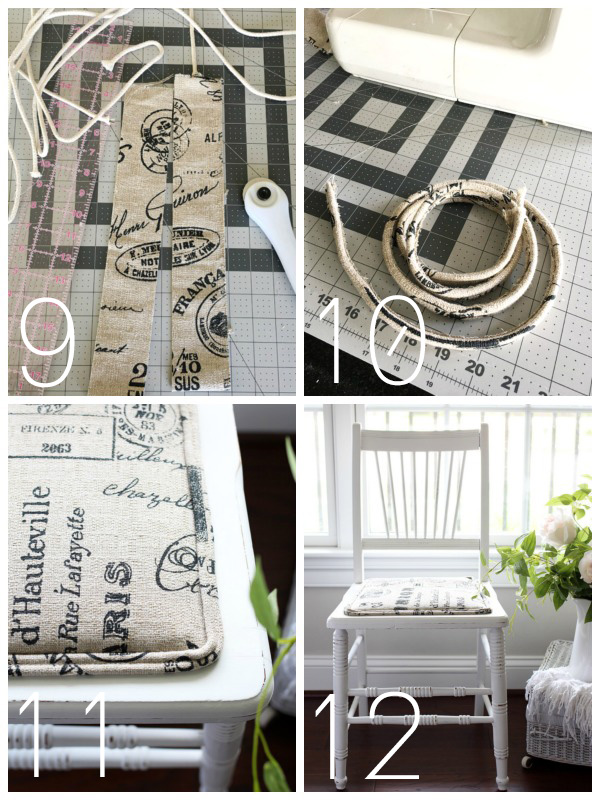
9. Then I gathered what I needed to make double welt trim. See my tutorial for that HERE. Basic sewing skills needed only for that one, I promise! Don’t panic if you don’t sew though, you can always purchase gimp trim at your local fabric store as an alternative.
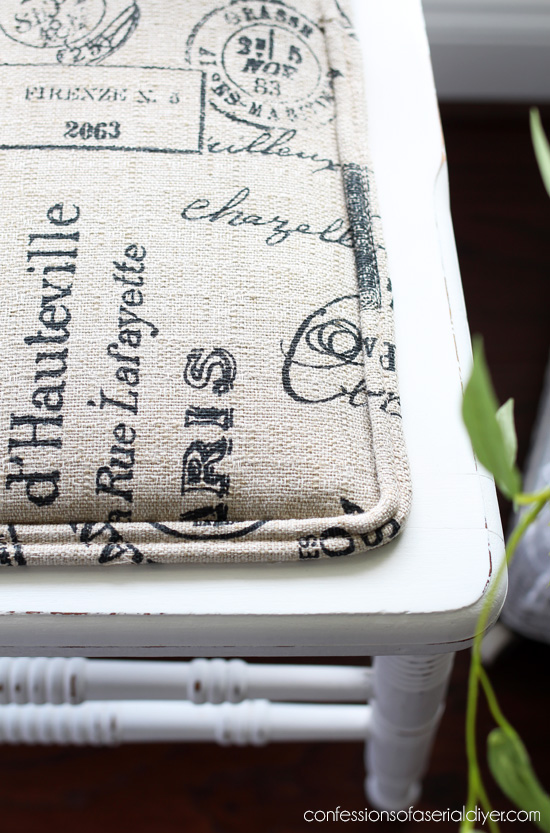
10. Tada…DIY double welt trim. That will hide all the staples!
11. Hot glue trim in place. I have this cordless Ryobi glue gun…awesome!
12. Stand back and enjoy!
Not too bad, right?
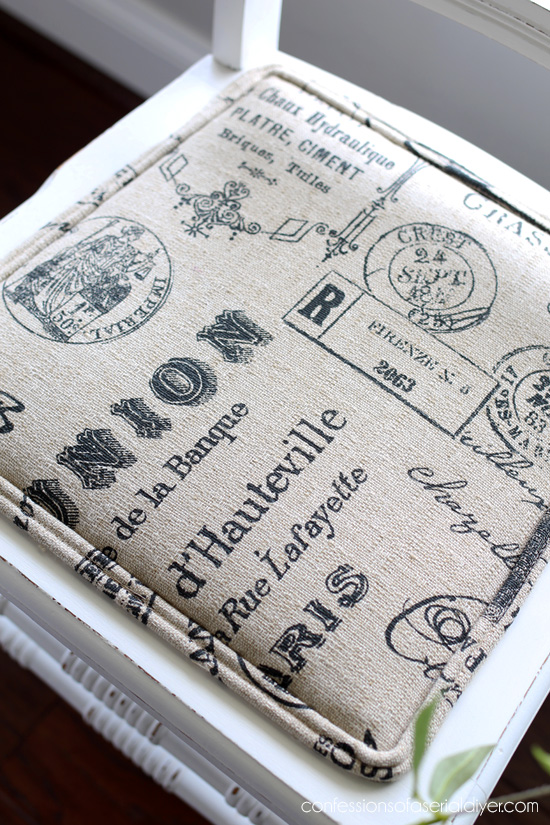
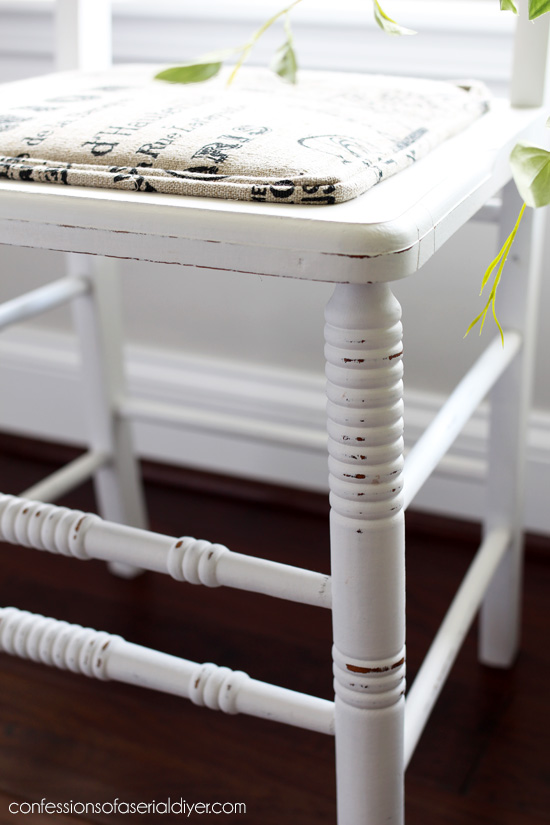
You can see where I joined the two ends of my double welt trim here:
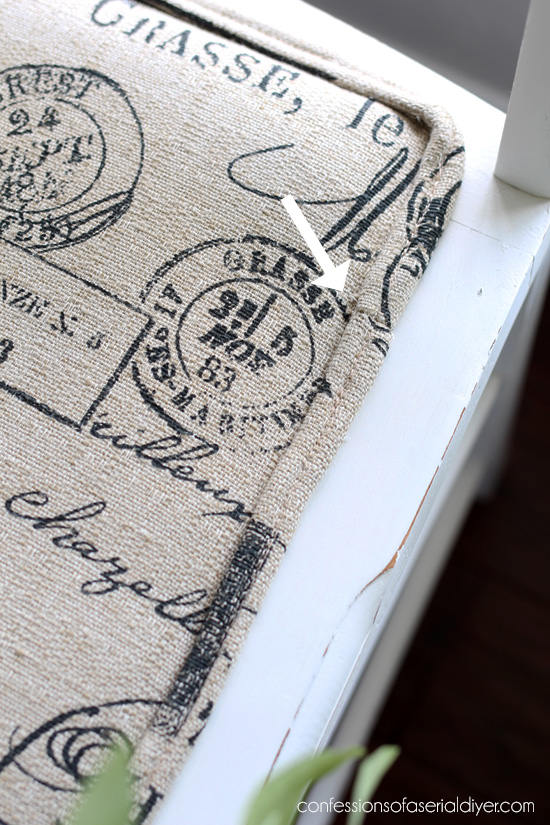
It is hardly noticeable unless you were looking for it.
This is one of my all-time favorite fabrics that I used to purchased from Hancock Fabrics when they were still in business. I still have a few scraps and was able to piece enough together for this chair.
Michaels has bought their online business, so I’m hoping I might be able to find it again some day.
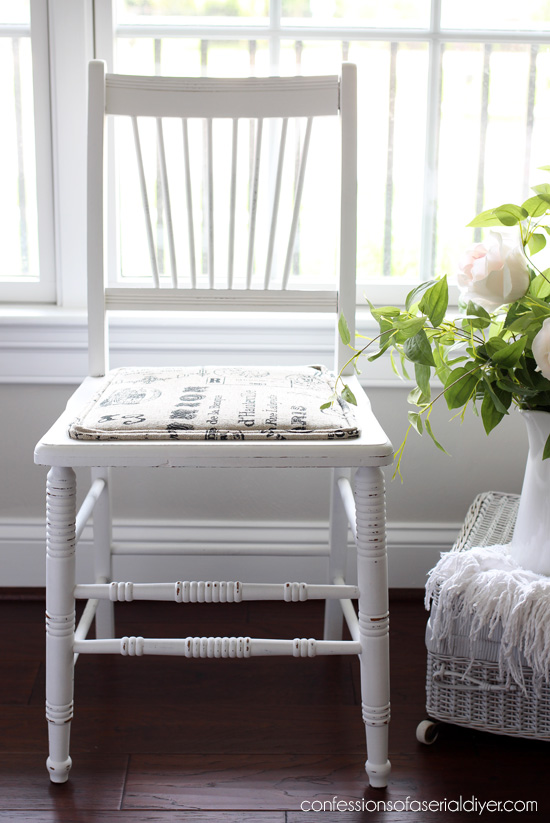
Remember I kept the little white chair that I did to go with this desk? Well I figured this will be a nice replacement. I’ll be dropping it off at my booth to go with that desk this weekend.
I love the spindle legs on this little cutie…
I had all the supplies I needed to fix this chair right up, so the only out-of-pocket expense was the $6.98 + tax that I paid for the chair. Gotta love that!
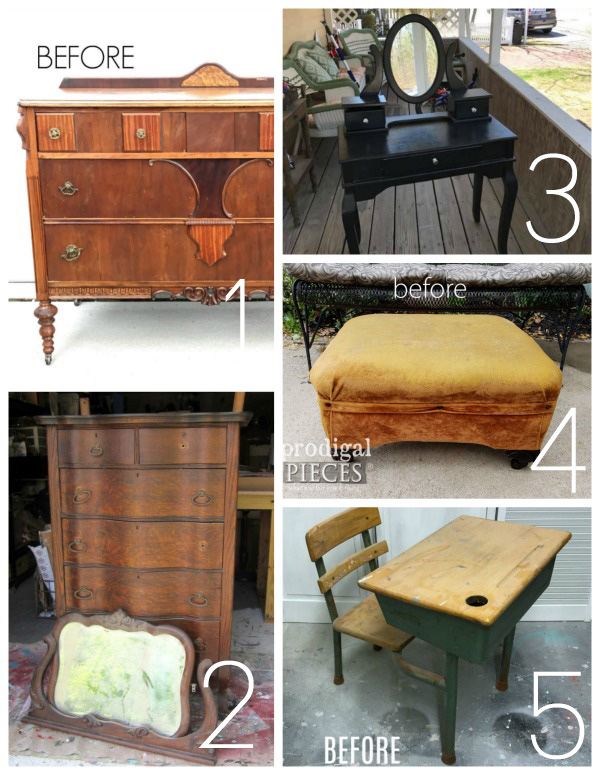
My Furniture Fixer Upper girls have been busy too. Follow the links below to see how their makeovers turned out!
And remember I mentioned earlier that I’ve been down this road before? I fixed this pretty little chair as well a few years ago:
See how that one turned out HERE!
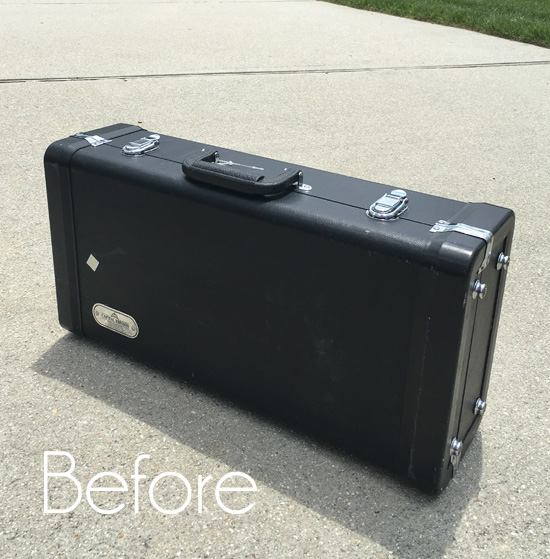
I’ll be back on Tuesday sharing how I redid this case:
Wishing you a fantastic weekend, my friends!
UPDATE: No need to come back, you can see how this case got a coastal vibe HERE!
XO,
![]()
Don’t Miss a Thing!
If you like what you see, there are several ways to follow along!
Email * Facebook * Pinterest * Twitter * Instagram


Mary Kaiser says
You saved its life and made it beautiful again! You are such a miracle worker! It is amazing!
Christy says
Aww thank you, Mary! You are always so kind! Have a great day! XOXO
Larissa ~ Prodigal Pieces says
You’ve nailed it again, Christy! Literally! I love the new look and think this is a fantastic save. Tres’ chic!
Christy says
Thanks, Larissa! Always good feeling to be able to save something, right? XOXO
Christina in SW FL says
Wow, Christy, nicely done! Love the fabric and white together. Your double welt looks great as always. Thank you for the inspiration.
Great weekend to you also!
Christy says
Thanks so much, Christina! XOXO
Lori says
Hi Christy – can you please share with us how to join the two raw ends when attaching the welting with glue?
Christy says
Hey Lori! If you follow the link to the tutorial for the double welt cording, I believe you can see how I finish off one edge. I start attaching the welting with that edge. Then at the other end, I cut it as close to the starting point as I can, add a bead of hot glue to the finished edge and butt the unfinished edge right up against it, like you see in the close-up I shared on today’s post. It is not really noticeable at all when you use a patterned fabric. I’m not sure of a better way to do it with the double welt cord. 🙂
Lori says
Oh, how I wish you knew the name of that fabric, or at least the manufacturer. It’s one of the best script fabrics I’ve seen. Love the linen-y texture.
Christy says
I know! It has the words “French” and “stamp” in it, I think. I really is pretty and has a lovely texture!
gwen says
this looks lovely! i think what really makes it look professional is the double welt trim in the same fabric as the seat!
and thanks for the tutorial for making chalk paint!
Christy says
Thank you, Gwen! And my pleasure! XOXO
Marcie Lovett says
Wowee wow. What broken seat, indeed! Beyond that marvelous fix, I couldn’t keep my eyes off those legs. What a beautiful chair it turned out to be. I love cane, but the fabric seat looks even better. It surely won’t hang around the booth for long.
Christy says
Right?? Thanks, Marcie! I do love cane as well, but I’m not ready to tackle that kind of repair lol. XOXO
Marie says
Nice save, Christy! The chair is oh so pretty and I bet doesn’t last long in your booth 🙂
Christy says
Thanks, Marie! Hope you’re right! XOXO
Sue Pagels says
It turned out really beautiful!
Christy says
Thank you, Sue! XO
kandice kullmann says
this is unrecognizable from the ‘before’. It looks fantastic!
Christy says
Thank you, Kandice! XOXO
Denise Zdziennicki says
I love your fabric/upholstery tutorials because you make it look professional and easy. Love the new look! 🙂
Christy says
Thank you, Denise! I really appreciate that! ????
Margie says
I love love how you put the welt on,so much easier than sewing on. Another great makeover.
Christy says
Thank you, Margie! XOXO
Robin says
OMG – Fabulous!!! I can’t tell you how MANY broken-caned chairs there have been in my neck of the woods (northeast) that are tossed to the curb (or for chump-change in garage sales). I’ve seriously wondered if I should take up caning! No need to, now. Any fabric/any paint color. Endless possibilities…..
But…are the 4 small corner nails enough to keep the wood seat from sliding around?
Christy says
Thank you, Robin! Yes the possibilities are endless!! And I only added a few small nails in the corners of the wood piece because the fabric that goes over the top is stapled around the entire edge of it, so it isn’t going anywhere. You could certainly add more nails if you like. 🙂 XO
Jen @ Girl in the Garage says
Such a beautiful save, Christy. I was surprised you still had some of that fabric left, ha! Excellent tutorial and step by step photos. xo
Christy says
Thanks so much, Jen! Yes I really had to stretch what fabric I had left lol…seriously just scraps! 🙂 XOXO
Julie Briones says
Sweet makeover, Christy! Love the welting you did! Have a wonderful holiday weekend!
Christy says
Thank you, Julie!! Enjoy your weekend too!! Did I hear there may be newborn snuggles involved? I sure hope so! XOXO
Julie Briones says
Well… the schedule is for 6/1… We’ll see what the Lord has planned! 😉 I’m sure you will be one of the first to know (at least through IG) 😉
Ivory says
You do excellent work, and this is nothing short of fabulous.
Christy says
Aww thank you! I appreciate that! XO