Amazing Friends, I have a super sweet furniture makeover to share today! My Furniture Fixer Upper Friends and I get together the fourth Thursday every month to share furniture makeovers. They have their own transformations to share as well so be sure to look for them at the bottom!
I shared a peek of my project piece on Tuesday:
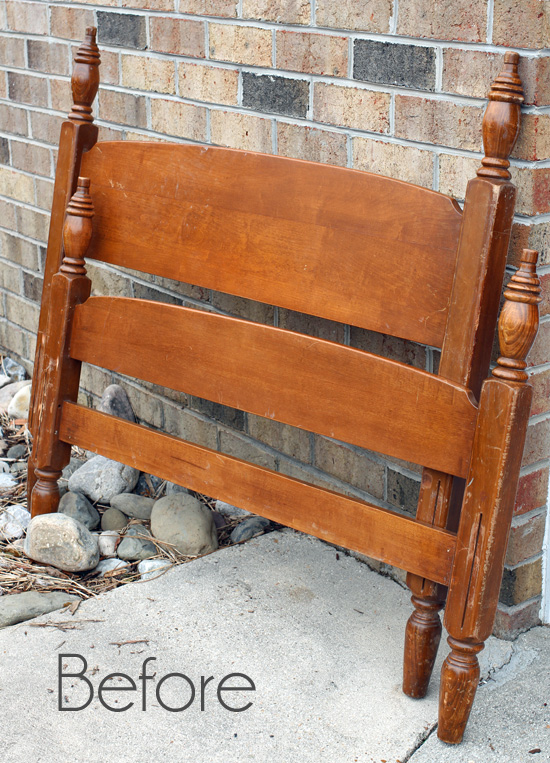
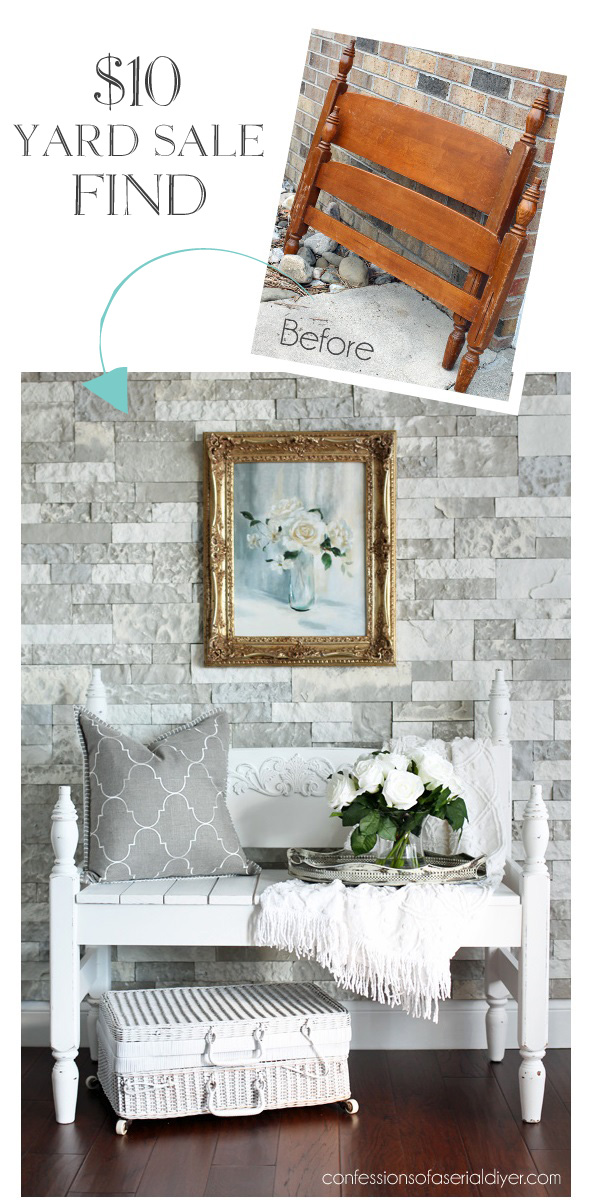
I picked this headboard up at a yard sale for $10 last Summer. How could I not bring this home for that price?
If you’ve been around here a while, you know exactly what I did with this set…
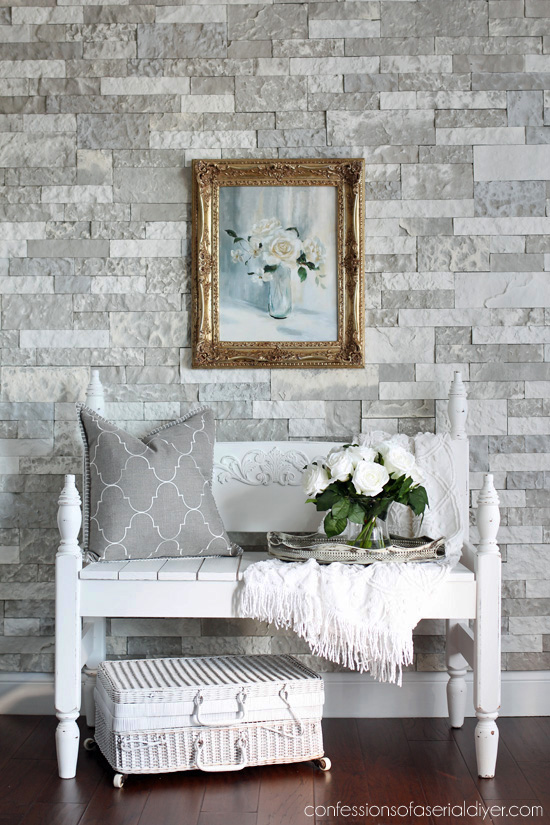
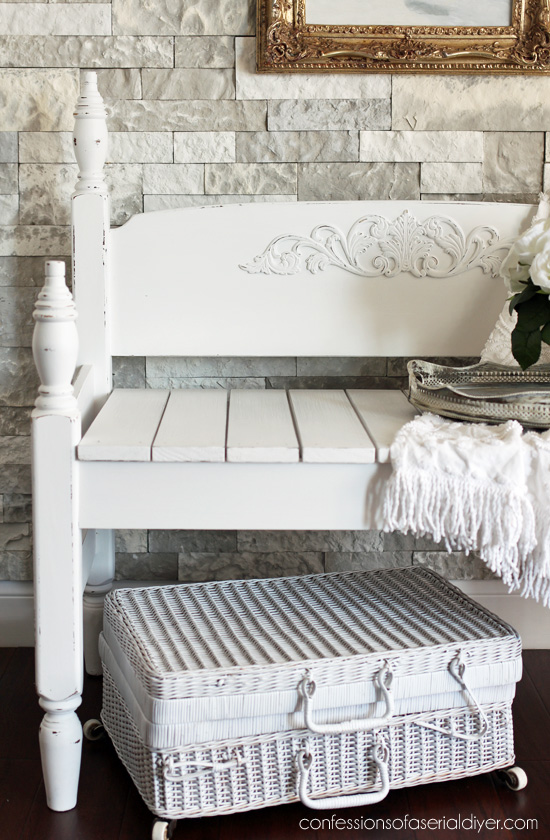
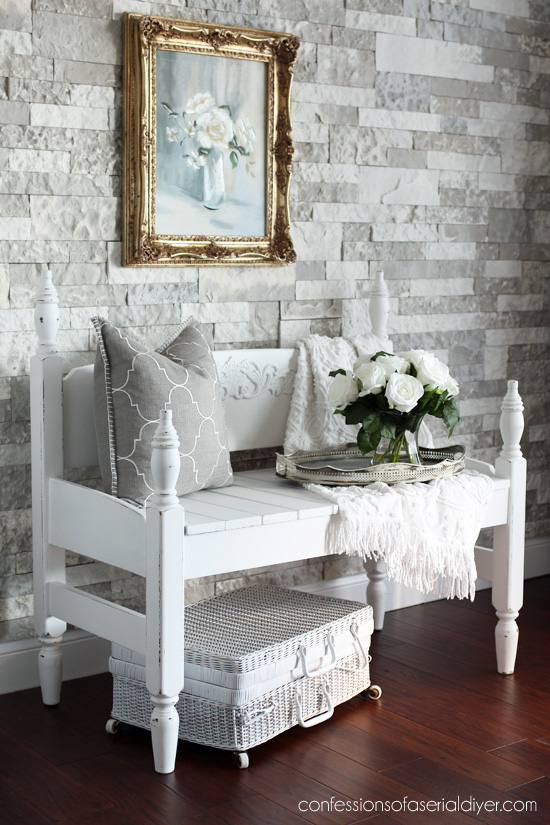
I made it into a sweet bench, of course!

I love how this one turned out.
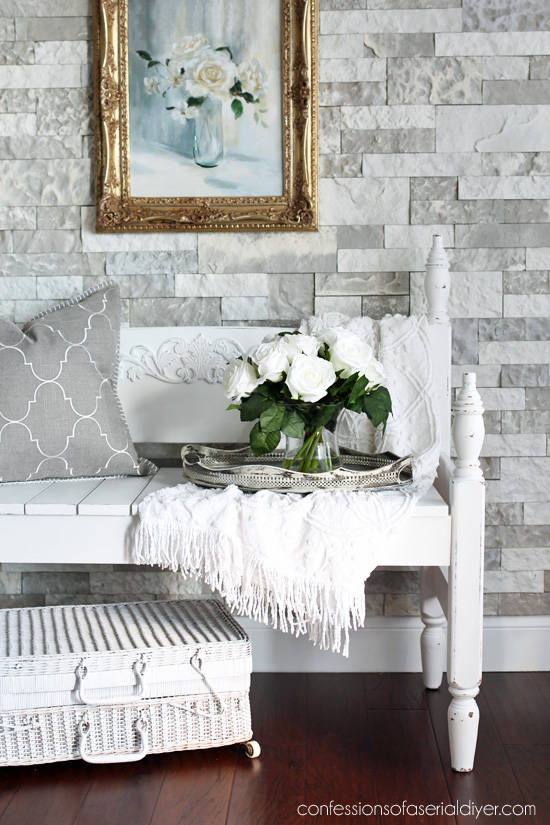
I was a little unsure at first because the footboard was quite low. That meant the side pieces wouldn’t come up very high…
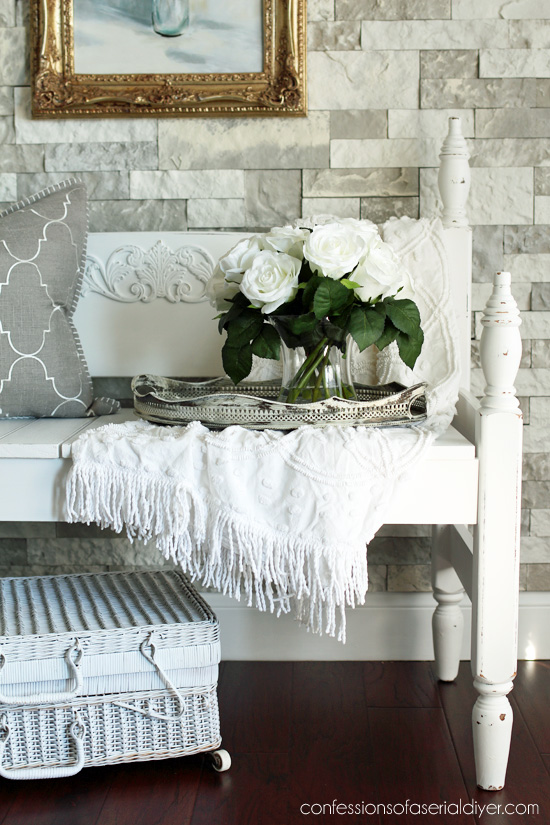
But it totally works.
I have included a few affiliate links so you can find the products I use.
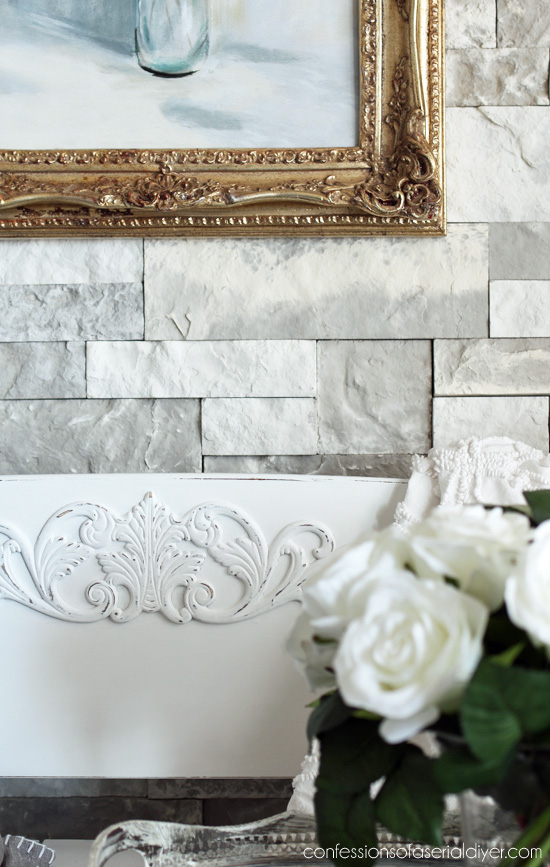
The back of the headboard was very plain, so I added up this wooden applique (find it HERE) to give it some charm:
I’ll walk you through steps just in case you’re in the market to create your own headboard bench.
To turn this bed set into a bench, I first used my sliding miter saw (I have this one HERE.) to cut each footboard piece to a depth of 18″:
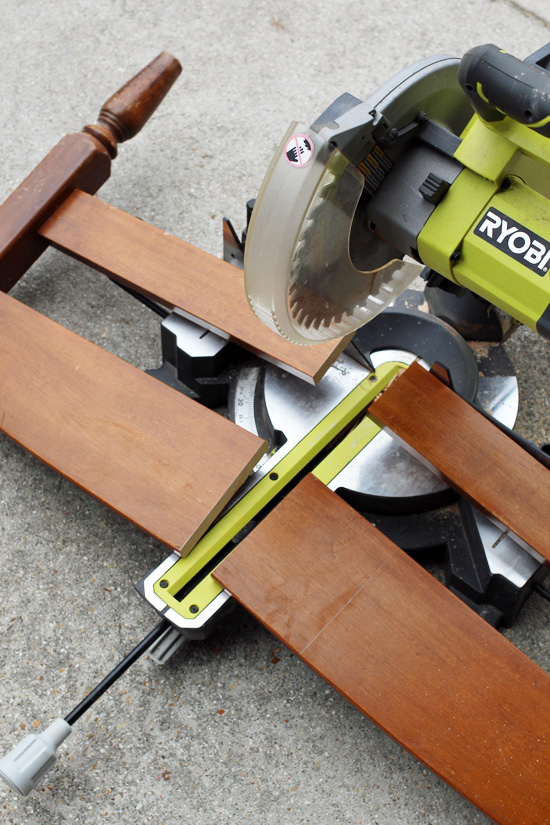
These two pieces will make up the sides of the bench.
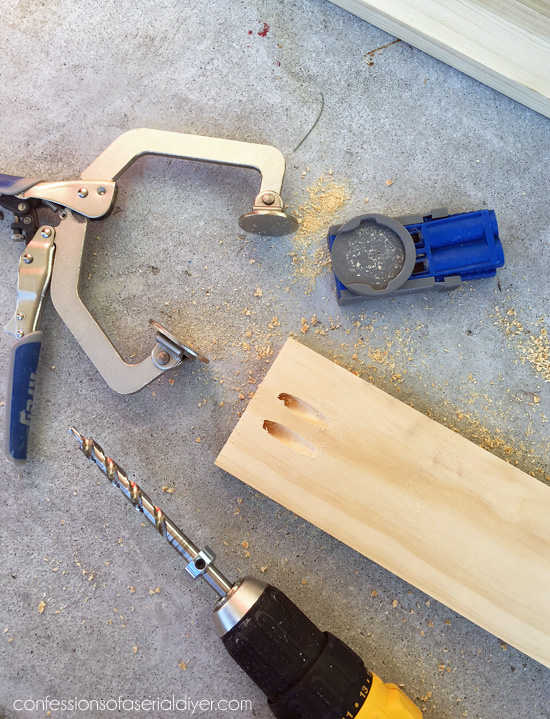
I used my Kreg Jig Jr (Find it HERE.) to drill two pocket holes where the sides will join the back:

The Kreg Jig Jr kit comes with everything you need except the clamp. (Find that HERE.) You can use a regular clamp, but this one fits the rounded piece on top of the Kreg Jig Jr perfectly.
You just set the ring on the drill bit that comes with the kit to the correct position, based on how thick your piece of wood is, and drill into the Kreg Jig Jr until you reach the ring. (THIS is my favorite drill!)
A perfect pocket hole will be left behind:
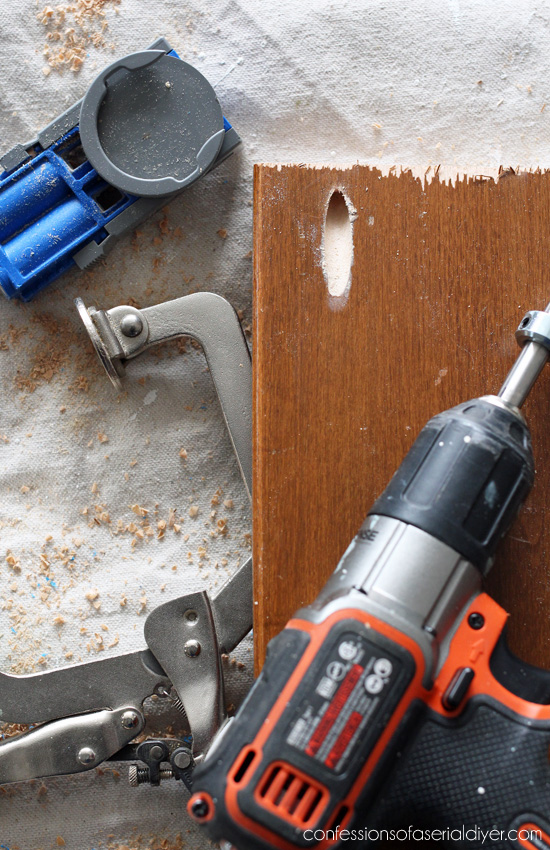
These are perfect for adjoining anything in a 90 degree angle.
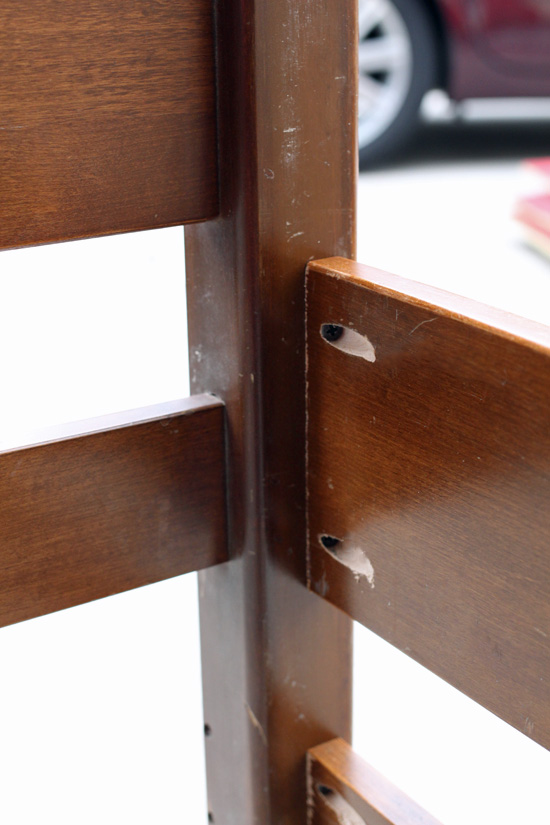
I was able to attach the new side pieces to the back perfectly!
The old bed rails if you have them work great for this next step, but if you don’t have them, a 1 X 4 works fine too.
The headboard almost always has a piece at the right height for the seat, so you will need to add a similar piece for across the front of your new bench:
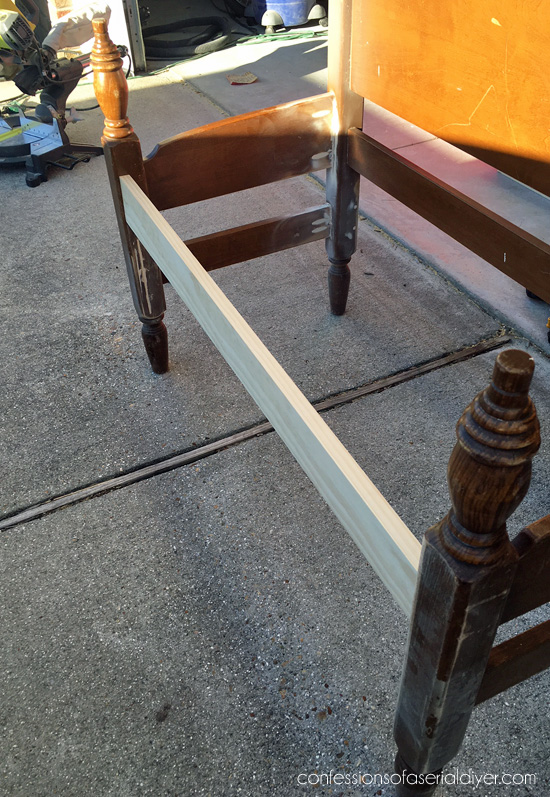
I used my Kreg Jig Jr again here…
Then I used a level to make sure the front and back pieces were even. (Be sure to construct your bench on a level surface.)
I used my sliding miter saw to cut the seat slats, that are also made of 1 X 4s that I picked up at Home Depot. (I used a total of four boards at around $6 each for this project.)

I did not attach the seat slats at this point. I lightly sanded them all and did a dry fit to see how they would look…
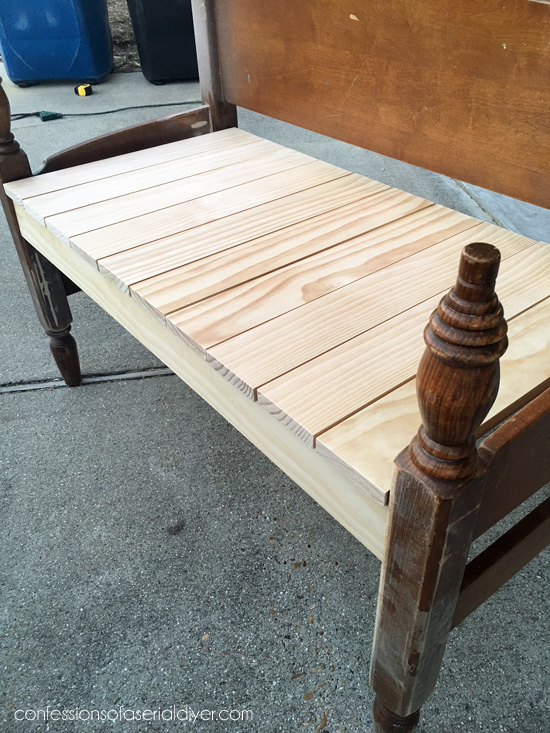
In the above photo, you can see I also filled in the pocket holes with this wood filler.
Before I painted everything, I stained the seat pieces and front piece with these staining cloths. They are water clean-up and dry in less than an hour…perfect for this purpose!
This was after one coat…I gave them two:
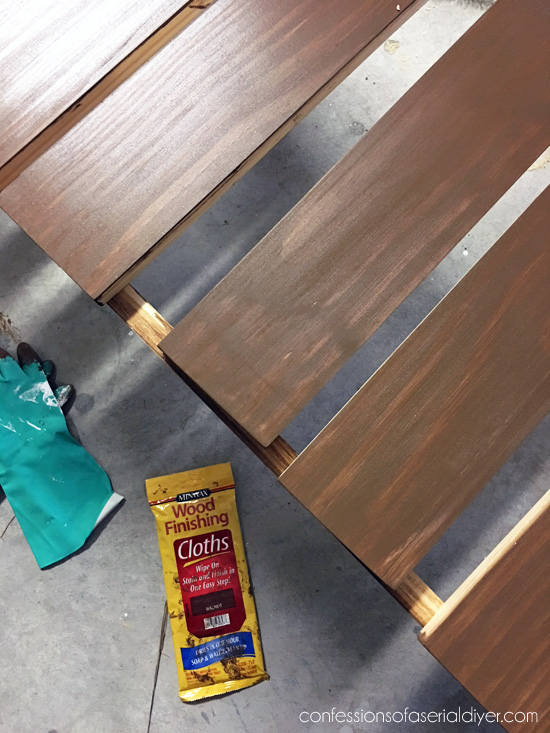
That is so when I paint and sand, you will see the darker stain coming through instead of new wood.
When they were dry, I painted them with two coats of DIY Chalk Paint in Behr’s Bit of Sugar. (Recipe HERE.) Then I followed with Annie Sloan’s clear soft wax.
Next I added the wooden applique to the back of the bench with wood glue and held in place with clamps:
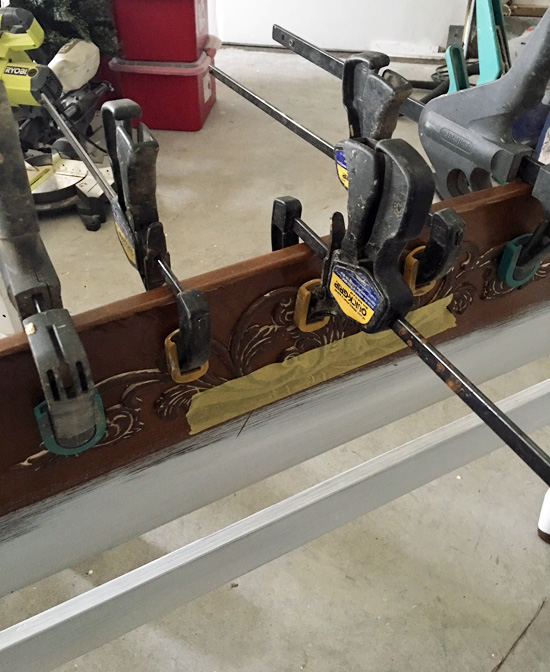
When it was dry I painted the bench in three coats of Behr’s Bit of Sugar made into DIY Chalk Paint as well, followed by a good sanding with 220 grit sandpaper, and Annie Sloan’s clear soft wax to seal.
You can find my detailed chalk painting tutorial for furniture HERE.
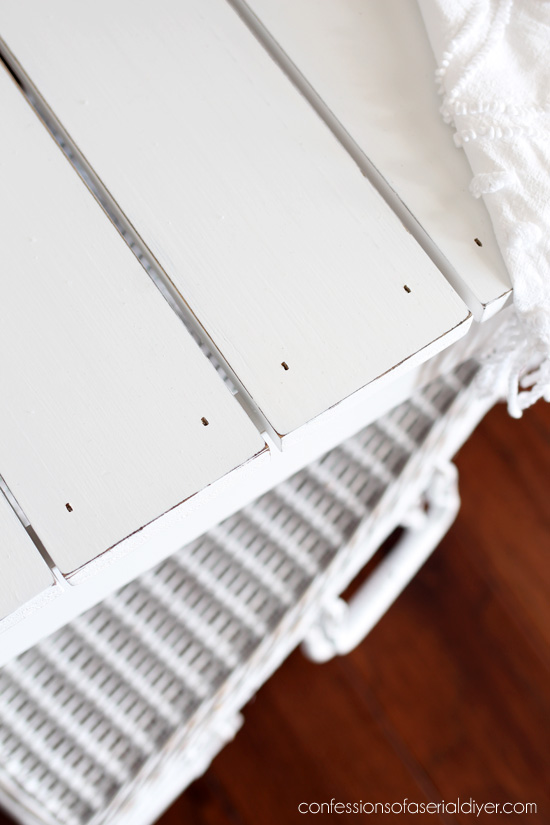
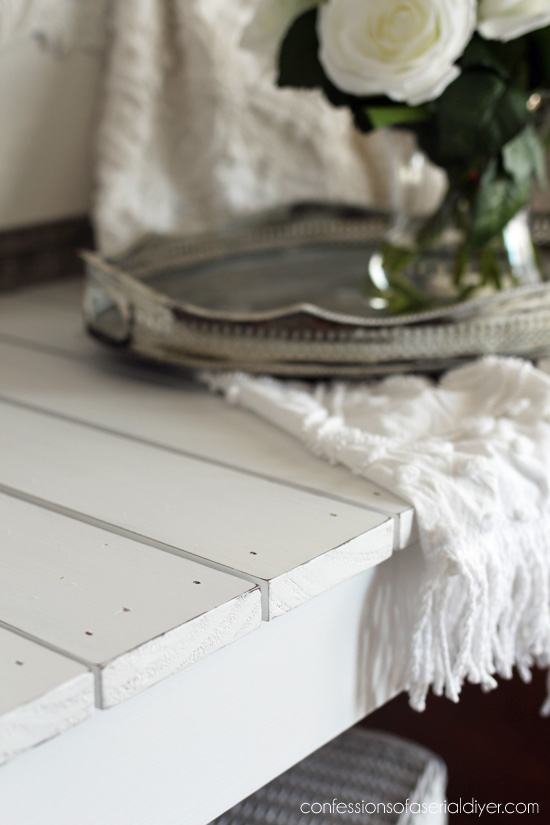
I attached the seat slats with my nail gun (I have this one HERE.) to finish it off. I didn’t bother to fill in the holes left by the nail gun. You can see here also how staining the seat slats first allowed the darker color to come through when sanding:
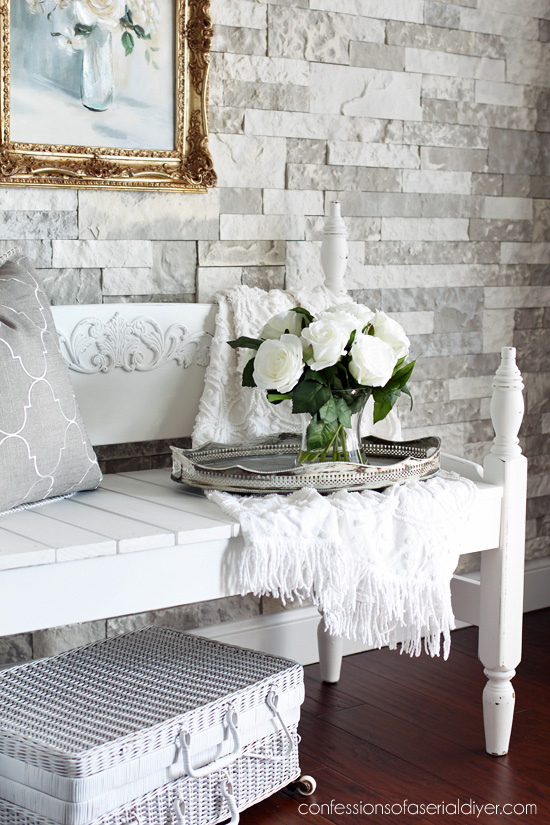
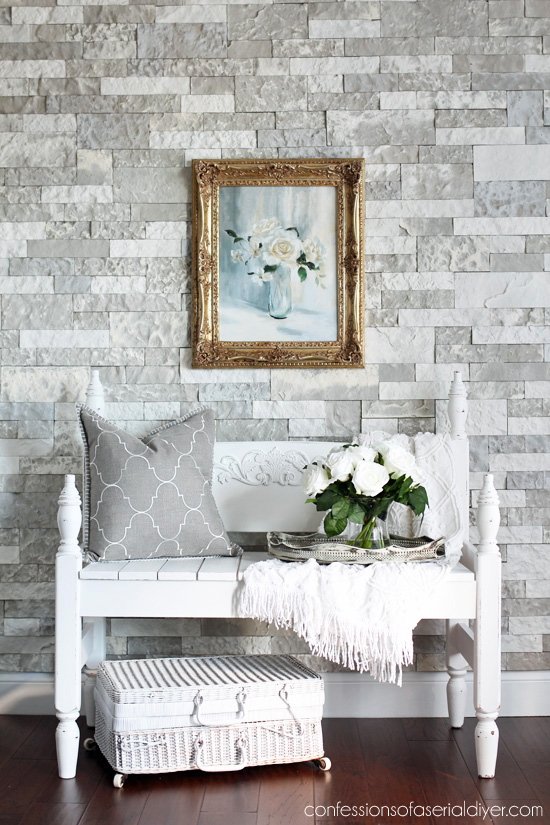
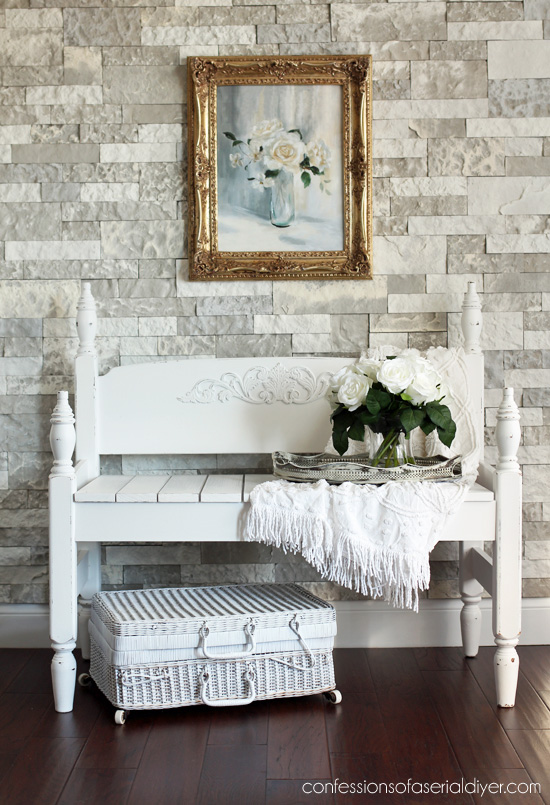
This pretty bench looks perfectly at home with my new faux stone wall, don’t you think? (If you missed that post, you can find it HERE.)
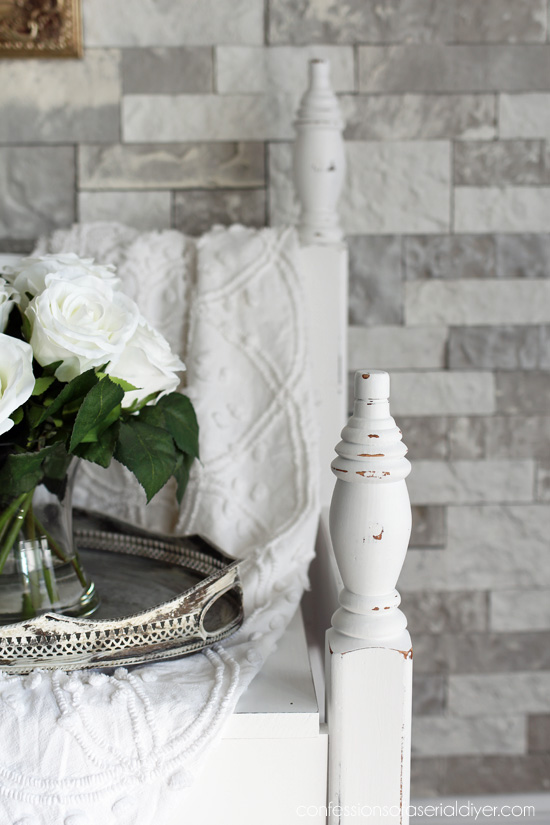
The decorative piece on the back adds such a sweet detail…
Remember my solution for inexpensive wall décor for my dining room? See how this “painting” came to be HERE.
My friends are sharing their own furniture flips today as well! See how they transformed these treasures at the links below the image!
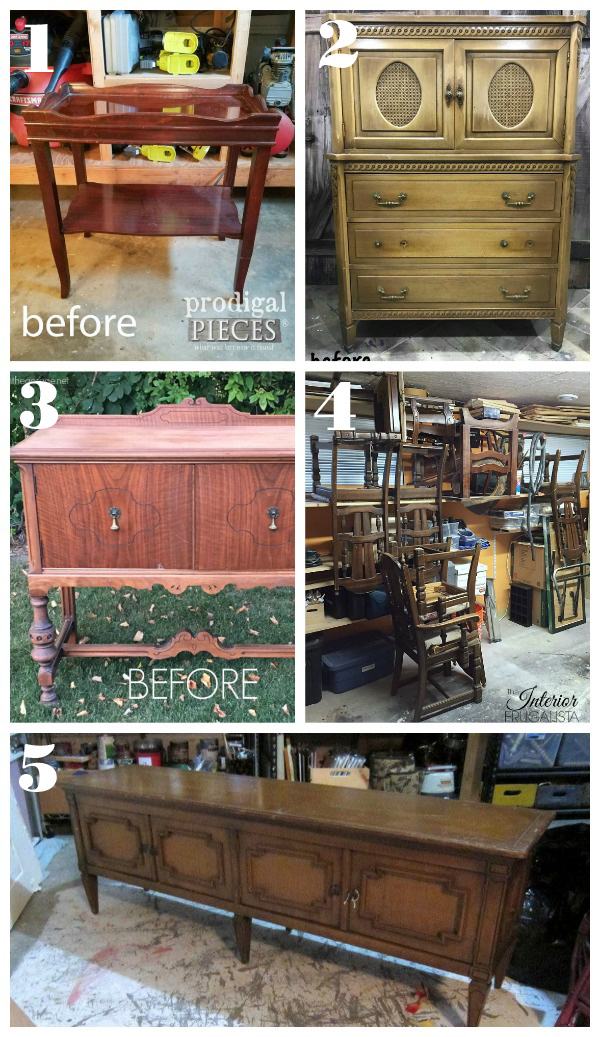
I can’t wait to see what they did as well!
I hope you enjoyed my makeover! I really cannot pass up a good deal on a headboard. They are like blank canvases! Here are 10 more headboards I repurposed in some way:

See what I did with them all HERE!
I’ll see you back here on Tuesday to share what I did with these old side pieces from our coffee table:
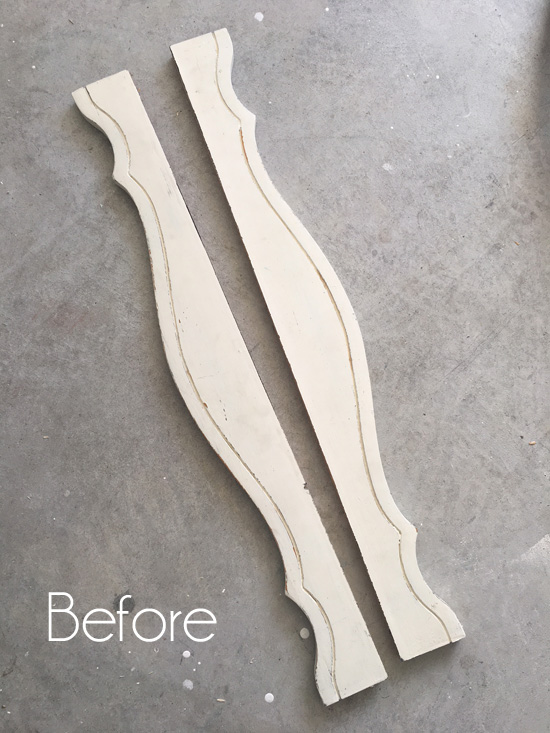
UPDATE: See what these scrap pieces became HERE now!
Have a great weekend!!
XO,
![]()
Don’t Miss a Thing!
If you like what you see, there are several ways to follow along!
Email * Facebook * Instagram * Pinterest * Twitter


Larissa ~ Prodigal Pieces says
You can never go wrong with a bench in my book. This one is beautiful, Christy, and I love all the charm you added to it. It’s so pretty!
Christy says
Absolutely! Thanks, Larissa!! XOXO
Christina in SW FL says
Wow, beautiful makeover Christy! Clearly I have to get a Kreg Jig. 🙂 Do you use Kreg screws? Love the wood filler versus plugs.
Someone is going to snap this up in a hurry! You did surprise me by not using any blue on this piece. 🙂
Have a great rest of your week and a grand weekend.
Christy says
Thanks, Christina! I just grabbed the closest screws I could find, but I have used the Kreg Screws. Same with the plugs…I have some, but usually just reach for the wood filler! Have a great weekend! ????
Holly Stevens says
HI Christy! I think I’m addicted to making my own chalk paint using your recipe 🙂 I have one question; I notice if I don’t use it all and store it for a few days it gets soupy and all the plaster is on the bottom. I can’t always get it to stir up again. What am I doing wrong?
Thanks!
Holly
Christy says
I’m so glad you like the recipe, Holly…certainly cheaper than buying the big name chalk paints! I have had that happen on occasion as well. It just needs a good stir…the “sludge” on the bottom may give you some resistance if it has been a while, but just keep trying and it should smooth out again. You mentioned plaster, but if you meant calcium carbonate, that should work! XO
Tamara Kenner says
Your projects, photography & home are just stunning. Thank you for sharing your talent with us!!
Christy says
Aww thank you so much, Tamara! XOXO
Cecilia says
I do love using bedframes for benches! Funny, back when I had my husband make one, it wasn’t something you did. What? Cut the footboard? Ruin it? No! Make it into something useful instead of rotting away in someone’s storage. Anyway, it seems it is all the rage now but that’s a good thing! This one turned out great!
Christy says
Thanks, Cecilia! My hubby still thinks I’m nuts sometimes ha ha! XOXO
Norma Rolader says
Absolutely awesome and thank you for sharing and the how to
Christy says
Thank you, Norma! It is my pleasure to share as much as I can! XOXO
Marcie Lovett says
Another marvelous bench and a beautiful setting to shoot it in. Fill that booth, Christy, this one’s going to sell quickly!
Christy says
Thanks, Marcie! Just dropped it off yesterday! XOXO
Kimberly says
This truly is a sweet bench. Also, as a heads up, I have seen the appliques like you used for detail used to cover up 80’s heart cut outs like you had on Tuesday (if they are not where you can remove them).
Christy says
Thank you, Kimberly! Yes that is a great idea for those hearts that can’t be whacked off lol! XOXO
Martha Rekni says
I have my old wooden twin bed from my childhood that I rescued from my mother’s house nearly a year ago. Now I know what I am going to do with it! Woo hoo!
Christy says
This is such a great way to treasure it for years to come! XO
Bonnie says
Christy,
Love this, the applique really puts it’s stamp on it. Can you use just regular nails, don’t have a nail gun.
This looks perfect next to that wall, did you keep it or did it go to the shop? See you next Tuesday.
Christy says
Thanks, Bonnie! Yes you can absolutely use regular nails. I dropped this sweet bench off to my booth yesterday! ????
MaryJean says
I actually like it a little lower. Some of them seem too high to me, but that’s just my preference. I see these bed frames all the time at our Amvets and one of these days I’m going to buy one for my front porch. What would you suggest to seal it for outdoor use? OMG, as I’m writing this there are two deer strolling through my yard. ????
I love the detail with the decorative piece. It finishes it off perfectly! Nice job!
Christy says
I agree, MaryJean, I prefer it lower as well now that it’s done. ???? If This were going outside, I would try to at least keep it in a covered area. If that is an option, I would probably use regular latex enamel to paint it and seal it with Polycrylic. Waxed pieces don’t do well in extreme heat. Have s great weekend!! XOXO
MaryJean says
Thank you! MJ
MaryJean says
Oops! Almost forgot to add, thanks for the tutorial on how you put the bench together. I will pin this for future reference.
Christy says
My pleasure! You know I love to share! ????
kandice kullmann says
this came out so pretty! I love the added applique!
Christy says
Thank you, Kandice! XOXO
Sandi says
The bench is so charming! I just love this makeover. And it looks so nice in your office! Is it a keeper?
Christy says
Thank you, Sandi! I would love to keep it, but I dropped it off at my booth yesterday. It’s hard to let some pieces go sometimes! XOXO
Robyn Wright says
Do I really need to say it again? Ok, I LOVE IT! I REALLY want to try this type of makeover. Soon….very soon!
Christy says
Thank you so much, Robyn! I hope you’ll try it! These benches are always so charming! XOXO
Karen Moore says
Turned out so cute. Love the applique!
Christy says
Thank you, Karen! XO
sandi magle says
I really love when people make these benches. This one is particularly lovely…and all the details you preserved and enhanced make it a great piece.
Christy says
Thank you, Sandi!! I love these benches too! 🙂
Marie says
What a lovely headboard bench, Christy! The applique detail is quite lovely too.
Christy says
Thank you, Marie! XOXo
Margie says
If I had room for this I would buy & have shipped just love it.
Christy says
Aww thanks, Margie! XO
Denise Zdziennicki says
My Kreg is still in its box waiting for a project just like this! Love this makeover and thanks for the detailed tutorial. x
Christy says
Thanks, Denise! The Kreg is really easy to use, and makes building these benches so much easier! Have a great weekend! XOXO
ROSE LEFEBVRE says
You do amazing quality work! Love this bench!!!Kudos!
Christy says
Thank you so much, Rose! Have a great weekend! XOXO
Robin says
So I was looking at the 10 Headboard makeovers and was wondering…If you make one into a sign and want to actually place it outside (not sheltered) then what type of protective sealant would be used to make it weatherproof? I also could see one of them made to be used for hanging potting (gardening) implements in a covered breezeway….. And you did a terrific job with all of them !
Christy says
Hi Robin! Thank you!! If you wanted to leave one outdoors, I would recommend a latex enamel paint, followed by a Polycrylic sealer. Then you would have to reapply the sealer yearly or so since the wood is really not made to withstand the elements. It would do great in a covered area though! XOXO
Julie Briones says
Just beautiful! Love the detail you added to the back… I wonder sometimes if I might need to do that to my media console. Great job, Christy… Will this be going to the booth?
Christy says
Thanks, Julie! The appliqué does add a sweet detail. And yep…just dropped this off at my booth yesterday! Have a great weekend! XOXO
Carrie says
I love it, it’s gorgeous!
Christy says
Thank you, Carrie!! XOXO
Carla J. says
The bench turned out beautifully! I love the decorative applique…it really adds the perfect finishing touch!
Christy says
Thank you so much, Carla! XOXO
Jen @ Girl in the Garage says
Christy, this turned out sooo pretty (of course it did)! <3
Since this is a smaller bench, was this a child's size headboard? I've seen those for cheap before but wasn't sure if they could be made into an adult-size bench.
Christy says
Thank you, Jen! This was a twin size. 🙂 XOXO
Heather says
Hi Christy, I always enjoy reading your posts and your tutorials really help! Hope you’re enjoying the New Year!
Christy says
Thank you so much, Heather! I hope your new business is doing well!! XOXO
Karen says
Christy,
B
Love this bench. Could you tell me how long did you make the bench slats for the seat. I am making a bench (inspired by all your posts) and I cut the foot board in half but looks like the bench seat itself would be too wide. Any suggestions?
Christy says
Thank you, Karen! I love that you are feeling inspired to create!! I cut the footboard down the center, then take a little bit more off of each end until each side piece is about 18″. That would make the depth of the bench 18″. I’m sorry if I wasn’t clear about that in the instructions. Hope that makes sense! Good luck! XOXO